Deadeye_281 Posted May 1, 2013 Share Posted May 1, 2013 Oh yeah, a dedicated camera is highly recommended for decent pictures. It would be a pretty big step actually. I'm of the opinion that phone cameras just don't really cut it. Phones and tablets are getting higher and higher in megapixels, but the built in lenses and sensors in them are still way below par compared to your average point and shoot camera. I took a couple pics. One with my p&s and another with my phone for comparison's sake. I took multiple shots with the phone, and the one I have below is the best I could manage in terms of clarity and detail. The 7 yr old point and shoot camera does a much better job than my less than 1yr old phone. Phone: [url=http://www.macrossworld.com/mwf/public/style_images/master/attachicon.gif]http://www.macrossworld.com/mwf/public/style_images/master/attachicon.gif[/url] IMG_20130426_193753.jpg Camera: [url=http://www.macrossworld.com/mwf/public/style_images/master/attachicon.gif]http://www.macrossworld.com/mwf/public/style_images/master/attachicon.gif[/url] IMG_2803.jpg That's a really nice looking weathering job. Very subtle and realistic. Quote Link to comment Share on other sites More sharing options...
Lolicon Posted May 1, 2013 Share Posted May 1, 2013 Thanks Junkie. Now I have to figure out who my sacrificial lamb is gonna be. Kakizaki! Quote Link to comment Share on other sites More sharing options...
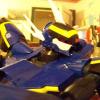
MacrossJunkie Posted May 1, 2013 Share Posted May 1, 2013 (edited) That's a really nice looking weathering job. Very subtle and realistic. Thanks! Those are terrible pics though. I have better ones posted a couple pages back Kakizaki! Poor Kakizaki. Always the sacrifice. At least with the Tamiya weathering kits, there's little to no chance of permanent screw up. On another note, I think I'm going to redo my VF-19P pics. They just look too washed out and just terrible in general. Too much lighting and exposure time. Here's the first of them. I also added a hint of additional weathering to it using other colors. Random pics of the 171 EX just because it looks badass with the armor pack. Edited May 1, 2013 by MacrossJunkie Quote Link to comment Share on other sites More sharing options...
Lolicon Posted May 1, 2013 Share Posted May 1, 2013 They both look amazing. I think I may have to detail my 171 next... (kinda makes me wish I didn't super glue the wing pins on now) Gerwalk and fighter pics of the VF-1S now that I've fixed the damaged decal. For future projects I'll have to use the Yamato stickers for parts that are likely to get scraped during transformation. Quote Link to comment Share on other sites More sharing options...
MacrossJunkie Posted May 1, 2013 Share Posted May 1, 2013 That looks fantastic. I dare say you may be better than I am at using the Tamiya kits. Quote Link to comment Share on other sites More sharing options...
Lolicon Posted May 1, 2013 Share Posted May 1, 2013 That looks fantastic. I dare say you may be better than I am at using the Tamiya kits. Now that's high praise! I wish I had started sooner. It's fun and I enjoy seeing the fruits of my labor. Quote Link to comment Share on other sites More sharing options...
MacrossJunkie Posted May 2, 2013 Share Posted May 2, 2013 Moved out my older 19P pics from my album and replaced them with better shots. I replaced Beaker with an actual pilot figure for the shots as well. I blame the bad pics on not shooting for while and forgetting how. It just goes to show that you can still take crappy pics even with a good camera. Quote Link to comment Share on other sites More sharing options...
Kurisama Posted May 2, 2013 Share Posted May 2, 2013 Goddamn. So jelly, I'm wobblin'. Quote Link to comment Share on other sites More sharing options...
MacrossJunkie Posted May 2, 2013 Share Posted May 2, 2013 I wish I had started sooner. It's fun and I enjoy seeing the fruits of my labor. I know right? It's something more to look forward to doing beyond just getting it in the mail, taking it out and transforming it a few times and putting it in display. Even during the times I don't feel like doing it, I still look forward to the end result. It certainly increases the enjoyment of my collection. I'd like to see you do more. Quote Link to comment Share on other sites More sharing options...
VF-18S Hornet Posted May 6, 2013 Author Share Posted May 6, 2013 Okay here are the pictures of my labor of decaling my VF-19F in stages of how I did it. I trimmed the intake and danger air intake decals to give it that printed on look wish I did the same with the 19S progress moving along after an hour bottom view top view Quote Link to comment Share on other sites More sharing options...
VF-18S Hornet Posted May 7, 2013 Author Share Posted May 7, 2013 finaly got my VF-19P today at work. Will have pictures of it up after I decal it. Quote Link to comment Share on other sites More sharing options...
MacrossJunkie Posted May 13, 2013 Share Posted May 13, 2013 I weathered and flat coated my second 171 which I got from HLJ. Still hoping I can get a fix for the one I got from NY. Pics of other modes coming later. Waiting for the coat to dry better before I try transforming it. I've already had to fix it several times with all the parts scraping. Quote Link to comment Share on other sites More sharing options...
ErikElvis Posted May 13, 2013 Share Posted May 13, 2013 As always awesome job! Quote Link to comment Share on other sites More sharing options...
xrentonx Posted May 13, 2013 Share Posted May 13, 2013 Beautiful! Proving to me once again that these look a billion times better in a matte finish. Quote Link to comment Share on other sites More sharing options...
Deadeye_281 Posted May 14, 2013 Share Posted May 14, 2013 I'd love to get my renewal VF-25F to this finish...how do you apply your matte? Sooo jealous. Great job BTW! Quote Link to comment Share on other sites More sharing options...
Edi Posted May 14, 2013 Share Posted May 14, 2013 That looks amazing! I want to try weathering along with matte coating, but as I only have one of each figure, I'm too afraid of messing it up! Quote Link to comment Share on other sites More sharing options...
Scyla Posted May 14, 2013 Share Posted May 14, 2013 I weathered and flat coated my second 171 which I got from HLJ. Still hoping I can get a fix for the one I got from NY. Pics of other modes coming later. Waiting for the coat to dry better before I try transforming it. I've already had to fix it several times with all the parts scraping. Great job as always MacrossJunkie! I envy you. Good luck on the NY one. Quote Link to comment Share on other sites More sharing options...
Ignacio Ocamica Posted May 14, 2013 Share Posted May 14, 2013 Awesome looking VF-171!!! It really looks better with the matt finish. Quote Link to comment Share on other sites More sharing options...
wm cheng Posted May 14, 2013 Share Posted May 14, 2013 Wow, MacrossJunkie & Lolicon ARE the masters! I bow down to you! Great work on all the toys, it makes me want the ones I never new I wanted now... argh. It's especially hard weathering the dark coloured planes convincingly, but you've done a great job! Have have that Tamiya B kit too, but I found the consistency of the colours to be too hard-like paste, it doesn't pick up much with a brush, it just stays in the container, I have to use the smudge brush to pick up the colour, then it won't lay on the plastic, it just stays on the brush/smudge sponge. Any tips? Fantasic photography BTW MJ! You should do a step by step thread with a photo-spread section at the end, I'd like to know what you're lighting with and is the background just a dark velvet curtain? Quote Link to comment Share on other sites More sharing options...
MacrossJunkie Posted May 14, 2013 Share Posted May 14, 2013 I'd love to get my renewal VF-25F to this finish...how do you apply your matte? Sooo jealous. Great job BTW! I mixed some Tamiya flat base with Future and sprayed on several layers via airbrush. Wow, MacrossJunkie & Lolicon ARE the masters! I bow down to you! Great work on all the toys, it makes me want the ones I never new I wanted now... argh. It's especially hard weathering the dark coloured planes convincingly, but you've done a great job! Have have that Tamiya B kit too, but I found the consistency of the colours to be too hard-like paste, it doesn't pick up much with a brush, it just stays in the container, I have to use the smudge brush to pick up the colour, then it won't lay on the plastic, it just stays on the brush/smudge sponge. Any tips? Fantasic photography BTW MJ! You should do a step by step thread with a photo-spread section at the end, I'd like to know what you're lighting with and is the background just a dark velvet curtain? This time around, I did 98% of the weathering just freehand via airbrush and only used the snow from the Tamiya kit to do some highlights and fade on the black areas like the piece under the cockpit or the black intake vents. It sounds like yours might be dried up if the brush end is not picking it up. It ought to be powdery and ideally a tiny bit damp. Some of the other colors I have were dried and hard like clay/chalk which makes them impossible to use. I haven't tried this before, but you could maybe try lightly misting the powder with some water from your airbrush and see if that helps the brush pick up the powder better. You could also try putting your finger over top the brush hairs to apply pressure while trying to get some powder on the brush. You don't really need much on the brush. A little bit goes a long way for me. Have you also done a coat of Future before using the Tamiya kit? It really helps. The order I did things was weathering via airbrush, clear coat with Future, apply powder from Tamiya weathering kit, clearcoat with Future mixed with Tamiya flat base. I plan on taking more pics of my 171 in the other modes tonight, so I'll include some pics of my setup for you to laugh at. You'd be surprised how haphazard and improvised it is. Quote Link to comment Share on other sites More sharing options...
Lolicon Posted May 14, 2013 Share Posted May 14, 2013 Wow, MacrossJunkie & Lolicon ARE the masters! I bow down to you! Great work on all the toys, it makes me want the ones I never new I wanted now... argh. It's especially hard weathering the dark coloured planes convincingly, but you've done a great job! Have have that Tamiya B kit too, but I found the consistency of the colours to be too hard-like paste, it doesn't pick up much with a brush, it just stays in the container, I have to use the smudge brush to pick up the colour, then it won't lay on the plastic, it just stays on the brush/smudge sponge. Any tips? Fantasic photography BTW MJ! You should do a step by step thread with a photo-spread section at the end, I'd like to know what you're lighting with and is the background just a dark velvet curtain? I just used a Q-tip for the weathering. It sounds like yours might have dried out, like MJ said. The soot is a little bit hard, but nothing that I can't work with. The snow is still powdery on mine. I've had my kits for about 2 years now. I put it straight onto the bare plastic, since Yamato valks have a matt finish, so it stays on pretty well. I know I'll have to apply some kind of flat coat before weathering any Bandai valks. Oh, and that 171 looks fantastic! Excellent work, as always, MJ. Quote Link to comment Share on other sites More sharing options...
Guest davidwhangchoi Posted May 14, 2013 Share Posted May 14, 2013 I just used a Q-tip for the weathering. It sounds like yours might have dried out, like MJ said. The soot is a little bit hard, but nothing that I can't work with. The snow is still powdery on mine. I've had my kits for about 2 years now. I put it straight onto the bare plastic, since Yamato valks have a matt finish, so it stays on pretty well. I know I'll have to apply some kind of flat coat before weathering any Bandai valks. Oh, and that 171 looks fantastic! Excellent work, as always, MJ. all of the pics here are professional, i wish one of you lived by NYC/Nj, it would be a dream to see these. Quote Link to comment Share on other sites More sharing options...
MacrossJunkie Posted May 14, 2013 Share Posted May 14, 2013 Here's the rest of my VF-171 set. And here's my totally make-shift setup: I use whatever lamps I can find in the house. I requisitioned two wall lamps and a desk lamp and fitted them with 5500k color temp flourescent bulbs for lighting that's close to sunlight and set my camera's white balance to "Direct Sunlight". Soft white bulbs are too yellowish. I stacked 3 monitor boxes as my makeshift table and use a fold away light box with a black velvety backdrop. The camera shown is a Nikon D7000 on a Manfrotto tripod. The nice part though is it all stacks or folds away neatly and I just stick it in a closet when I'm done. Quote Link to comment Share on other sites More sharing options...
Lolicon Posted May 14, 2013 Share Posted May 14, 2013 Hey, whatever works, right? The results speak for themselves. Simple, but effective. And that's still less ghetto than my setup, which doesn't even involve a tripod and uses tracing paper for light diffusion. Quote Link to comment Share on other sites More sharing options...
anime52k8 Posted May 14, 2013 Share Posted May 14, 2013 not totally makeshift, you've at least got a legit light box and a Manfrotto tripods better than the one's I've got. Hey, whatever works, right? The results speak for themselves. Simple, but effective. And that's still less ghetto than my setup, which doesn't even involve a tripod and uses tracing paper for light diffusion. hey man, you'd be amazed how well cheap copy paper taped over an Ott-lite works. also, white presentation board is perfect for an impromptu reflector. I just realized I got this new tracing table that's got super bright and really even LED's. I should seriously try using that for photo lighting. Quote Link to comment Share on other sites More sharing options...
plastik Posted May 15, 2013 Share Posted May 15, 2013 MacrossJunkie, as always excellent work on that vf-171. I don't own an airbrush machine and was wondering if it's possible to achieve a good flat look using the spray can offerings? Quote Link to comment Share on other sites More sharing options...
Mizicke5273 Posted May 15, 2013 Share Posted May 15, 2013 VF-1S DYRL - Roy Focker 1/48th VF-1J with Super Parts - Max Jenius YF-19 1/60th F-1A DYRL with Strike Parts - Hikaru Ichijo Quote Link to comment Share on other sites More sharing options...
MacrossJunkie Posted May 15, 2013 Share Posted May 15, 2013 MacrossJunkie, as always excellent work on that vf-171. I don't own an airbrush machine and was wondering if it's possible to achieve a good flat look using the spray can offerings? Thanks. Yes, you certainly can. (no pun intended) If you haven't used the spray can stuff before, you'll want to try it out on a plastic piece first to see how it comes out. Also cautious with the lacquer types. Some can react with/melt the plastic or paint on the toy. Quote Link to comment Share on other sites More sharing options...
plastik Posted May 15, 2013 Share Posted May 15, 2013 (edited) Do you have any experience with Mr. Hobby TopCoat (link below)? is this a good brand or do you have one in particular you can recommend? My local gundam store has these in stock. Thanks again for helping me out http://www.amazon.com/gp/product/B0000WS12C/sr=8-3/qid=1368652503/ref=olp_product_details?ie=UTF8&me=&qid=1368652503&seller=&sr=8-3 Edited May 15, 2013 by plastik Quote Link to comment Share on other sites More sharing options...
MacrossJunkie Posted May 15, 2013 Share Posted May 15, 2013 I can't say I have, but Mr. Hobby is a very good brand. I've tried Tamiya's and Testor's and didn't like them. Also, I heard they have a tendency to yellow after a while. After that, I switched to using Future with the Tamiya flat base. Quote Link to comment Share on other sites More sharing options...
MacrossJunkie Posted May 20, 2013 Share Posted May 20, 2013 (edited) I got the VF-17 super pack and did a quickie weathering job on it. It definitely looks much better in person than it did in the photos I've seen of it up until now. Edited May 20, 2013 by MacrossJunkie Quote Link to comment Share on other sites More sharing options...
Benson13 Posted May 20, 2013 Share Posted May 20, 2013 Love the second to last pic. Great job. Quote Link to comment Share on other sites More sharing options...
Kanedas Bike Posted May 20, 2013 Share Posted May 20, 2013 Love the second to last pic. Great job. AGREED. Was not a fan of the 17 at all, but those pics are flat out awe inspiring. -b. Quote Link to comment Share on other sites More sharing options...
VF-18S Hornet Posted May 20, 2013 Author Share Posted May 20, 2013 Was the UN Spacy smybol aways been on the fast pack booster on the VF-17, if not you did a good job. Quote Link to comment Share on other sites More sharing options...
MacrossJunkie Posted May 20, 2013 Share Posted May 20, 2013 Was the UN Spacy smybol aways been on the fast pack booster on the VF-17, if not you did a good job. They come unmarked so I cut out the UN Spacy kites from the VF-17 sticker sheet since the super pack didn't come with any. I took some markings from other sticker sheets as well. Quote Link to comment Share on other sites More sharing options...
Recommended Posts
Join the conversation
You can post now and register later. If you have an account, sign in now to post with your account.