Xx-SKULL-ONE-xX Posted October 25, 2010 Share Posted October 25, 2010 Do people paint detail onto the panel lines of there 1/60/ 1/48 toys? I read something that made me wonder... Quote Link to comment Share on other sites More sharing options...
claude grant Posted October 25, 2010 Share Posted October 25, 2010 what did you read? oh, and i don't, but am curious what it was you read. Quote Link to comment Share on other sites More sharing options...
Xx-SKULL-ONE-xX Posted October 25, 2010 Author Share Posted October 25, 2010 (edited) Just a comment in one of the threads about how even with half painted panel lines his 1/60 VF-0A looked good. I know some people completely customized theirs with paint but I had never heard about people doing just panel detail... Edited October 25, 2010 by Xx-SKULL-ONE-xX Quote Link to comment Share on other sites More sharing options...
ff95gj Posted October 26, 2010 Share Posted October 26, 2010 Copied from this page: http://www.toysdaily.com/discuz/viewthread.php?tid=74213&extra=&highlight=&page=1 The 1As are only panel-lined I think. Look incredible. Quote Link to comment Share on other sites More sharing options...
derex3592 Posted October 26, 2010 Share Posted October 26, 2010 I have used a Gundam type marker on my 1:48, YF-19 and Mospeada stuff, but for the 1:60 ver 2 stuff, Pro modelers weathering wash is the only way to go. It takes time and a bit of practice, but the results are greatness!! Quote Link to comment Share on other sites More sharing options...
BlueMax Posted October 26, 2010 Share Posted October 26, 2010 (edited) Or a very simple method. 2B pencil. Looks pretty good without overdoing it, and best of all, completely reversible. Edited October 26, 2010 by BlueMax Quote Link to comment Share on other sites More sharing options...
Old Man Posted October 26, 2010 Share Posted October 26, 2010 Or a very simple mothod. 2B pencil. looks preety good without overdoing it, and best of all, completely reversible, Hmmm, I should try that some time. Thanks for the tip, BlueMax. Quote Link to comment Share on other sites More sharing options...
Xx-SKULL-ONE-xX Posted October 26, 2010 Author Share Posted October 26, 2010 awesome...I shall have to give it a try, perhaps with the pencil first. Quote Link to comment Share on other sites More sharing options...
Jasonc Posted October 26, 2010 Share Posted October 26, 2010 I've used the pencil before. I'm not too big on the washes and the Gundam markers. Pencil is reversible, and that is probably the best reason why I go that route. Quote Link to comment Share on other sites More sharing options...
derex3592 Posted October 27, 2010 Share Posted October 27, 2010 I've used the pencil before. I'm not too big on the washes and the Gundam markers. Pencil is reversible, and that is probably the best reason why I go that route. I tried the pencil route--just wasn't big on the "shiny" effect it had. Just my .02 Quote Link to comment Share on other sites More sharing options...
GU-11 Posted October 27, 2010 Share Posted October 27, 2010 I've used the pencil before. I'm not too big on the washes and the Gundam markers. Pencil is reversible, and that is probably the best reason why I go that route. Same here. Except I mostly panel line and detail TF's due to all the missing paint apps and shallow panel lines on many deluxe figs. I don't really feel the need to panel line my VF's, although some of the white colored VF's do look like they'd benefit from some panel lining. Personally, they look good enough to me without any form of detailing or weathering. Of course, that's just me. Quote Link to comment Share on other sites More sharing options...
arrow Posted October 27, 2010 Share Posted October 27, 2010 I've never seen the need to panel line. except for my one vf-1s that yellowed. And, it looked so much better. Quote Link to comment Share on other sites More sharing options...
Shin Densetsu Kai 7.0 Posted October 27, 2010 Share Posted October 27, 2010 I use Sakura brush pens. I loathe using them for drawing, but I found another use for them when it came to toys. What I do is generously brush on a lot of ink on the surface, enough to seep between the panel lines. Then after a few seconds or so, wipe off with tissue paper. In doing so, I accomplish 2 things: Inking in the panel lines Give off a weathered look It made a world of difference on my Classics Jetfire, and eventually I plan on trying these techniques out on one of my Yamatos. Quote Link to comment Share on other sites More sharing options...
ae_productions Posted October 27, 2010 Share Posted October 27, 2010 I use Sakura brush pens. I loathe using them for drawing, but I found another use for them when it came to toys. What I do is generously brush on a lot of ink on the surface, enough to seep between the panel lines. Then after a few seconds or so, wipe off with tissue paper. In doing so, I accomplish 2 things: Inking in the panel lines Give off a weathered look It made a world of difference on my Classics Jetfire, and eventually I plan on trying these techniques out on one of my Yamatos. That is pure genius! I'm going to have to try this. If only there was a store withing 300 miles of me that sold Sakura brush pens. Quote Link to comment Share on other sites More sharing options...
Shin Densetsu Kai 7.0 Posted October 27, 2010 Share Posted October 27, 2010 (edited) That is pure genius! I'm going to have to try this. If only there was a store withing 300 miles of me that sold Sakura brush pens. They should be at any art/crafts store, pretty cheap too, only $2+. Also, the ink does not turn purple over time, unlike Sharpie markers. Edited October 27, 2010 by Shin Densetsu Kai 7.0 Quote Link to comment Share on other sites More sharing options...
Macross_Fanboy Posted October 29, 2010 Share Posted October 29, 2010 I use a .2mm(?) lead pencil on my VF-1s only, and only my TV and Movie valks, I haven't felt the need to do M&M 1Js due to their color, I smeared it a little too to give it a dirty look and they look nice to me. I was thinking about my YF-19s but just left it at the VF-1s. Quote Link to comment Share on other sites More sharing options...
MacrossJunkie Posted October 31, 2010 Share Posted October 31, 2010 (edited) I have used a Gundam type marker on my 1:48, YF-19 and Mospeada stuff, but for the 1:60 ver 2 stuff, Pro modelers weathering wash is the only way to go. It takes time and a bit of practice, but the results are greatness!! I'll give another vote for the promodeller weathering wash. I've used enamel mixed with thinner, gundam markers, pencil (sort of. I tested it on a few panels once and hated the shininess.), and promodellers mixed with a small drop of dish washing liquid. The enamel paint properly mixed to the right color with thinner added looks great but you have to deal with venting the thinner fumes. Gundam markers emphasize the panel lines too much, particularly on light colored surfaces and the lines just seem too heavy. I've had to rub most of it out of the panel lines in order for the lines to not look so overdone, but even then, the color of the inks don't look very natural to me. Darker colored valks still look alright. I still use them, but only sparingly in certain situations. The biggest problem I've found with the markers is that while it's normally easy to clean off if you mess up and wipe it immediately, some plastic surfaces seem to get stained right away so you're kinda screwed if the pen slips. Painted surfaces fare even worse as the paint seems to absorb the ink right away. I finally settled on using promodeller wash because it doesn't stain (even if you leave it on for days or longer), it's easy to apply, and the results look pretty natural. It's effectively tiny particles of dirt (clay actually) mixed into liquid. The only real downside is that it can come off fairly easily if your hands are moist and the the panel lines are extremely shallow to nearly non-existent, like some of the panel lines on the v2 1/60 VF-1's. Edited October 31, 2010 by MacrossJunkie Quote Link to comment Share on other sites More sharing options...
Nightingale Posted October 31, 2010 Share Posted October 31, 2010 Water colors work well too and are very forgiving. Quote Link to comment Share on other sites More sharing options...
ae_productions Posted November 2, 2010 Share Posted November 2, 2010 Water colors work well too and are very forgiving. Really? Interesting... Is it durable? Can you handle the valk after using watercolors? Quote Link to comment Share on other sites More sharing options...
Nightingale Posted November 2, 2010 Share Posted November 2, 2010 You might want to use either of these (depending on your taste) before handling, as moisture from your hands will wipe away the water colors. http://www.thewarstore.com/TestorsDullcote.html Since water colors wipe off very easily on most any surface, they are easy to work and experiment with. Quote Link to comment Share on other sites More sharing options...
Chet Posted November 13, 2010 Share Posted November 13, 2010 I've got two questions: 1. Does panel lining = weathered look? Is it possible to panel line without getting the toy dirty-looking? 2. Do you panel line before or after you apply decals? Quote Link to comment Share on other sites More sharing options...
MacrossJunkie Posted November 13, 2010 Share Posted November 13, 2010 I've got two questions: 1. Does panel lining = weathered look? Is it possible to panel line without getting the toy dirty-looking? 2. Do you panel line before or after you apply decals? 1. They're two distinctly different things, although some people will do both at the same time by smearing some of the ink/paint/whatever being used for the panel lining. But yes, you can have panel lining and still have no weathering effects applied. 2. You would normally do the panel lining after applying decals/stickers. If you panel line beforehand and put decals on after and a decal happens to go across a panel line, the decals will cover the panel lining and will not look right, thus making you redo the panel lining anyway. Quote Link to comment Share on other sites More sharing options...
derex3592 Posted November 14, 2010 Share Posted November 14, 2010 (edited) 1. They're two distinctly different things, although some people will do both at the same time by smearing some of the ink/paint/whatever being used for the panel lining. But yes, you can have panel lining and still have no weathering effects applied. 2. You would normally do the panel lining after applying decals/stickers. If you panel line beforehand and put decals on after and a decal happens to go across a panel line, the decals will cover the panel lining and will not look right, thus making you redo the panel lining anyway. The way I have found that works best for me is---First decide if you want your Valk weathered OR just panel lined. Then I use the Pro Modelers wash to do both. different methods however. And be aware that in my experience, on the REALLY WHITE valks, the wash WILL kind of dull the white down a bit. I either brush the entire thing down and then wipe away some of the wash to give a weathered and panel lined look, OR I just "paint" over the panel lines area with a small brush and then wipe away the access for a "clean" look. This does take a bit of practice--so don't try it on your prize Valk! I can now get great results with either method. And also I do decals LAST, as I found out if I don't---the wash kinda collects around the edges and looks weird to me, and also I prefer that the panel lines seem to go "through" and or "under" my decals. Just my .02! Edited November 14, 2010 by derex3592 Quote Link to comment Share on other sites More sharing options...
MacrossJunkie Posted November 15, 2010 Share Posted November 15, 2010 The way I have found that works best for me is---First decide if you want your Valk weathered OR just panel lined. Then I use the Pro Modelers wash to do both. different methods however. And be aware that in my experience, on the REALLY WHITE valks, the wash WILL kind of dull the white down a bit. I either brush the entire thing down and then wipe away some of the wash to give a weathered and panel lined look, OR I just "paint" over the panel lines area with a small brush and then wipe away the access for a "clean" look. This does take a bit of practice--so don't try it on your prize Valk! I can now get great results with either method. And also I do decals LAST, as I found out if I don't---the wash kinda collects around the edges and looks weird to me, and also I prefer that the panel lines seem to go "through" and or "under" my decals. Just my .02! Personally, I've not had good results doing weathering with the ProModellers weathering wash despite the name of the product. I use it strictly for panel lining and that's it. I use other alternatives like air brushing (pain in the butt) or the tamiya weathering kits (easier with no clean up work after and can use it anywhere) to do actual weathering. For the panel lines, I just use a fine brush and dab the tip into the panel lines and let the capillary effect carry the wash (only works if you add a drop of dishwashing soap or the surface tension of the basic product is too high). But yeah, if you just brush over the entire valk, then putting on the decals before hand wouldn't be any good due to it collecting on the edges (not a problem if you do a couple layers of gloss clearcoat first however). If you have a problem with the wash dulling very white valks like hikaru's 1J, try using isopropyl rubbing alcohol instead of plain water. Using alcohol, I've been able to completely remove any trace of the wash in the rare cases it is hard to remove. Word of warning, paint on Bandai's MF valks comes right off with the slightest touch of rubbing alcohol so avoid using at all costs. The paints used on Yamato valks are much much much more resistant to rubbing alcohol. Quote Link to comment Share on other sites More sharing options...
ae_productions Posted November 15, 2010 Share Posted November 15, 2010 These are some really great tips. Thanks for sharing. Now it's only a matter of deciding WHICH method to use, and WHICH valk to test it out on! THAT is the scary part! Quote Link to comment Share on other sites More sharing options...
derex3592 Posted November 16, 2010 Share Posted November 16, 2010 Personally, I've not had good results doing weathering with the ProModellers weathering wash despite the name of the product. I use it strictly for panel lining and that's it. I use other alternatives like air brushing (pain in the butt) or the tamiya weathering kits (easier with no clean up work after and can use it anywhere) to do actual weathering. For the panel lines, I just use a fine brush and dab the tip into the panel lines and let the capillary effect carry the wash (only works if you add a drop of dishwashing soap or the surface tension of the basic product is too high). But yeah, if you just brush over the entire valk, then putting on the decals before hand wouldn't be any good due to it collecting on the edges (not a problem if you do a couple layers of gloss clearcoat first however). If you have a problem with the wash dulling very white valks like hikaru's 1J, try using isopropyl rubbing alcohol instead of plain water. Using alcohol, I've been able to completely remove any trace of the wash in the rare cases it is hard to remove. Word of warning, paint on Bandai's MF valks comes right off with the slightest touch of rubbing alcohol so avoid using at all costs. The paints used on Yamato valks are much much much more resistant to rubbing alcohol. I have a package of the Tamiya weathering stuff just waiting for me to have enough time to experiment with it!! Good tips otherwise! LOVE threads like this! Quote Link to comment Share on other sites More sharing options...
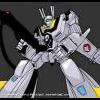
MacrossJunkie Posted November 16, 2010 Share Posted November 16, 2010 Here's a couple of my valks with only panel lining done (these were done with black enamel paint mixed with thinner). And these are some of my valks that I did panel lining and weathering/battle grime/etc. (using promodeller's and tamiya weathering kits) I would say all of my macross toys have been panel lined and about half or less have had some form weathering done on them. Quote Link to comment Share on other sites More sharing options...
derex3592 Posted November 16, 2010 Share Posted November 16, 2010 WOW! Your weathered stuff is amazing!! Especially that blue max!! Good looking destroid as well! Quote Link to comment Share on other sites More sharing options...
derex3592 Posted November 16, 2010 Share Posted November 16, 2010 here's a couple of mine....these were some of my early attmepts... Quote Link to comment Share on other sites More sharing options...
Nicaragua Posted November 17, 2010 Share Posted November 17, 2010 Here's a couple of my valks with only panel lining done (these were done with black enamel paint mixed with thinner). And these are some of my valks that I did panel lining and weathering/battle grime/etc. (using promodeller's and tamiya weathering kits) I would say all of my macross toys have been panel lined and about half or less have had some form weathering done on them. That VF-22 is really good, I mean really really good. I was always happy with my YF-21 but seeing that is making me want to get a 22 and give this weathering thing a try. Quote Link to comment Share on other sites More sharing options...
David Hingtgen Posted November 17, 2010 Share Posted November 17, 2010 Instead of practicing on a "real" valk, find some cheap knockoff, or an old toy at Goodwill etc. So long as it's plastic and has some engraved lines, it'll work fine to perfect your technique, before you try smearing ink on a $200 out-of-production VF-1... And these are some of my valks that I did panel lining and weathering/battle grime/etc. (using promodeller's and tamiya weathering kits) Could you expand a bit on your Promodeller's technique? I have some of their wash, but only ever tried it once or twice--I couldn't really get it to flow evenly, it always seemed to almost bead/clump on me, so it'd look like a bunch of black dots/globs in the panel line, rather than an even dark line. Quote Link to comment Share on other sites More sharing options...
MacrossJunkie Posted November 17, 2010 Share Posted November 17, 2010 (edited) Instead of practicing on a "real" valk, find some cheap knockoff, or an old toy at Goodwill etc. So long as it's plastic and has some engraved lines, it'll work fine to perfect your technique, before you try smearing ink on a $200 out-of-production VF-1... Could you expand a bit on your Promodeller's technique? I have some of their wash, but only ever tried it once or twice--I couldn't really get it to flow evenly, it always seemed to almost bead/clump on me, so it'd look like a bunch of black dots/globs in the panel line, rather than an even dark line. Sure. Like I mentioned in my earlier post, I add a bit of dishwashing liquid. Not the kind that you put into a dishwasher but the kind you'd use to handwash dishes like this: Add a small drop of it into the promodeller bottle. About this much to start with (pictured with a teaspoon): Mix it, shaking the bottle circularly so it's swirling along the walls of the bottle instead of up and down to avoid making bubbles. Take a fine tip brush like this: Dip it into the mixture and brush or dab it along the panel lines. I didn't have any non-panel line valks so I took one of Ivanov's boosters to use as an example. If it continues to bead up for you, add another dab of soap to lessen the water's surface tension until it doesn't. Wipe off the excess that's outside the panel lines with a paper towel after it dries. Dab a drop of water on the towel if it's not coming off easily. If you accidentally take some out of the panel line, just reapply and be careful as you wipe next time. Edit: Forgot to mention you should probably re-shake it every few minutes since the particles tend to settle fairly quickly. Edited November 17, 2010 by MacrossJunkie Quote Link to comment Share on other sites More sharing options...
miriya Posted November 18, 2010 Share Posted November 18, 2010 @MacrossJunkie, Thanks for that tip! Totally going to try that. I have a bottle of the wash that I have been having the same problems as David. Quote Link to comment Share on other sites More sharing options...
anime52k8 Posted November 18, 2010 Share Posted November 18, 2010 (edited) I'm probably in the minority here but I really don't like using that "ProModeler" stuff. I've tried using it and found it to be absolute pain. Like David I all it tended to do was bead up and pull out of the panel lines except that I tried mixing in dish soap starting with a very small drop and gradually increasing the amount, but I never saw much improvement. When I finally did get the stuff to go into the engraved detail and stayed there long enough to try, the result was rather unimpressive. the lines where weak and splotchy, Not at all what I wanted. Personally I stick to Gundam markers and heavily thinned enamel paint. Edited November 18, 2010 by anime52k8 Quote Link to comment Share on other sites More sharing options...
ae_productions Posted November 18, 2010 Share Posted November 18, 2010 How do you weather colored sections of a valk? I noticed many of the pics above are not weathered in colored areas, such as Max's VF-1A TV. It is just harder to weather colored sections? Quote Link to comment Share on other sites More sharing options...
Recommended Posts
Join the conversation
You can post now and register later. If you have an account, sign in now to post with your account.