Chronocidal
-
Posts
10757 -
Joined
-
Last visited
Content Type
Profiles
Forums
Events
Gallery
Everything posted by Chronocidal
-

Star Destroyer to end all Star Destroyers
Chronocidal replied to Mr March's topic in Anime or Science Fiction
Pretty sure the decals will absolutely suck. I don't see any reason why a Bandai kit would have any advantage over the existing kits though, unless the entire thing is molded with the main markings as separate pieces. And even then, all that will do is horribly complicate the assembly (which does seem to be Bandai's trademark though ) -
Hah.. you know, I would never take this out of fighter to begin with.. wonder how close the blue on the crotch plate is to Michael's? It might work as a replacement for mine.
-
Huh, wonder if there was some structural reason they redesigned her hold-down. Wouldn't be hard to build it that way. The inner control room I actually modified without moving her nook. It's not perfect, but you can seat two figures inside (without any back equipment), even with the lid closed. I just have two consoles mounted next to each other in the center facing opposite sides, and the figures are offset by two studs.
-
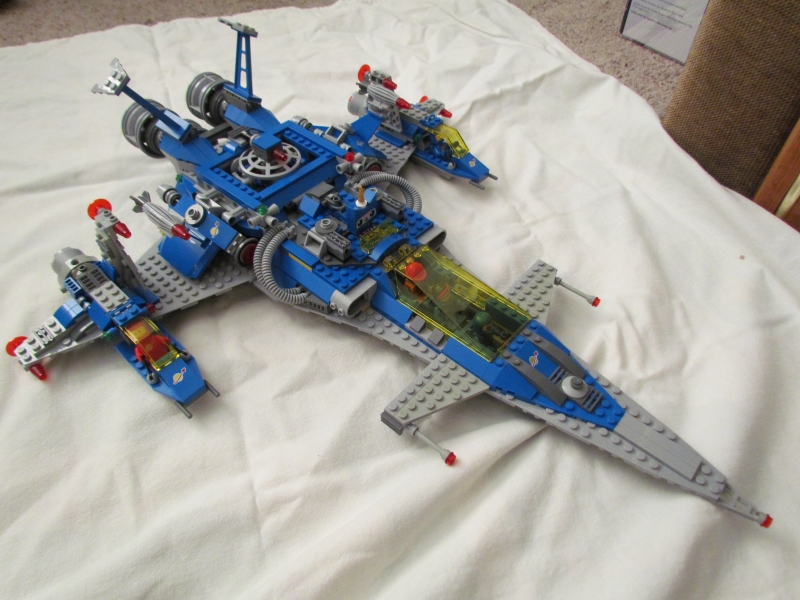
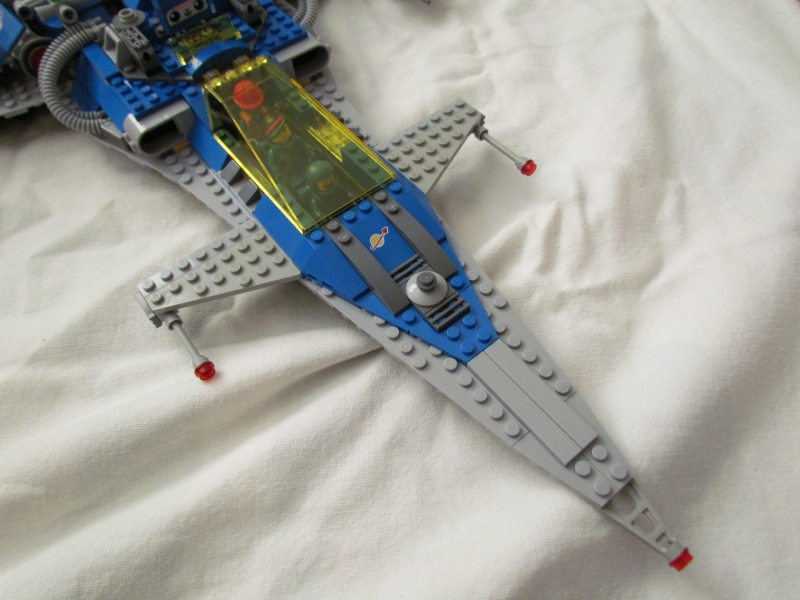
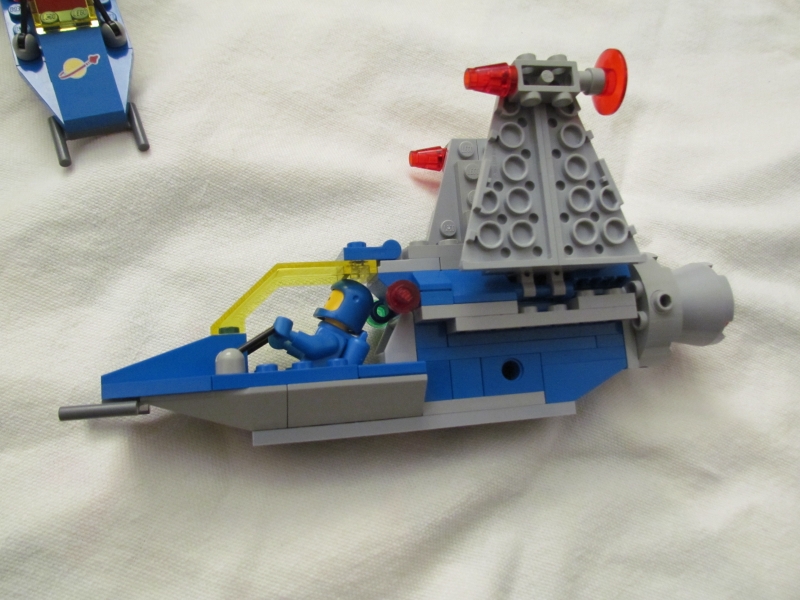
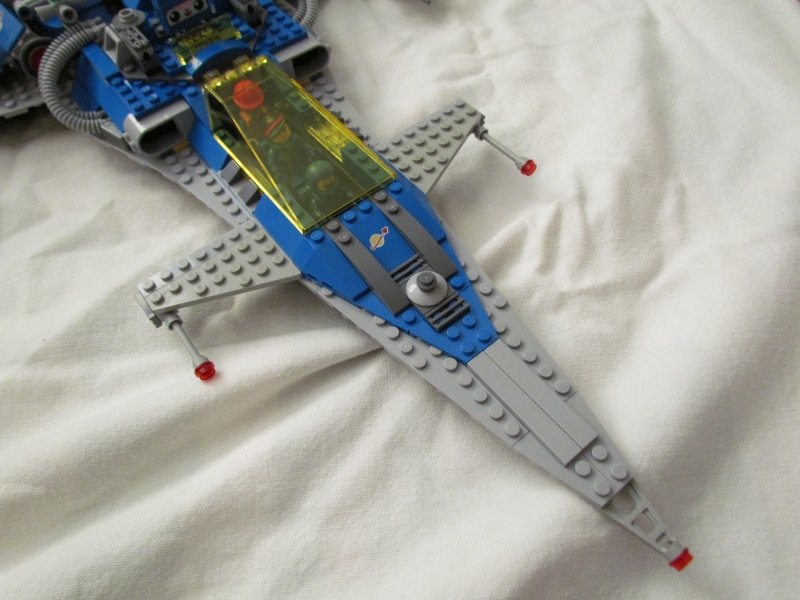
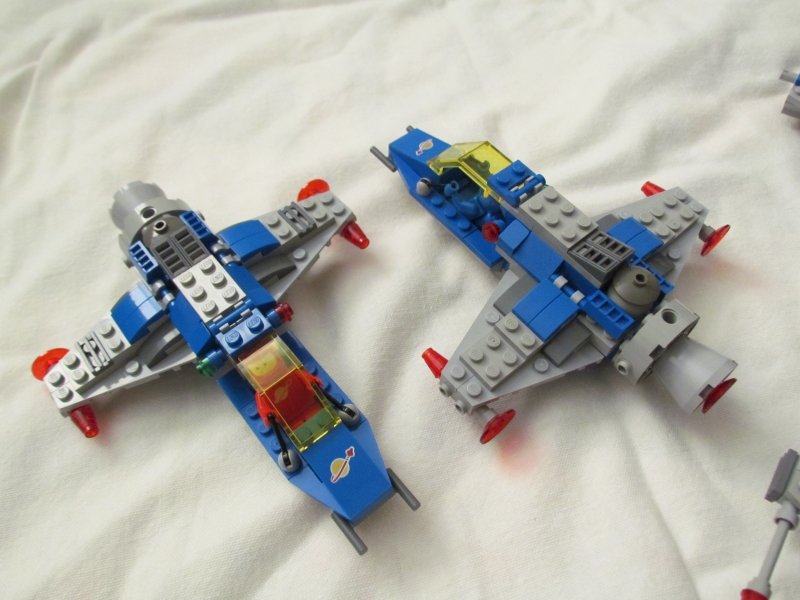
Here's a few pics of the changes. I'm not sure I love the wing design of the new pods yet, but they work, and still blend with the sweep of the main wing. Nose redesign: New wing attach points, reversed hatch dishes (with gray mounts ), and bigger tails: Underside (I removed half of the rails from the wings, and filled in some of the gaps with gray plates): New pods: Pod structure: My main issue with the pod wings is that now the wings look a little crowded, since they're the same height as the tails on the cover flaps.. but since those are constantly falling off anyway, I might just remove them. I might also redesign the pods with swing wings instead of vertical folding ones, but I think the overall planform is better with these.


-
Oh, good point. I was mostly thinking of how the ankles on the early VF-19 releases would be loose in the middle, and tighten up around the extremes. That's not a bad design, that's just shoddy CAD/manufacturing for that to happen. But yes.. I'd rather they just go back to ratchets period. I'd much rather use a stand for fancy poses anyway.
-
Sad part about the ankles.. by all rights, the design should work just fine. They just don't.. it's like there's just something fundamentally wrong with the shape or tolerances that makes the ball joints have completely uneven tension. It varies a lot, my YF-19's ankles have been fine so far, but I also prefer fighter mode so much, they rarely get any use.
-
Yeah, I'd really love to get a second G, just on the hopes that THAT one will actually have all the parts included in the box. Freaking Bandai.
-
Mostly done rebuilding a few of the details, and I think it came out much better than stock. Biggest change is the rebuilt wing pods, which are now a decent sized mini-ship. Also, no, the entire bulky structure under the wings is unnecessary. You can remove the bottom layer of reinforcement and replace it with a single 4x8 plate. One thing I am noticing though.. while all the features practically scream "playability," this is one you probably don't want to go swooshing around the room too much. The base structure is nice and sturdy, but various pieces just love to fall off. Worst ones are the tails mounted to the cover flaps over the launchers. I really don't like the big blue panels they used there, they seem to just be manufactured to the wrong tolerances, and nothing likes to stay attached to them. The little dishes mounted to the front of the flaps also don't like staying on.. inventive as it was to use a wheel hub as a double-sided stud, they really don't hold on very well. I'll see about posting some pictures up later. I had some fun replacing the instrument panels with old vintage versions, and manned the new wing pods with the two classic space figures I have.
-
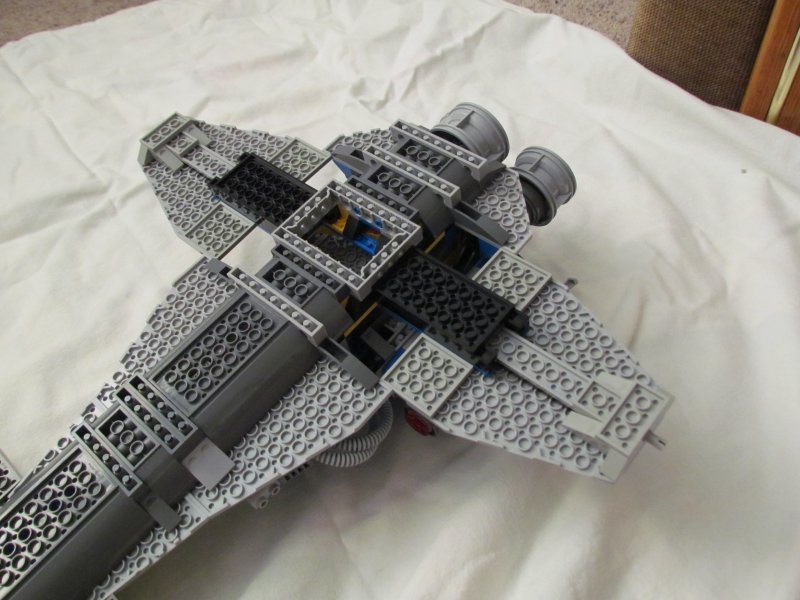
I just decided to skip the stickers entirely, and stick to the pre-printed ones. Few thoughts about construction... There's actually a nice potential separation joint from the main body with the wings, and the forward section, but the problem is the interior compartment bridges between them. If you remove the front half of the ship, you lose the back wall (and whatever crystal-doohickey power core the engines use). Also, wish they'd designed that interior section with the consoles in the middle, so you could seat someone in there with the lid closed. Unikitty's nook gets in the way. Between this and the Imperial Shuttle though, I'm noticing a trend.. they seem to be getting fairly conservative in how many parts are used to reinforce things. Lots of OCD moments where you realize there are just huge gaps left in the structure, but they don't need to be filled to remain sturdy. I think with a little rebuilding, you could easily design the wings to not need the entire underside structure. I'll probably be digging for pieces to build some larger mini-pods soon, and I might redesign the nosecone a little. The cone between the blunt wings kinda just rubs me the wrong way, so I might replace it with a tapered plate, and finish the tip off with a pair of classic guns.
-
That thing is just flat out amazing.. roughly twice the size of the UCS star destroyer from years back, but at like 1000x the complexity. Th fact that he got it to hold together on its own is a massive achievement itself. I've been anticipating Benny's ship by building up a couple sets, just did the giant Imperial Shuttle last night.. my fingers hurt. Never seen that many 1x1 plates in a single set before, and they're mostly used to stack the connection blocks for the wings and tail. The set itself is beautiful (and a huge supply of white plates), but I'm planning to rebuild the nose with stacked plates instead of the slopes, and I might need to track down some different pieces to rebuild the engine exhaust section.. they didn't make it wide or tall enough, and it kinda sticks out.
-
So, I'm eagerly awaiting arrival of my box of plasticky rattling goodness. I think I might finally redesign my Imperial Shuttle's nose while I wait.
-
Aircraft Super Thread Mk.VII
Chronocidal replied to David Hingtgen's topic in Anime or Science Fiction
Most likely, water injection in the engines. There was a period around Vietnam where they fiddled with things like that on turbojet engines, with some impressive performance increases. I know the F-105 set a speed record that way. That's what was going on when you saw older planes dumping huge black trails of smoke. The water cools the engine so you can achieve higher compressor RPM, and you get higher thrust from the increased mass flow rate, but the cooling also reduces combustion, so you get unburnt fuel in the exhaust. I don't know if the benefits carry over into more modern turbofan engines though, since the majority of low speed thrust on those actually comes from the giant fan itself, and the primary use was for getting a take-off thrust increase for larger planes like the B-52. -
I grabbed two as well, currently plotting how I can rebuild those wing pods into something more substantial, and thinking of ways to work in some of the classic space parts I still have around.. mostly, thinking of those tall support-structure style tails for the rear, instead of the dual 1x4 fins.
-
The VF-25 was already a CAD model, so most of the work was done for them. The VF-1 basically fell into the "let's try a completely new mold to account for anime magic in a completely different way than ever before" bag, with predictable results.
-
Well, I made up for you and ordered two. I want one to do experiments on.
-
Unless of course, they never sell, and they sit there for a few months unsold, until they drop the price to something reasonable. Pretty sure that's happened before.
-
Macross Collectibles Market Watch - Current Auction/Store SOLD prices
Chronocidal replied to jvmacross's topic in Toys
You know, I'm not sure if any of the broken shoulders I got have actually completely failed. They had clear cracks in them, yes, but nothing ever broke badly enough that it couldn't be glued back together, and hold decently well. I know that's probably not the case for everyone, but even then, I know people came up with some fancy methods to reinforce and fix the stock shoulders, even if they were cracked. It wouldn't stop me from picking up a good deal, especially for something like an old DYRL or VT/VF-1D, since you can't print the parts in those colors. -
Macross Collectibles Market Watch - Current Auction/Store SOLD prices
Chronocidal replied to jvmacross's topic in Toys
I'd go track down an unassembled kit then, if they're still around, and just use the parts you need from it. I could be wrong, but I don't think those would be as expensive as the fully assembled releases. It's just an awful lot to pay for authentic parts. -
Thanks for that, I've been browsing the main LEGO website for hints that it might be up, but the main site is like an experience in blunt-force trauma from every modern website design cliche that I hate. Ordered, can't wait to build it!
-
Macross Collectibles Market Watch - Current Auction/Store SOLD prices
Chronocidal replied to jvmacross's topic in Toys
Fixed. Bandai needs an award for the most disservice and disdain for their paying customers. -
Arcadia 1/60 VF-19 Custom Nekki Basara Special with Sound Booster
Chronocidal replied to SaitouSad's topic in Toys
Any changes visible to the sound booster, or are they only on the valk side? I'd probably be tempted to get another one if I could pick the combo up for less than $250, but I've got a serious weak spot for the Y/VF-19. -
NEWS!!! 1/48 VF-1J Super Valkyrie Max/Miria w/Reaction Mis
Chronocidal replied to joscasle's topic in Model kits
I'm pretty sure most of Hasegawa's VF-1 decals include a solid white circle decal to place the insignia over. I don't know how effective it is though, since I haven't gotten to that stage with any of my kits yet. -
Man do I wish someone would re-release the old B5 kits, both the Starfury and Thunderbolt. Those are beautiful kits.
-
Arcadia 1/60 VF-19 Custom Nekki Basara Special with Sound Booster
Chronocidal replied to SaitouSad's topic in Toys
It was quite a while ago, at the time they were both on discount I think. I picked up all I could of that mold, I still think it's one of the best things Yamato ever came out with. -
Macross Collectibles Market Watch - Current Auction/Store SOLD prices
Chronocidal replied to jvmacross's topic in Toys
It's gotten pretty easy to replace the broken shoulders at this point though, I think a lot of people aren't so concerned about it. I've actually gone and replaced one of the old broken shoulders on my TV Hikaru 1J using one of the shoulder joints from one of the unassembled kits I have. Since I probably won't be transforming the kits once I paint them, it'll probably be just fine with one of the broken ones.