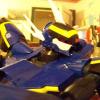
valkfighter Posted November 10, 2013 Share Posted November 10, 2013 Finally managed to snap some pics of this guy. My first yammie, love it. Thing was so tight out of the box I was afraid I'd break something. I'll detail it up and transform it once I have more time next month. Anyone have any tips to not make the sticker looks so.. stickerish? Does trimming it down help? Would it hold in place well and last even after the trim? Hi, just leave it like it is the v2 has enough detail, just add the un spacy logo to the super parts and you are done. i applied stickers on the 1/48 even trimmed them to allow better contact to the surface but is a nightmare when you try to clean the valk, you can accidentaly remove them. on the 1/48 you had no choice but on the 1/60 v2 is a different thing. Quote Link to comment Share on other sites More sharing options...
MacrossJunkie Posted November 11, 2013 Share Posted November 11, 2013 (edited) Finally managed to snap some pics of this guy. My first yammie, love it. Thing was so tight out of the box I was afraid I'd break something. I'll detail it up and transform it once I have more time next month. Anyone have any tips to not make the sticker looks so.. stickerish? Does trimming it down help? Would it hold in place well and last even after the trim? 1S Open Canopy.jpg1S Super Side.JPG 1S Super front.jpg1S half gerwalk.jpg 1S Super.jpg1S Super side open.jpg Definitely trim the stickers down right to the edge if you plan on applying them. They should stay in place fine as long as you have cleaned the surface of any oils/lubricants properly. Since it can be pretty subjective, I'll leave some examples of how the stickers look on the VF-1s when trimmed with a hobby knife and you can judge for yourself if it makes the stickers look less sticker-ish. Also keep in mind the full sized pics are very magnified compared to how you would see them with your eyes at a normal distance. Edit: Here's one with no weathering or clear coats. I didn't use this one before because this was uploaded during a time when I was uploading pics at only 25% of the original size and has some noticeable jpeg artifacting because I didn't save them at 100% quality so I wasn't sure how useful it would be. Edited November 12, 2013 by MacrossJunkie Quote Link to comment Share on other sites More sharing options...
lancalot Posted November 11, 2013 Share Posted November 11, 2013 All your figure look amazing MJ Quote Link to comment Share on other sites More sharing options...
Falcon18 Posted November 11, 2013 Share Posted November 11, 2013 Yeah those definitely look good. Does the clear coat play a part or it'll be fine without one? I just wanna add those little details cause it makes the valk looks nicer to me. Details are always nice. Also, how would I know what surfaces to clean? Or just clean the whole thing? With what too? Thanks all. First toy, kinda unsure. Been just playing with model kits. Quote Link to comment Share on other sites More sharing options...
Mommar Posted November 11, 2013 Share Posted November 11, 2013 Yeah those definitely look good. Does the clear coat play a part or it'll be fine without one? I just wanna add those little details cause it makes the valk looks nicer to me. Details are always nice. Also, how would I know what surfaces to clean? Or just clean the whole thing? With what too? Thanks all. First toy, kinda unsure. Been just playing with model kits. If you want to be happy with your Valks never look at MacrossJunkies photos, he doctors the hell out of them. Quote Link to comment Share on other sites More sharing options...
Falcon18 Posted November 11, 2013 Share Posted November 11, 2013 lol! It's inspiring to see at least Makes me wanna do it to mine. Though there's that possibility of screw ups.. Quote Link to comment Share on other sites More sharing options...
close313 Posted November 11, 2013 Share Posted November 11, 2013 lol! It's inspiring to see at least Makes me wanna do it to mine. Though there's that possibility of screw ups.. Well if you're up to the challenge, get the assembly kit from HK Collectibles to practice on that. Plus they include waterslides so u can use those instead of stickers. Quote Link to comment Share on other sites More sharing options...
Mommar Posted November 11, 2013 Share Posted November 11, 2013 Well if you're up to the challenge, get the assembly kit from HK Collectibles to practice on that. Plus they include waterslides so u can use those instead of stickers. Do they still have some of the kits at HKC??? Quote Link to comment Share on other sites More sharing options...
Reïvaj Posted November 11, 2013 Share Posted November 11, 2013 Do they still have some of the kits at HKC??? Oh yeah! http://www.hkcollectibles.com/macross-robotech/7036-vf-1s-unpainted-kit-1-60.html http://www.hkcollectibles.com/macross-robotech/7033-vf-1a-unpainted-kit-1-60.html Quote Link to comment Share on other sites More sharing options...
MacrossJunkie Posted November 12, 2013 Share Posted November 12, 2013 Yeah those definitely look good. Does the clear coat play a part or it'll be fine without one? I just wanna add those little details cause it makes the valk looks nicer to me. Details are always nice. Also, how would I know what surfaces to clean? Or just clean the whole thing? With what too? Thanks all. First toy, kinda unsure. Been just playing with model kits. Preferably clean the whole thing. If there's grease on other parts, your hands could touch those areas and transfer them back to areas you're applying stickers to. The clear coats play a part in the way it helps make the sticker surface and the toy surface match so that they don't have different reflectivity. The trimming is the most important part. The clear coat doesn't really matter as much. The stickers aren't that shiny. I only clear coat because of the weathering I add. I don't do anything special to clean them off. I just use water and a paper towel. If you want to be happy with your Valks never look at MacrossJunkies photos, he doctors the hell out of them. What do you mean by doctoring the hell out of them? Quote Link to comment Share on other sites More sharing options...
skullmilitia Posted November 12, 2013 Share Posted November 12, 2013 I think he was trying to say you modify them with weathering and what not. Quote Link to comment Share on other sites More sharing options...
VF-18S Hornet Posted November 12, 2013 Author Share Posted November 12, 2013 Dance of the Valkiries Ha ha ha ha that so funny! Quote Link to comment Share on other sites More sharing options...
MacrossJunkie Posted November 12, 2013 Share Posted November 12, 2013 I think he was trying to say you modify them with weathering and what not. Ah, I thought it was referring to the photographs themselves. Quote Link to comment Share on other sites More sharing options...
Falcon18 Posted November 12, 2013 Share Posted November 12, 2013 Preferably clean the whole thing. If there's grease on other parts, your hands could touch those areas and transfer them back to areas you're applying stickers to. The clear coats play a part in the way it helps make the sticker surface and the toy surface match so that they don't have different reflectivity. The trimming is the most important part. The clear coat doesn't really matter as much. The stickers aren't that shiny. I only clear coat because of the weathering I add. I don't do anything special to clean them off. I just use water and a paper towel. Awesome. Thanks for the help! Quote Link to comment Share on other sites More sharing options...
valkfighter Posted November 13, 2013 Share Posted November 13, 2013 Lets remember the good old days of the 1/48 Quote Link to comment Share on other sites More sharing options...
TCracker Posted November 13, 2013 Share Posted November 13, 2013 (edited) Edited November 13, 2013 by TCracker Quote Link to comment Share on other sites More sharing options...
lancalot Posted November 13, 2013 Share Posted November 13, 2013 just love the YF29 looks in all modes Quote Link to comment Share on other sites More sharing options...
lancalot Posted November 14, 2013 Share Posted November 14, 2013 OK finally had time to take some of these shots ... My VF 171 squad time to bomb them!! YF29 with backup VF25 super tornado Quote Link to comment Share on other sites More sharing options...
Scyla Posted November 14, 2013 Share Posted November 14, 2013 You know Alto had his own squad of white VF-171EX Nightmare Plus Valkyries. You should buy two more VF-171 Alto custom with the add-on set and paint the red stripes gray. Oh and don't forget they don't use the full Armor Parts only the beam gun and the missile launcher on the arms (and the under wing missiles). Quote Link to comment Share on other sites More sharing options...
lancalot Posted November 14, 2013 Share Posted November 14, 2013 im actually trying and to do a custom RVF 171 soon after the YF25 Quote Link to comment Share on other sites More sharing options...
Scyla Posted November 14, 2013 Share Posted November 14, 2013 Your YF-25 will be based on a Luca Custom so you have a radar dish and elint fin lying around. That is actually a good idea. Any ideas how you solve the problem that the fin is bumping into the backpack when in Battroid-Mode? Quote Link to comment Share on other sites More sharing options...
lancalot Posted November 14, 2013 Share Posted November 14, 2013 Your spot on about the spare from the yf25 custom ...i was looking at the RVF171 and the fin start just behind under the cockpit ..so i might have to make it removable , and that would solve my display stand problem as well... still havn't looking into that problem properly as yet... Im just thinking about the radar dome at the moment...should i just repaint it or putty it up and make it like the cartoon dome , but then it couldn't spin with the armor on .... and if i raise it too high it look funny ... but then in the cartoon he never had armor Quote Link to comment Share on other sites More sharing options...
TCracker Posted November 14, 2013 Share Posted November 14, 2013 Quote Link to comment Share on other sites More sharing options...
barurutor Posted November 14, 2013 Share Posted November 14, 2013 that's fierce! Quote Link to comment Share on other sites More sharing options...
TCracker Posted November 14, 2013 Share Posted November 14, 2013 Thanks, here is some VF-27 love... Quote Link to comment Share on other sites More sharing options...
JET7 Posted November 15, 2013 Share Posted November 15, 2013 showing some love for bandai 1/72..just dont ask for battroid and gerwalk mode Quote Link to comment Share on other sites More sharing options...
Reïvaj Posted November 15, 2013 Share Posted November 15, 2013 You know, many people wouldn't consider this as a toy. It looks good though. Quote Link to comment Share on other sites More sharing options...
TCracker Posted November 15, 2013 Share Posted November 15, 2013 Quote Link to comment Share on other sites More sharing options...
lancalot Posted November 16, 2013 Share Posted November 16, 2013 YF19 "bird of prey" prototype Unit 3 Quote Link to comment Share on other sites More sharing options...
lancalot Posted November 16, 2013 Share Posted November 16, 2013 Quote Link to comment Share on other sites More sharing options...
EXO Posted November 16, 2013 Share Posted November 16, 2013 Great pics... just need to fix focus a bit more and add some more light. Quote Link to comment Share on other sites More sharing options...
TCracker Posted November 17, 2013 Share Posted November 17, 2013 (edited) Edited November 17, 2013 by TCracker Quote Link to comment Share on other sites More sharing options...
505thAirborne Posted November 20, 2013 Share Posted November 20, 2013 A little VF love!! Quote Link to comment Share on other sites More sharing options...
Guest davidwhangchoi Posted November 20, 2013 Share Posted November 20, 2013 A little VF love!! is the black one at the far right a custom colored cavaliers? Quote Link to comment Share on other sites More sharing options...
wmkjr Posted November 20, 2013 Share Posted November 20, 2013 (edited) is the black one at the far right a custom colored cavaliers? I think that's his custom 321 valk. Got a few custom guys in there. Very nice collection I must say. Edited November 20, 2013 by wmkjr Quote Link to comment Share on other sites More sharing options...
Recommended Posts
Join the conversation
You can post now and register later. If you have an account, sign in now to post with your account.