Rock
-
Posts
386 -
Joined
-
Last visited
Content Type
Profiles
Forums
Events
Gallery
Everything posted by Rock
-
 Premium Bandai has a free shipping coupon right now if you order from them, which can be applied to a few Metal Spirits/Build figures listed. https://p-bandai.com/us/cont/campaign/presidentsday2022
 -
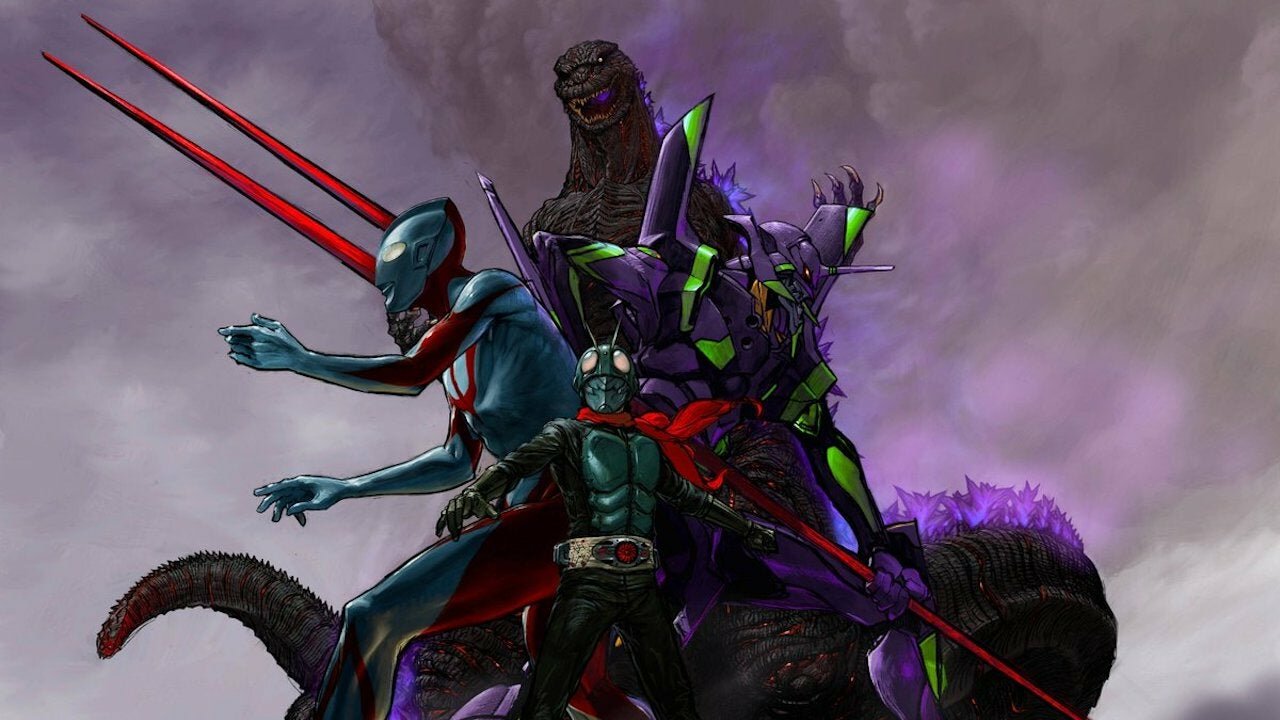
So this is now going to be a thing starting in 2022. Evangelion. Godzilla. Ultraman. Kamen Rider vs Kaiju! The project will bring together properties from Toei, Toho, Tsuburaya Productions, and Hideaki Anno’s Studio Khara. It is unclear what form the project will take but, more details are promised for later in the year. https://sjhu.jp/#project_top (Anyone remeber Weta Workshop's doomed live action Evangelion that never took off?)

- 11 replies
-
- 1
-

-
- evangelion
- kamen rider
- (and 2 more)
-
The 'Hey look at this really cool model build I saw' post
Rock replied to Shawn's topic in Model kits
Hayate figureRise bust mod from Kaname. Oil Pallet painting style for a Delta display. 1/48 FI-YAAAA conversion of a Hase VF-19. Amazing weathering on a a VF-0D from Zero. -
Shouldn't be. The figures have the titles Ranka Amaterasu (Sun Goddess) and Sheryl Tsukuyomi (Moon Goddess). I can't see Ranka's Labrynth of Time figure being mixed into that. More options... which we'd get the SMS team though.
-
And greatful for it.
-
How many in you fleet is that now? You a production factory R! It was more geared toward MT. It sound unbelievably difficult. But we must remember not to discredit other's efforts to keep the hobby forward and upward no matter how much we sometimes struggle. It's really true for any hobby, skill or craft. It can be so easy to just put yourself (and others) down when we are feeling down ourselves even if we don't mean to. This is a special hobby that doesn't play favorites. The times I've been embarrassed in ability by someone younger, someone less fortunate is absurd. I can still remember the heartbreak of the first time I entered a gunpla competition only to get swept by someone 1/2 my age with 1/2 the experience, with 1/2 the scale and 1/2 the $$$ invested in a kit. Or the complete opposite happen when a 92 year old WW2 vet at an IPMS gathering who was gravely injured, couldn't even hold a brush steady and blew everyone away using that as an advantage in his weathering. With the magic of the internet and the advances in social connection it is really easy to be discouraged. In an age where people tend to only share the best things in their life and their successes in It's hard not to compare yourself to others. We're not seeing the many times when that superglue tube exploded when we needed a dab, spilled paint, lost parts or failed projects that just seemingly disappear from the internet. These struggles are things that get fixed in time when effort is applied and we learn from the past. And on a personal level, pengbuzz it is also important to remember that your building things really fast from scratch and in one go. That is amazing Take a look at something like the design sketch of a car. A team spends months and years just sketching and sculpting 'scrap' before the final project is designed. You may not be happy with your Batmobile model but, it also could just be your first draft if you choose. Sometimes we cannot really understand what we are working on until we physically have it in front of us to use as a model, for measurements, or a more through understanding of the often more complex design in a non-2D form. It simply is hard. But, it is your choice whether to pick yourself back up or not. It may take more time than someone else, more resources, more money, more tries, and more heart. So set that heart on fire. Ignite the passion or let burn with envy. Either way we will be here, looking forward to what you may do next.
-
I cannot say that I agree with that at all. Clean=time+skill(effort)
-
Am I the only one who wishes the marking were in white and not gold? IDK the pink and gold just don't look as good as a deeper red would.
-
There is also this one. It is it's own design and not a direct copycat. http://www.inask.net/blog-entry-1462.html
-
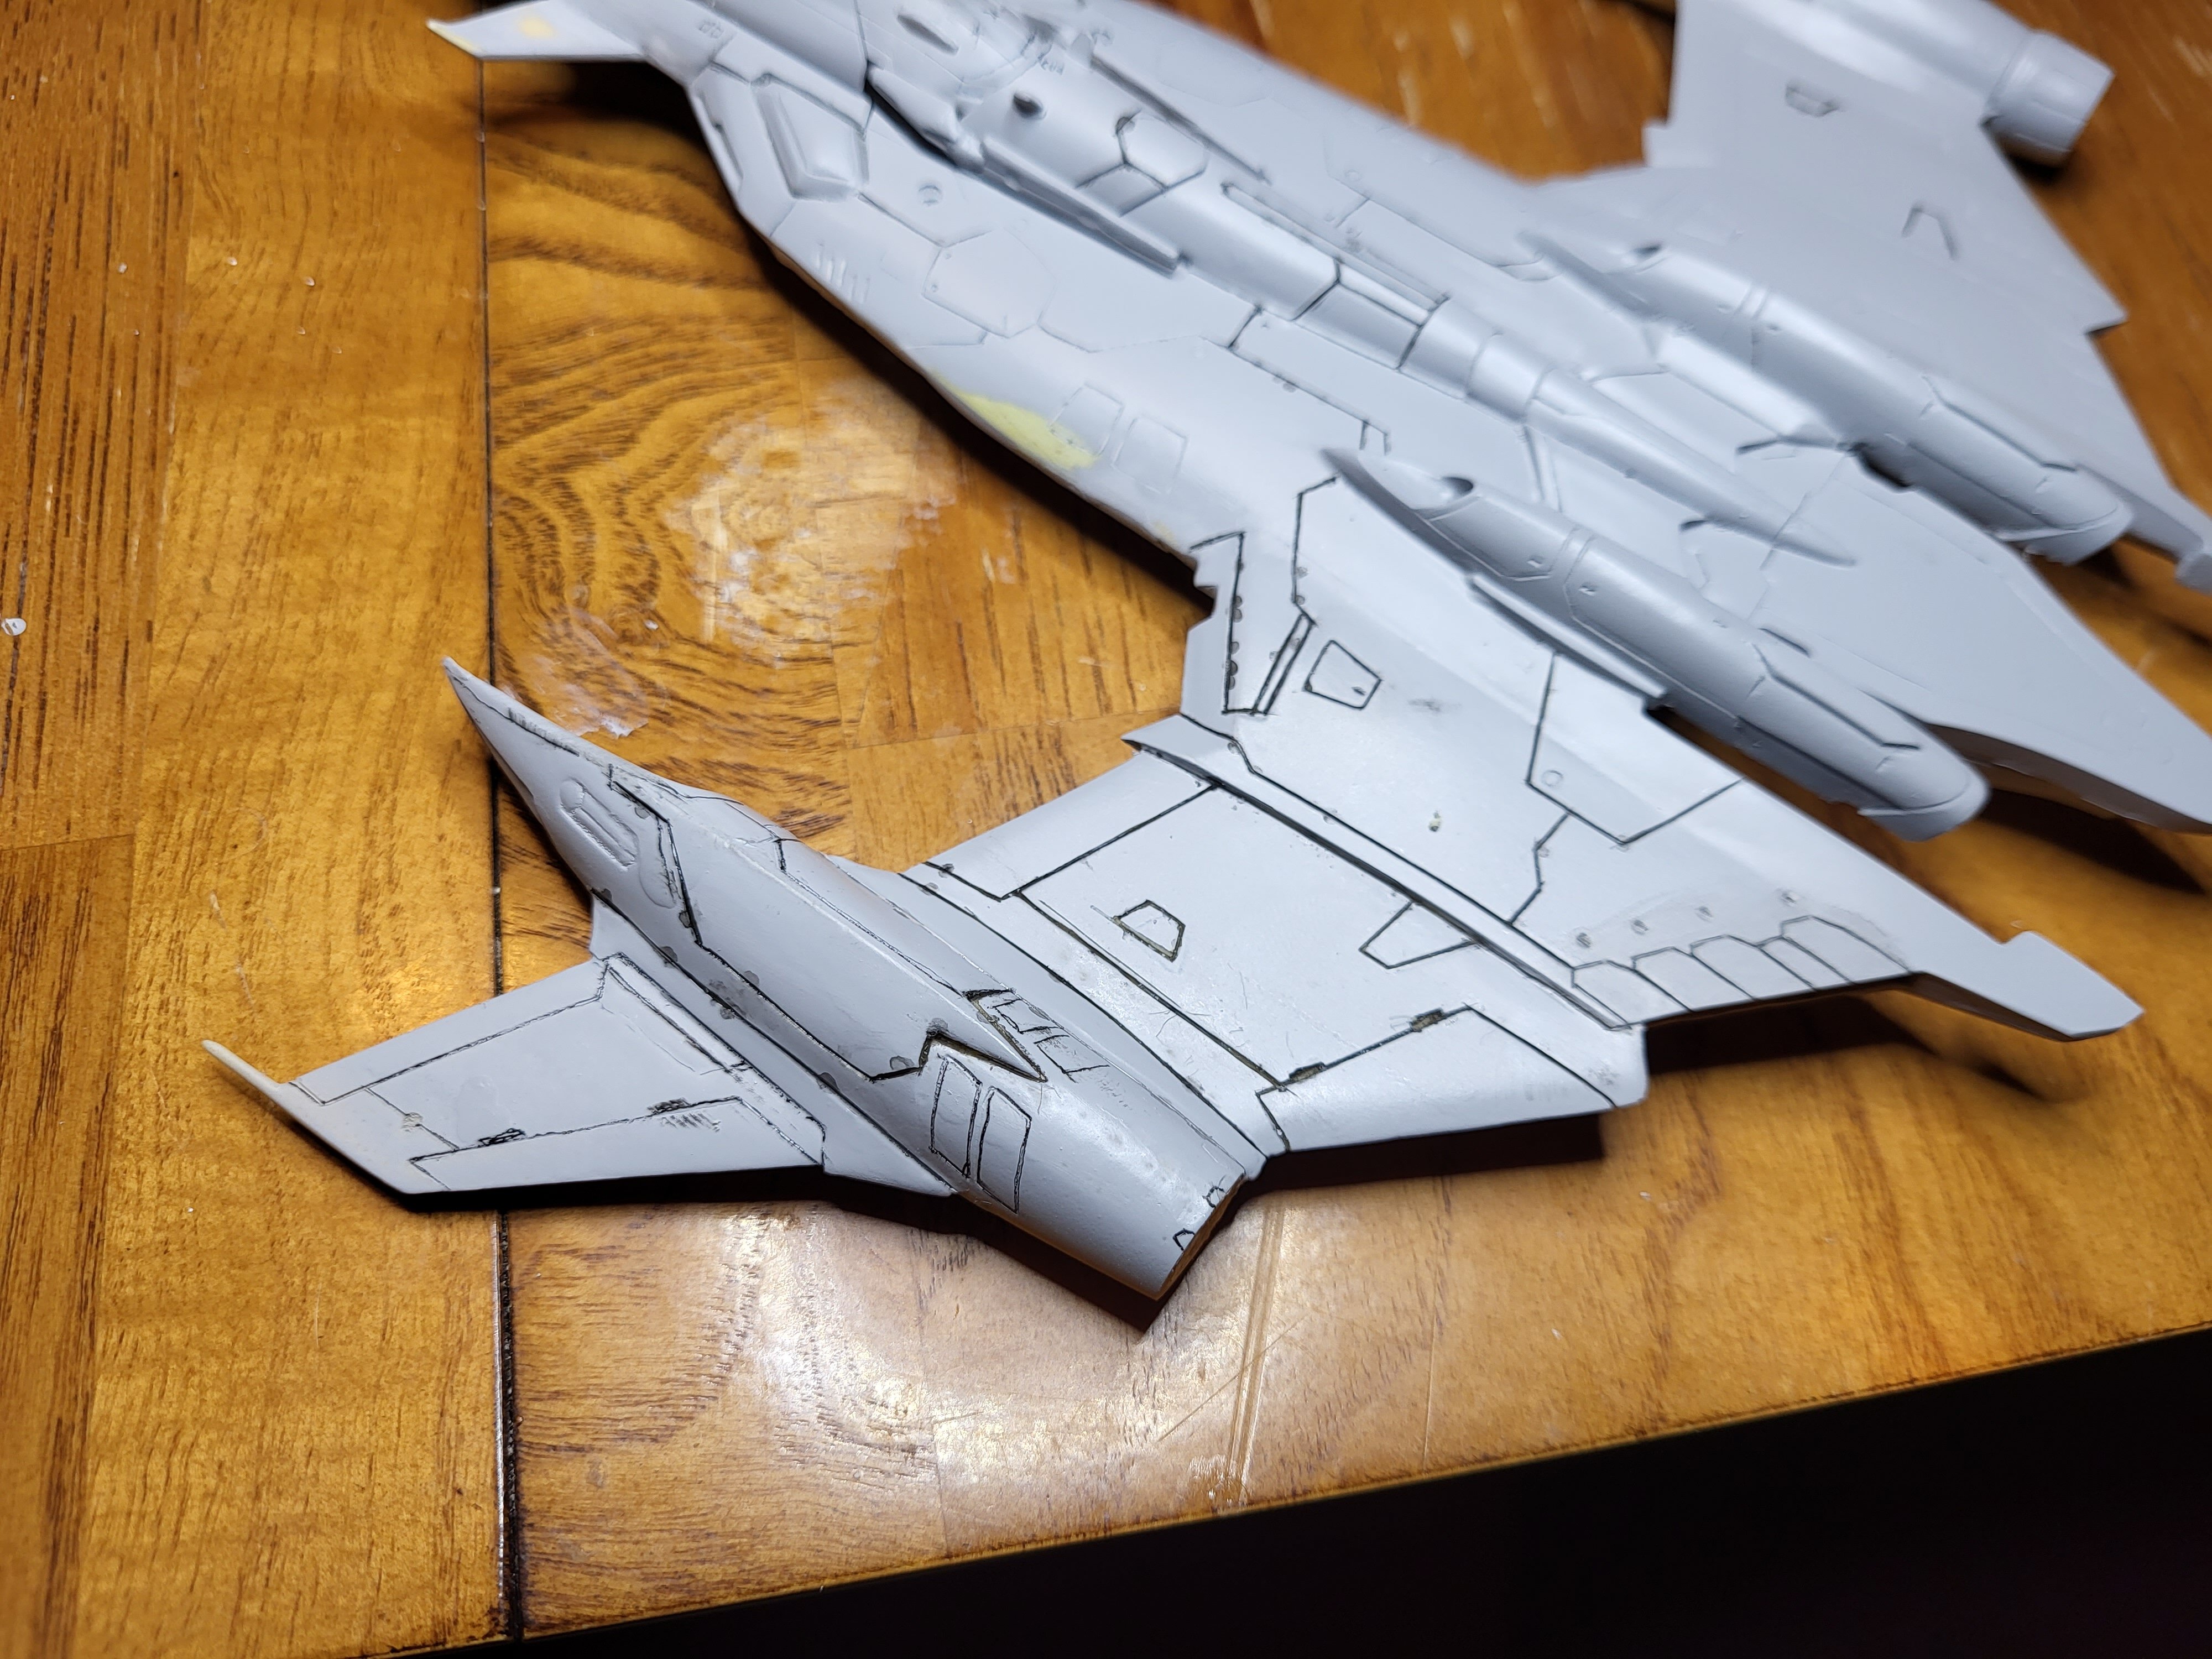
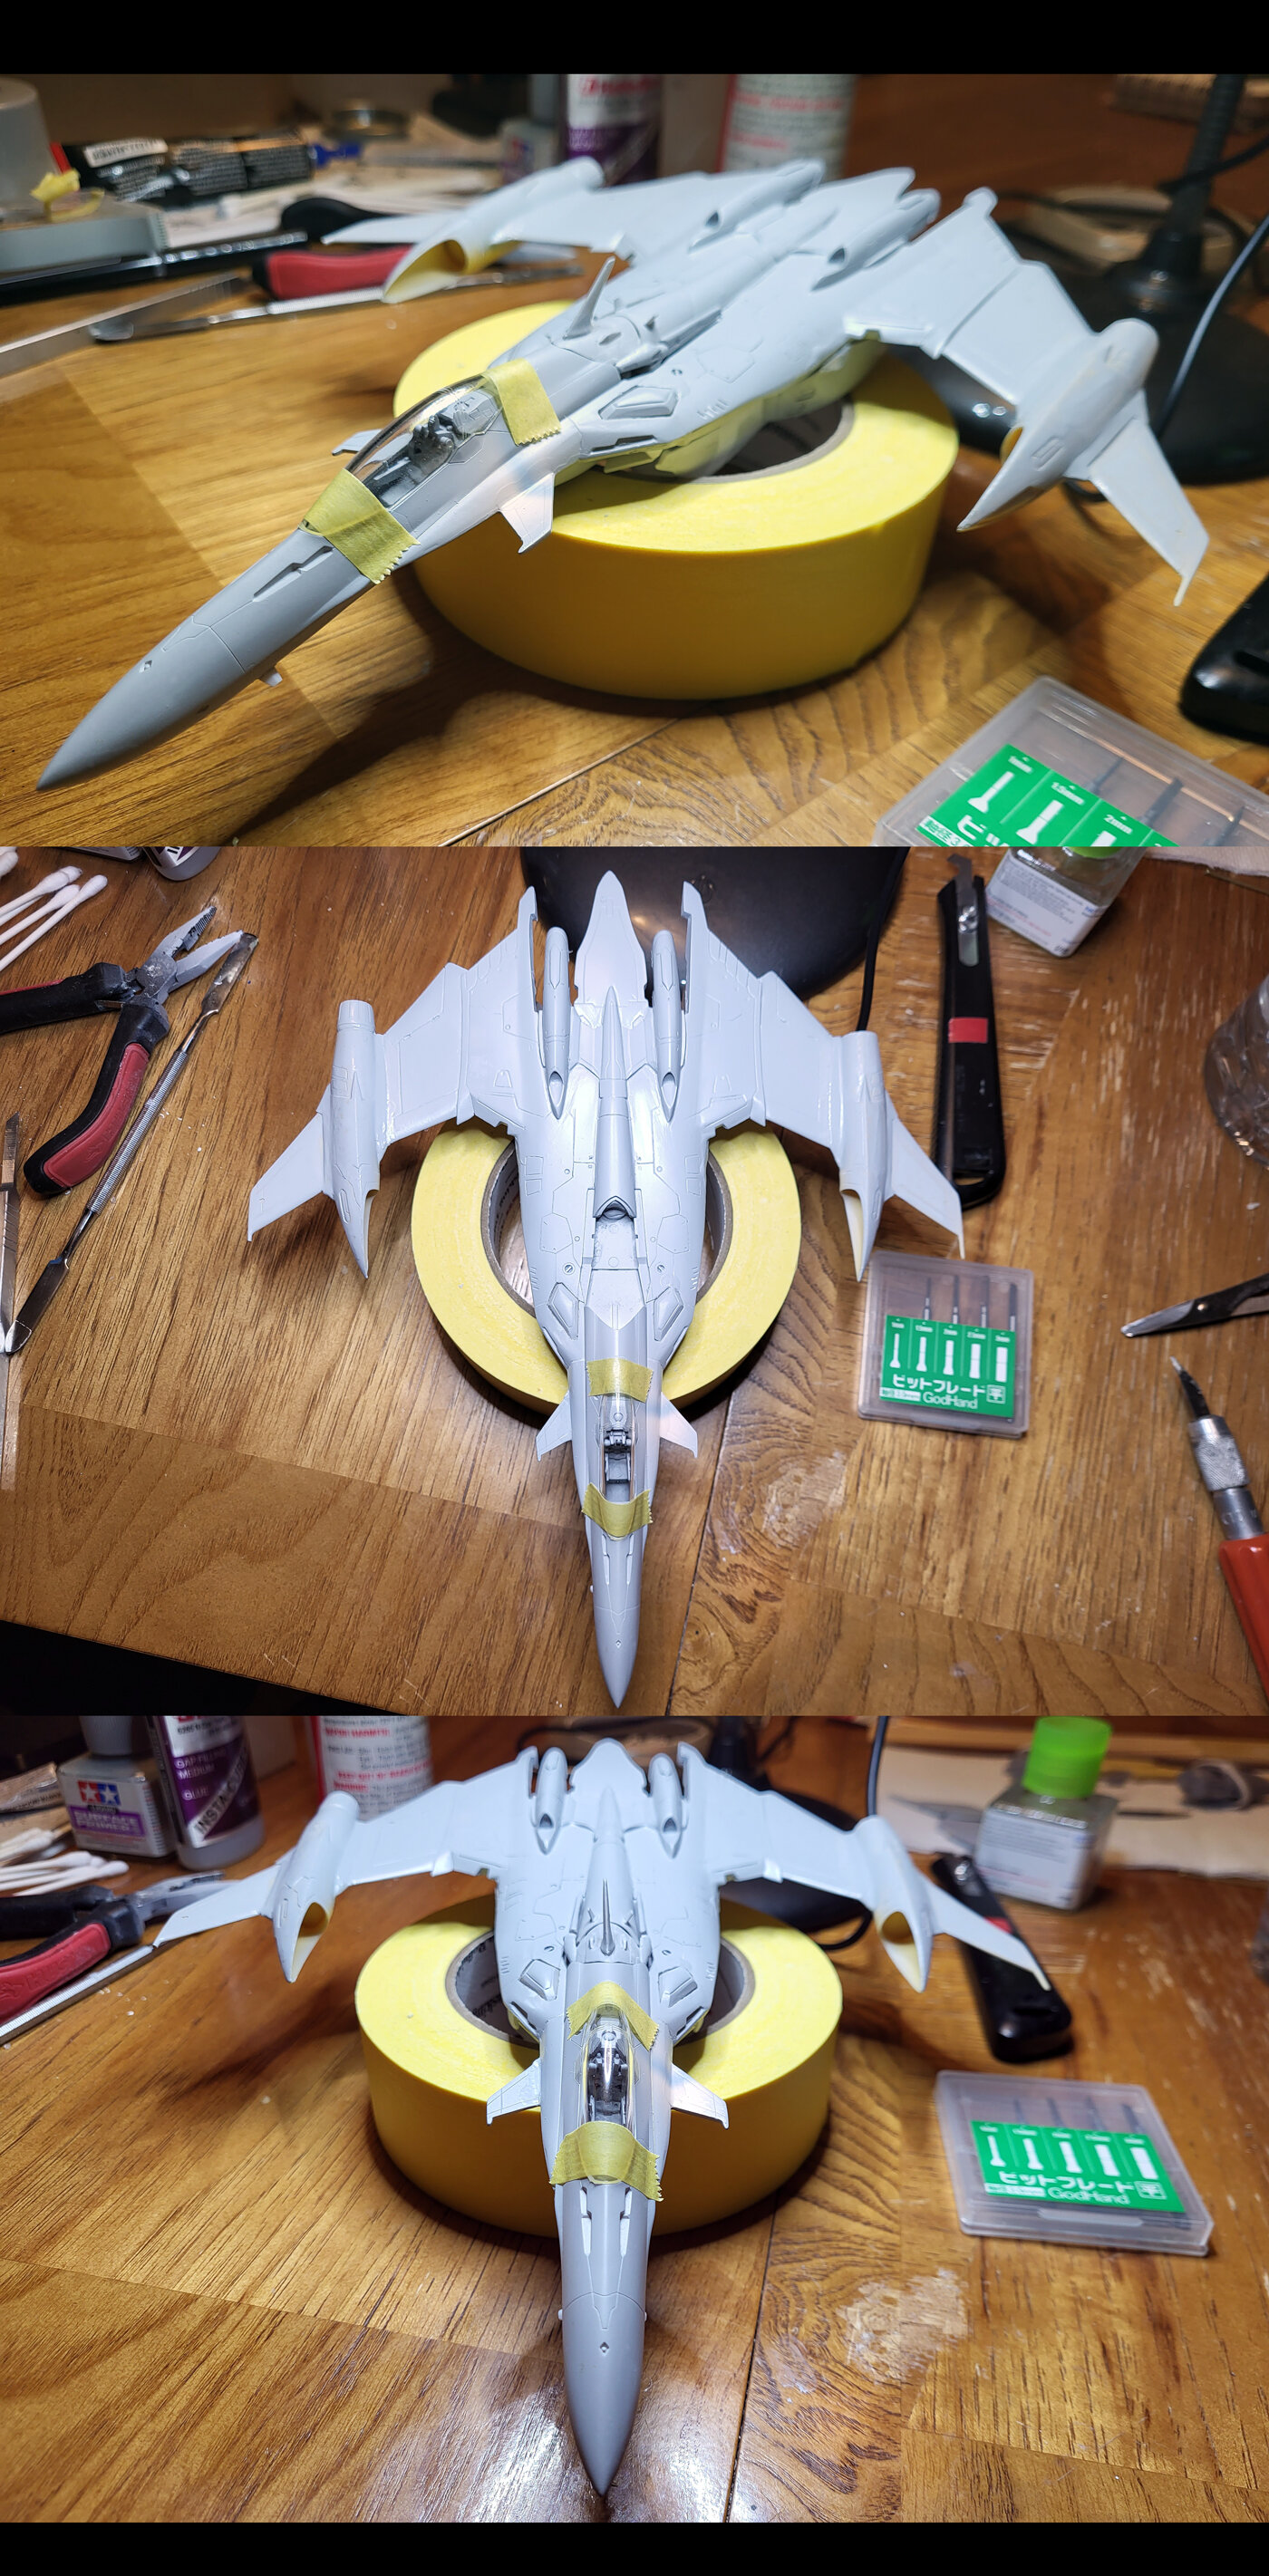
More lining. Across the spine and down to the wing tips. The secondary engines, what a headache... I mean what fun. Some more to go but the remaining sketched bits are about it. I'll forgo the small hatch details for the time being until it is further along. Still thinking about crashing this bird. The idea of building some inner structure showing through the damaged parts is intriguing.
- 30 replies
-
- 1
-
-
- yf-29 durandal
- hasegawa
- (and 1 more)
-
So something you can also do is airbrush dish soap onto the walls of the booth in a few layers. Let it dry up and reapply. You'll get a film that will catch the overspray. When your ready you can just rinse off the parts under warm water and repeat the process for the next time.
-
That is the Nu Gundam featured in the movie Char's Counterattack. The movie is streamavle on Netflix and the gundam.info YouTube page. The funnel count is 6 shown mounted unsymetricl on the unit's left side. A popular variation not shown un the movie add 6 additional funnels the the other side. The wiki should get you up to speed. https://gundam.fandom.com/wiki/RX-93_ν_Gundam The Hi-Nu gundam the above poster mentioned is a variation/different take of the original design featured in the novel/manga that the movie draws some of it's plot from. It is the white and purple/blue metal build design shown a few posts ahead of yours.
- 8718 replies
-
- 1
-
-
- gainax
- evangelion
- (and 14 more)
-
MegaHouse has Macross Frontier listed in the series for a new item reveal during their next MegaHobbyExpo event on 2/4/22. Would love a Labrynth of Time figure or a Frontier Bridge like the Arch Angel on they just announced. https://megahobbyexpo.jp/plus-2022winter/ Edit: it is a Lucrea PVC or Ranka Lee from the recent short.
-
-
Just happy to be back to an episode without overdrawn flashbacks!
-
Out of curiosity, did you use the LP premium service that has the 'upgraded packaging' ?
-
Saw that a few of the VF-31 Walkurie versions were restocked last month. Can anyone confirm that the idol versions of the kits included the original waterslides with the kit? I still need Arad/Chuck's kits to complete delta squadron. Buying it at msrp for $35 sounds much better than an original kit 2nd hand prices which are above double the cost $$$
-
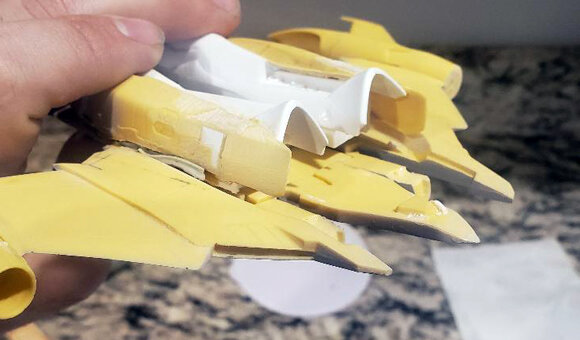
Yep. I like it and dislike it just as much. While the application is a huge plus, my results vary and I usually end up regretting it. For me when doing small surface corrections I like to brush on some Mr. Surfacer. The putty takes it well most of the time but occasionally I run into the issue of it not being fully dried before application (deep in on thicker seams) or the putty rewetting due to the thinners in the primer. It creates a big headache with shrinkage after the fact or staying wet when sealed which you only find once you run sandpaper across it. My rushed planning in this project due to the trial and error nature of kitbashing really showed up after the fact. PPP's success is much greater if you don't go cooking your kits to al dente midway through the build too. That's on me but, I cannot pretend like I'm ready to be past gap filling and onto the fun(er) parts of the project and on to the next. As always! I have a few more rounds of filler work and primer before I'll bother retouching the panel lines and working on the final finish... well on the topside. The underside is receiving some parts simplification at the moment as I'm tired of fighting gaps for removable sub assemblies. Just don't go thinking it is a waste of time.
- 30 replies
-
- 3
-
-
- yf-29 durandal
- hasegawa
- (and 1 more)
-
A good preview of how the Plamax Mirage might fit in her VF-31. *1/20 Minimum Factory Mirage shown has Sheryl's head swapped on*
-
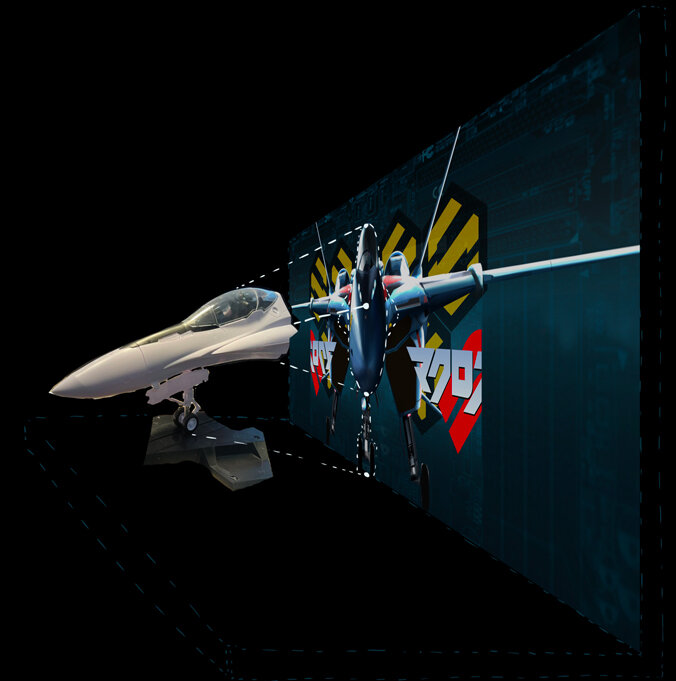
It's interesting how the canopy tint's application can make the finished build's feel swing towards model kit or a more toy-like appearance. Diorama concept?
-
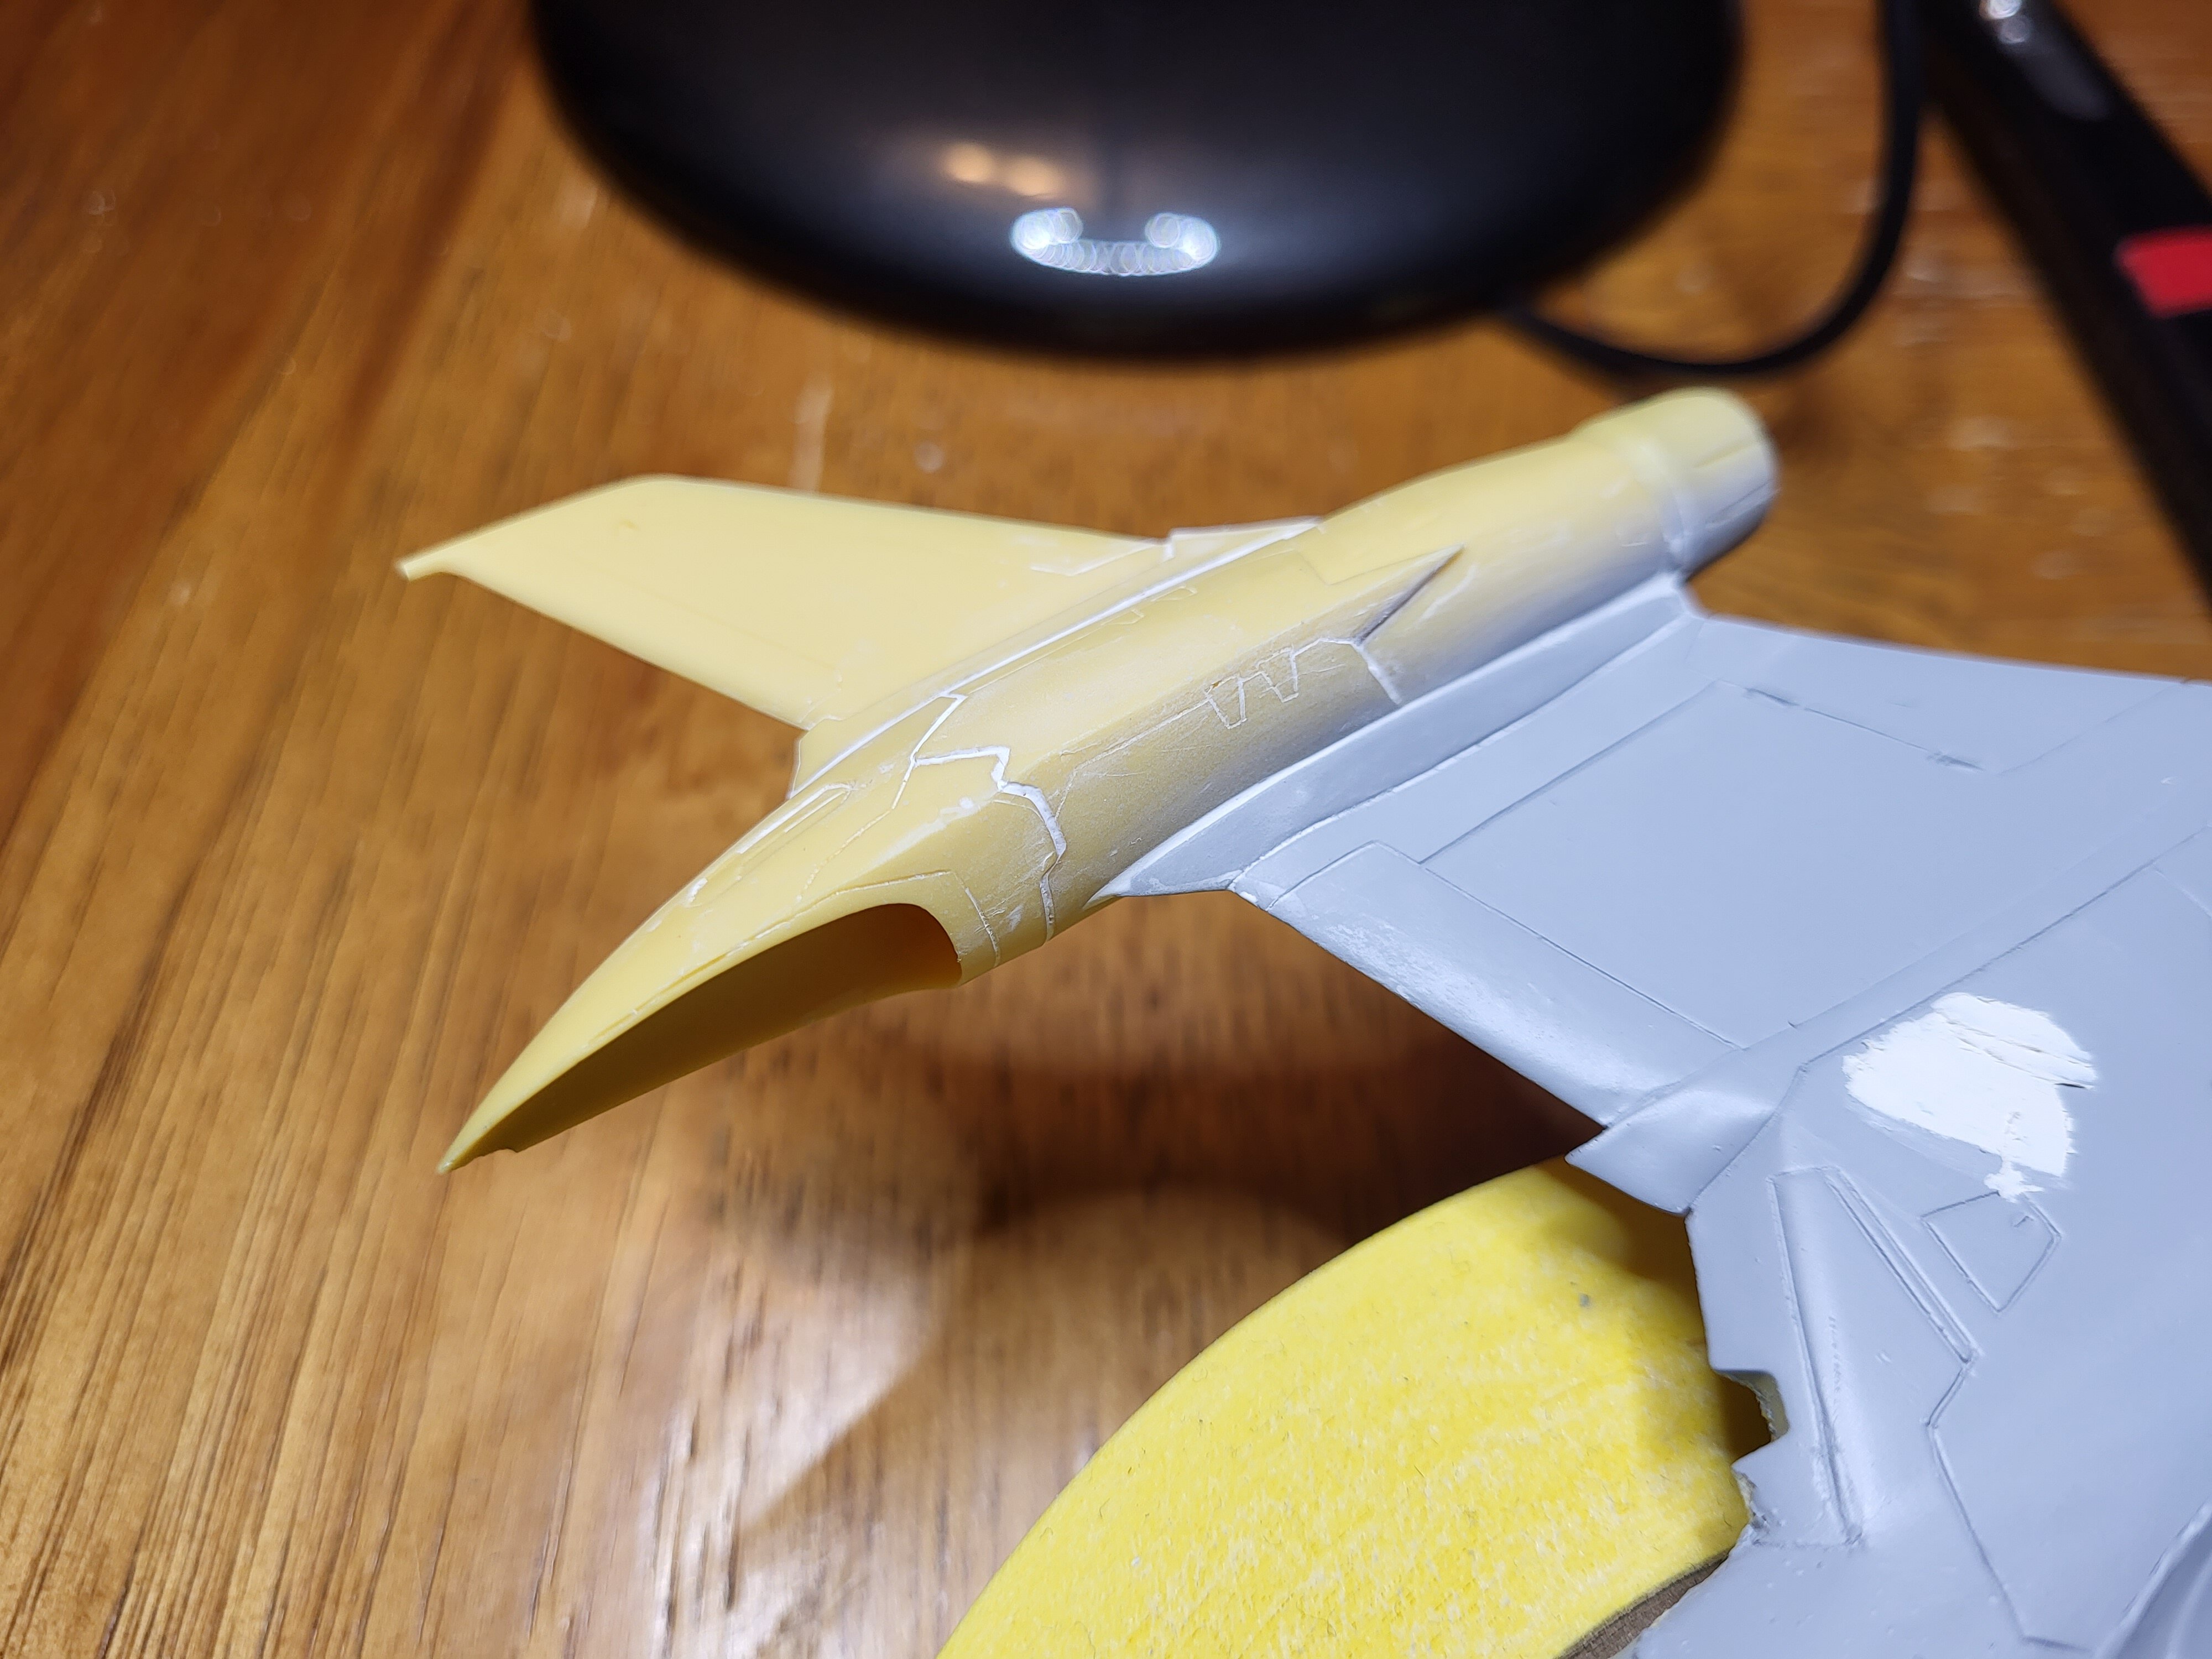
Water-based fillers really help when your sanding fatigued. Deep into the mindless gap fillings when hours become days and days become torture. Still will get sanded after surfacer but, it helps.
- 30 replies
-
- 1
-
-
- yf-29 durandal
- hasegawa
- (and 1 more)
-
The 'Hey look at this really cool model build I saw' post
Rock replied to Shawn's topic in Model kits
-
https://www.animenewsnetwork.com/news/2022-01-14/macross-7-basara-explosion-2022-concert-streams-globally/.181500 https://otakumode.com/news/61e15424bed7bb0020d4feea/First-Official-Tour-Report-from-MACROSS-7-BASARA-EXPLOSION-2022! The completely sold out Macross 7 Basara Explosion 2022 concert to be streamed globally from Zepp DiverCity (Tokyo) on the 28th. Tickets have already went onsale. Concert Merch is up on the store. I'd love to grab a shirt and guitar pick set if I can! https://otakumode.com/shop/pickup/macross

-
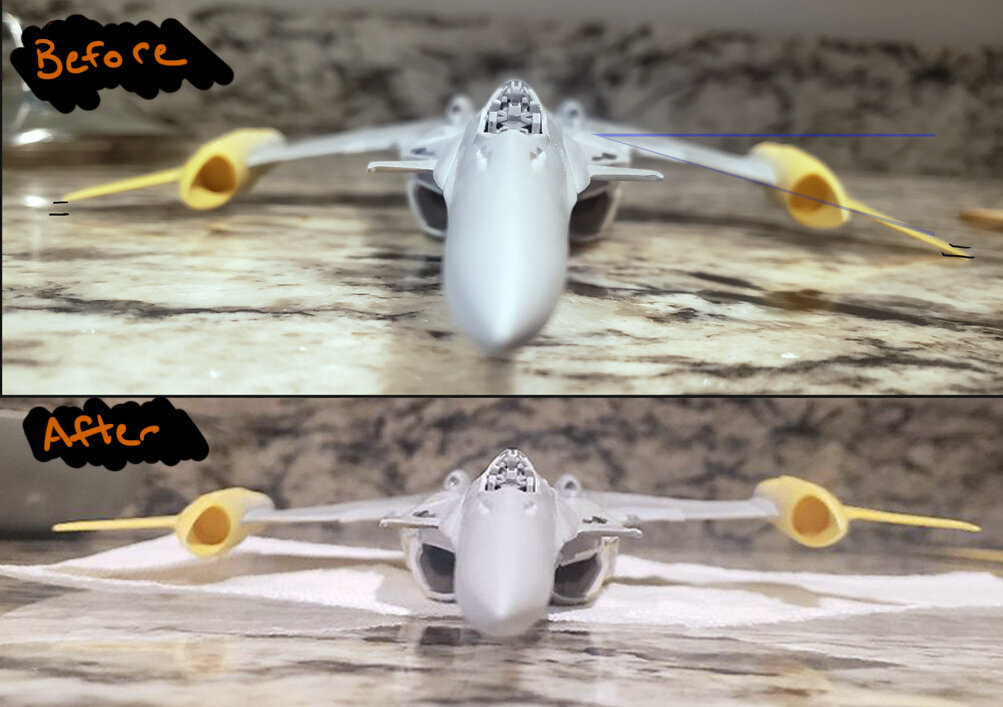
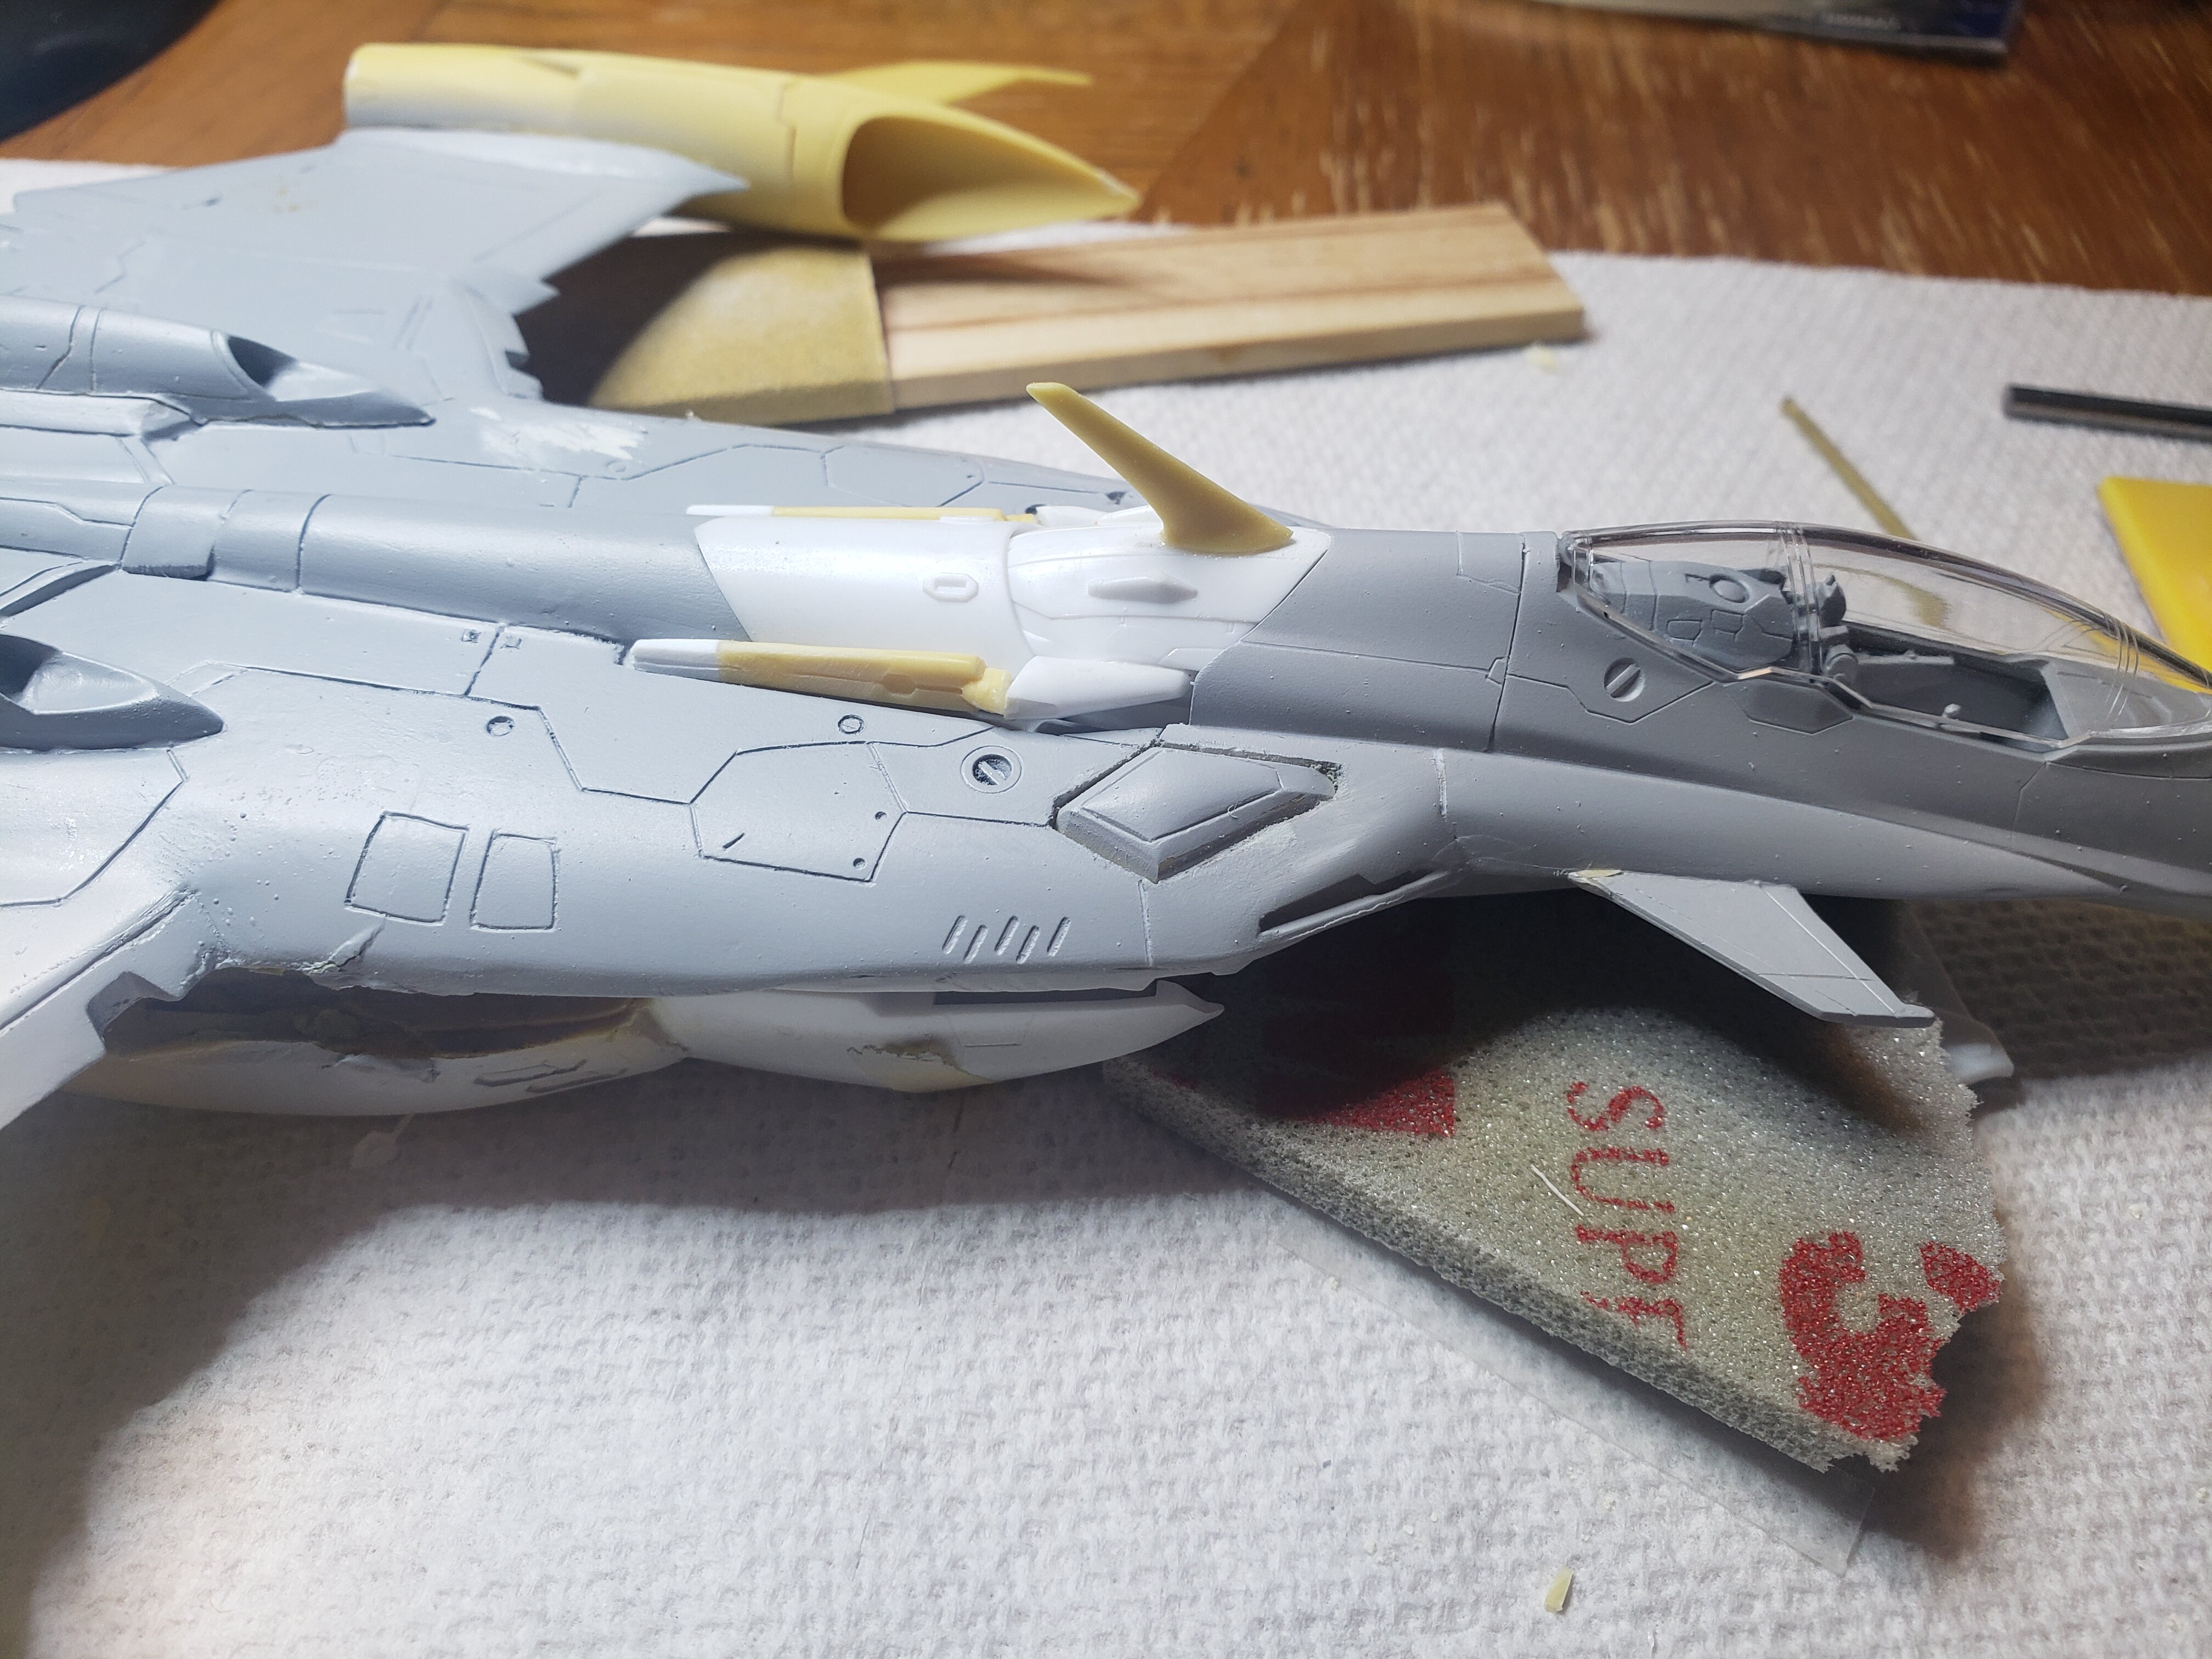
While waiting for the underside's filler to cure from my blunder earlier... I tackled the head. First up, I took off a few mm of the antenna's base and angled it backwards for a bit more of a streamlined appearance. Next up the head cannons or 'ears' were reportioned lengthening the rear instead of the front this time. I matched the length to the VF-25s' pair. I'll beef up the connection to the head and call it good given that the rest will remain hidden in fighter mode.
- 30 replies
-
- 1
-
-
- yf-29 durandal
- hasegawa
- (and 1 more)
-
The good fix. ...and the bad side-effects. >_<