

wm cheng
-
Posts
4322 -
Joined
-
Last visited
4 Followers


Recent Profile Visitors
24648 profile views


wm cheng's Achievements
")
SMS Squadron Leader (11/15)
546
Reputation
-
Weathering looks great! Yes, I have 2 of the FineMolds kits and 2 Hasegawas and now I'm going to be collecting the new Tamiyas all of which haven't been built - looks like I may never get to my old Hasegawa. That's the problem falling in love with this plane and not getting around to building them till a better company puts out a better kit to put the older stuff to shame. I even have all the old Verlinden resin upgrades from the 90s - argh, now with the Quinta 3D printed cockpit controls or MCC nozzles and landing gears with hydraulic lines, it just makes the old stuff laughable.
-

Kitz Concept Toy Thread 2.0
wm cheng replied to Stampeed Valkyrie's topic in Anime or Science Fiction
Yeah, same here. Not a big fan of that horizontal blue bar across the main opening piece though. -
Hey @Urashiman that GWH Tomcat is a very nice kit! (one of the best around until the 1/72 Tamiya F-14 came around). I loved how it gave the option for down flaps, slats and even spoilers. Too bad the rear RIO coaming is too narrow and you really have to build it with the canopy closed. Your weathering is looking amazing!
-
Hey did anyone ever release a cockpit/canopy upgrade to their previous line of 1/72 resin models where the cockpit and canopy were a combined resin piece which made it impossible to paint the cockpit interior?
-
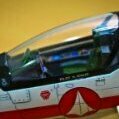
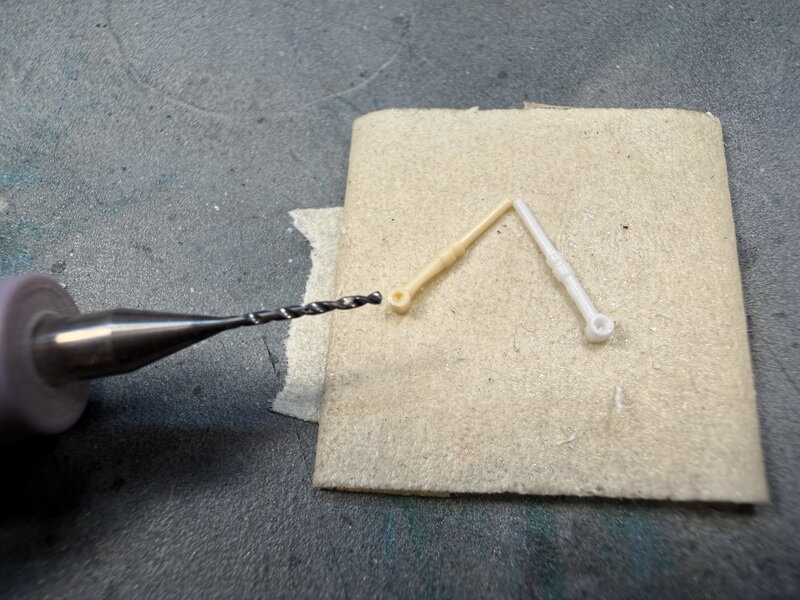
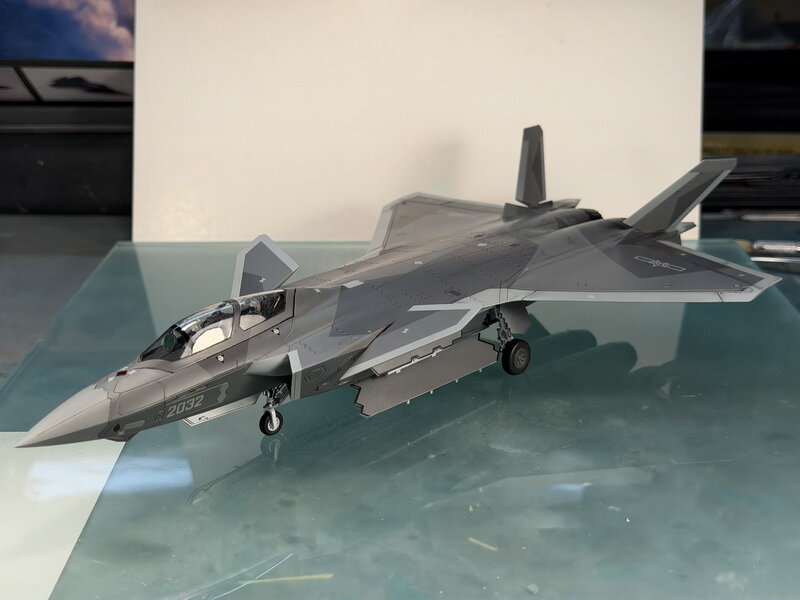
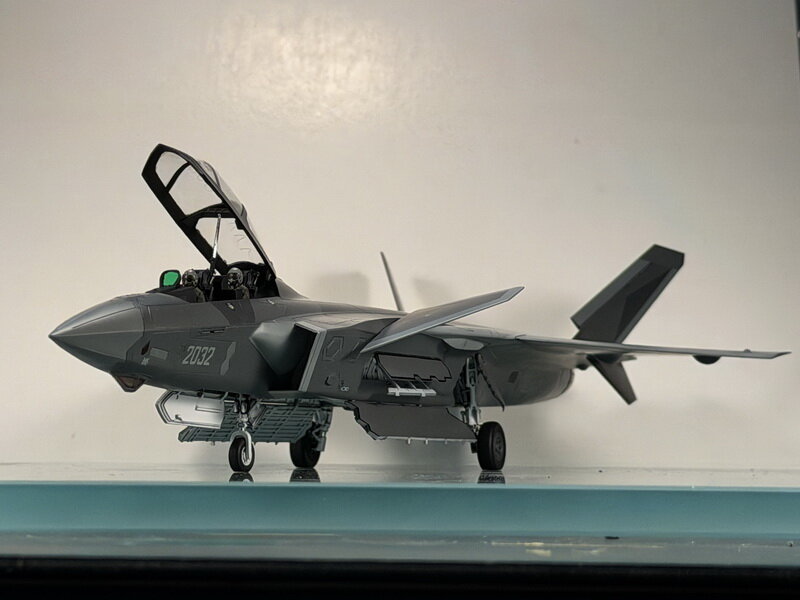
One last thing to finish up was to make those CADs in the front of the underside of the canopy - being white against a black background made them stand out and I couldn't have the canopy opened without them. Luckily I built a few Hasegawa valkyries in flight mode which gave some nice small spare hydraulic actuator structs that I can scavange. That and the metallic pod underneath (don't really know what it is, my guess its some anti-stealth device to make the aircraft visible to civilian radar during training exercises and I can finally call this finished! I had wanted to complete it by the end of the year, but a week and half late is better than never. At least I've learned how to do the metallic greys for the F-22 & F-35 now. I'm really liking how this turned out, so different than when I had first planned to have a OOB build with the landing gears up in flight mode (because I saw how plain the landing gear details were and also it didn't come with pilots so I couldn't justify the flight mode, but when I started to detail the open bays, I found extra pilots in my FineMolds Phantom) I wished there were some decent aftermarket upgrades for these newer Chinese birds in 1/72 - but unfortunately everything I found was for 1/48. Now I'm not so afraid of my 1/72 Fujimi F-22 - really nice kit, but the landing gears are god awful, so simplistic and again lacks the torque links, so when I'm in the mood to beat myself up again, I might have to scratch build and detail those up myself as I can't find any detailed 1/72 gears for the F-22. Now I'm looking for a decent J-35 kit in 1/72, anyone heard of UMa model (I think they are a Hong Kong company)


-
Oh nice! I'm loving this little build (my first Speed Champions) it's so amazingly designed. Now that I see the Knight Rider truck, we need the Doc Enterprises white truck to go with the Delorean! There needs to be the white Lotus Esprit from the Spy Who Loved Me that parts swap to the sub!!!

-
Nice! I just ran out to pick up the Delorean myself! It was getting sold out at a few local Lego stores and completely backordered online, so I was lucky to find it at a physical store. The figures are better than the big Delorean!
-
Hey @derex3592 - it has happened to me before, but it usually lightens back up once you've clear coated it over with a super flat clear coat again. Super flat finishes scatter the light differently than glossy surfaces and often appears lighter. It might not get you back to exactly the lightness you had, but it should get you back at least 85% to where you were. Very nice pre-shading BTW!
-
On the lego site it says coming soon Jan 1st?
-
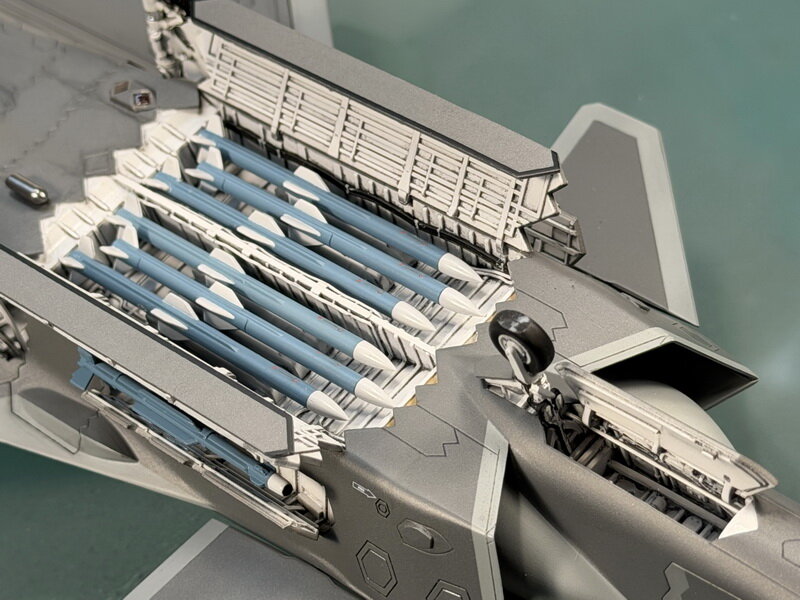
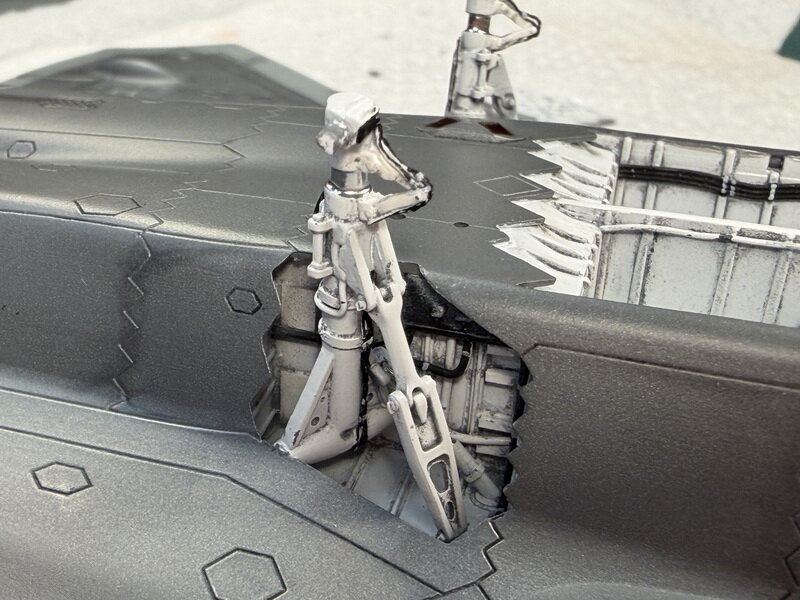
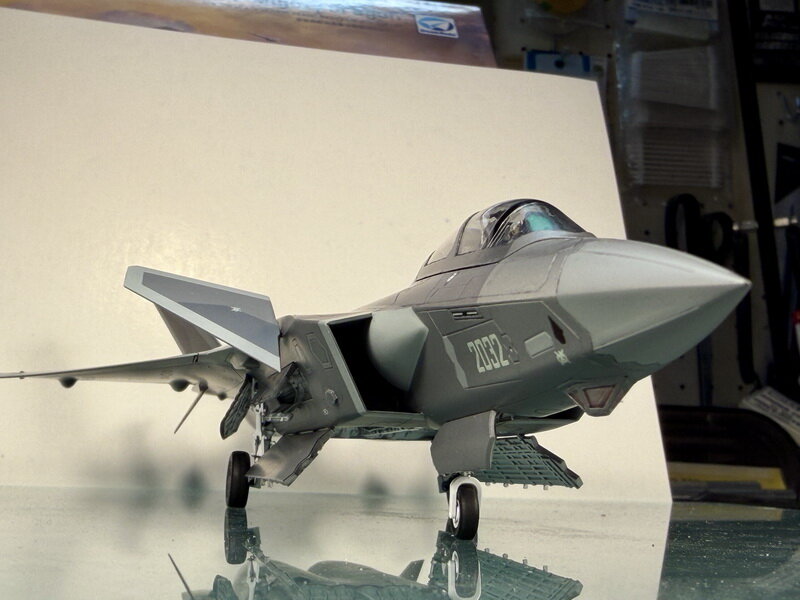
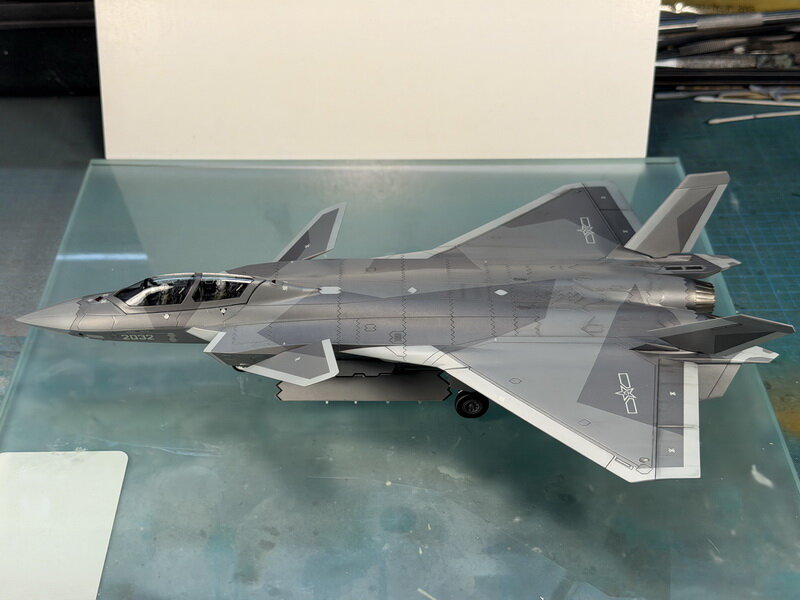
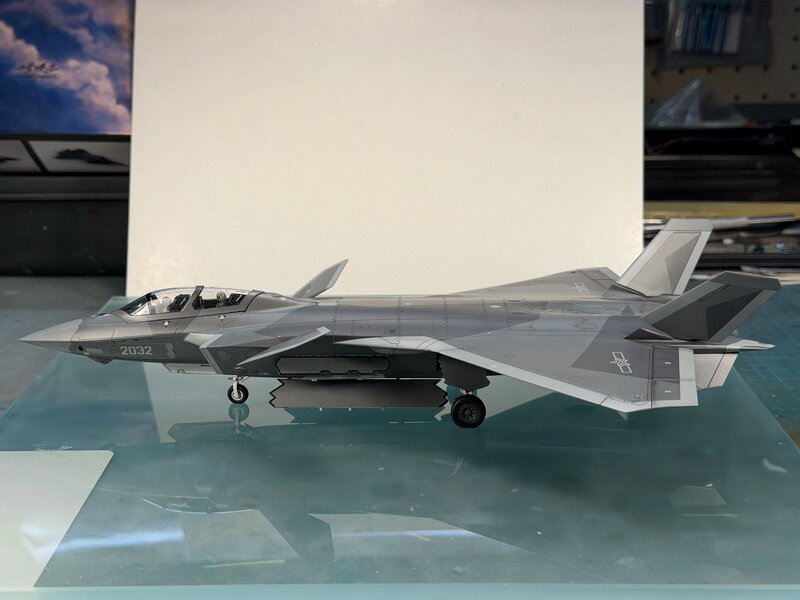
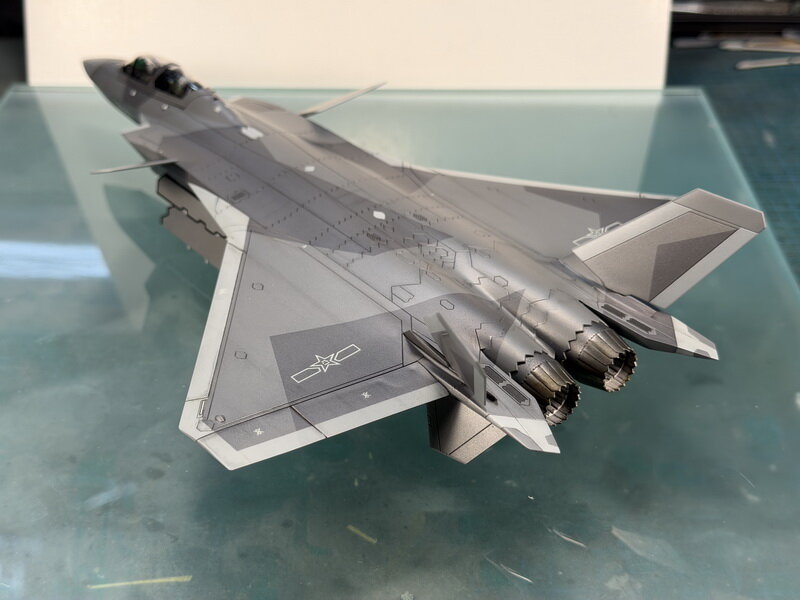
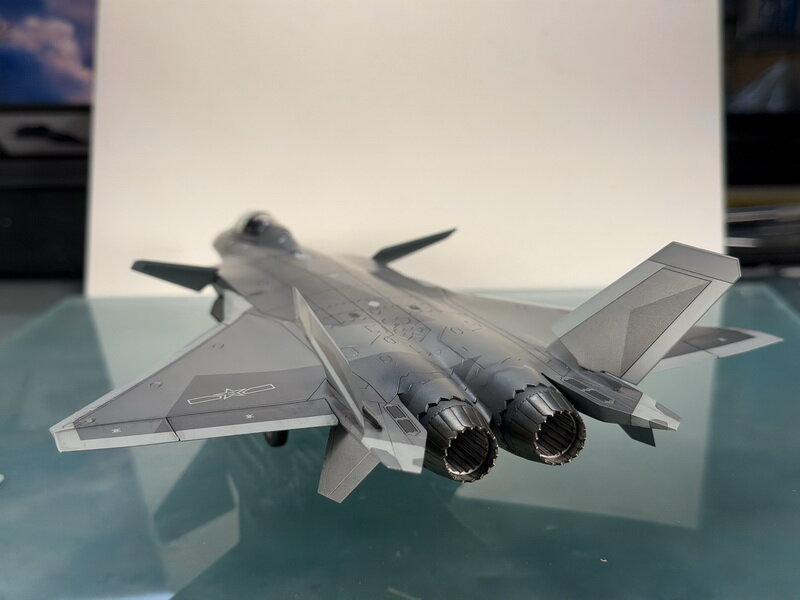
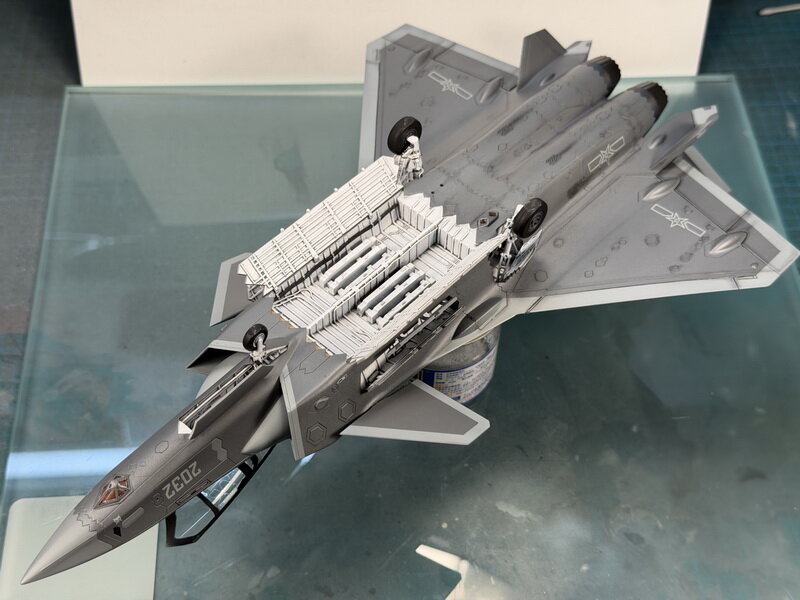
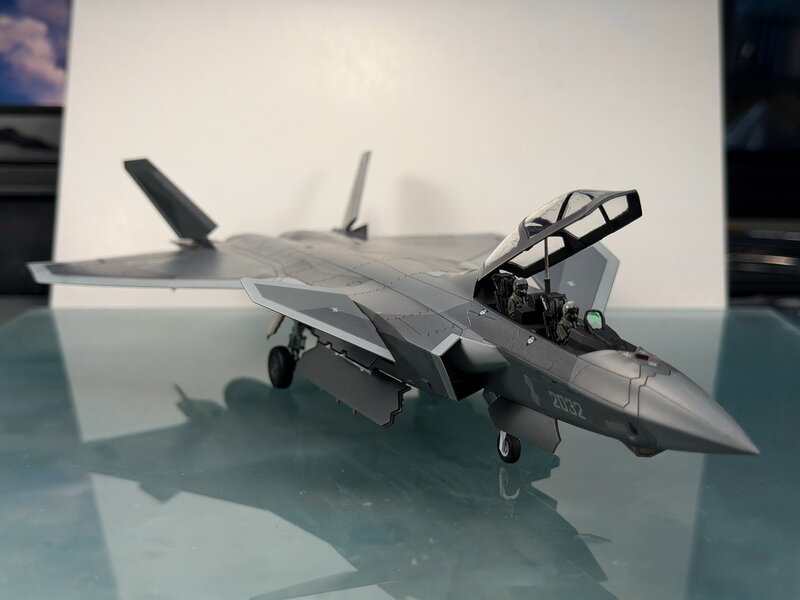
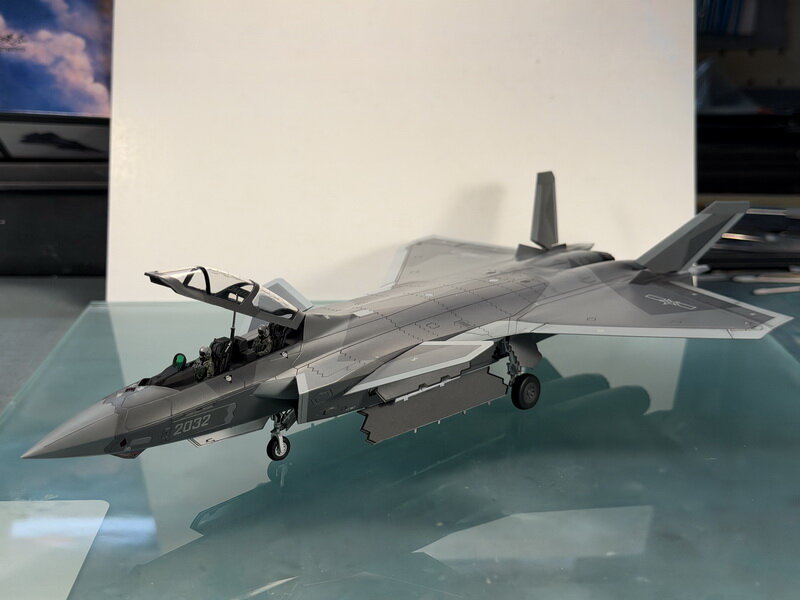
@Urashiman I can't believe there's no paint, it looks great and a lot of fun! I might have to pick one up to finally get my bug of just a straight forward build for fun right out of the box out of my system! My current J-20S started out with that intention but my anal self didn't let it go that way 😛 @pengbuzz So glad you are doing something to take your mind off of things. How's the Enterprise kit fit wise (I have that but don't know what to expect from PL kits) and the Reliant because you can't just have one?!?! @derex3592 That B-52 is looking sweet - crazy you got that seam. You must have a pretty cool 1/144 bomber collection going on there (I've always wanted a 1/144 US bomber collection but I'd have to have the B-58 and the XB-70 in there, are those next?) Got a little bit of time to myself after everyone went to sleep and I stayed up letting all the food settle. Got to unmask the canopy finally!!! Man this jet is pretty sleek... I don't get why I always get a tiny chip off the edge of the canopy on my last few builds lately (luckily its small enough for a hand painted touch up). Oh yeah, this is the reason I couldn't just simply enjoy an Out-Of-The-Box build - there were so many exposed internal bays, but they all had so many many ejector pin marks all over and including the doors that I had to either get rid of them or cover them up with detailing. The landing gears were also so simplified that it would have been embarrassing; they didn't even have the torque links on the oleo structs (I've been noticing this detail being omitted from more and more 1/72 scale kits lately). Luckily I had these links to use from my VT-1 Super that was built in flight mode so I had the spare landing gears to use. The hydraulic hoses were added (a first for me but it wasn't as bad as I had feared - painting them was another matter though) and they really did bump up the realism. I think I'm getting old, as something always happens when I build, that's 2 steps forward and one step back! I had to touch up some overspray and I re-masked after I had decaled, even though I had used MicroSOL on the decals and clear coat gloss over them, and then clear coat matte over them. The Tamiya white flexible masking took off my 4 white outlined triangle ejection seat symbols - argh! I had to search through all my extra decals to find another 4 identical white ejection seat triangles. Finally I found a black and white set from a Super Hornet that was the right size, and the english writing on it wasn't so clear so it didn't look too obvious it wasn't in Chinese - oh well. I don't have the last bit (horizontal fold) of the bottom doors glued in yet (gotta let these big doors dry first). Weird for a kit so devoid of internal details and bad profiles that I needed all the internal bracing to prop up the fuselage, it got the slight twisted wing structure bang on from the photos! It does make a cool imposing front view! The rear engines were totally devoid of detail as well. Funny enough, the kit provided these serrated exhausts (for the WS-15 engines) as an option to the Russian AL-31 engines, but both lacked any internals. I'm normally not a stickler for the entire afterburning section but some interior petals/detail would have been nice. Luckily, I had some leftover Phantom afterburning sections from a FindMolds F-4J kit that I used the resin 3D print and these kit cans fit perfectly inside the kit part and provided a pretty realistic opening for the WS-15. You are probably getting the sense that I'm a pack rat, and I save every little un-used scrap/option from every kit I've ever built - the trouble is storing and finding them again to use. I would spend hours going through spare decals and parts sometimes. With so much internal bays exposed, I'm glad I spent the effort to detail them and fill in most of the ejection pin marks. Now which colour scheme for the missiles should I use? All the photos show a light blue missile body with white fins in these bays - what I would suspect to be training missiles or dummies. I think it might make a nice contrast to the grey and white bird. Or do I use live ammunition rounds with just an overall white missiles (which I think might get lost in the bay). There no photo reference at all with this J-20 with live munitions - only blue dummies. I opened up the canopy for these final round of shots for now. I'm missing these two white round tubes (Cartridge Activation Device) at the front of the inside of the canopy that I'll have to scratch build (or scrounge from my parts to find two hydraulic cylinders) as well as the missiles. Weird that they would have these CADs and also canopy det cords at the same time (I guess the PAAF is a belt and suspenders kind of outfit :)) Good night for now... (I'm loving the slight metallic sheen to the grey, really looks light and dark at the same time depending on the lighting - weathering not really showing up though). It was refreshing to paint something so new and very lightly weathered for a change. Don't know how I'm ever going to paint he F-22 😮


-
ABSOLUTELY GORGEOUS!!! @MacrossJunkie, glad to see you are continuing the tradition with such excellent work!
-
Wow! Just incredible, thanks @M'Kyuun never knew about these guys - simply amazing. Thanks @Scyla I wish these get made into real sets at some point!
-
Wow! The PAAF certainly doesn't have many markings on them - I'm kind of in shock decaling mine (I tripled checked the photo references and they are clean!) since my last model was a 70s Phantom and I couldn't believe how many data stenciling there were!
-
@electric indigo What do you mean you do the light areas first and mask those out to do the camo afterwards? That seems harder, because the lighter greys don't get the metallic sheen only the camo areas does. So it kind of makes sense to do the lighter areas on afterwards, then you don't have to protect the flat grey areas from the metallic mist. I'd love to see your J-31! (weird that I couldn't add anything after the original post after the @electric indigo tag - I had to make a separate post - sorry)
-
@Thom That F-35C looks amazing! Can't wait to see more and now I'm looking forward to this ugly duckling. I guess they don't highlight the ram tape anymore on the latest F-35s? That will make painting easier? @Urashiman That Shinden looks sweet! I have the earlier one with the grey and orange markings, does this one also come with a huge sheet of decals for all the grey lines? I think this might turn into a Star Trek model with wallpaper decals where almost every square inch is covered 😛 @electric indigo
