Rock
-
Posts
406 -
Joined
-
Last visited
Content Type
Profiles
Forums
Events
Gallery
Everything posted by Rock
-

Macross DYRL in 4K UHD with English Subtitles
Rock replied to GGemini's topic in Movies and TV Series
Grabbed my copy. Amazon now has it 39% off! -
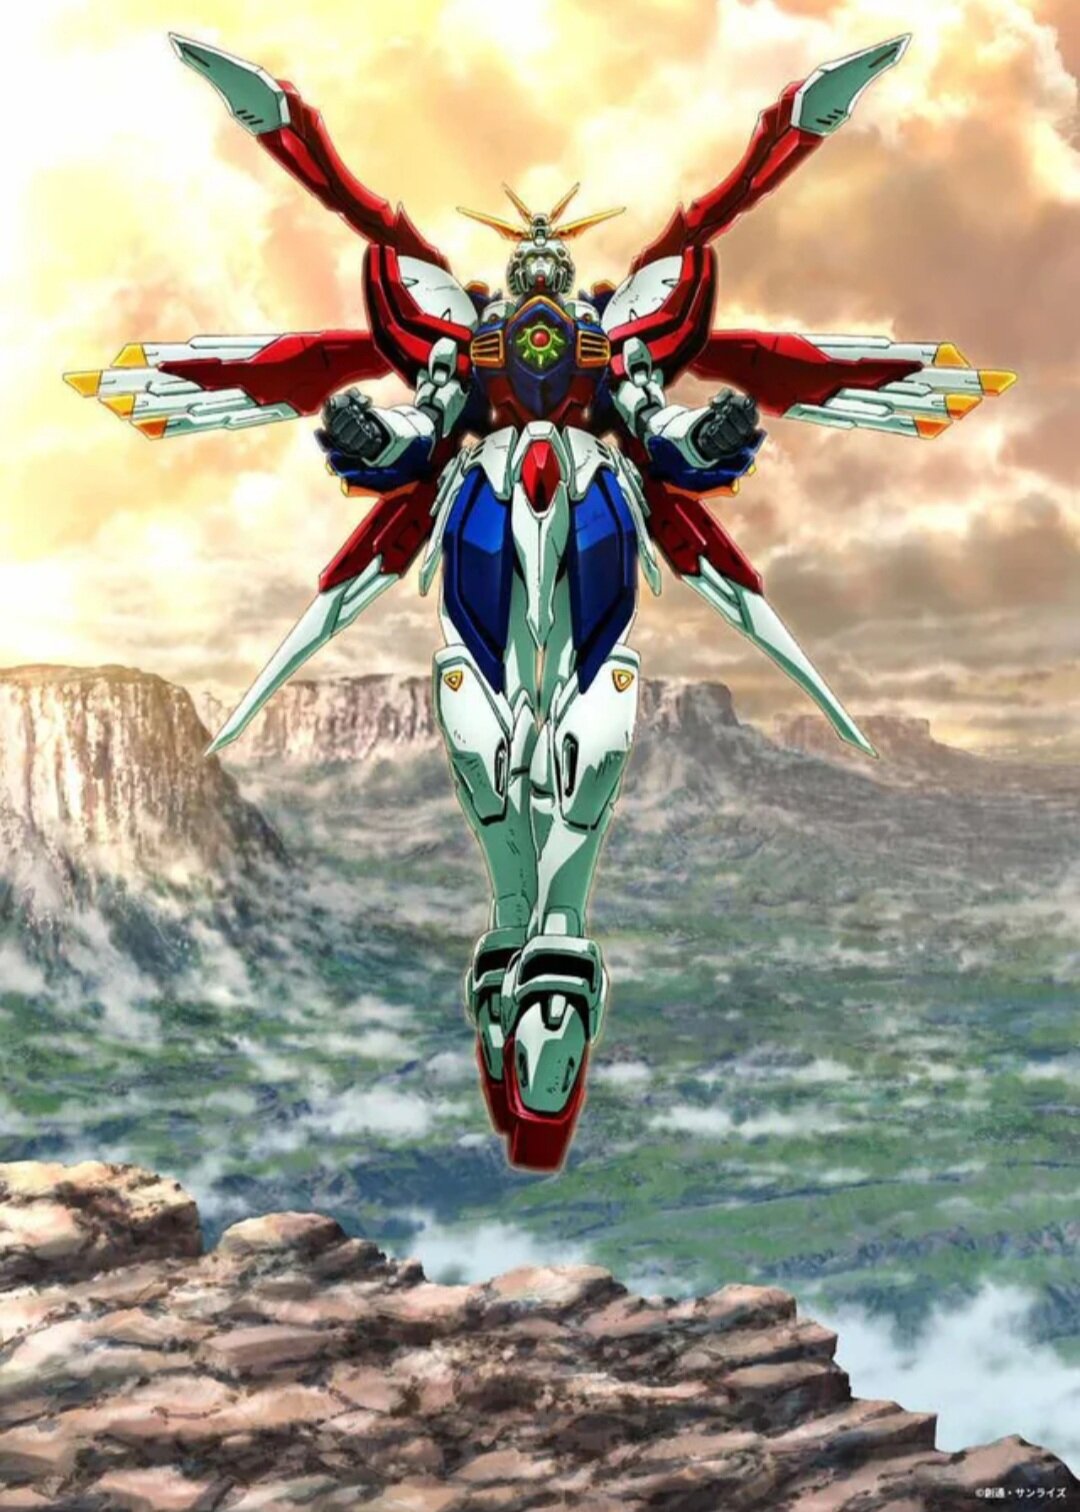
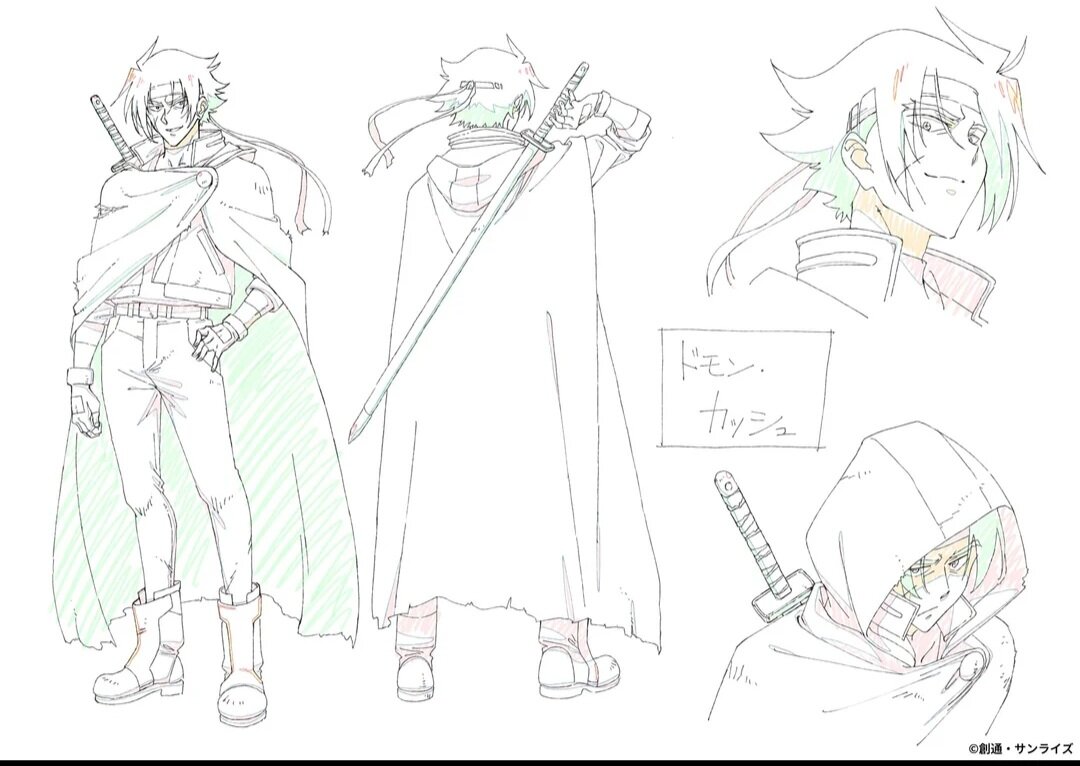
God Gundam II announced for the 45th G-Gundam side story events with a tie-in lazy Metal Build variant just in time for the OG release.
-
-
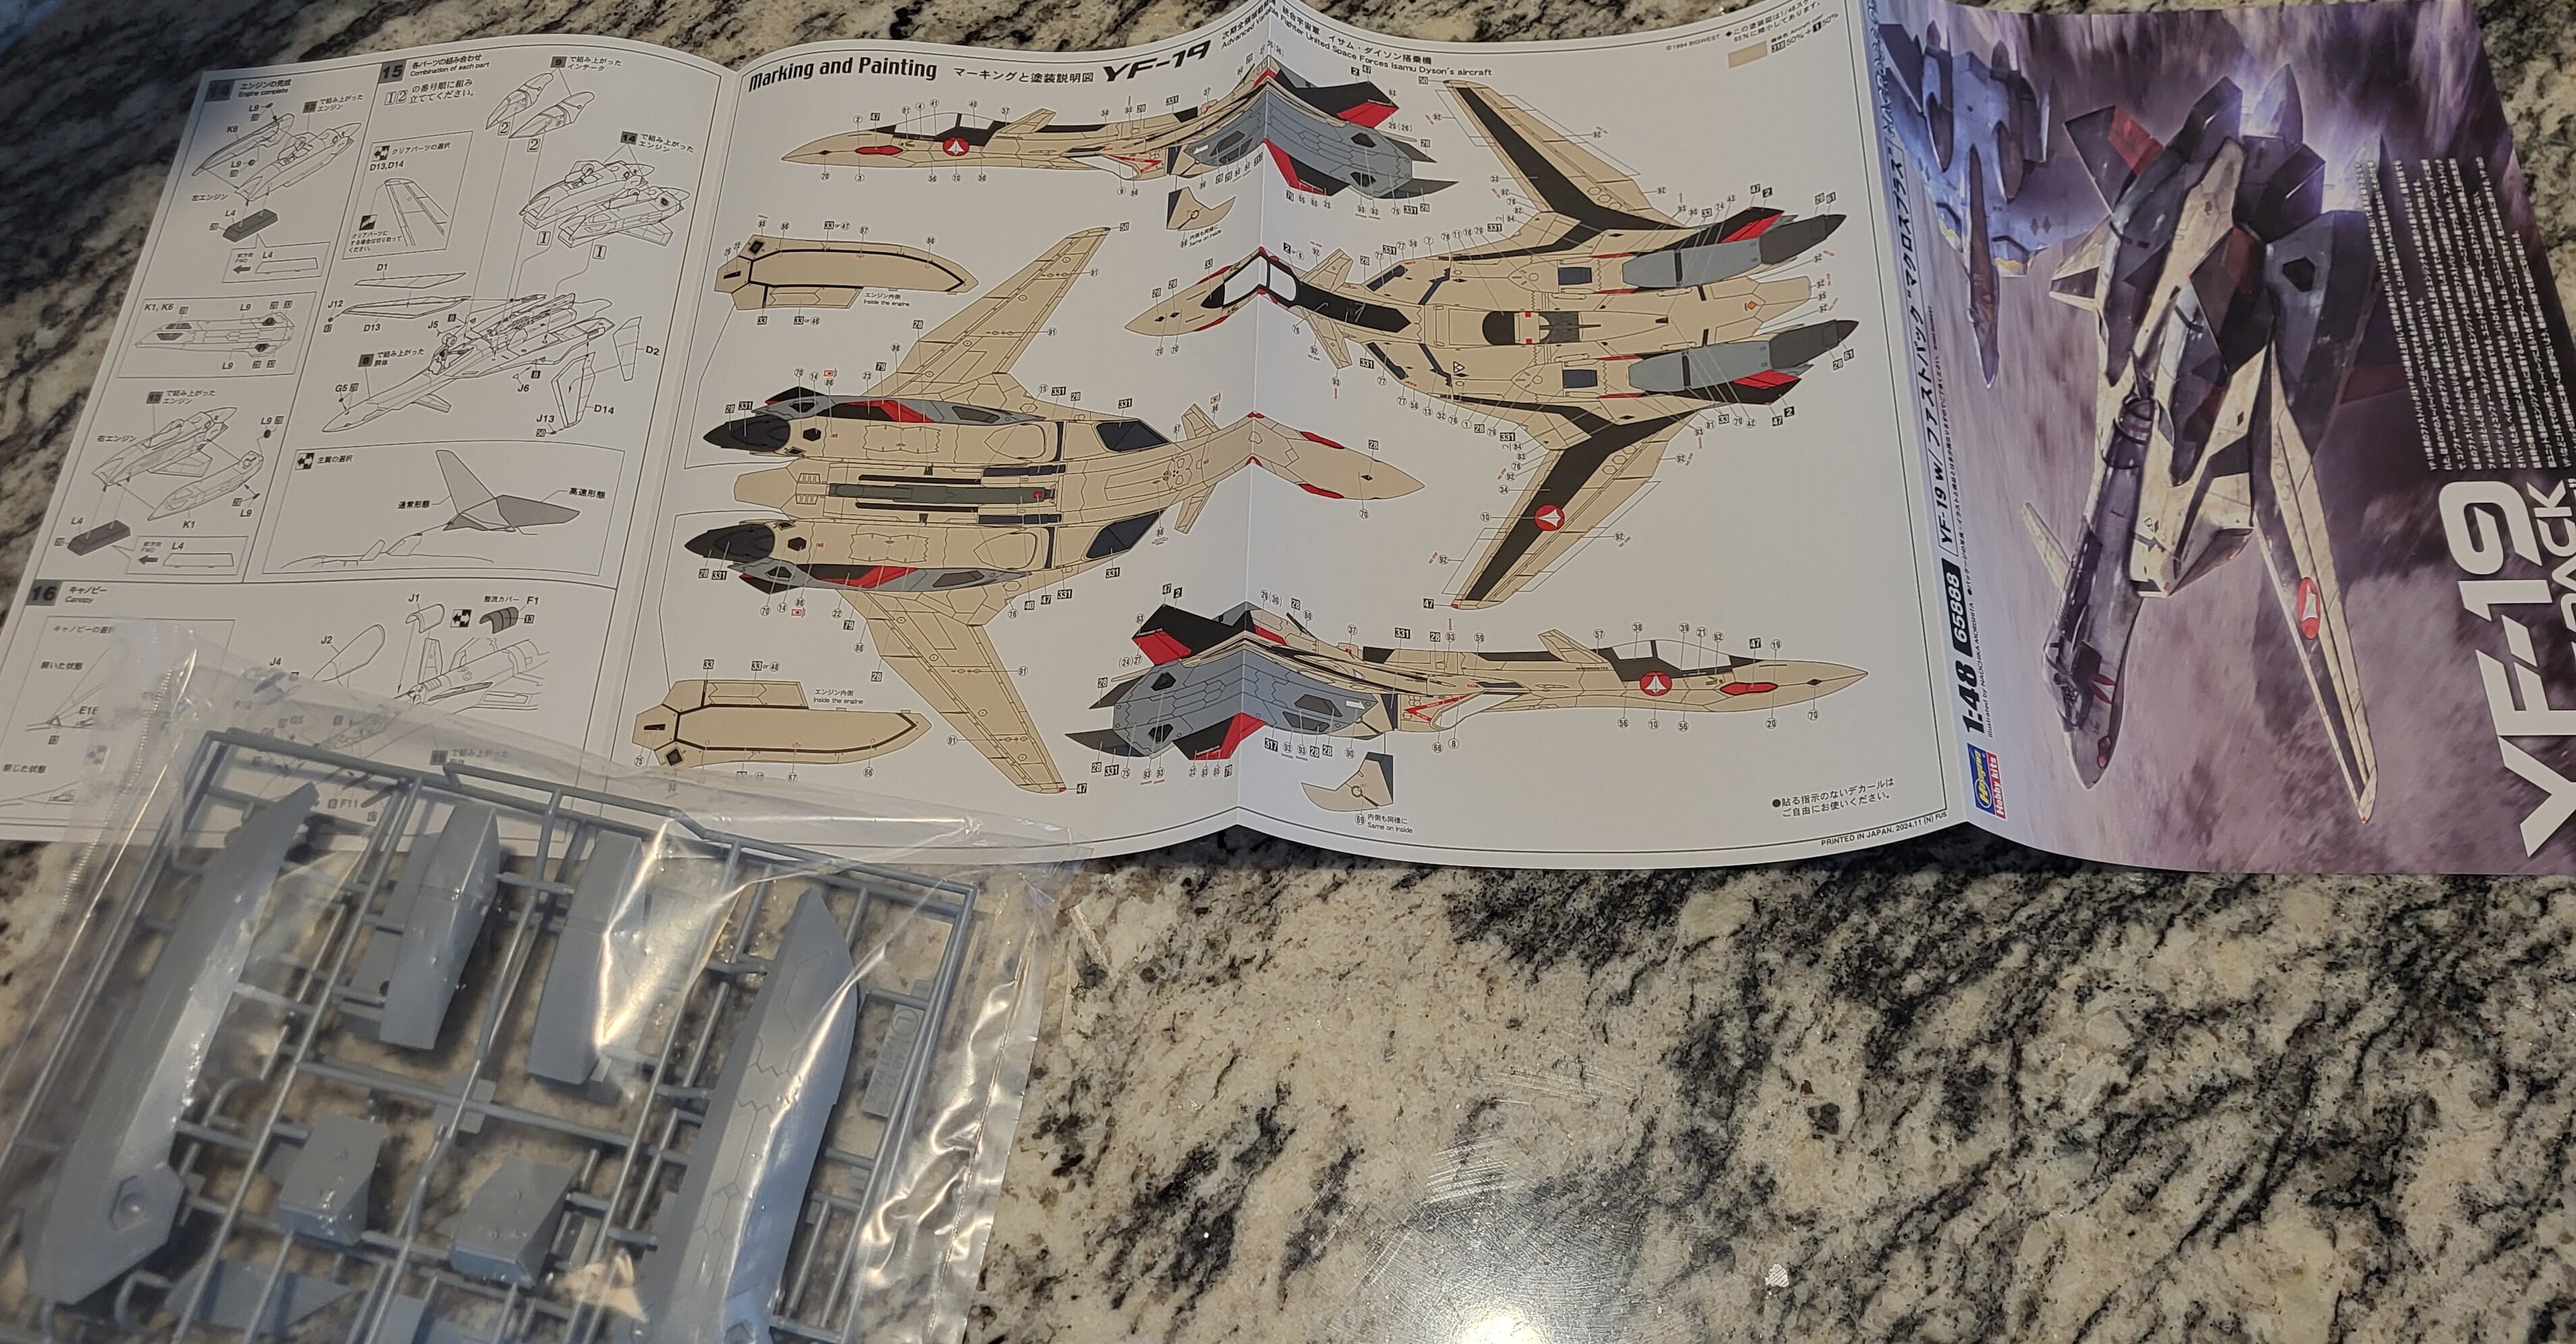
Congratulations Hasegawa on printing an instruction booklet in full color! 👏
-
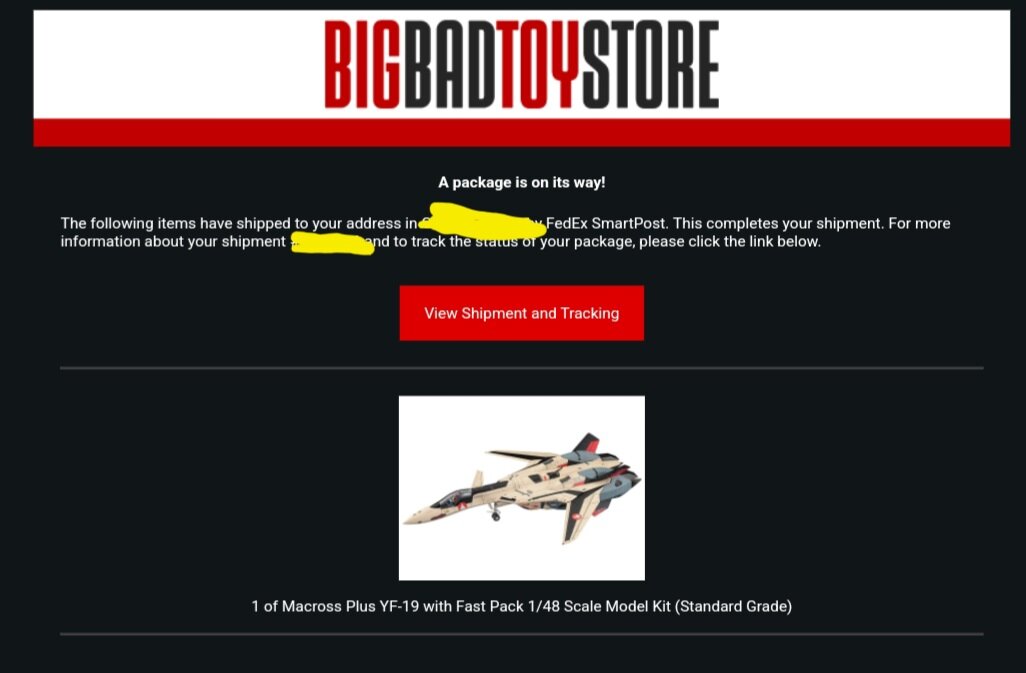
A Merry Christmas indeed!
-
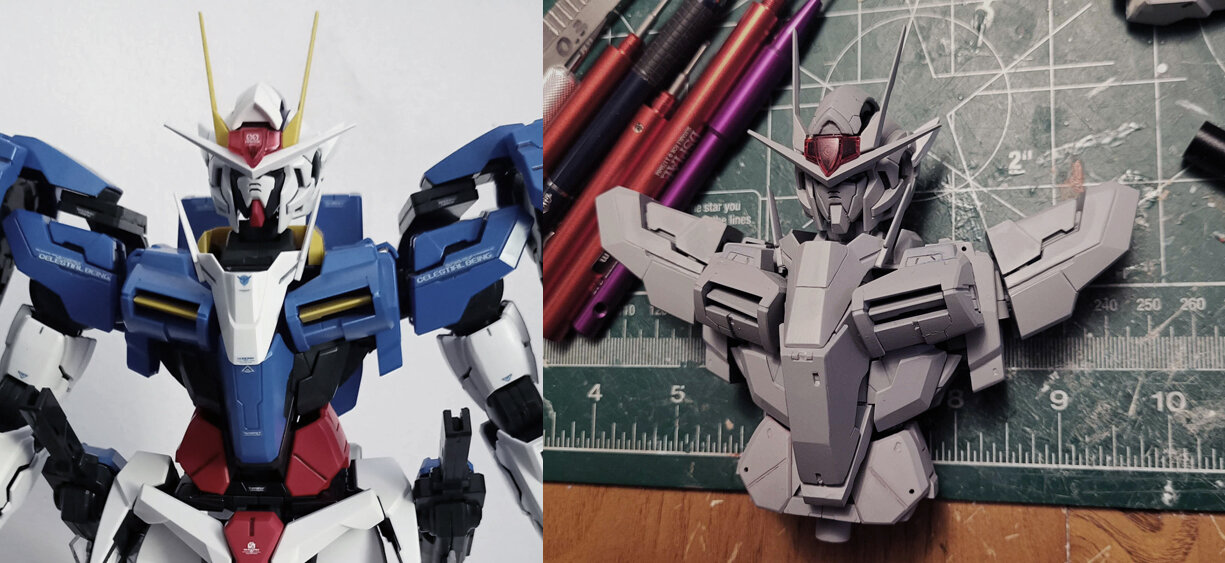
The 'Hey look at this really cool model build I saw' post
Rock replied to Shawn's topic in Model kits
-
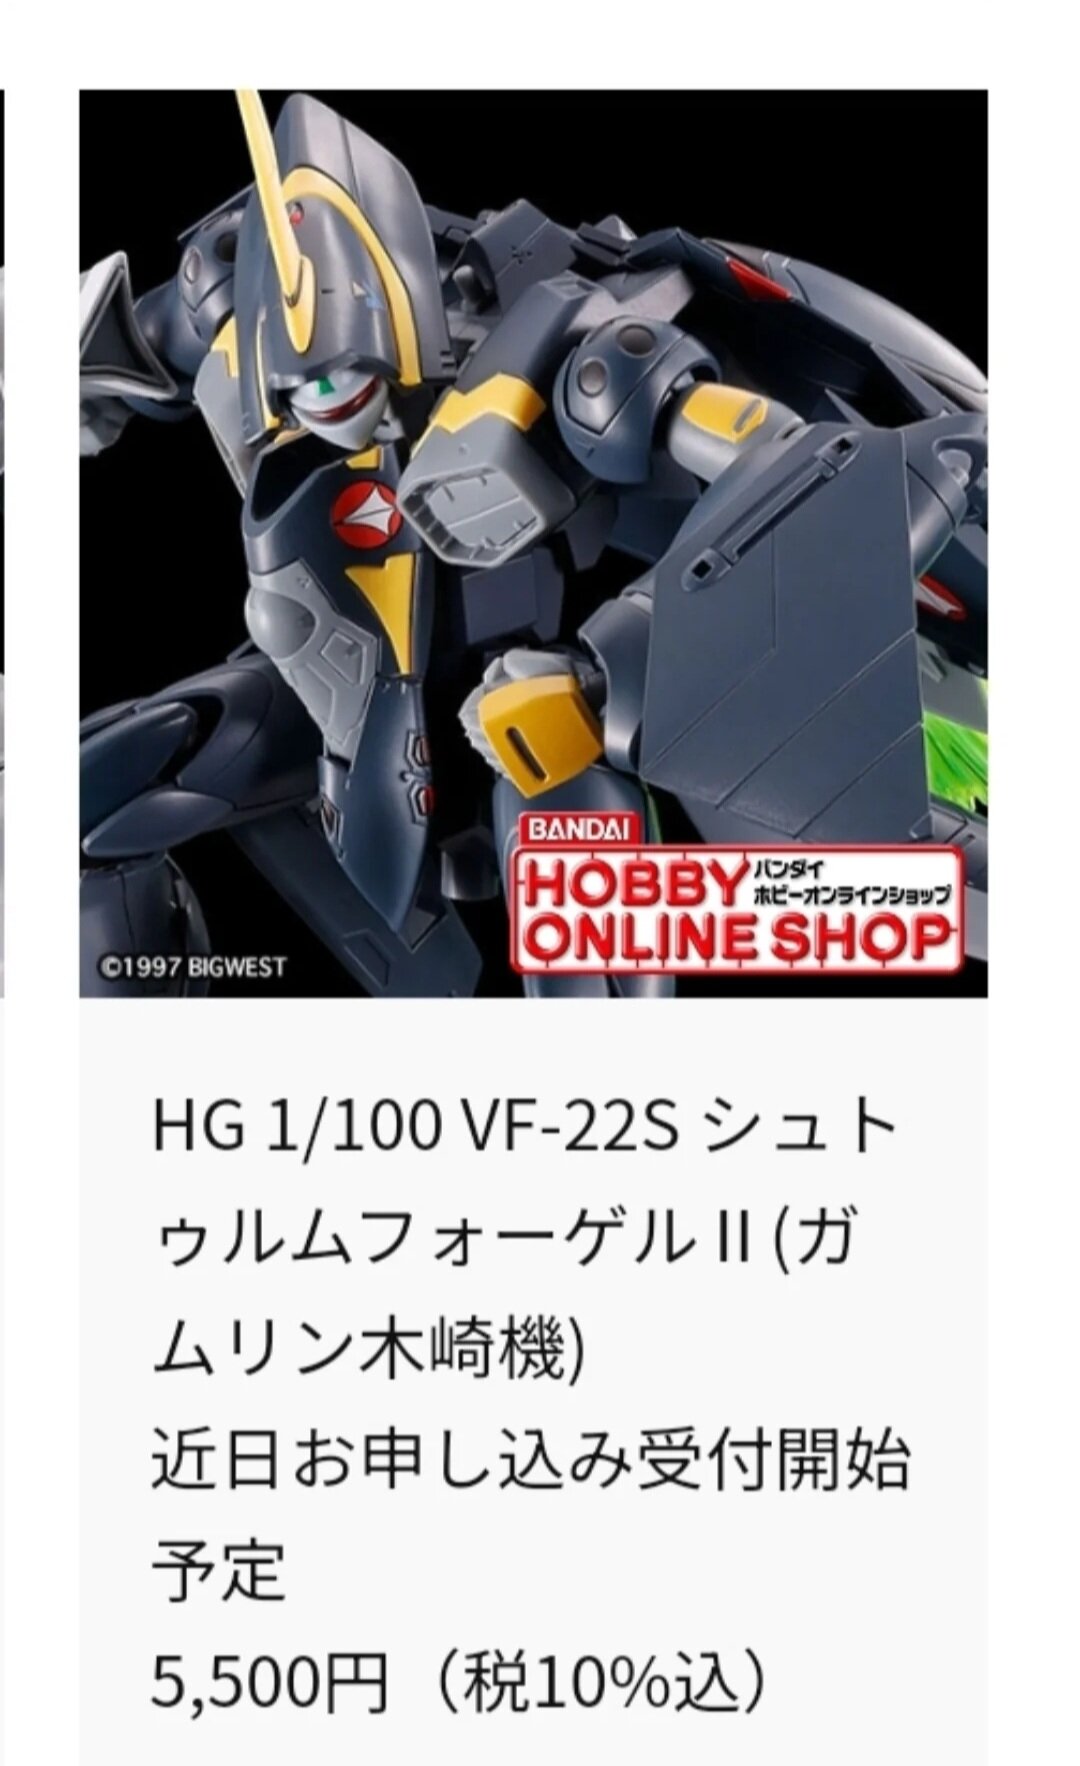
What are we guessing the wait for the VF-19A SVF-440 Dullahan's will be?
-
It was your own thread too! 🤣 https://www.macrossworld.com/mwf/topic/51068-wave-172-yf-29/#comment-1694585
-
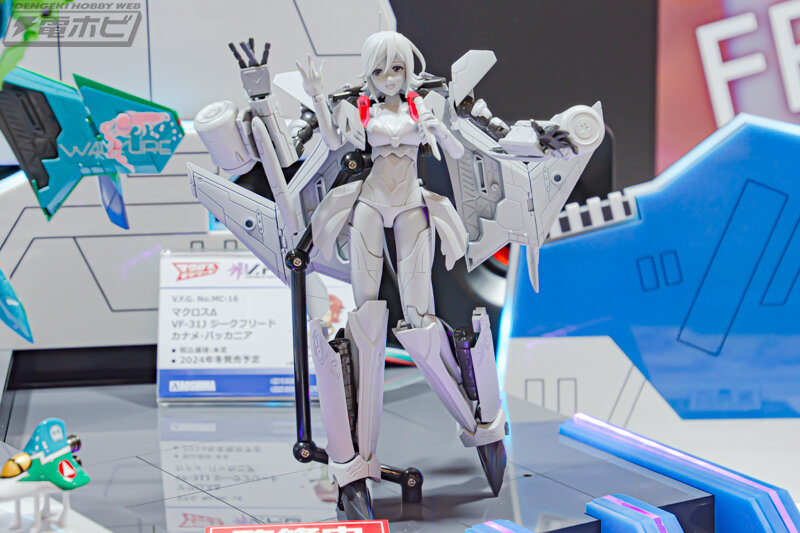
https://hobby.dengeki.com/event/2372651/
-
-
Hmmm... might have to wait for the White Unicorn (Amuro/Green Divers) color way at $400
-
Mr. Color's GX series, Gaia's EX clears, all thinned with Mr. Leveling Clear. GX100 Super Clear III (UV Cut) is probably the best gloss clear I've used outside of a 2k clear. GX113 is their flat coat in that respect. There are a few downsides, I've notice quite large particles (grit) in some jars, not sure if a bad batch or age related. It looks like dust when sprayed out onto a clear part. Secondly, they require a lot of thinning. They take Mr. Leveling Thinner really well but, you will go through a lot. I use a 1(paint) : 1 (laquer thinner) : 1 (Mr. Leveling Thinner) ratio. Lastly there is a big downside being that you only have gloss and flat. All other finishes must be hand mixed between the 2. That is why I rely on Gaia Notes EX clears more often these days or when the project cannot be sprayed in one go. EX-03 (gloss,) EX-04 (Flat,) EX-10 (semi-gloss.) The whole Gaia EX line is fantastic and the colors have blown MR. Color out of the water for a long while*** (in my opinion.) *** If you want a really fun paint look for their new EX-06 Fluorescent clear, it makes almost anything shine under a fluorescent/black light, such a cool product! With LED lighting models being so popular these days it definetly has a niche. I do rely on Alclad II Clears (lacquer) for final coats still. Anything more than a mist and I have issue with them (dry spots and yellowing.) I really like their Light Sheen Klear Kote which is about as close to a suede finish, and Semi-Gloss. Love them for my final overcoats on kits. FWIW The MIG Ammo line is just rebottled Alclad. The bottles used to clearly state that but, they since have renamed them. Just working on my (probably not going to finish on-time) GBWC entry and trying to become more comfortable with putty sculpting, carving. Until this project gets to paint, I won't drag out my whole spray setup, which is what the other projects are awaiting anyways.
-
The only thing I recommend Aqua Gloss for is brush painting on lens/sensors after you've matte (lacquer) top coated a kit. Things like Gundam Eyes, Camera's and Screens inside cockpits.
-
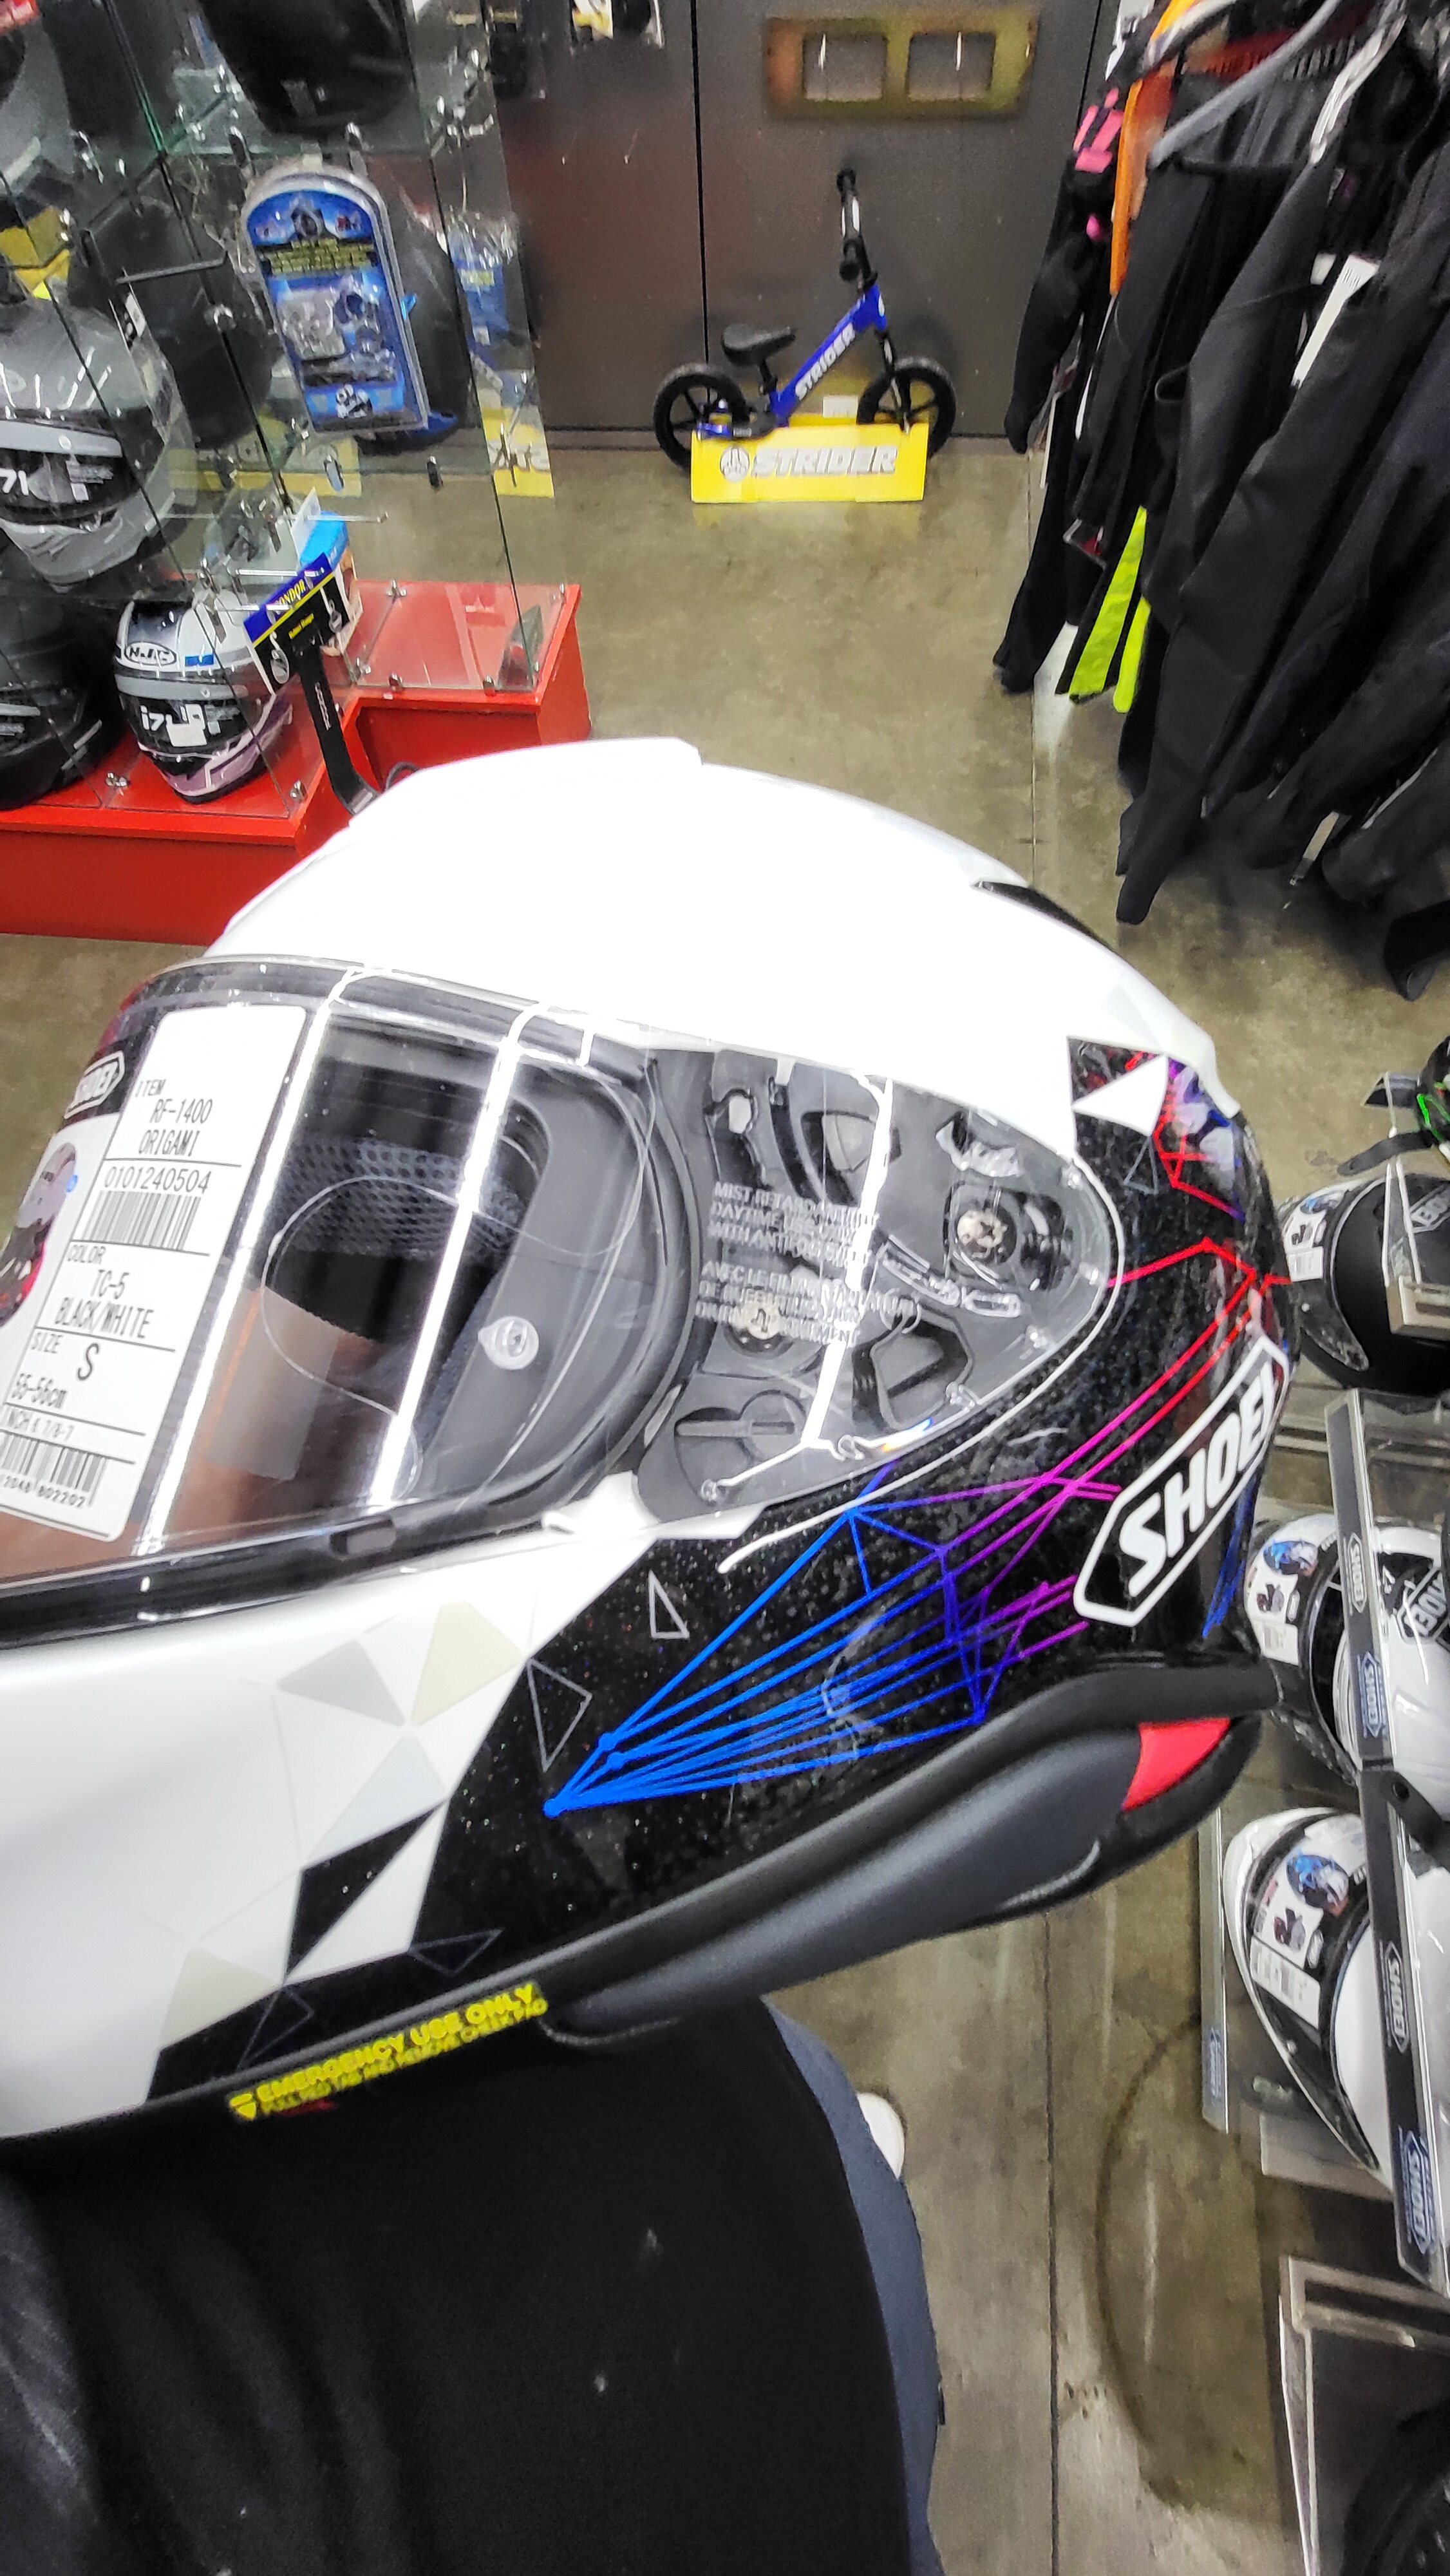
So your scheme remonds me of a Shoei helmet I recently bought... love it!
-
Siren! https://x.com/hobbywatch_jp/status/1822075490825609673?t=ZJvt3ZtATSSgVjoVT8dX7w&s=19
-
FIIIIIYA!
- 91 replies
-
- 1
-

-
- sheryl nome
- mikumo guynemer
- (and 10 more)
-
The 'Hey look at this really cool model build I saw' post
Rock replied to Shawn's topic in Model kits
RIP -
June 23-26 in theaters. Full 4k restoration of GITS2
-
It is something new for the Gundam 00 Revealed Chronicle CGI shorts that fill in 00 with new content. The SAGA is a reference to the Cherudim Saga from Gundam 00V. The took bits of the color scheme, style, and arsenal from the SAGA and applied it in a similar fashion to the Dynames for a 'new' makeshift repair unit/variant. We haven't seen or heard much from Gundam 00 Revealed Chronicle past it's initial video/trailer and this design hasn't even appeared in it or any other media (yet.) It honestly feels like they are just stalling and trying to get more money out of the existing Dynames kit instead of making the other gundams or mobile suits from the 00 series...
- 8857 replies
-
- 1
-
-
- gainax
- evangelion
- (and 14 more)
-
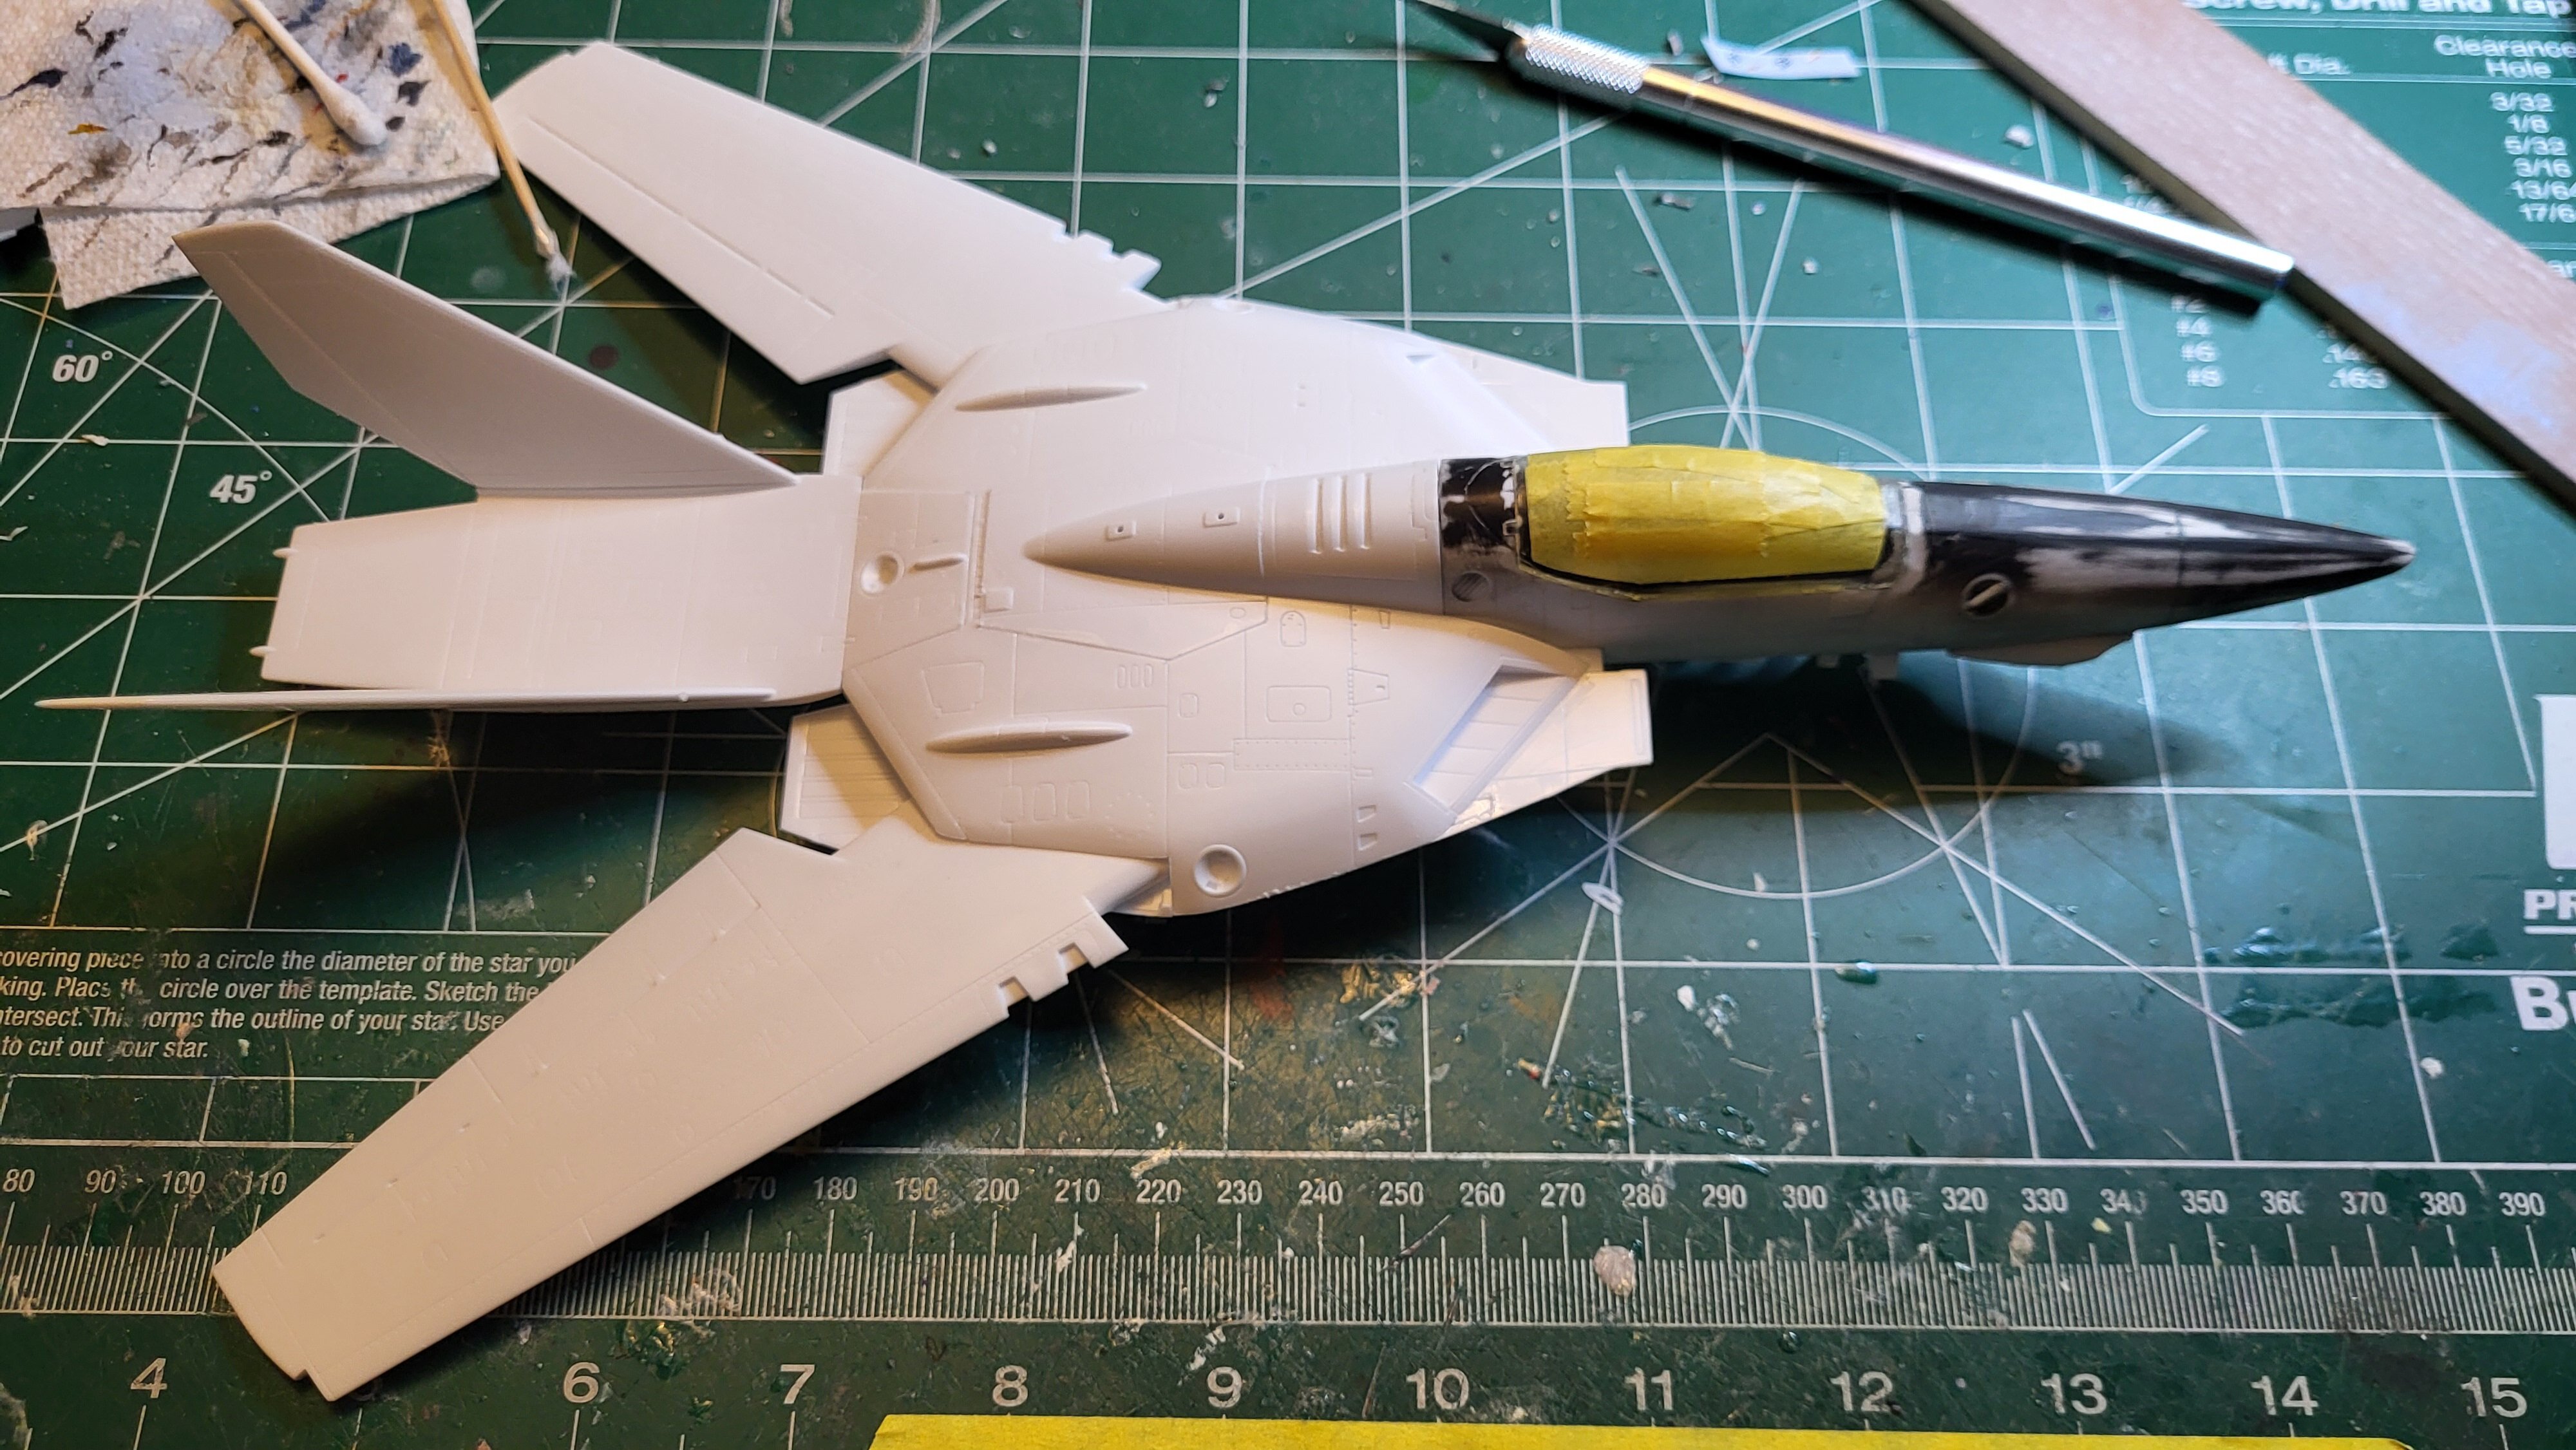
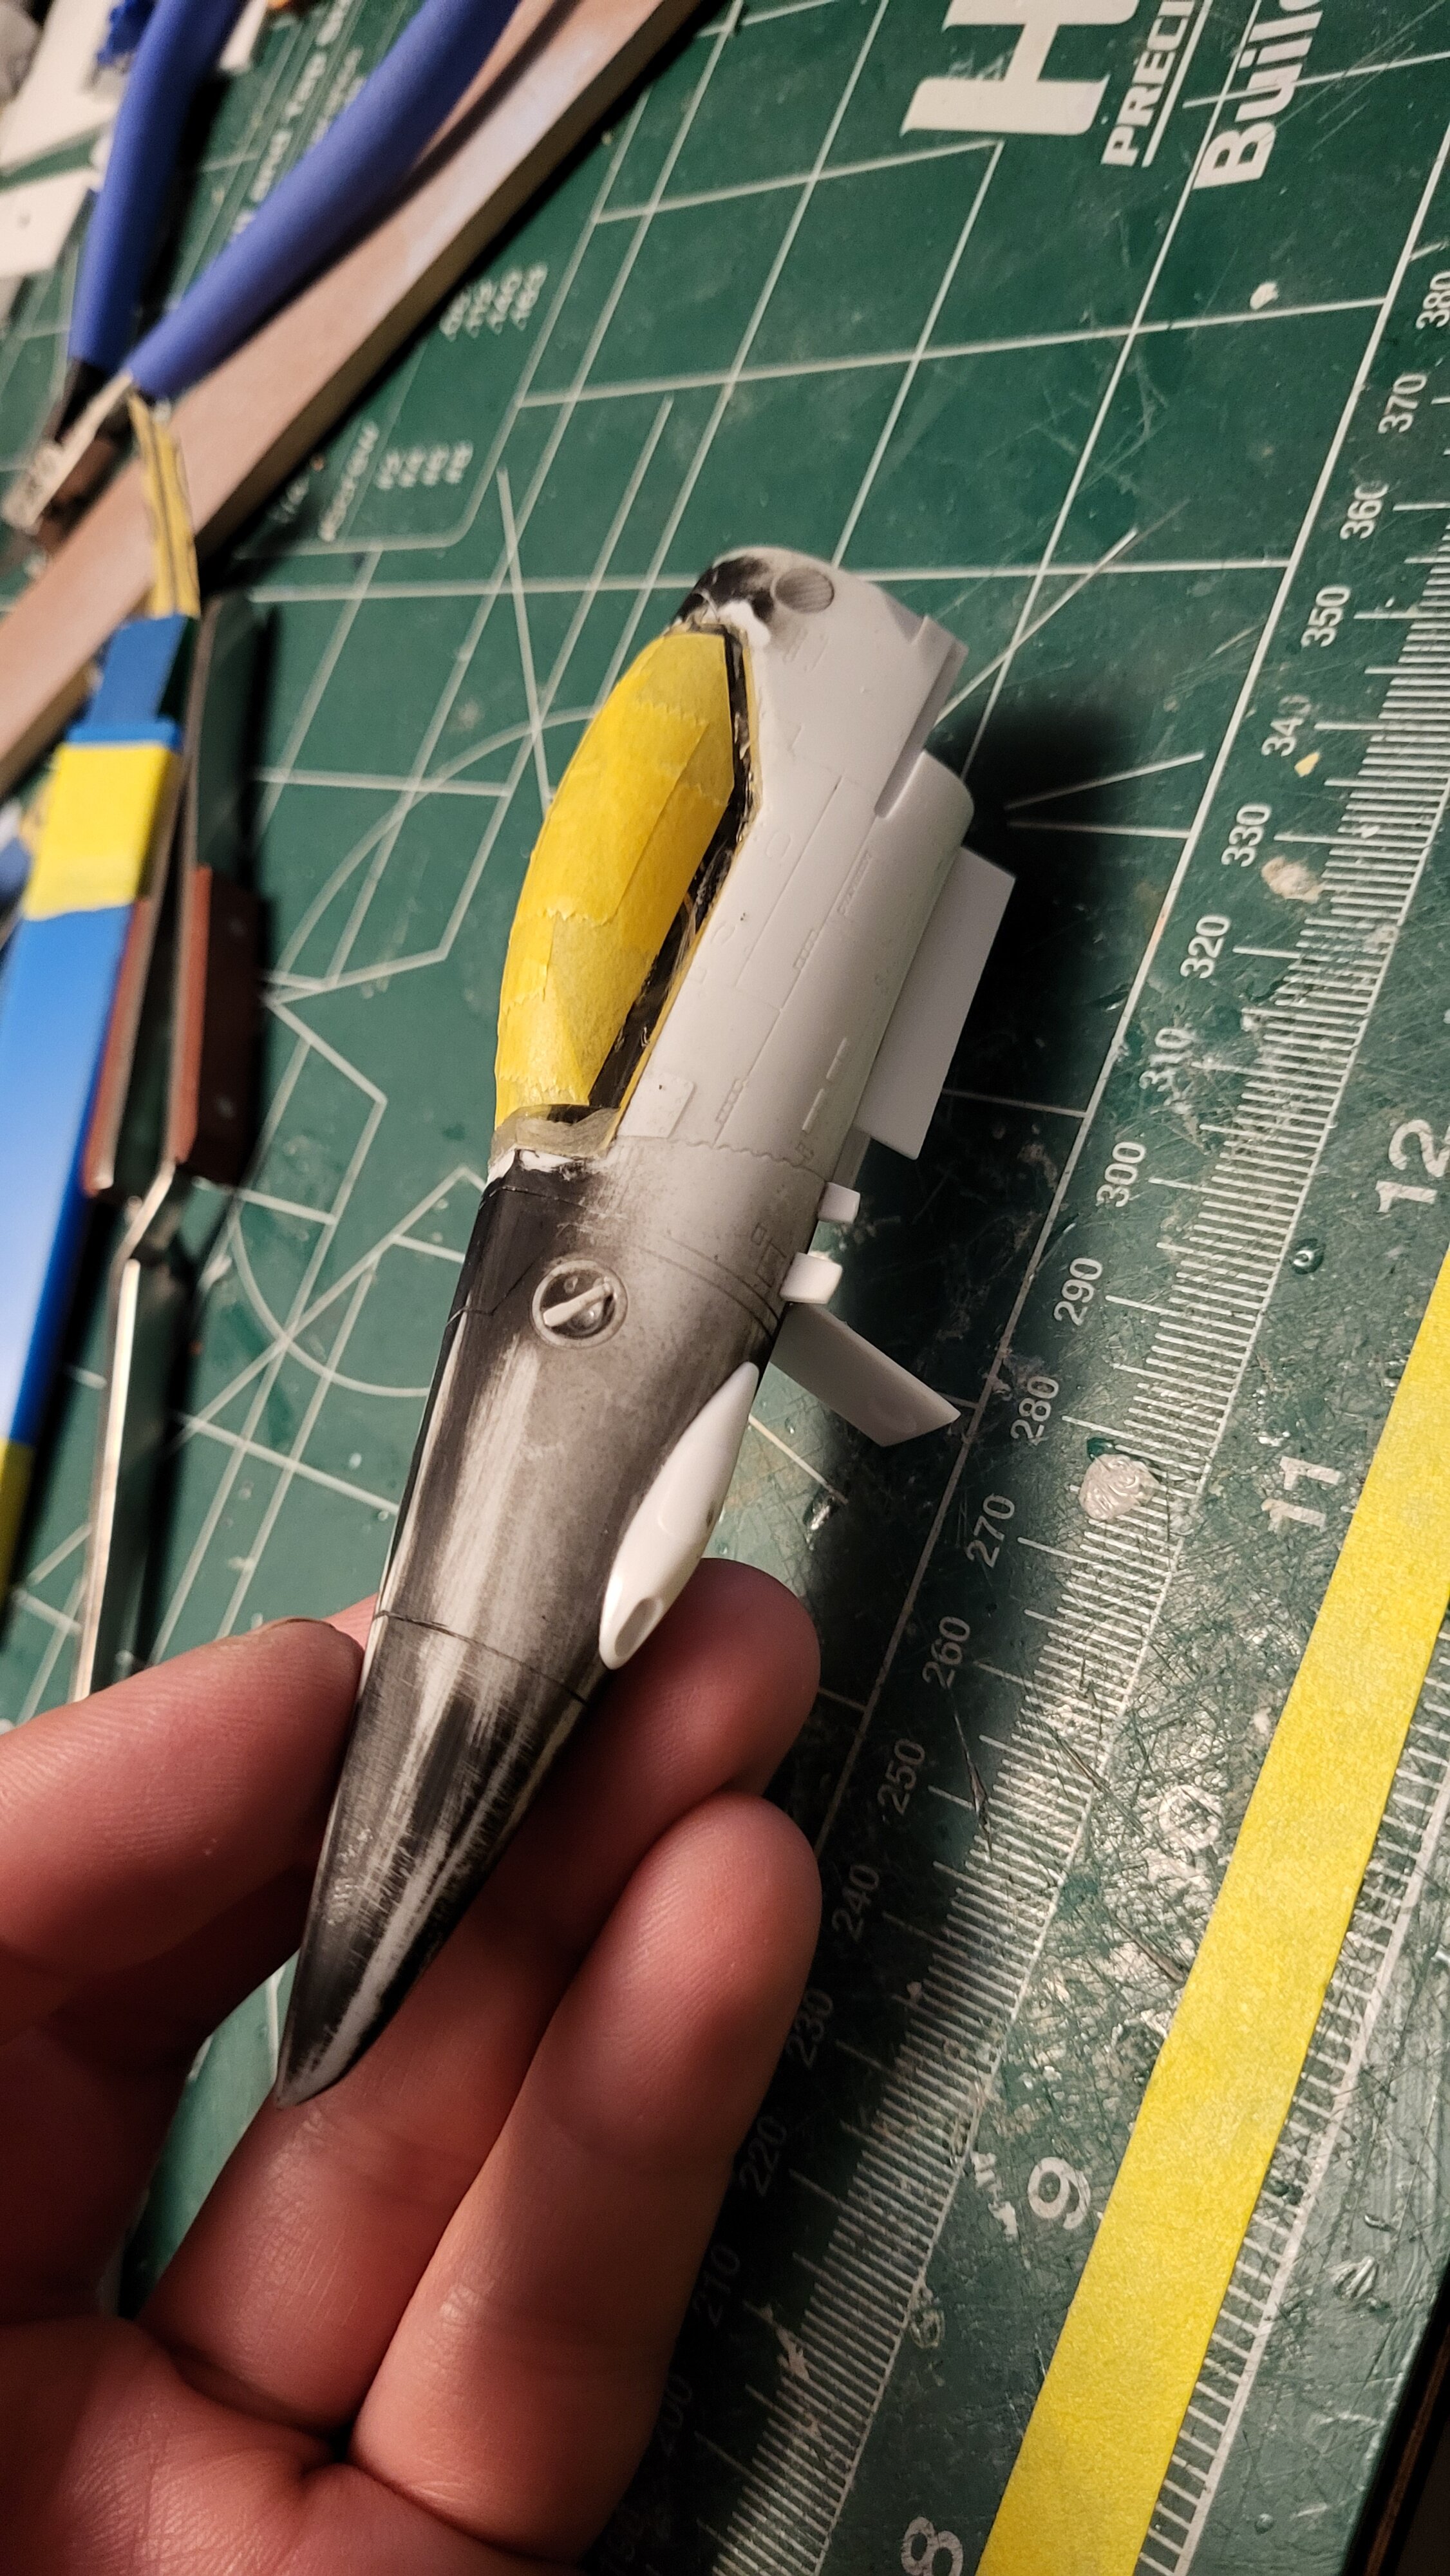
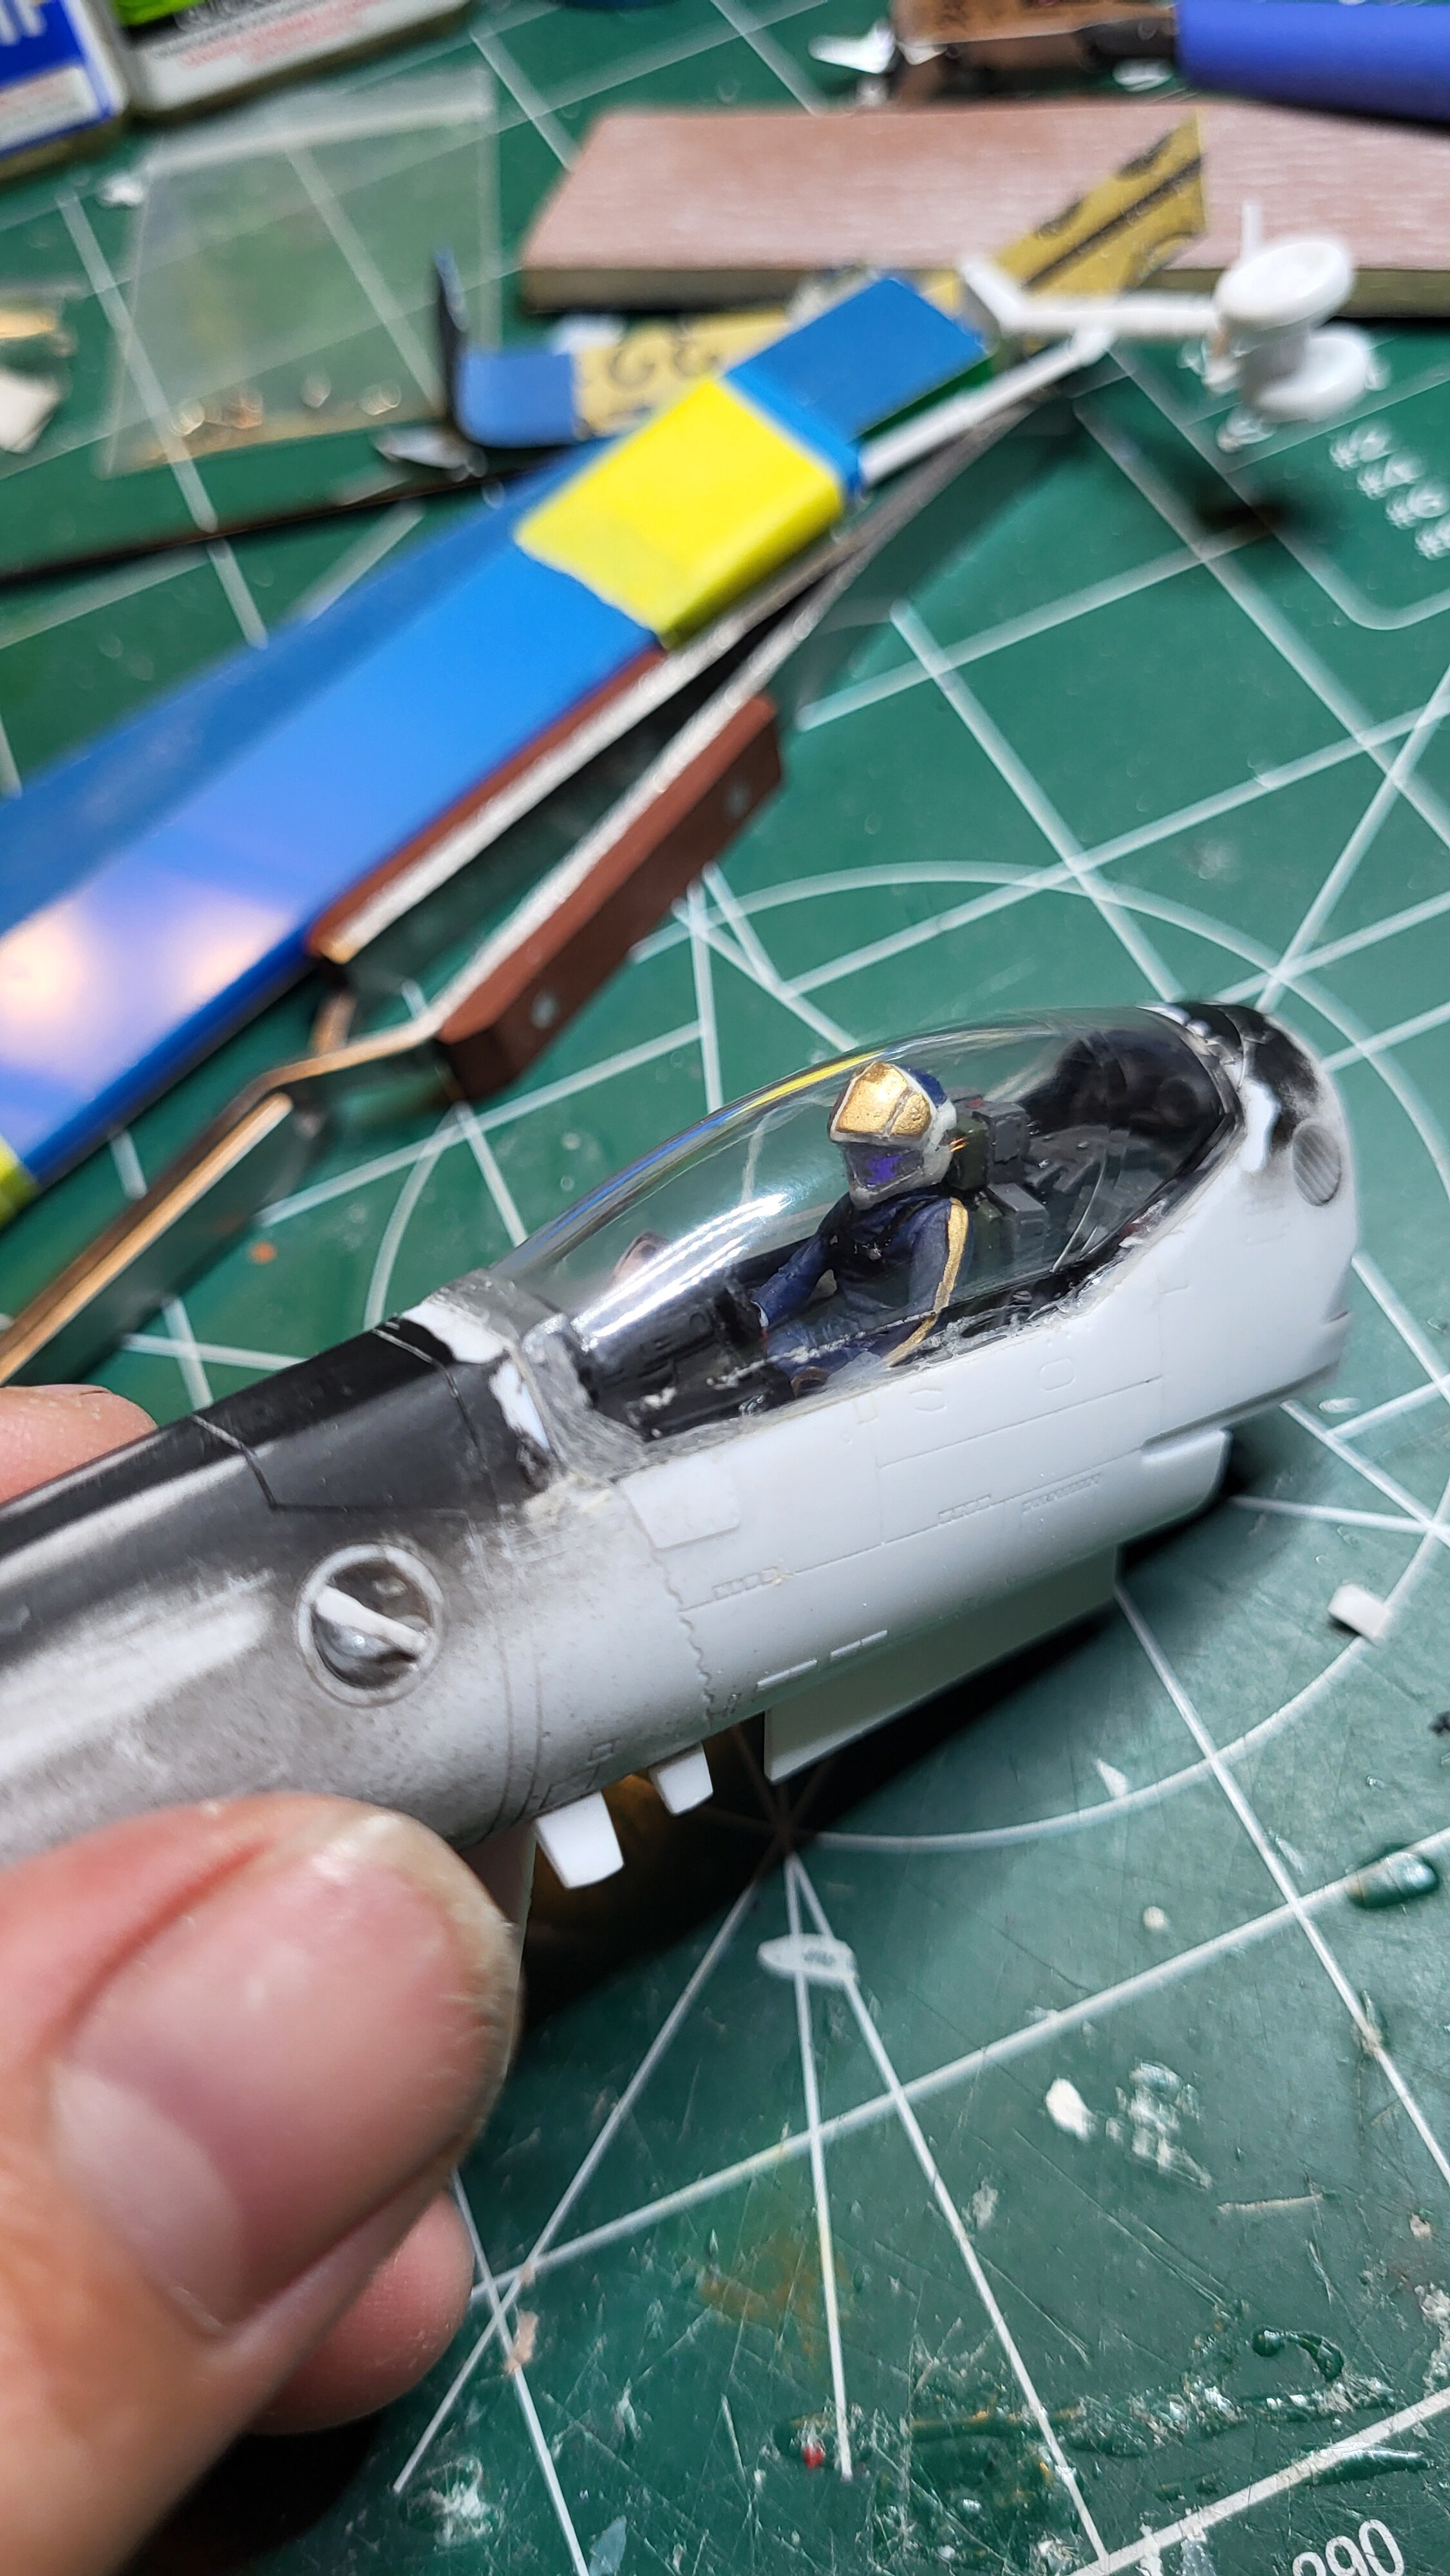
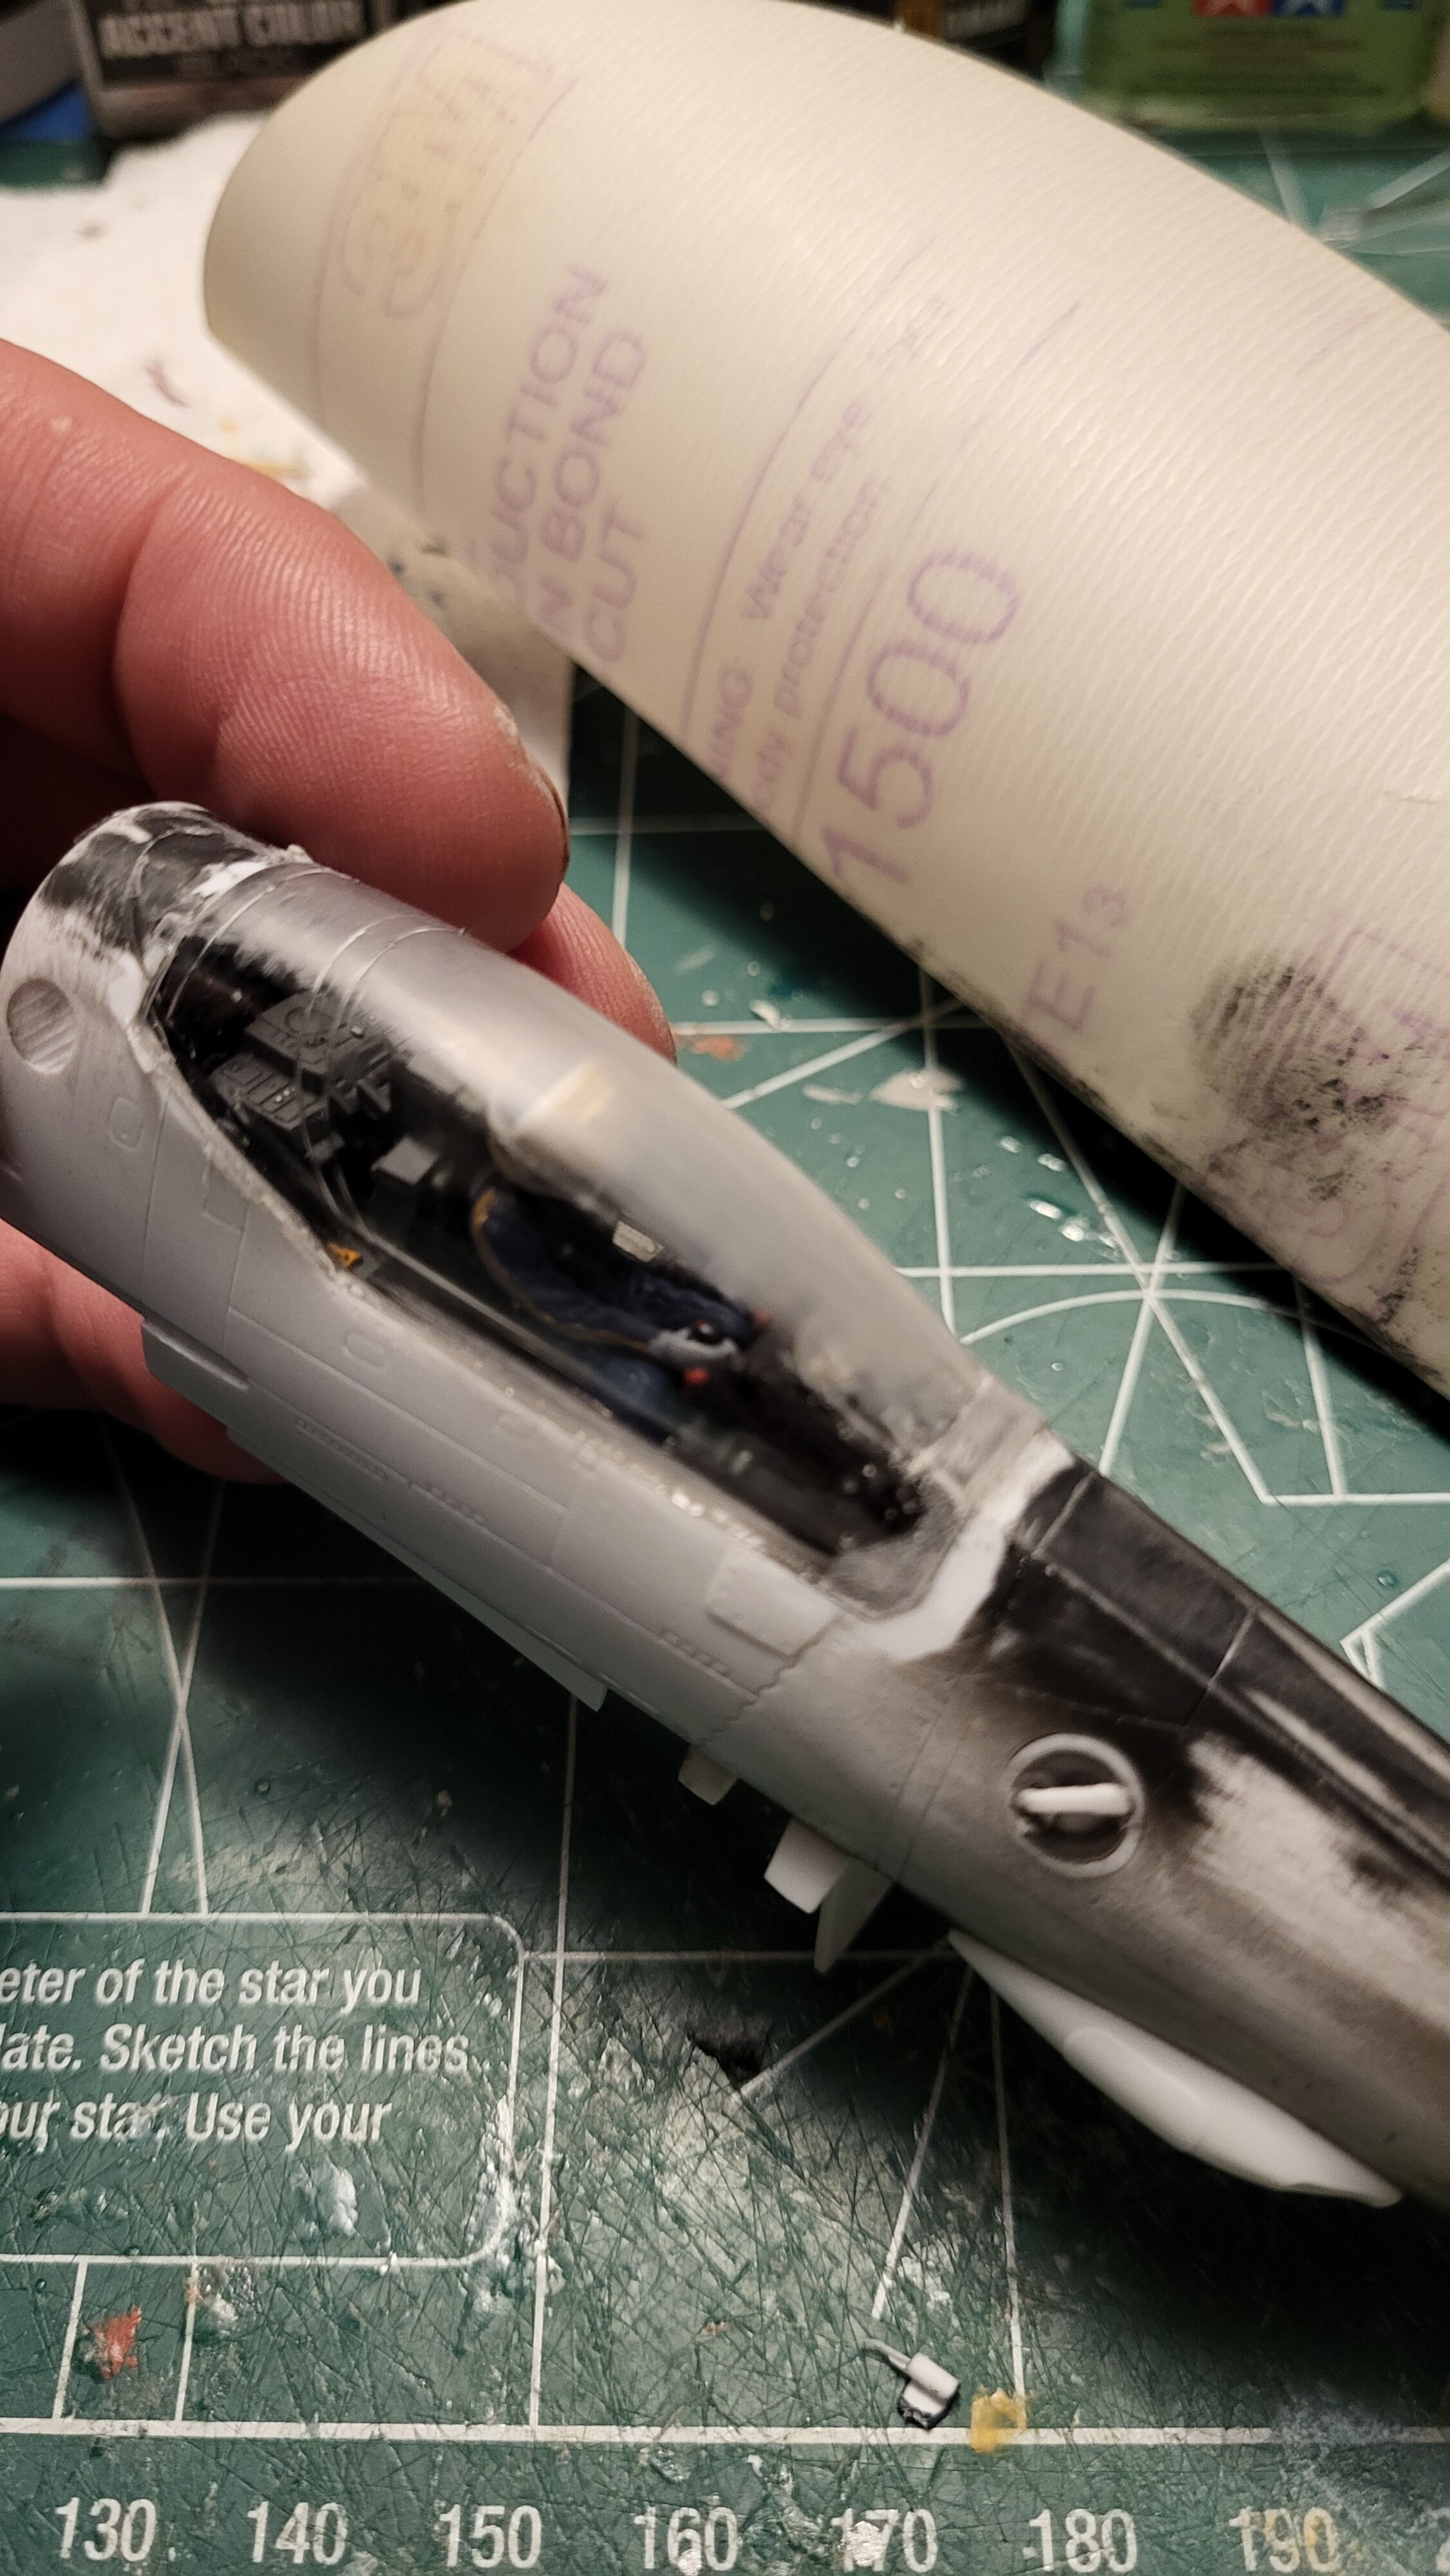
Had a bit of canopy glue squeeze out that required cleanup using warm water and a toothpick/cotton swab. A few edges of the canopy required a bit of sanding to get a better, flush fit to the body. For the seam line, xacto blade scrape>1000g>1500g wet>Madworks Super couse polishing compoud. Good enough with minimal effort! More sanding to get the seams straightened upm From here the canopy frame gets masked up and we can move forward to primer! Outside of that just building the sub-assemblies, removing seams and getting the rest of the bird to action. Next time will defold into a lot of progress.

-
The 'Hey look at this really cool model build I saw' post
Rock replied to Shawn's topic in Model kits
https://twitter.com/nue_post/status/1788527236649562200 -
https://www.youtube.com/watch?v=zFD6TujMsj4
-
Amazing work R! The lack of a little Alloy figure to put this beast into scale is a little letdown. The kit turned out and looks fantastic! I really want to buy one, but so far all by Moderoid kits just collect dust partially snapped (Sterlitzia, Escaflowne, Big-O, and Evangelion 01...) Hope Goodsmile keeps up more kits from Horizion, so many good mecha designs.
-
https://twitter.com/hobby_magazine/status/1788003403899310095?t=oI1QTzSQC2YZcHLb5xKjrQ&s=19