
Falcon18
-
Posts
708 -
Joined
-
Last visited
Content Type
Profiles
Forums
Events
Gallery
Everything posted by Falcon18
-
I know. I was just playing it safe with my wording in the case that it wasn't. And TKing, I wasn't directly aiming at you. I was only trying to make the point that people should just stop stressing on something that has been acknowledged to be changed. Clearly there are other priorities in life than to stress about the colour of a toy. Also, Mr.K is the guy who actually designs and settles the valkyries (correct me if I'm wrong) so no, definitely not just "some guy" on Twitter. He's the one sort of in charge in this. I don't wish to argue. Just asking people to relax. There's still months to release. And yes, I know this site loves to nitpick on every single detail. At the same time, companies can't please everyone. Also, you're not the only one spending a pretty penny on this. So is everyone who intends to get it. Peace.
-
We're still arguing abt the blue? People should just relax. Remember that it's already been acknowledged that the blue is wrong. It will be changed. Also, this is just a prototype. The first one too. Things will definitely change in the next few prototypes. There's also the chance that it's hand-painted from previous pics. Stop stressing over the colour when it's clearly been acknowledged and that this thing still has about 6 months to release. That's a long time to have lots of things changed.
-
Here's one by VF5SS of CollectionDX. Battroid to fighter from halfway through: http://www.youtube.com/watch?v=NPHqtpoKmU8 Edit: beaten by close
-
Yes. Anyone and everyone could get the Tamashii exclusive Isamu before it was released which is why there's so many still reasonably priced. In the future it may be more expensive. Hard to tell considering there's still quite a bit of stock now. The other 3 however were just general releases and Bandai with general releases usually mean low supply with high demand. So the aftermarket is priced higher as probably not everyone had the chance to grab one when they could at release.
-
Jefuemon was asking for that video to be put on facebook to reply to that person's comment on facebook. He knows that Max was #001 in that instance.. Regardless, amazing build. Had a look at your flickr too. Just wow.
-
All hail the 30. Nice!
-
Agreed. Always wanted a 0S in my collection. Though I'm probably buying both too anyways.
-
That black VF-27 looks really, really cool.
-
Big difference actually. TV (credits goes to eyeforthings blog): DYRL (credit goes to hobbygen):
-
+ the TV vs DYRL pilot.
-
Great pictures. Thanks for sharing.
-
No problem. Good luck. Looking forward to your completed kit. Erh.. my scheme was a pain to do too. Masking wasn't fun.
-
Great pics everyone. It was an only one item page. So maybe once it sold the page was put down.
-
Yeah. Maybe you can get some compensation with the screw up they made. Eitherway, good to know they managed to solve it and that you're gonna get it soon enough.
-
Yeah. I notice that the gerwalk pics are the same blue. Yup. It is beautiful. Those beefy legs while still looking good in fighter. Sexy.
-
Cool stuff. It was neat how he added crumpled paper/tissue as smoke from the exhausts. The 1J one was the nicest imo.
-
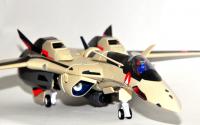
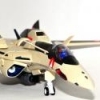
Is that the new updated blue or the old one? Edit: on the battroid pic
-
1/48+fp's, 1/60+fp's, 1/72, 1/2k, 1/3k,1/100 and now 1/144
Falcon18 replied to VF-18S Hornet's topic in Toys
Nice.. That makes the 25A look sooo much better. Great work on it. Congrats. -
derex that turquoise/blue looks really great. Nice paint job. I used gunze acrylics. You could prime it if you wanted to. I didn't. I brush paint my kits. You could mask specific areas then paint first colour then mask and paint the other colour etc. This is probably best as you'll have an even coat of paint and not too thick. I went the lazy way. I drew the edges of the different colours with pencil then painted purple, masked purple, painted red and masked red and lastly the blue. So yeah, there were some going over another colour. Needed a few coats to cover it. Try not to overdo it or you'll lose the panel details. No worries. Glad to help. Just shoot more questions if you need to.
-
1/48+fp's, 1/60+fp's, 1/72, 1/2k, 1/3k,1/100 and now 1/144
Falcon18 replied to VF-18S Hornet's topic in Toys
That looks very good. Nice job on it. -
^ Nice. The Cav is a beautiful bird. Oops. Great pictures nonetheless.
-
No problem. It's a fun, sometimes frustrating, build. Oh, you'll need something to widen some of the holes for the pins. Some of them just don't fit.... A small diameter drill can help if you have one. I used a slightly larger diameter screwdriver than the specified hole, enlarged it and forced the pin in..
-
If you meant unbuilt, some pointers are: - check all the pins are of the specified size (diameter and length) before you shove it into the hole. Once in, they're very hard to remove. Had to remove one before, it wasn't fun... - if you intend to make it transformable and fully painted, there are some parts where you'll have to sand down to make sure that the contact point is minimized to prevent scratching - test fit and see what parts go where before you commit to building the part fully - check which surfaces are exposed to know what to paint and what you don't have to paint. Don't want to paint one part and let it dry only to realise after fitting that you left something unpainted. - a pair of pliers come in handy too. Ultimately, just to take it slow and don't rush things cause if you do, you might either hurt yourself or fix a part wrongly. (had both happen to me. lol) Instruction manual's in japanese and can be easily figured out. But i referred from this site (credits to mech9) as it's translated and it prevents the hassle of taking the booklet out. That's all I can think of off the top of my head now. If you wanna know anything else, feel free to pm me. I'll help how I can.
-
If you want the white to "pop-out" more. You could do a prime first so the yellow won't be seen at all after the white goes over. To me, a few layers of white over should be sufficient. I don't think stripping is necessary. Other members can give you better advice on this. Mine's just an easy way without spending much just for one repaint. Hope it helps.
-
You should. But careful. Once you start with one they'll somehow multiply by themselves.