

Pontus
-
Posts
476 -
Joined
-
Last visited
Content Type
Profiles
Forums
Events
Gallery
Everything posted by Pontus
-
+1 Waiting for a deal on Mandarake/Amazon IF I ever get one, and ONLY if I can get it for less than a Yamato. I already have a Yamato which is a great toy imho (thanks to @jenius awesome reviews for helping with that decision), but I guess I HAVE to get a second 21 one way or another since I just picked up a second 19 on Amazon. Pretty hard to justify $350+ when I got the latest 19 for just $230. And since that piece was clearly a shelf warmer considering there's still plenty of stock on hand, I wouldn't expect the 21 to be any different. Unfortunately, this doesn't bode well for future releases or new designs if it's not profitable.
-
Yeah, I'm curious how they plan to do her long hair/tentacles with the batroid mode. Every other Walkure has shortish hair.
-
I will not be ordering anything directly through KC anymore! I saw your reports of getting invoices yesterday and checked my account. As @jenius noted, it just says "processing" in my account. Anyone with an open order should check your spam, old emails, etc. I got mine on the 8th of June. I have long since changed my email with Kitz, and I just checked to make sure... both my login and my email on file are current. But on the off chance, I checked my now long dormant old email (fortunately still active amazingly), and waddaya know, there's the invoice! So I paid it, and went to recheck my account at Kitz site, still says processing and no record of payment being made or request to pay any invoice in ANY section of my account. Are these invoices we're getting a scam?! If KC can't keep track of simple email changes, let alone PAYMENTS, I. am. done. Unfortunately, I'm still on the hook for Max, but if I thought I could get a refund without a huge hassle and go through BBTS instead, I certainly would.
-
Thanks for posting @no3Ljm! I skipped Freyja thinking that'd be the only one they release and because I already made my own custom version... but if they're going to release them ALL, I have some pre-orders to make. And I see that BBTS has an awesome Ranka Lee with costume that looks like actual cloth! Now that I'm committed to this, they'd better do the rest.
-
Yeah, I've been annoyed by the lack of fixed pose hands in some of my recent Arcadia purchases. I'll have to look and see if there's any available for 3D print. Does anyone know of them? I wonder if I don't have something from other releases hanging about in my parts bins that might work if not an exact match. Now if I can only find one for an acceptable price. I saw one come up here in the for sale section, but I can't bring myself to pay $450 for a non-PF, so I think I'll just be patient for now.
-
This is quoted from the recent purchase thread where I posted getting a Yamato VF-0S. Well I just opened said valk to transform and... What a hunka junk, so yeah, I think I'll be looking for an Arcadia. Did Arcadia fix the floppy hands (and floppy gun grip), the front leg vents that pop off, the stupid hip interference so you can't move/pose the legs properly, and the flimsy shoulder joints that rely on spring tension of PLASTIC that's loosely screwed down in order to function properly? Other than my 1/72 scale Yammie YF-21, I think this is the biggest POS I've gotten yet, so it's definitely a fighter only display piece.
-

Macross Zero Collector's Edition Blu-ray Release Thread
Pontus replied to sh9000's topic in Movies and TV Series
Looks to me like a different company has licensed this for release since Anime.ltd is a UK company that normally does anime releases for the european market. I'm guessing this is a euro release that happens to be doing an NA release because Robert didn't get exclusive release rights for the Animeigo release that started this thread. So I think they're completely different products. This one is probably just the existing Japanese release where they created english subs (and possibly a dub) for it on their own. Edit, I'm getting this confused with the Macross 2 kickstarter and the new zero release. My bad @no3Ljm. -
Sorry, been working long hours and trying to ask from work. But I transformed it and managed to wiggle the shoulder joint back down. But the thumb joint was super stiff and broke off when I tried to fit the gun! Yay. And of course, no fixed pose hands.

-
I only just took mine out of the box and haven't transformed it yet, but the shoulder hinges have a huge gap between them and the panel. I see a bit of gap in other pics, but nothing this big. Will those drop down if I transform it properly, or did I get a dud? Indeed. Although I think that different shades can look good and take away from the massive amounts of plasticky red everywhere, these just look like bad plastic. Frankly, the whole thing is way too plastic looking. But I like to look at problems like this as something fun to do to make it better and, in this case, maybe learn a new skill. I'm looking into electroplating plastic. A little red acrylic over nickel plating makes a perfect metalic red! I'm thinking I may try to plate some gold on it too. Does anyone have any experience plating their valks?
-
The 'Hey look at this really cool model build I saw' post
Pontus replied to Shawn's topic in Model kits
It's definitely not a tesla coil. Looks like a simple circuit to increase voltage to jump the air gap similar to what you find inside an electronic fly swatter but with much higher voltage. It's basically creating high voltage static which is most likely quite safe. Those batteries have enough juice to kill you if the current is concentrated, but since they have to increase the voltage to at least 60,000V in order to jump what looks like about a 6cm air gap, the actual current will be miniscule, and it's the current that kills you, not the voltage (otherwise a simple static jolt would kill you). As such, it probably wouldn't have enough wattage to melt the plastic unless you left it running for quite some time. As for the MASSIVE amounts of electromagnetic radiation coming off of that thing, you would NEVER see this as an actual product because it could induce some VERY damaging voltage in any nearby sensitive electronics. I wouldn't want my cell phone or computer anywhere near it. Edit: on successive viewing, I'm starting to suspect that this is a fake video. First of all, why are they using "Mr. Muscle" cleaning solution instead of flux which should be included in the solder? Secondly, the arch wouldn't hop around from pin to pin unless you forced it to with separate wires to each pin. It would only go to the pins closest to each other and pretty much stay there. I think it's BS. -
Incidentally, if anyone is interested, a seller on ebay just listed several non-PFs and a PF for sale... for the low low price of $1000!!! A friend of mine put this sort of thing best, "Tuna fishing." Maybe one of them will get folded into the orbit of Pluto.
-
The 'Hey look at this really cool model build I saw' post
Pontus replied to Shawn's topic in Model kits
I hope there's no sensitive electronics around that thing when you light it off. Especially ones with antennas. Like your cell phone. -
Yup, both PF and not are in my alert list (along with the reactive armor), but even on Manda they're stupid expensive when available. But I managed to snag this pristine, unyellowed Yamato on ebay for a decentish price, so it'll do for now. I won't mind having 2 tho, as I did for the Elintseeker after buying the Yamato on Manda for under $200 then being the sole bidder on an Arcadia PF from a US seller for just $225! I felt kinda bad about that actually, but I assured them it was going to a good home, not a reseller.
- 508 replies
-
- 1
-

-
- toys
- just purchased
- (and 14 more)
-
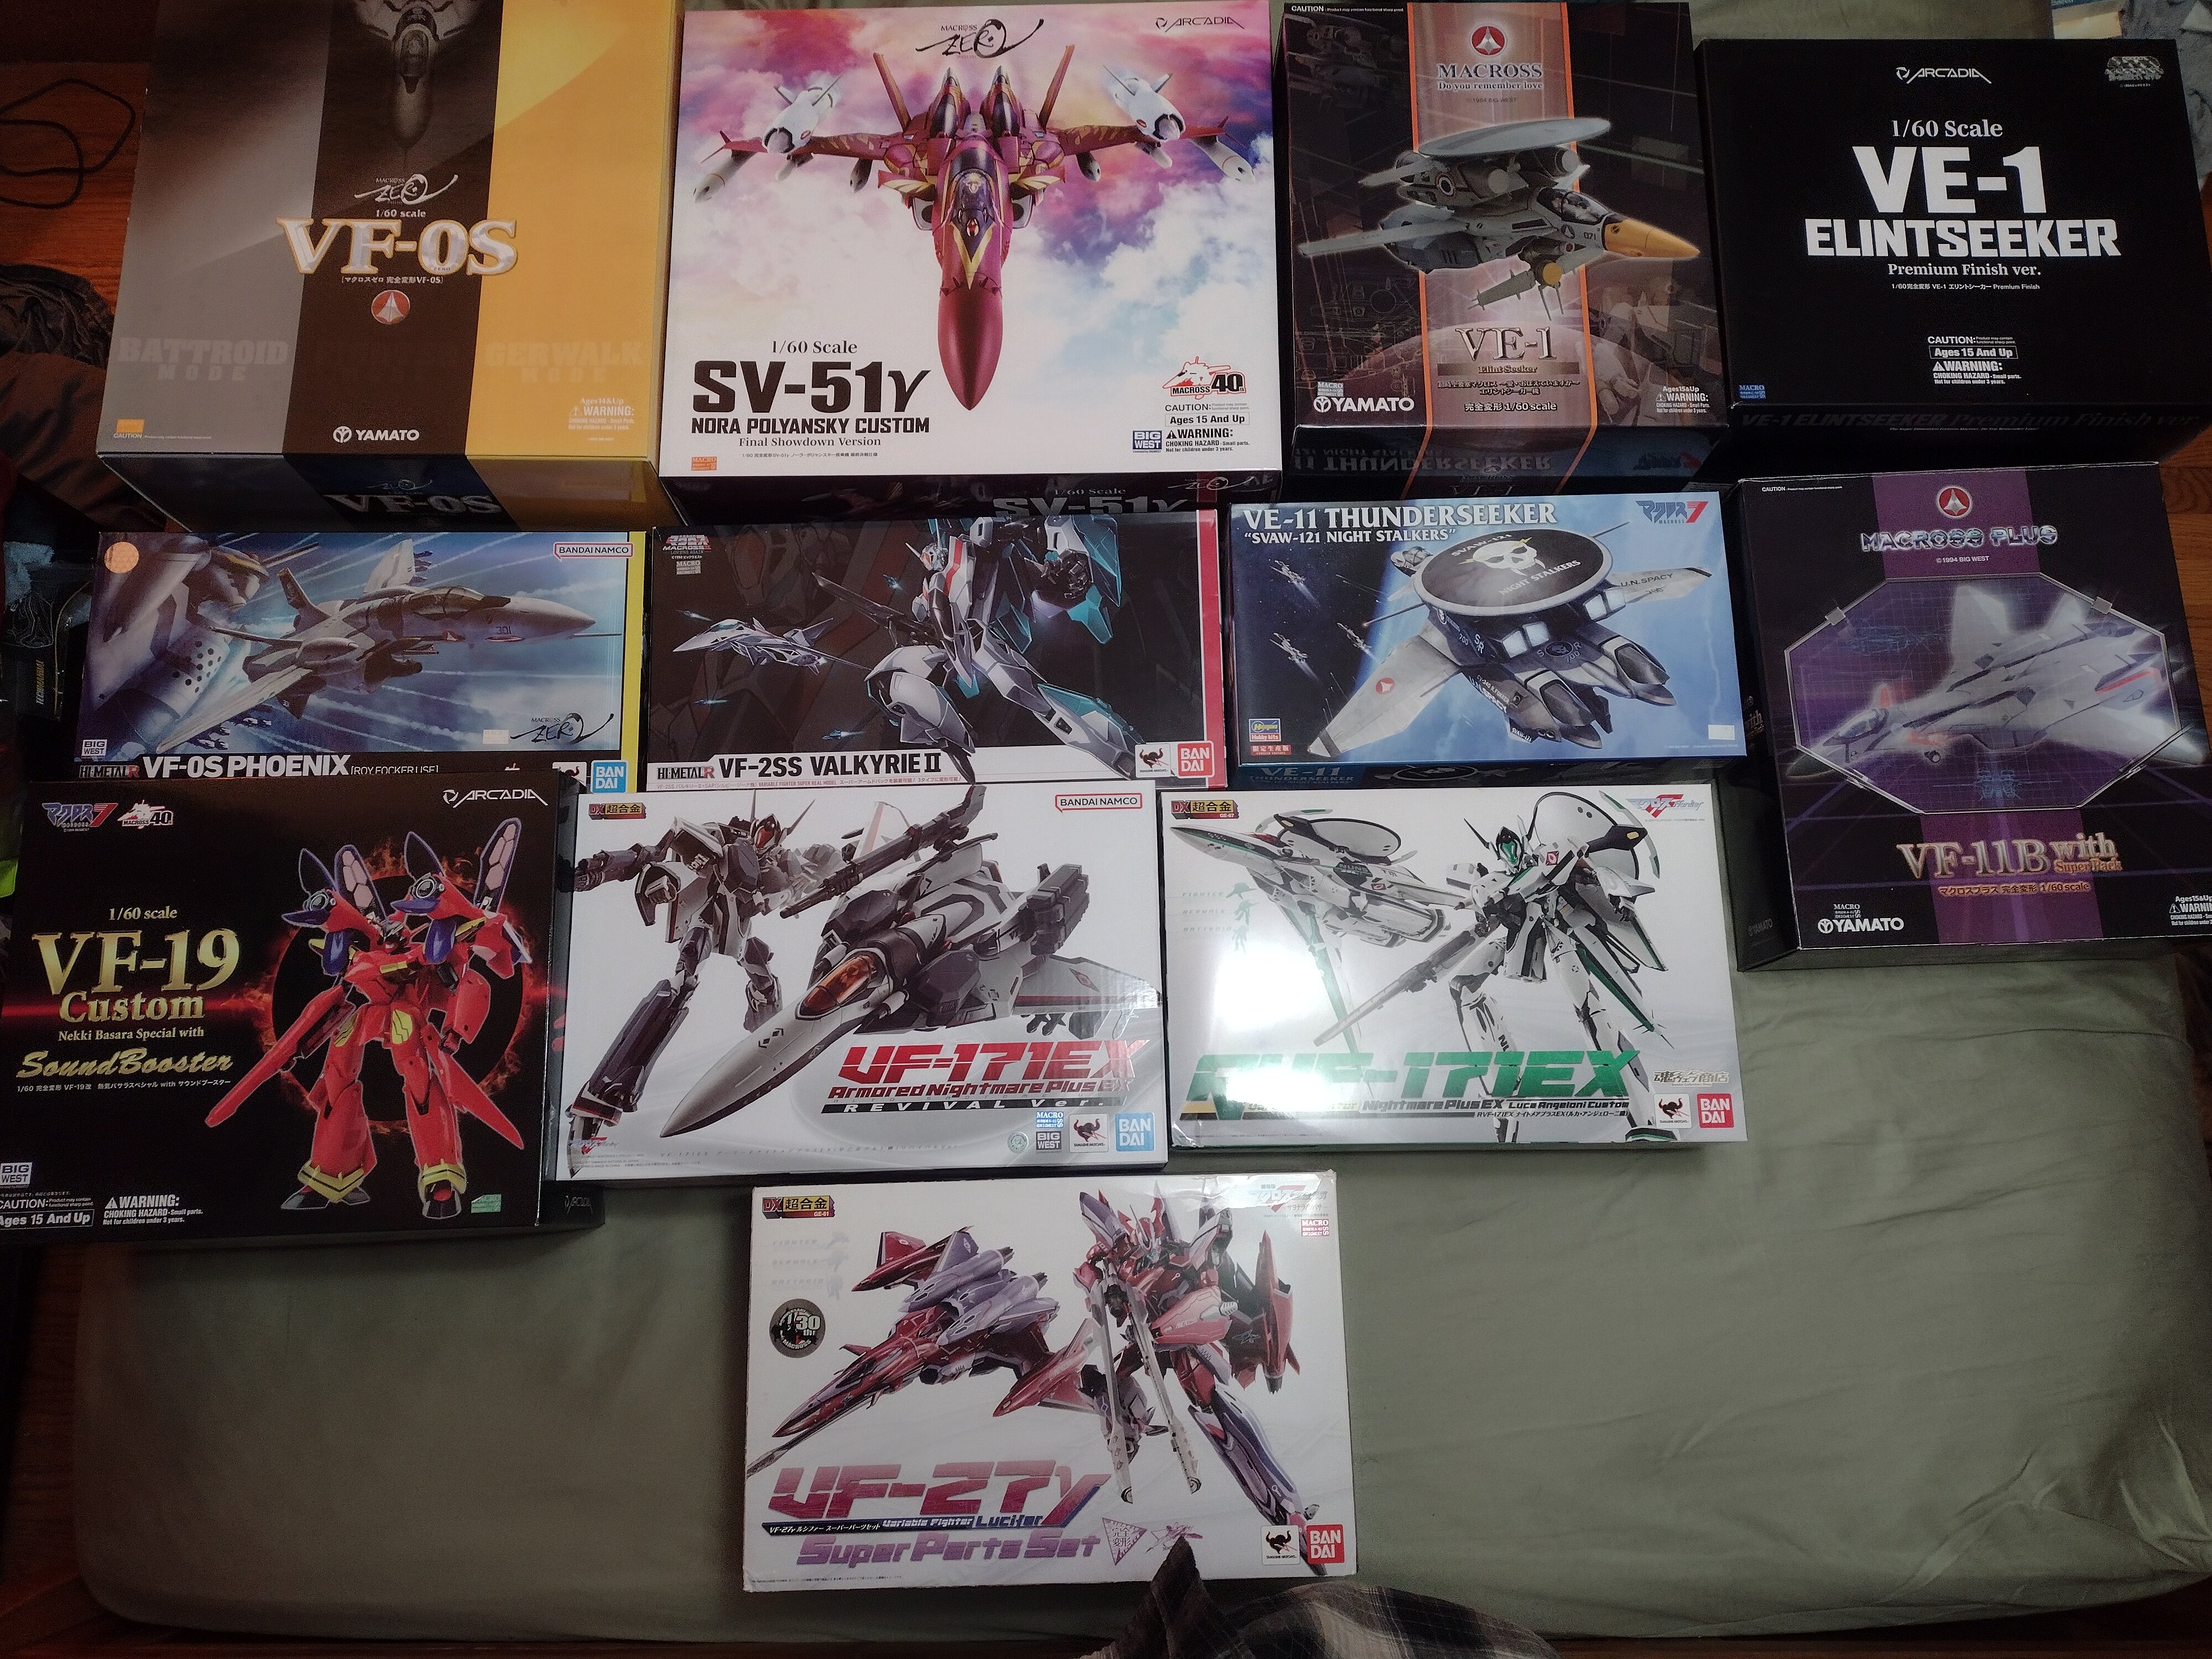
I have been almost completely holding back from purchasing for the past few months despite it being an excellent time to make purchases from Japan and seeing my personal grails come and go. But I've recently had some financial ease... did I overcompensate? These complete my recon collection as well as filling out all the missing numbers in 1/60 wherever possible. I'll have to settle for HMR VF-2SS because Evolution got bad reviews. Now to figure out where to put all these.
- 508 replies
-
- 4
-
-
- toys
- just purchased
- (and 14 more)
-
The 'Hey look at this really cool model build I saw' post
Pontus replied to Shawn's topic in Model kits
+1 INDEED! I first saw this on my phone, and it seriously took me a hot minute to realize it wasn't a painting. I thought, "Wow, they did a good job of getting the shadow on those clouds right, but... there's shadow on the sky too... wait... OH! NOICE!" -
What Millia fig? I don't see a PO for that one on their website. Or is someone else dipping into figs and I missed it?
-
Considering how low the bar is set by Toynami (not even remotely acceptable), and not everyone wants to paint a still model statue, those are pretty much the only real options, so I don't mind the minor issues with their figures at all. Are they perfect? No, but good enough. That's about it, but at least someone is making an effort. I hope they release the pilot figure tho, and PLEASE bring on the other characters especially Kakizaki, Global, Claudia, and the bridge bunnies in that order. I'll buy every one they release.
-
Yup, you're right, my bad. And $100 for shipping 2 large toys doesn't seem that bad.
-
Thanks for that! ...Aaaaand, nope. I paid $70 for the first one, but now they want $140 for "two for the price of a single product" which is supposedly now double the price. (edit, $70 was the deposit, it's actually $133) Still seemed like a good deal until I went to check out and the express shipping was $100 - despite it being only $35 for my original preorder - or standard shipping which they say takes 4mo. If they ever actually release the darn thing and have some extras on sale later, I'll consider it, but otherwise, they can keep their 💩!
-
If this is true, they need to advertise that and commit because that would certainly at least triple their sales. Personally, I would preorder/buy 3 more right now if this was official if it meant I could have a light, heavy, and hopefully a scout version (pleeeeeease). As it is, I feel like I'll be lucky if they ever actually release the darn thing, so I'm not holding my breath.
-
That's exactly why I was looking forward to this one and avoided buying HMR versions. They just didn't make sense to me, and there's scenes in the show where they indeed seem much bigger than valks. I was going to use 1:72 regult kits to match my other HMR, but once this was announced, I was excited to not have to do another model I don't have time for. And I haven't been collecting any of Kitz valks, so I don't have to find any... did Yamato or anyone ever even make 1:60 Regults?
-
I can't find a meme or a proper gif to make one, but in the immortal words of Tuco Salamanca, "Talk... is talk. But owing me <toys>? That's bad."
-
Your most recent Macross or toy purchase! General thread.
Pontus replied to Gakken85's topic in Hall Of The Super Topics
Looks like I've got some binge watching to do! Not all of these are new purchases, but it's nice to have everything together at last. Still looking forward to the legit releases coming out this year, but this is what I could get with english subs for now.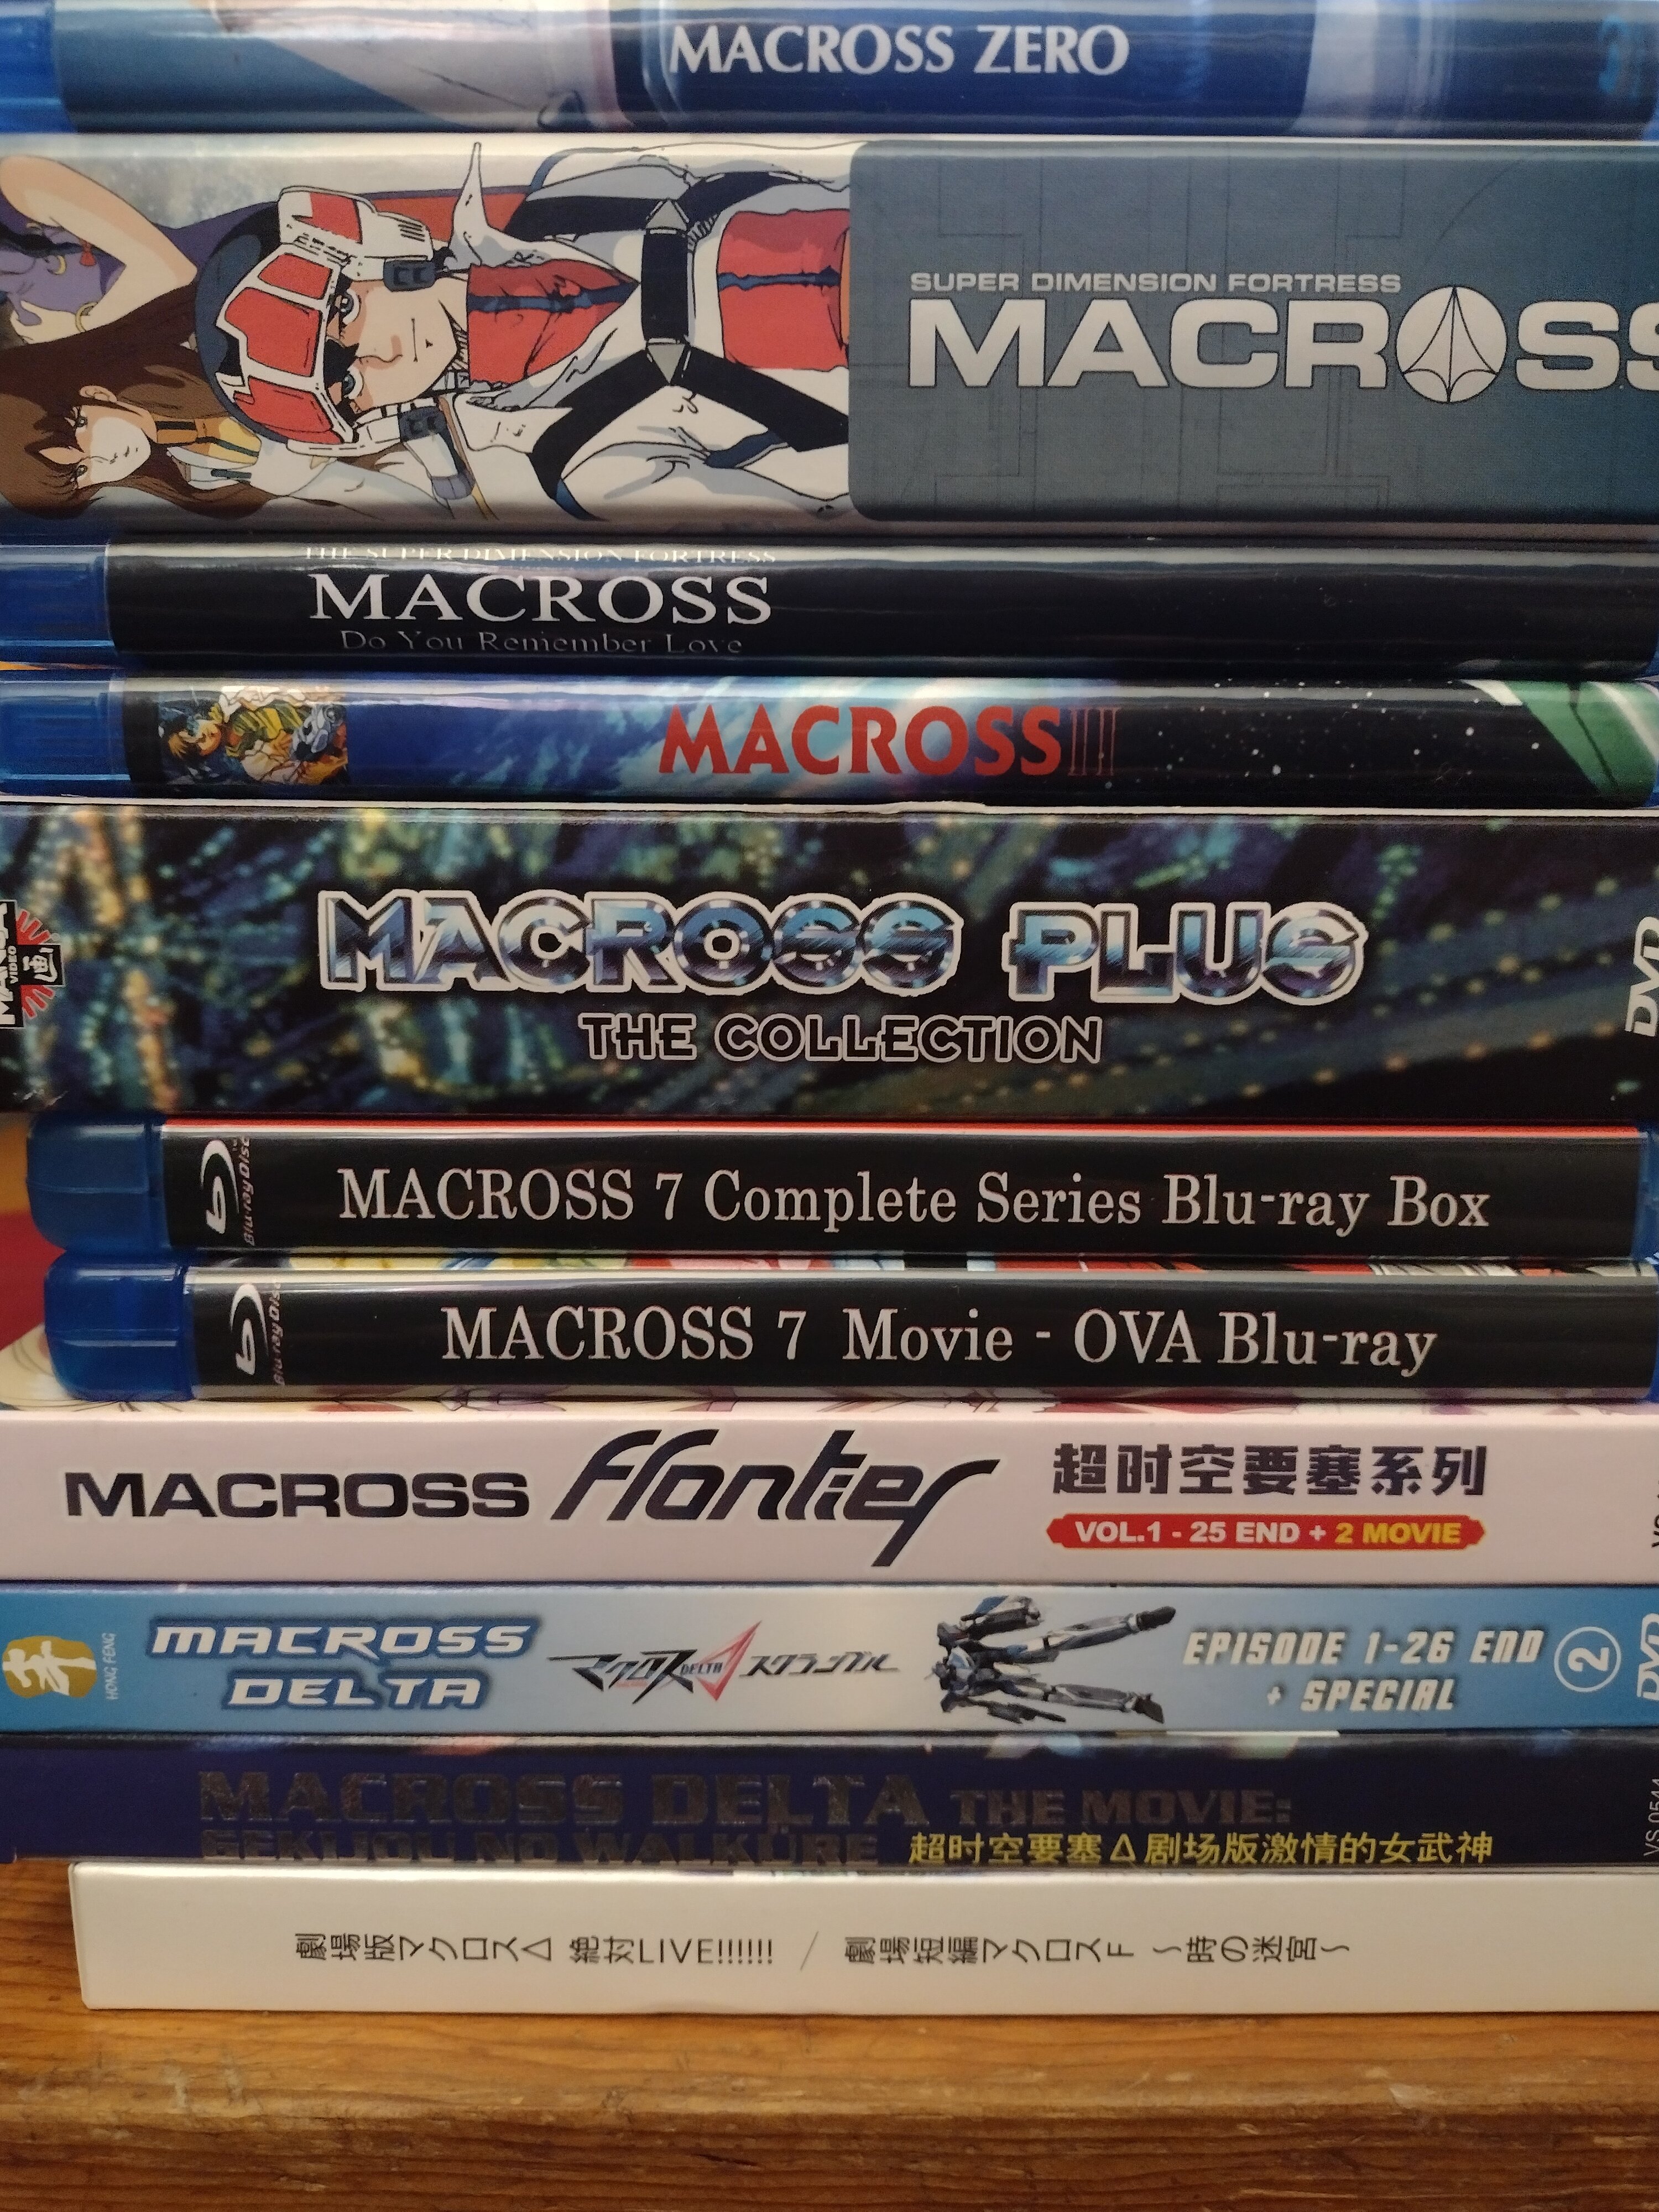
-
I'm surprised it didn't come up in the Amazon listing for all the other DX WWM releases along with the YF-19 (only $217!) because they're all on the same listing. Maybe it will soon, so keep an eye out there too. I just pre-ordered the 171 there for $275 which is just shy of my maximum price for valks. I thought seriously about pre-ordering a second 19 to go with a DX 21, but I'm not paying $350 for a 21 when I have a perfectly good Yamato. It's funny though how prices change. Before Bandai first showed off the prototype 21, prices were insane for the Yamato. Afterwards, they came down to the $200 range for a bit. Now that the DX is getting an actual release and preorders, prices on the old Yamatos are back to being sky high again. No sense.
-
Your most recent Macross or toy purchase! General thread.
Pontus replied to Gakken85's topic in Hall Of The Super Topics
Oh duh. You said Hayate not Hikaru. Doh, sorry, I was distracted by all the beautiful shots of VF-1 GBP above. I actually just purchased the movie with english subs from Amazon here if you wanna buy it.