MechTech
-
Posts
4688 -
Joined
-
Last visited
Content Type
Profiles
Forums
Events
Gallery
Everything posted by MechTech
-
@pengbuzz Looking awesome! I like the iridescent look! A pearl coating would make it that much better. Yep, he definitely needs a Vicky Vale to go with it😄 Got a little work done this weekend! Once again, normally people clean their tires, I'm gluing sand into mine! The one that looks dusty I tested the Tamiya weathering shades on. I like that stuff! It will make the dusty look on the tires realistic! Then I got the smoke grenades painted and glued in. The fun part was drilling out the TINY holes for the antennas and then gluing/painting the steel music wire antennas to go in them. Still have LOTS of shading and coloring to do. That's it for this week. Thanks for checking in! - MT
-
The pod model looks great! Overall, if the fit and details are better than the original from decades ago - it's a vast improvement! The articulation looks great too! - MT
-
Some cardboard, tape and the Joker's goin' down! That is some talent right there! I think all your Batmobile is missing is a couple of old headphone speakers for a sound system🤣 - MT
-
I LOVE the LCD displays! Nice touch! - MT
-
@pengbuzz Your Batmobile is looking great! Having an opening canopy is cool too! @Thom Your Tomcat is looking good! Weird looking panels in some places, but at least the wing slips over the swivel. Nice for painting and detailing later. - MT
-
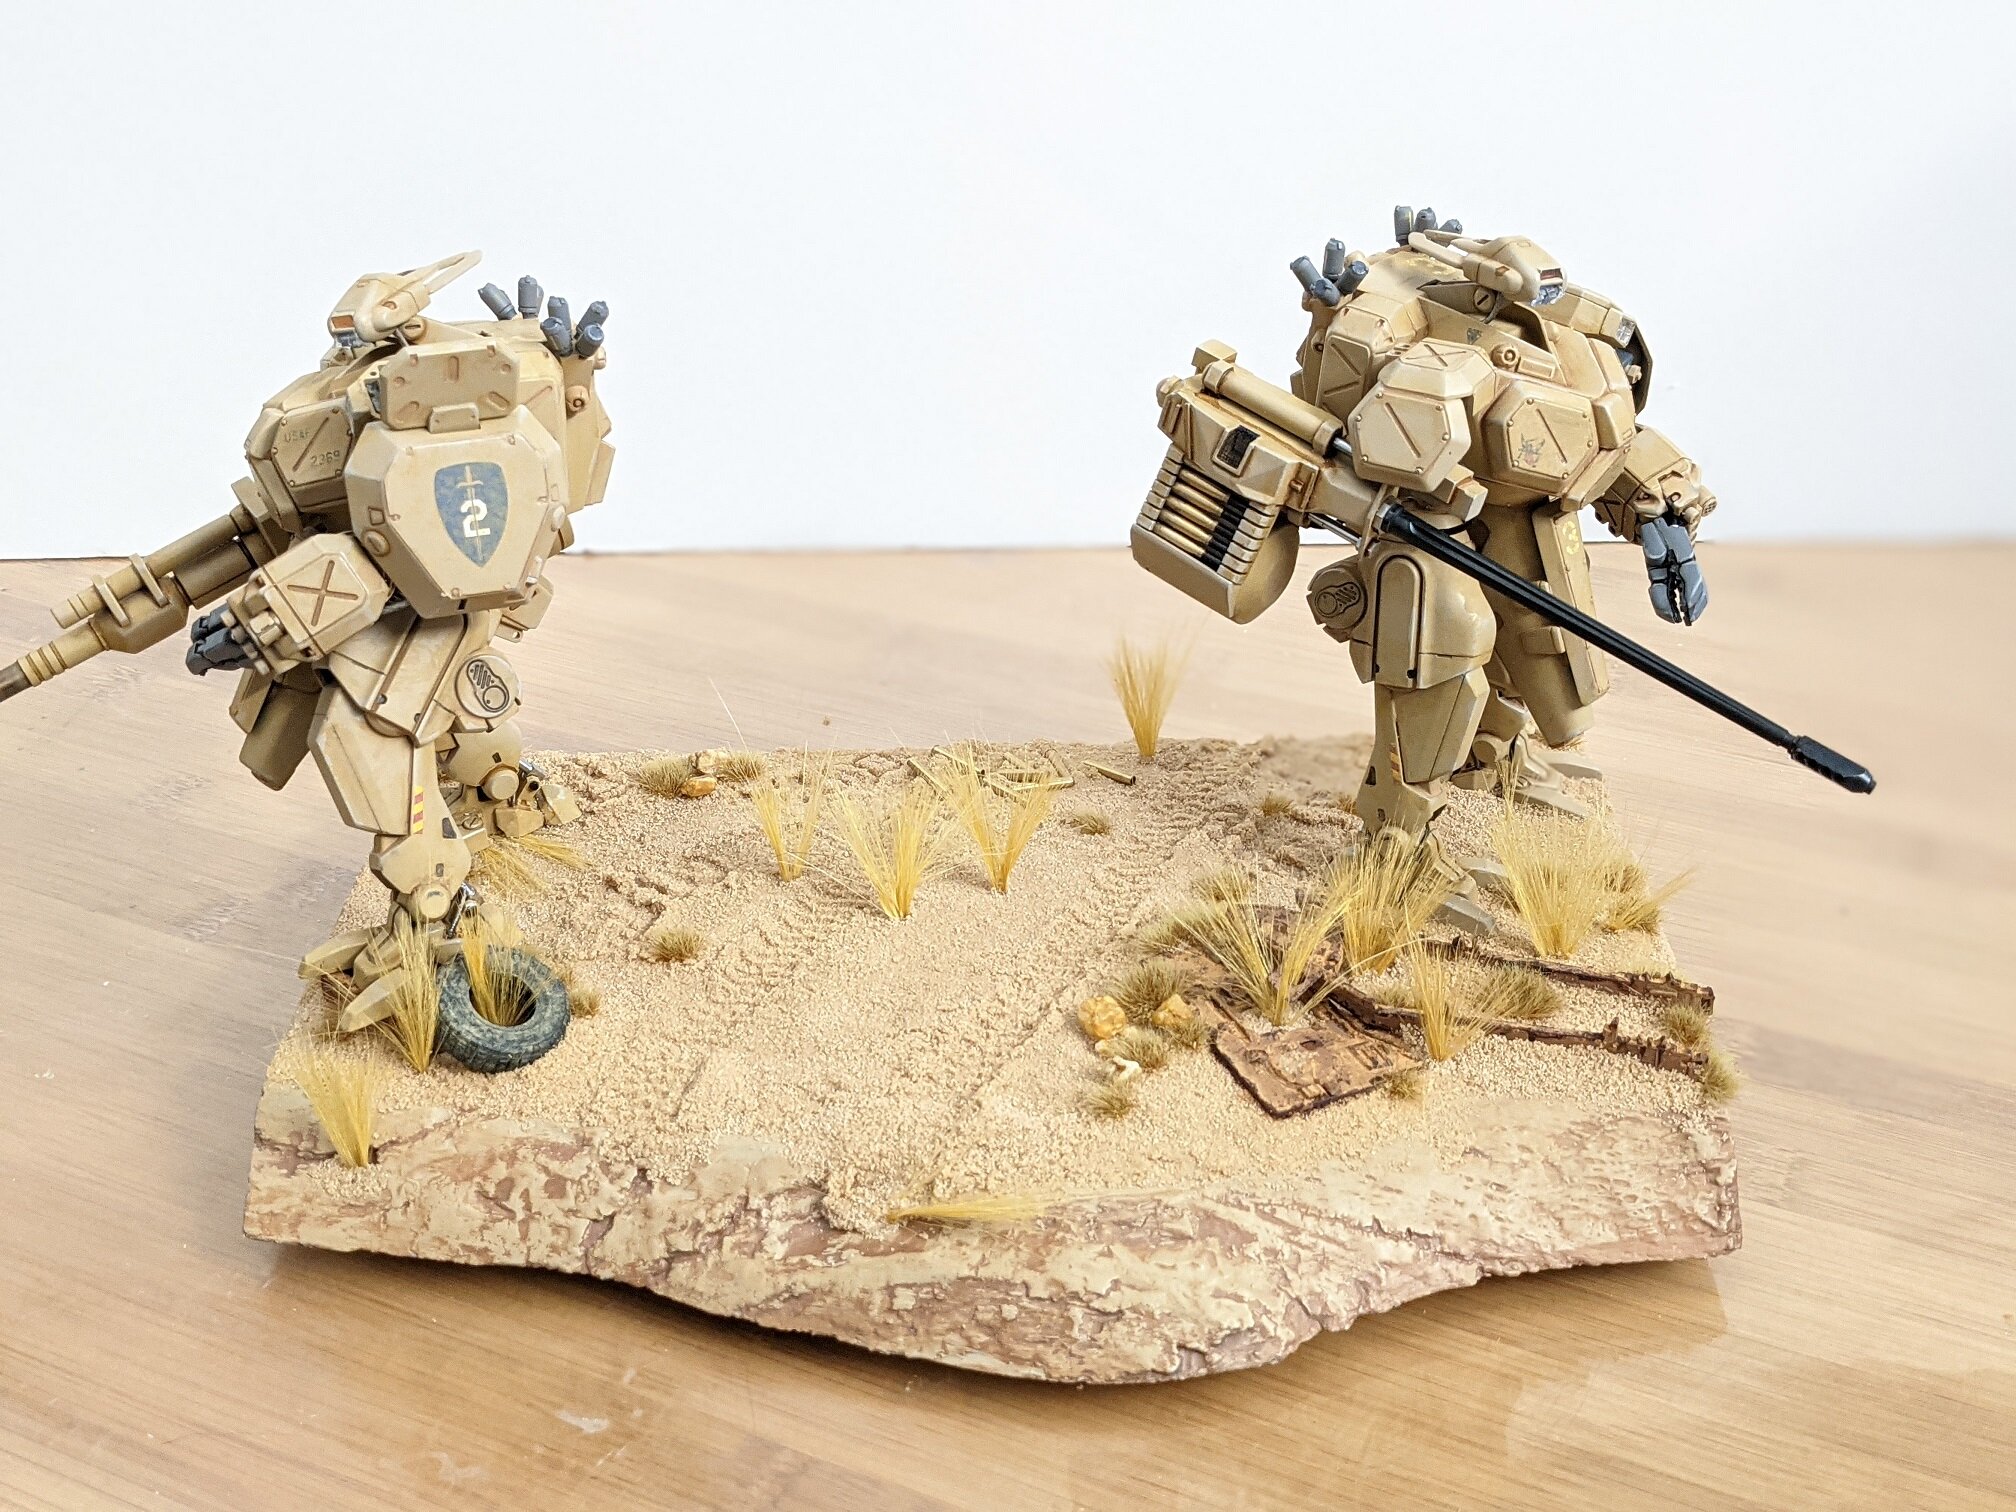
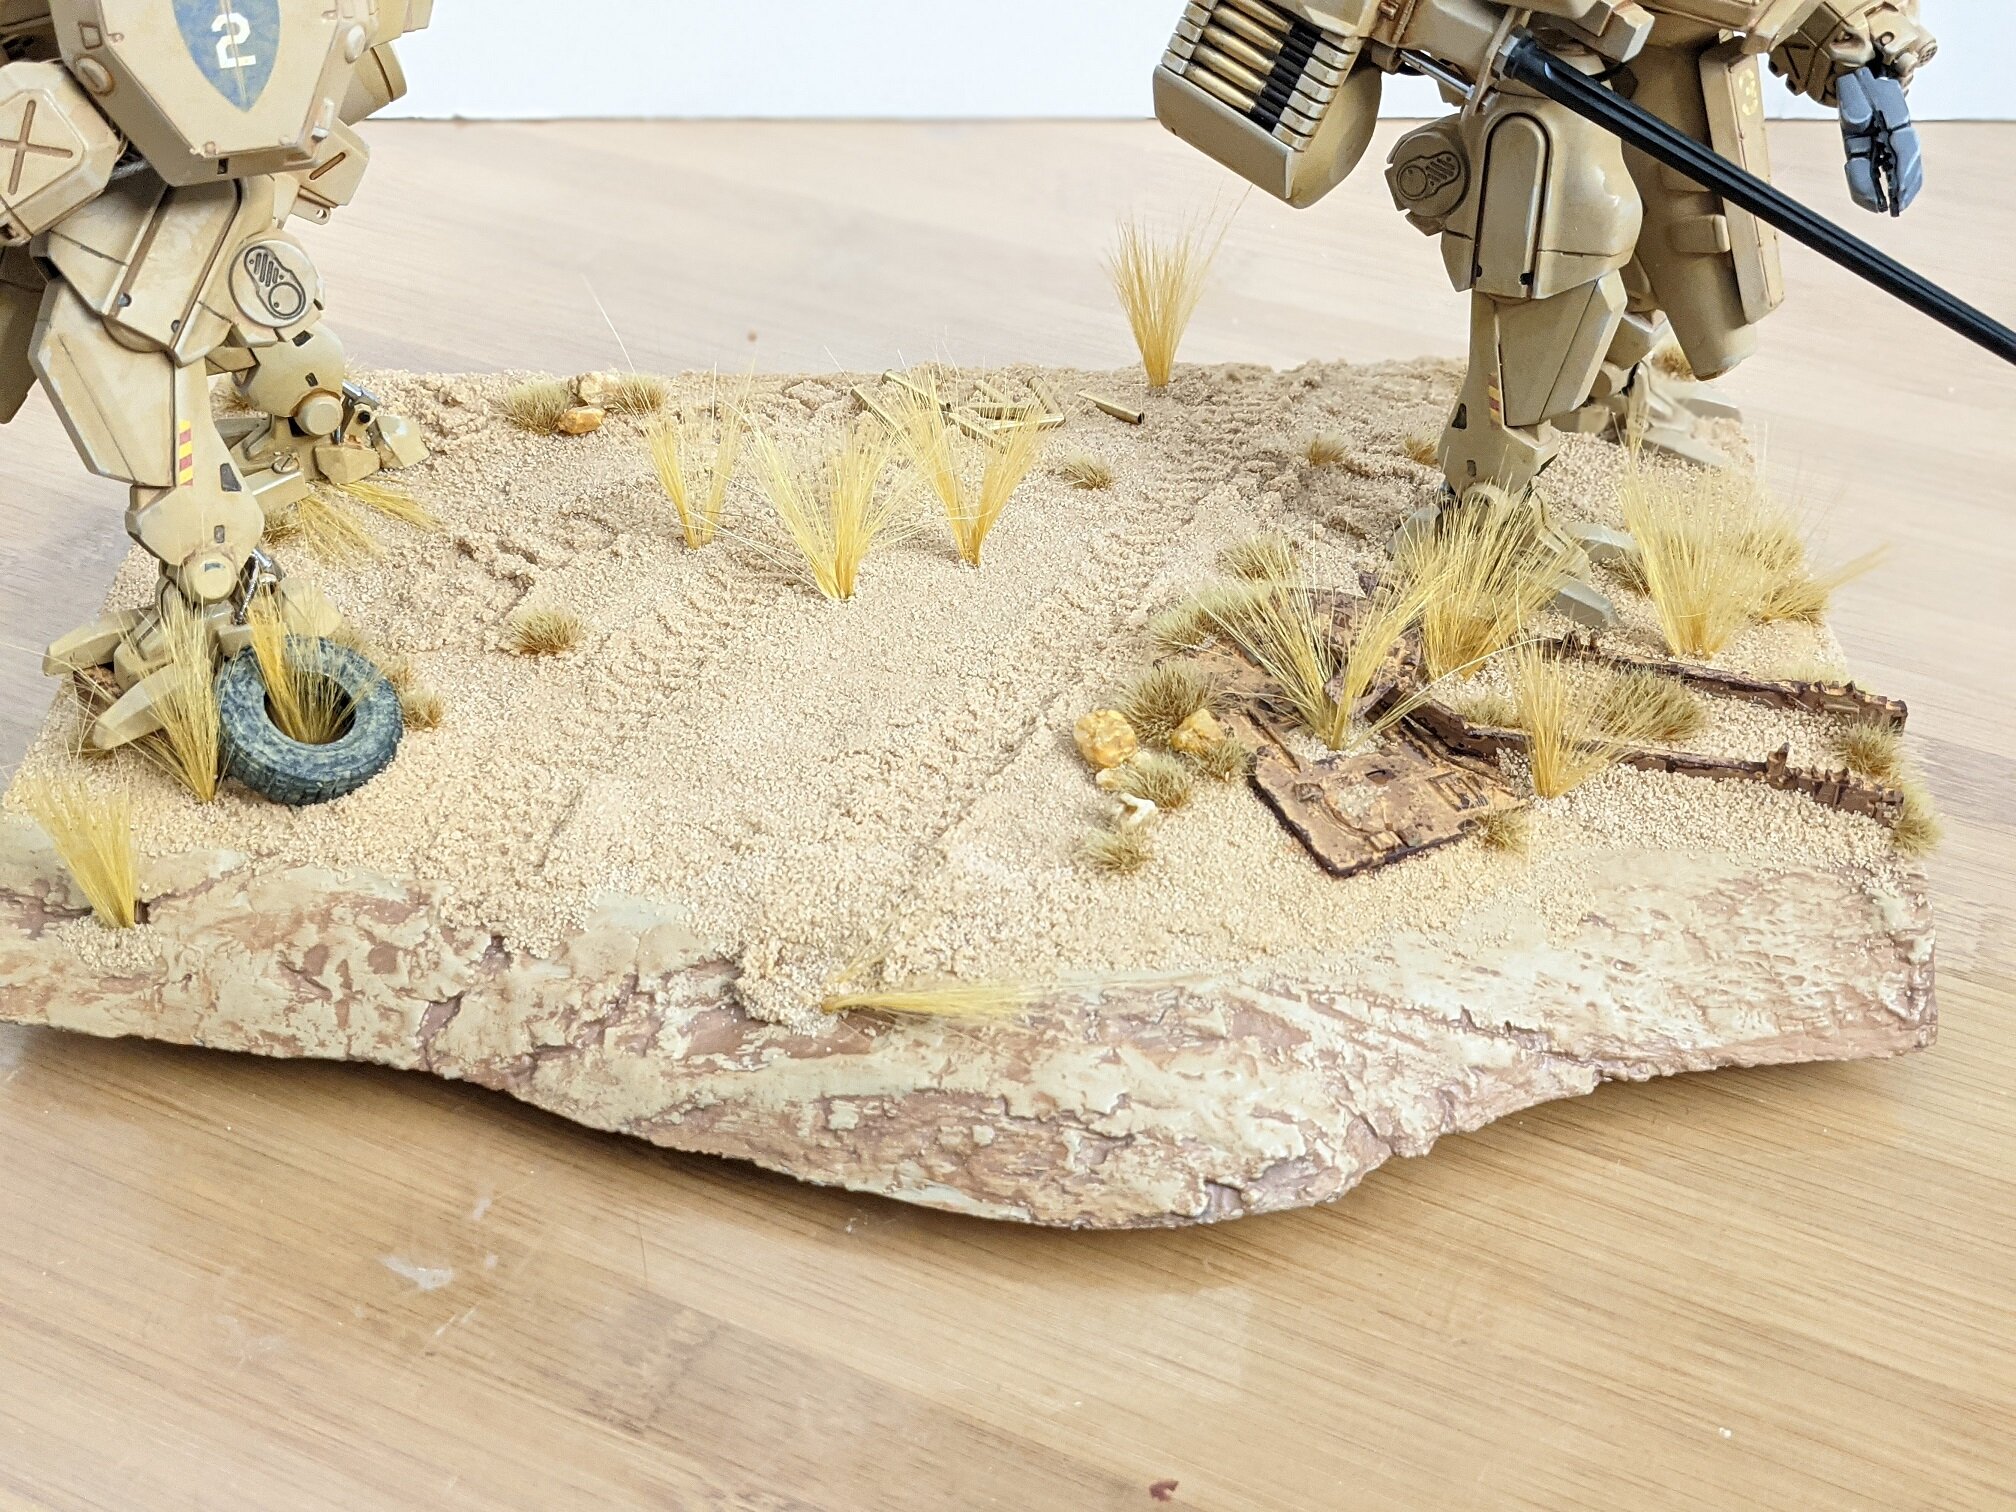
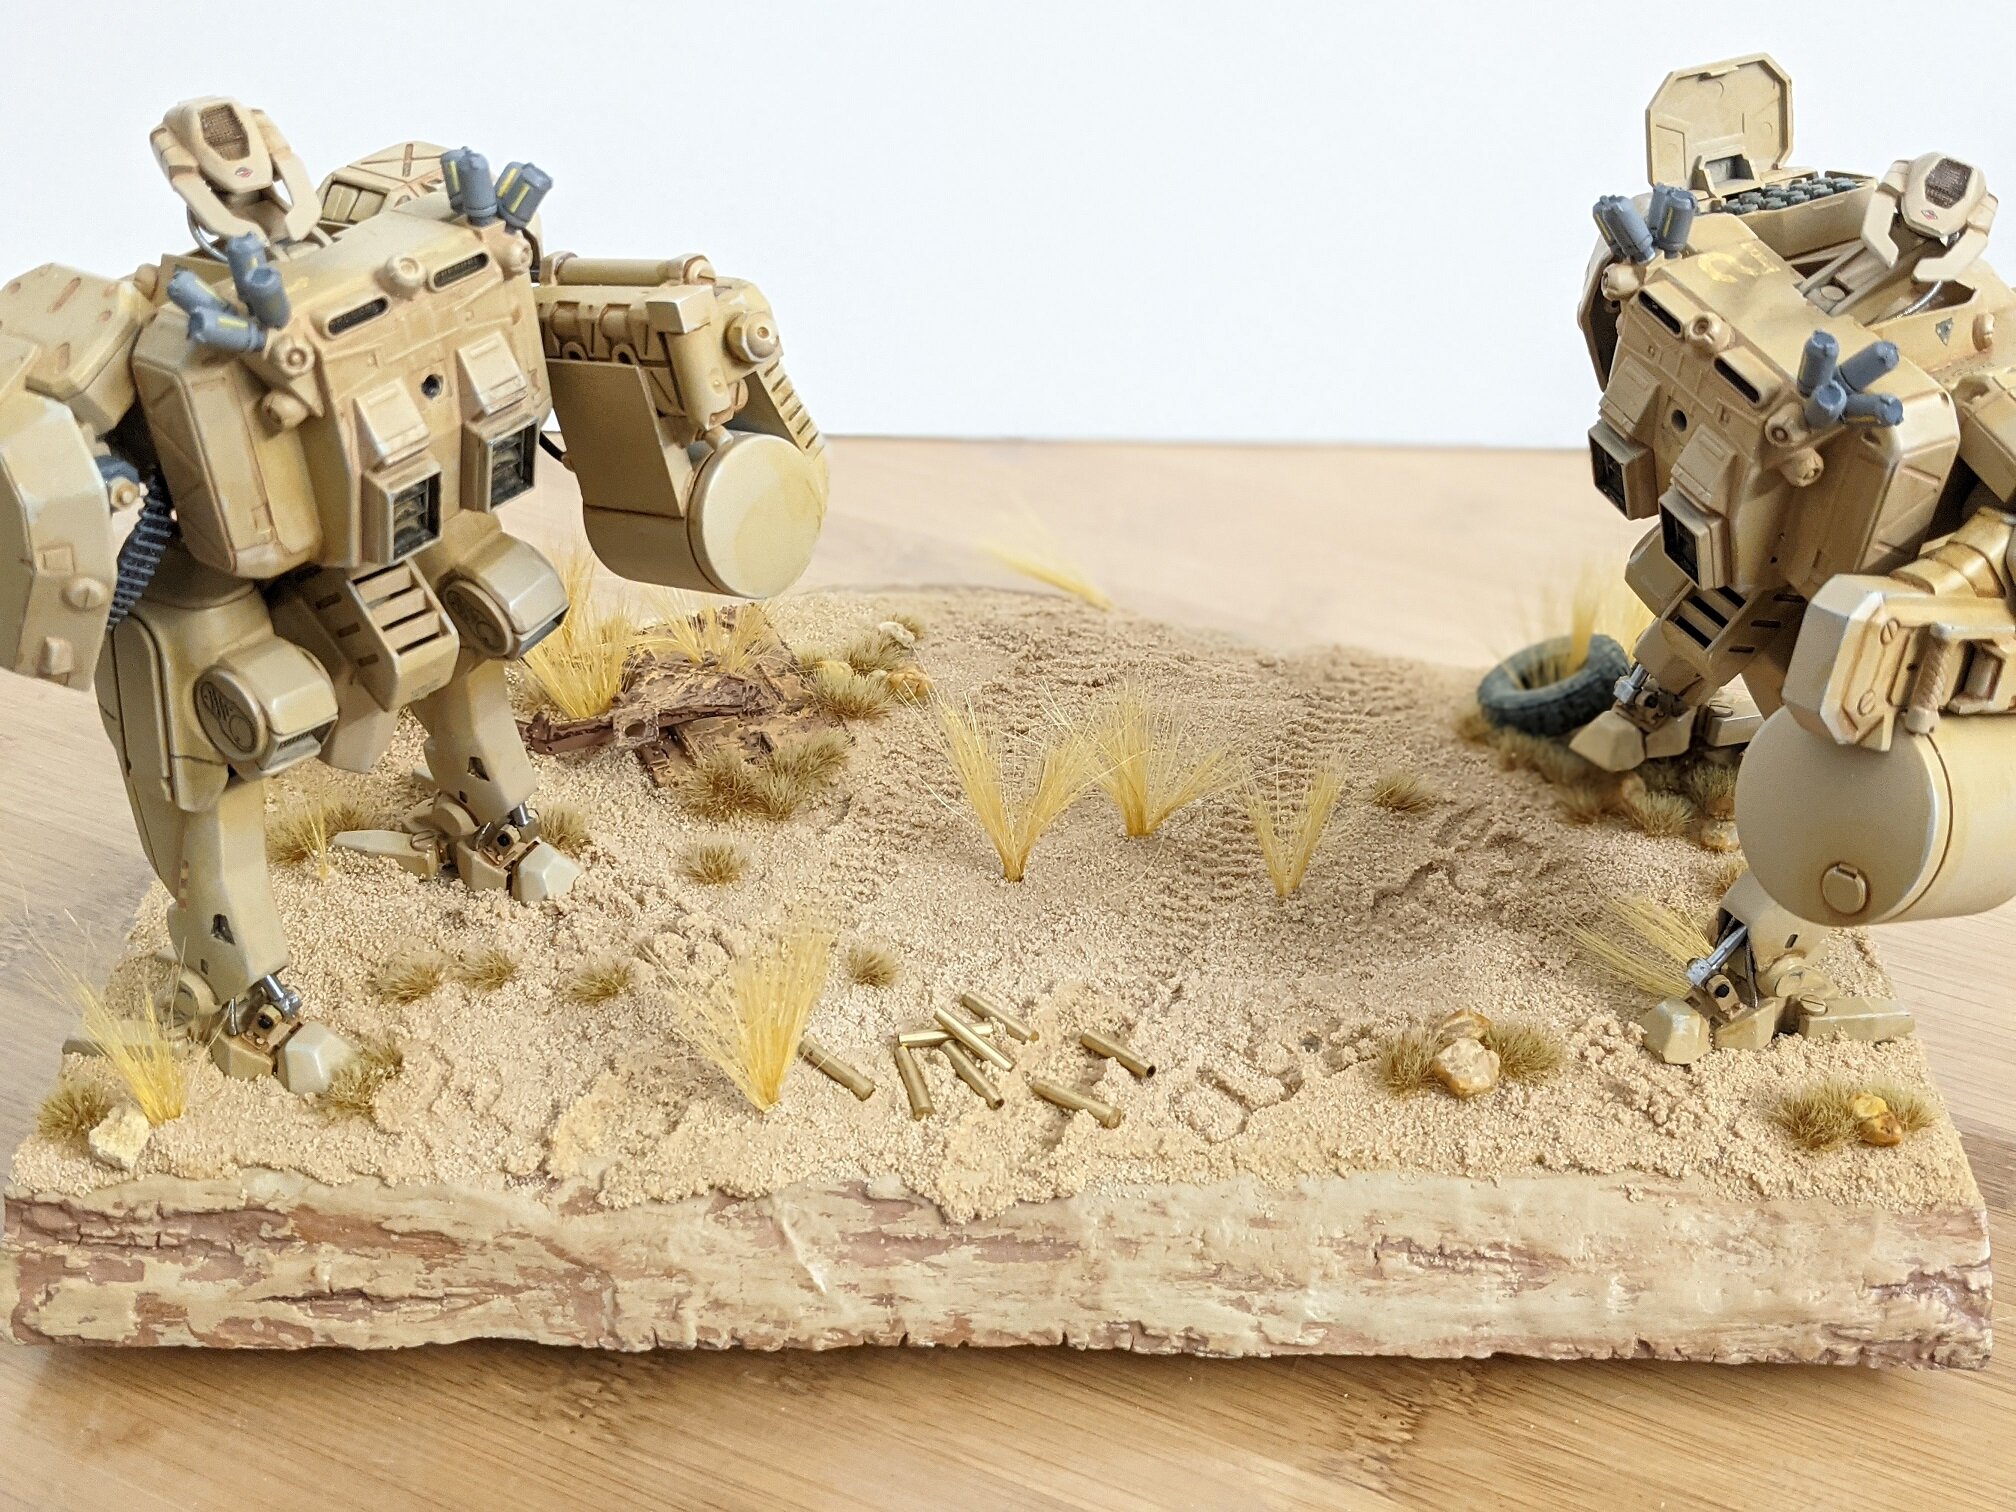
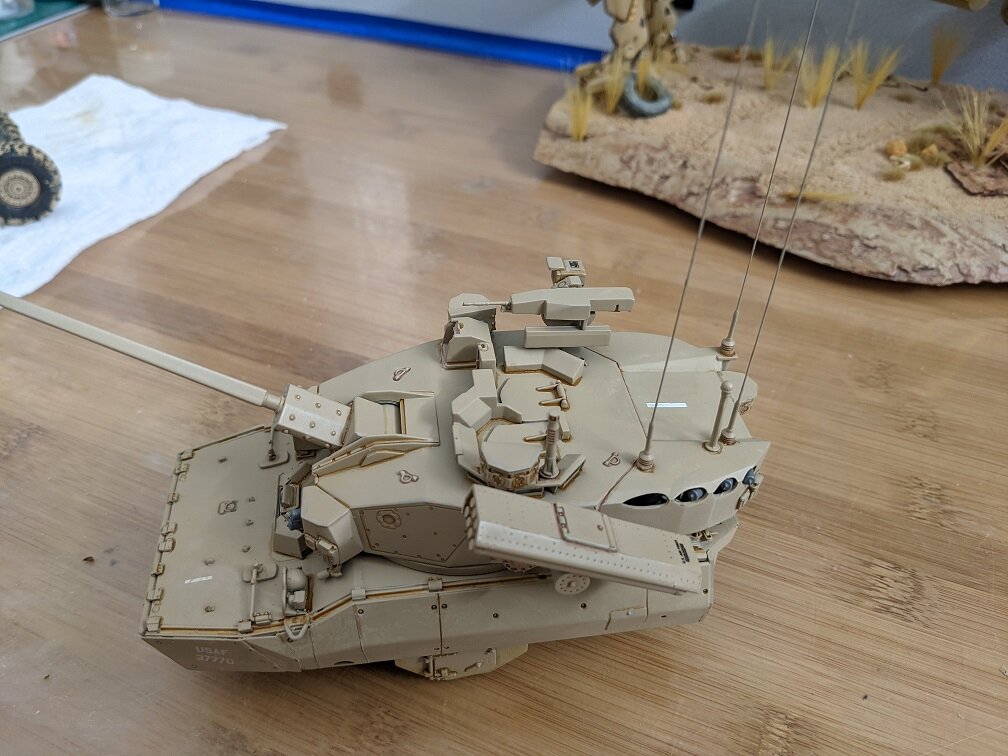
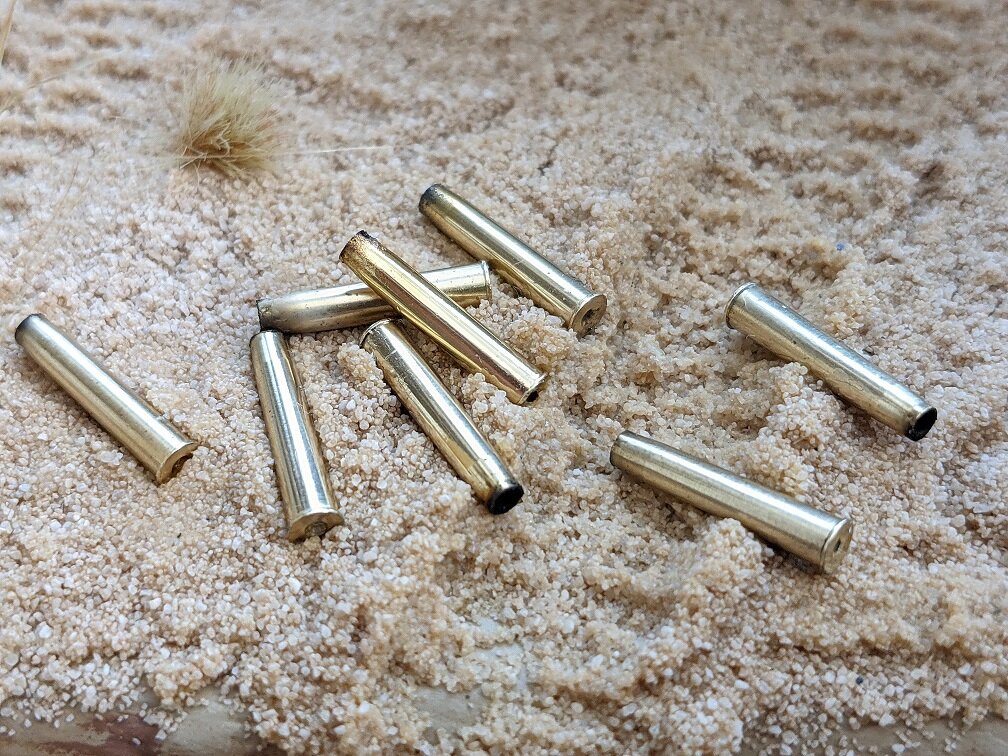
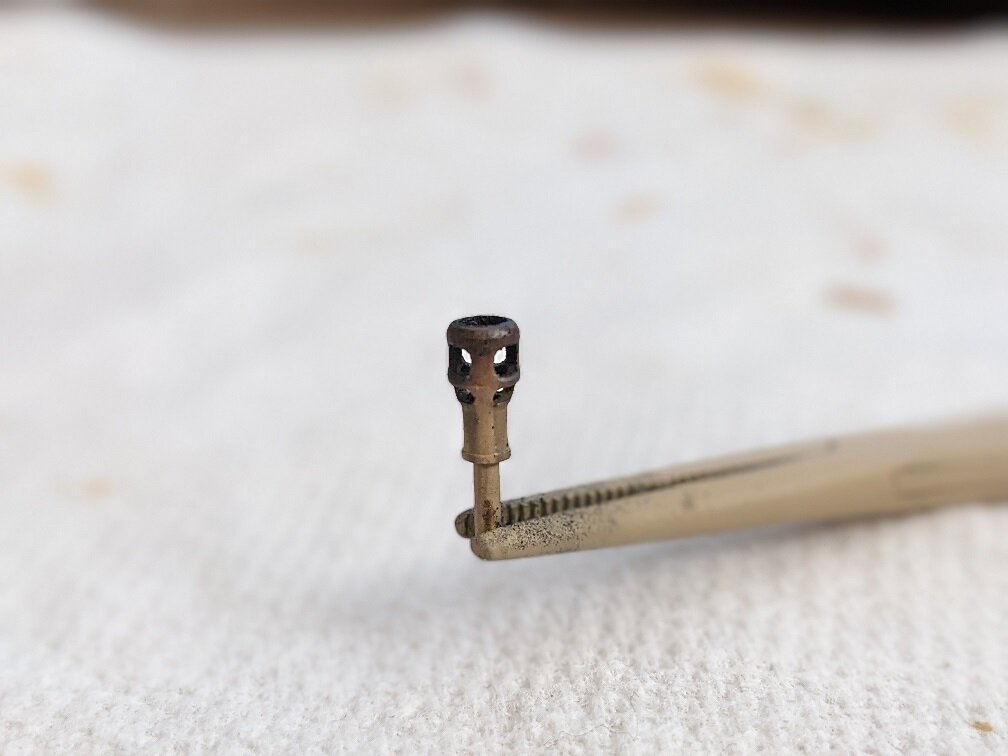
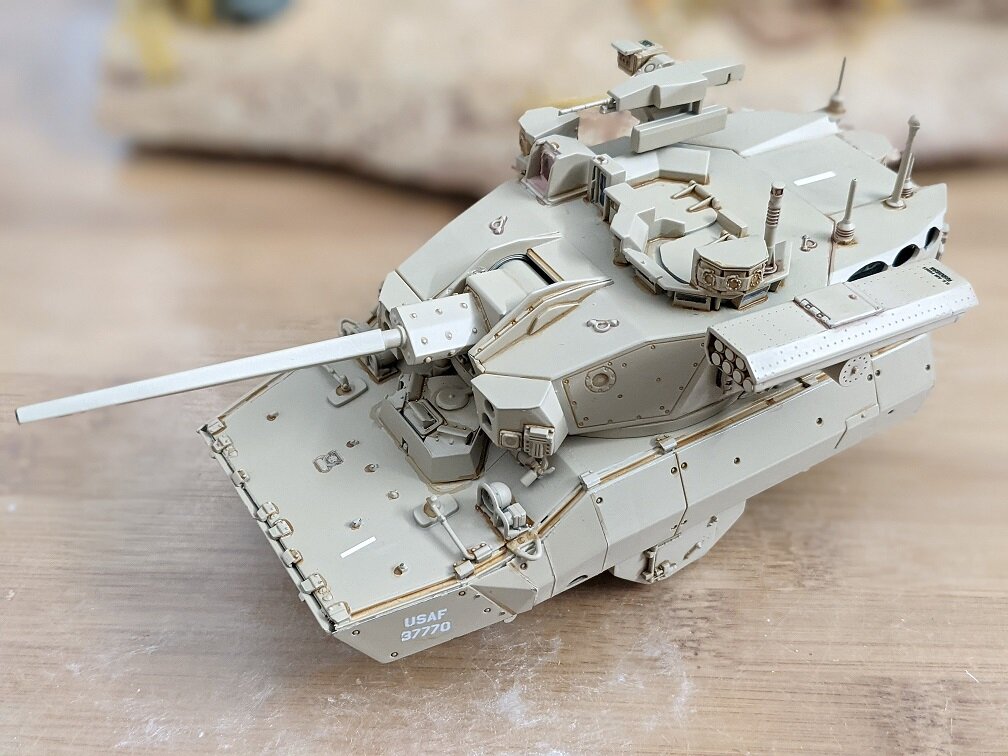
@GMK Your Boxer is looking great! The details will make it look more authentic too! I got some work done this weekend on the diorama and armored car. The first step was to make the shell casings look more authentic. I pulled them up one at a time as I processed them to ensure they all went back as I originally arranged them. 1. First step, clean therm up and then polish them. 2. Second step was to clean up the residue with isopropyl. 3. Third step was to lacquer them with clear nail polish. 4. I used some leftover powder from a tiny Estes rocket engine (black powder) and put just a bit in the shell casing mouth and ignited it. Instant powder burns on the casings! 5. CAREFULLY glue them all back in one at a time. Yes, they look shiny, but will still become a little dull over time. I did the same thing with the muzzle break. I filled it full of powder and ignited it. Combined with the char from a lighter, it too now has powder burns on it. then I sealed it in a clear matt coating. The decals are now drying on the tank. Not many at all. I thought drilling-out three of the rockets in the robot's shoulders would look more realistic, so I did that too. I need to touch up the paint now too. That's it for this week. I'm trying to get this done before the new year. My two-month project is way over my estimated time - just like a real military project in development! Thanks for checking in! - MT

-
@pengbuzz Your Bat-mobile is looking good! The cockpit looks just right. You need room for Vicki Vale too! He kinda looks like he's sayin', "C'mon babe. How's about a ride"? @derex3592 Thanks; that looks like a cool kit! They made it a light color though!? Unusual for a Blackbird kit. Everything about the Blackbird was cool. They had to secretly buy titanium from the only people who massed produced it - Russia - who it was built to spy on. Then they had to learn new welding techniques because some welds held, others didn't and environmentally controlled welding was invented. The engines were special. The intakes were special (and won awards). It was a crazy, cool design! - MT
-
@pengbuzz Looking good! You have a good frame to build on. @derex3592 I remembered you talking about it months back, and then saw it go up for sale, but I forgot to say something. That old kit sucked! Yes, I had it. It went together like oil and water! I'm glad you got the new kit. I have to do a Knight Rider for my wife one of these days😅 - MT
-
@pengbuzz Cool project! The Express Mail box will make it go faster😄 - MT
-
Thanks guys, I appreciate it! @derex3592 She's looking good! Especially the hand-made benches! @pengbuzz That's a cool backstory. Some of the guys at our museum worked on that program up to modifying what would become the first "D" model. @Thom Whahahahaha! 🤣 - MT
-
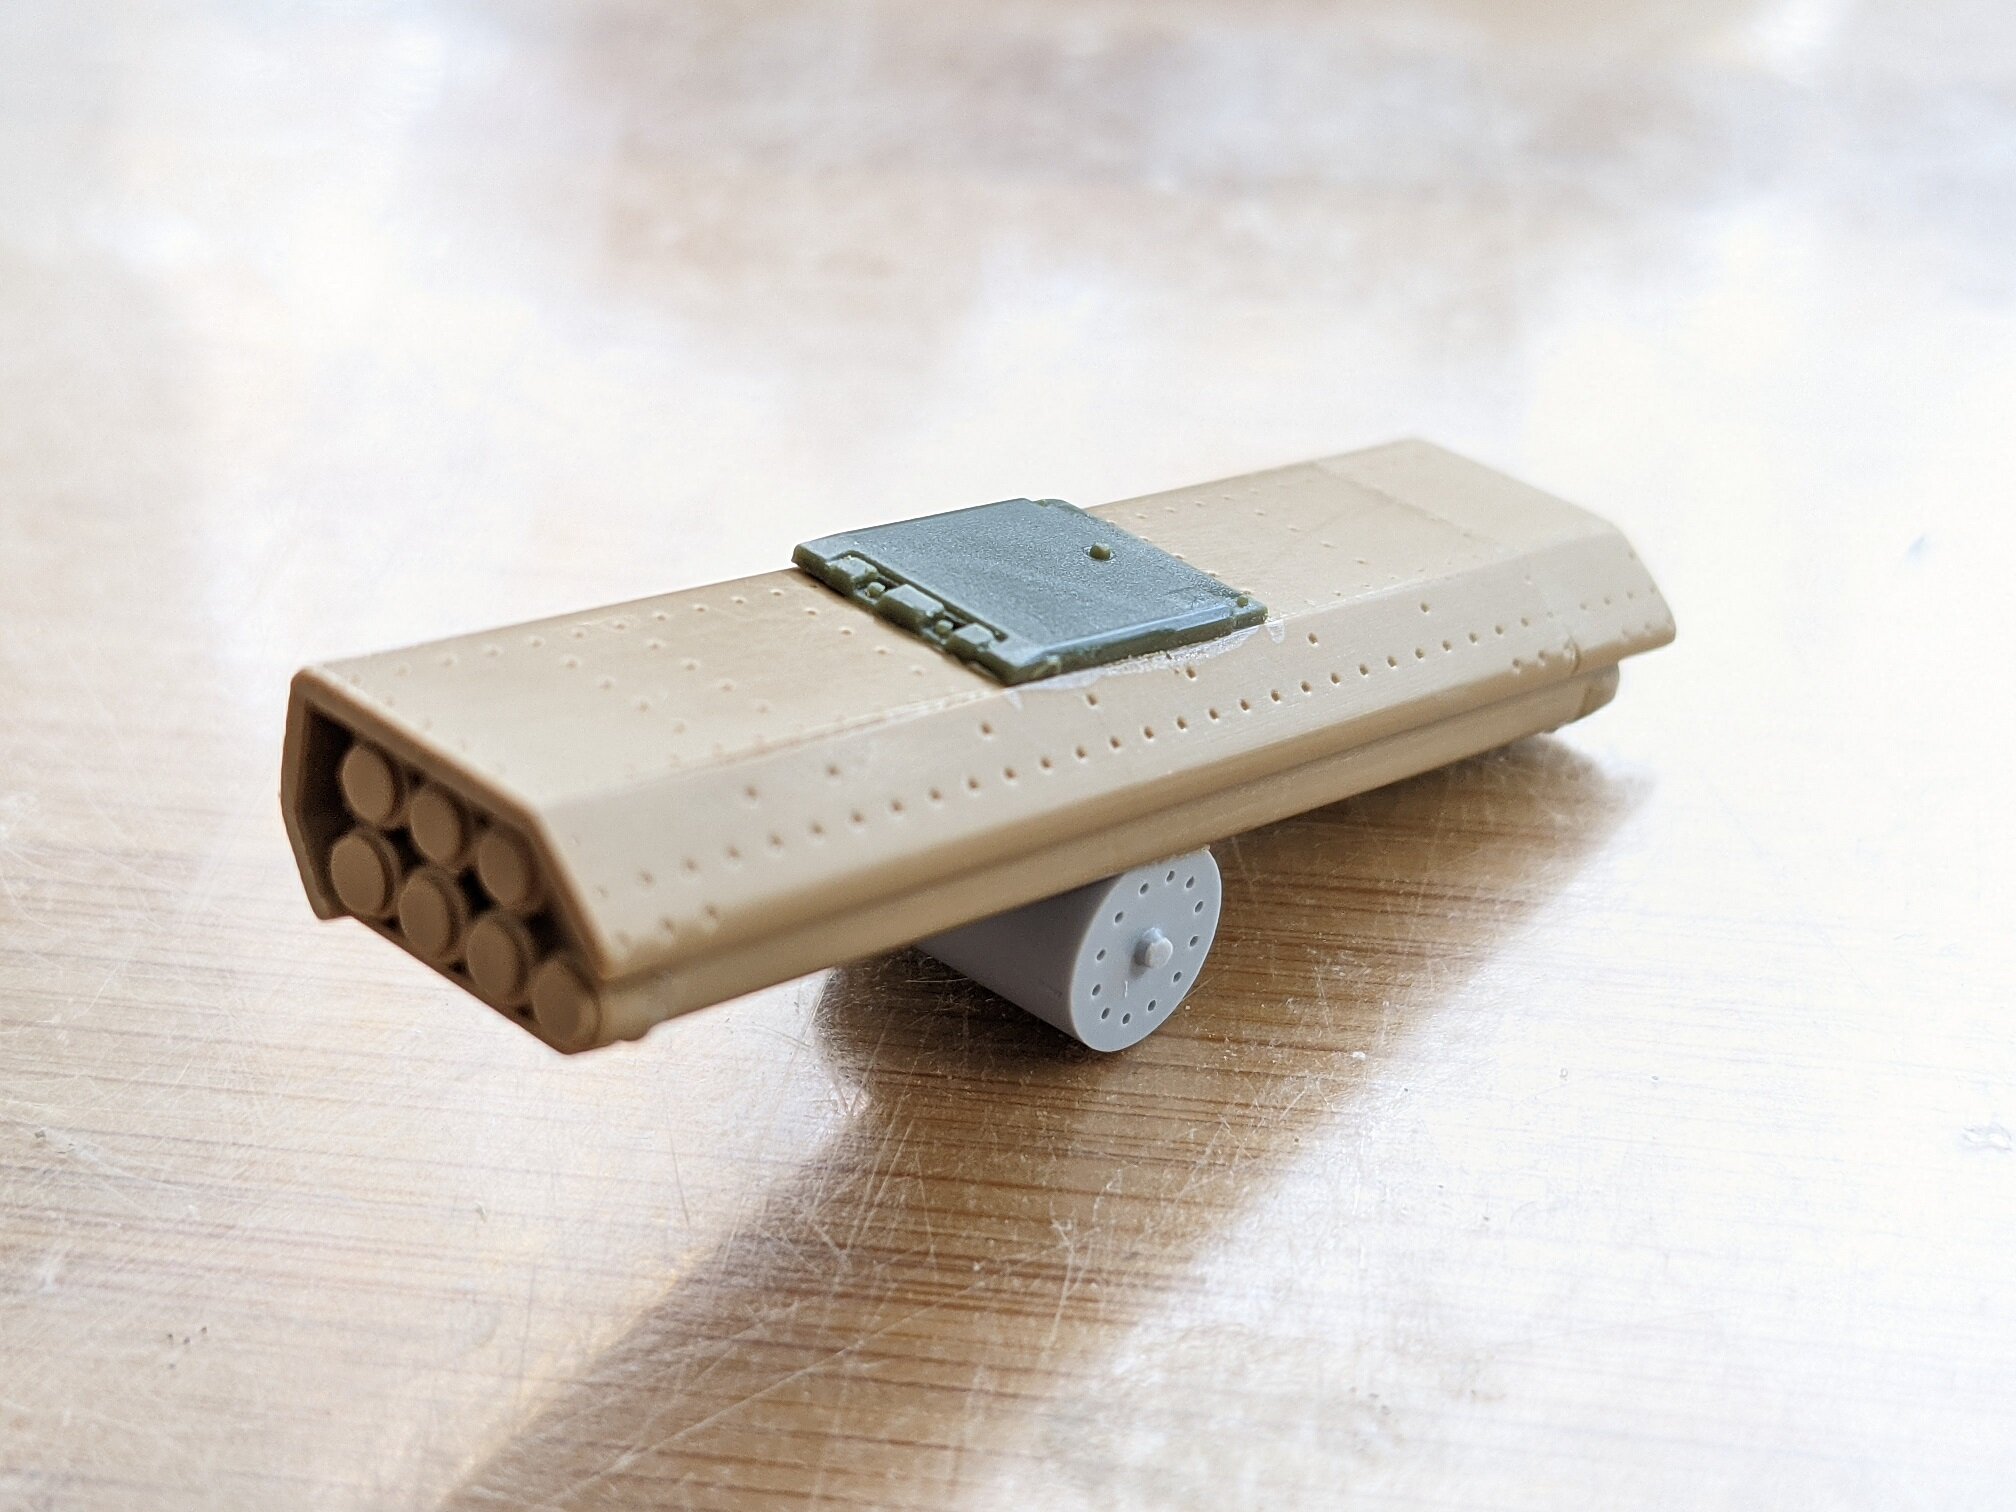
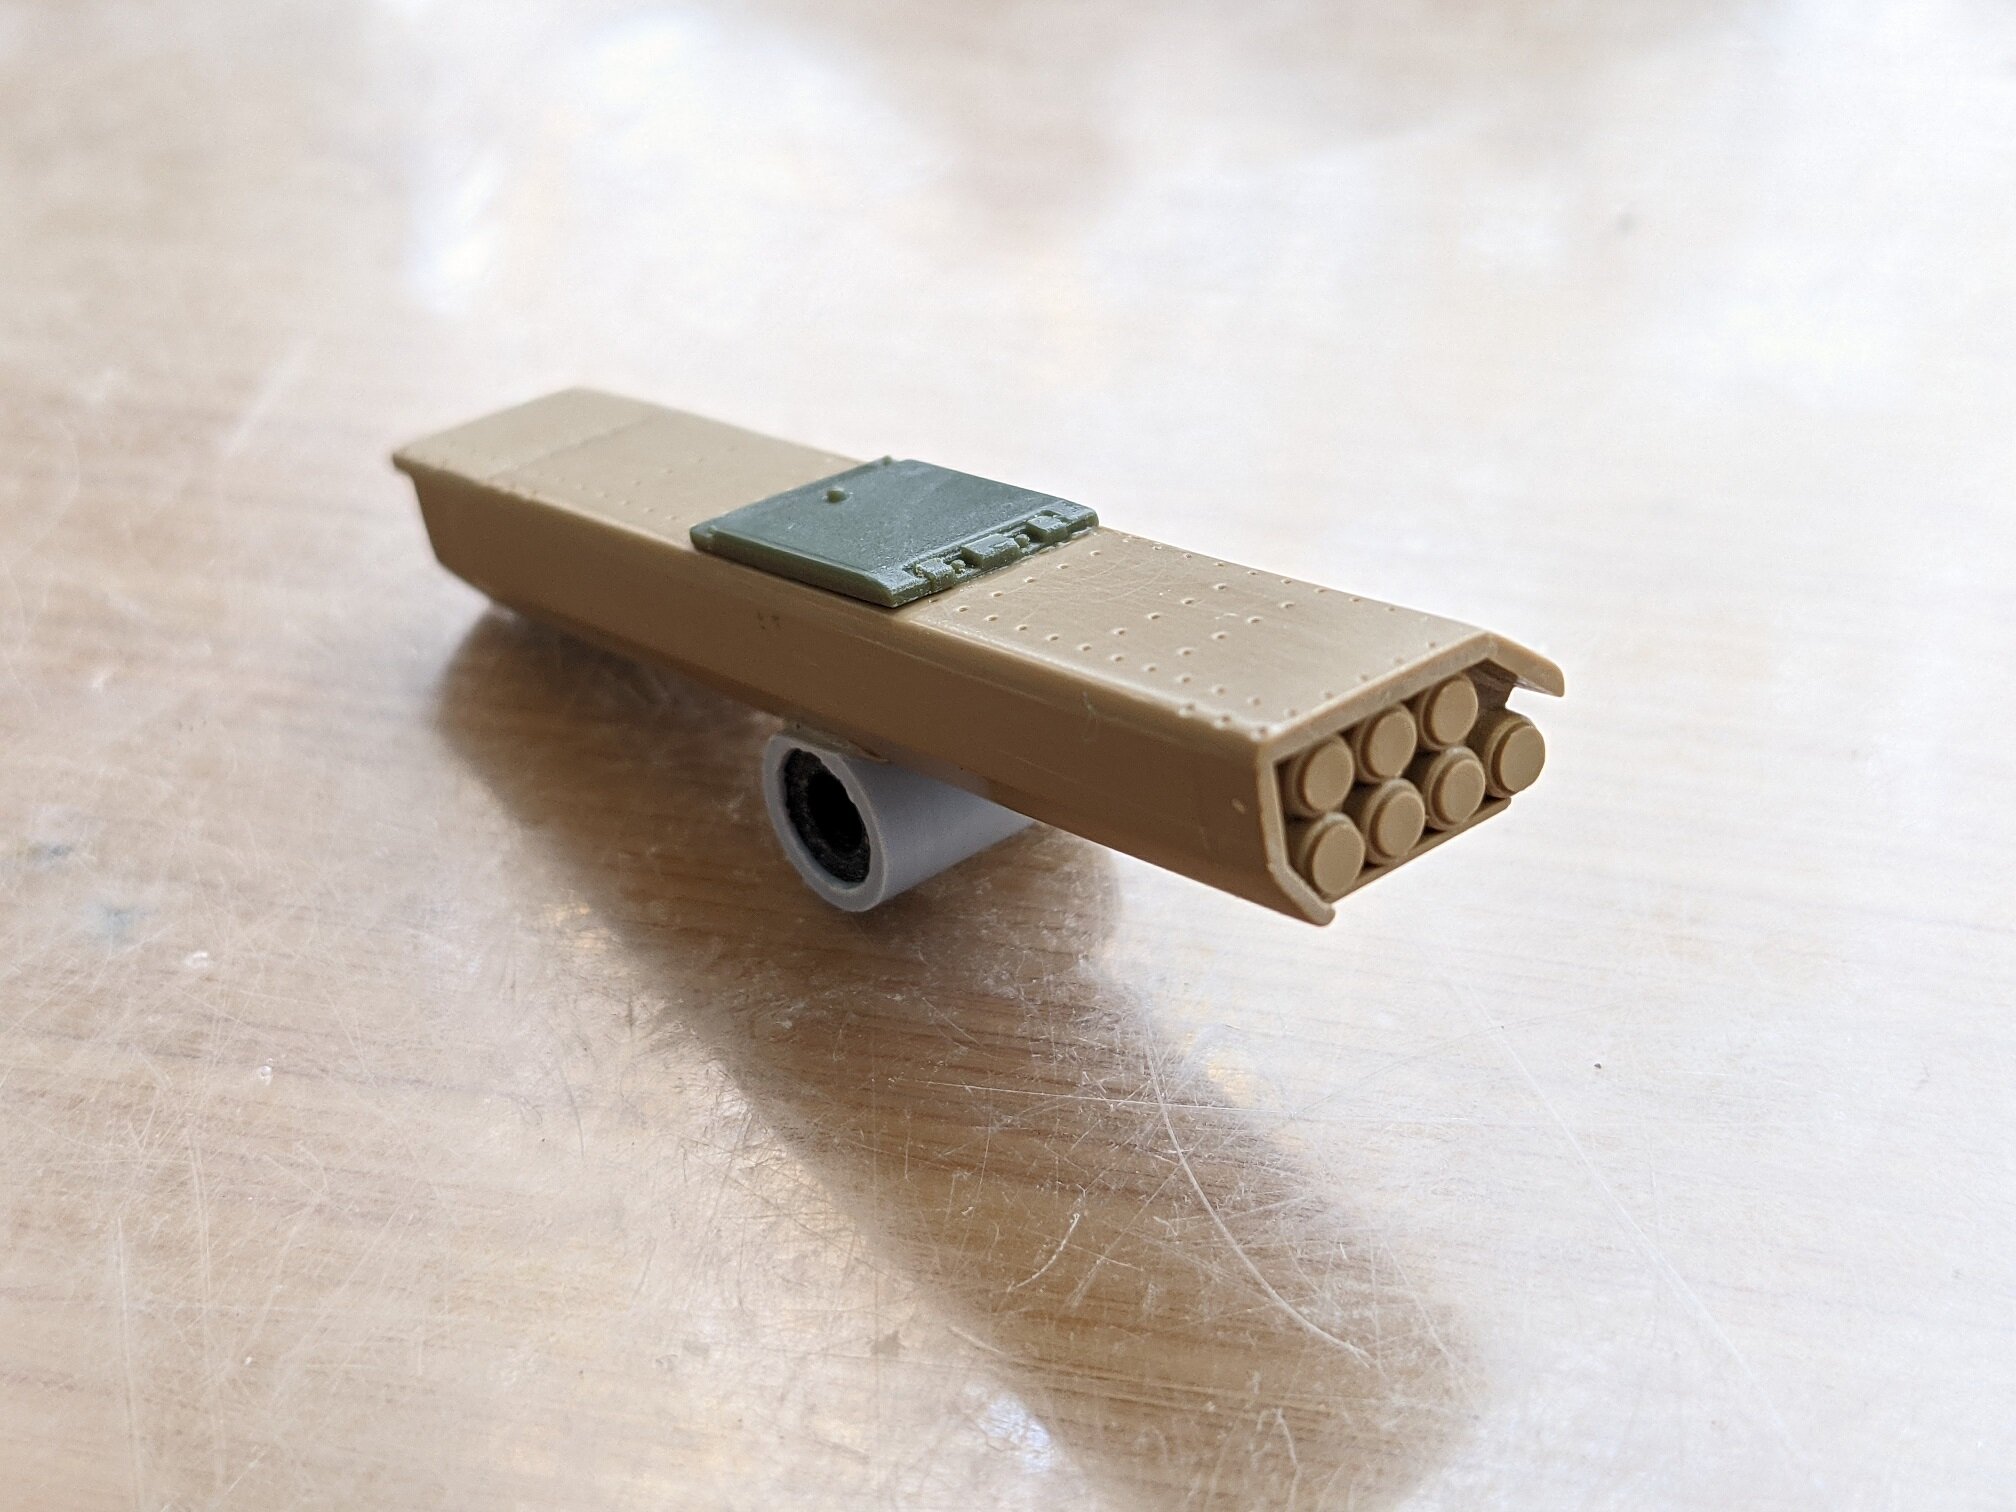
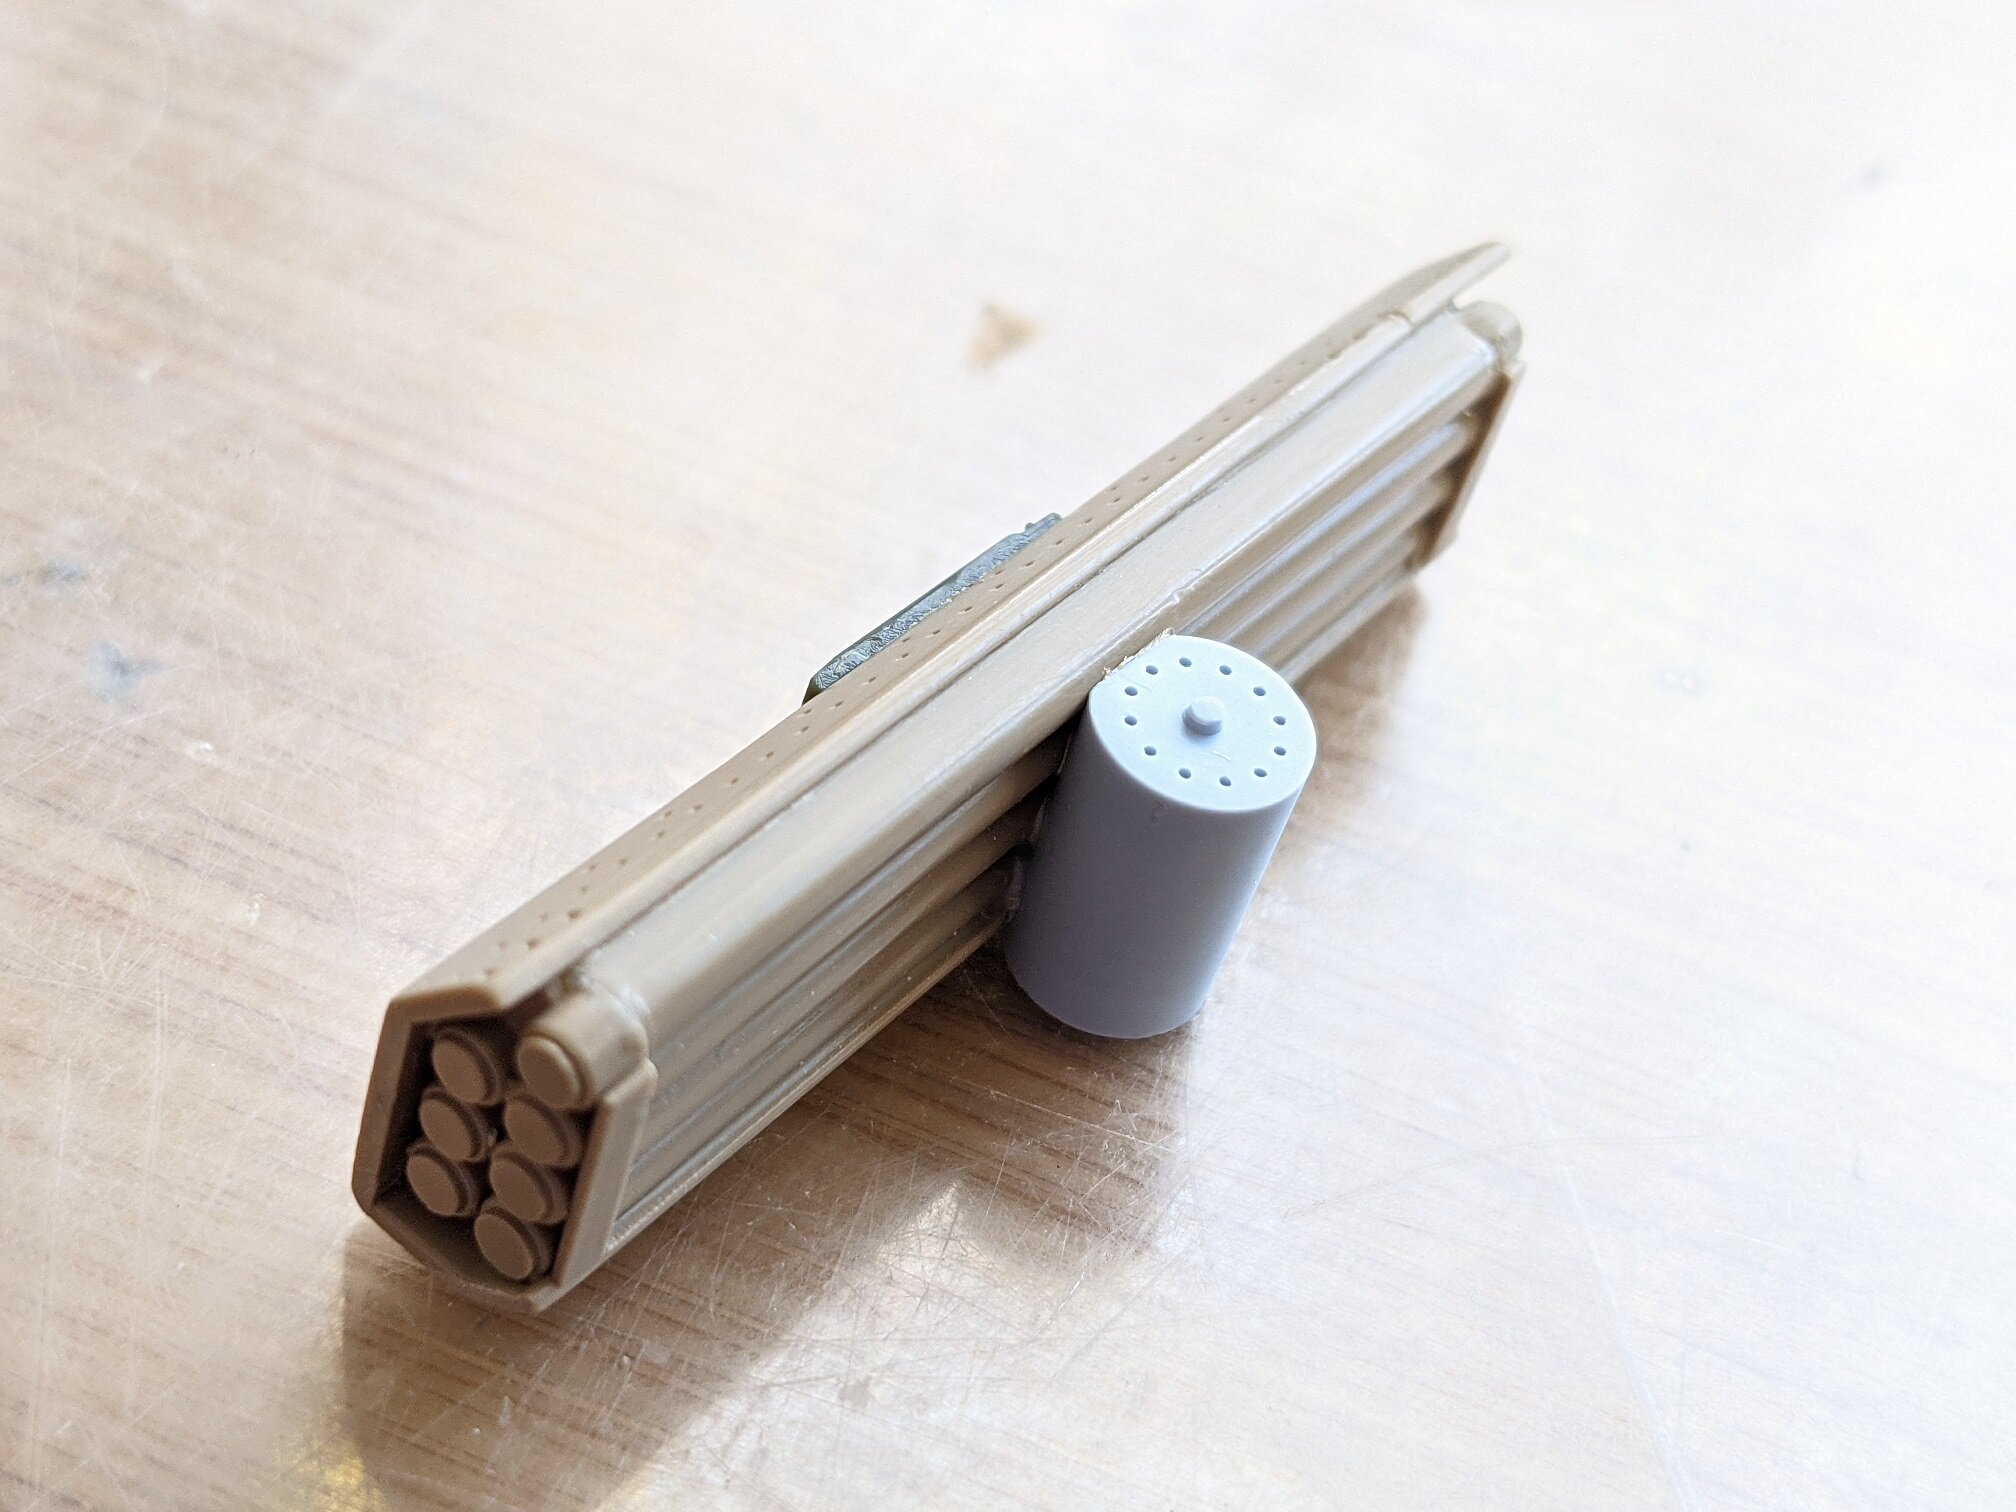
@Urashiman I loved that kit of the X-29 when I was a kid! Knowing Matchbox, their kit was a little on the smallish side. Hasegawa was usually right on with their scales. I got some work done this weekend on the armored car. What is a modern armored vehicle without missiles! So I re-used a pod I made for an earlier ship model and machined a piece to hold it (the light blue piece) with a vinyl ring inside it for friction. Then I added in a hose for detail to make it look more realistic (hopefully). Then I got to do a little bit of washing on it too. That's it for this week. Thanks for checking in guys! - MT
-
I thought it looked a little different from stock. Cool all the same! - MT
-
@Thom Getting everything together right for the "D" model seems to be tough for some reason. Even some purpose built "D" model kits. @Urashiman @505thAirborne Ah yes, "Venus Wars". I loved the organic looking vehicles from that in lineart I saw. I don't remember if I saw the movie or not. That is a COOL looking model kit! It almost looks like it would be a possibility today. - MT

-
Cool! I liked the Ingram kit, but I'm trying to figure out why they made them light grey instead of white. - MT
-
@arbit The video was good. I would focus on speaking clearly with confidence, be precise / brief to the point, edit footage to keep it brief, and keep a sense of humor. And don't be afraid to be funny - BUT be yourself! @electric indigo That cockpit looks great! You can never have enough Harriers! @Urashiman Yes, mental health is important!😁 That is a great looking photoetch set! @505thAirborne What series is that from? I'm not familiar with it? @Thom Those ejection seat fixes look good! - MT
-
Nice finish on that kit! Out of the box, its full of seam lines, but it looks like you did a great job getting rid of them. The base looks cool too. - MT
-
I don't know if you found them yet, but they're on our legacy site: https://macrossworld.com/macross/models/_models_index.htm - MT
-
I second that! This WOULD make an awesome poster! - MT
-
He looks cool! Ready to confidently crush some human cars or something. - MT
-
That would be cool! Over 30 years plus and the technology is there to improve over the old Imai kits. - MT
-
I don't miss my networking days just for that reason Hopefully you got to work on them instead of saving the world from not being able to access black Friday deal websites! - MT
-
@arbit That's a cool idea! Just keep your work short and to the point. I see some videos and the dudes talk for like 10 minutes before they actually do anything. I look forward to your upcoming build! - MT
-
@pengbuzz GREAT save! That was an ingenious fix and creative with the materials too! The force is strong with this one!😁 Now you have a beautiful model for your collection. - MT
-
You're getting a GOOD workout sanding and a good looking fuselage too. -MT
-
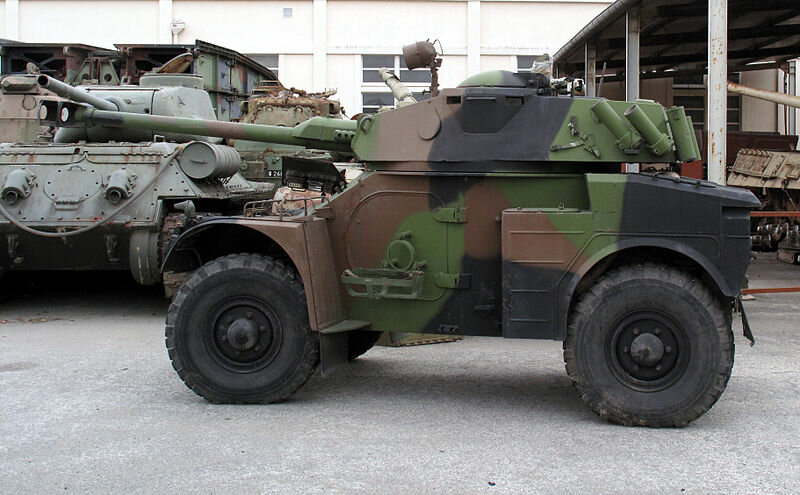
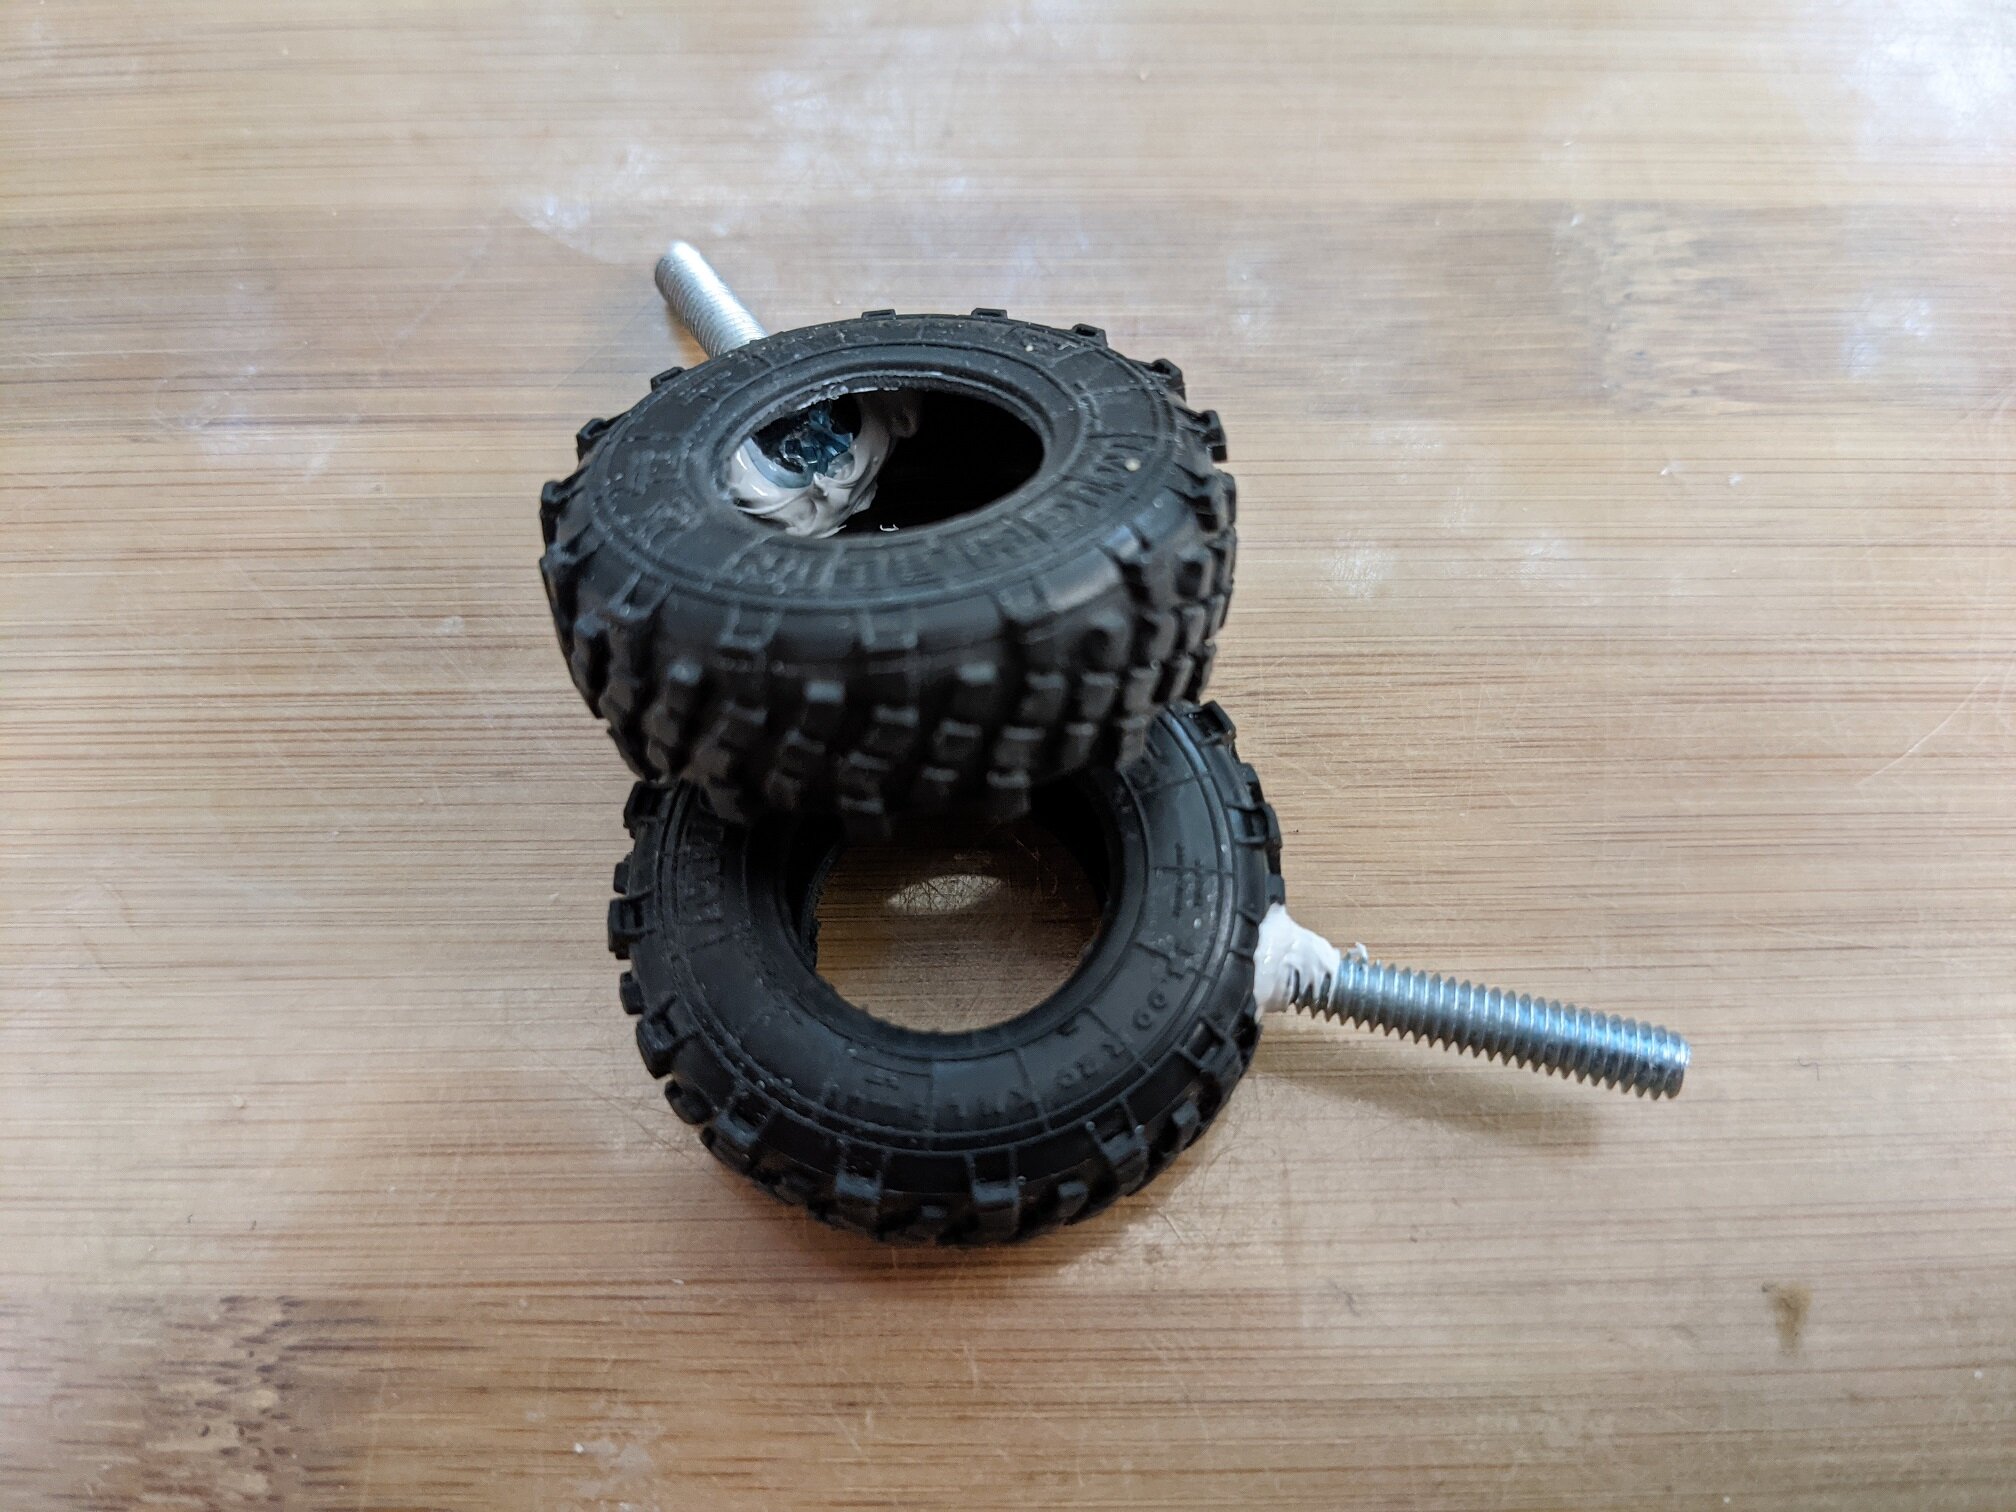
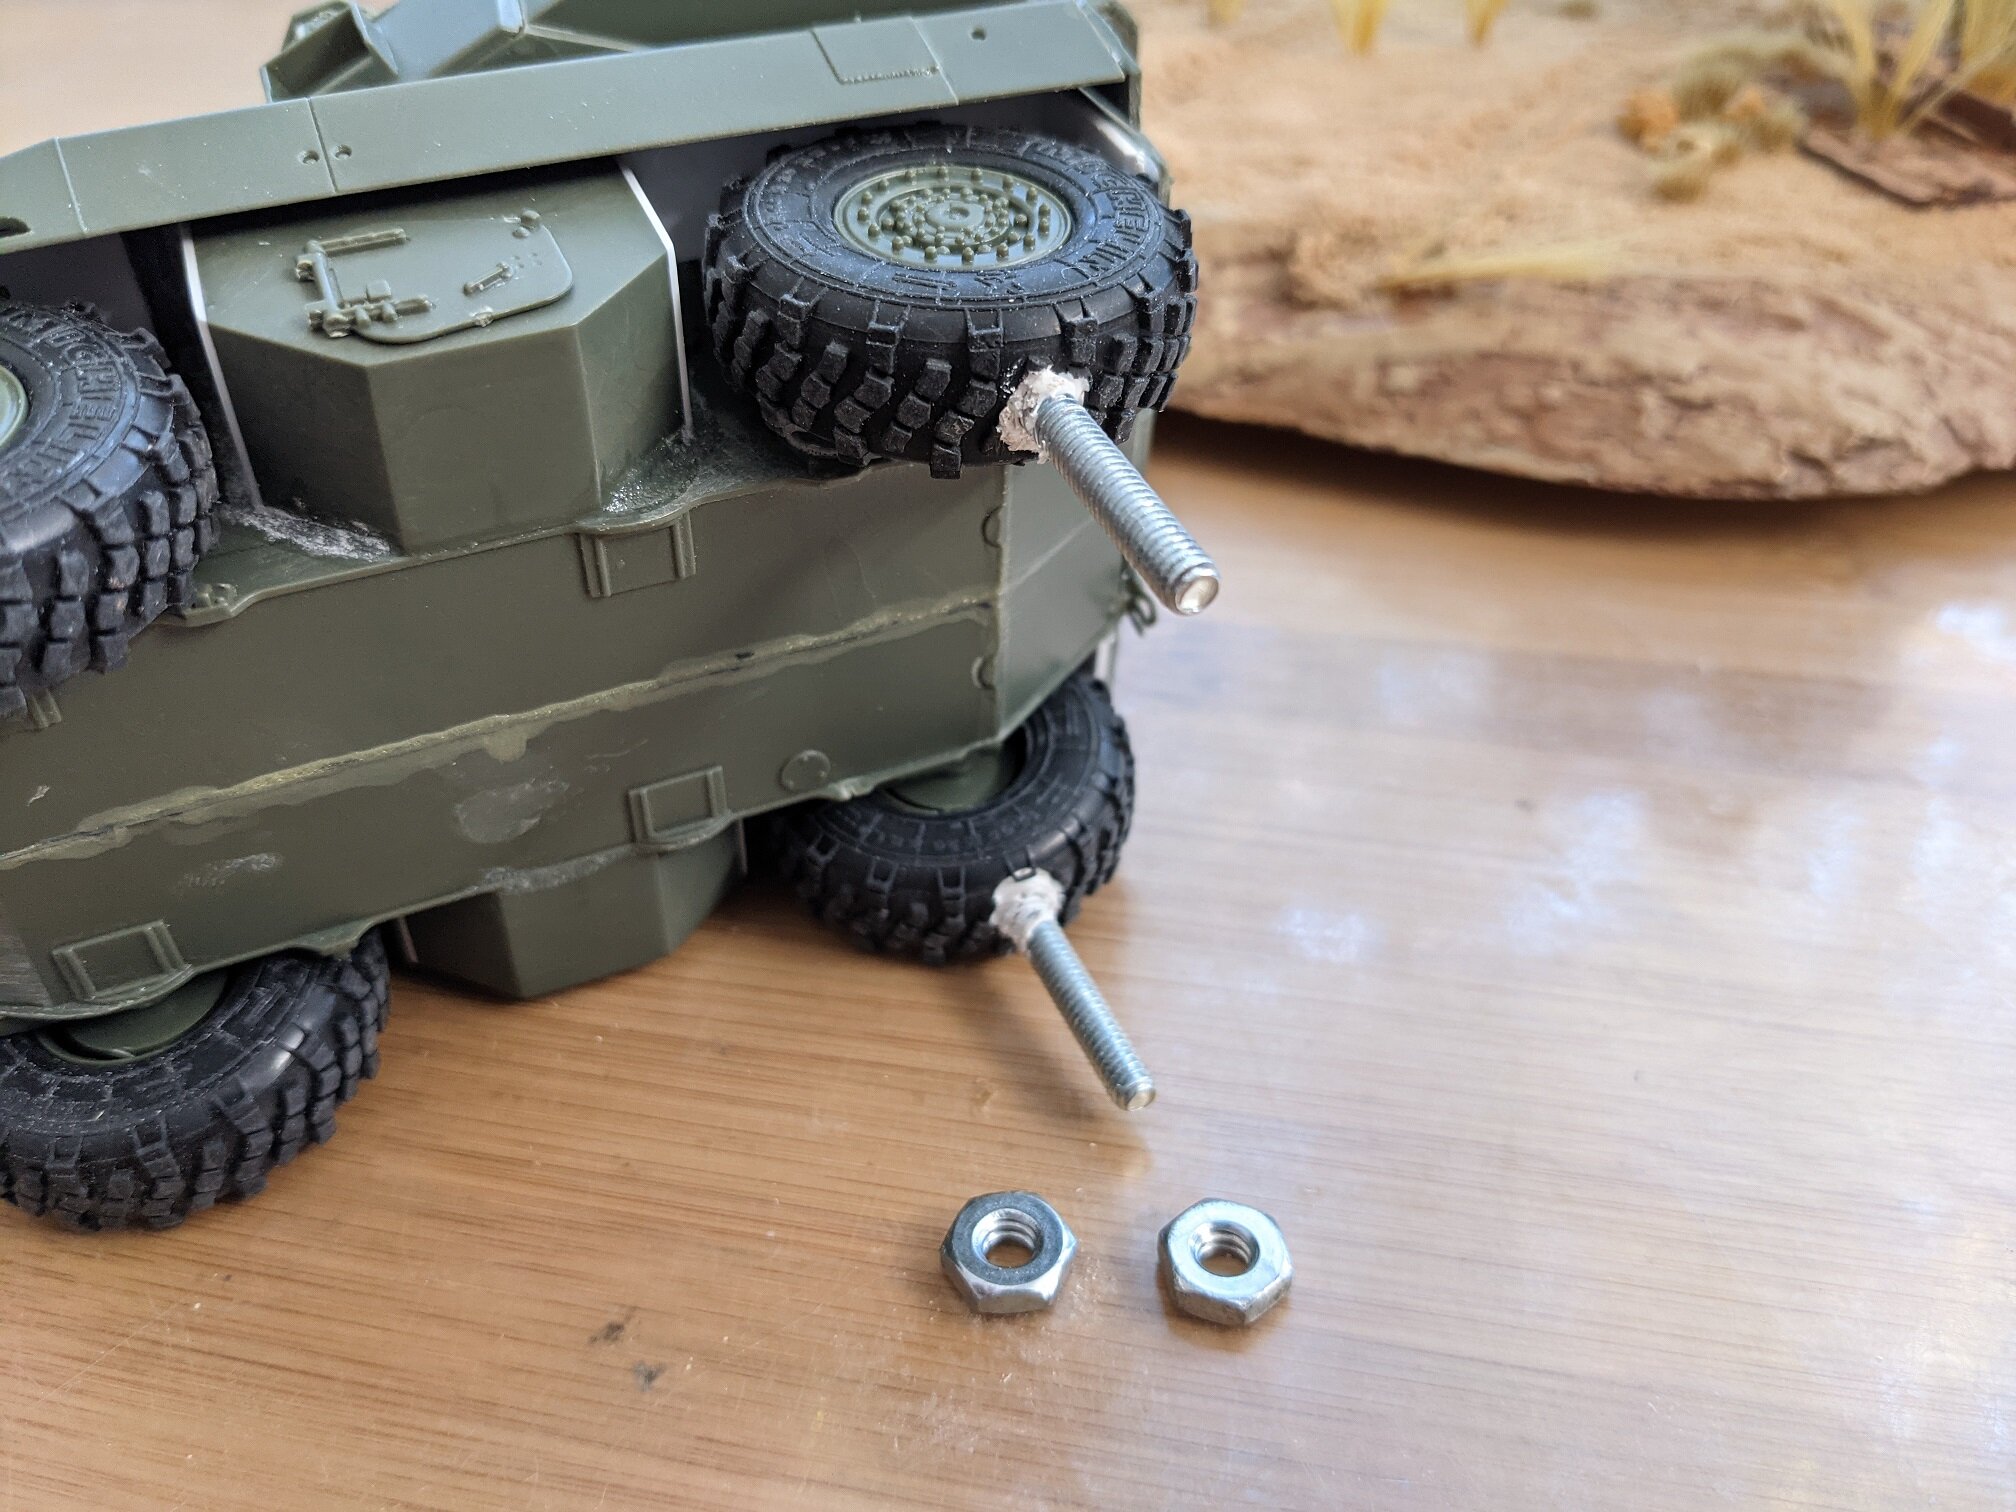
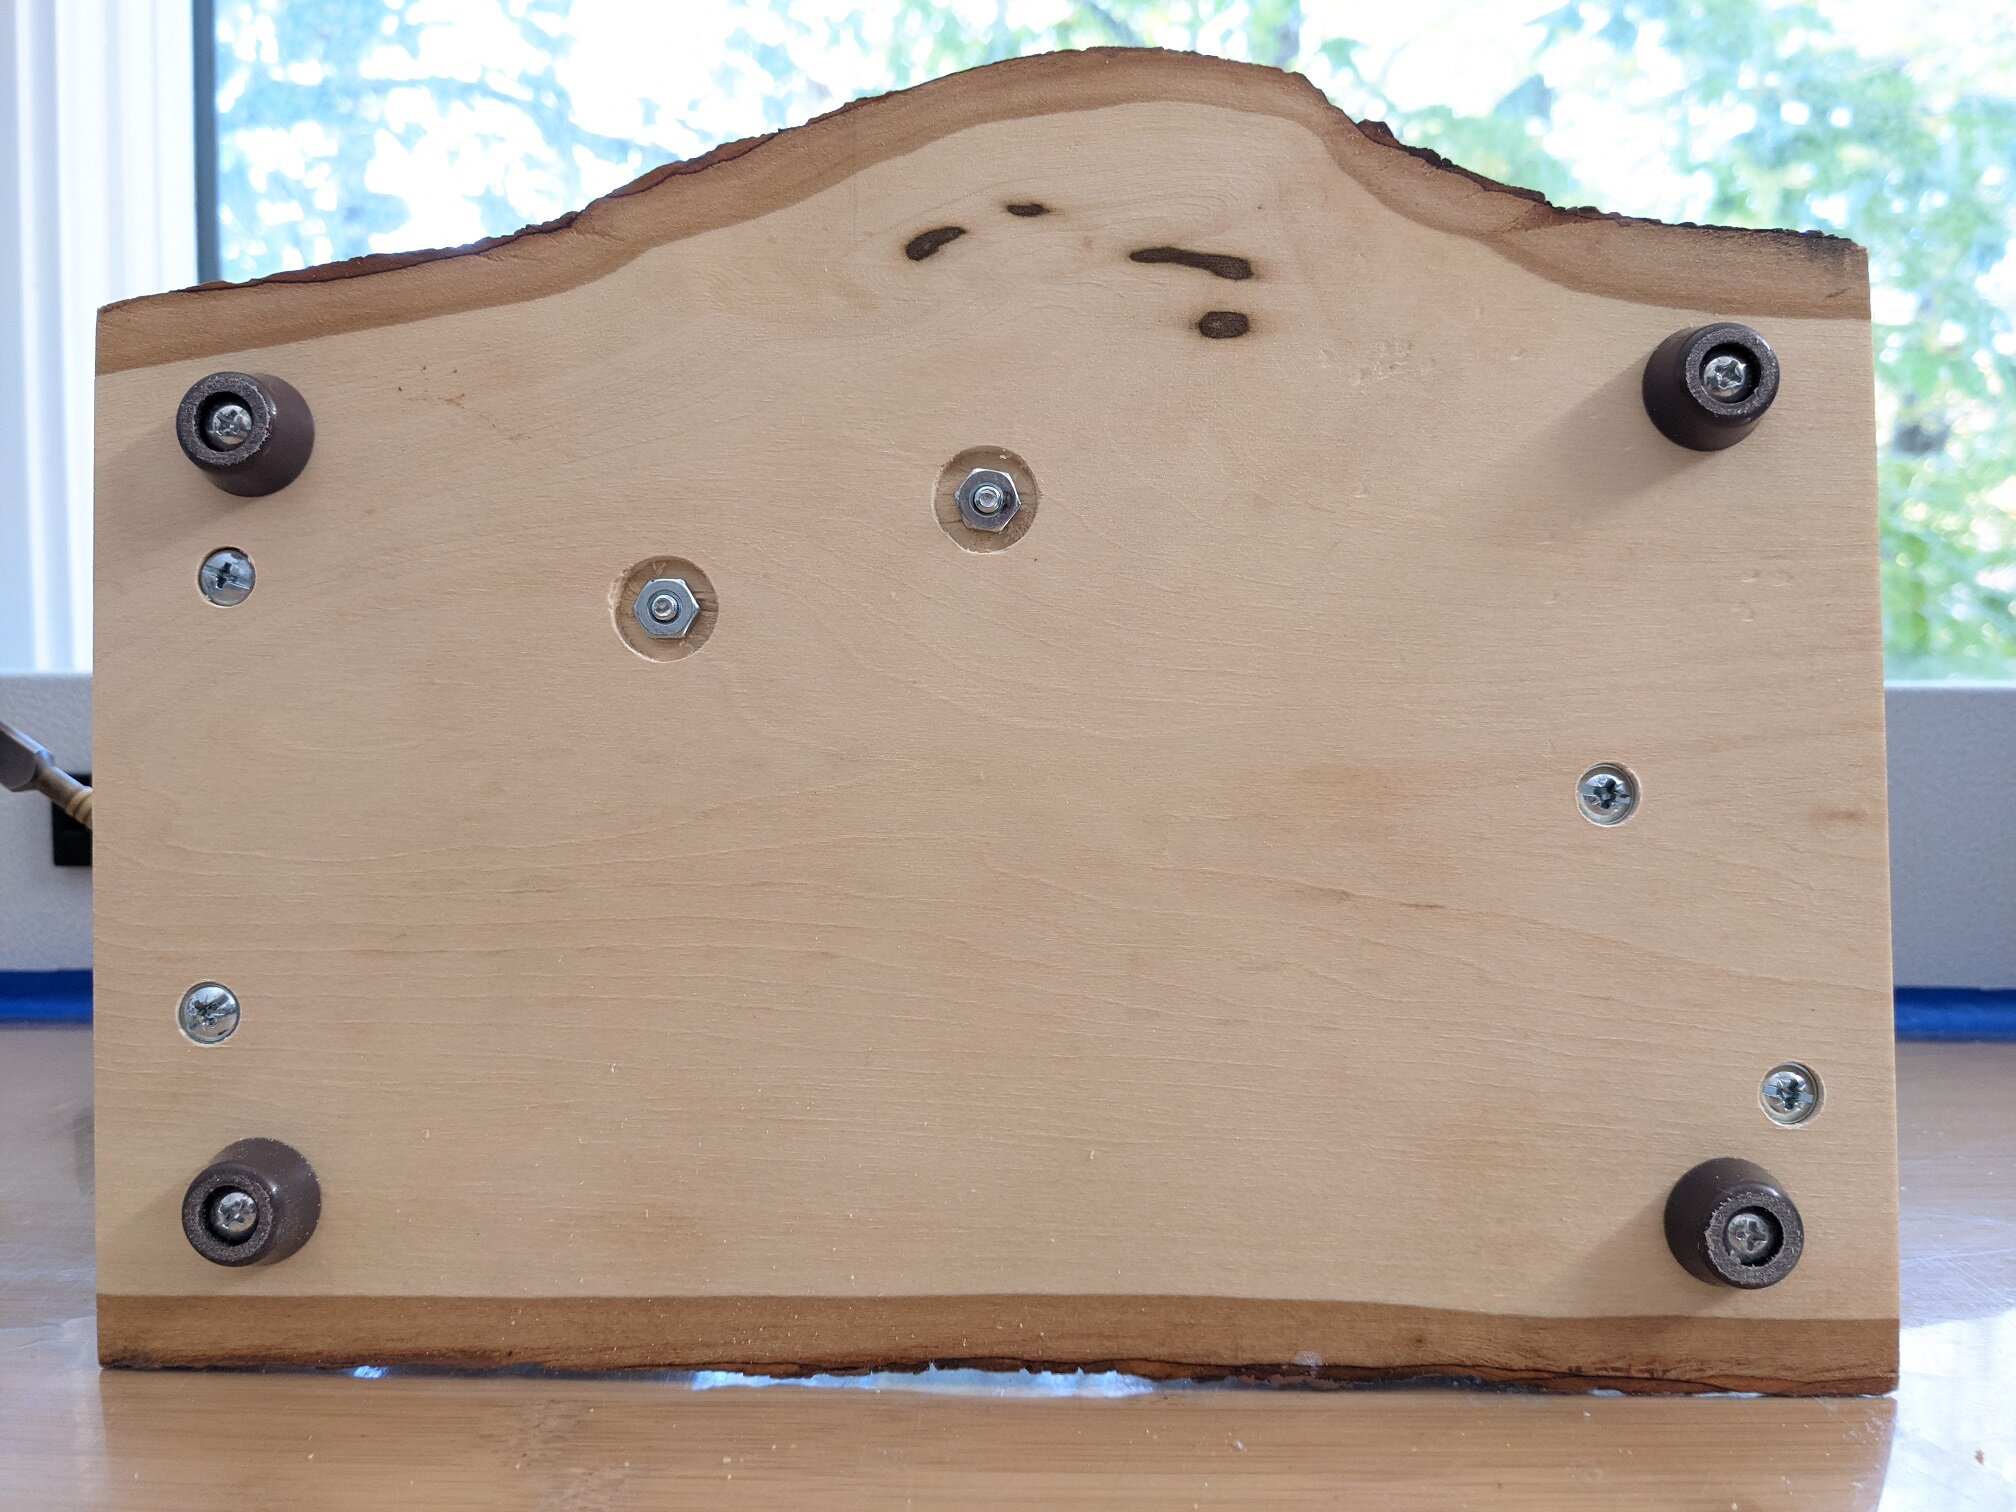
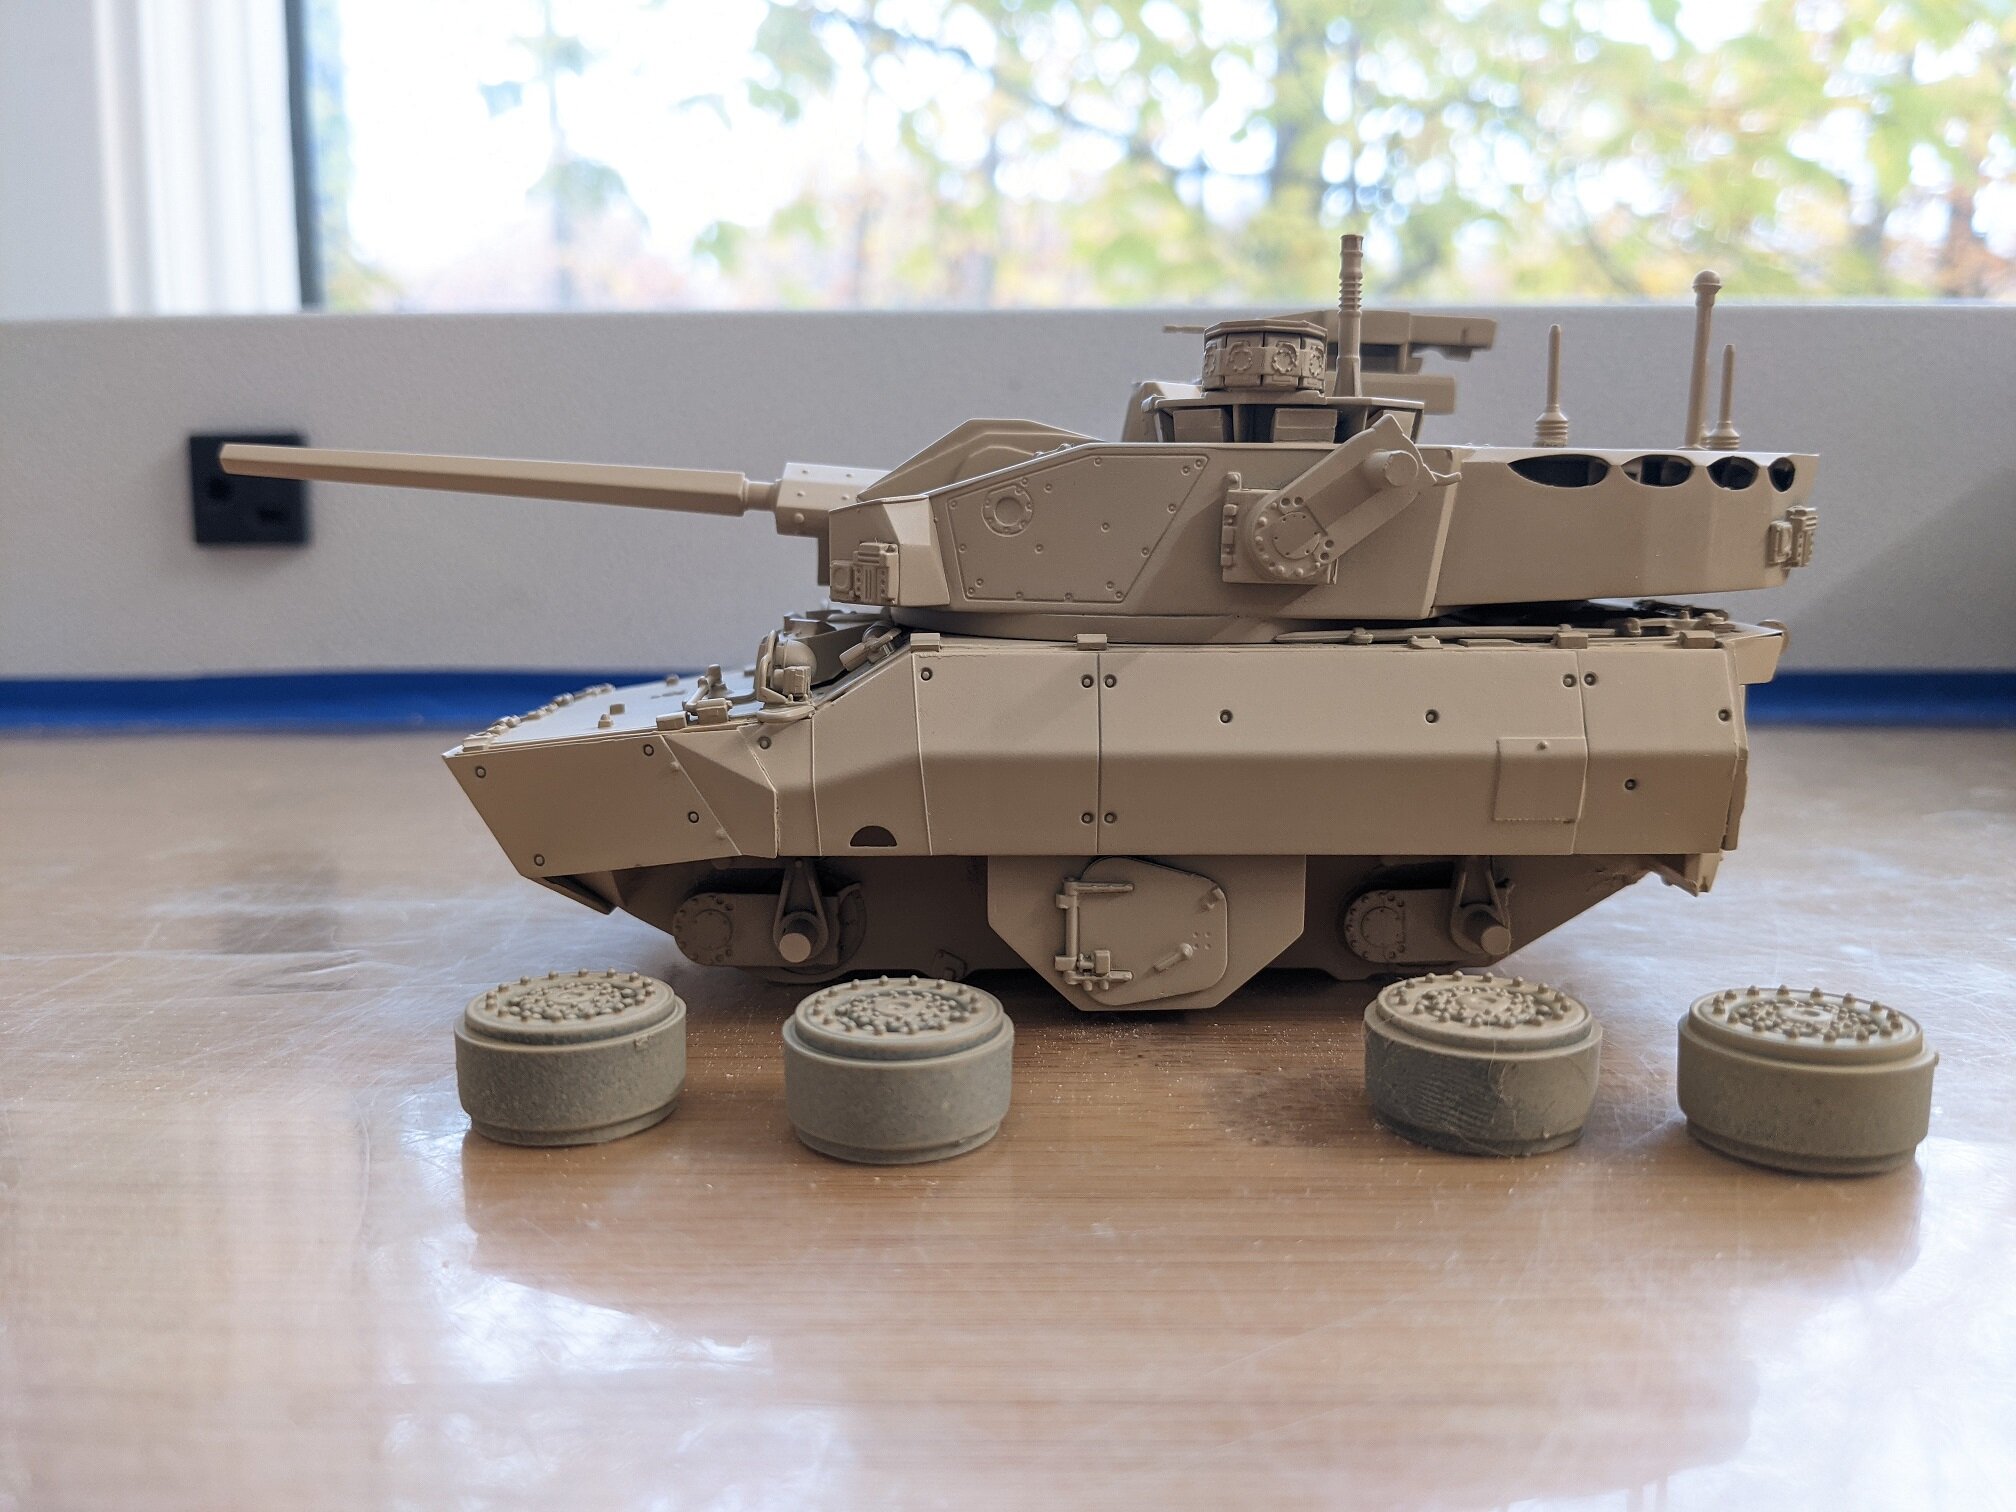
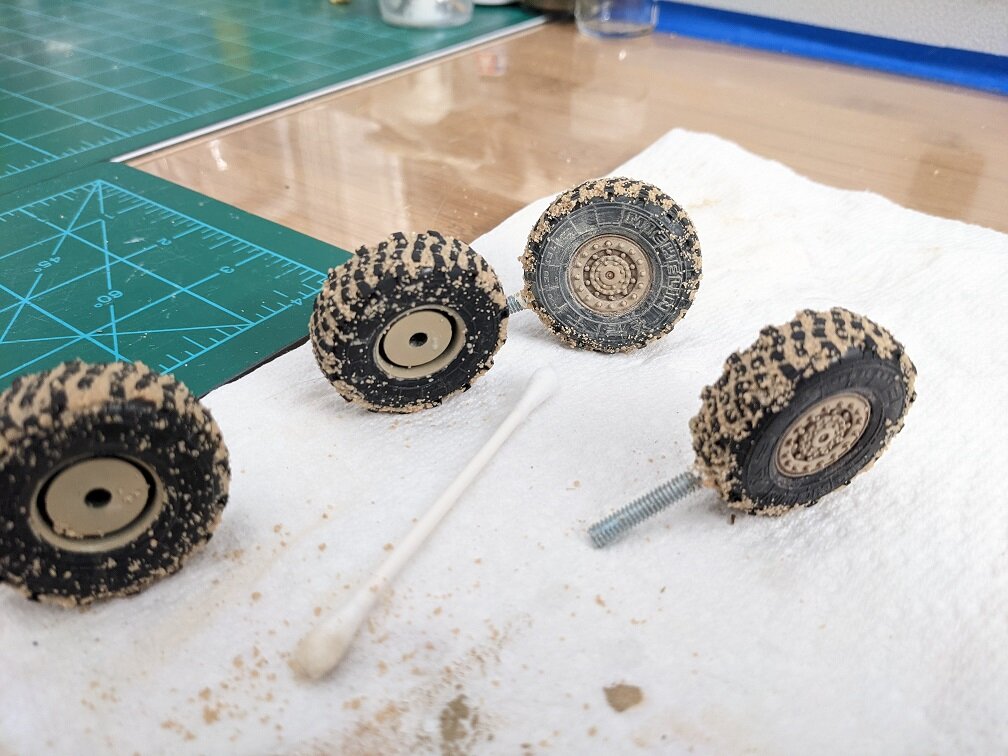
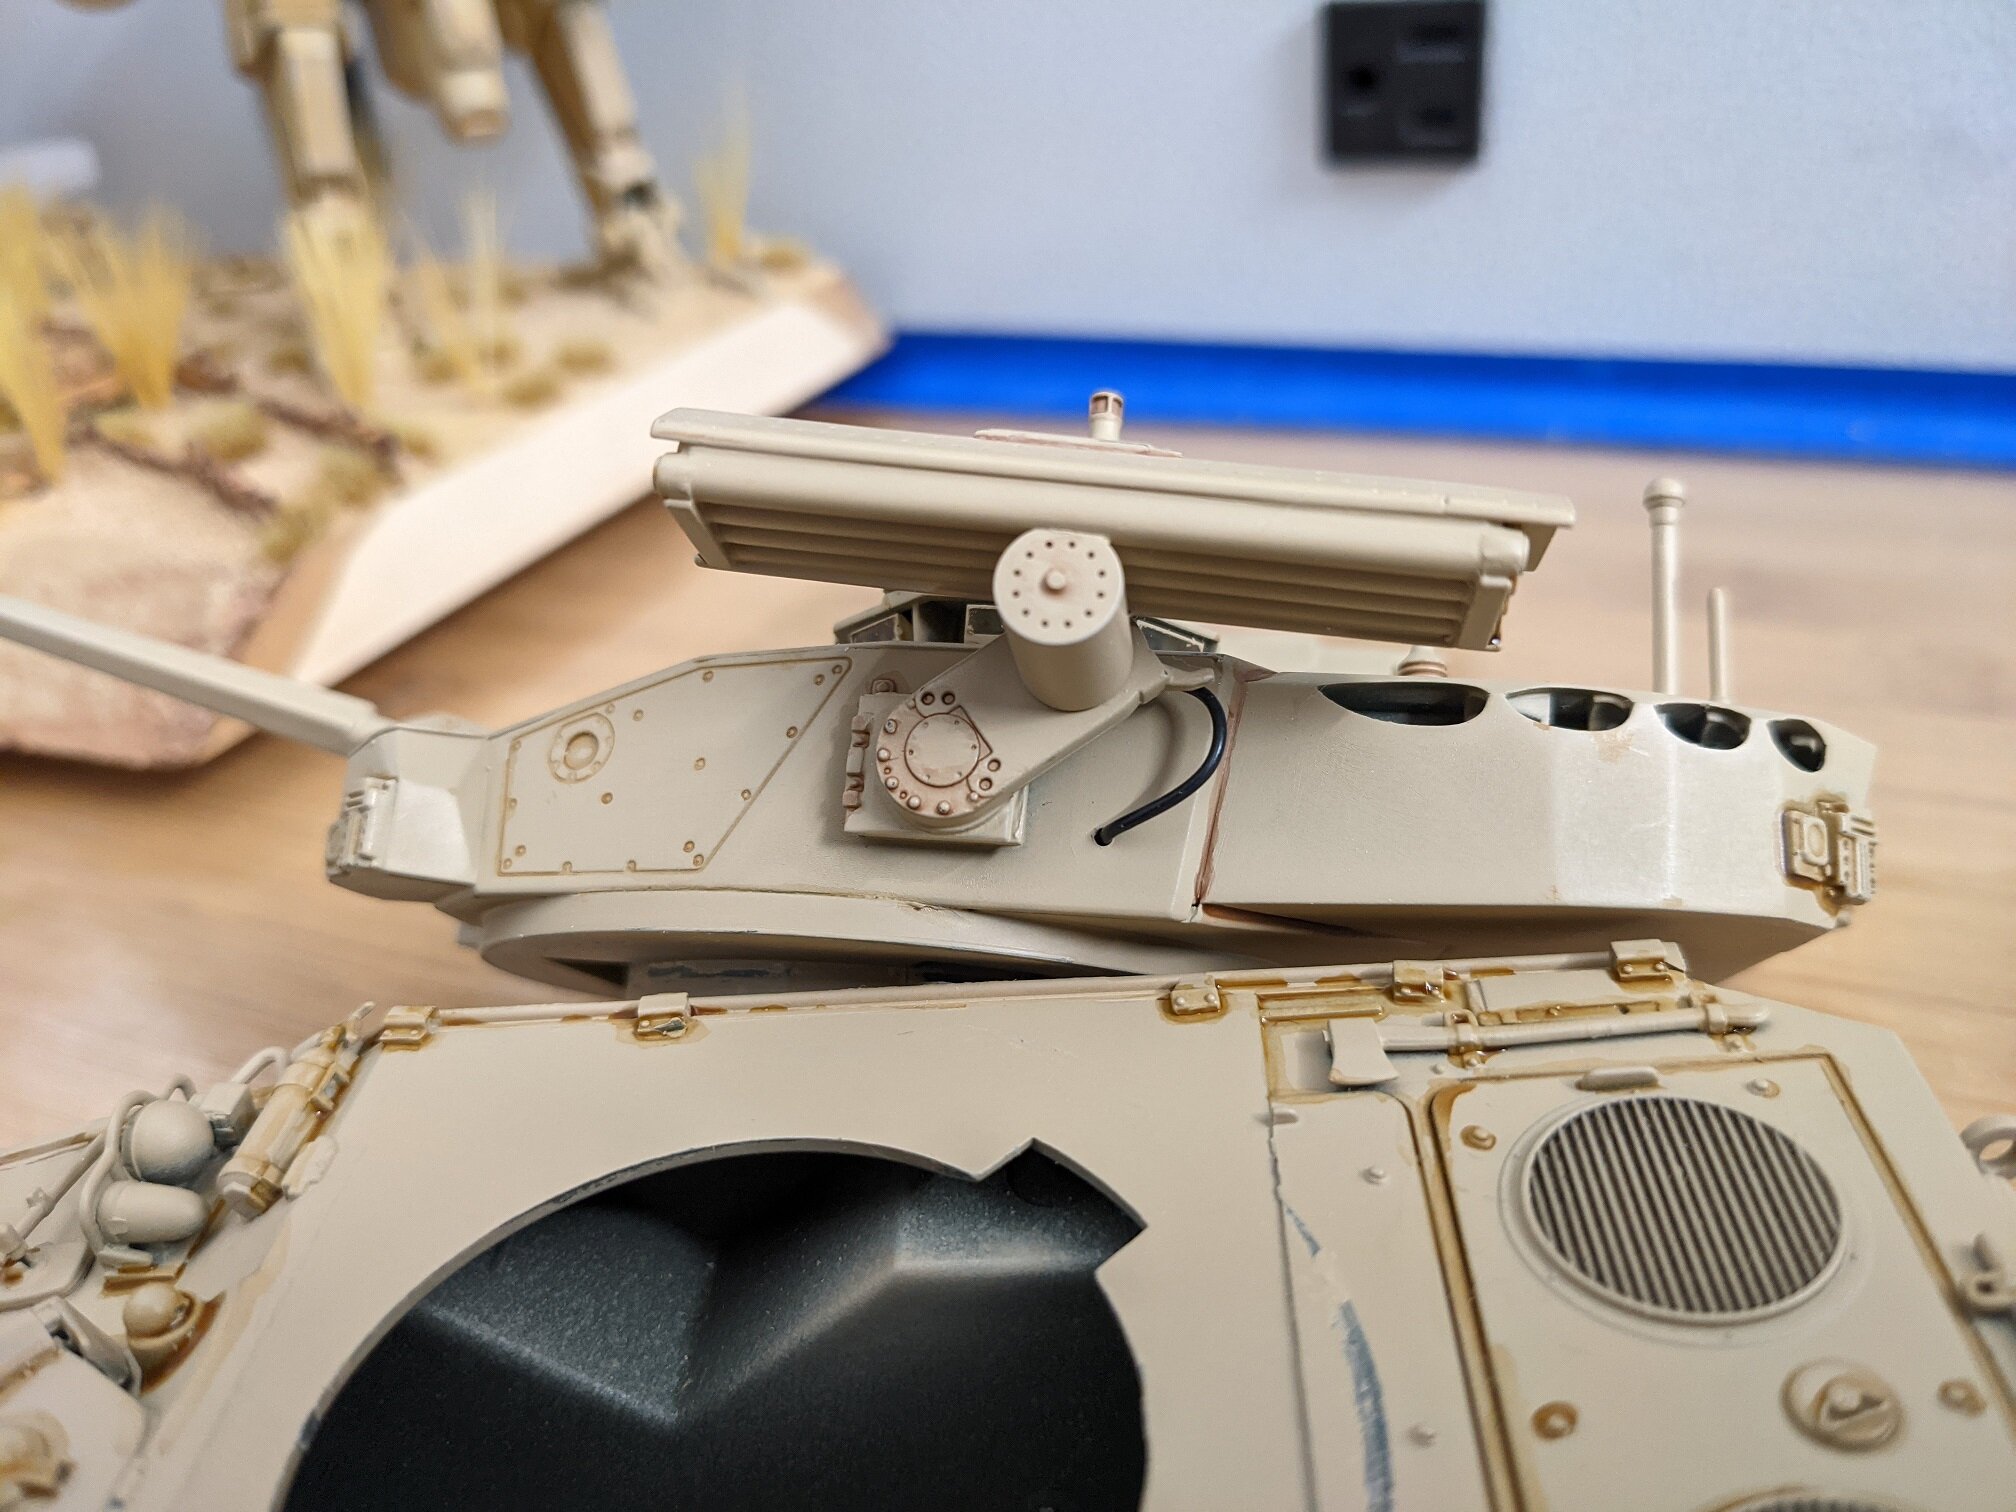
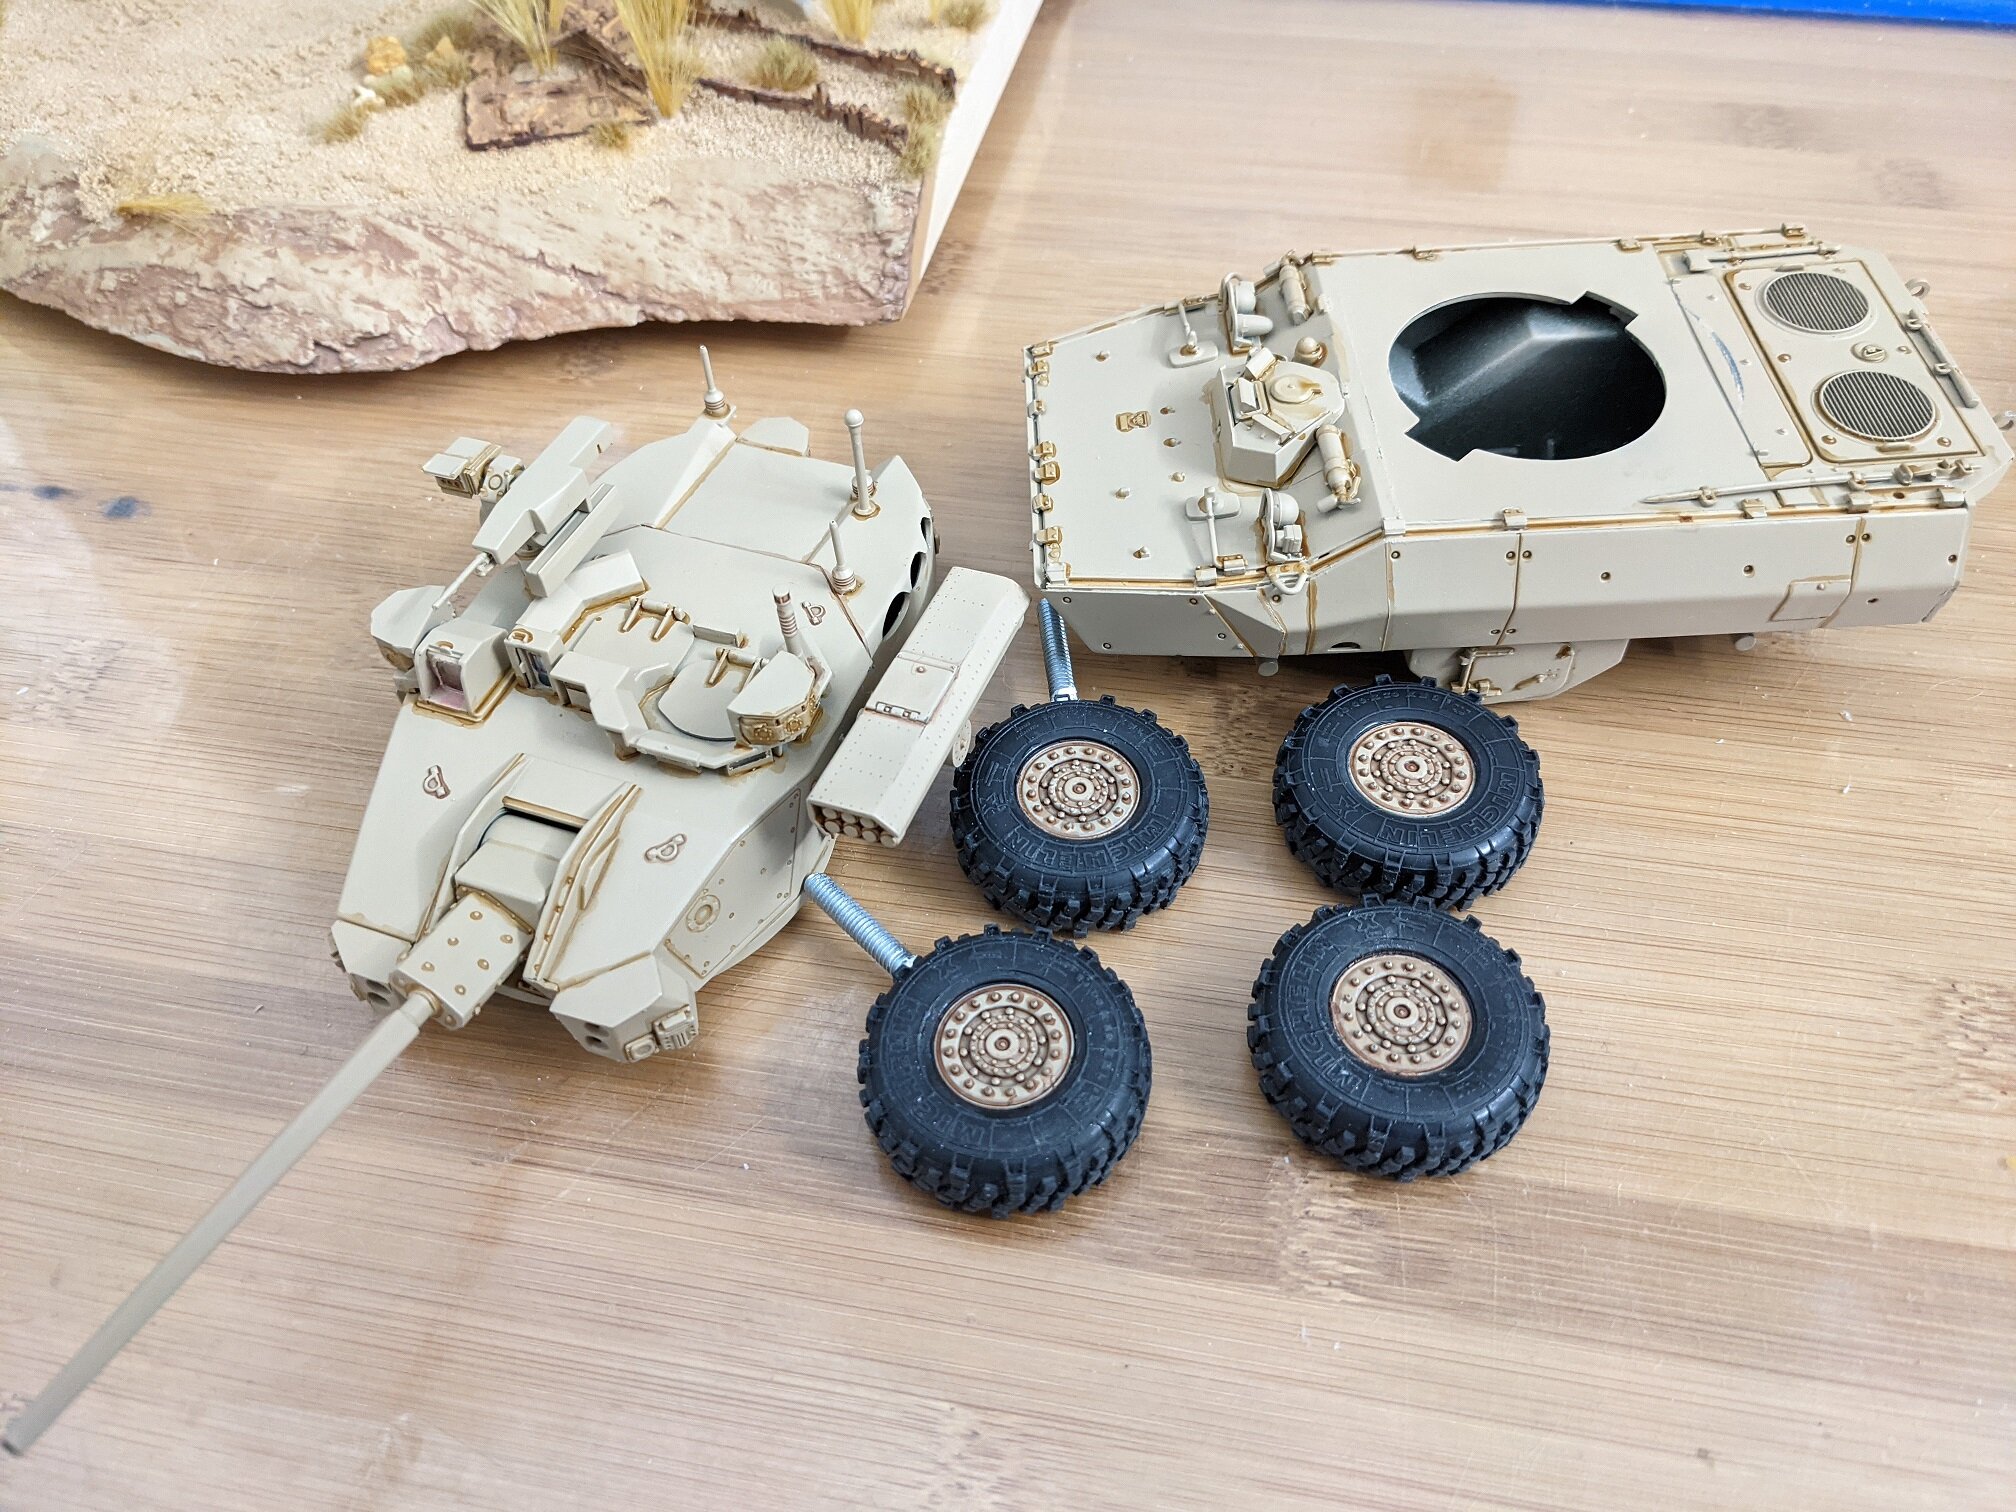
Hi everyone, I got some more work done over the past couple of weekends. Sorry for photo-bombing you guys with so many photos! The armored car I'm modifying is based on the French Panhard AML-90 (below). I modernized it a bit. You can see where the over-sized turret comes from. Normal people remove screws from their tires and plug the hole. I punched a hole and glued some hanging out! These are what will hold the model to the base. I used silicone RTV to glue them in place. Here's the completed tires and base with screw heads underneath. I FINALLY got to put a base coat of paint on my model this weekend. Time for A LOT of weathering and detailing. Last weekend was spent doing landscaping on the base by adding more sand and more dead plant life. This was BEFORE I drilled the holes for the screws in the base. I also rusted parts from an old artillery carriage frame. I'm thinking of calling this diorama "The Sands of Time" or "Haunt of Jackals", but I'm not sure yet. That's it for this time. Thanks for checking in everyone! - MT