Xigfrid
-
Posts
2607 -
Joined
-
Last visited
Content Type
Profiles
Forums
Events
Gallery
Everything posted by Xigfrid
-
If only they could switch their FUD material with a much stronger resin that would be delightful, I have given up so many design because of that... Brass could be a solution if the antennas are not less than 1mm diameter, but much more expensive unfortunately.
-
Does that mean that a Yetistand can handle and display a Detolf or at least a Detolf shelf ?? The Detolf is becoming a standard for Macross display, or kind of until someone find one. Without stands, I think Klingsbo could be superior but once you got battroid mode on a Bandai stand, the Detolf height is a already tight fit.
-
On the first pic, I said myself that this idea was saving a LOT of space because you still have so much room for a the dynamic 25G pose in that detolf... Then on the second pic, this isn't a detolf ! The detolf is so challenging when you got to put these Bandai releases and their fast packs/tornados and ghosts!
-
I hope they won't mess with the plastic again!
-
It happened to my Yamato VF-1S Roy "30th anniversary" edition. Perhaps they were in a hurry for this last production before switching to Arcadia and less QC?
-
Looks like a very solid CAD software
-
VF-0S!? Damn I thought I was done with the VF-0D this year!
-
What? Wait! This booster paint scheme is exquisite! Nice custom!
-
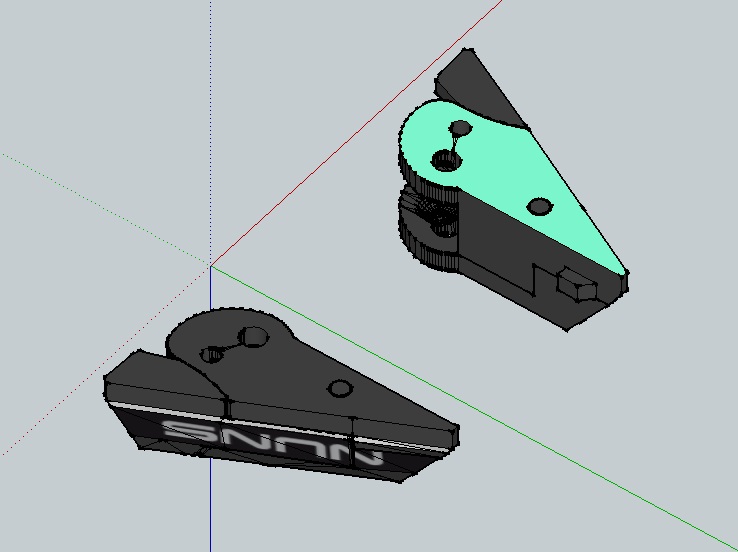
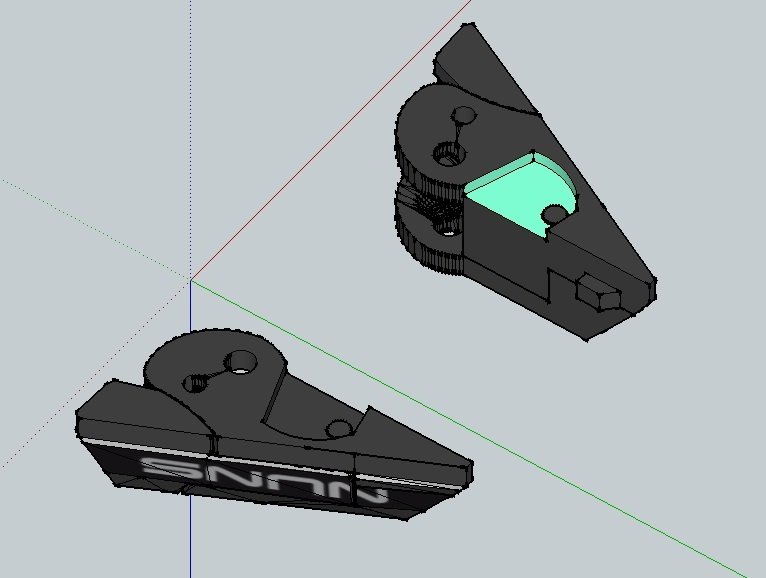
There are 2 triangles that fold one into the other. They both are prone to breakage. The larger one, the upper one, is the more visible and it folds into the shoulder when transforming. The lower one, folds and hide itself into the part that becomes the batroid chest. It has small impact on the fighter esthetic and I can't do a replacement part for it, mainly because the part is too slim. If your lower triangle is not broken, then you should take the version with the "lower triangle fit". This version has a cavity where the lower triangle comes and fit into the NUNS triangle. If your lower triangle is broken, you better order a Upper triangle wihtout this hole for the "lower triangle".

-
Big update for colored version! I finally was able to put all the textures correctly and after dozen of dozen emails with Shapeways services, I got 4 versions ready for "FULL COLOR PLASTIC" material. You can have a look at the models here: http://www.shapeways.com/shops/xigfrid3dshop?section=VF-171+NUNS+textured There are the VF-171 CF version triangle with or without the lower triangle fit and the ALTO (red and black) versions. The good news is that it is cheaper than what I expected! 15 USD for a set of left and right triangles. Unfortunately, this material is available only to the designer for the moment, let's hope it would be made public soon. That means that if you want one now, you would have to send me a PM.
-
That's totally weird, knowing the price of a VF-4G and the Arcadia YF-19 on resell market, he panel-lined his and even stickered them and then wanted to sell it one year later?
-
Has anyone heard of this material... Plastimake?
Xigfrid replied to wm cheng's topic in The Workshop!
Are you sure of that? I use 48H curing epoxy resin and I know it can be heated to 100°C to cure stronger, but I doubt it heats up that much by itself -
Has anyone heard of this material... Plastimake?
Xigfrid replied to wm cheng's topic in The Workshop!
Sounds great for resin molding ! -
This bird is amazing, perfect execution cool9or!
-
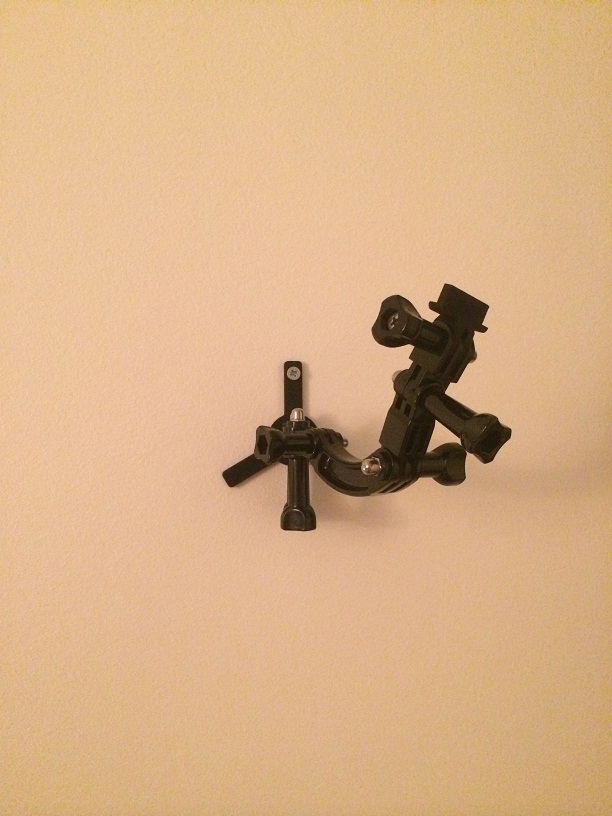
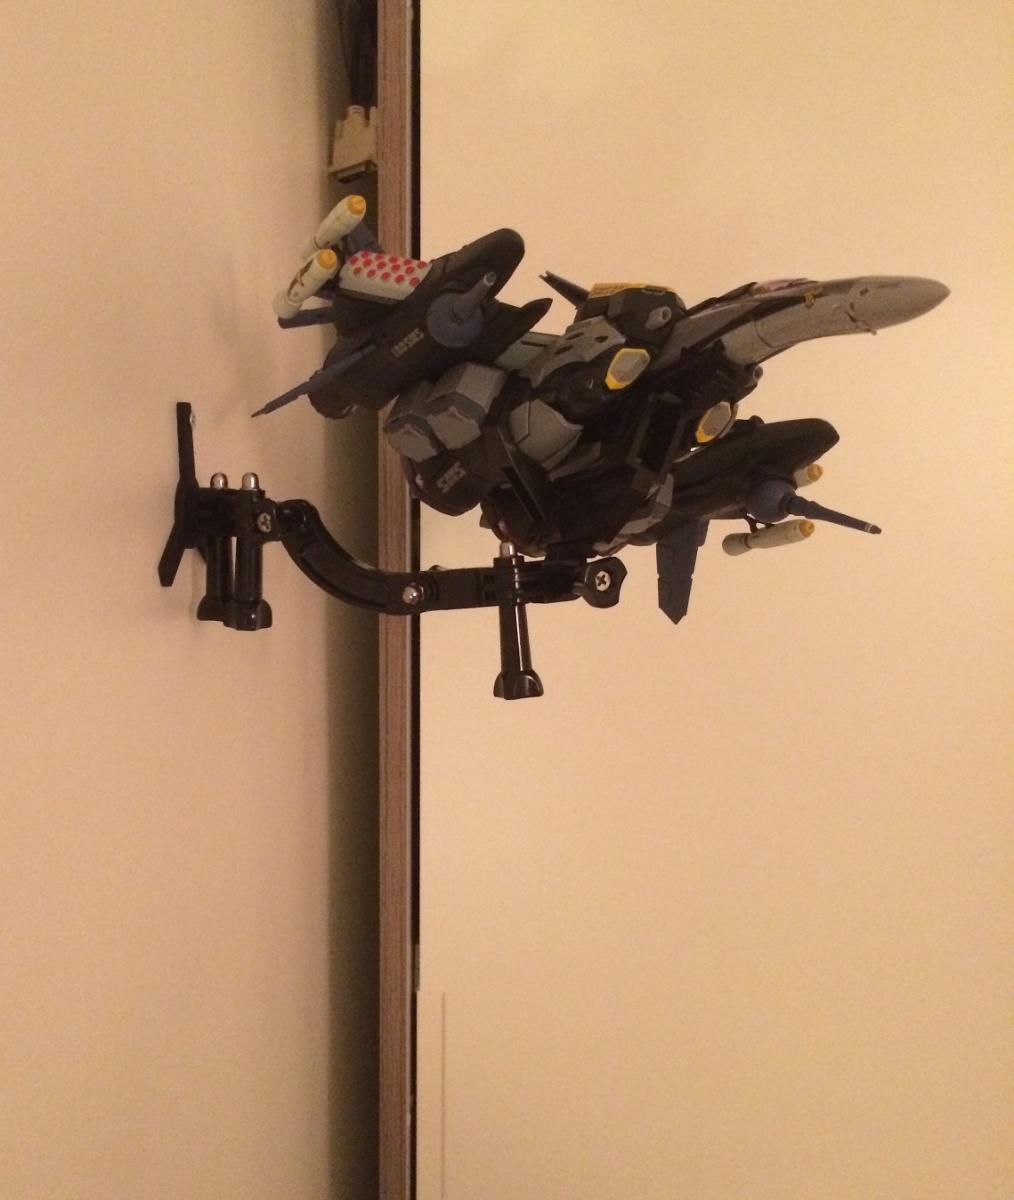
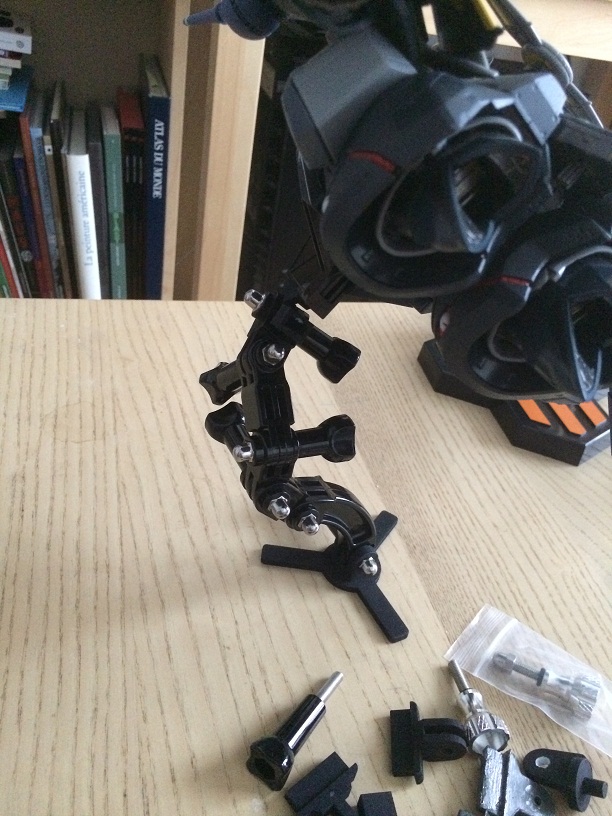
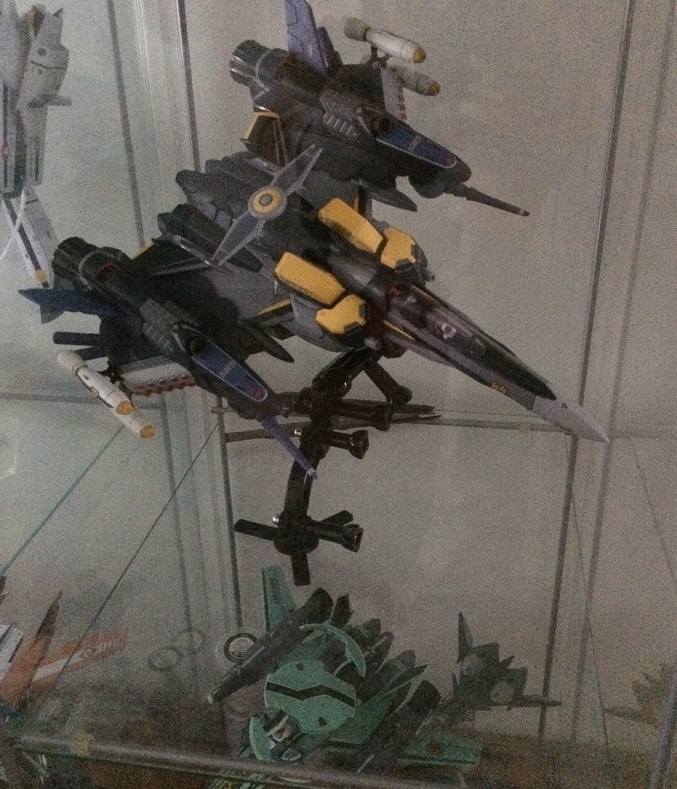
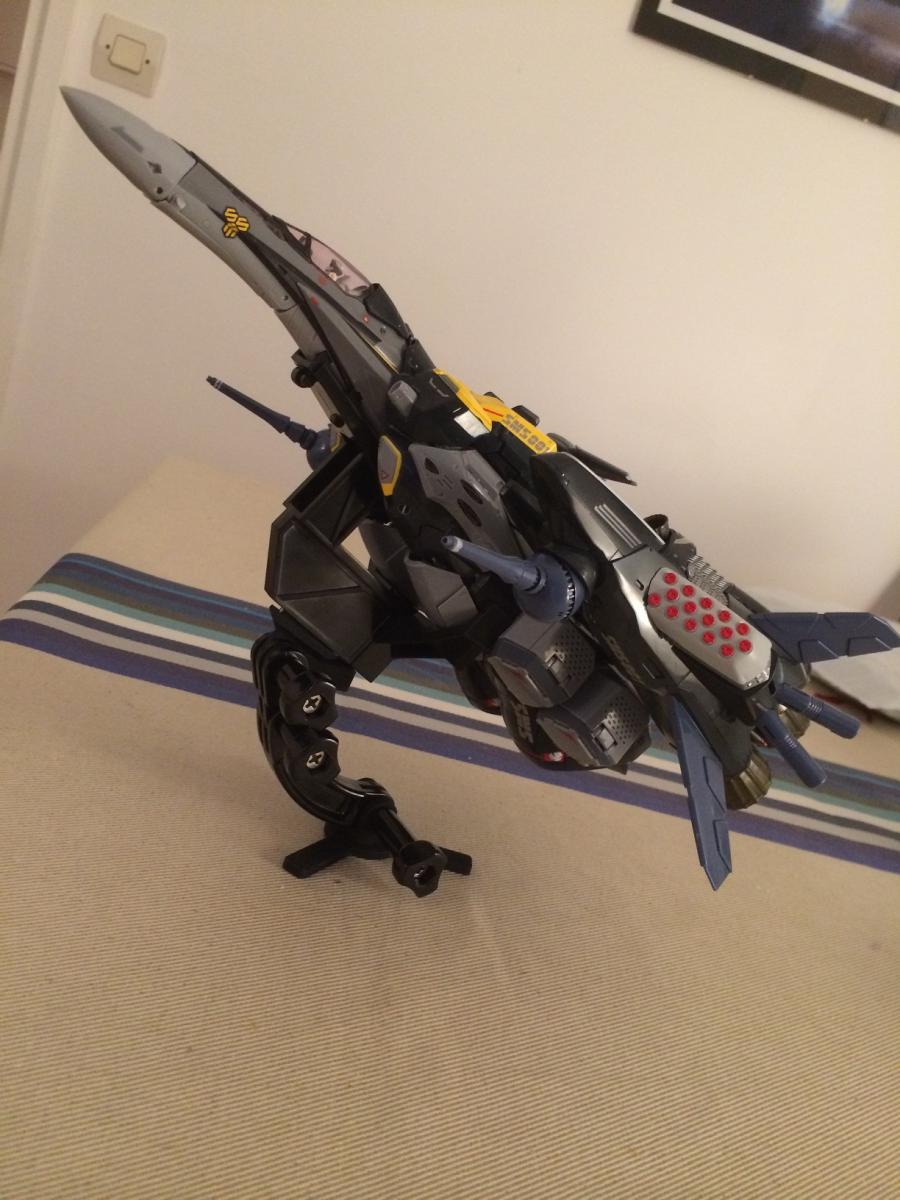
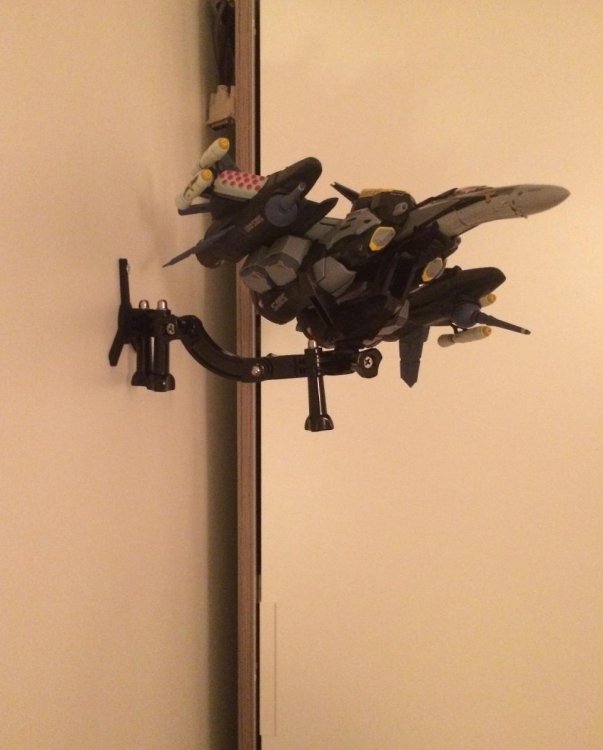
Another display alternative: the GoPro compatible stand (Shapeways)
Xigfrid replied to Xigfrid's topic in The Workshop!
Doing some house work today, I wanted to experiment the stability of the stand when being screwed... As a wall mount! I got to say I love it ! Unfortunately my wife didn't agree that our baby need a flying Ozma in his room Just for the sake of gravity tests:


-
That's a pleasure and thank you for the support! Except If you leave in the USA where Shapeways shipping costs are affordable, you should consider to order both of the two available versions: the one with and the other one without the lower triangle fit.
-
That was a big increase! I will pass on this one and wait for release I guess. I found the VF-19 Advanced at toysbuddyHK at 26,000 yen approx (http://203.135.134.135/shop_ud/store/index.php?route=product/product&product_id=503) BUT I don't really know how reliable they are. They seem legit, but couldn't find any recommendations for this eshop, so if you want to buy from them, it's at your own risk!
-
Impressive display Saburo!
-
I really like the low vis schems, thx for sharing your tools. I am really debating if I need an airbrush for next Christmas gifts.
-
Another display alternative: the GoPro compatible stand (Shapeways)
Xigfrid replied to Xigfrid's topic in The Workshop!
I also came to an alternate way to solve all the stability issues without the need to 3D print very large socle / bases (which can be very expensive): you can simply drill the base and screw it to a larger plate made of wood or plaxiglass. You can also buy one of those cheap GoPro base, but I don't like their esthetics... In fact I haven't found one I like yet ! -
Very nice setup! Be careful, you are now distracting your guesses!
-
Thank you Kurisama, your work is inspiring!
-
Another display alternative: the GoPro compatible stand (Shapeways)
Xigfrid replied to Xigfrid's topic in The Workshop!
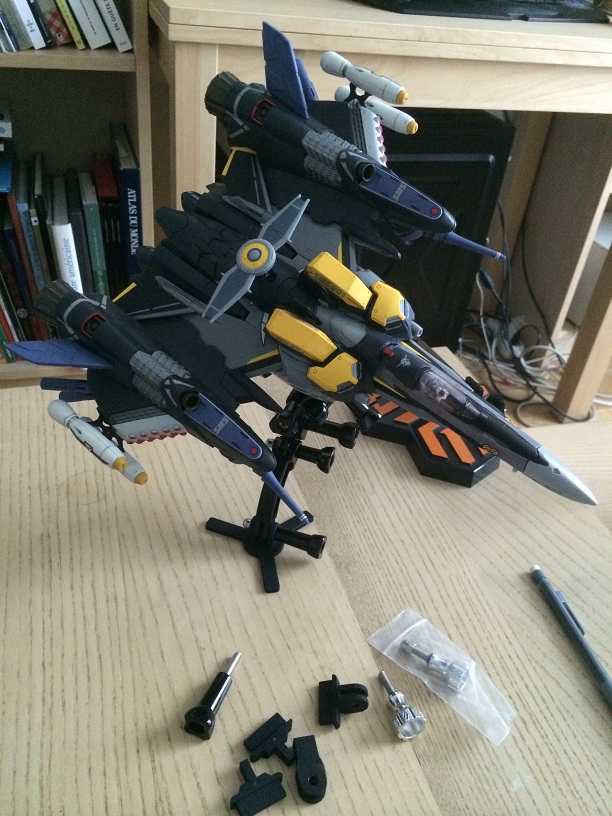
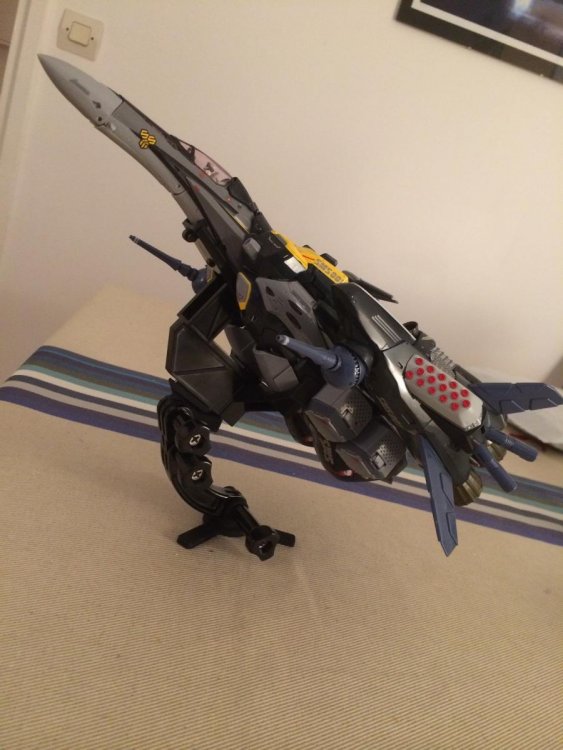
tests on VF-25s with its armor parts and it is pretty stable once you got the center of gravity I am waiting for more options and posability upon receiving this accessory: http://www.amazon.com/gp/product/B00IS3N6ES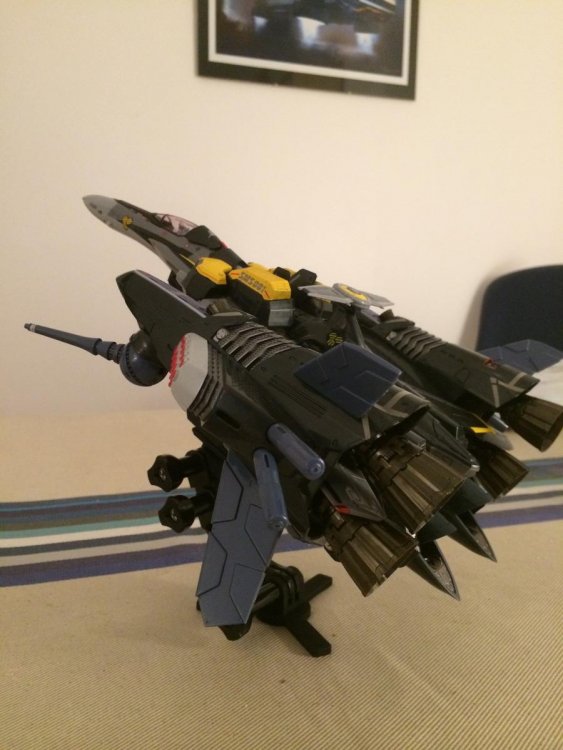
-
As jenius said, there is an additional spacer only for that matter. It is very rare that the metal tabs stay locked with the armor parts on without the spacer.
-
That's mainly the only issue I got with shapeways Shipping is expensive, try to grab a few sets and / or other items for your friends, that's what I do generally to reduce the shipping costs.