derex3592
-
Posts
8871 -
Joined
-
Last visited
Content Type
Profiles
Forums
Events
Gallery
Everything posted by derex3592
-
Live Action Space Battleship Yamato
derex3592 replied to capt.actionjackson's topic in Anime or Science Fiction
I can't wait to actually see this on Blu-Ray someday with 5.1 audio and english subs...PLEASE PLEASE PLEASE!!! -
Yamato 1:3000 SDF-1 Macross - unpainted model kit
derex3592 replied to CF18's topic in The Workshop!
pm sent. -
Yamato 1:3000 SDF-1 Macross - unpainted model kit
derex3592 replied to CF18's topic in The Workshop!
what about the PE parts...anybody know where to score those???? -
No Beagle Blow Superior... that blows superior...
derex3592 replied to EXO's topic in Anime or Science Fiction
I would be ALL OVER a 1:10 Scout!!!!! -
Yamato 1/60 VF-19 Fire Valkyrie (v2.0)
derex3592 replied to UN Spacy's topic in Hall Of The Super Topics
after transforming my 19 for about the 3rd time over the weekend along with some of my older Yamato Valks--the 21, the yf-19,the VF 11, and so on, it is just amazing how much BETTER the 19 is than ALL of them...I will have to get a blue blazer! ohh...and i did NOT have to resort to youtube for a video for it either...like i did for the 21.... -
great job on both!!!
-
No Beagle Blow Superior... that blows superior...
derex3592 replied to EXO's topic in Anime or Science Fiction
We need a drooling smiley...... -
No Beagle Blow Superior... that blows superior...
derex3592 replied to EXO's topic in Anime or Science Fiction
Congrats!! It's an awesome piece! Get ready for THE MOST difficult (but fun) transformation process you have ever encountered! (set aside an hour the first time...) -
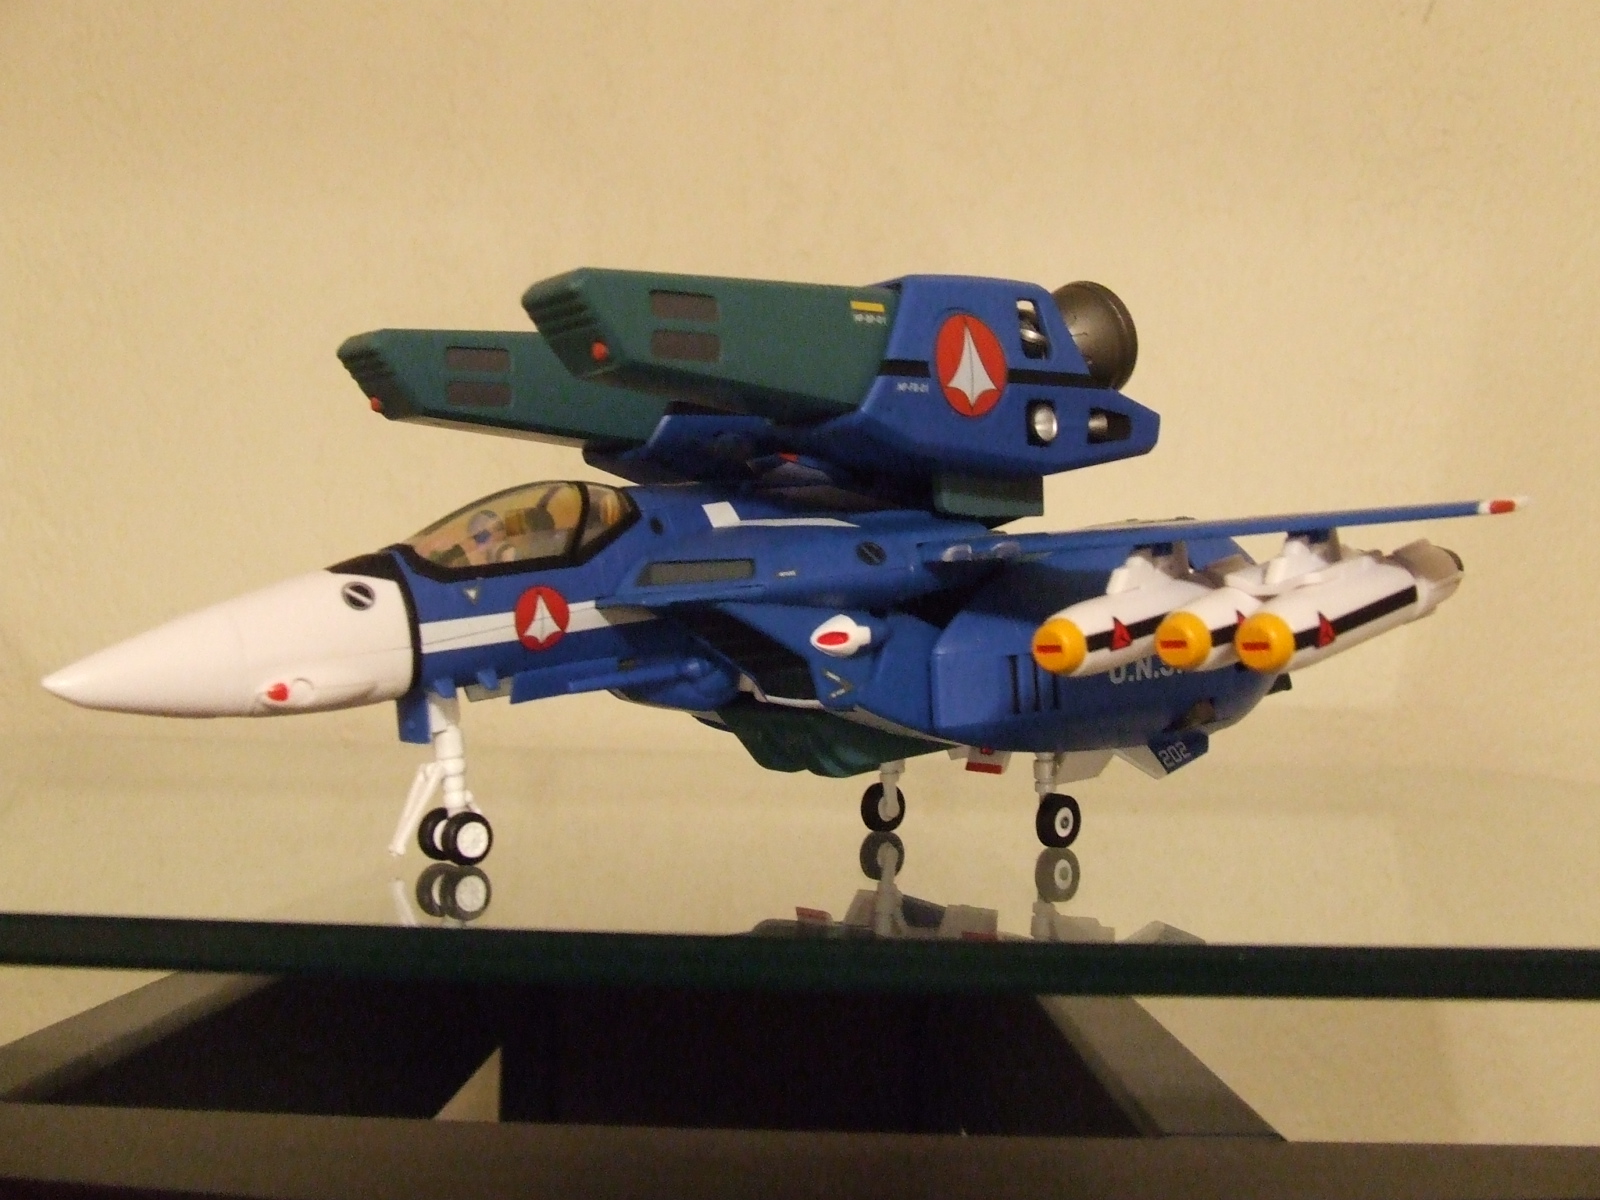
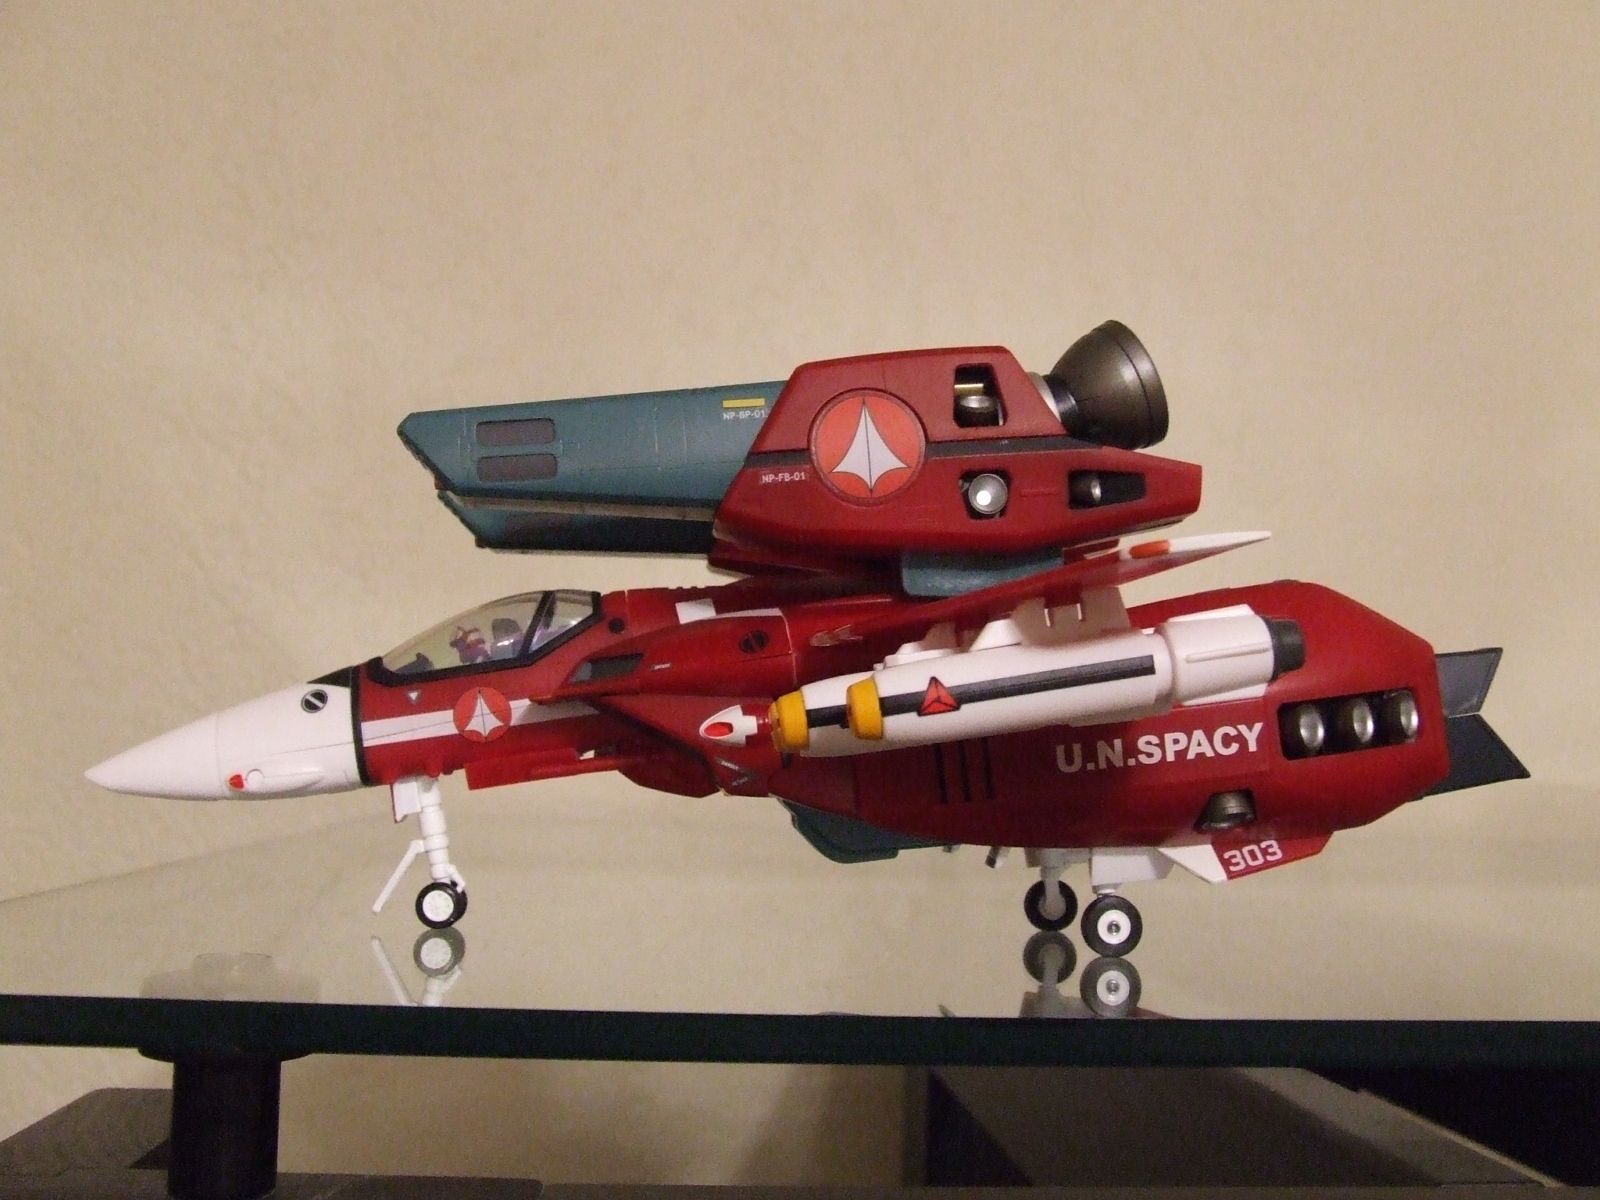
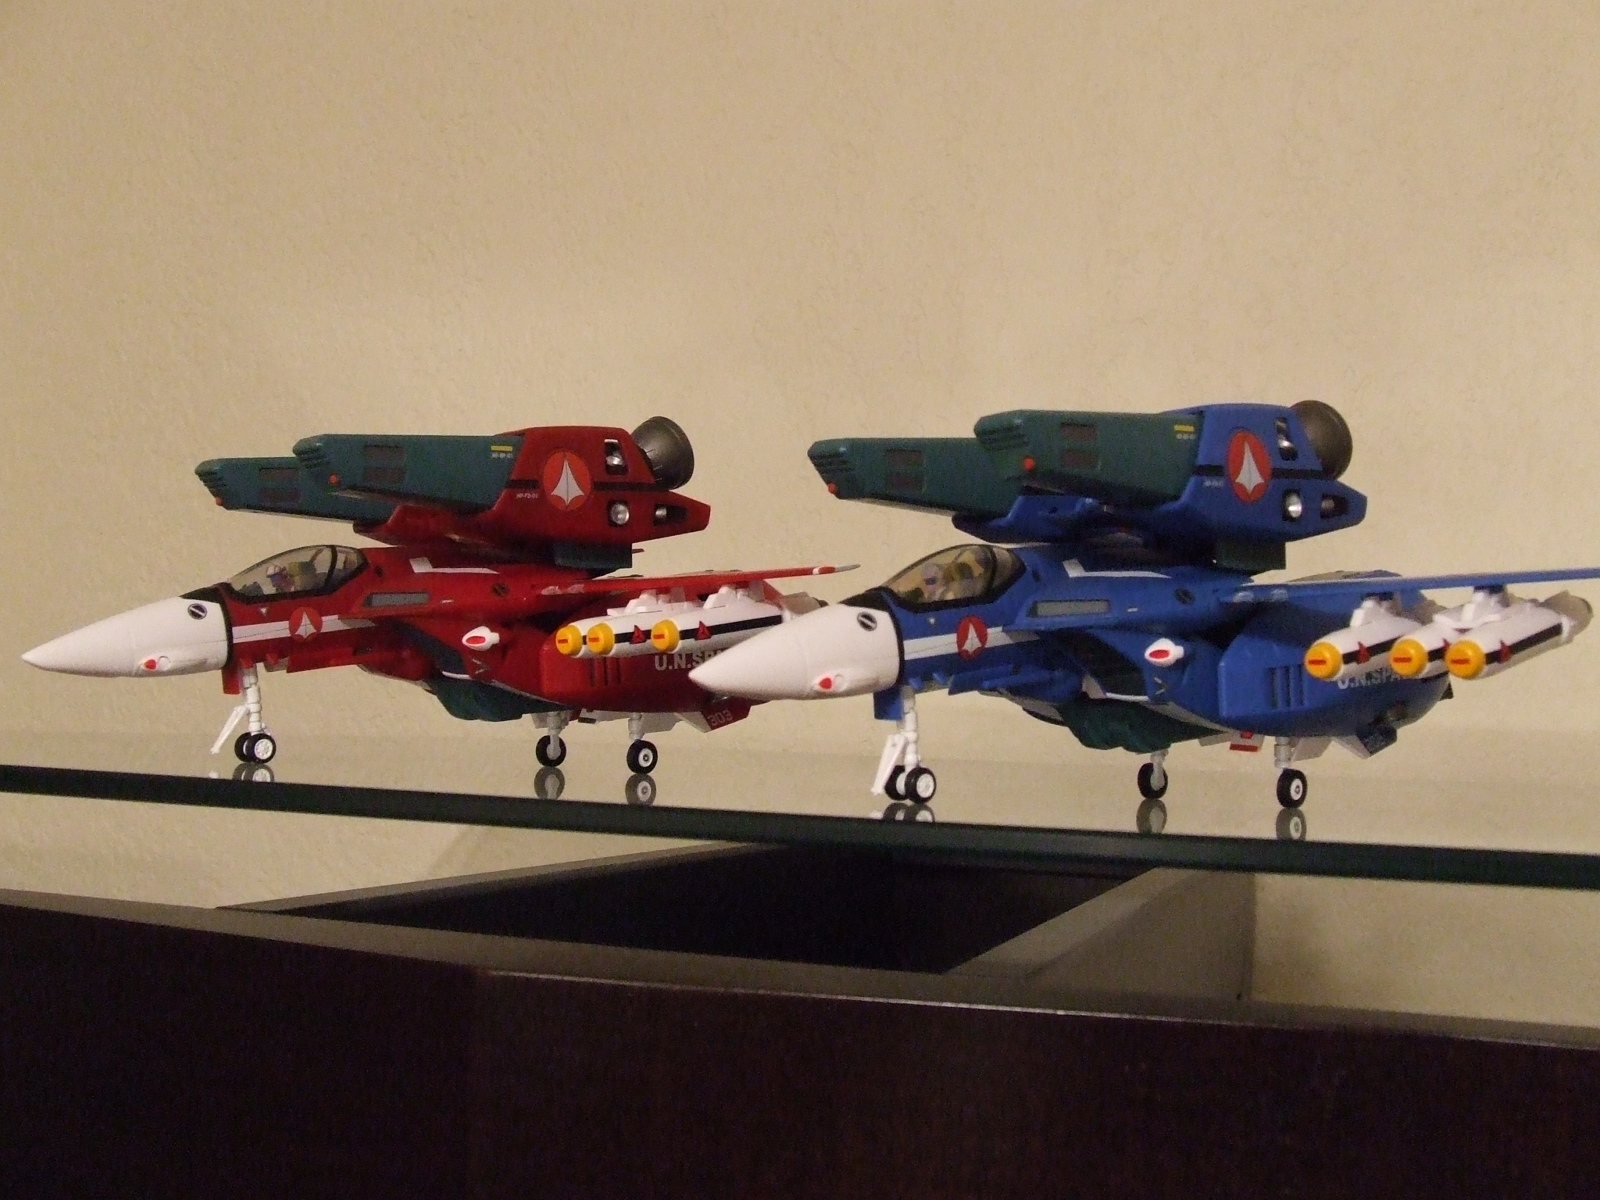
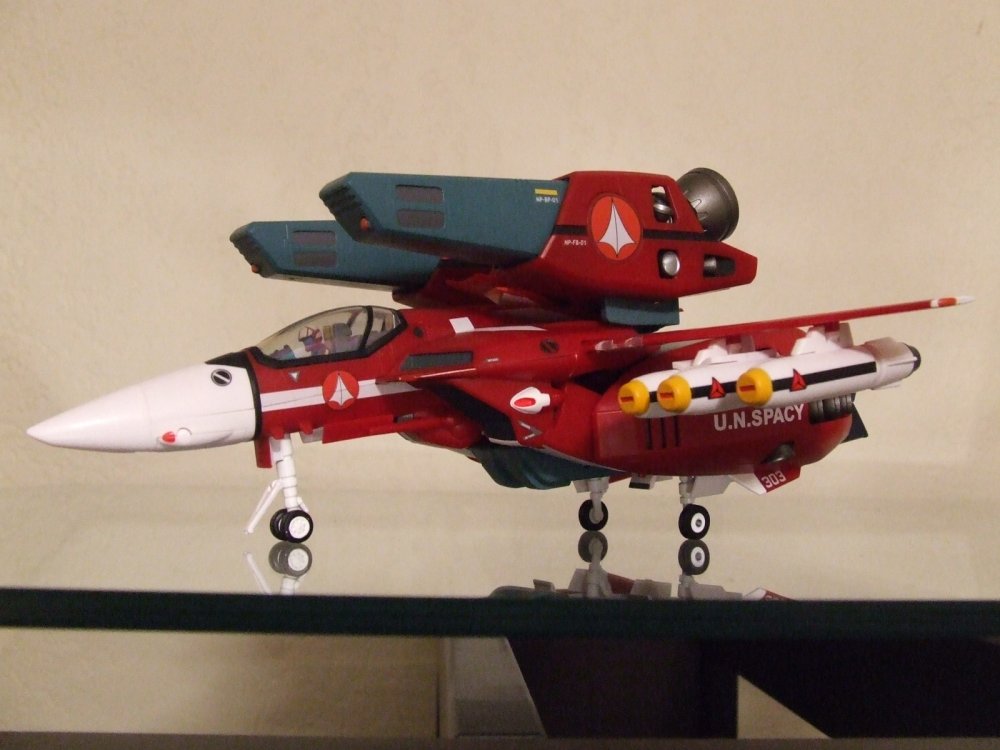
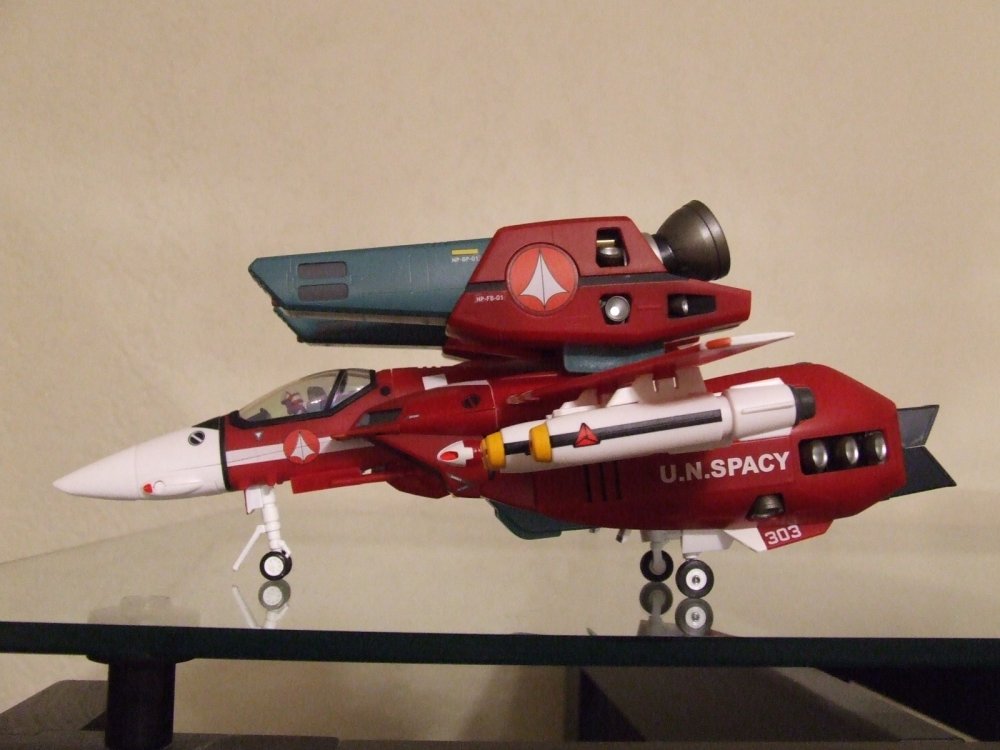
This thread needs pics!!!.....these were a kind of "meh, might as well since they are on clearance sale" buy for me the first X-mas after they were out....glad I did now!!! These were the fresh out of the box pics..I have since panel lined and stickered. The dark color of these two makes panel lining them a real b*tch btw...


-
No Beagle Blow Superior... that blows superior...
derex3592 replied to EXO's topic in Anime or Science Fiction
I happen to own two of the Matchbox Shocktroops and one Scout from back in my childhood, I have them in a box somewhere. The Shocktroops aren't bad at all--kinda big for today's stuff..ie 1:60 or 1:55 or whatever the Toynami Alphas are, the scout isn't anywhere close to the lineart, but then again, it's probably the only ones we'll ever get! Maybe I should dig them out and find a place for them.. -
No Beagle Blow Superior... that blows superior...
derex3592 replied to EXO's topic in Anime or Science Fiction
I for one was hoping beyond hope that the vinyl line of battlepods would do well enough for Toynami to proceed with some Invid...but ummm...yeh. Seeing as those idiots could not even manage to get more than 2 models out, I don't think we are gonna ever see any Invid/Inbit anything.. -
The Transformers 3 Thread--A Michael Bay Thread
derex3592 replied to areaseven's topic in Anime or Science Fiction
OK---just went and saw this at an early 10am showing. Saw it in 2D--thankfully. I don't think I could have handled it in 3D. I guess it was good-ish. Better than ROTF for sure. Still to long and drawn out. Liked Nimoy as Sentinal. LOVED Rose Huntington Whatever as eye candy....Megan WHO???? and this chick at least could somewhat act...liked the first part on the moon...liked the last 10 minutes..other than that...meh. -
EXACTLY!!!!
-
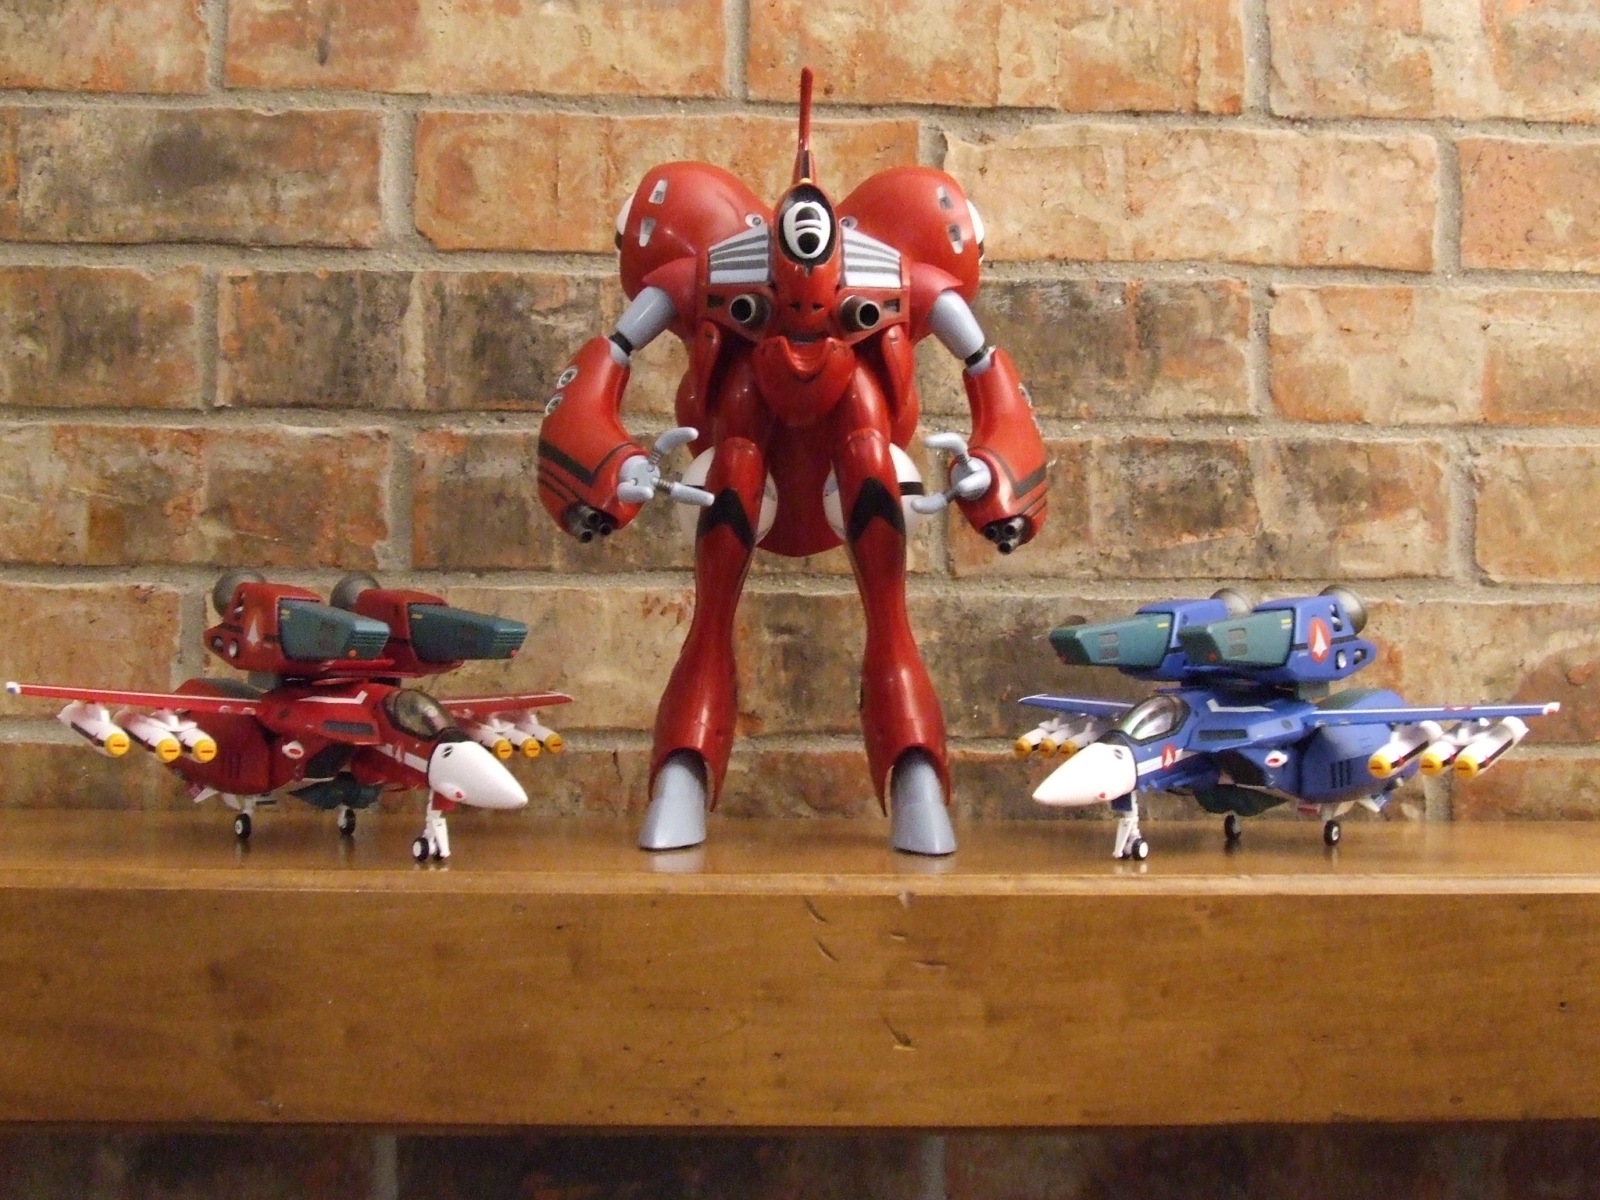
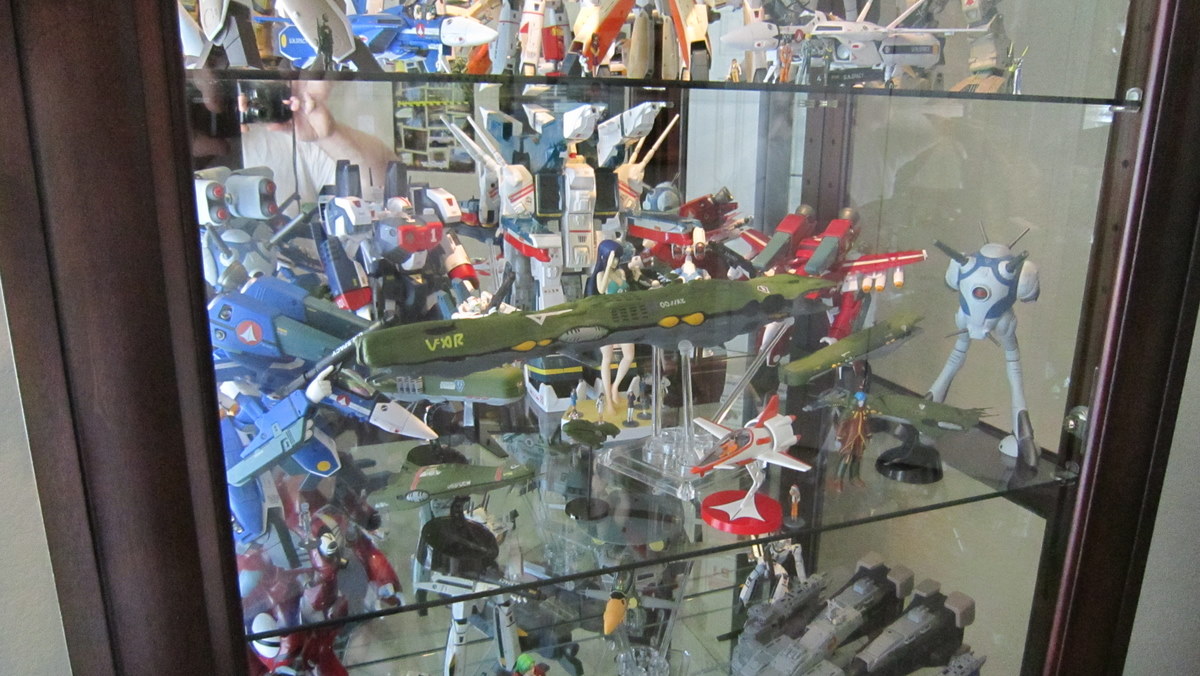
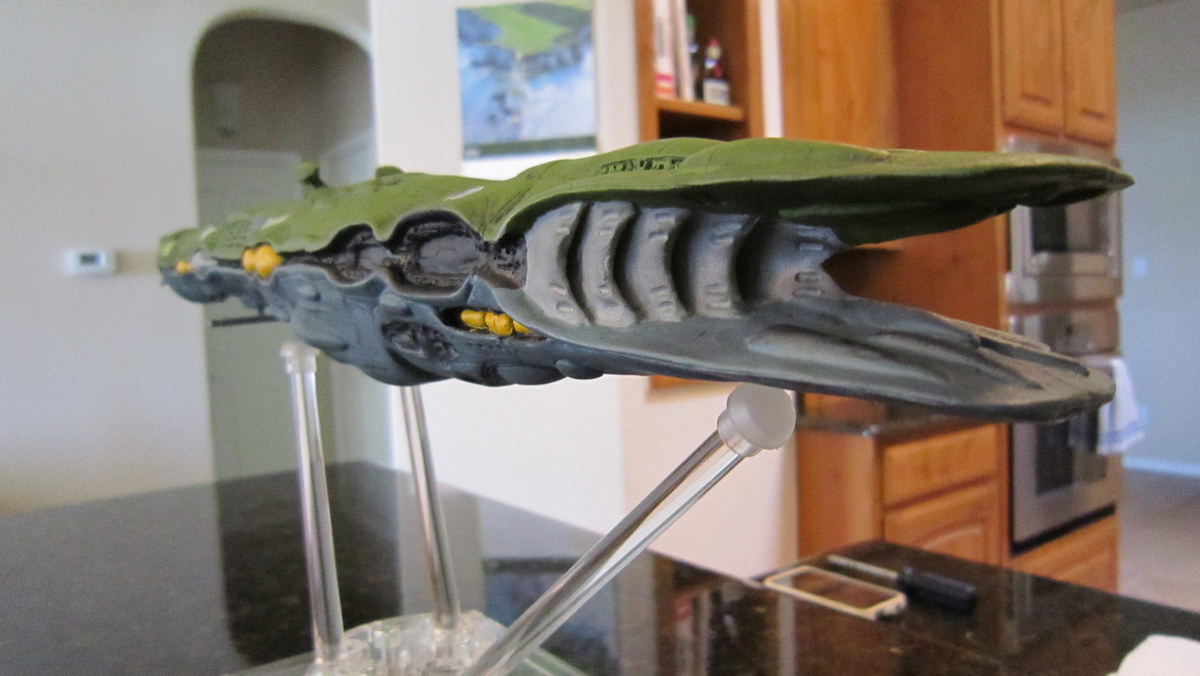
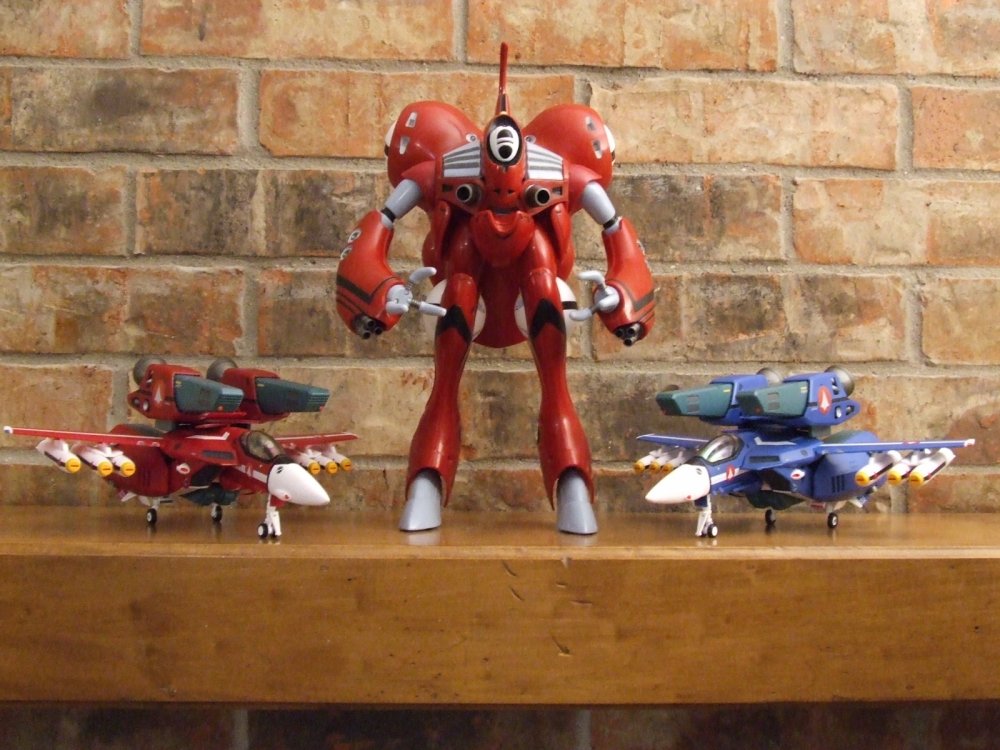
Thanks KyeKye...! One more shot of this big green monster in my case with his friends...don't think I'm gonna get much more in there...

-
If it had the option to do all three of the above variants, AND came with a pilot AND decals, YES I would have bought one. No problem.
-
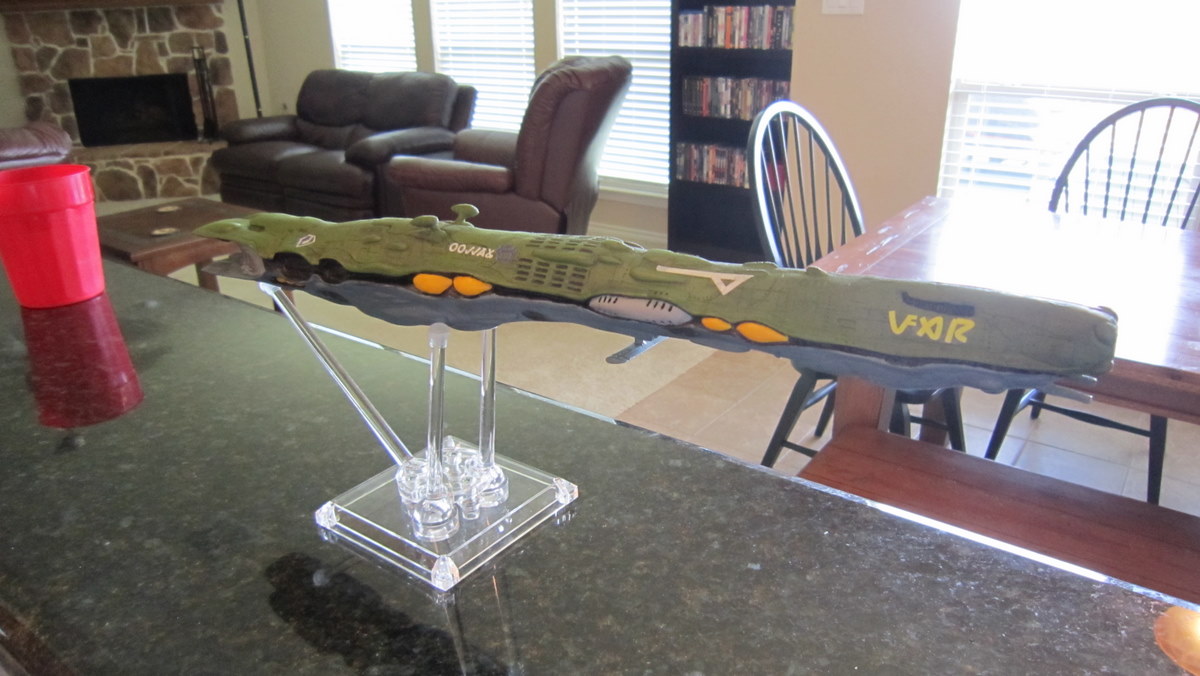
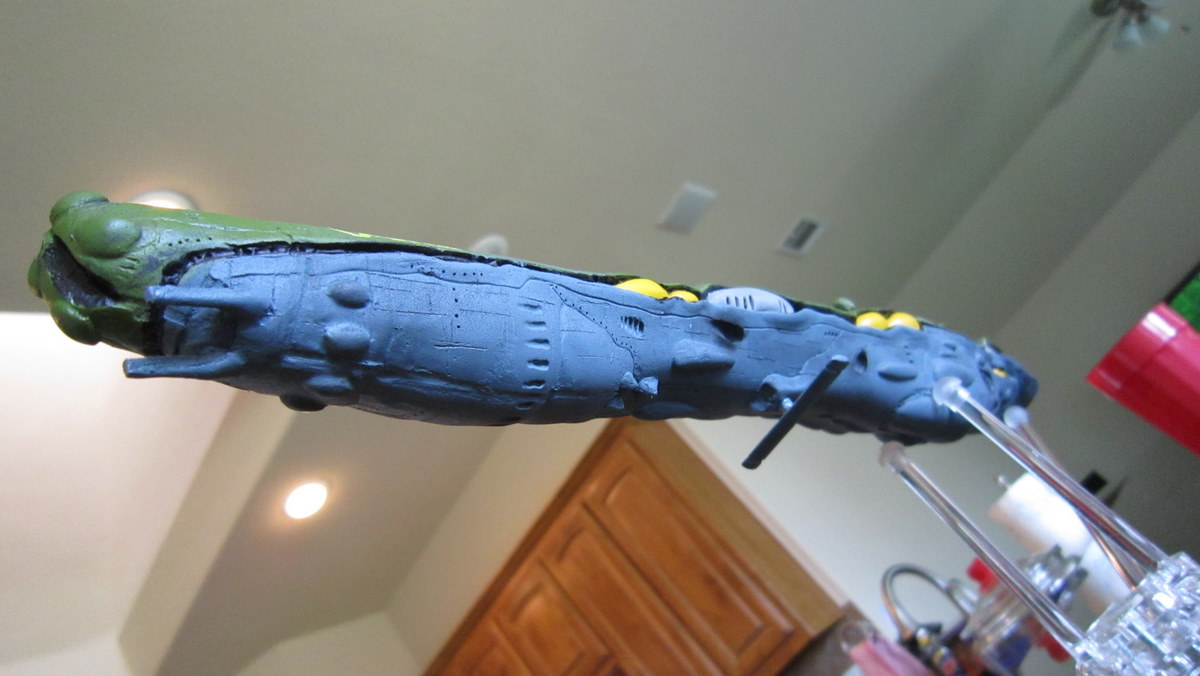
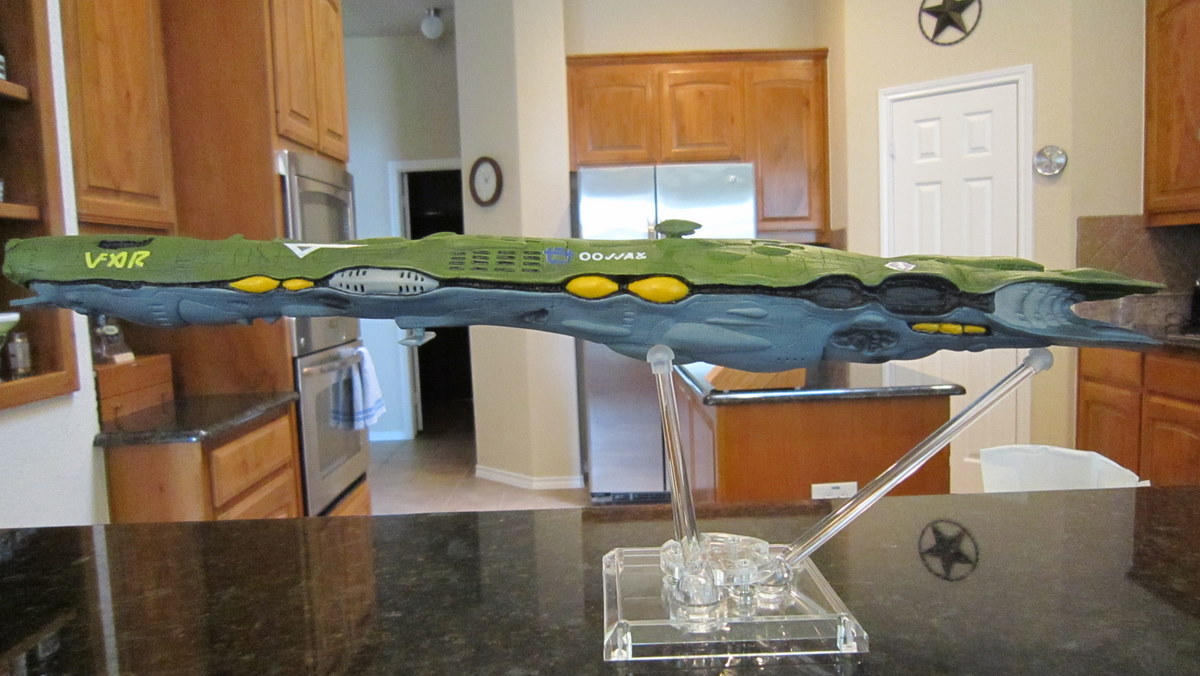
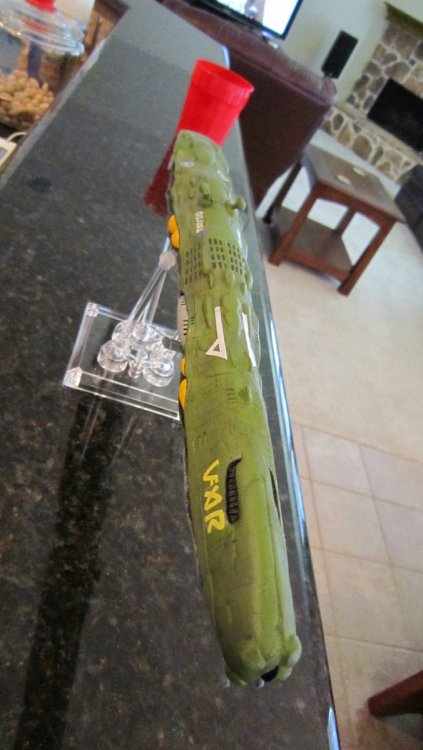
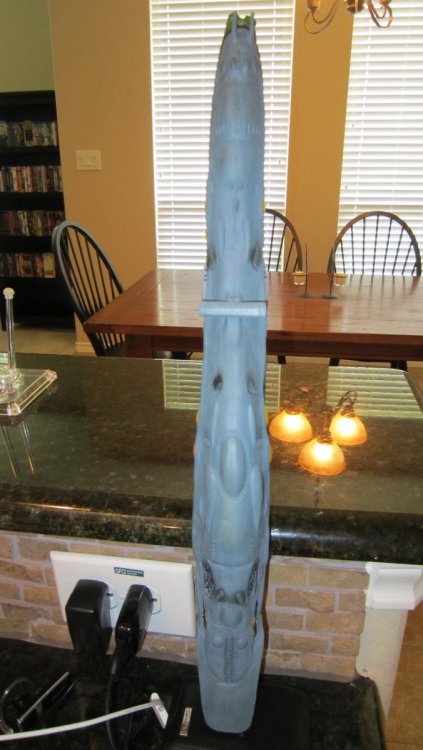
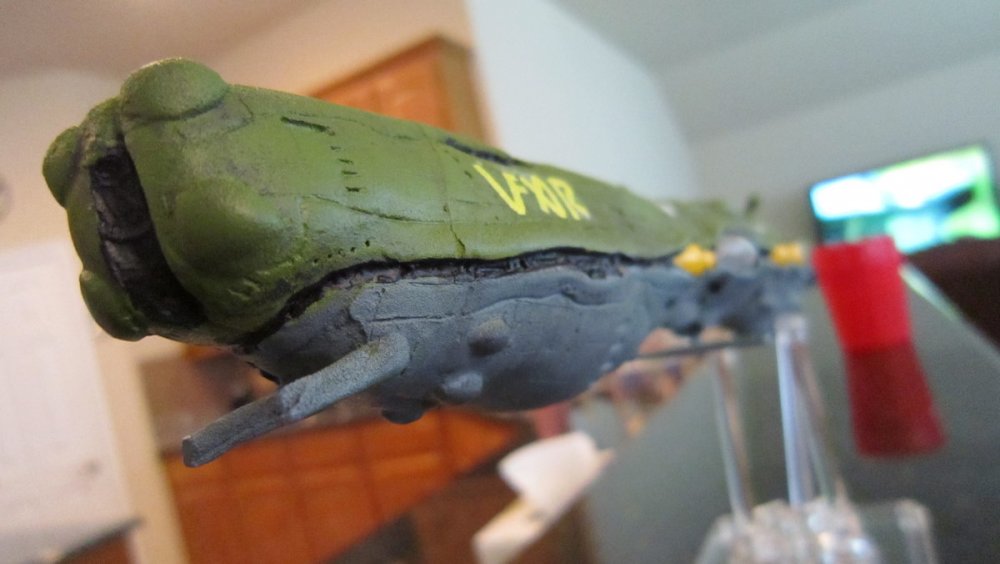
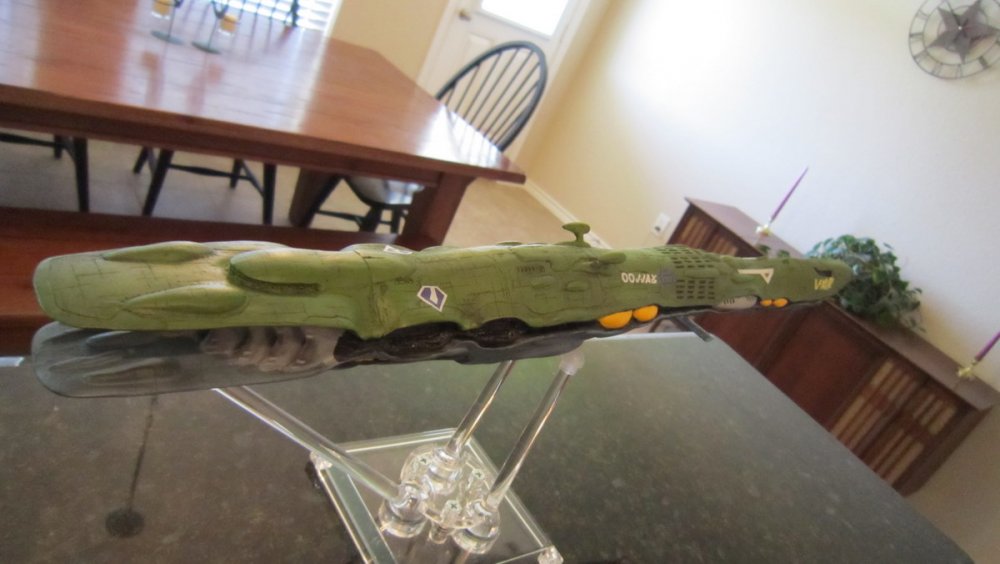
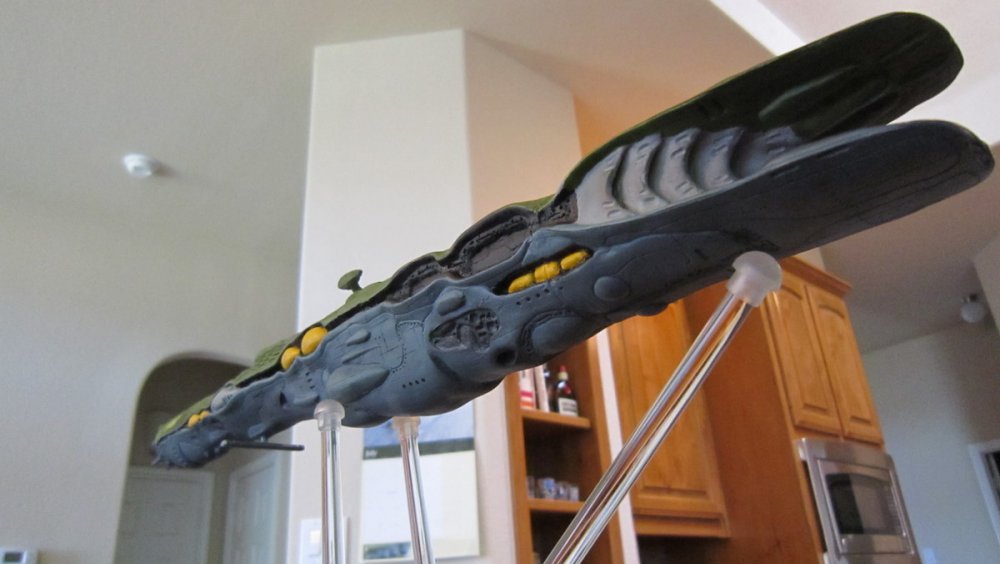
Ok Guys.....Here she is...the model I have wanted since childhood...finished. This was my first multiple piece resin kit..different to say the least from a normal kit...aside from the very difficult task of getting the two halves together, I really enjoyed building it. I tried to take my time and I am pleased with how it came out. Pics really don't do the weathering justice...hard to get a good pic of it on the green paint. The kit was made by Wayne at Scale Solutions down in Australia. It was very well done in my opinion. Now I just have to figure out where and how I am going to fit it in my Macross cabinet!


-
awesome!!!
-
LMAO!!! That's great.
-
Living in Fort Worth and going to Dallas for work a lot, I see some pretty cool stuff around here, especially Dallas..I ALWAYS scream when see a Ferrari or Lambo...saw a 458 Italia the other day and scared my gf half to death as I screamed "oh my god!" or something to that effect. The ones that catch u off guard are better though...just driving home from work one day and a yellow Lexus LFA passed me...it took a minute to actually realize what it was...doubt I'll ever see another one. No Veyron sightings yet...but that's good as I might have a wreck trying to get a pic!
-
Prometheus - on Blu-Ray and DVD Oct. 9, 2012
derex3592 replied to Pizza the Hutt's topic in Anime or Science Fiction
sounds interesting! I'm there! -
Yamato 1/60 VF-19 Fire Valkyrie (v2.0)
derex3592 replied to UN Spacy's topic in Hall Of The Super Topics
LOL. exactly. -
BIG +1 on this.
-
Yamato 1/60 VF-19 Fire Valkyrie (v2.0)
derex3592 replied to UN Spacy's topic in Hall Of The Super Topics
I think I'm gonna have to pass on this one....FireValk is enough by itself for me.. -
Ghost X-9 from Mac Plus in 1:60 1:72, or even 1:48 would be FULL of WIN!!!!
-
Sweet plane! Always liked the F111.