derex3592
-
Posts
8810 -
Joined
-
Last visited
Content Type
Profiles
Forums
Events
Gallery
Everything posted by derex3592
-
CORRECTION! It's coming back to me now... I used Tamiya TS-12 Orange. Spray can. White I think I just used some Model Master enamel white spray paint maybe? Might have been generic Home Depot Gloss White. Sometimes I swear the cheap spray paints go down better! I used model master Steel for one fan blade and testor's aluminium for the other just for fun. Hope this helps!


-
I would love to help broh, but it's been tooooo long since I did mine! I can't remember what I used!
-
-
I agree. God I wish I would have forked over the cash for one of these !
-
That rocks!
-
1/48+fp's, 1/60+fp's, 1/72, 1/2k, 1/3k,1/100 and now 1/144
derex3592 replied to VF-18S Hornet's topic in Toys
My 17 looks like a steaming pile of cow poo now.....thanks! LOL. -
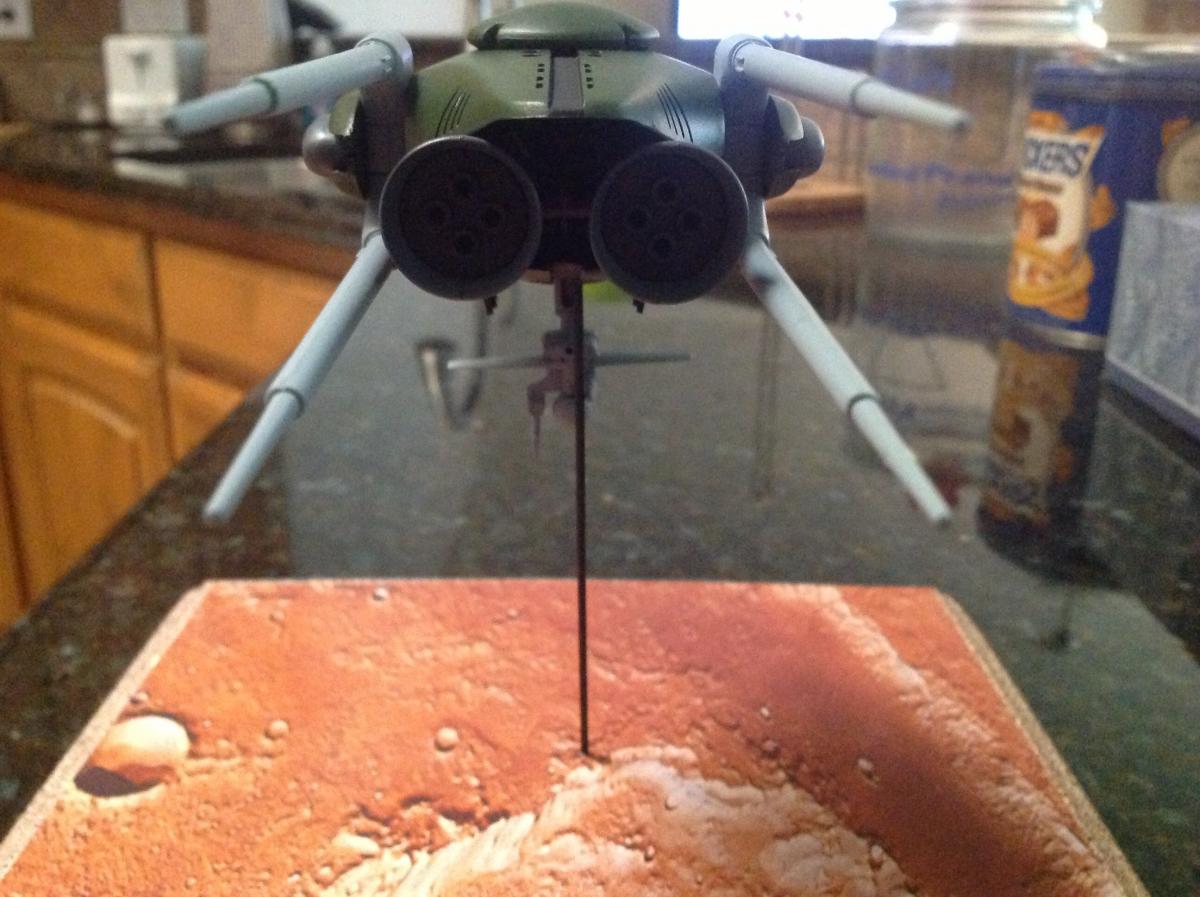
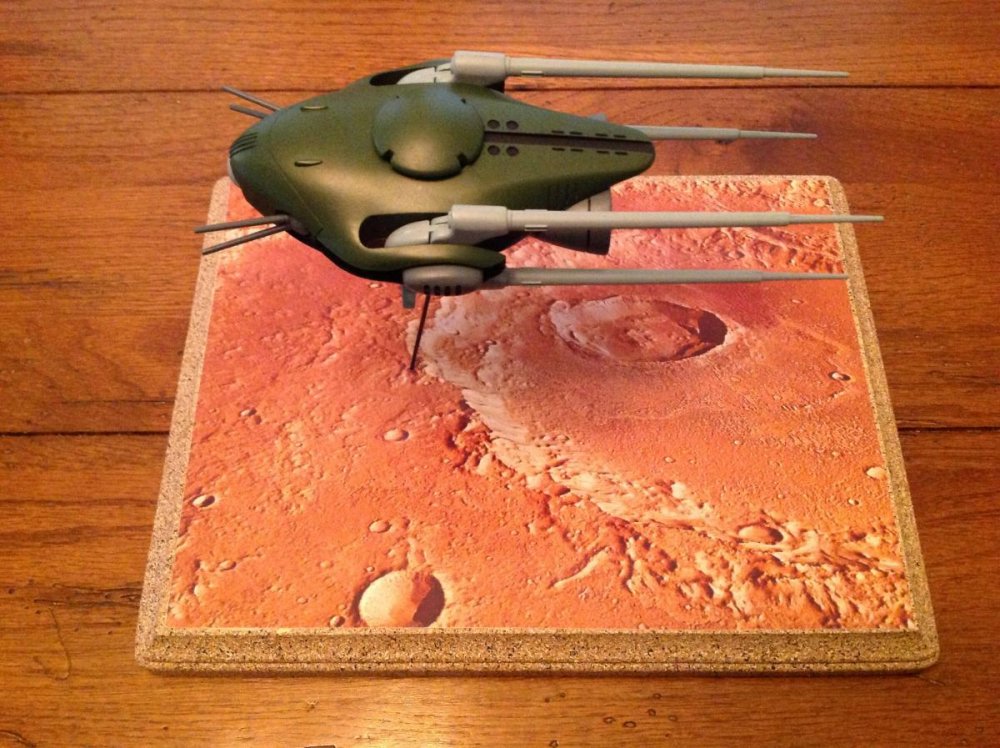
It's funny you guys bring this up...I actually thought long and hard about where on the base to place it...and yes, I can rotate it any direction I choose. I went with that point on the base for one simple reason---I DID NOT want the legs and in particular the guns (you have NO idea how brittle this plastic is!!!) sticking out past the wood because sure as the world ...somehow ...my clumsy ass would hit them or something and then there would be falling and breaking and crying and screaming! . So it's more of a safety measure and also to use only as much real estate in my display cabinet (which is already filled to overflowing) as needed for the base/model.
-
Yup. Not the kit version. Screw that. Just a Kaki TV repaint. Go over and check my build thread in "Workshop" forum.
-
No thanks! Once was enough!
-
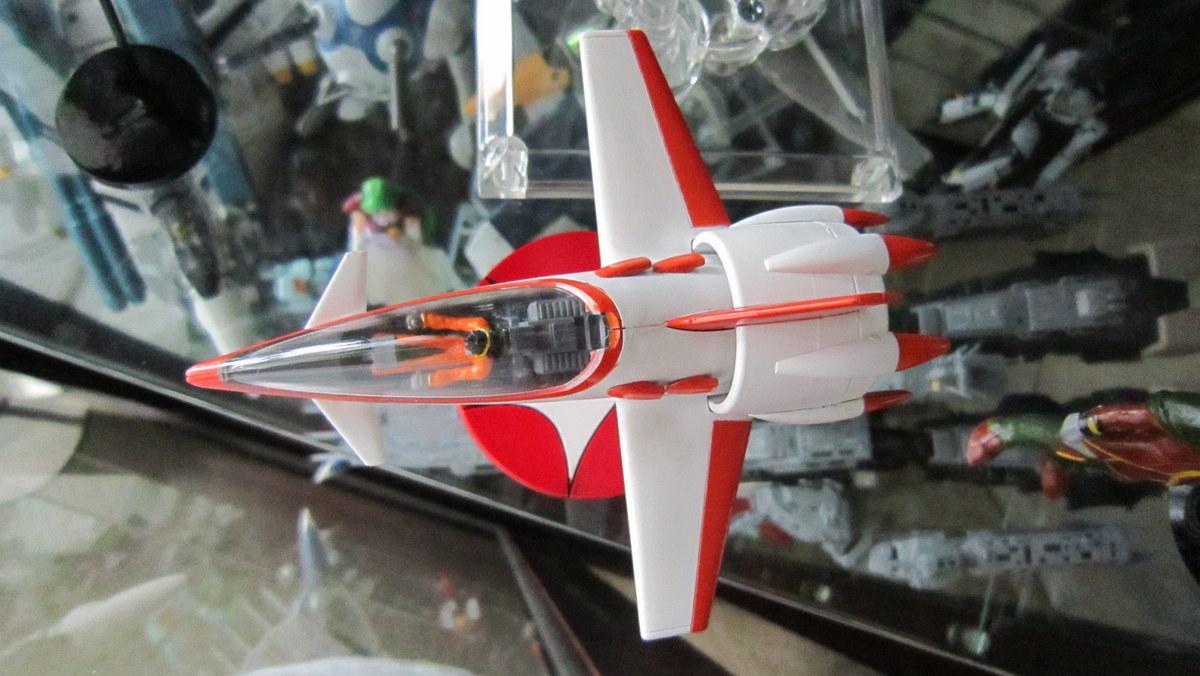
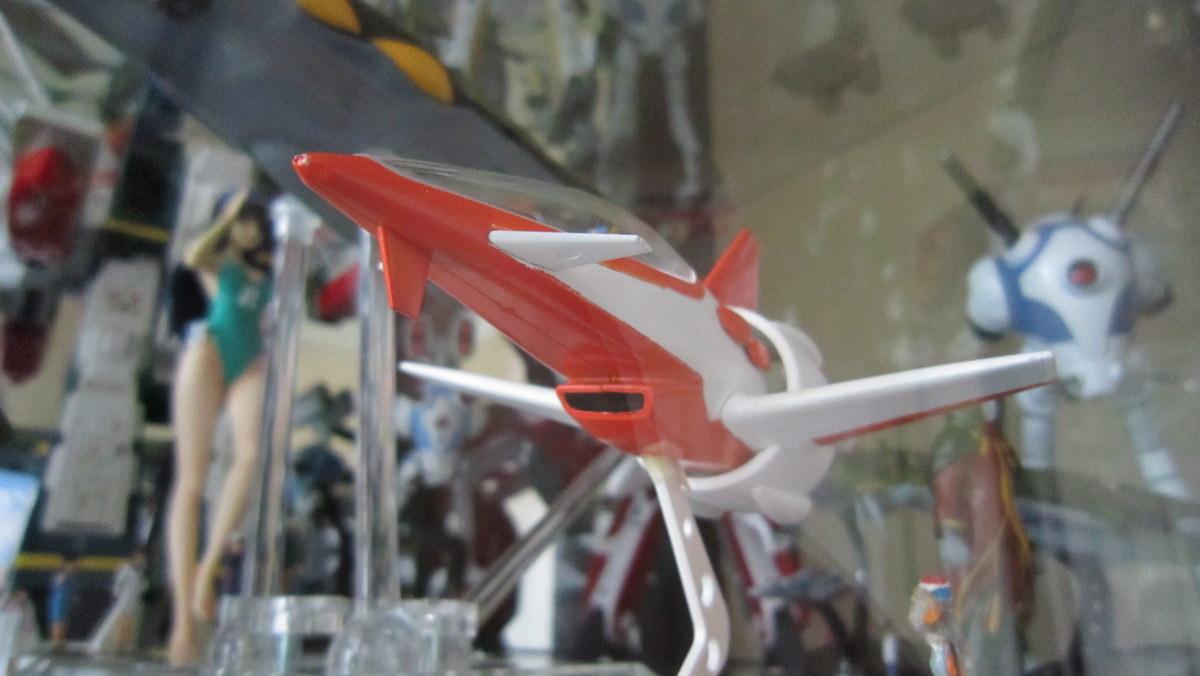
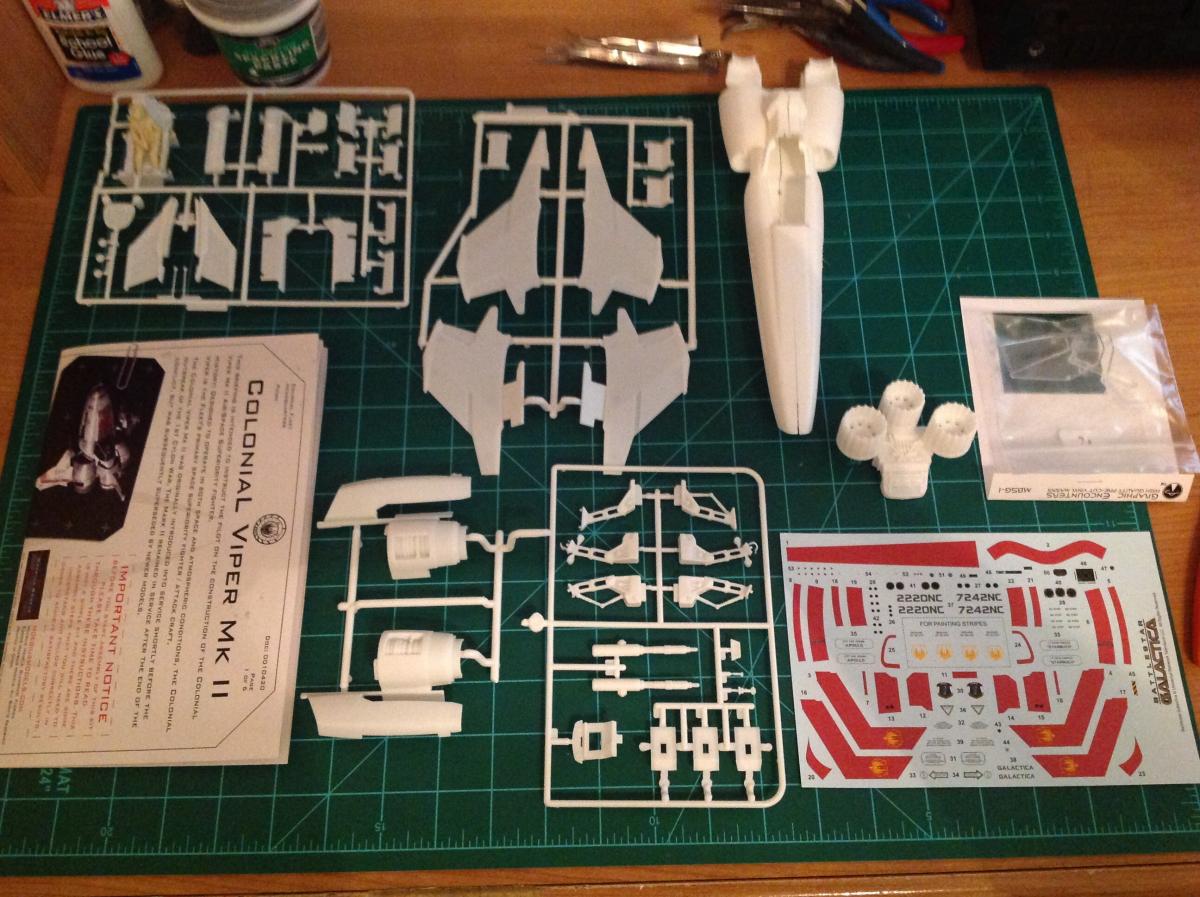
Maybe later...in the mean time...next! ...time for some BSG Viper action!

-
Bandai 1/72 fully transform able VF-1 plastic kit for Macross 30th Ann
derex3592 replied to Vi-RS's topic in Model kits
ummmmm....gross....ewww...and gag. NEXT! -
Those AngelBirds are REDONKULOUS!
-
Yes I do.....sadly I've run out of room to display them!!!
-
Thanks Guys!
-
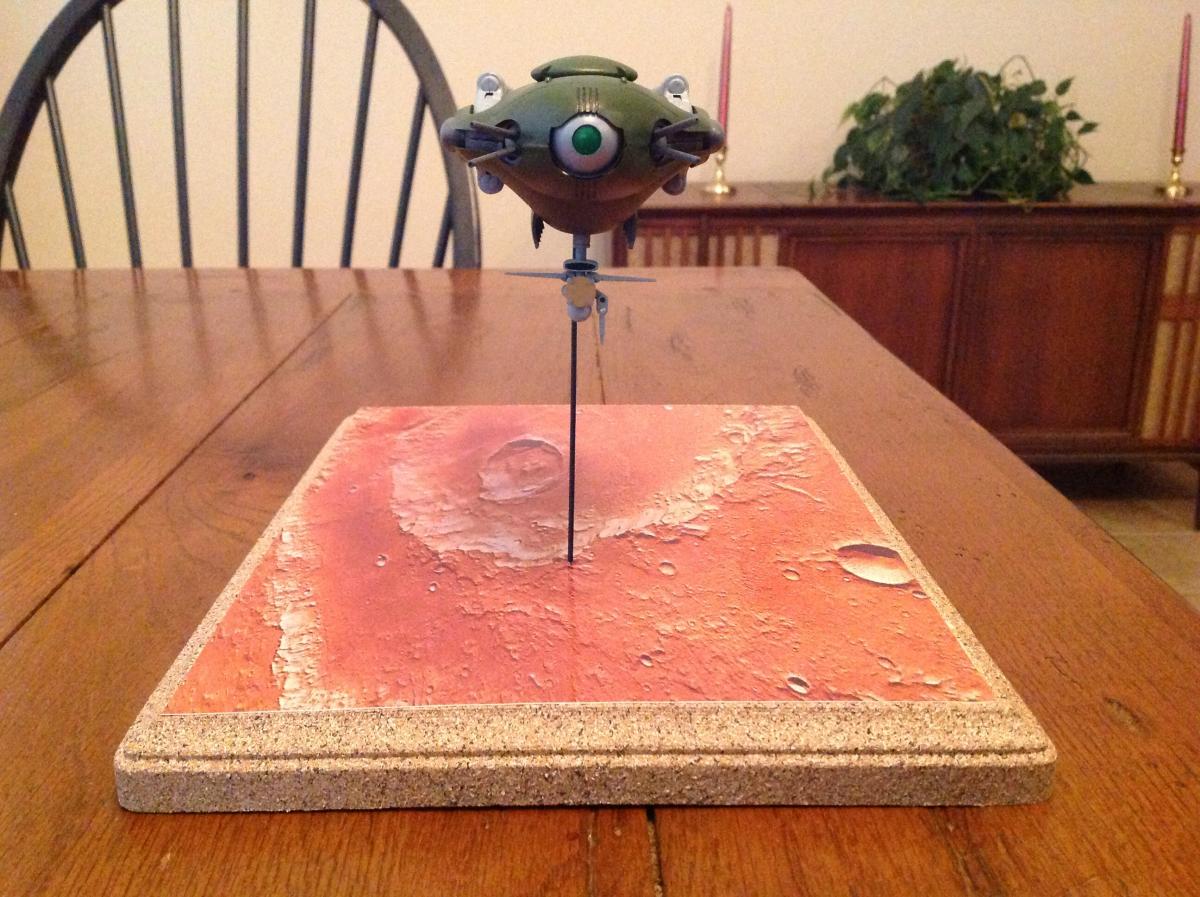
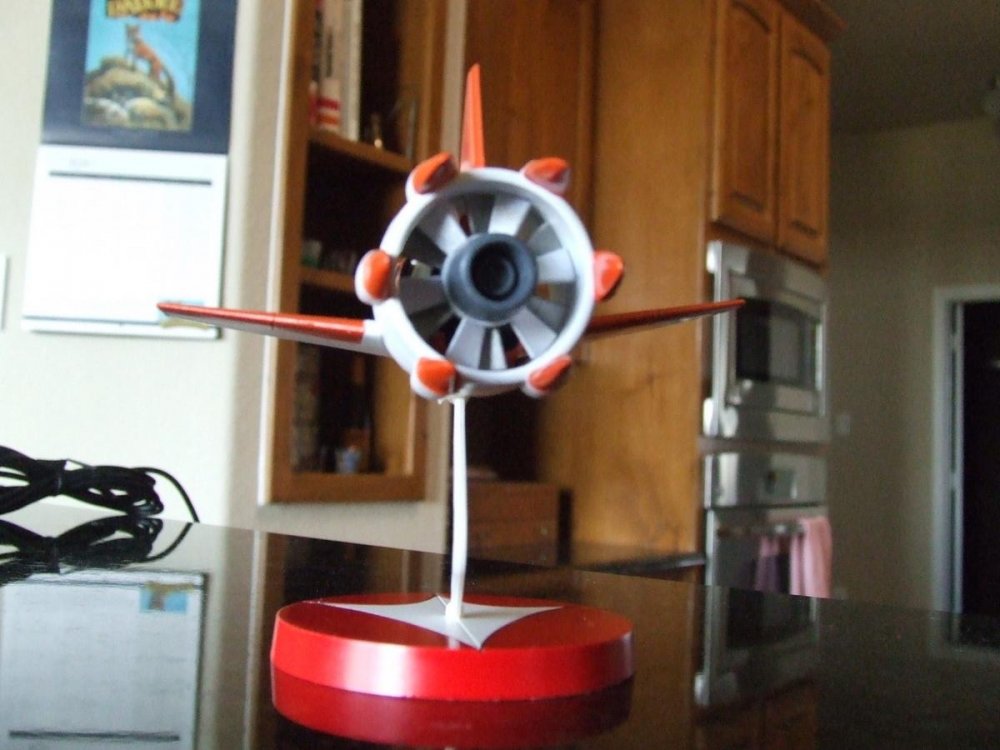
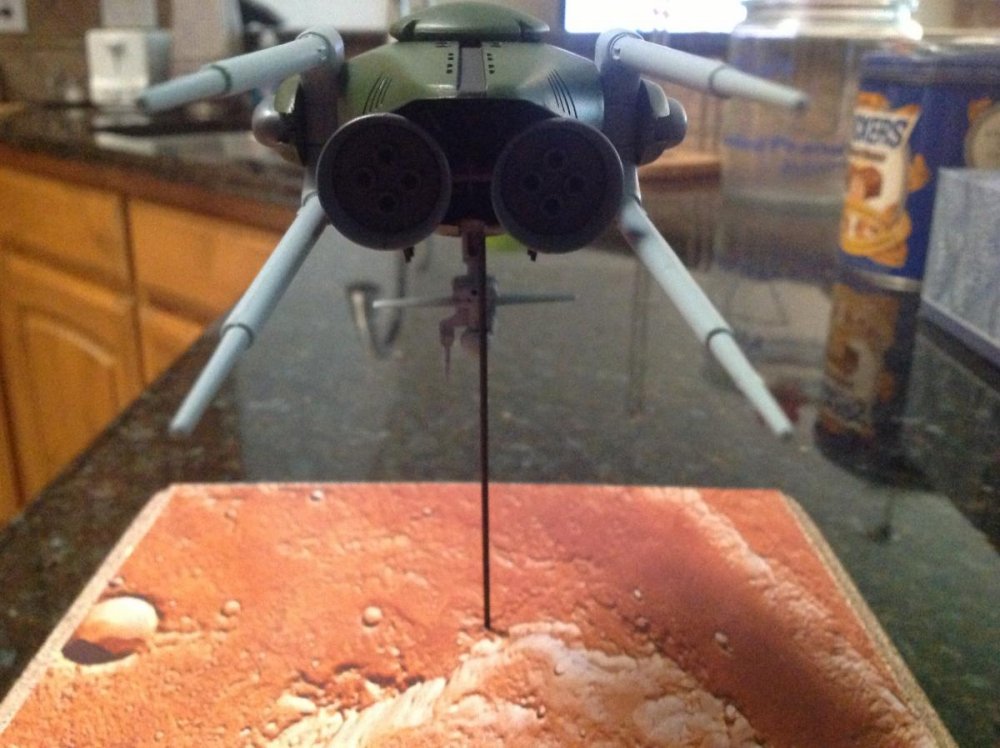
Finished my 1/720 Bug Eye Scout. Tried every trick I know to get the 30+ year old decals to come off the sheet but had no luck so I'm going with this is as it looks more anime accurate! Pretty proud of this turning out as well as it did considering the 30 year old cheap dime store plastic! There were more than a couple of unplanned breaks....enjoy!

-
Where can I watch SDF Macross and DYRL?
derex3592 replied to Spacerat53's topic in Movies and TV Series
bummer... -
Where can I watch SDF Macross and DYRL?
derex3592 replied to Spacerat53's topic in Movies and TV Series
Does anyone know why Robotech was dropped off Netflix this week? It was nice to be able to pull it up on my iPad to check mecha for model building quickly....strange!.... -
I'm sure it'll all be worth the wait!
-
Star Trek Into Darkness, in theaters May 17, 2013
derex3592 replied to UN Spacy's topic in Anime or Science Fiction
because A New Hope was and still is just that freaking awesome! -
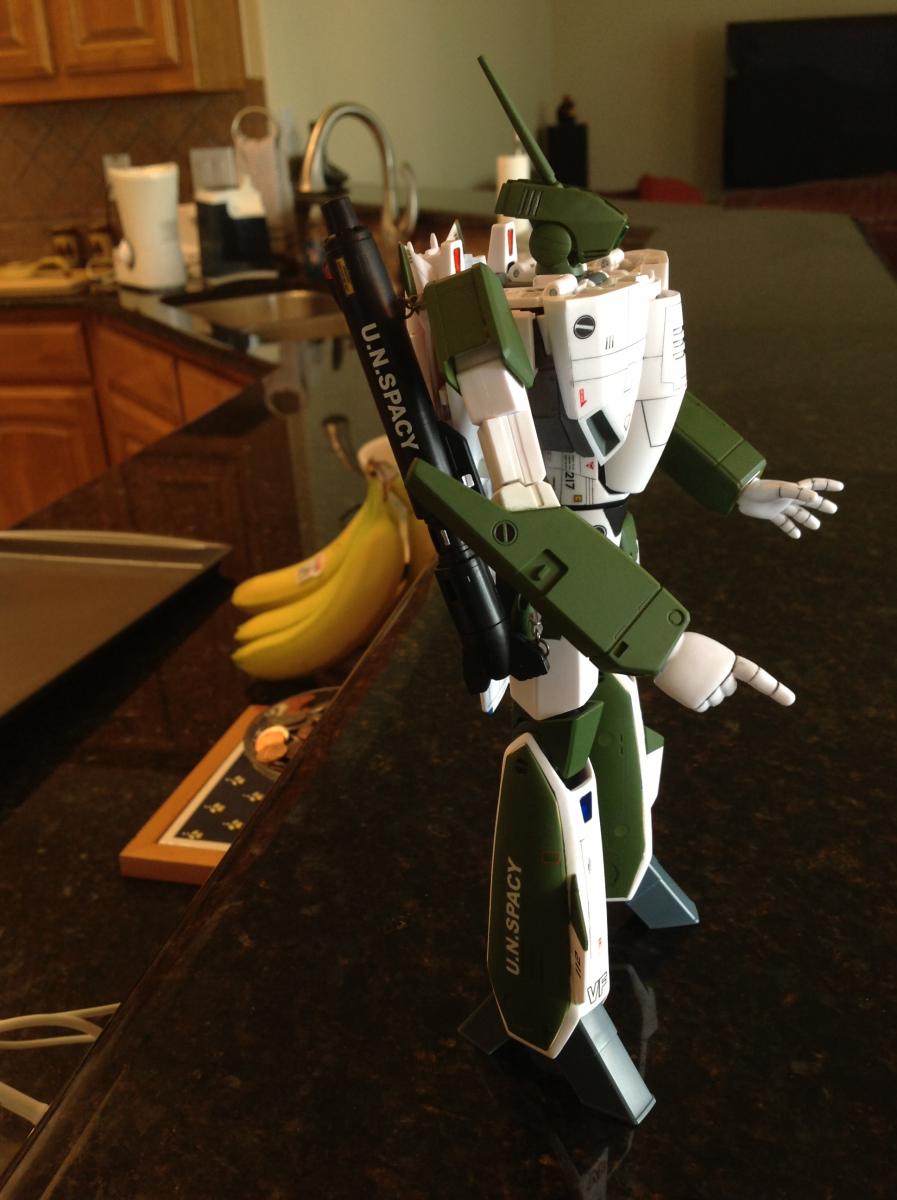
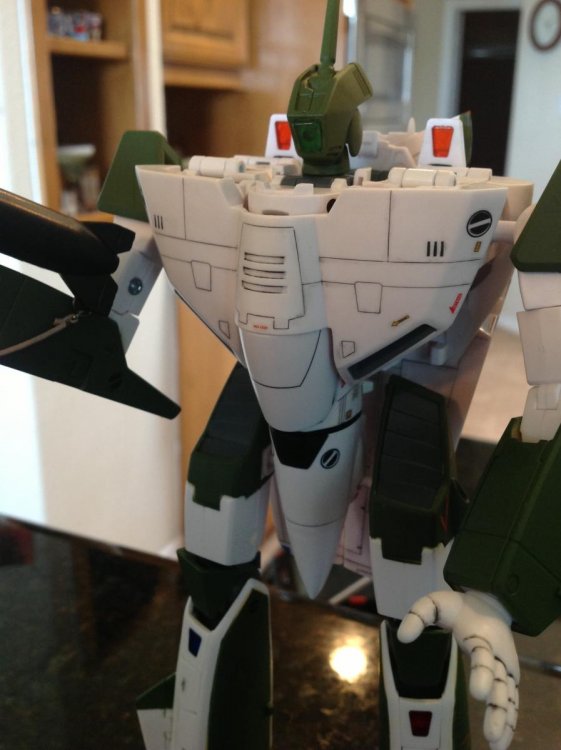
yeh..i know..but THANKS for noticing!!! and callin me out for it! and no...I'm not gonna transform it. I already know what would happen. LOL. He's gonna stay as a battroid as that how he was in the show.
-
thanks guys!
-
this!
-
yeeeeh...I have that one and the 19 sitting in my "to build" pile, but I dunno...something tells me they are both gonna be a b*tch to build....
-
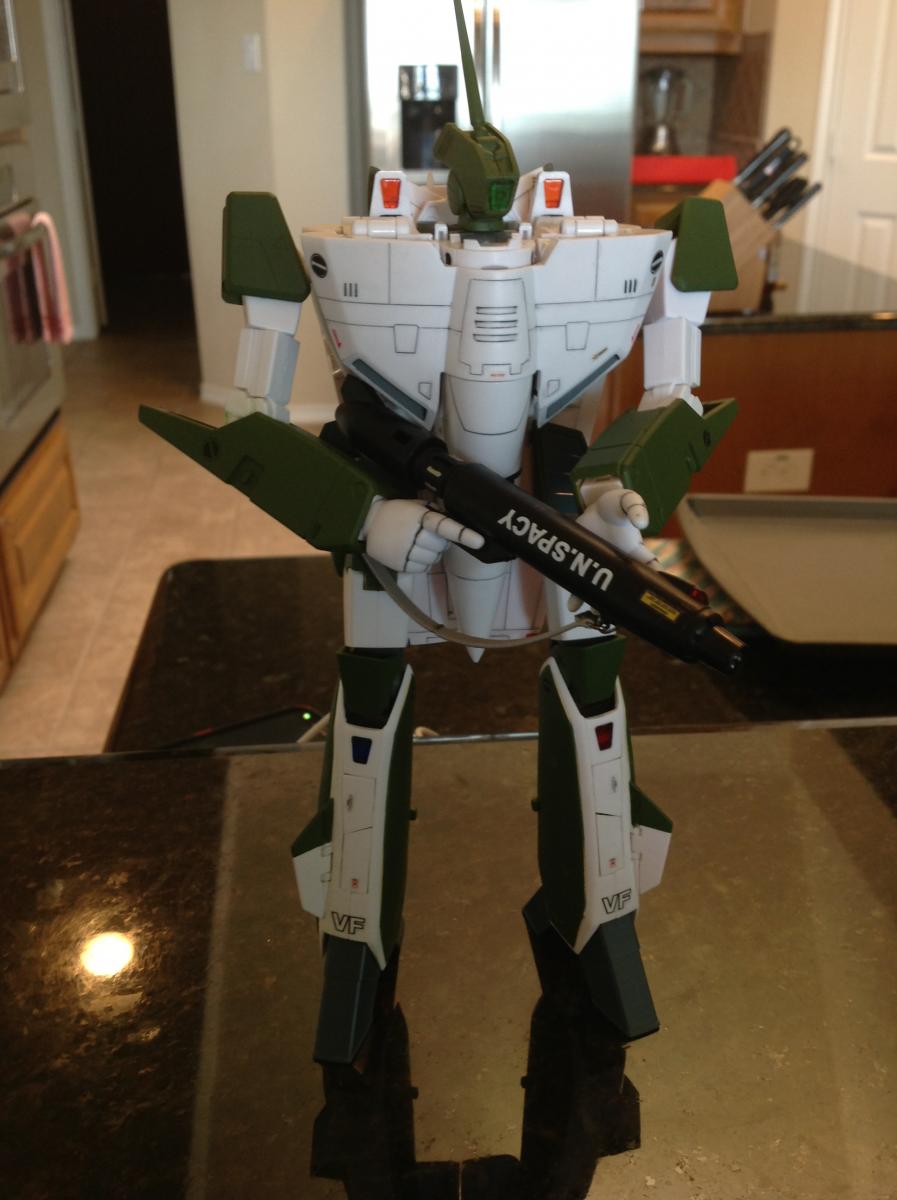
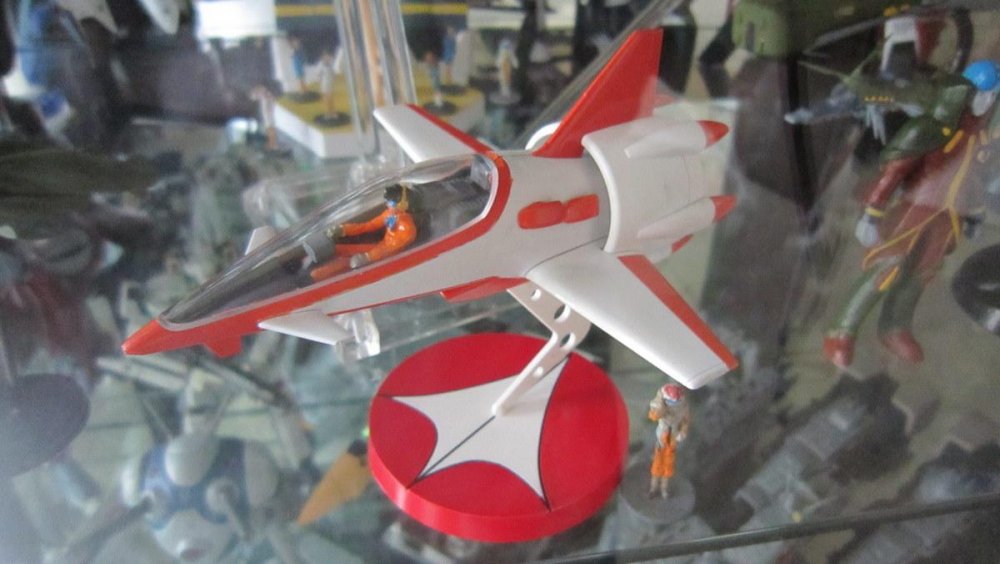
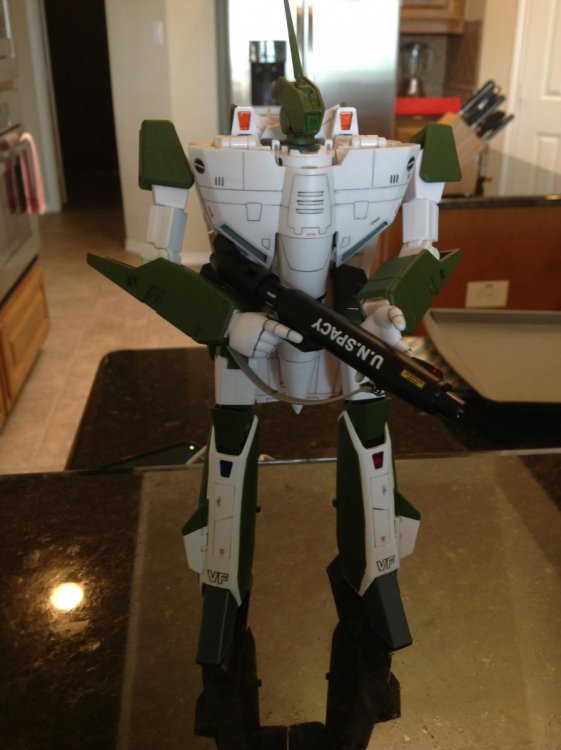
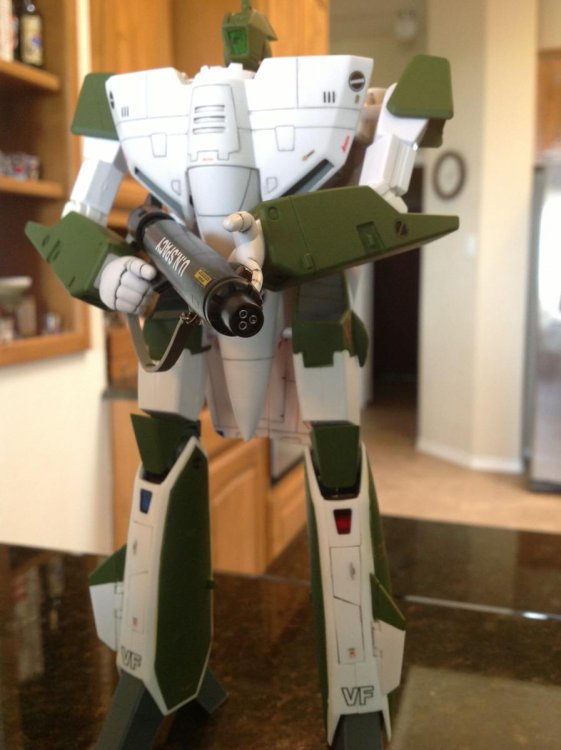
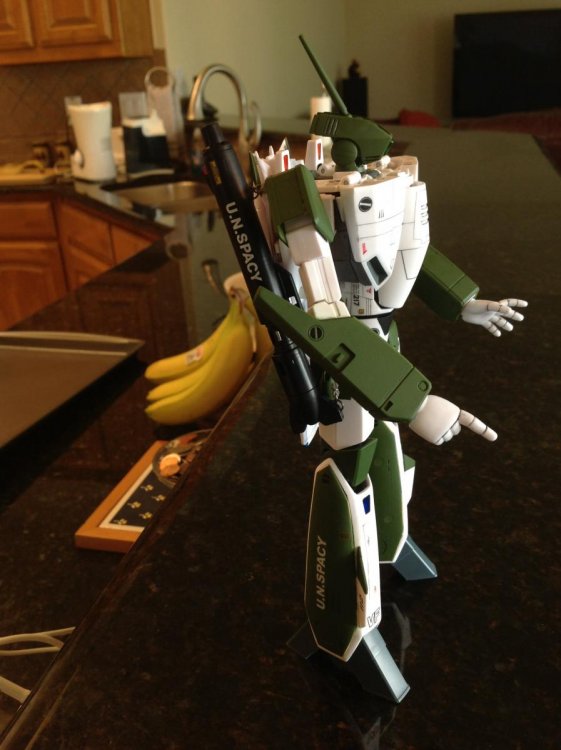
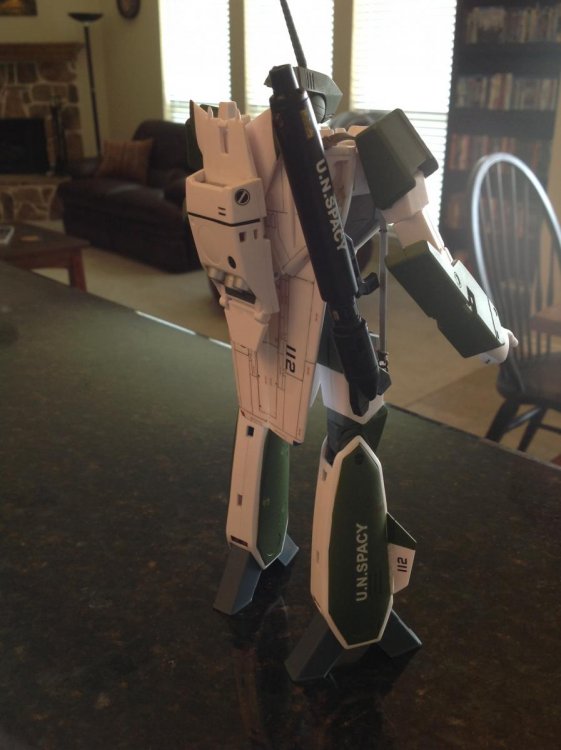
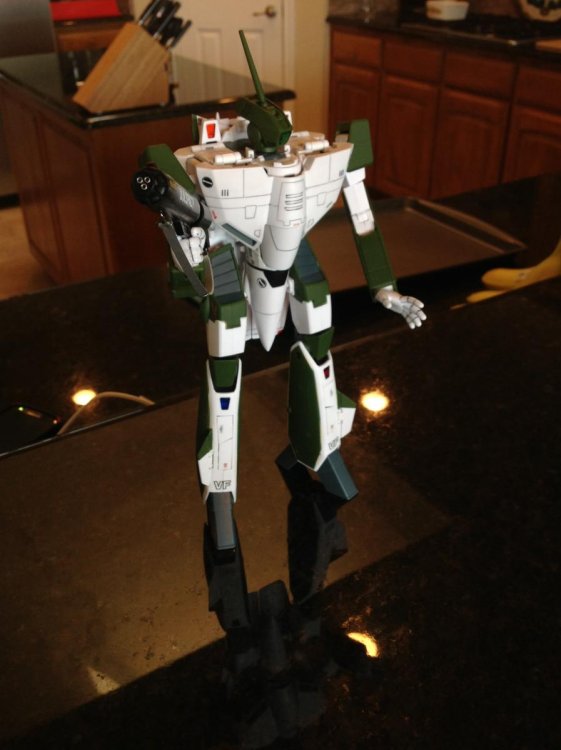
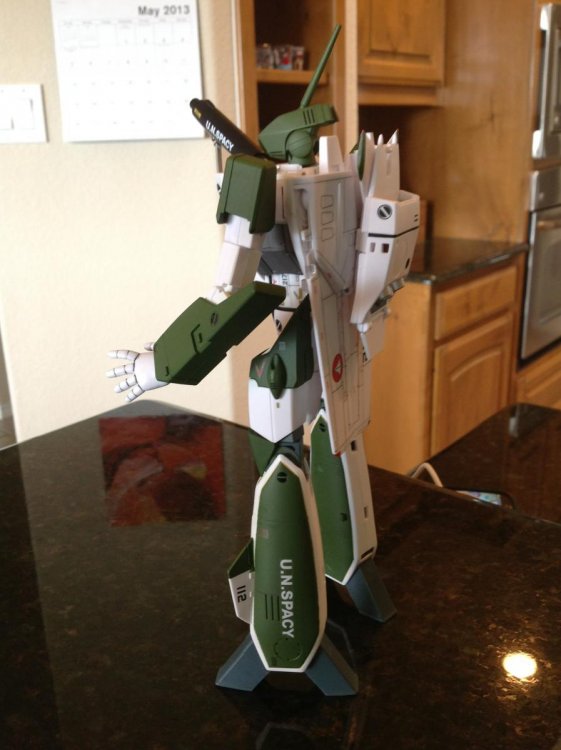
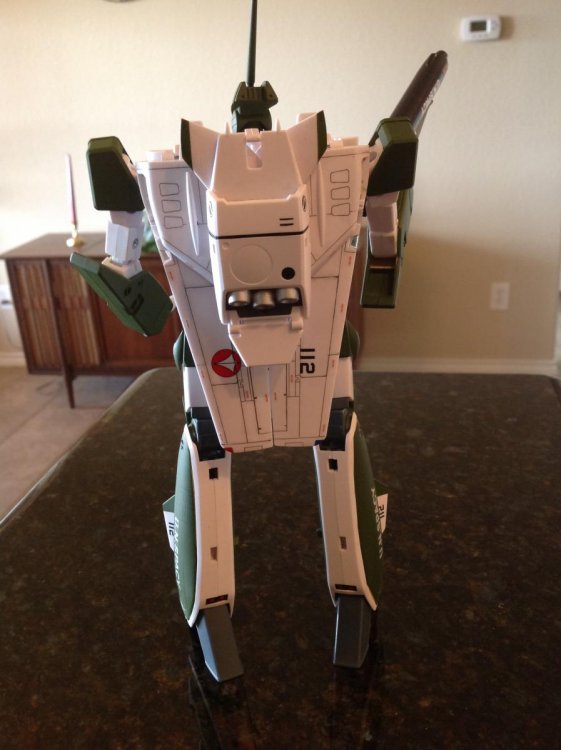
Thought I would share some pics of this over here in the toy forum since it is a toy technically. This was my first ever attempt at modifying a Yamato Valk that involved major re-painting. It wasn't to bad, but I still give mad props to those guys who have built the kit version. I can say just after doing this little bit I would never attempt it. This was a Kaki TV version I picked up "before the fall" for $98 shipped. Enjoy...

-
Tamiya tape man! It's hard to find locally, but order it online, Different widths. It's perfect for masking models and toys. :-)