derex3592
-
Posts
8858 -
Joined
-
Last visited
Content Type
Profiles
Forums
Events
Gallery
Everything posted by derex3592
-
I used 1:72 water slide decals on a 1:60 Yamato and they looked perfect.
-
Arcadia TV SDF-1 1:3000 scale under my X-mas tree next year (2014) is what I'm screamin!
-
I like battroid as well! Fighter is gorgeous as well, but takes up lots of space!
-
Ohhhh my gooood!!!! That's gonna be awesome!!
-
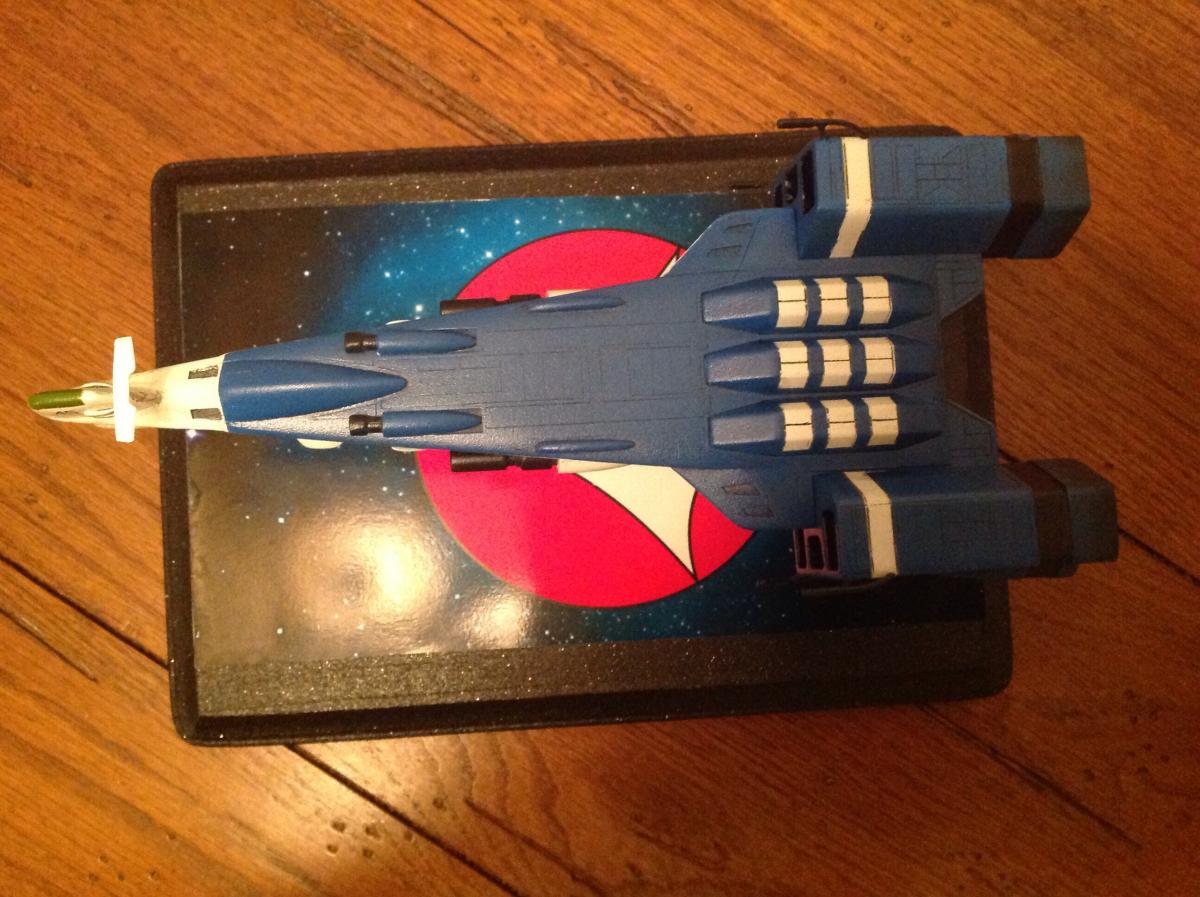
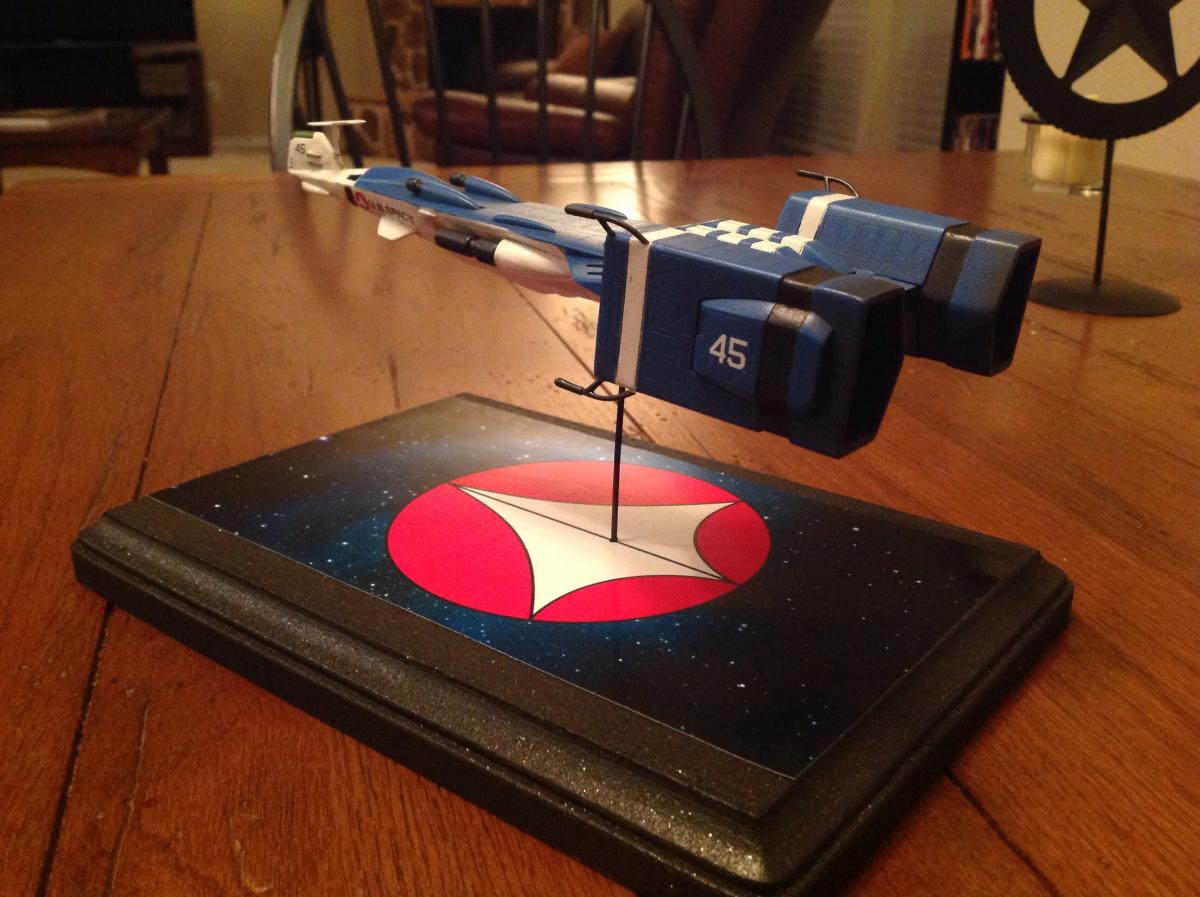
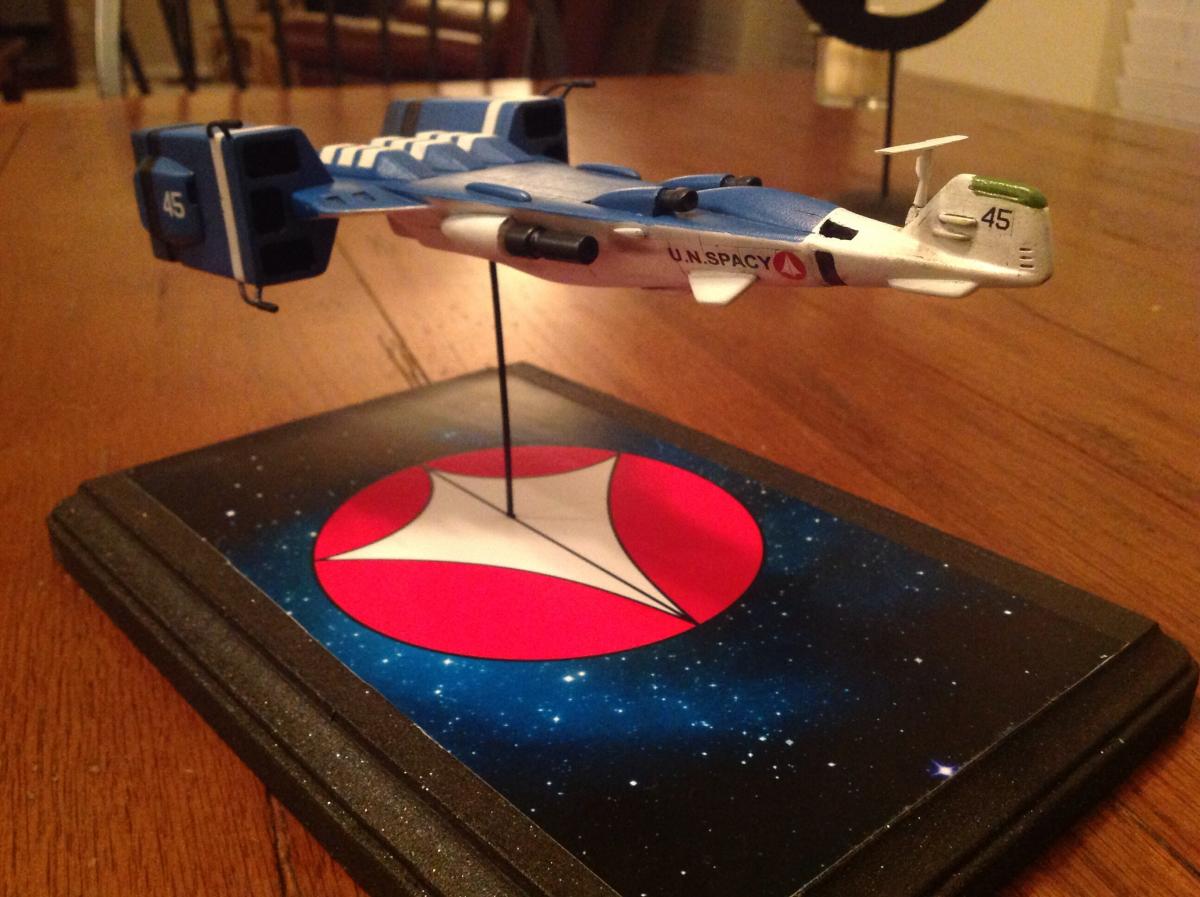
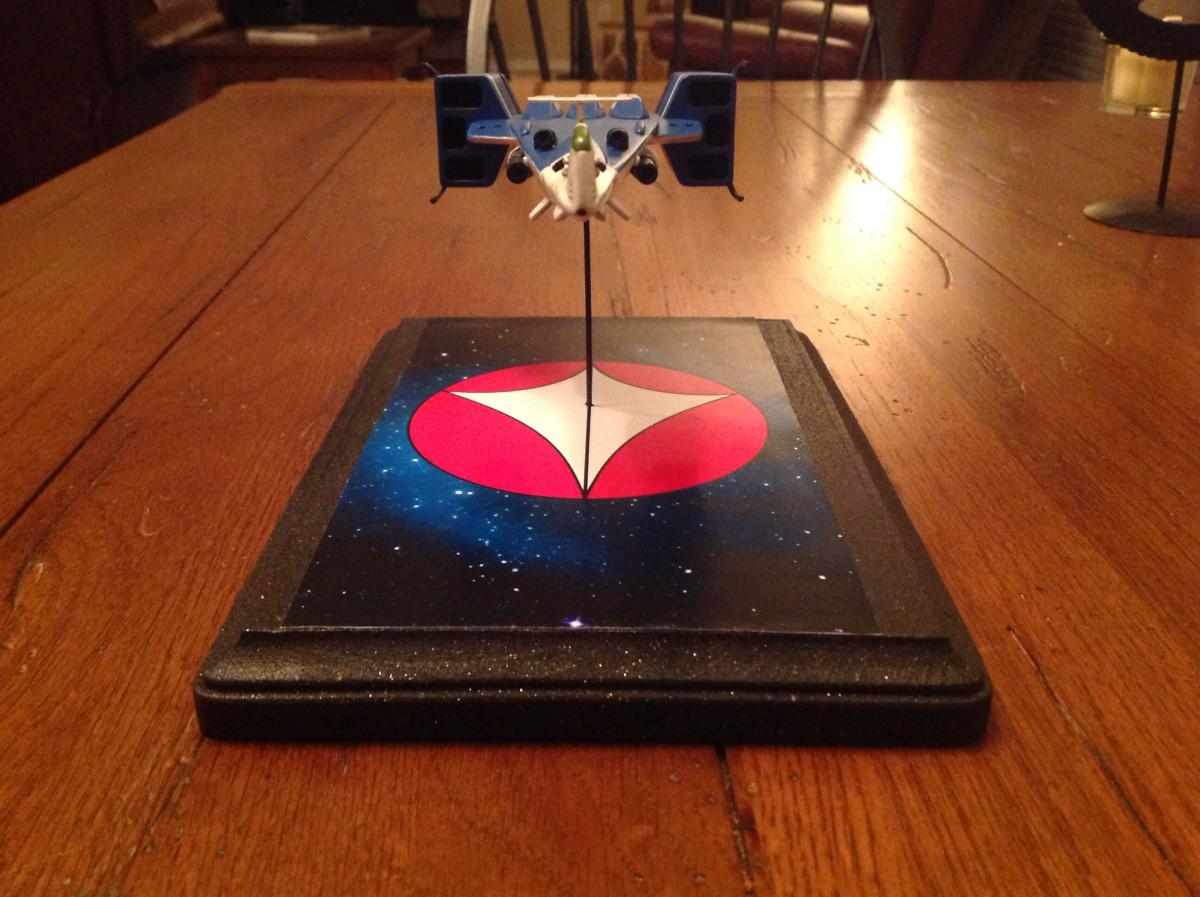
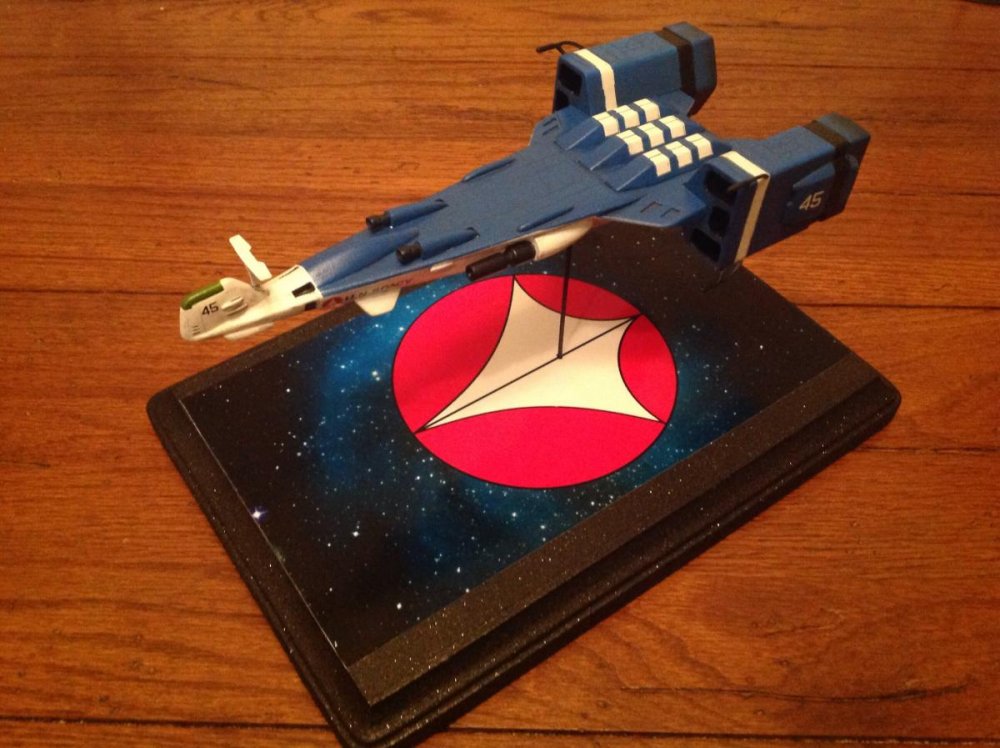
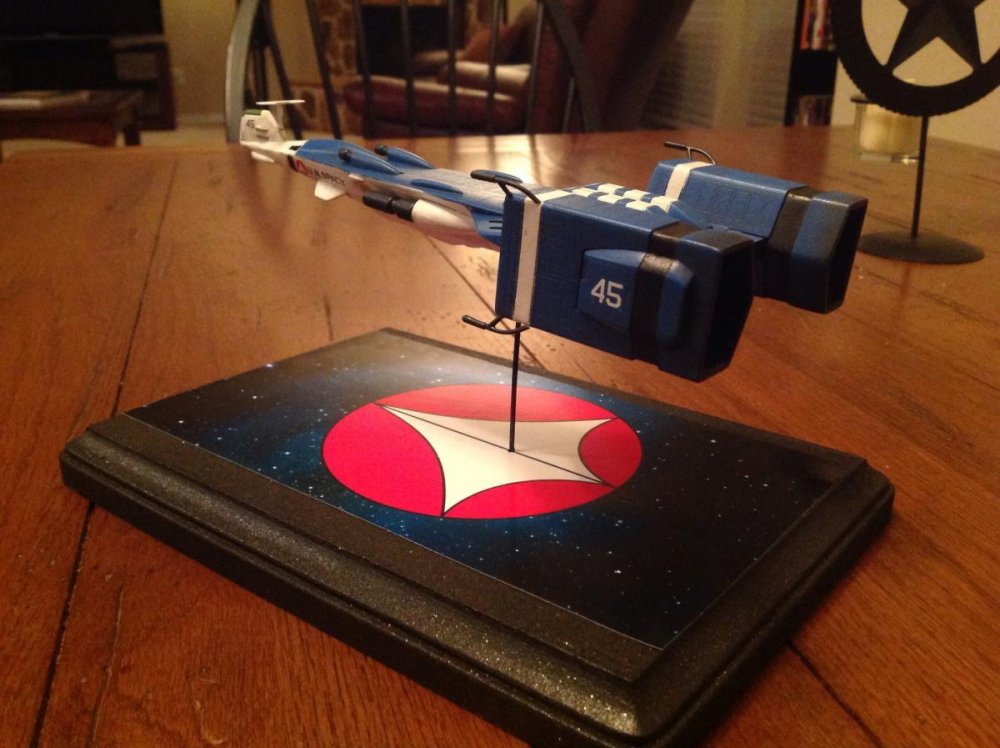
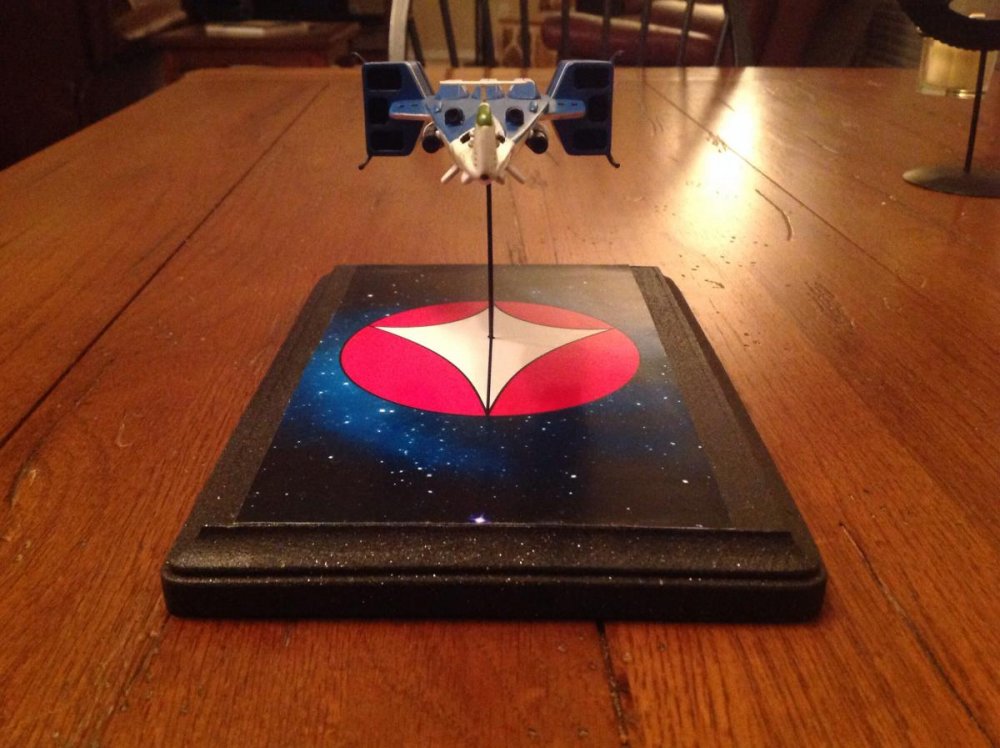
Ladies and Gentleman....The Macross Heavy Missile Cruiser "Oberth"! ...built...(rather painfully because of horrible resin that would NOT hold paint)...by yours truly....enjoy! Seriously though....I'm soooo over resin kits not made by Captain America or someone reputable around here....this should have been a two weekend fun project, not the long drawn out ordeal it became!


-
Mo-Suu-Pii-Dah Inbitoh in 1/48
derex3592 replied to captain america's topic in Anime or Science Fiction
I'm in for one of course!!!!....possibly 2 -
Custom scratch built 1/60 Zentradi Uniform for VF-1A TV Max
derex3592 replied to erikos0311's topic in Toys
I'm interested in a 1:60th Scale -
Went and saw this Friday night in IMAX 3D with the GF and was blown away. I normally despise 3D movies and leave with a headache. Not this time! It was VERY entertaining and I found myself dodging fast flying debris a couple of times as well! Highly recommended! Sandra Bullock was excellent, and Clooney was his normal lovable self. GO SEE IT!
-
mospeada MOSPEADA 1/10 Scale Protector Inbit--interest?
derex3592 replied to captain america's topic in Anime or Science Fiction
what about a new poll for 1:48 shock troopers/enforcers/Royal Command units---sorry don't remember non Robotech names... -
oh my god.....well that's great...gotta go get a new keyboard now...this one's full of drool.
-
Congratulations! it can be the greatest thing and the most frustrating thing on earth all at the same time. good luck!
-
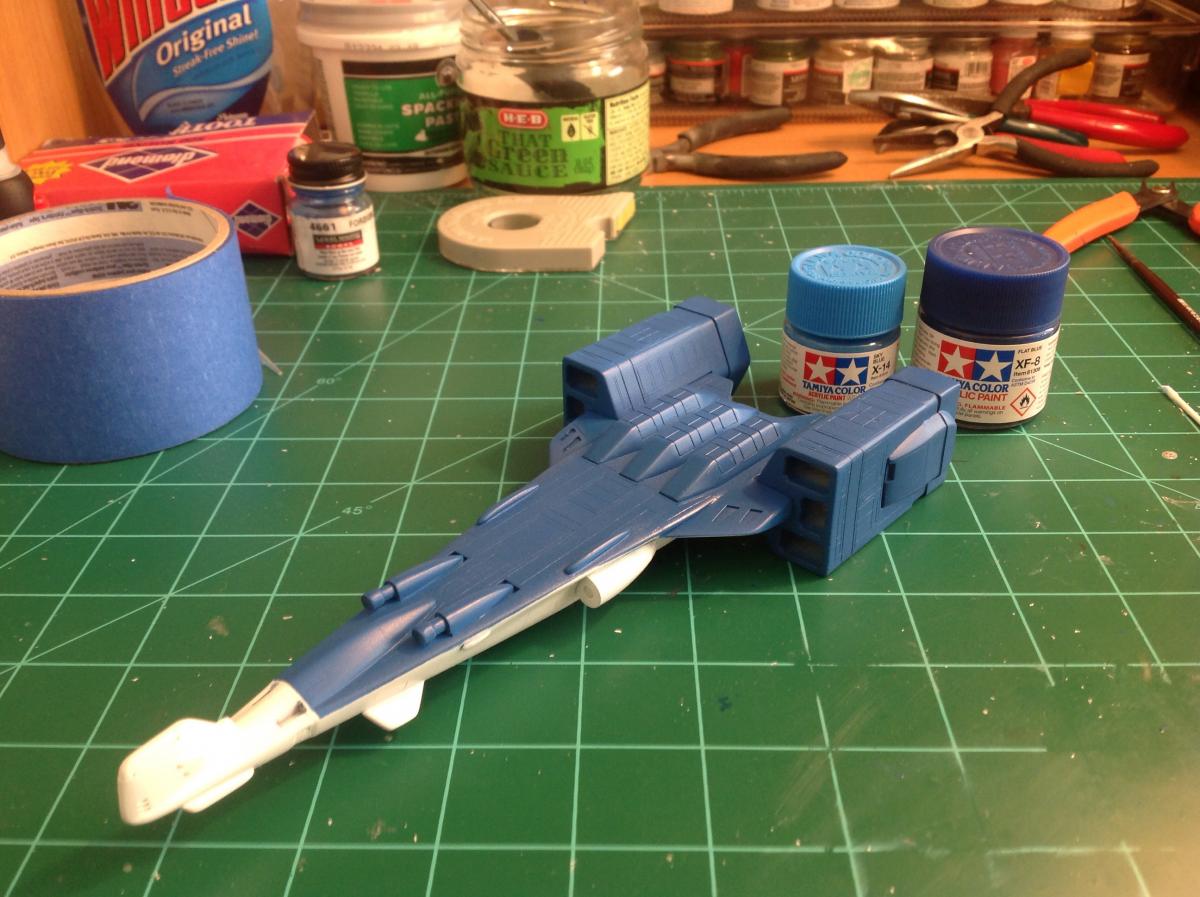
Thanks guys ! I really do think temperature and humidity make a lot of difference when painting . today was 70° with very low humidity and my paint laid down excellent. Here in Texas we do not get many days like this, I think if we had more, my painting would be a lot better and easier!
-
Decided that I really did not like that color of blue so I stripped it off with Windex last night and today I repainted the blue with a custom mix of flat blue and Sky-blue from Tamiya..... what do you guys think ...better? Cause I do!

-
I think we can all join together now in our mutual hatred of Alex at this point.....LOL! Awesome work man...super jealous.
-
Better than the new Corvette stingray.... and that's coming from a Corvette owner and lifelong fan...
-
Your most recent Macross or toy purchase! General thread.
derex3592 replied to Gakken85's topic in Hall Of The Super Topics
That last pic brings back memories! I got those exact same three Valkyries together the first year they were out on a steep discount at Christmas time! Man am I glad I got them back then! -
Your most recent Macross or toy purchase! General thread.
derex3592 replied to Gakken85's topic in Hall Of The Super Topics
Nice haul!! -
1/48+fp's, 1/60+fp's, 1/72, 1/2k, 1/3k,1/100 and now 1/144
derex3592 replied to VF-18S Hornet's topic in Toys
Glad I never bought one cause I'd be doing the same thing right about now... -
This thread has been de-railed into another time zone...LOL...but that's fine...cause I loved the modded Toyota Supra in the original FF as well! Having actually driven a Ferrari F430 I can truly say the sound is the most amazing thing you will ever hear! Other than that...no thanks. Took me 15 minutes to find the window up/down switch...
-
Star Wars: Clone Wars animated series
derex3592 replied to BoBe-Patt's topic in Anime or Science Fiction
Just ordered Season 5 on Blu-Ray. Looks to be pretty good. Glad they are letting them do some to wrap it up! -
I live next door to Dallas...light rain makes their server have issues???
-
Agreed. IF they are gonna do the proper tan color of Plus, then do it. Don't make some half albino/brown looking color that everyone will bitch and moan about for years to come! (Not that anything like that EVER happens around here...)
-
Thanks for the advice guys...I'll let you know how it all works out. Not really digging the color of blue either...lol..
-
Custom scratch built 1/60 Zentradi Uniform for VF-1A TV Max
derex3592 replied to erikos0311's topic in Toys
Gerwalk looks freaking awesome!! I'm so pumped about this! -
I can't easily get Tamiya acrylics locally and I don't really care for acrylics in general. I have used them before, with good results, I just prefer the enamels for a more durable finish and ease of 1 or 2 coats vs. a million to get acrylics to cover.