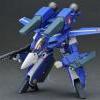
Nicaragua Posted October 4, 2010 Share Posted October 4, 2010 The VF-11 is WELL worth the money I really like those stands in your picture - what are they called and where do you get them from ? Quote Link to comment Share on other sites More sharing options...
SpaceCowboy Posted October 4, 2010 Share Posted October 4, 2010 I really like those stands in your picture - what are they called and where do you get them from ? http://www.flightpose.com/ Quote Link to comment Share on other sites More sharing options...
DrunkenPilot72 Posted October 4, 2010 Share Posted October 4, 2010 I'd have to disagree man, I used to think the VF-11 was the same size as the VF-1 toy also, but I was pleasantly surprised to see that it wasn't. In person, the VF-11 is actually significantly bigger and taller all around. Not to mention the engineering is ridiculous in a good way. It incorporates a lot of advancements that surprised me upon the initial transformation. Not to mention, there are several internal parts that are not visible unless you open the toy up, and the higher the amount of smaller parts to tool=higher price. Engineering-wise it's on par if not a bit more advanced than the V2 1/60 VF-1, which IMHO, shoulder-issues aside, was a turning point for Yamato, as the V2 1/60 VF-1 is a more toyetic release(compared to previous Yamato toys) without compromising detail. Toy-wise, VF-0 feels dated, V2 1/60 VF-1 is "just right", while VF-11 goes beyond. Well that is a relief. I knew about the engineering behind the VF-11 but I didn't know that it was actually larger than the VF-1, it always looked about the same size from all the pictures I've seen (that is unless you pose it with a VF-0 in the back to make it look much larger ). I'll think about it but at this point I'm much more interested in the larger more diverse valks since I already have a VF-1S and VF-1A. Though I have to admit the sale at Angolz for the VF-11B is tempting right now. That said, does anyone know if Ivan's SV-51 has been improved at all since the original release? I'm already familiar with the build since I got my little brother Nora's version last Christmas but I wanted to know if Ivan's was still one of the valks to avoid. Quote Link to comment Share on other sites More sharing options...
pud333 Posted October 4, 2010 Share Posted October 4, 2010 (edited) I just got my 0S today, and it's great. No QC problems whatsoever. The only thing I can see is part of the front still sags just a little bit, but that's it. Transformation is easy, and the only problems I had were with the shoulders. They were so tight, and I was paranoid I might break them, so I took a screwdriver and loosened up the screws and now there are no worries. Looking forward to picking up a Ghost soon. Edited October 4, 2010 by pud333 Quote Link to comment Share on other sites More sharing options...
Shin Densetsu Kai 7.0 Posted October 4, 2010 Share Posted October 4, 2010 Anyone have rubber seeping out of the shoulders on their VF-0A/S reissues? Rubber is seeping out of mine. Quote Link to comment Share on other sites More sharing options...
Tking22 Posted October 5, 2010 Share Posted October 5, 2010 Anyone have rubber seeping out of the shoulders on their VF-0A/S reissues? Rubber is seeping out of mine. I got a re-issue 0A about a month or so back, it's fine. Quote Link to comment Share on other sites More sharing options...
firmpulse Posted October 5, 2010 Share Posted October 5, 2010 Anyone have rubber seeping out of the shoulders on their VF-0A/S reissues? Rubber is seeping out of mine. the shoulders on my reissue 0s are fine. however, it left foot is crooked Quote Link to comment Share on other sites More sharing options...
Tking22 Posted October 5, 2010 Share Posted October 5, 2010 the shoulders on my reissue 0s are fine. however, it left foot is crooked Yea same here, crooked and loose on the right side. Quote Link to comment Share on other sites More sharing options...
regult Posted October 5, 2010 Share Posted October 5, 2010 (edited) That said, does anyone know if Ivan's SV-51 has been improved at all since the original release? I'm already familiar with the build since I got my little brother Nora's version last Christmas but I wanted to know if Ivan's was still one of the valks to avoid. Short answer is: at your own risk. I got one, cracked limbs, got a second one, never transformed it except once when new to confirm everything is right, btw, that's how I found one of the legs on the first one was cracked. Same problem reported and illustrated years ago by fellow member. Just search old posts and you'll find the info you want. Edited October 5, 2010 by regult Quote Link to comment Share on other sites More sharing options...
DrunkenPilot72 Posted October 5, 2010 Share Posted October 5, 2010 the shoulders on my reissue 0s are fine. however, it left foot is crooked Sadly I found that mine also has a gimped foot last night... Quote Link to comment Share on other sites More sharing options...
DrunkenPilot72 Posted October 5, 2010 Share Posted October 5, 2010 Short answer is: at your own risk. I got one, cracked limbs, got a second one, never transformed it except once when new to confirm everything is right, btw, that's how I found one of the legs on the first one was cracked. Same problem reported and illustrated years ago by fellow member. Just search old posts and you'll find the info you want. Damn that sucks, I can't believe that it is still an unsafe valk. Well thanks for the info, I'll definitely start digging through the old posts. Quote Link to comment Share on other sites More sharing options...
firmpulse Posted October 7, 2010 Share Posted October 7, 2010 Sadly I found that mine also has a gimped foot last night... well how awesome is that?...that's three mw'ers with gimped 0s feet. anyone else? i haven't heard of this particular problem before Quote Link to comment Share on other sites More sharing options...
regult Posted October 8, 2010 Share Posted October 8, 2010 Damn that sucks, I can't believe that it is still an unsafe valk. Well thanks for the info, I'll definitely start digging through the old posts. Actually I remember the victim of the leg crack managed to glue it back together. Since mine was just purchased, I just went back to the shop and the owner didn't even look surprised so I guess even he was aware of the recurrent issues with the SV-51. Don't get me wrong, I love the design and I have both versions, only that I don't transform the Ivanov. Quote Link to comment Share on other sites More sharing options...
boota Posted October 8, 2010 Share Posted October 8, 2010 Sadly I found that mine also has a gimped foot last night... Wht'ya expect? These toys are made by gimps. Quote Link to comment Share on other sites More sharing options...
Shin Densetsu Kai 7.0 Posted October 8, 2010 Share Posted October 8, 2010 I think the VF-0S could really be improved using the same, or similar design for the rubber shoulder blocks as the V2 1/60 VF-1. The shoulders on the V2 1/60 VF-1 are pleasantly tight. Quote Link to comment Share on other sites More sharing options...
pud333 Posted October 9, 2010 Share Posted October 9, 2010 (edited) I've realized that the VF-0S I have is not tight at all. At first I was happy about it, I thought the QC was good, but now after a few transformations, nothing seems to stick together. My VF-1S is super tight still, all the joints lock together nice. My VF-0S just seem loose, as if some kid had been playing with it for years. It holds together in fighter mode okay, but as soon as I put it down on its landing gear or move it around a bit, it starts to want to fall apart and sag. For example, not only does the nose sag, but the vents don't fit flush against anything. There are gaps everywhere. Ah well. Disappointed for sure, conidering my VF-1S and SV-51 are excellent. Pondering now if its worth it to spring for the Ghost. Edited October 9, 2010 by pud333 Quote Link to comment Share on other sites More sharing options...
boyarque Posted October 11, 2010 Share Posted October 11, 2010 Hey guys, sorry if i'm interrupting your peaceful day...but I just got to ask you this question.. I have just received my VF-0S, all are well...that is until I try to transform it into battroid mode. I have gone thru the manuals, look thru youtube even....but I just could not get the hip bar locked into place! I saw in the vids, the cover just snap close on the metal bar easily enough, but not in my case. Is there a trick or tips or anything that I messed out in transforming this toy? Also, I cannot get the backpack to snap into the metal bar...is this normal? All help and suggestions are greatly appreciated... Quote Link to comment Share on other sites More sharing options...
Shin Densetsu Kai 7.0 Posted October 11, 2010 Share Posted October 11, 2010 Hey guys, sorry if i'm interrupting your peaceful day...but I just got to ask you this question.. I have just received my VF-0S, all are well...that is until I try to transform it into battroid mode. I have gone thru the manuals, look thru youtube even....but I just could not get the hip bar locked into place! I saw in the vids, the cover just snap close on the metal bar easily enough, but not in my case. Is there a trick or tips or anything that I messed out in transforming this toy? Also, I cannot get the backpack to snap into the metal bar...is this normal? All help and suggestions are greatly appreciated... There isn't much clearance when trying to insert the hip bar into the nosecone. As for the metal bar snapping to the backpack, there is resistance due to the paint on the bar, you just have to force it through, the backpack should be parallel to the nose section when you are done, and you will hear an audible "click". Quote Link to comment Share on other sites More sharing options...
DrunkenPilot72 Posted October 12, 2010 Share Posted October 12, 2010 I've realized that the VF-0S I have is not tight at all. At first I was happy about it, I thought the QC was good, but now after a few transformations, nothing seems to stick together. My VF-1S is super tight still, all the joints lock together nice. My VF-0S just seem loose, as if some kid had been playing with it for years. It holds together in fighter mode okay, but as soon as I put it down on its landing gear or move it around a bit, it starts to want to fall apart and sag. For example, not only does the nose sag, but the vents don't fit flush against anything. There are gaps everywhere. Ah well. Disappointed for sure, conidering my VF-1S and SV-51 are excellent. Pondering now if its worth it to spring for the Ghost. Well at least you lucked out with an SV-51, Ivan's is now on back order on hlj and the thing wasn't even on sale. I can't say that I'd be comfortable with gambling $200+ on a potentially floppy bird with a history of exploding thighs . I will say that I am going to get a ghost booster as soon as one becomes available. I currently have my VF-0S next to my Fast Pack loaded VF-1S and I have to say that as good as it looks it feels somewhat off. The VF-0S actually looks smaller than the VF-1S because of the extra height the Fast Packs add. Quote Link to comment Share on other sites More sharing options...
boyarque Posted October 12, 2010 Share Posted October 12, 2010 There isn't much clearance when trying to insert the hip bar into the nosecone. As for the metal bar snapping to the backpack, there is resistance due to the paint on the bar, you just have to force it through, the backpack should be parallel to the nose section when you are done, and you will hear an audible "click". Upon closer inspection, I just realised..... YAMATO INSTALLED THE METAL BAR WRONGLY!!!! The inside of the metal bar is facing outside, no wonder it never fit in the nosecone.... Damn, I have just unscrewed the the half of the backpack, but The metal bar is too tight....any idea on how to remove the metal bar guys? I need to reinstall it the right side up..... Quote Link to comment Share on other sites More sharing options...
pud333 Posted October 12, 2010 Share Posted October 12, 2010 Well at least you lucked out with an SV-51, Ivan's is now on back order on hlj and the thing wasn't even on sale. I can't say that I'd be comfortable with gambling $200+ on a potentially floppy bird with a history of exploding thighs . I will say that I am going to get a ghost booster as soon as one becomes available. I currently have my VF-0S next to my Fast Pack loaded VF-1S and I have to say that as good as it looks it feels somewhat off. The VF-0S actually looks smaller than the VF-1S because of the extra height the Fast Packs add. You're right, at least the SV51 turned out good for me. As for the VF-0S, I have found that it only looks all gappy (is that a word?) and loose when it is on its landing gear. Lifting it up, everything falls into place, so I'll probably be getting a flight stand for this eventually. I actually just managed to buy a Ghost set off Amiami. They had them up for preorder again and I just got my email last night telling me it came in, so I sent them money and I should be receiving my Ghost in a couple weeks. Definitely looking forward to it. Quote Link to comment Share on other sites More sharing options...
ae_productions Posted October 13, 2010 Share Posted October 13, 2010 Upon closer inspection, I just realised..... YAMATO INSTALLED THE METAL BAR WRONGLY!!!! The inside of the metal bar is facing outside, no wonder it never fit in the nosecone.... Damn, I have just unscrewed the the half of the backpack, but The metal bar is too tight....any idea on how to remove the metal bar guys? I need to reinstall it the right side up..... I am sorry to hear that. It's rather unfortunate that this happened to you. Especially with a toy that is so expensive. It will happen with anything that is mass produced, but it doesn't make you feel any better! The VF-0 is very intricate. I recently traded away an 0A, and took apart the arms to repair it (I did notify the buyer that it was broken and that I was going to fix it). I never had to work on the swing bar, just the sholders and arms, but beware! That plastic on the first release is weak. Be very, very careful. Quote Link to comment Share on other sites More sharing options...
boyarque Posted October 13, 2010 Share Posted October 13, 2010 thanks man. Right now, my 0S is in pieces on my room's floor....lie it was shot to pieces by Ivanov, lol! Still, anyone else knew of a way to push the metal bar out? Quote Link to comment Share on other sites More sharing options...
shuji Posted October 13, 2010 Share Posted October 13, 2010 sad to hear that bro...mine afraid to transform..huhu..still mib..planning to get vf0a but maybe next next next next year..huhu Quote Link to comment Share on other sites More sharing options...
Chronocidal Posted October 13, 2010 Share Posted October 13, 2010 (edited) thanks man. Right now, my 0S is in pieces on my room's floor....lie it was shot to pieces by Ivanov, lol! Still, anyone else knew of a way to push the metal bar out? Ok, I don't have time to completely take my 0S apart at the moment, but which part of the bar is mounted backwards? For it to work, both the upper bar and the hip crossbar piece should look like this. If both pieces are backwards, it might be a really simple fix. It looks like the main mount to the backplate isn't pinned the same way, and it might come out just by taking apart the wing area (3 main screws, the ones in the wings and one under the swing bar when you swing it toward the nose.. I don't think the two holding the shoulder mounts need to be removed). If the two pieces for the bar are flipped at the lower pin mount though, I think your best bet is just going to be applying VERY LIGHT direct pressure on the pin, maybe with a hammer or mallet. Fortunately, you're dealing with metal parts, so there's a little less to worry about than with plastic, but it can still break. I'd suggest something like a nail setting tool, if you have access to one. Basically, it's a rod with one fine tip and one fat one, used to gently tap nails below the surface. You'll need a REALLY fine one to do this though.. A regular nail might be better to use actually (smaller diameter than the pin) with the tip filed blunt to get solid contact with the pin. Once you've got that, it's just a matter of lining up the nail or nail setter on the pin, and gently tapping the nail until it pushes the pin out. The trick to this though.. it looks like the pin isn't knurled in the middle since it spins with the larger bar, but it might be knurled on one end, and that means you'll have to tap the non-knurled end to get it out. Your guess is as good as mine here, since I can't tell if there's any knurling at all.. but if tapping one end goes nowhere, try the other side and see if it moves. Hope that helps some, and remember be very gentle tapping with that hammer. For stuff like this I usually use a rubber mallet, just to be on the slightly safer side. Edited October 13, 2010 by Chronocidal Quote Link to comment Share on other sites More sharing options...
boyarque Posted October 13, 2010 Share Posted October 13, 2010 thanks for the tips choronocidal..as for which part of the bar? Well, here's the stinker... The whole stretch! I have removed the wing area but sadly, the top part of the metal bar is lodged pretty tight to the backpack. I tried to pop it up, but then stress mark start to develop around the centre screw hole and I just could not dare.... So I did the next best thing; I removed the lower hip bar ( and its pin is only knurled at one end ), flipped it over and hammer the pin back in. So now the nosecone cover can close snugly over the hip bar, but the backpack is still loosely clipped to the bar but it will hold if not handled roughly. Might have to revisit this part later on when I get my ghost booster...... Again, thanks to all that have given me their tips and insights. Quote Link to comment Share on other sites More sharing options...
ae_productions Posted October 14, 2010 Share Posted October 14, 2010 Ok, I don't have time to completely take my 0S apart at the moment, but which part of the bar is mounted backwards? For it to work, both the upper bar and the hip crossbar piece should look like this. If both pieces are backwards, it might be a really simple fix. It looks like the main mount to the backplate isn't pinned the same way, and it might come out just by taking apart the wing area (3 main screws, the ones in the wings and one under the swing bar when you swing it toward the nose.. I don't think the two holding the shoulder mounts need to be removed). If the two pieces for the bar are flipped at the lower pin mount though, I think your best bet is just going to be applying VERY LIGHT direct pressure on the pin, maybe with a hammer or mallet. Fortunately, you're dealing with metal parts, so there's a little less to worry about than with plastic, but it can still break. I'd suggest something like a nail setting tool, if you have access to one. Basically, it's a rod with one fine tip and one fat one, used to gently tap nails below the surface. You'll need a REALLY fine one to do this though.. A regular nail might be better to use actually (smaller diameter than the pin) with the tip filed blunt to get solid contact with the pin. Once you've got that, it's just a matter of lining up the nail or nail setter on the pin, and gently tapping the nail until it pushes the pin out. The trick to this though.. it looks like the pin isn't knurled in the middle since it spins with the larger bar, but it might be knurled on one end, and that means you'll have to tap the non-knurled end to get it out. Your guess is as good as mine here, since I can't tell if there's any knurling at all.. but if tapping one end goes nowhere, try the other side and see if it moves. Hope that helps some, and remember be very gentle tapping with that hammer. For stuff like this I usually use a rubber mallet, just to be on the slightly safer side. That is GREAT help! Thanks for the insight! Quote Link to comment Share on other sites More sharing options...
boyarque Posted October 14, 2010 Share Posted October 14, 2010 (edited) Just to share; pic of the metal bar which has been installed backwards on my VF-0S and the rather stubborn end of the metal: Edited October 14, 2010 by boyarque Quote Link to comment Share on other sites More sharing options...
firmpulse Posted October 14, 2010 Share Posted October 14, 2010 Just to share; pic of the metal bar which has been installed backwards on my VF-0S and the rather stubborn end of the metal: god, that suuuuuuuuuuucks you had to do all that Quote Link to comment Share on other sites More sharing options...
Chronocidal Posted October 14, 2010 Share Posted October 14, 2010 (edited) Looks to me like that metal swing bar should pop right out of the backplate, but I guess the stress to get it out might be too much. It might just depend on rotating the bar to a specific angle, actually. It looks really possible from your photos, but I haven't tried taking mine apart that far, so I don't know how tightly that upper bar is lodged in that slot. Edited October 14, 2010 by Chronocidal Quote Link to comment Share on other sites More sharing options...
boyarque Posted October 15, 2010 Share Posted October 15, 2010 Looks to me like that metal swing bar should pop right out of the backplate, but I guess the stress to get it out might be too much. It might just depend on rotating the bar to a specific angle, actually. It looks really possible from your photos, but I haven't tried taking mine apart that far, so I don't know how tightly that upper bar is lodged in that slot. trust me, it's virgin-tight. I dunno, maybe it was designed for the bar to pop in, not out. I tried pushing straight up, I tried twist and shout..errr..I mean, push....the only thing I accomplish is a nasty, creaking sound and stress marks around the centre plastic. But I believe u can drill holes at the sides and push the pin out, except I dun have any drills with me... Quote Link to comment Share on other sites More sharing options...
firmpulse Posted October 15, 2010 Share Posted October 15, 2010 trust me, it's virgin-tight. I dunno, maybe it was designed for the bar to pop in, not out. I tried pushing straight up, I tried twist and shout..errr..I mean, push....the only thing I accomplish is a nasty, creaking sound and stress marks around the centre plastic. But I believe u can drill holes at the sides and push the pin out, except I dun have any drills with me... did you try using a drop of teflon or small dab of wd40? it can really help with friction. seems like you've tried everything but thought i'd throw it out there. maybe buy a tiny brass punch (generally used in gunsmithing) and a small vice. then try tapping it out. just another idea... Quote Link to comment Share on other sites More sharing options...
m0n5t3r Posted October 21, 2010 Share Posted October 21, 2010 finally got off my a$$ and did this fix for my 0A. works like a charm. Ok, here's a series of pictures showing what I did to fix my nose droop. Unfortunately I don't have shots from before I changed it, but it's pretty easy to understand what I changed. The first step is taking apart the nose, and hoping Yamato didn't glue it shut. There are three screws you'll need to get to. The first is a small screw that holds down the door that covers the hip bar mount, which removes that door and lets you get to the second screw, which actually attaches to the upper half of the nose. The third screw is inside the landing gear well. After you take out those screws, the nose should come apart with a little bit of pulling. Mine had some adhesive tape near the front that you can see, but it wasn't hard to pull loose. The nose is pretty sturdy, so as long as you're careful I don't think this will damage anything. Note, the insert that holds the main gear doors is just held in by pressure, so it, and the doors, will fall out when you pull the nose apart. Be careful to keep track of the pieces. As a side note, if your front gear is difficult to pull down, this is the perfect opportunity to fix this. The front gear is held into the nose by the screw you see here, and loosening it a little will lessen the tension on the gear. I don't recall how much I turned the screw, but I was able to make the gear easier to extend, while still holding decently in the down position. What you're left with now is the following. It's easier to remove the upper nose with the plane partially transformed, since it moves the chest plate away from the nose, but I was able to get the nose out without taking it out of fighter mode. You really just need to pop the large peg out of the slot in the metal plate, but it's easier to do once the nose is slid back from the front a little. What I did was pull the cockpit shield out from under the lip at the back of the nose, and raise the chest just enough to slip the nose back under it a little. The nose peg popped out of the metal plate without much trouble after that. Now, you've got this: When I first took this thing apart, the large center plate with the track cut out of the center was quite bent. It was bent down far enough that it reached down between the two plates ahead of the intakes. What I did was just gently bend it back up with my fingertips, pressing against the center plate with my thumbs while pulling on the intake plates with my other fingers. Make sure to press evenly on both sides at once so the plate doesn't warp sideways. After a little gentle pressure, the plate should be aligned to look like this: The center metal plate should be parallel to the outer plates, so everything slides in a straight line when moving to battroid mode. Now just a word of caution if you do this... I'm not sure how strong the metal used in that plate is. Die-cast is obviously stronger than plastic, but it's also rather brittle in terms of metal. Don't force the plate to bend, and be very gentle. I probably held my thumbs against the plate pressing it upwards for a good few minutes before it was level. It doesn't take a lot of force, but it does take patience. I really don't want to hear that anyone snapped that plate, and ruined their VF-0. That being said, it really helps the nose stay in place well, and after I did it, I could detach the legs entirely and the nose still stayed pretty level, with almost no gap behind the cockpit shield. Good luck! Quote Link to comment Share on other sites More sharing options...
Reïvaj Posted January 19, 2011 Share Posted January 19, 2011 (edited) I had been thinking of different possible ways to fix my VF-0S nose drop for a few days and I’m happy to say that, after reading the incredibly clever and straightforward method Chronocidal shared with us, I was able to fix it in a matter of about 10 minutes! Now the nose stays in place well ad level, with almost no gap behind the cockpit shield and a much more sturdy feeling. Thanks again, Chronocidal!!! Edited January 19, 2011 by Reïvaj Quote Link to comment Share on other sites More sharing options...
ae_productions Posted January 19, 2011 Share Posted January 19, 2011 I had been thinking of different possible ways to fix my VF-0S nose drop for a few days and I’m happy to say that, after reading the incredibly clever and straightforward method Chronocidal shared with us, I was able to fix it in a matter of about 10 minutes! Now the nose stays in place well ad level, with almost no gap behind the cockpit shield and a much more sturdy feeling. Thanks again, Chronocidal!!! That's awesome to hear! It is a great fix, did it myself. Took me more than ten minutes, though. Guess I'm too afraid to mess up any of my valks! Quote Link to comment Share on other sites More sharing options...
Recommended Posts
Join the conversation
You can post now and register later. If you have an account, sign in now to post with your account.