MechTech
-
Posts
4701 -
Joined
-
Last visited
Content Type
Profiles
Forums
Events
Gallery
Everything posted by MechTech
-
There are also these, I believe they would be sturdy enough. - MT https://www.usagundamstore.com/collections/display-base
-

The 'Hey look at this really cool model build I saw' post
MechTech replied to Shawn's topic in Model kits
Somebody dared to actually build their collection! They made them look good too. - MT -
Thanks, but that's where the F-86 has to go. I like the design of your mecha. It has a nice arrow shape to it. It looks like it has a more realistic transformation to it than most designs which are overly complicated. @MacrossJunkie Thanks! All this work just to sling around an F-86 to "battle" Godzilla!
-
Great build and weathering! - MT
-
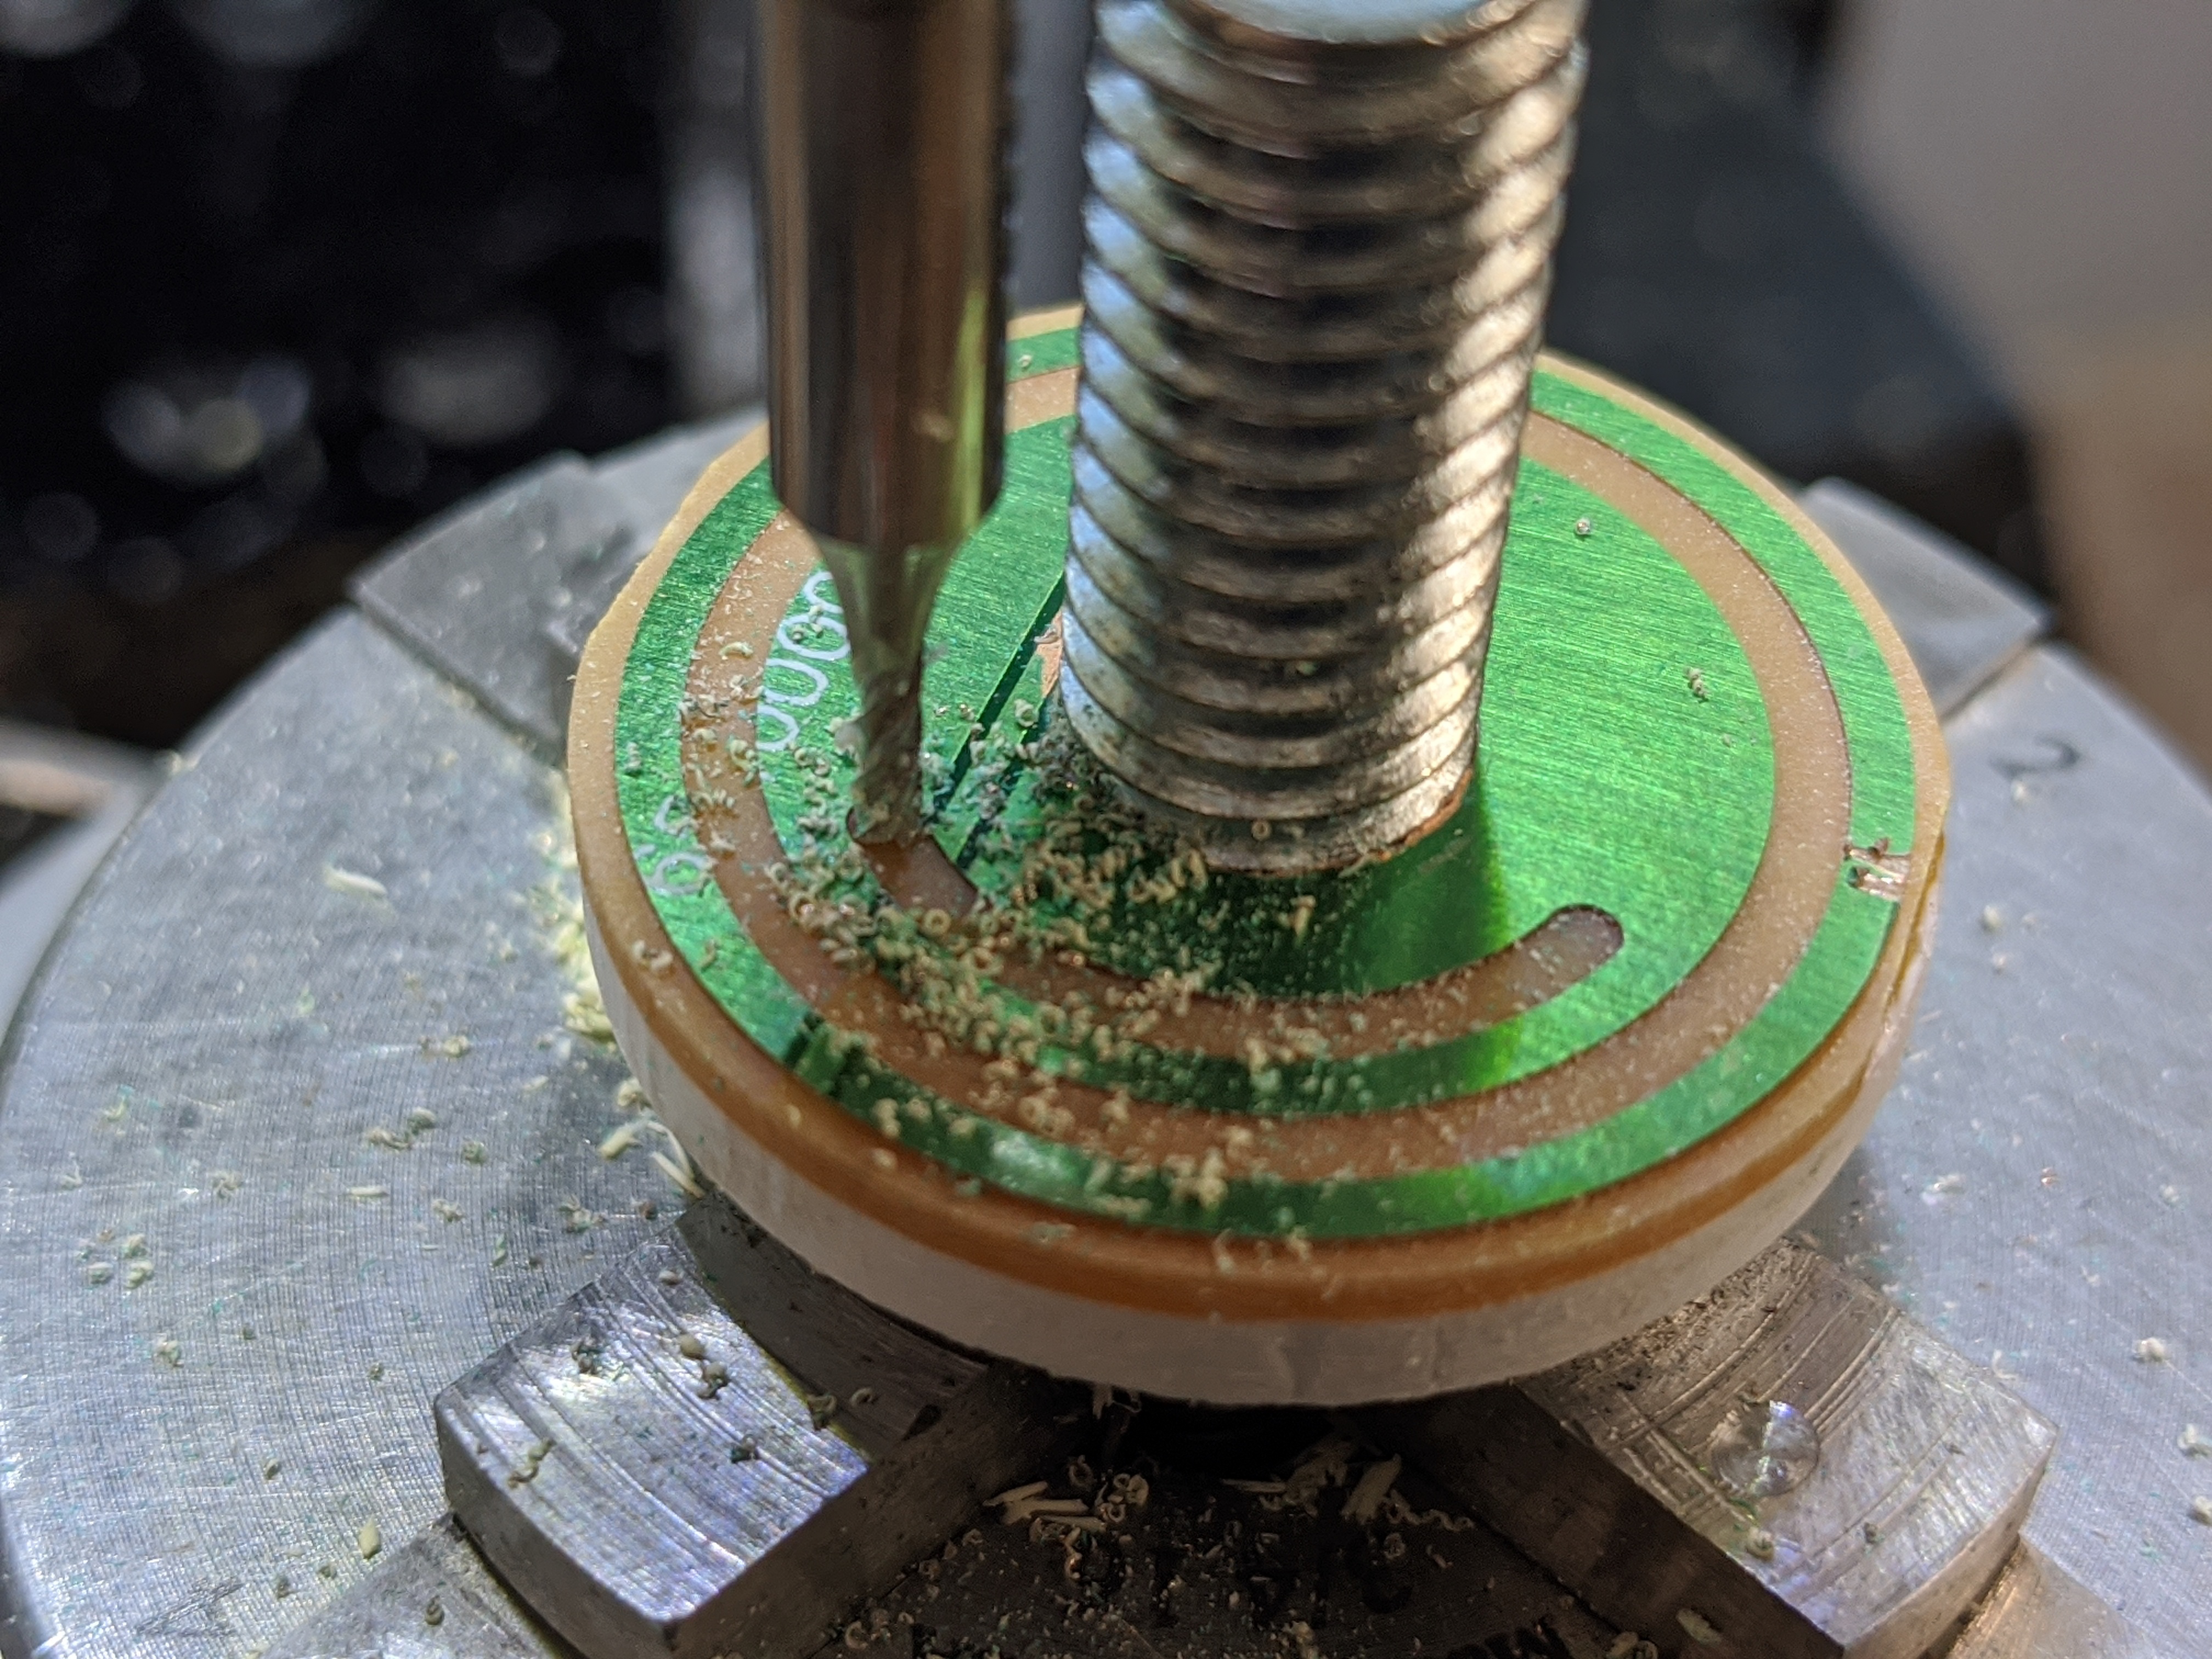
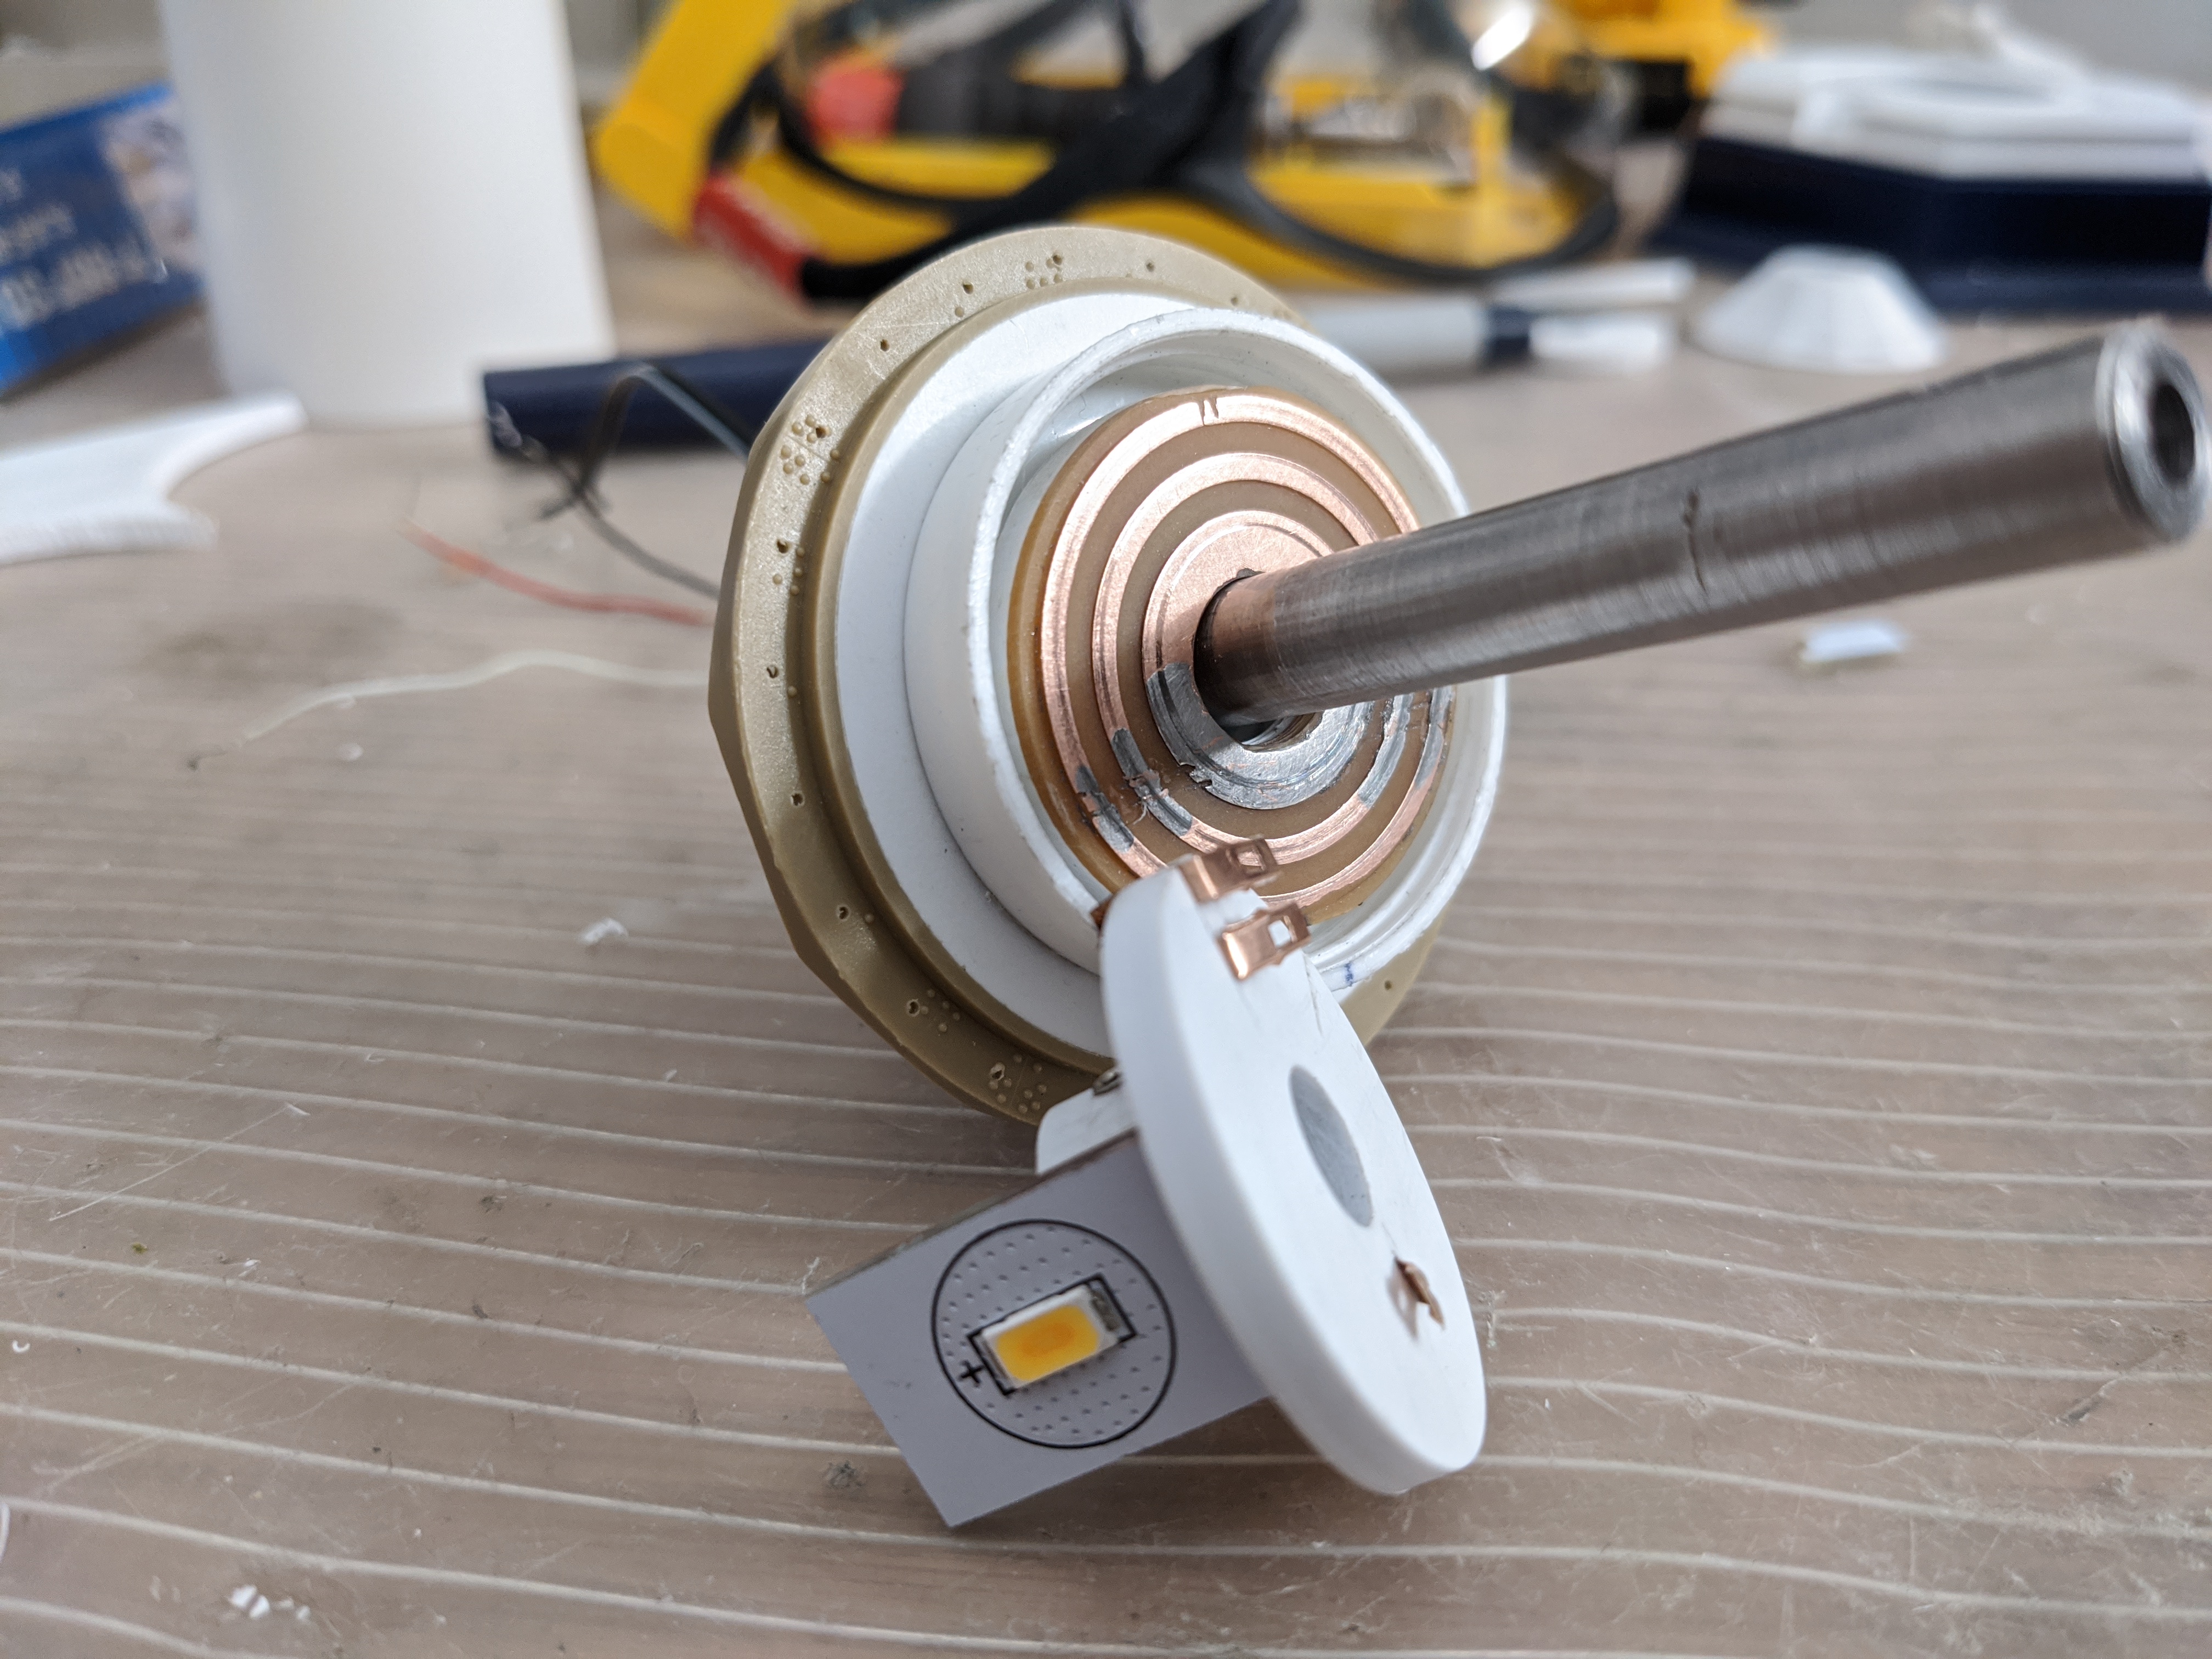
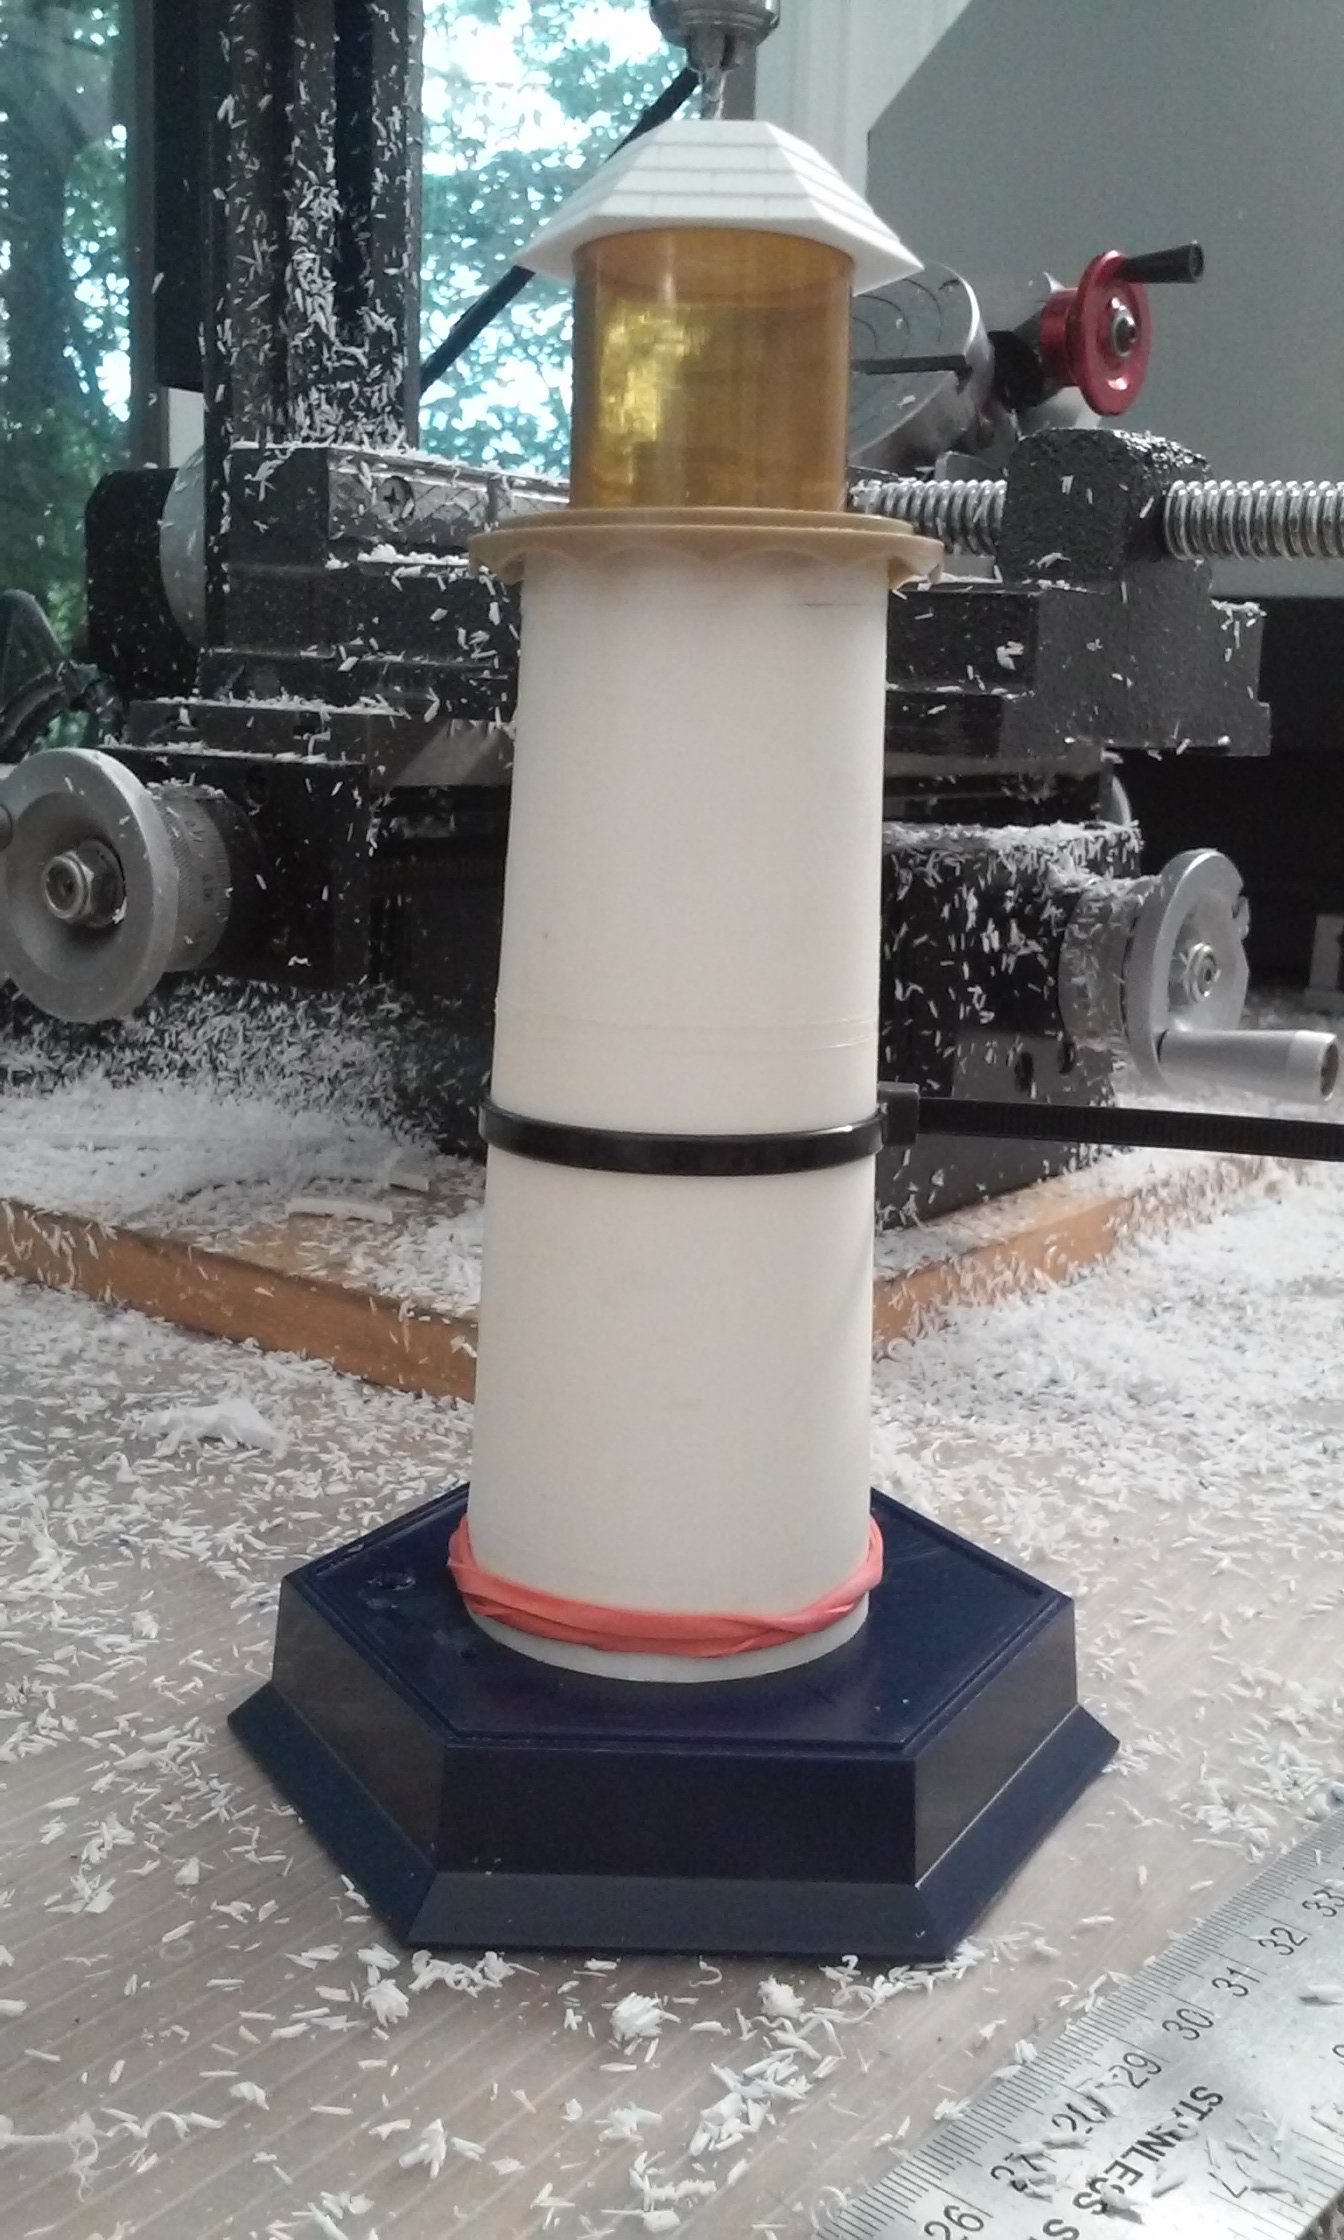
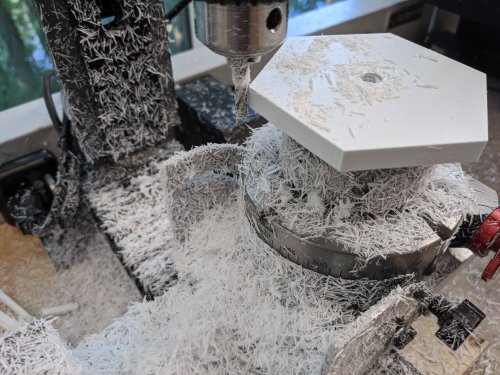
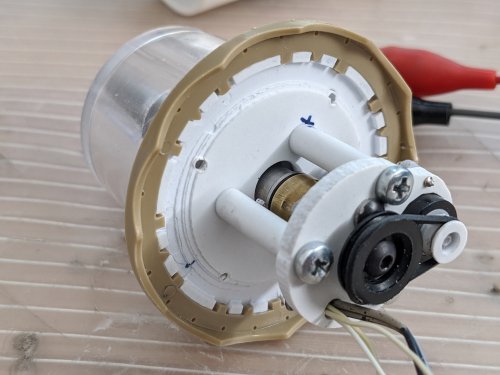
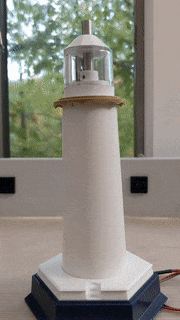
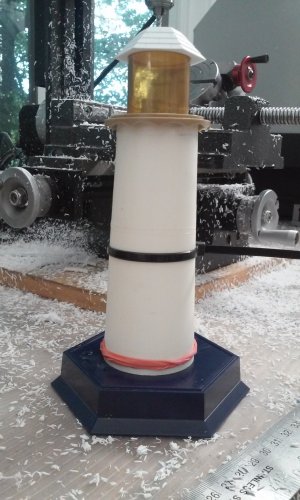
@Dobber I love the details and the photoetch does makes a big difference! Your pencilwork paid off too! At least it will never "peel off." Is it just me, or does that one nacelle shot look like the mouth of a leach or lamprey? @pengbuzz The head design looks cool! I love the hood design too, but like you said, it gets overused. I think because its reminiscent of Samurai armor. @derex3592 It's looking good! Let us know how the paint works. I use foil, but it's a pain to lay down and it conducts so it can cause short circuits. Lighthouse update: Last week I made a base to cover the marks on the blue base (used previously for something else) and the drive mechanism. The drive is a tiny gear motor and belt drive. The belt drive acts like a clutch in the event something jams the plane from "flying" around the tower. It is also dead quiet! This week I machined a recycled circuit board with a lot of "meat" on it it and made the shaft and rotor to go on it. The circuit board gaps were filled in with solder and sanded smooth. The rotor is styrene with old motor brushes for contacts. The roof will be redone to match the new size of clear piece I used. And a GIF to put it all together... For now. I got to say I like the rotation better than those model circuits that dim and brighten a light like on train sets, This actually casts light and shadows for more realism.- MT


-
Someone who can use that keyboard can surely make a transformable mech with masking tape! It's looking good. Transformable models are tough because you do one thing and then find it interferes with another. Then you gotta start all over again... - MT
-
@derex3592 Hopefully you can get a coupon or discount. I got a bunch of Tamiya paint on sale last year. - MT
-
Too late! I already did! They have great stuff too! I HIGHLY recommend them. Over the years I've gotten their power tools (disc sander, drill press, band-saw and mill). Their stuff has variable speed motors so styrene doesn't melt when being machined. The smaller sizes fit on your workbench without eating up real estate. - MT
-
@wsna Welcome to MW! I was just about to post the text below when Derex posted an update. His method would be better. But if it's not what you want... Sanity is right, that is a good idea. You can get a tube with better control or buy tips separately from hobby and craft shops. I just get a .07oz (2 gram) tube of "The Original Super Glue" (Red Cap). I started using it lately because the applicator doesn't seem to get clogged as easy. The alternative is to get an applicator as posted in the link below. If you're a little crafty, you can make your own. Get a needlepoint needle and file/grind down half of the eye. The open area will hold a tiny amount of glue and only release it once touched to a surface - but be fast before the glue dries. I made one of these. You can stick the needle in an old paintbrush handle or something for better control. You have to scrape the glue off with each use as it dries. I hope that helps! - MT https://www.micromark.com/Micro-Glue-Applicator_2
-
@electric indigo That's a cool idea for a paint theme! Nice concept. But I would keep your day job just in case. - MT
-
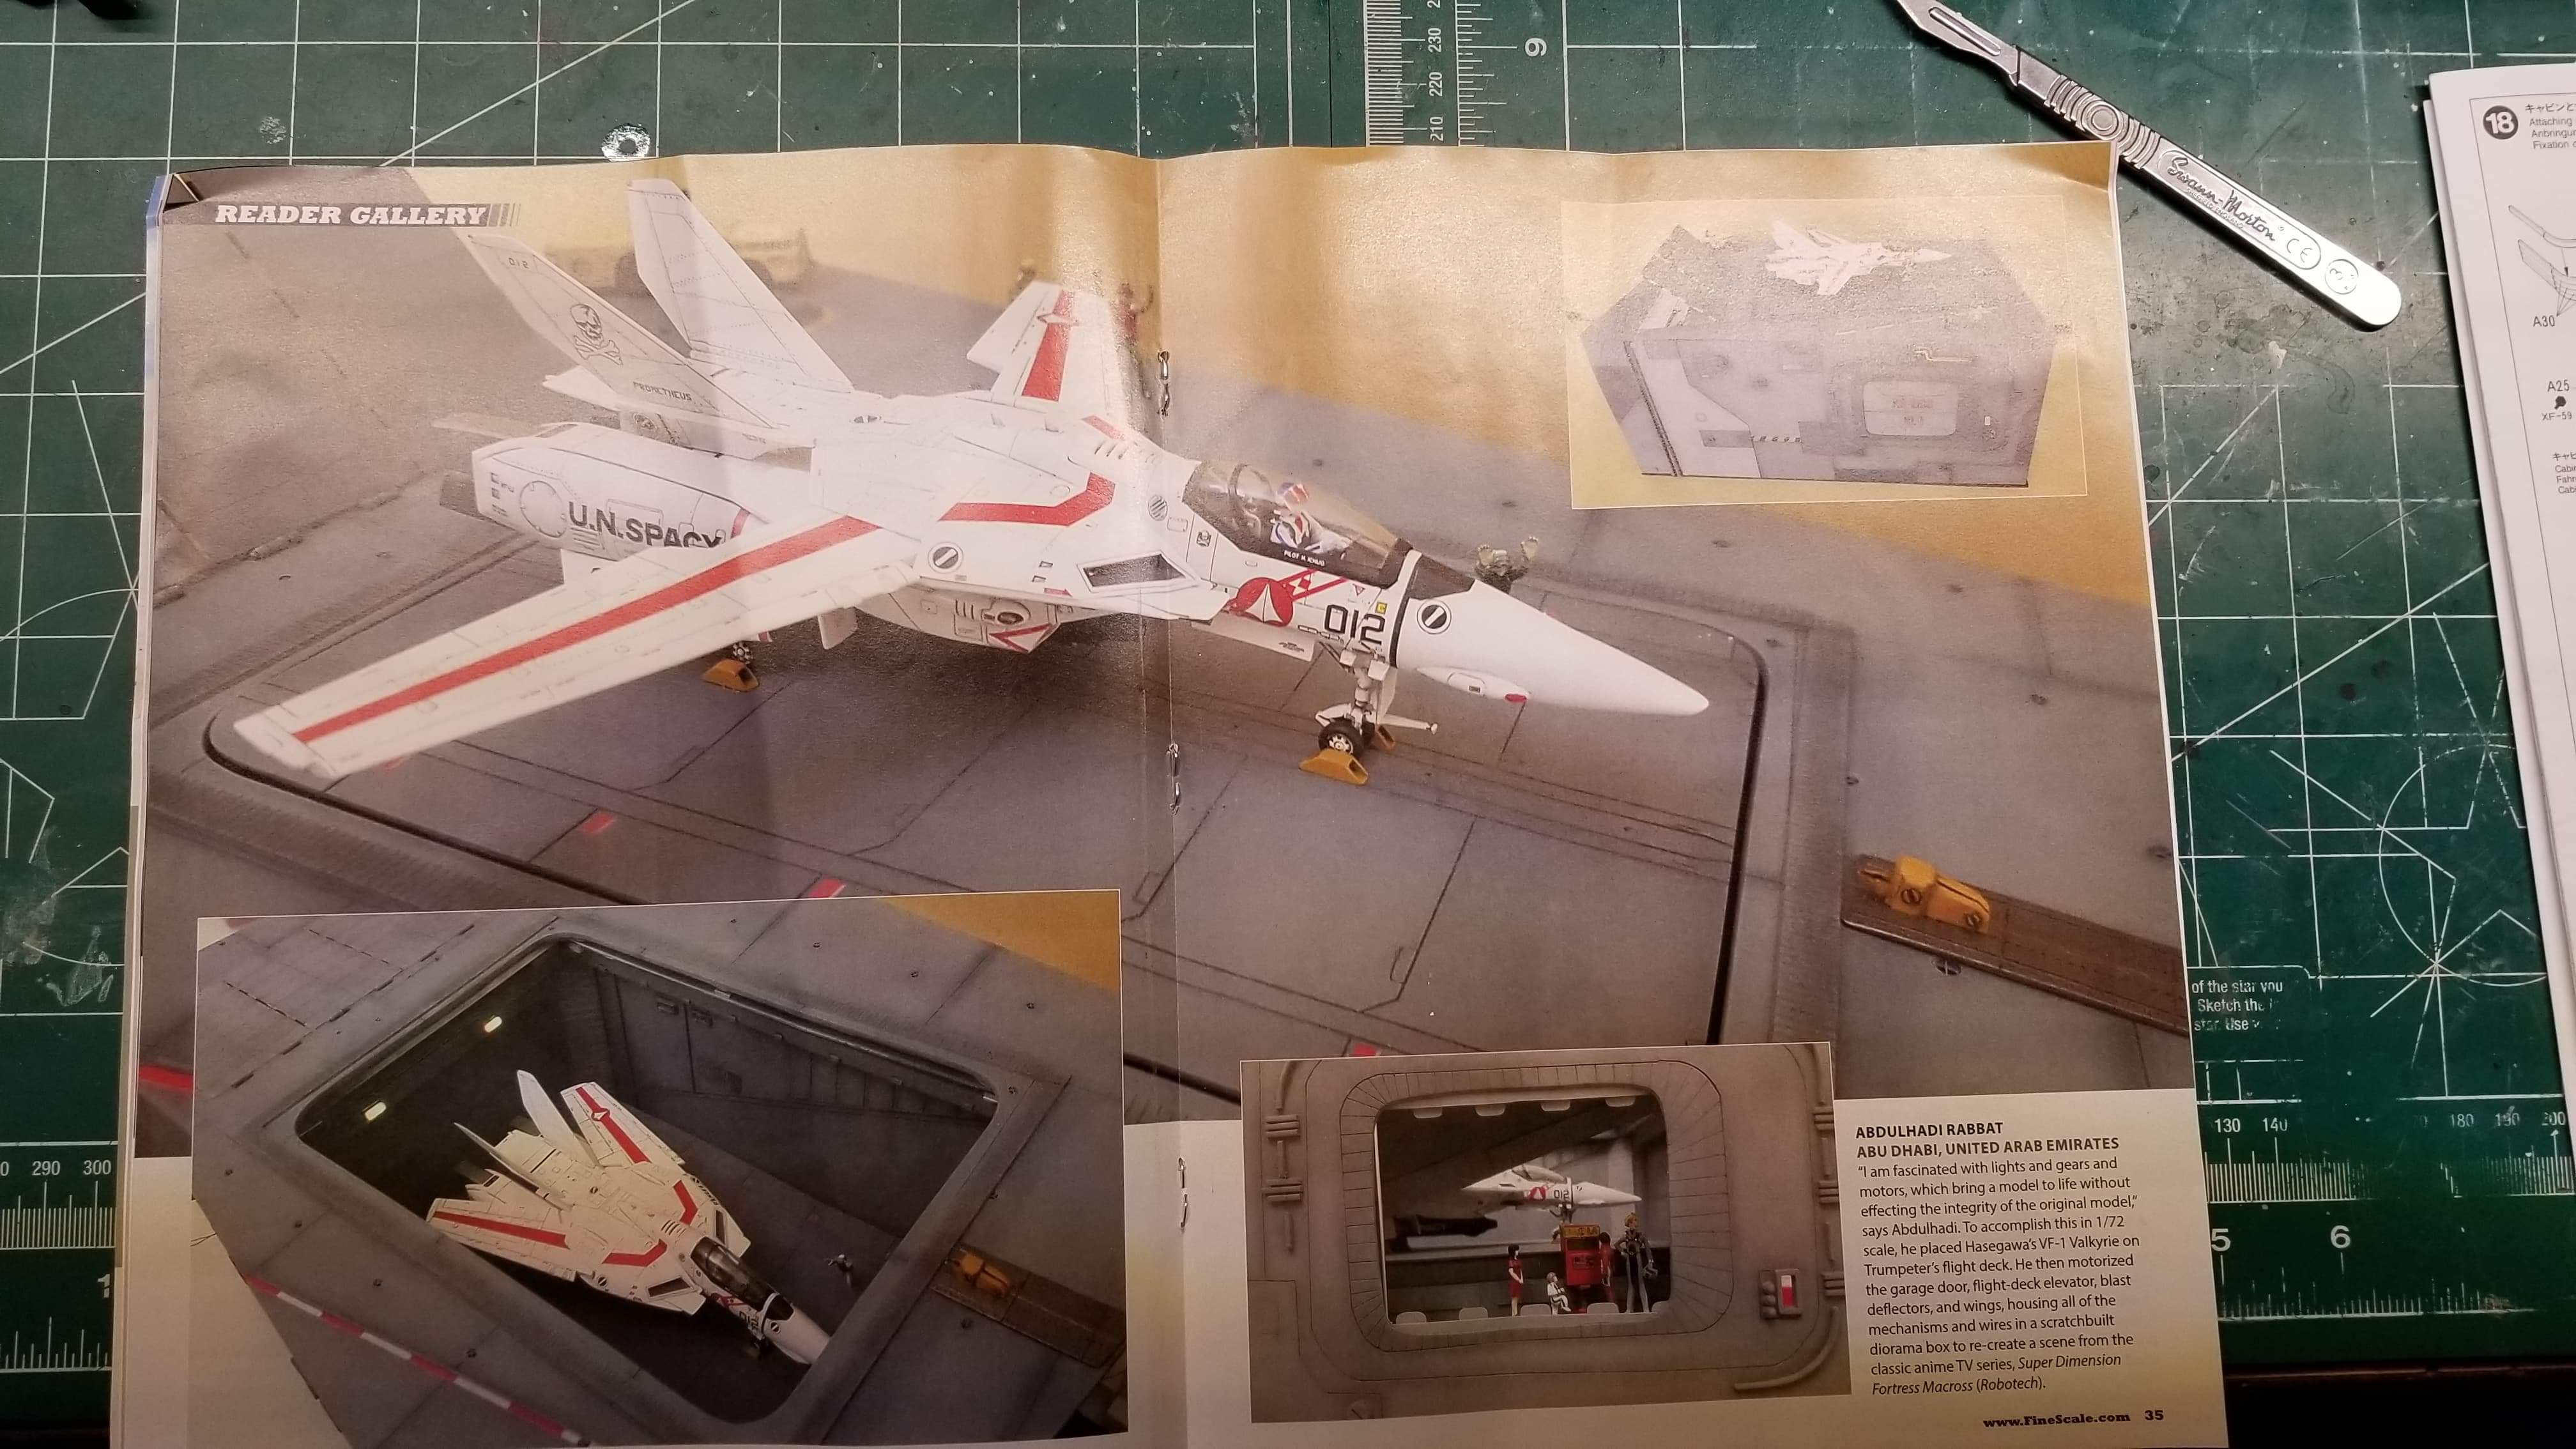
He he, what he said! By the way, someone from our model club brought in November's issue of FSM and I got to see your centerfold in person. It's cool! I told the guys about the model since the static photos don't really tell the story well. - MT
-
IMPORTANT SCOPEDOG UPDATE @arbit Thanks Arbit. I have the Red Shoulder. UPDATE - I have a second kit, #5 in the series. I opened it up just now to check it. The styrene in there seems fine. It looks like I got a bad batch of styrene or something else happened to it. So I think everyone is safe. It's the first time in decades of building it has ever happened to me. I guess I can't complain @pengbuzz Your creation is coming along nicely! - MT
-
Thanks @pengbuzz and @Thom. I don't think this thing will stay together to make ANYTHING out of it Even the tabs in the arms allowing it to move broke from just a minimal bit of friction. It's sad because it will go great with all my 1/72 scale stuff. We'll see how it goes. It's insane just how BAD the plastic is! - MT
-
That's cool! I haven't seen one before. Nicely done! - MT
-
That looks great Claus! Nice n clean paint. - MT
-
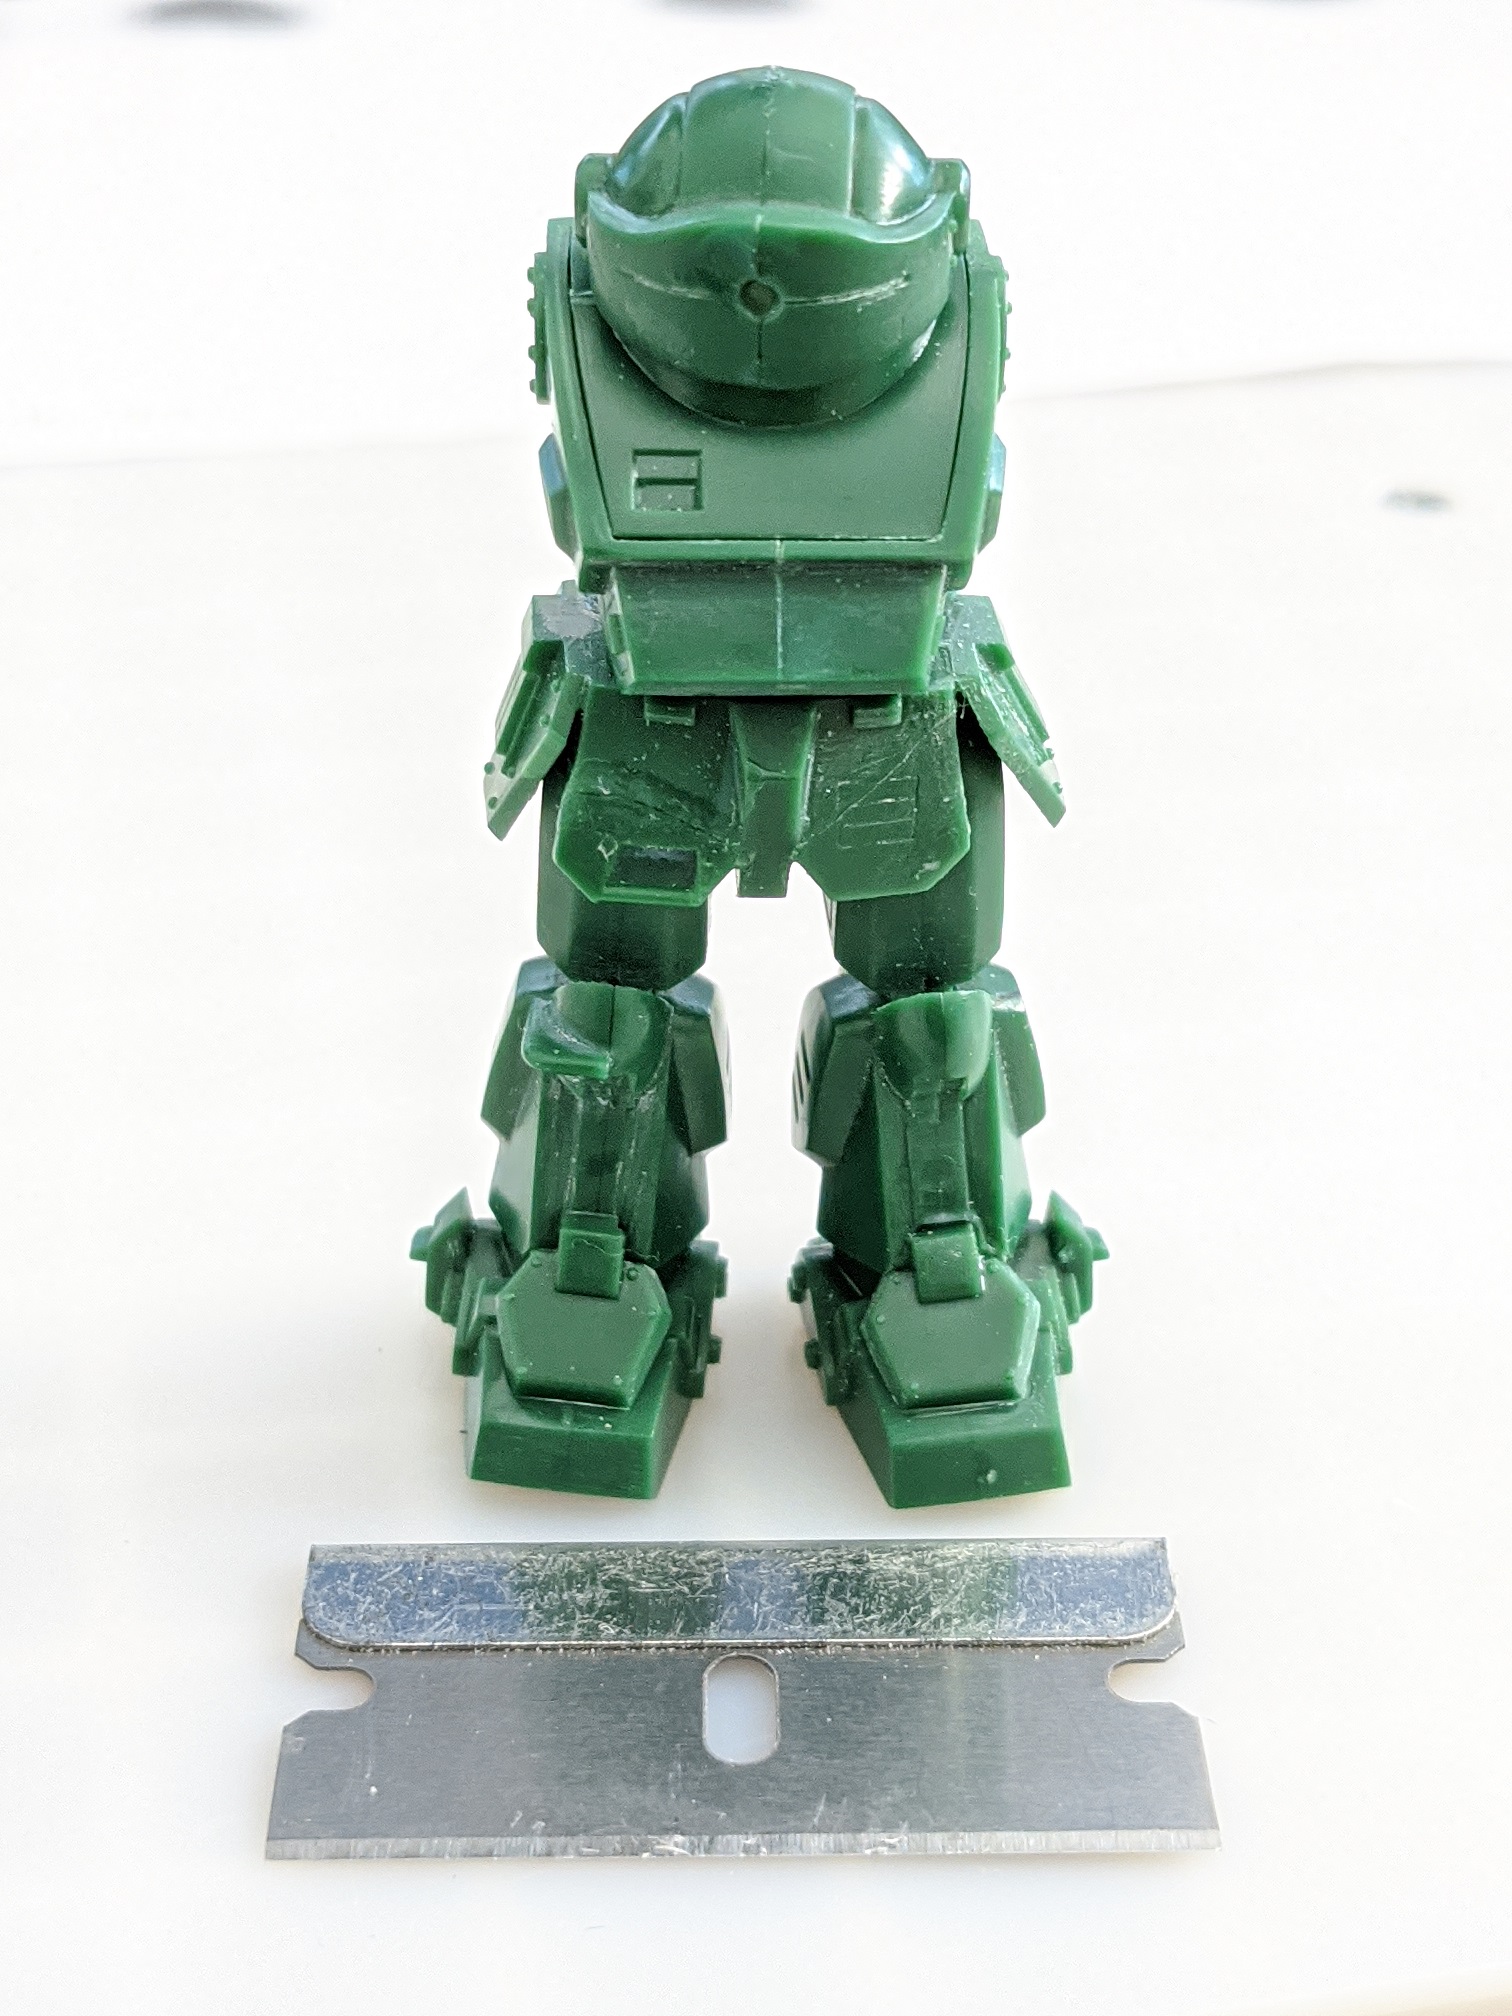
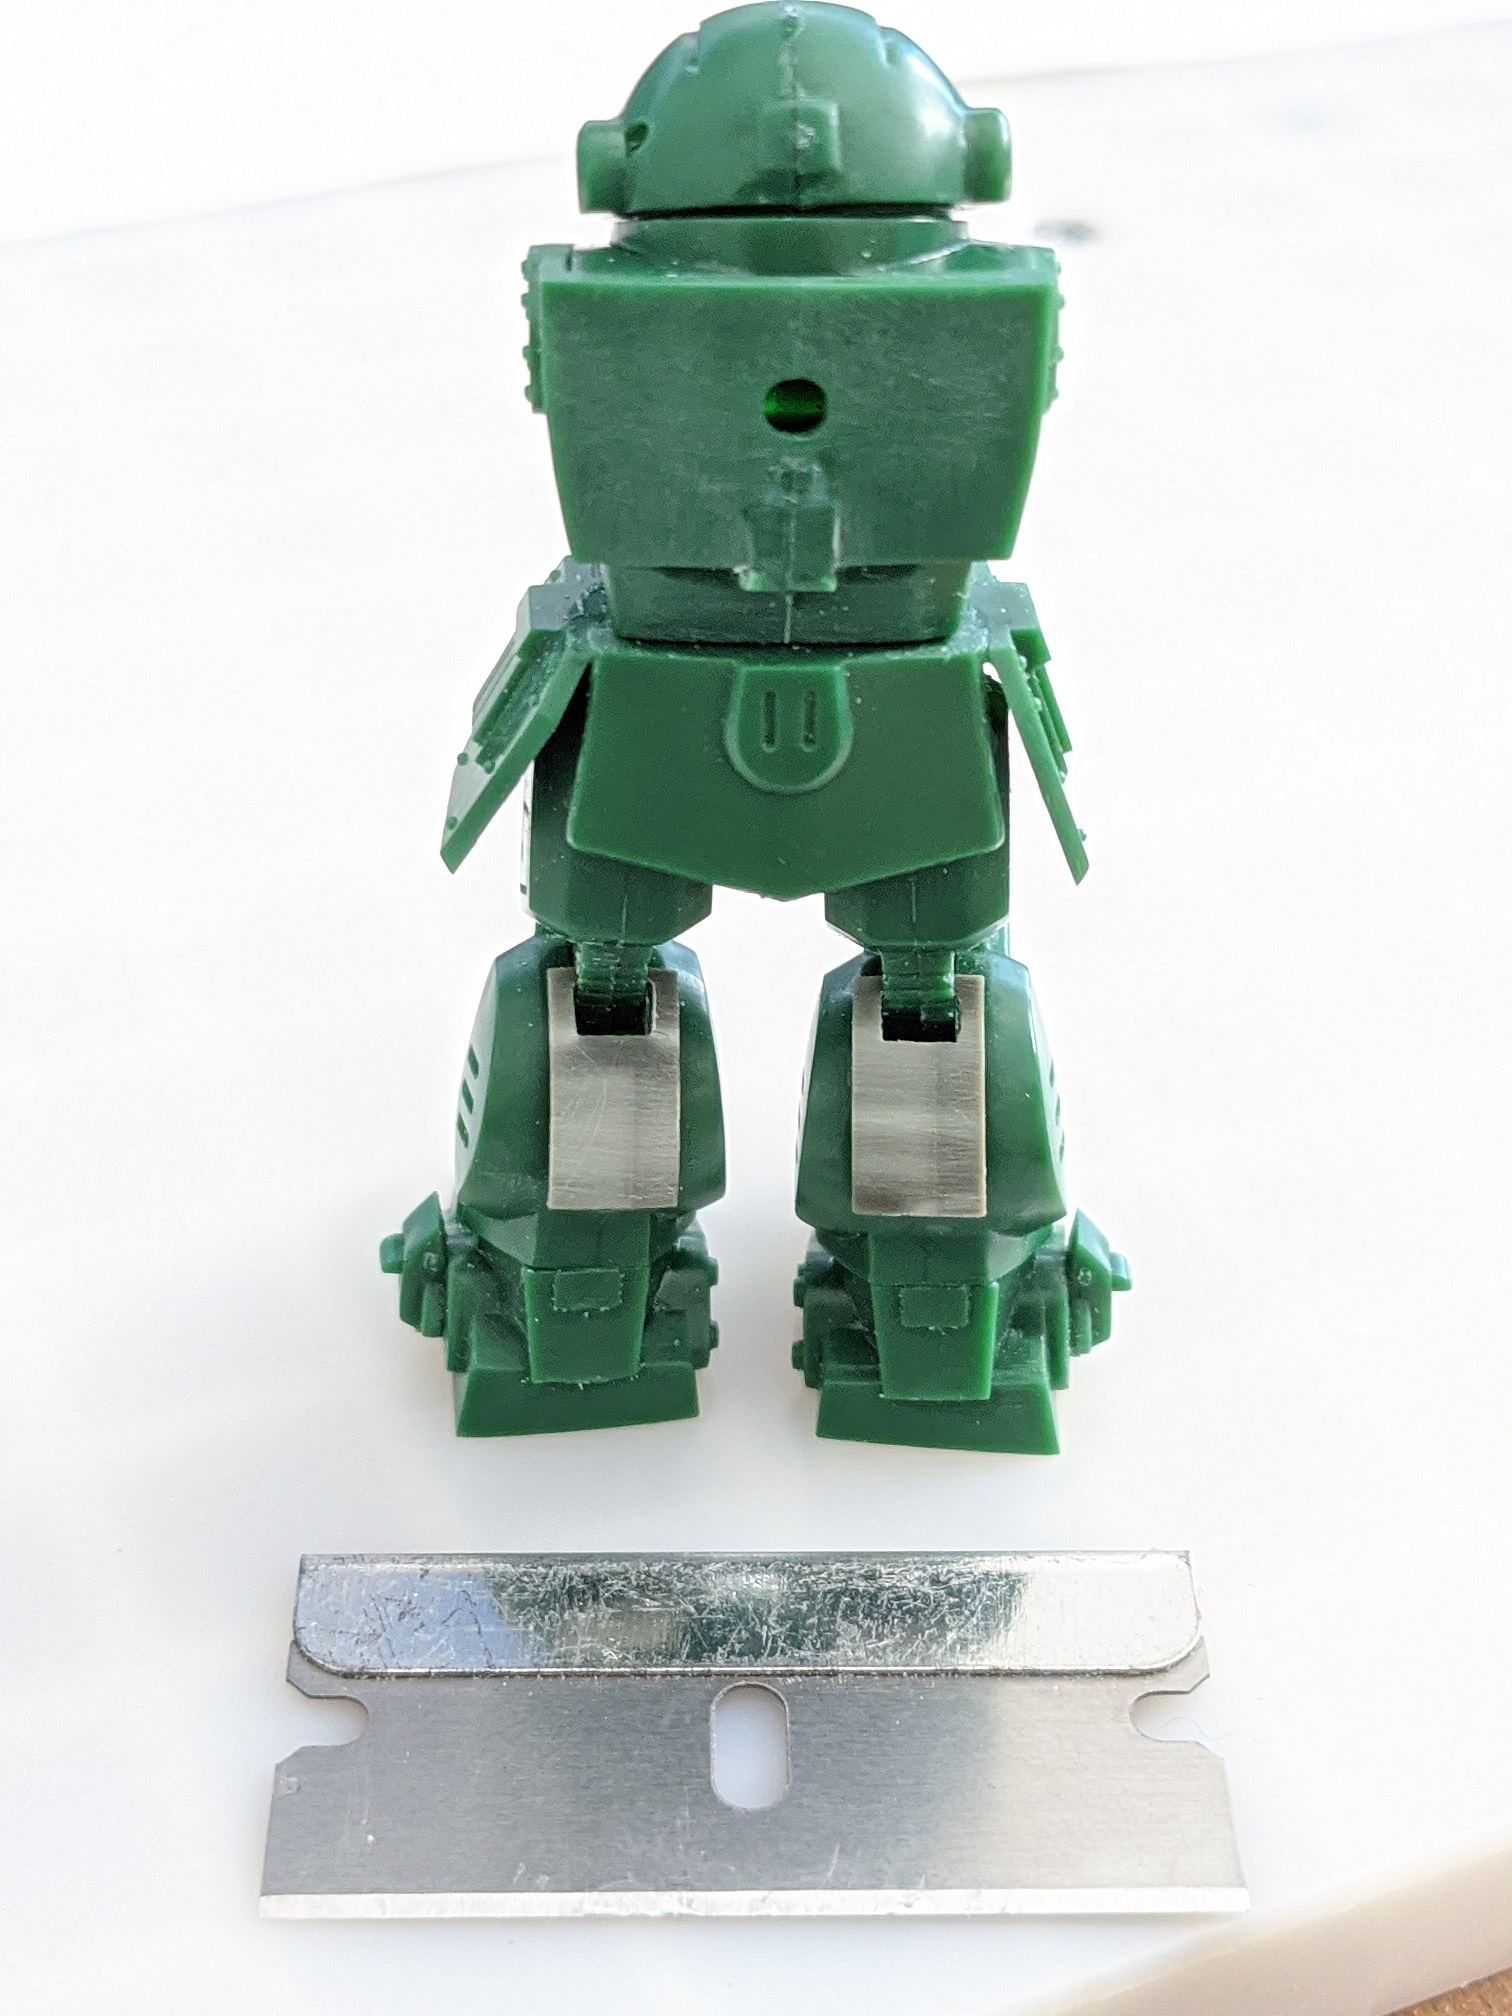
@pengbuzz Sorry to hear that! Hopefully you can get it sorted soon. Your model is starting to look cool! @NZEOD None of the artwork I've seen shows any trace of burning around the nozzles. Perhaps they're from compressed air? Some aircraft have compressors on them for pneumatic actuators, why not vernier thrusters? @derex3592 How is your cat in your box my fault! I think you'll love the kit, I'm tempted to get one myself. I got a tiny /144 F-86 for a club build (Godzilla). My cat couldn't fit inside the box, so he put just his front paws into it and curled up while crushing it! Needed something small to bring to our model club meeting, so I brought this tiny 1/60 scale Scope Dog. The sculpture is awesome, but the plastic is the ABSOLUTE WORST! It is so brittle, I went to show my son by breaking a piece of sprue and it shattered into pieces hitting him! So is the model - beyond brittle! Solvent glue and CA do not work properly on it. It would have been done by now, but I have to keep fixing things that break or come unglued. I had to make new armor flaps from other styrene to cover the calves because the originals broke just putting them on. Then they couldn't be repaired. I filed a piece of sprue to make new flaps (which also broke). When plastics get warm they let off a scent. This is NOT normal styrene and its definitely not ABS - It's evil! WAVE made it in Japan, but I think they used cheap import junk to cast it. Gotta go back and repair everything - somehow. - MT


-
That's cool! Chunky Monkies everywhere will have a little extra smile in their visors. - MT
-
@sqidd There are actually ABS pipe fittings and then the standard PVC. Both cement types can be thick and gloppy so be careful. Macrossjunkie had a good point with the plastic weld. If it's what I remember it is, use it outdoors with a breeze! It does weld ABS great though. Everyone is right, the CA will prevent the solvent from hitting the ABS. Acetone is also a great solvent for ABS. Too bad you don't have sprue, you can melt a little (sprue goo) to build it up, let it sit for a week or two, and then reshape the area. - MT
-
@pengbuzz That looks awesome Pengbuzz! That is the perfect backdrop. Who knows what lurks beneath the waters... I'd agree with adding distorted blur behind the the engines and slight vapor condensation off the wingtips. Then you wouldn't know if it was real or not. - MT
-
@MacrossJunkie Thank you! It looked like it snowed in my shop too! It took as long as shoveling the sidewalks too. Your valks are looking awesome!!! They just need a good background and some Photoshopping to bring them into a Macross scene. - MT
-
And now for something completely different... One of our club builds are 1/144 F-86 Sabres to "fly" around a 1/144 scale Polar Lights Godzilla. I thought it would be cool to make one actually "fly" around a lighthouse as a tower on an arm. So here's the start of the lighthouse - the yellowed clear piece is just a place-holder. The lighthouse is a 2" styrene tube that had a slice taken out of it and then glued together again to make it conical. Heavy bulkheads were glued to the interior to make it sturdy. Two "D" batteries will fit in this for weight and to power it. - MT
-
@derex3592 Plastering primer on is a good idea. I might need it for my current project. @pengbuzz That's a great idea and looks fantastically weathered! @MacrossJunkie Awesome weathering! He's probably blushing right now, but did you guys see that Arbit made the Fine Scale Modeler centerfold? Return to Kit Form (Brett) posted this photo in Arbit's thread. We're waiting to hear which issue. - MT

-
That's AWESOME Arbit!!! I used to subscribe to them for years! I stopped because they rarely had sci-fi stuff in there. It would have been cool to see this! - MT
-
If I was going to build another Tomcat, I would go with the Fine Molds kit. It looks absolutely AWESOME with hydraulic lines and several open panels including the gun magazine. - MT ]
-
Life Size Papercraft Sheryl (Crossover Costume)
MechTech replied to tankball's topic in The Workshop!
Excellent work!!! One of the best uses of paper related stock on Macross World! Great engineering with the sound system and lights too! - MT