MechTech
-
Posts
4701 -
Joined
-
Last visited
Content Type
Profiles
Forums
Events
Gallery
Everything posted by MechTech
-
@pengbuzz Thank you and great change-up of details in the cockpit to include fixing the consoles too! You even striped the helmets! @derex3592 Thank you! I'd have to side with madman. That's what it felt like drilling all those holes and then threading the rods through them! Your Runabout is looking great! Your paint colors are great and like EI said, the nacelle colors look better than solid colored lenses. @electric indigo That just needs some sky for the background and some vortices and it would be hard to tell from the real deal! @505thAirborne That's a nice color! @arbit Thank you, Arbit! I kept thinking of Tweetie's bird cage! @Thom Thank you, Thom!
-
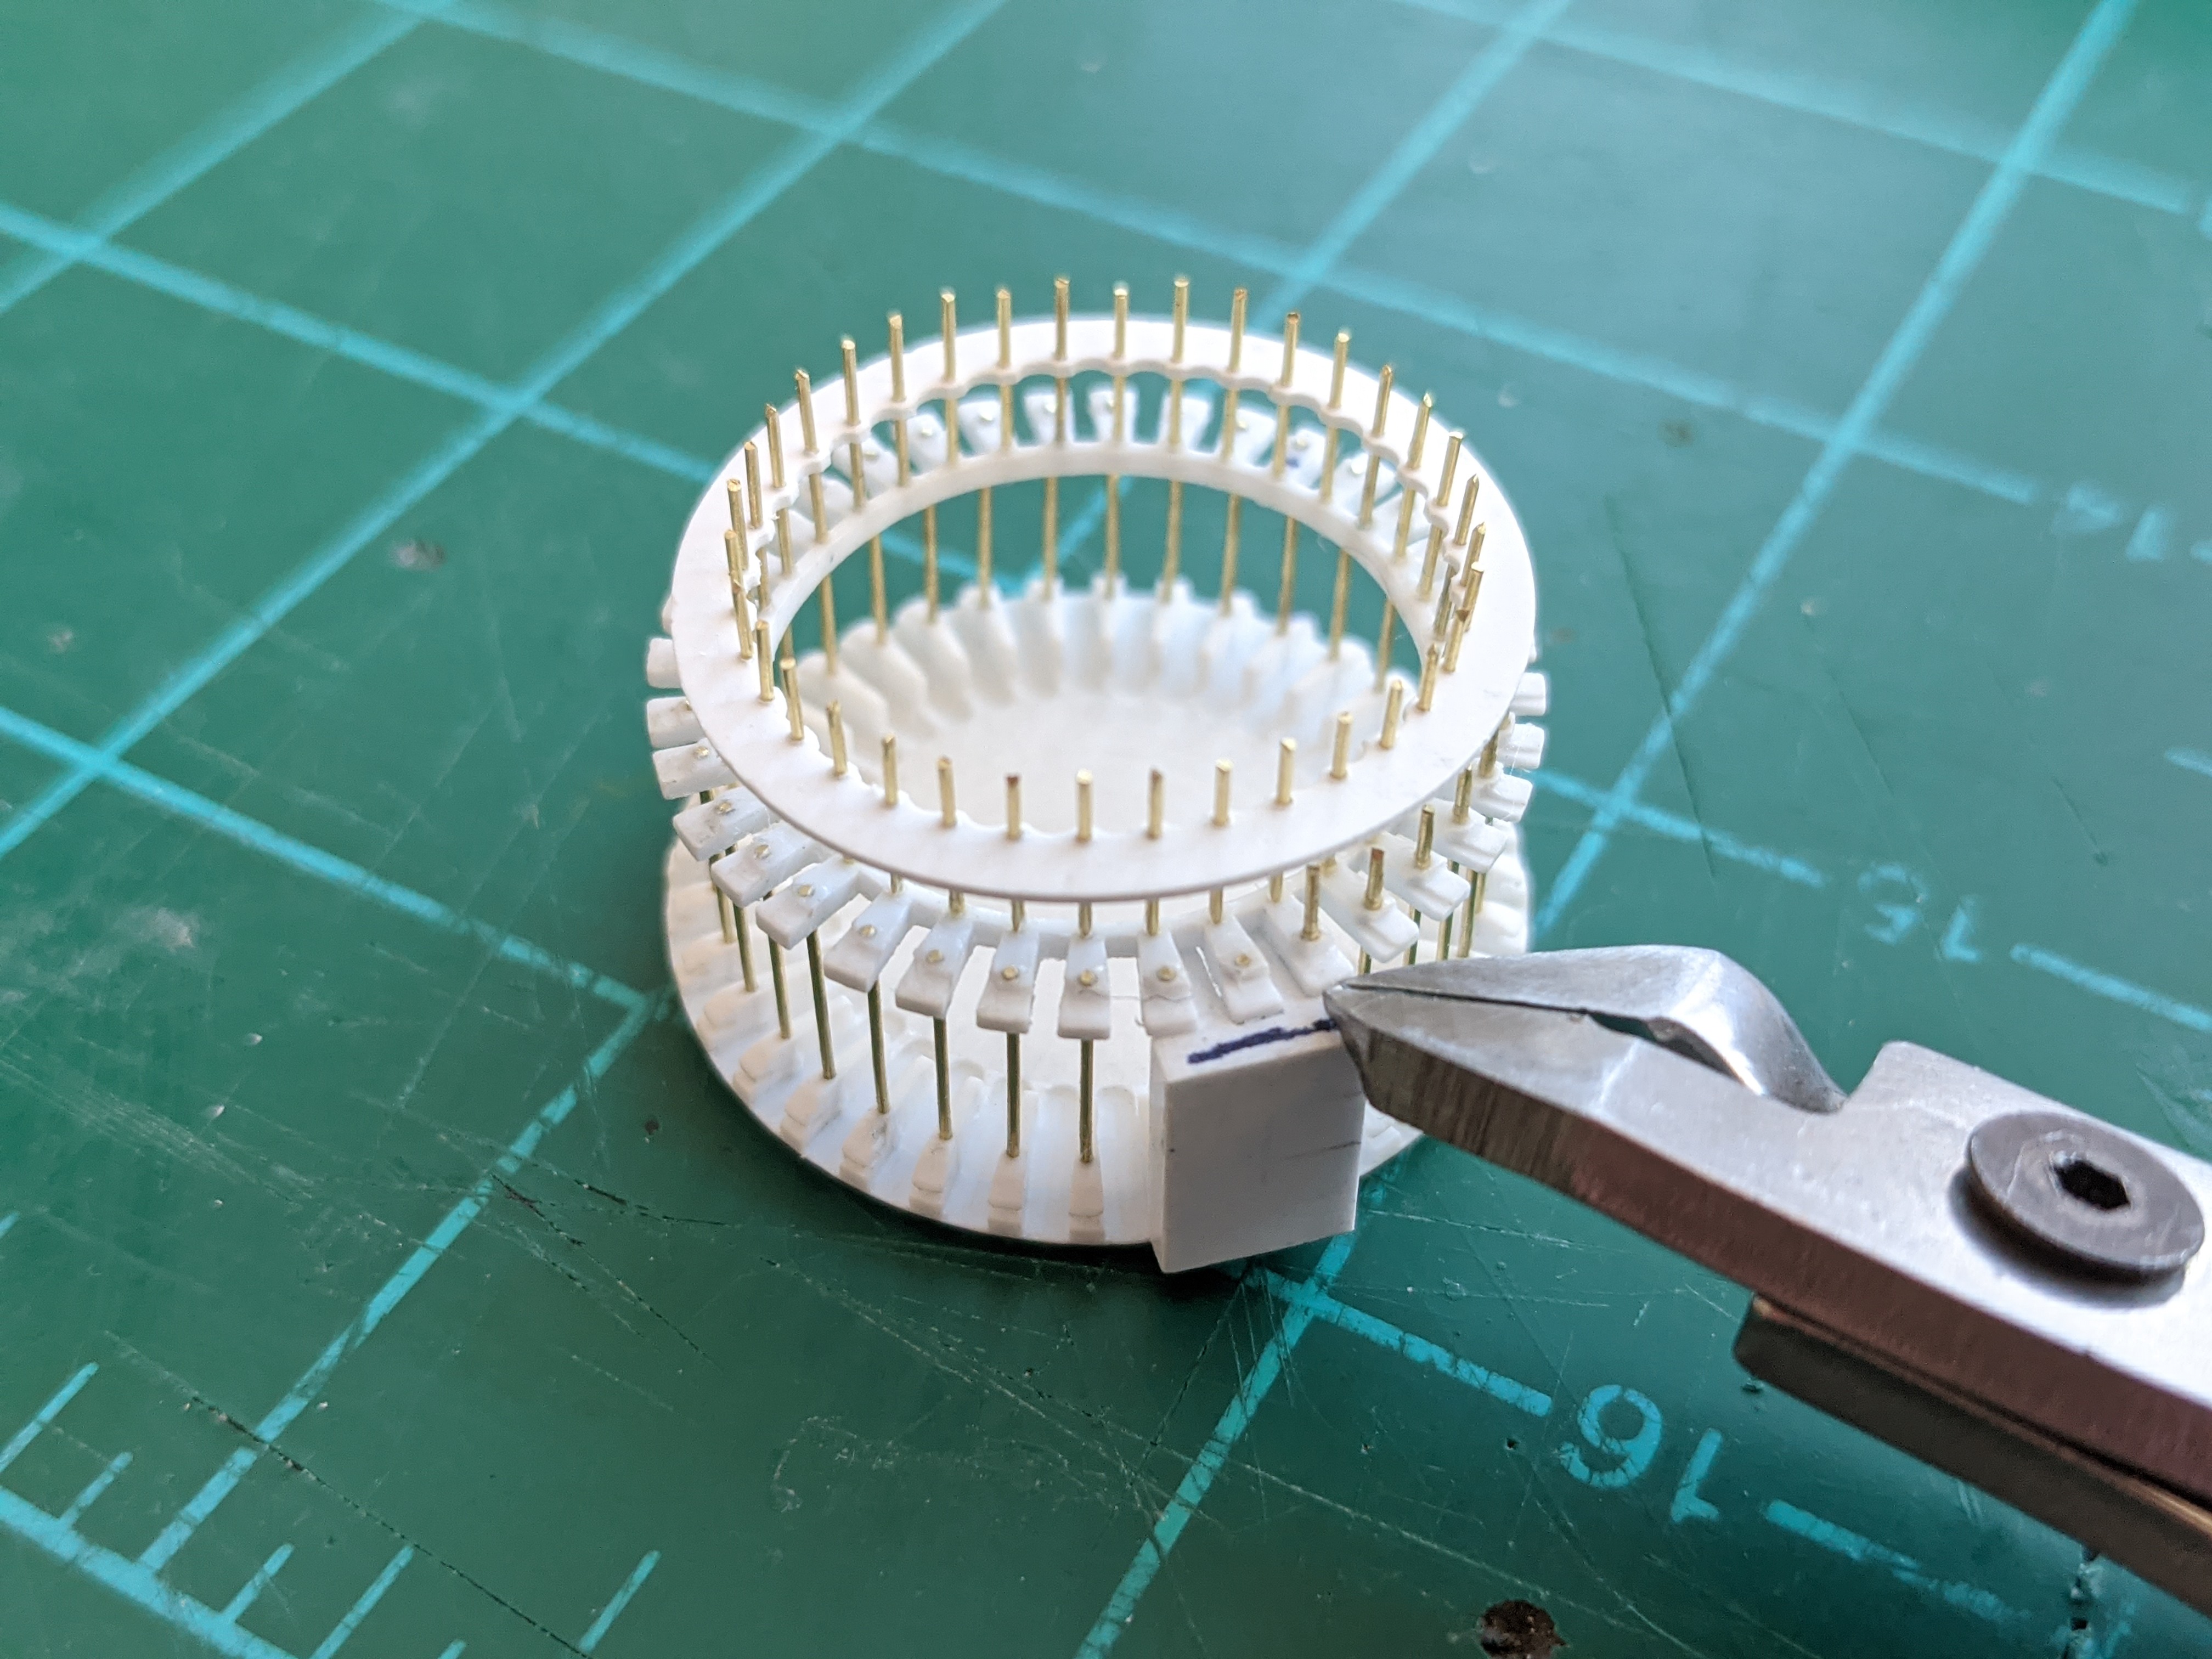
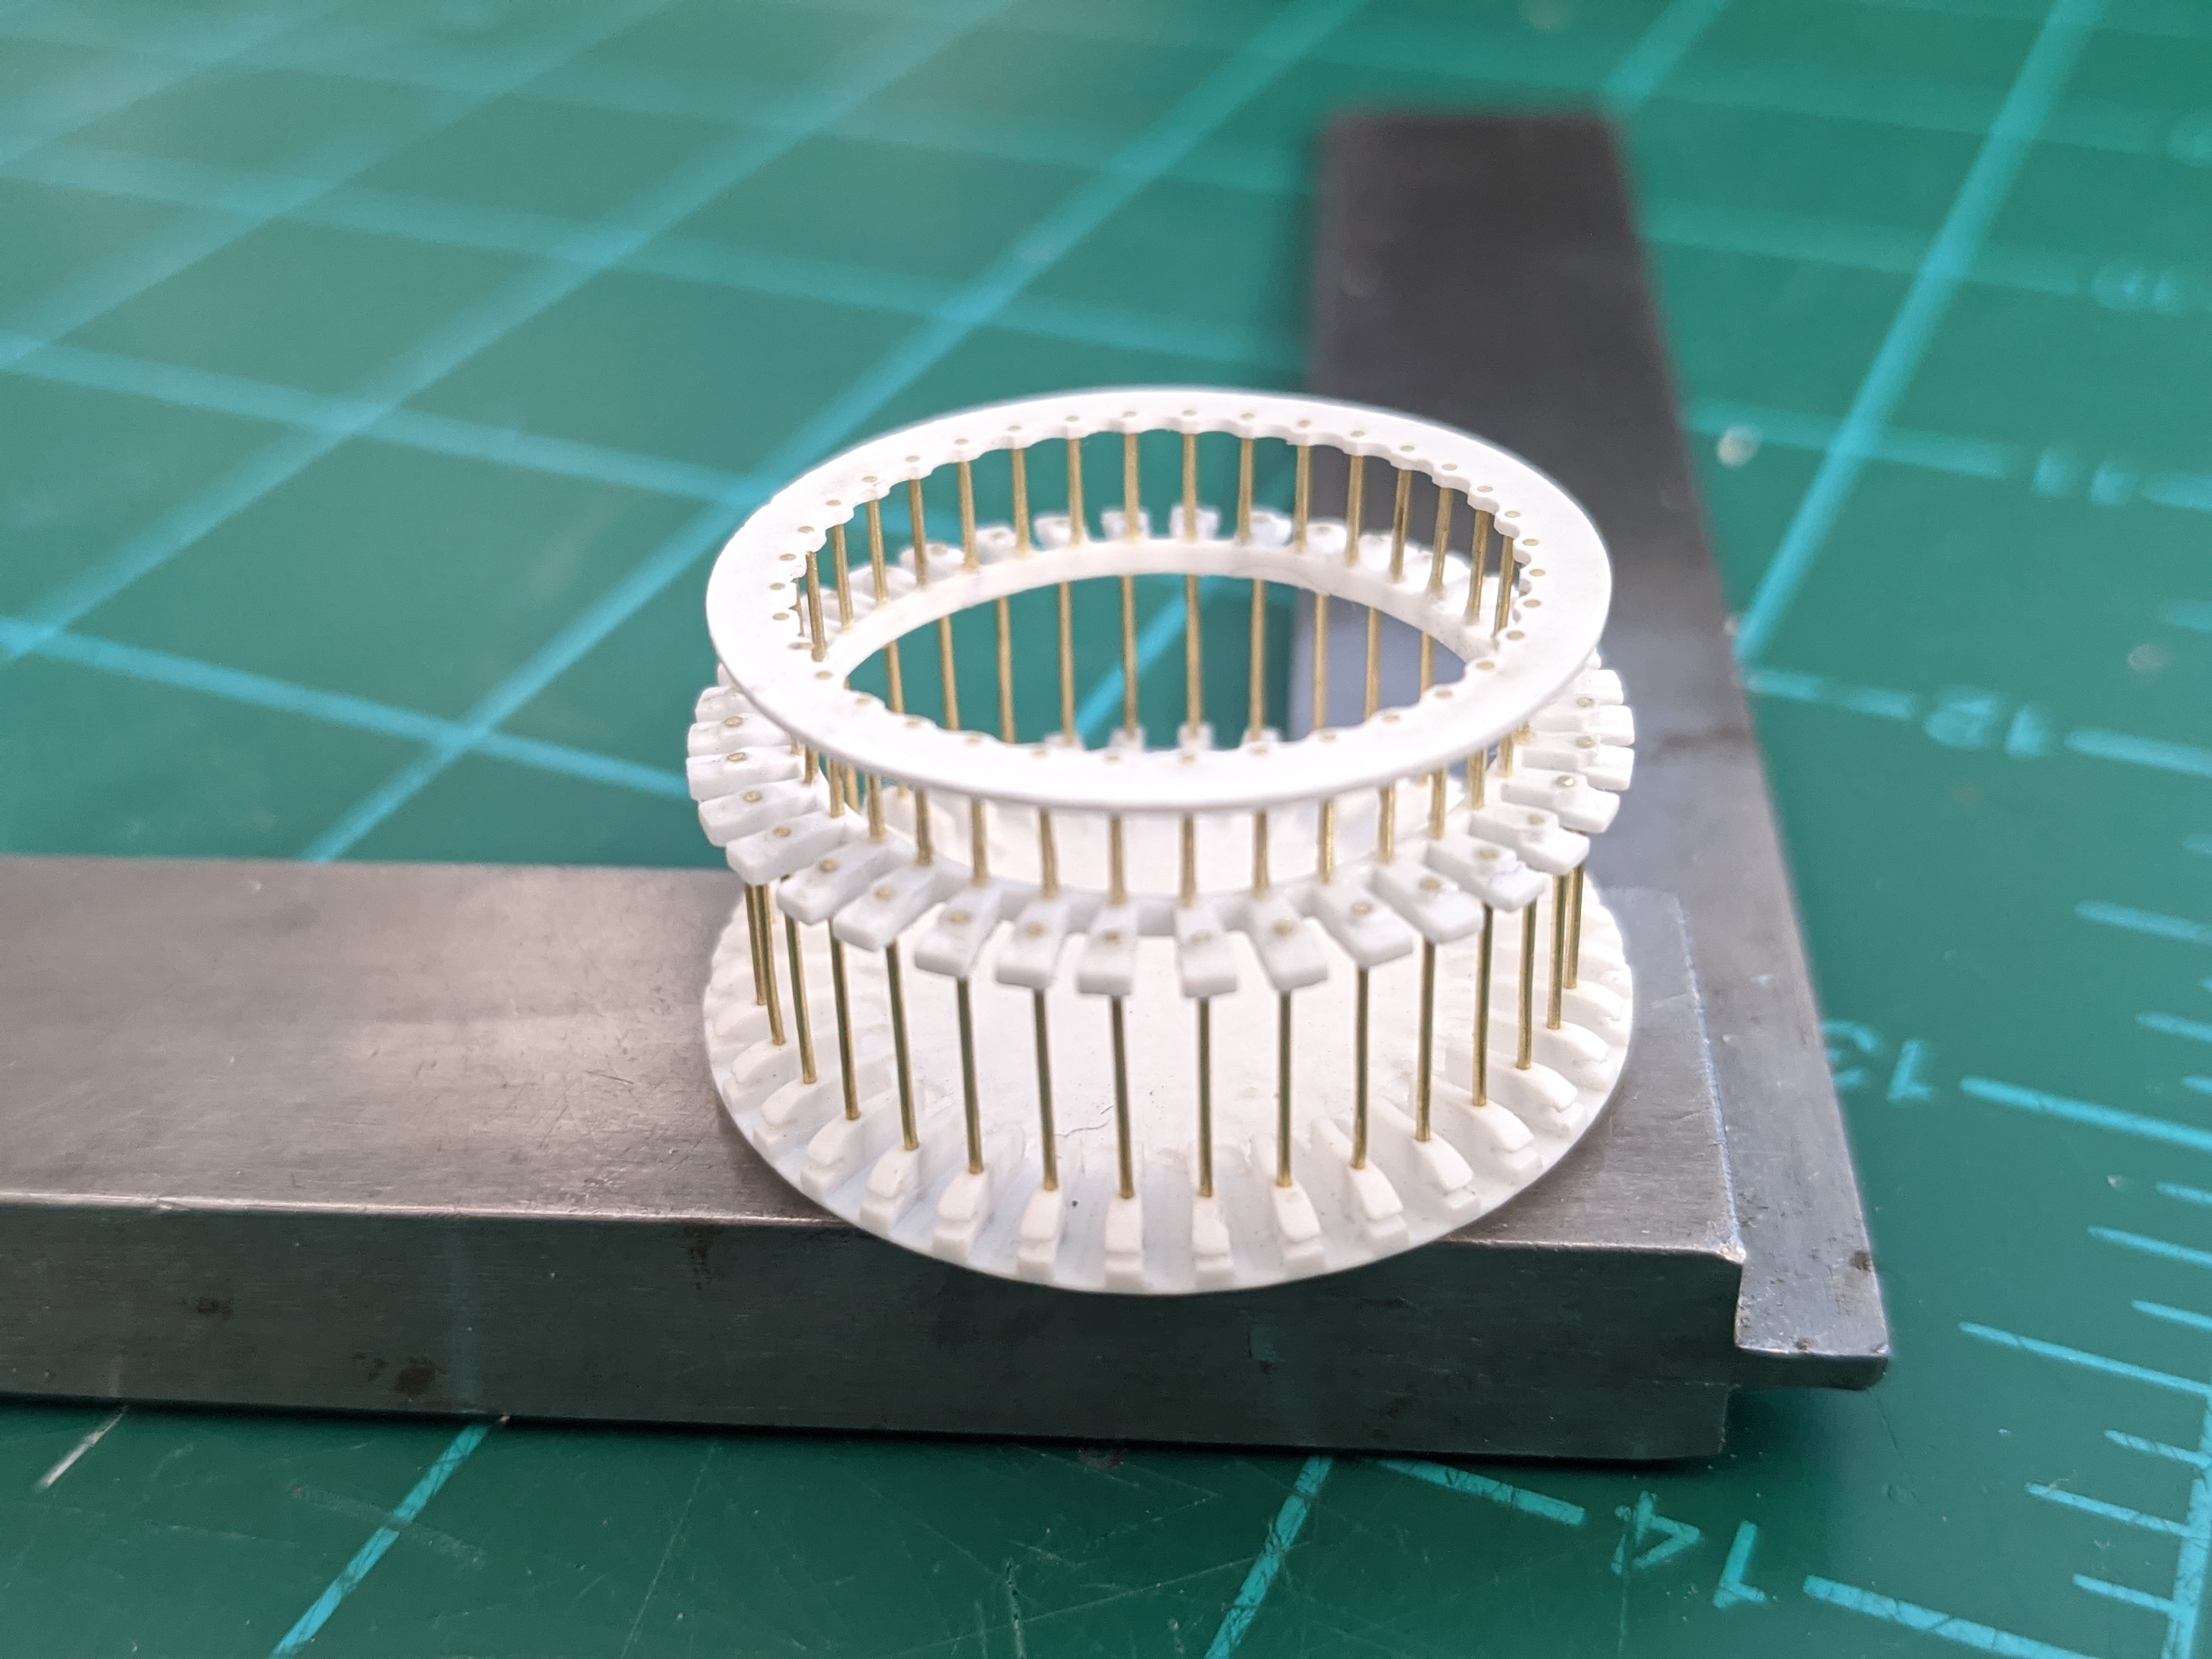
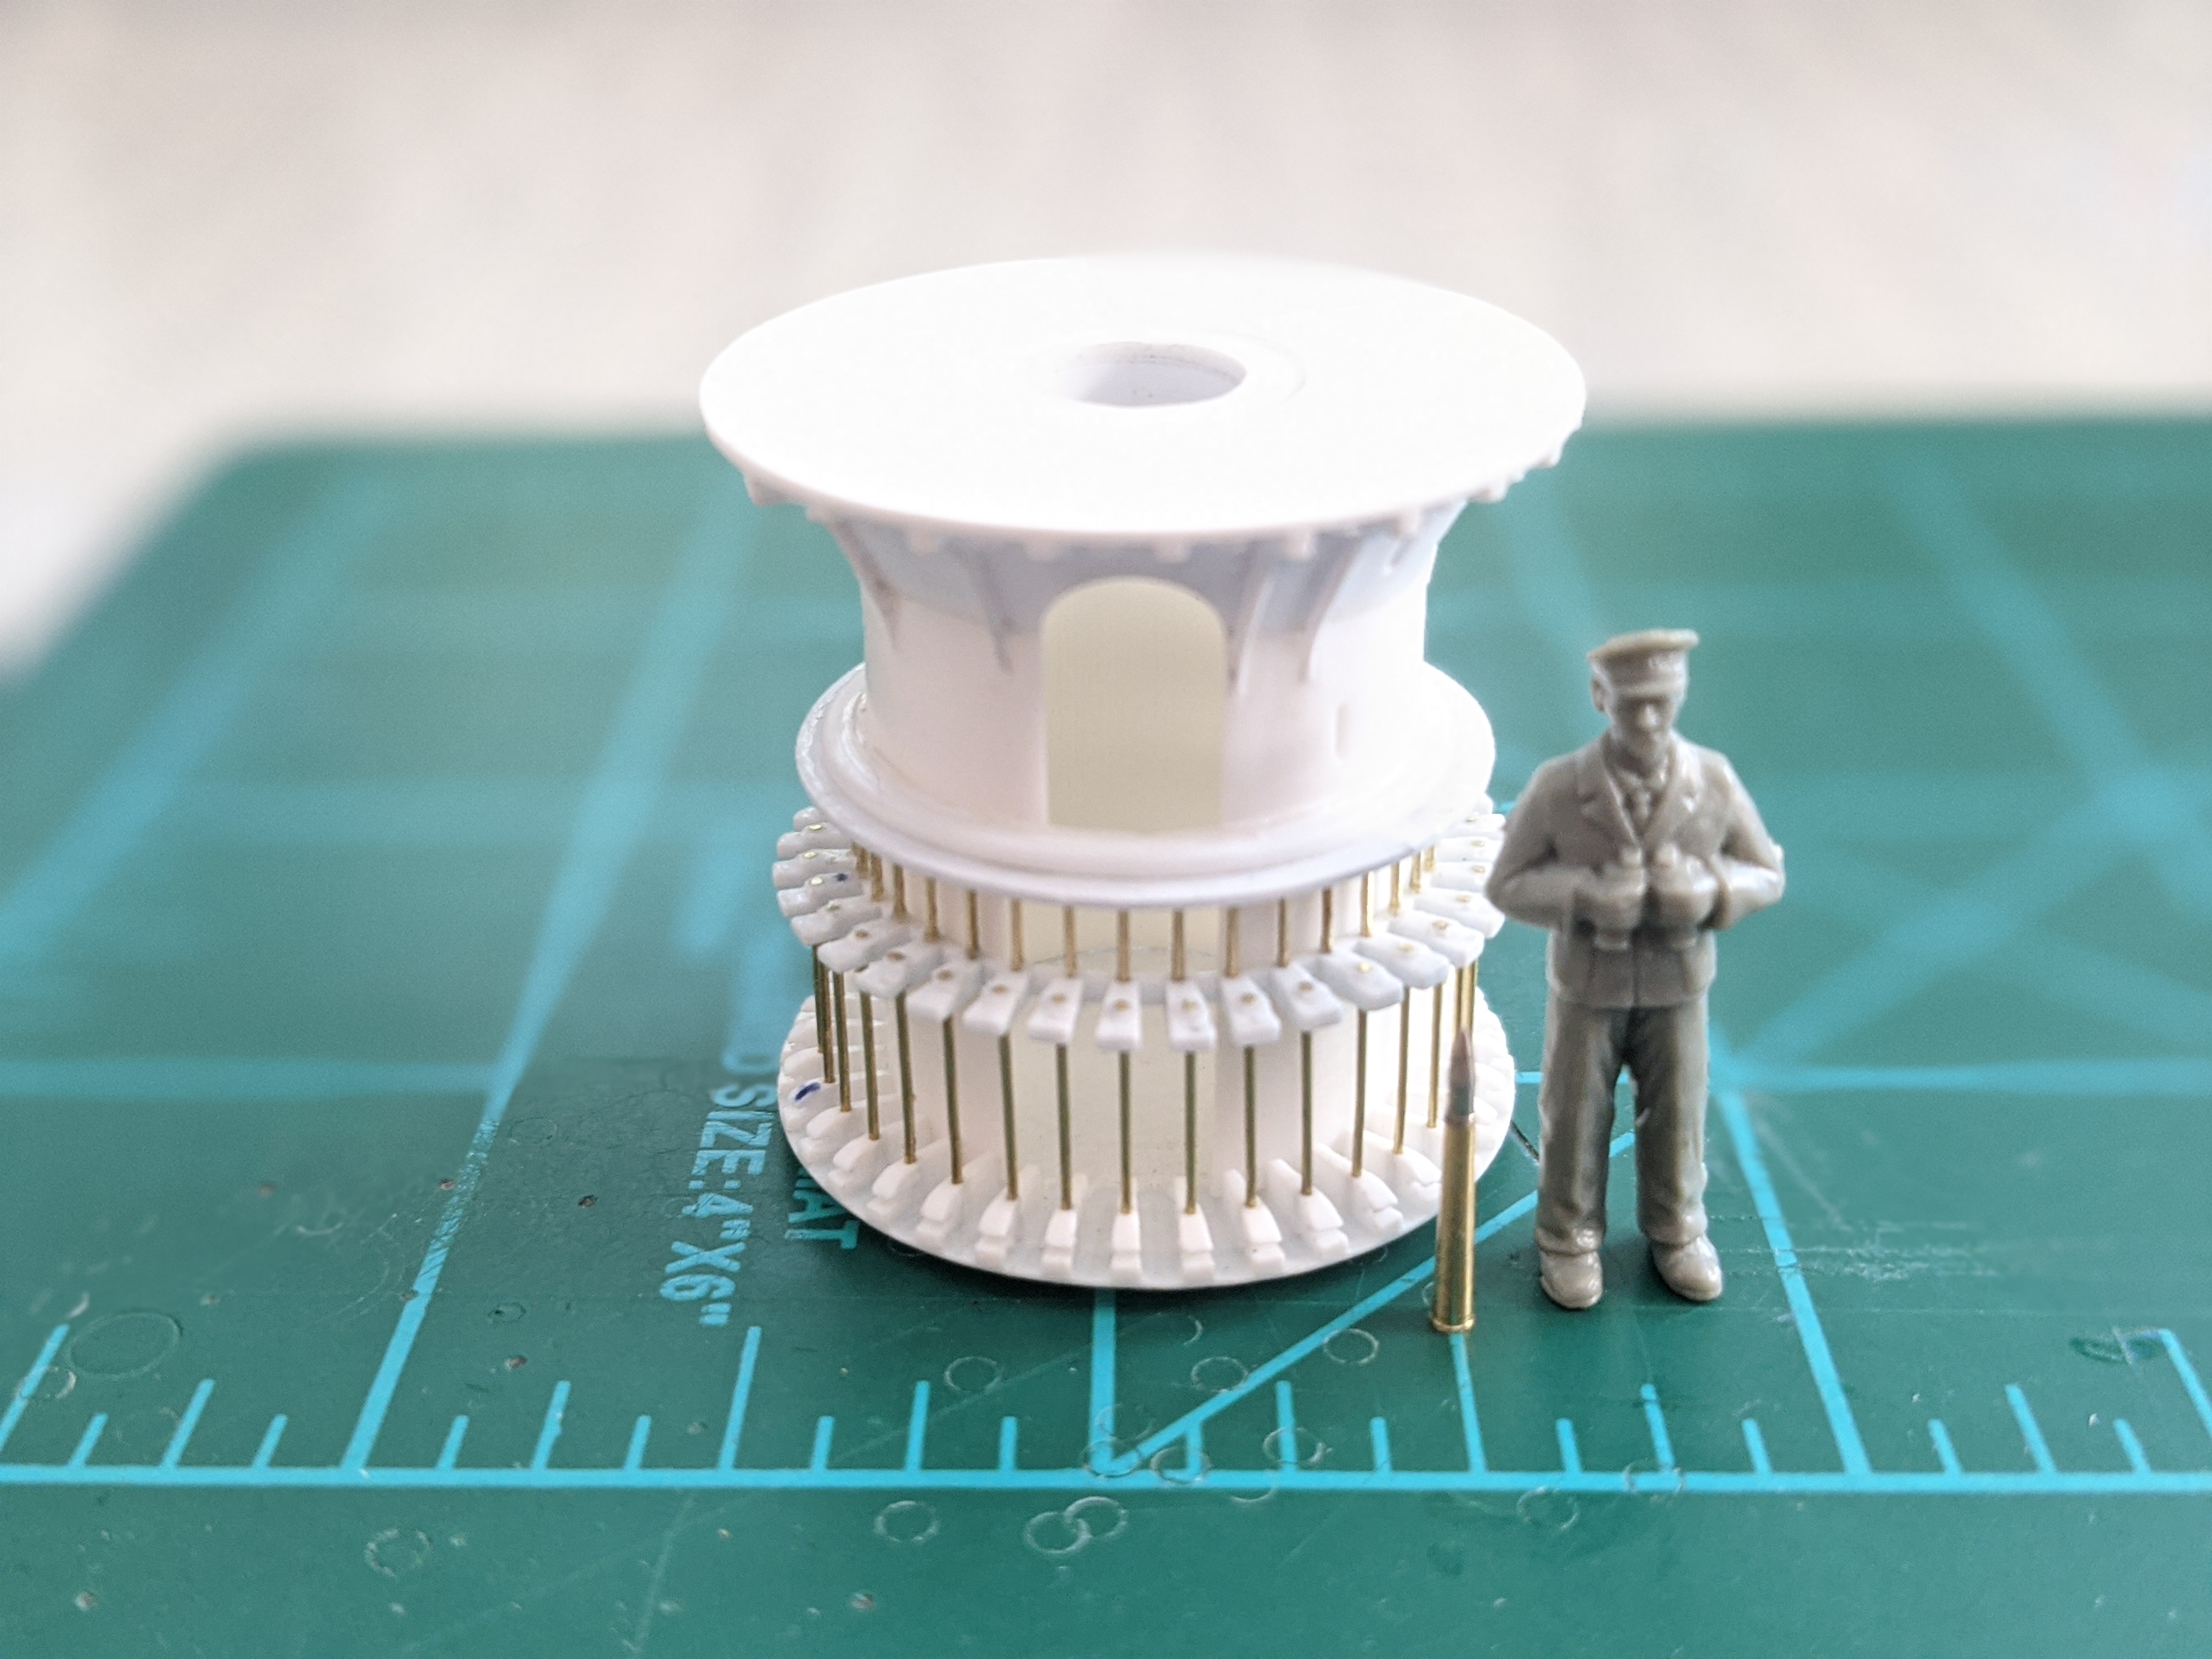
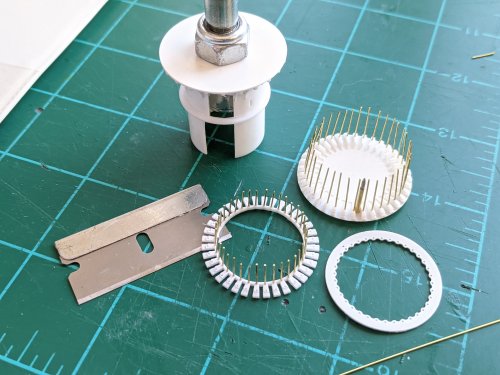
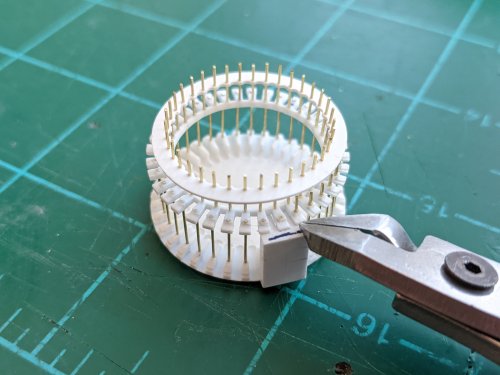
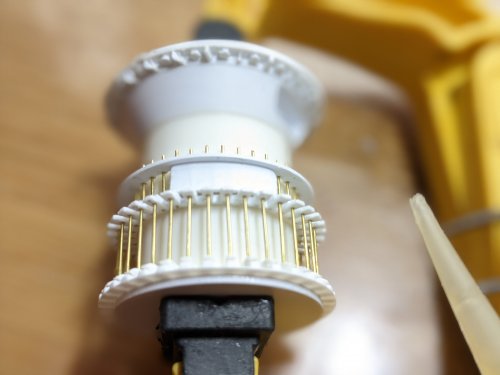
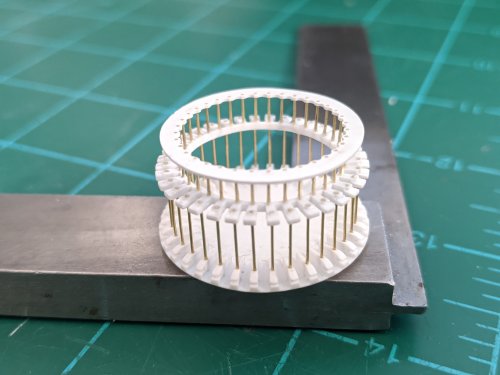
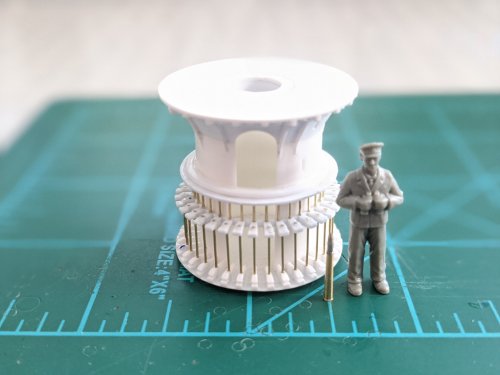
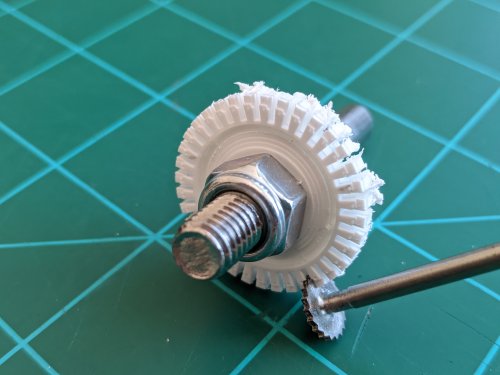
For the past few weeks I've been trying to engineer and machine the parts for the 1/72nd scale Oto Melara 76/62 76mm naval gun. Since the parts are small and don't have much "meat" on them, it has been tough with a lot of reject parts, but a lot of gained knowledge too. Some parts were just redone so they looked more accurate. It all adds up! Badly scaled parts and things don't look right. The magazine that sits below the deck looks like a sort of bottling plant. It actually spins around independently from the turret which sites inside it (the interior green colored cylinder). Each row holds TWO 76mm rounds. The whole magazine holds 80 rounds total between the carousel and the feed mechanism. That is what you're looking at here: My son thought these looked like torture devices. It was fun cutting all those tiny lengths of brass wire and the gluing the into place on the top row. The bottom row is friction fit. You can see a complete round in one of the rows. Do you know how hard it is to line up all those tiny pins with all those tiny pieces? It took hours just to do that - before the gluing. I then made a couple of jigs to keep the parts evenly spaced while gluing them in. Flush cutters were used for trimming the excess ends off. And FINALLY, trimmed, sanded and test fit around the turret piece. The 1/72nd scale figure and a complete round are for scale. If you noticed the big bolt is no longer attached to the turret? I VERY CAREFULLY machined-out the interior roof so the feed mechanism (next part of this project) can fit up in there. Thank God I'm only making one of these! - MT


-
@peter AWESOME fleet Peter! All your hard work and tenacity paid off! @derex3592 Looking good! It's a good thing you found some good putty! Looks like you'll be filling in the Grand Canyon! @pengbuzz That's TWO gold stars for the wifey!!! That's awesome! I hope all goes well with this build. - MT
-
@peter GREAT work on the decals! You got some skills with not only laying down the decals, but also some tenacity to stick with it! @electric indigo Awesome and smooth finish as always! - MT
-
@derex3592 @Chronocidal @arbit For using the glue and styrene trick, let it dry for one to two weeks - not one to two hours - unless you barely use any. A nickname for that stuff is "Sprue Goo." It does work great and where sanding/gluing a seem won't do, it's great. The more goo, the longer the drying time though. It's perfect for gunpla and avpoiding painting where it would just rub off. @peter Your collection is just getting better and bigger! The NX looks good too! @electric indigo Your Messerschmidt is look good! I was always glad more ME-262's didn't make it into production. @derex3592 That Monster is a beautiful rendering!!! Too bad it's just CGI. @pengbuzz Your Tomcat is looking good! That kit isn't an easy one even when everything is going your way!
-
@valkyriepm It's cool to see that scheme being done! I haven't seen one in a while. It's looking great! @electric indigo Beautiful finishes as always! That pair looks great together! Great focusing in the photography too! @Thom You gotta finish that Thom! It's looking good. So close, yet so far away... @peter Peter, you need to name your house the "Utopia Planitia Shipayrds." You're knocking them out like an ammunition production line! They're looking great too. @pengbuzz That is AWESOME Pengbuzz! You gotta give your wife kudos from all of us! Having that support is way more cool than any model - MT
-
@derex3592 Oh, I forgot, that's the Cap'n's kit. I was thinking it was the other one. That's right, I also forgot you're stripping it down. I'm sure your finish will come out smooth as a baby's bum! - MT
-
@electric indigo Thanks! That sounds like a type of sale @CrossAir Thank you! Details are what help make everything realistic. I'm trying! Sorry about the glue! You recovered great though! @peter Thank you! I'd love to get a 1/20th Valk and do that. They are just crazy expensive - before the shipping that costs about the same. Keep up the great work! You'll have a fleet able to rule the universe at the rate you're going! @derex3592 Thank you! Don't tempt me! Caps are as far as I'm going to go - I hope! That Catseye looks 50% kit and 50% putty. Too bad it doesn't fit better for what he wanted for them. - MT
-
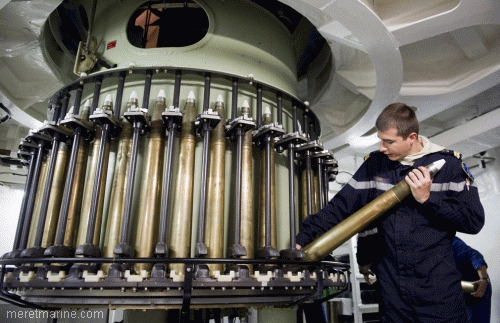
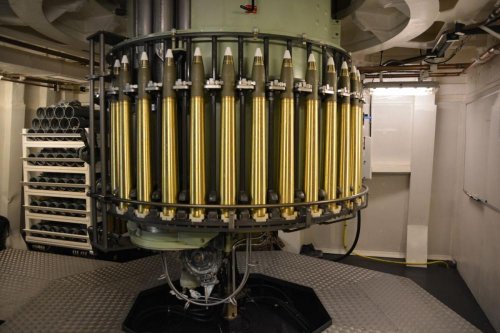
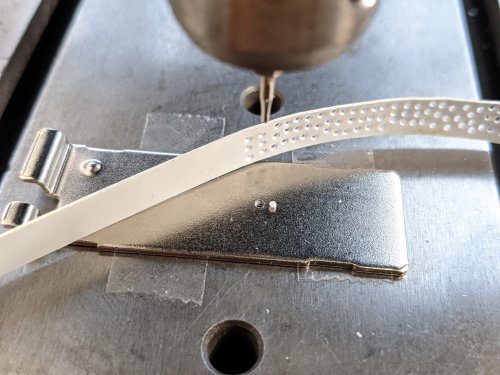
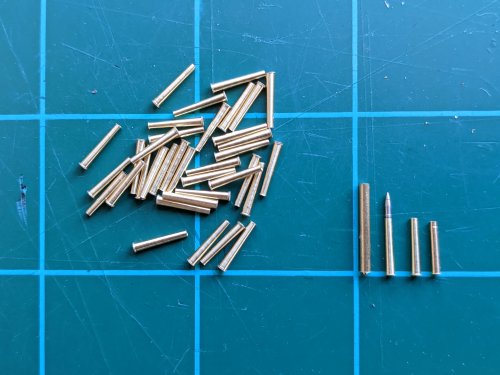
I've been working on parts for the Oto Melara 76/62 76mm gun - below deck portion. I'm thinking of displaying it on a clear baseball cube container. Gun above it, all the workings below it in the clear cube. Here's the real deal below deck and an inert 76mm round for comparison: Easy bolt heads. Take a metal plate, drill your selected size hole in it (1mm in this case), and get a Allen wrench driver bit the same diameter. Line up the bit with the hole (I used my drill press) and punch the plastic. They're not perfect, but passable. I made about a hundred bolt heads in about 20 minutes. The fun part was trying to figure out how to make the parts that hold the rounds. You can tell by the mat with one inch squares in the photo how small the parts are. I used a bolt, cut the head off, and used opposing facing nuts to hold plastic in place. A Dremmel bit was ground to the right thickness (you can see it in the photo) and used to make cuts on my rotary table. The actual plastic is .020 mounted to a 1/8" thick piece of plastic with double sided tape. The 1/8" plastic acts as a disposable table and supports the thin plastic for milling. You can see the part after machining and cleaned up. Getting the double sided tape off was a pain. Here are some of the parts LOOSELY fit together to give you an idea of what it looks like so far. You can see where the 1mm bolt heads went. The rounds actually fit snug into the carousel. RB Models makes the 76mm ammo, and cheap too! The ammo for the German 75mm PAK 40 is the same size as what I need. But they are on a long break from making it and nobody has it anywhere in stock! I did find their 76mm ammo for the Sherman Easy 8 tanks (and other similar guns). The problem, the shell casings are too short, like about 1mm. They also have a pinched neck which is wrong. It also threw off everything else in the carousel. So I had to make the shell casings. I spent several days and after DOZENS of failed attempts (I mean that too) I figured out how to lathe the 76mm shell casings. It required grinding a new cutting tool and setting my lathe up like never before. The casings below STILL NEED to have the rims trimmed, they are still rough. Left to right, a pile of casings (about 30), a piece of 1/16" tubing as the working material, a completed round with RB Models projectile, and a correct size shell casing next to RB Models shell casing. "So, what did you do this weekend?" I made itty bitty cannon shell casings - MT


-
@Urashiman Ooooh, Langnese honey is on sale! C'mon, tell the truth, that is multiple kits you are putting together! That nose seam is horrible and the winshield. But you're making it SOOOoooo much better! @Thom The Joxer looks like the muscle car of Starfleet! It's all nacelles and little ship. It just needs a supercharger scoop on the hood somewhere Great build! Nice-n-clean finish too!
-
@peter A wash makes a world of difference! @pengbuzz That's one way to get models off your "to do list" fast! Sorry man! - MT
-
Wow guys, I don't check in for a few days and you go bazerck! Got some work done on the cannon, but need to take photos. @peter I love your molten metal pot marks! That's a great idea! I like how your ATAT came out! Nice color blending. Your battle damage on the Birds of Prey look cool too. The screen was a great idea! Admit it, you found another way to get the hardware store into a model, even a small one! It's funny you're using XF-71 for that color. I think that is the same color my gun mechanism will be when done - or close to it. @pengbuzz That sucks about the canopies! I'd definitely vacuum form new ones. A Maverick Tomcat would be cool. It's great to see some classic plastic being built! Your SDF-1 looks great! Great save on the stand too! That model is a CLASSIC for sure! @Bolt Nice mods! I think that will look good when done. - MT
-
@pengbuzz "KAAaaaaahhhnnnn!" That's a GREAT vignette Pengbuzz! I love how you put the two together and even scratch built a badge! Is Kirk's chair made with "Corinthian leather?" That's cool (And I'm not even a Trekkie - which evidently isn't a word). - MT
-

The 'Hey look at this really cool model build I saw' post
MechTech replied to Shawn's topic in Model kits
Yeah, canopies suck! Yes, I agree, everything does look right! - MT -
@peter Great work on your projects so far! I'm glad someone's getting some painting done. It's going to be a while for me while I'm still machining and gluing. - MT
-
The 'Hey look at this really cool model build I saw' post
MechTech replied to Shawn's topic in Model kits
@Gabe Q They probably buffed the windshield and used a Mop n Glow coating. There's some stuff for motorcycle lights that gives a pearlescent sheen too. I gotta get some of that! That is a GREAT build! He mottled the heck out of the paint, but it works! It looks VERY sun bleached - like being out in space without cloud cover to shield it! Hey, it's STILL for sale!- MT -
@ChristopherB Congrats on getting that great collection together! Are you looking for this listing of kits (on the legacy page): http://www.macrossworld.com/macross/models/imai/imai_main.htm Hey everyone, it looks like this is for collections, not builds. If you have a build in progress, I would post it here: - MT
-
You get EXTRA credit Kelsain for doing contract work too! - MT
-
@peter That sucks about the decals, but your work looks great despite the issues. Use MicroSol Super Film to cover your decals. You can just hand brush it on. It will reinforce them and is also good for coating your own decals too. @derex3592 Your crew is looking great Derex! I'm going out on a limb, but my bet is that the "red shirts" are the first to get "written off" the show! - MT
-
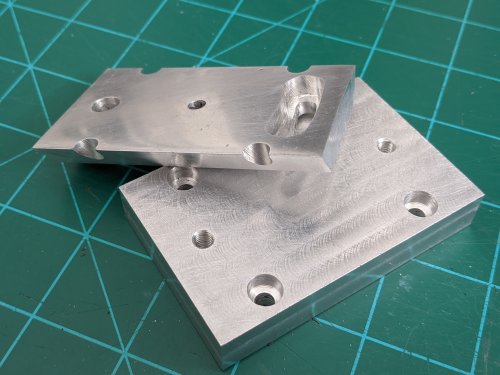
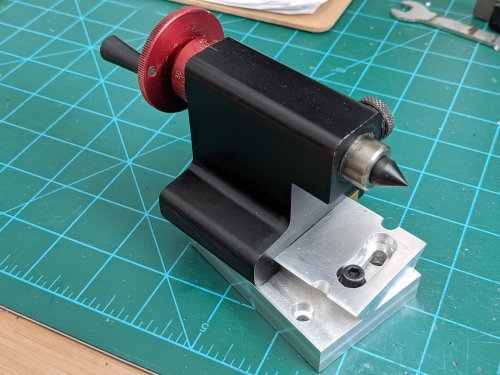
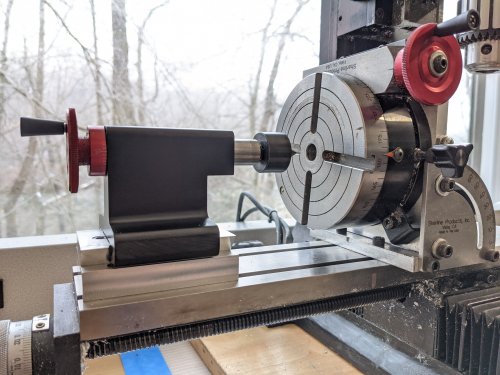
@peter Your weathering came out great! Sometimes a smear is more realistic than an airbrush! @electric indigo Your finish is realistic as always! It's just missing a smokey exhaust plume and you could hardly tell the difference! @derex3592 That is crazy they made the kit like that! Well, congrats on getting them all on! Now you know why I made mine punched into the deck. All that PE work would be crazy! I don't know what it looks like there, but everything here has a coating of ice on it. Half of the bit of snow we got melted. Something different this week. Shiny! My rotary table is used to rotate parts around or rotate them in increments (like cutting teeth into a gear). It's how I made the THIRD version of the attached photo for my gun turret. I had nothing to support long pieces like model gun barrels or shafts for cutting splines into. So I machined a couple scraps of aluminum (courtesy of my local recycle center) to make an adapter for my lathe's tool stock holder. Some work isn't always straight cuts, so I added the ability to make it swing out a little. They sell a similar adapter (without the adjustments) for about $100! Forget that if you can make one (that's what you get a mill for in the first place - to make stuff). Long story, I messed up on both prior gun mechanisms for below deck of the model. So the third time I think I got it right - I hope! Most of the pieces of the crown on the part will actually be cut off, so the broken piece is OK. Take care everyone! - MT
-
The 'Hey look at this really cool model build I saw' post
MechTech replied to Shawn's topic in Model kits
Did somebody confuse Mak with Macross? - MT -
@derex3592 The Ft. Worth is looking good! I can't believe they made you photo etch the padeyes on the flight deck - that's just wrong! The Runabout is looking good too! A full crew will add realism to the interior. @peter I think you MORE THAN improved upon what you dug out of the boxes from 20 years ago! They look great and it's cool having book-ends to gang up on the Federation ships. Yeah, I was surprised by the glue. It wasn't a lot, but the bolt is on tight anyhow, it didn't take much to lock it up. @electric indigo That's looking very realistic! - MT
-
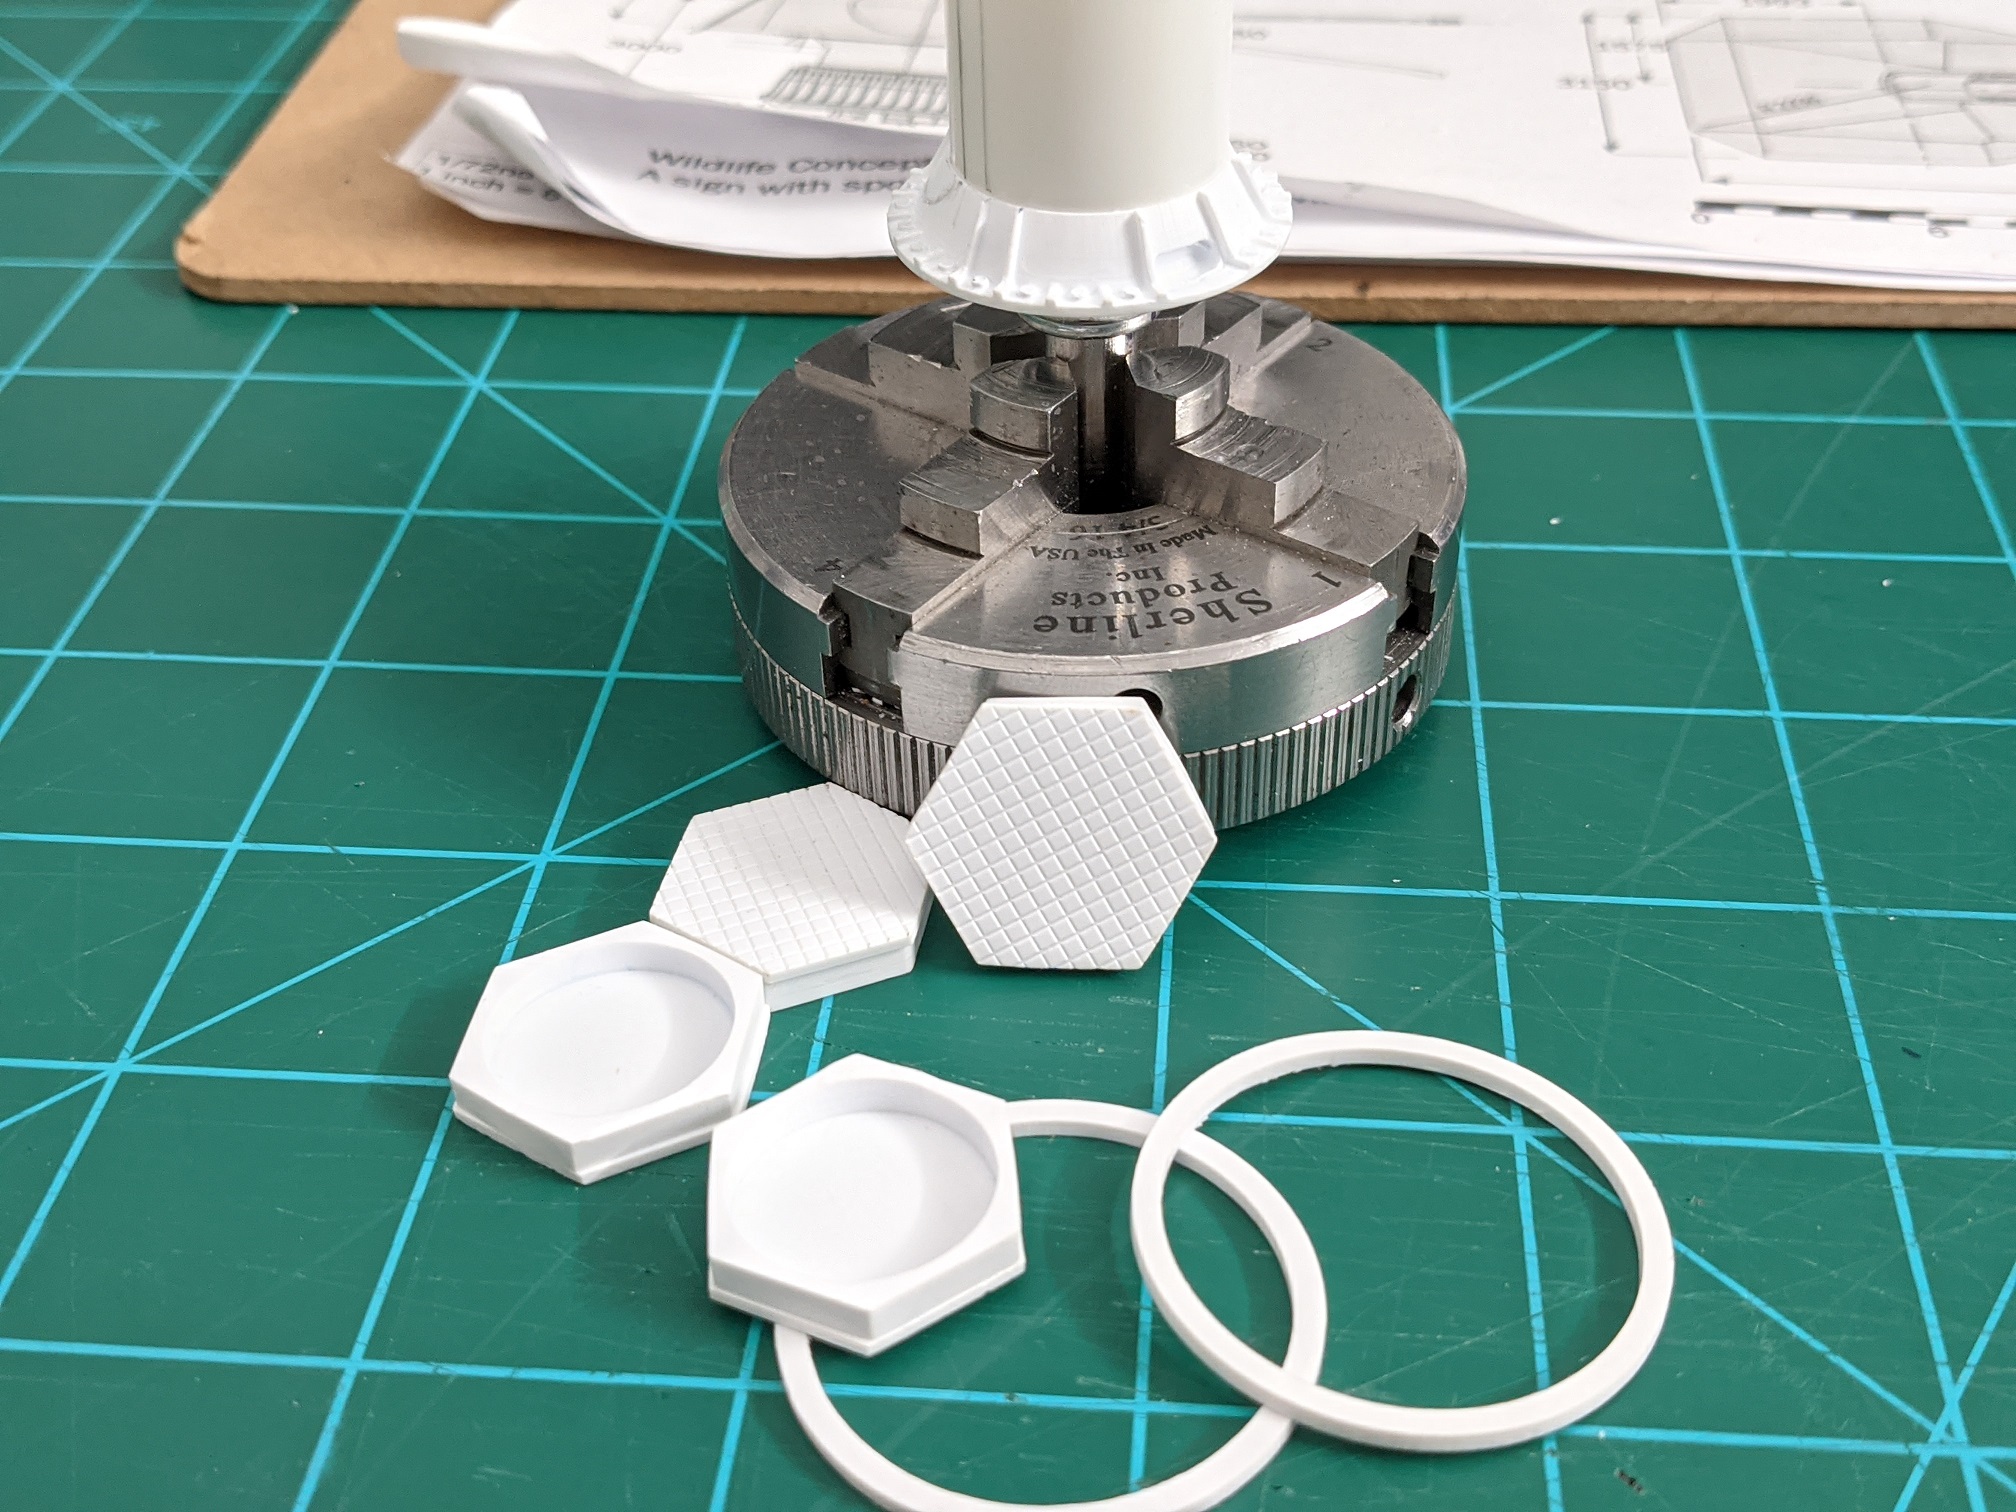
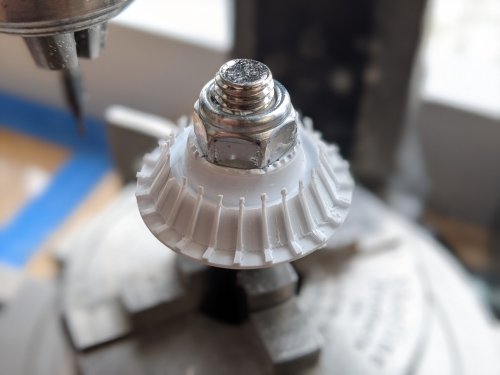
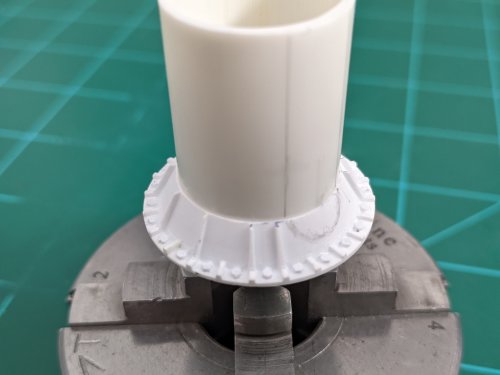
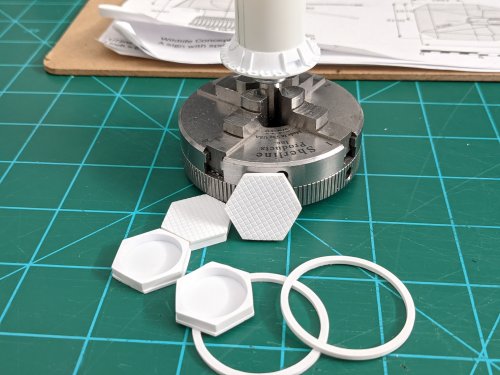
Well, all the work I did last week was ruined when somehow the glue also melted the plastic around the bolt that was holding it for machining. What a drag! It had to be placed in a vice to unscrew the bolt - it was that bad! I redid it though and with more experience, made it more accurate before having to add in details later. I also made the rings to fit around it and then using existing parts, made the planar panels to go on the mast. - MT
-
@peter Great improvements! Nice use of a wheel, I usually toss 'em! Another method of using matt paints is to buff them smooth if you want to skip using a clear coating. Then clear coat after the decals are. As usual, great work of incorporating a hardware store into your models . - MT
-
@peter Your K'Tingas look great! Wait, that sounds wrong... Nice models dude! @electric indigo Looks like if I waived at him, he'd wave back! Nice n clean gun site too! - MT