
Urashiman
-
Posts
630 -
Joined
-
Last visited
Content Type
Profiles
Forums
Events
Gallery
Everything posted by Urashiman
-
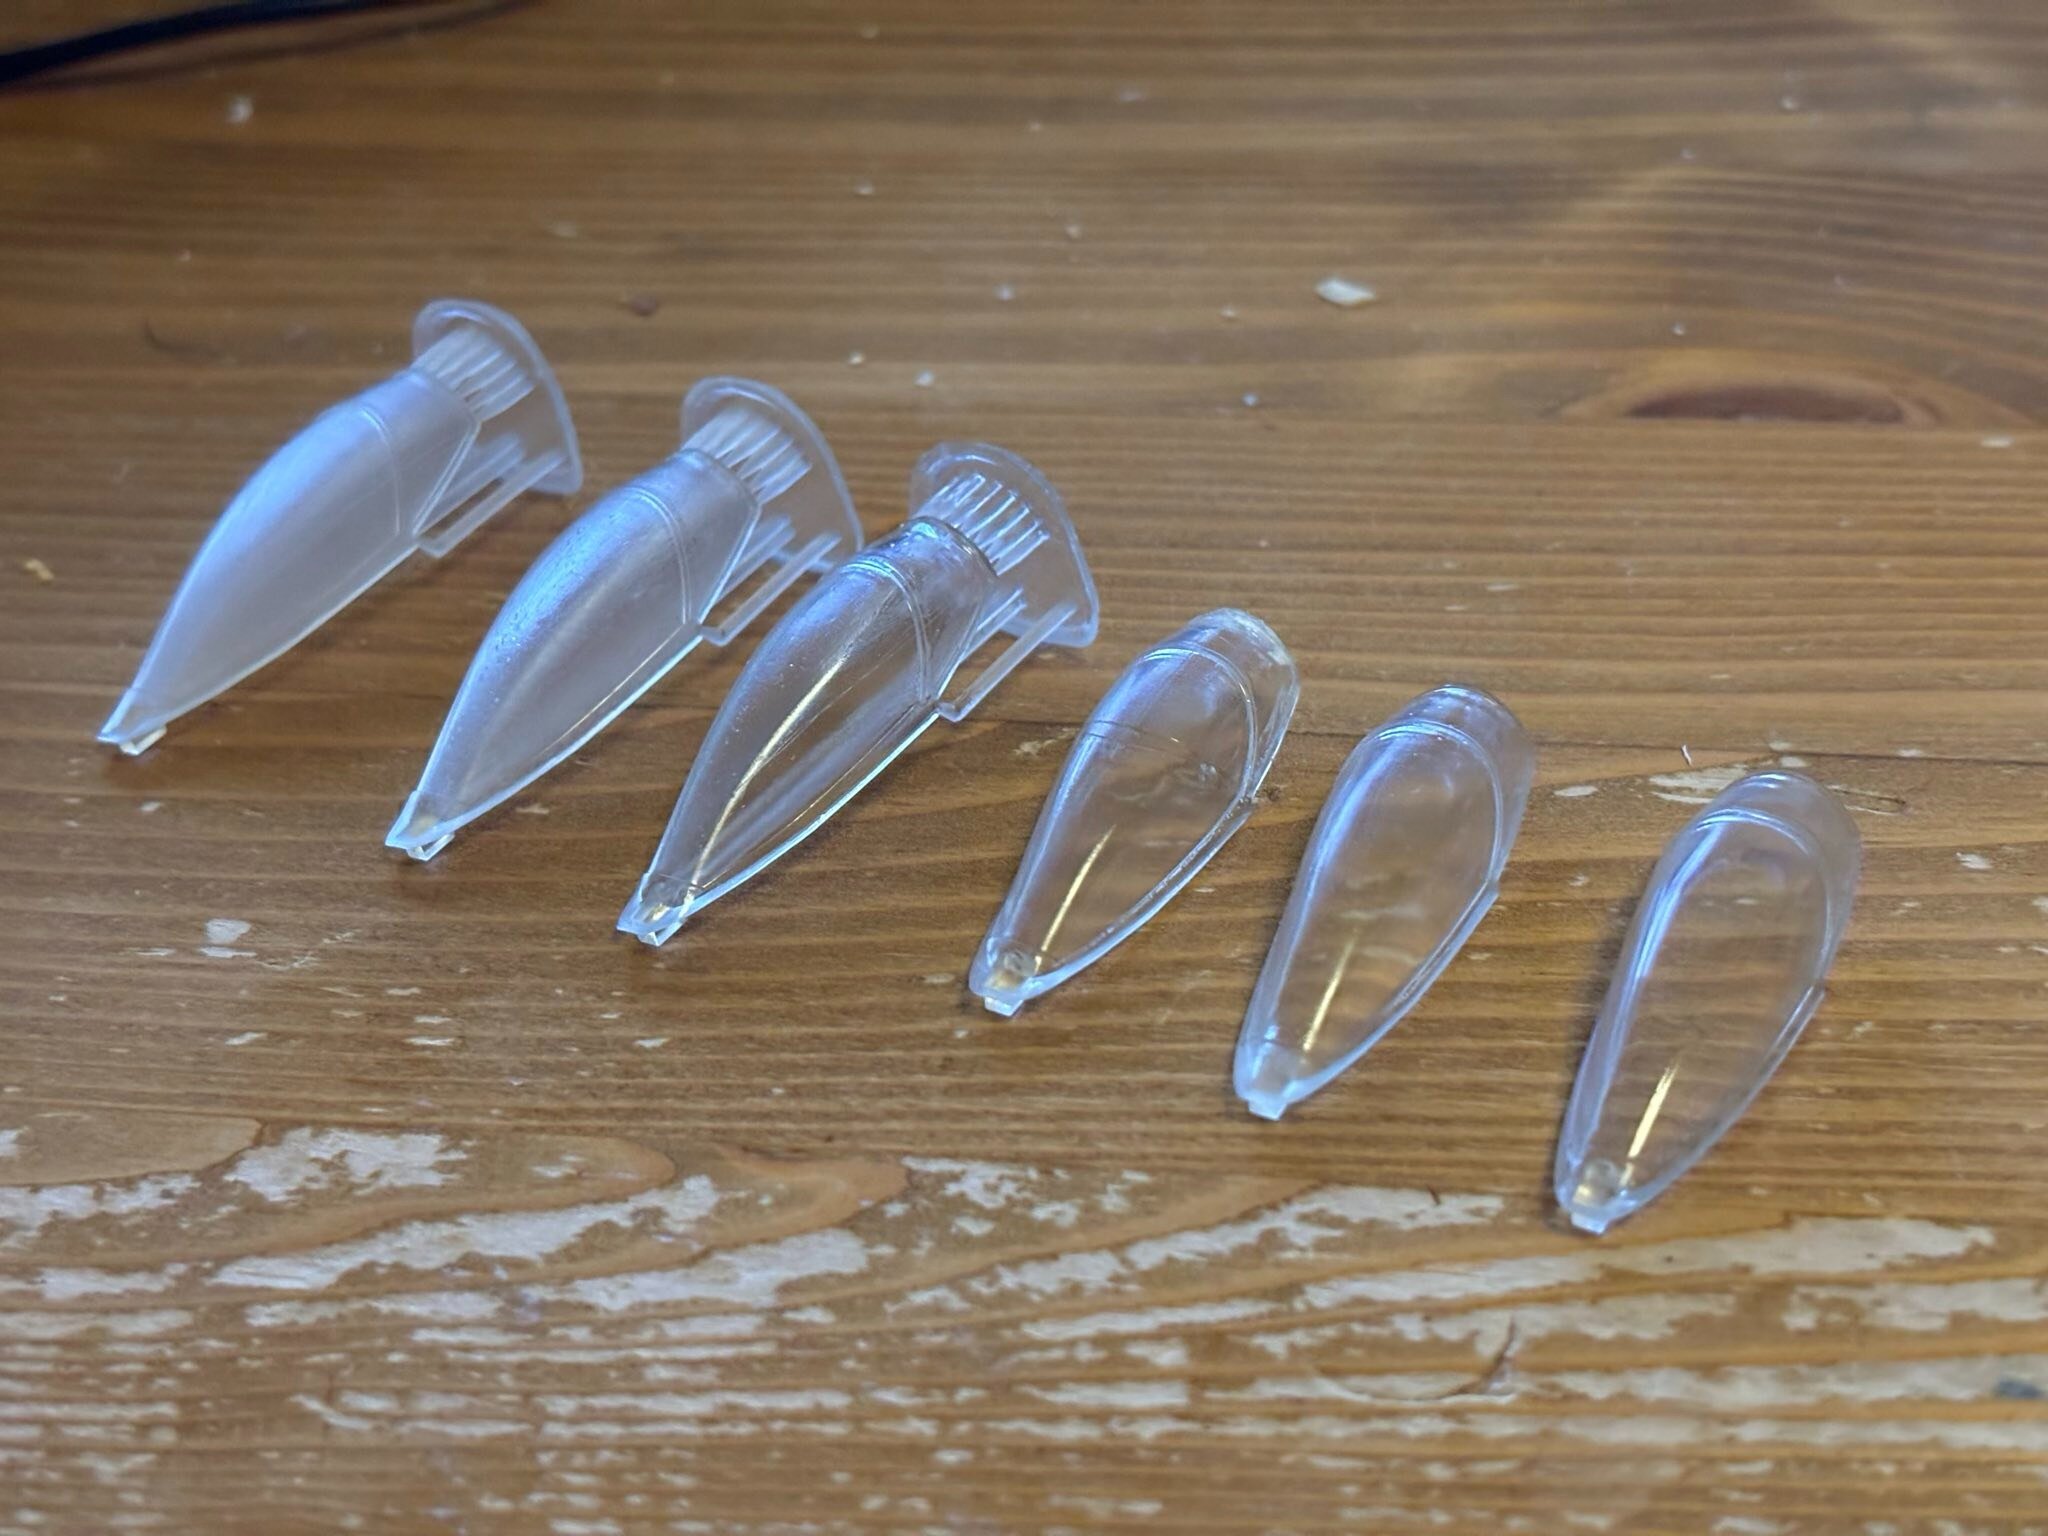
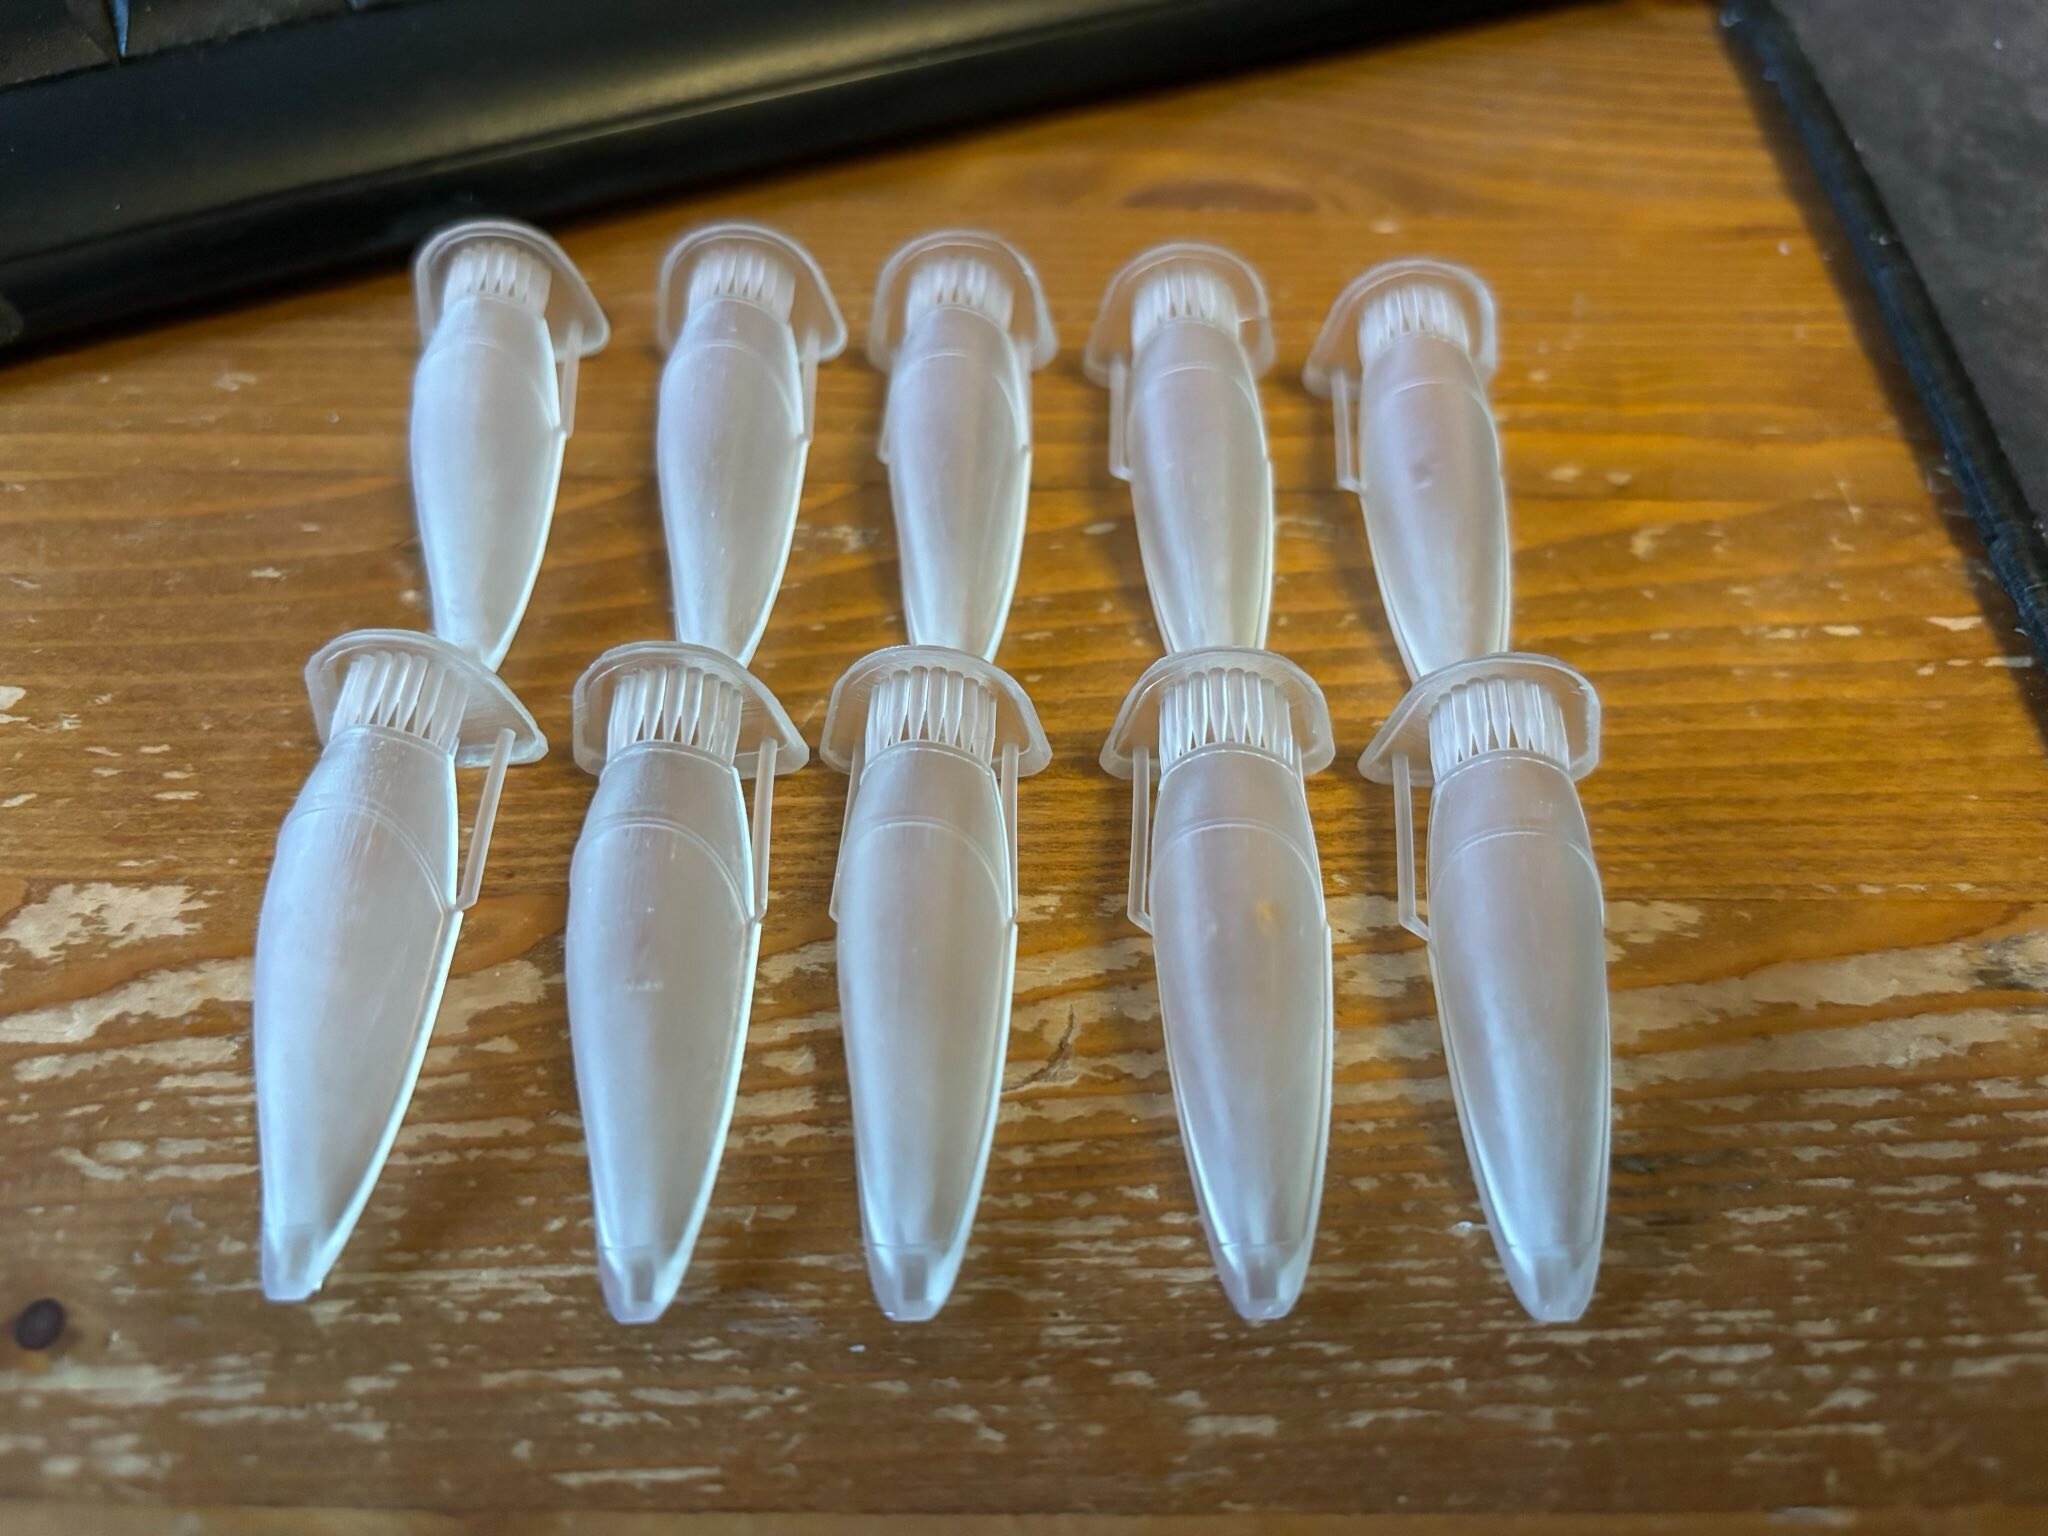
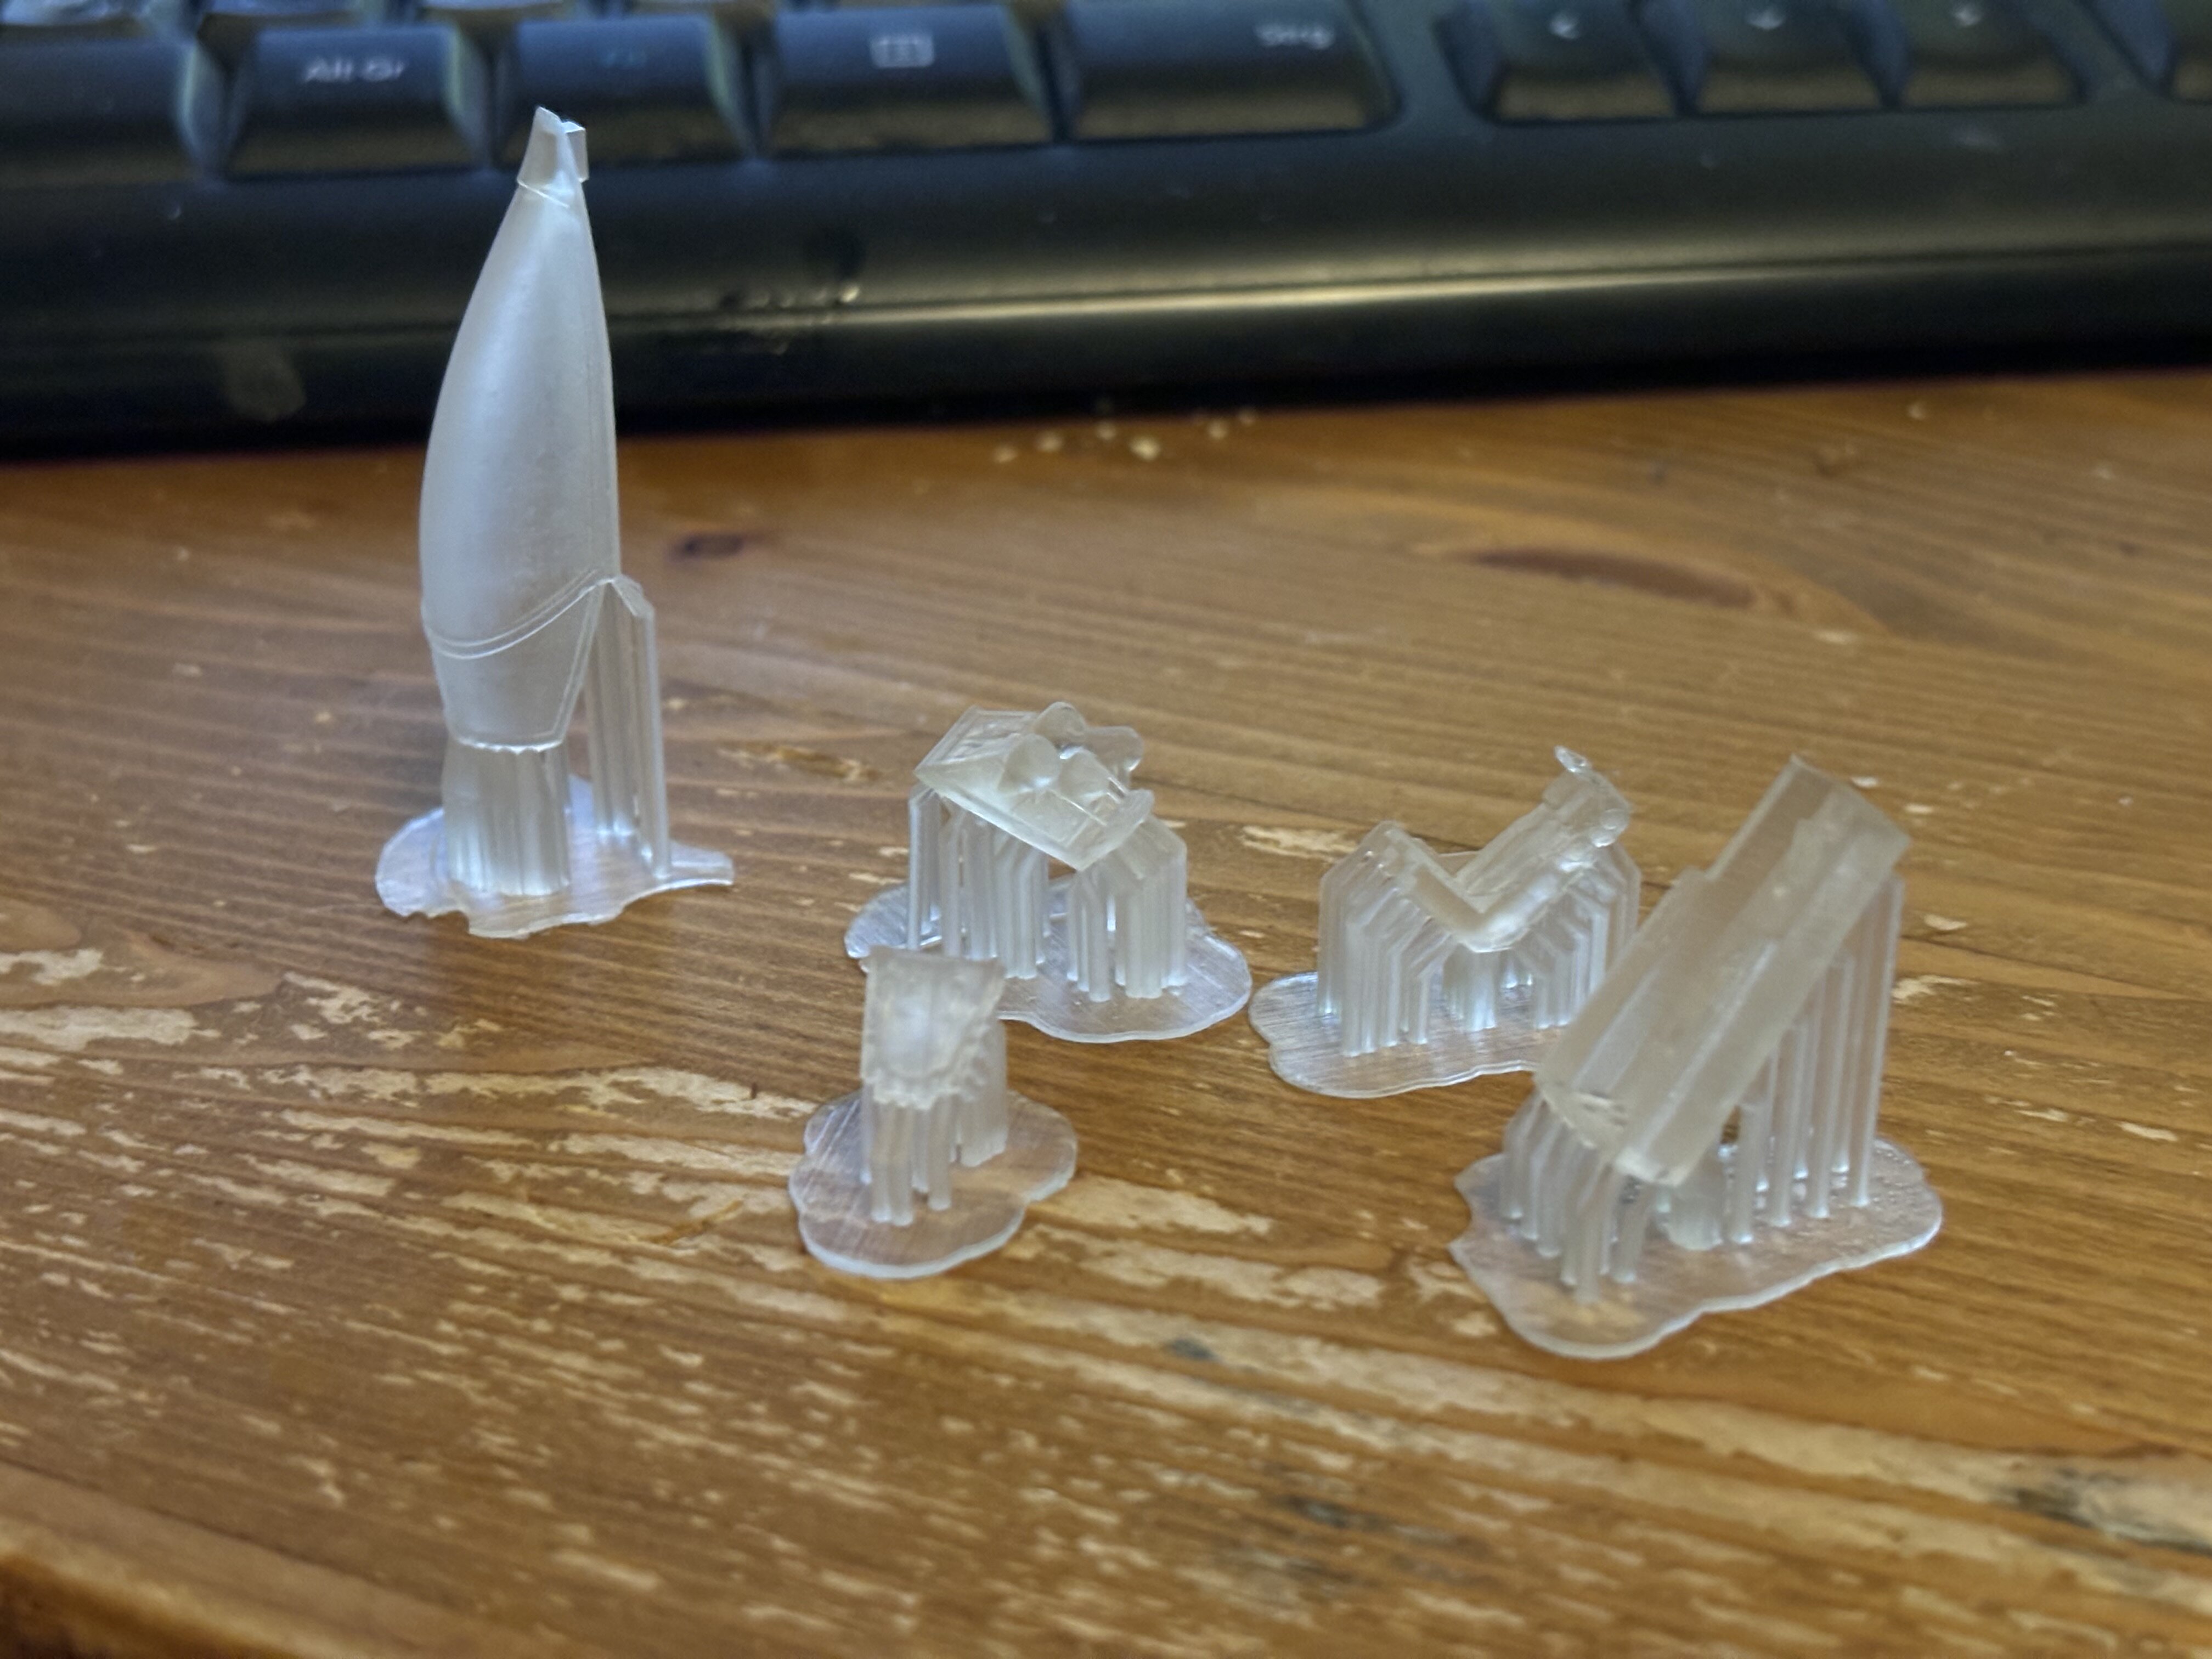
Got some stuff to show again. I have been testing around with polishing the clear resin stuff and basically came to the conclusion, that even with microfiber pads on a hobby drill to polish the stuff and using polishing compound, the canopies stayed slightly milky and never went full clear. So I went another approach. Left to right. Unprocessed cured print of the canopy Unprocessed cured print of the canopy coated with hairspray (because someone told me, they coat their models in loreal hair spray) Unprocessed cured print of the canopy dipped in Tamiya X-22 Unprocessed cured print of the canopy dipped in Humbrol Laquer Clear Coat Sanded (up to 500 grit) cured print of the canopy brushed with Humbrol Laquer Clear Coat Sanded (from 180 to 2500 grit and polished with microfiber) cured print of the canopy, dipped in thinned (mr. color leveling thinner) Tamiya X-22 The last one on the list is by far the clearest and shiniest of the canopies. I used the failed prints with the bubbles inside to test around, so no worries. I will pick one of the good prints later and start sanding and polishing, then dipping in thinned X-22. That should be good I think. @pengbuzz sorry to hear about that... hope everything is okay.
-
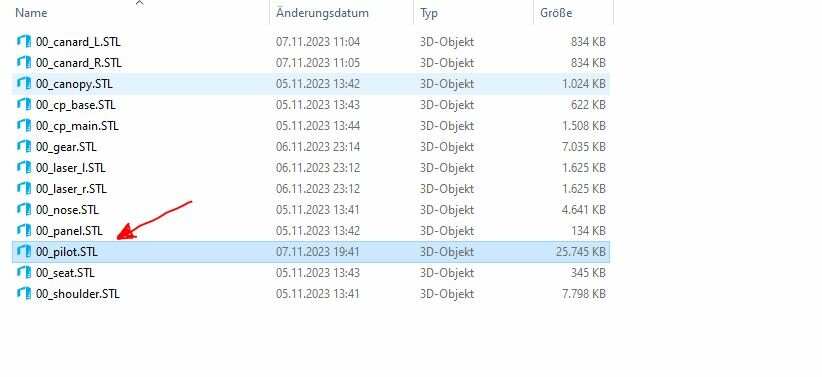
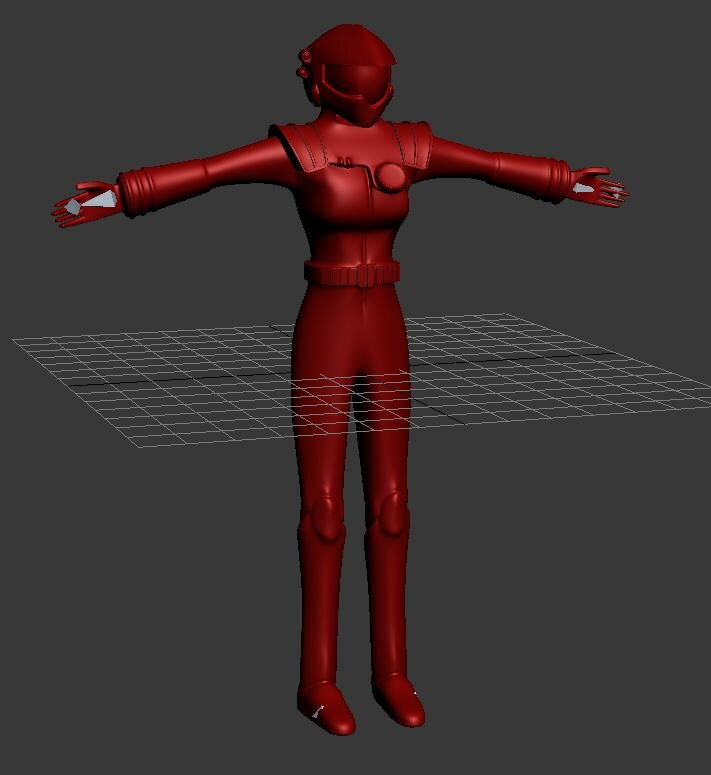
@Thom Anyone can print that now. I released the model. @SteveTheFish Here you go, have your friend print this: https://cults3d.com/en/3d-model/art/1-72-macross-m3-milia-pilot
-
@wm cheng this is so awesome to! Great work! I‘ll need a minmay for my VT-1 as well haha. I spend the night fixing my M3 Milia. Test printed her three times and seems so work now. detaching from the support went easily, nothing broke so it has enough strength. and it fits the VF-9 pilot seat. I will upload the STL later the day, so who ever wants to print an army of Milias can do that.
-
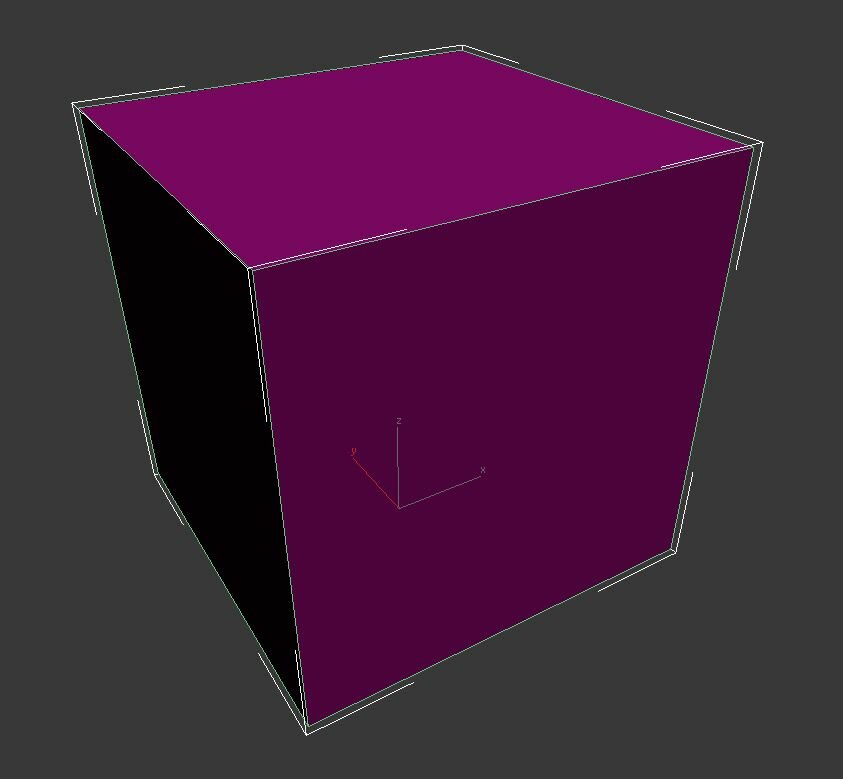
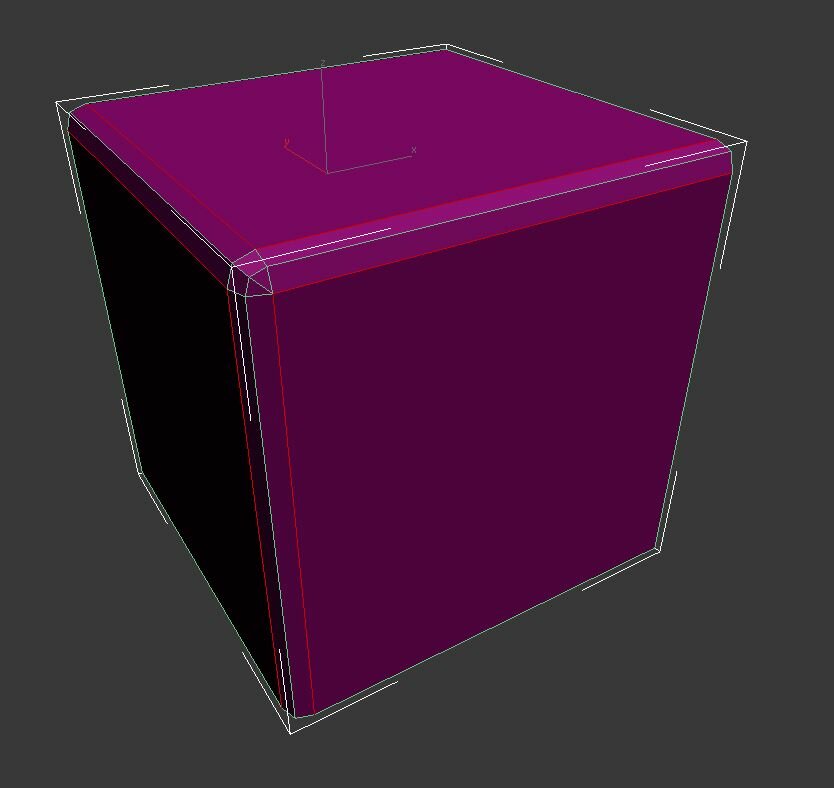
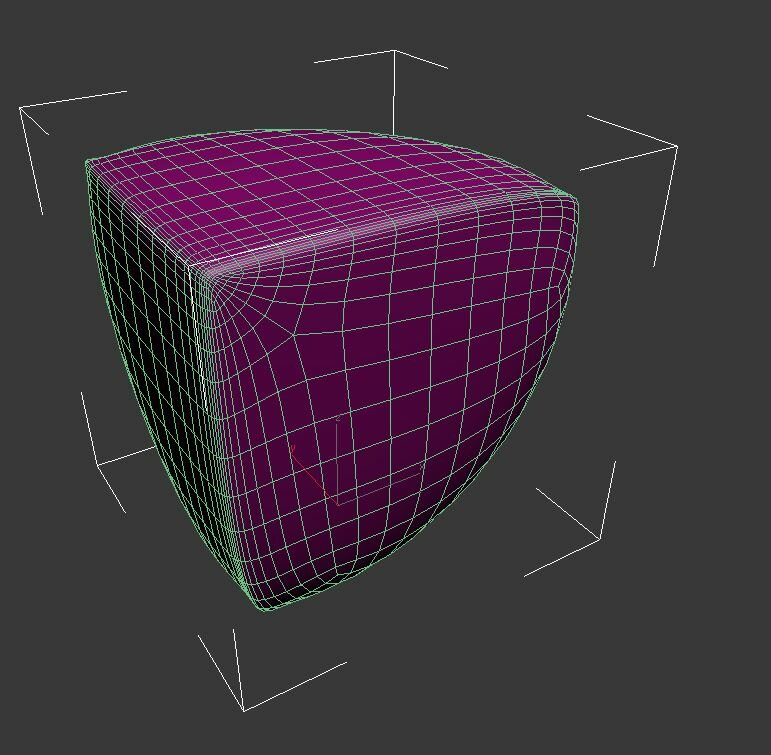
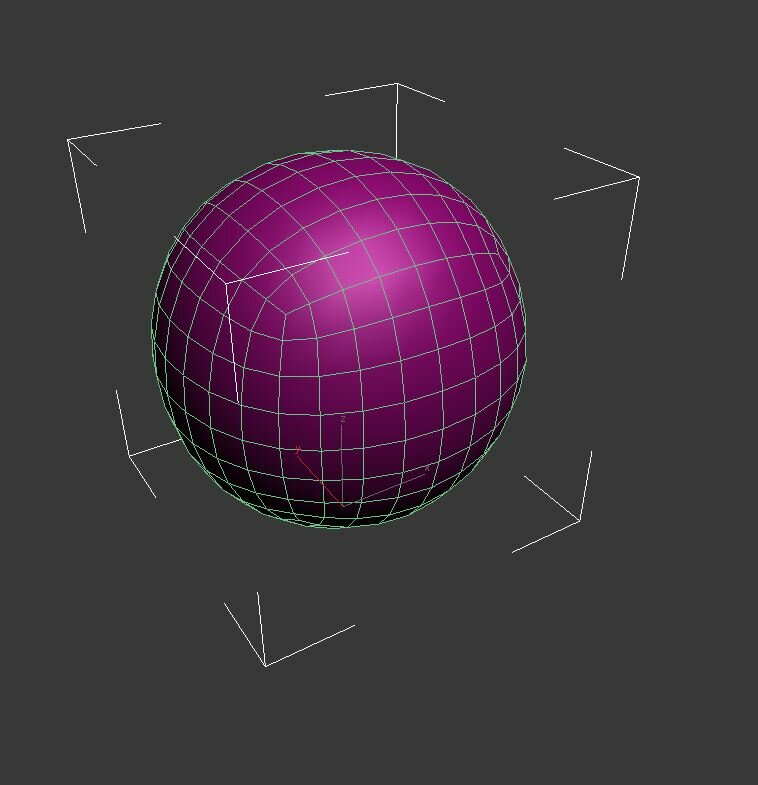
@SteveTheFish That's okay - no one can know everything. Well - the game plays kinda like VF-X 2 with enhancements that make the gameplay a bit weird. In VF-X 2 you would have been able to solve a mission without ever switching modes, so you could be in fighter mode all the time. In M3, you have to switch around. You cannot finish the first mission without switching around. The game is a bit hard due to the tight time constraints, but can be played through in roughtly a day. The M3 is referring to Max, Milia and Moaramia. So no Komillia. Moaramia is an adopted Zentradi/Meltrandi. The story is simple. You fight Zentradi fundamentalists... and bugs ... that's that. @arbit I use "chamfer" for that. Let me show you. Let's make a cube. Turbo smooth it with 3 iterations, you basically get a weird ball. Go back to the base and chamfer some edges. Then check the turbo smoothed mesh and et voilà... fun commences!
-
Well… the bubbles are super tiny and inside the print.
-
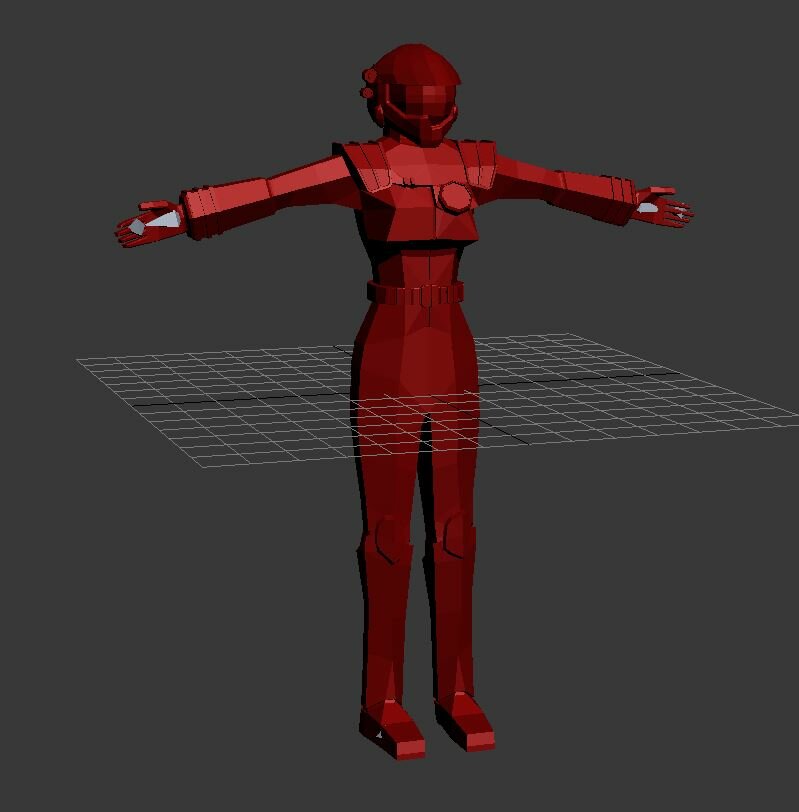
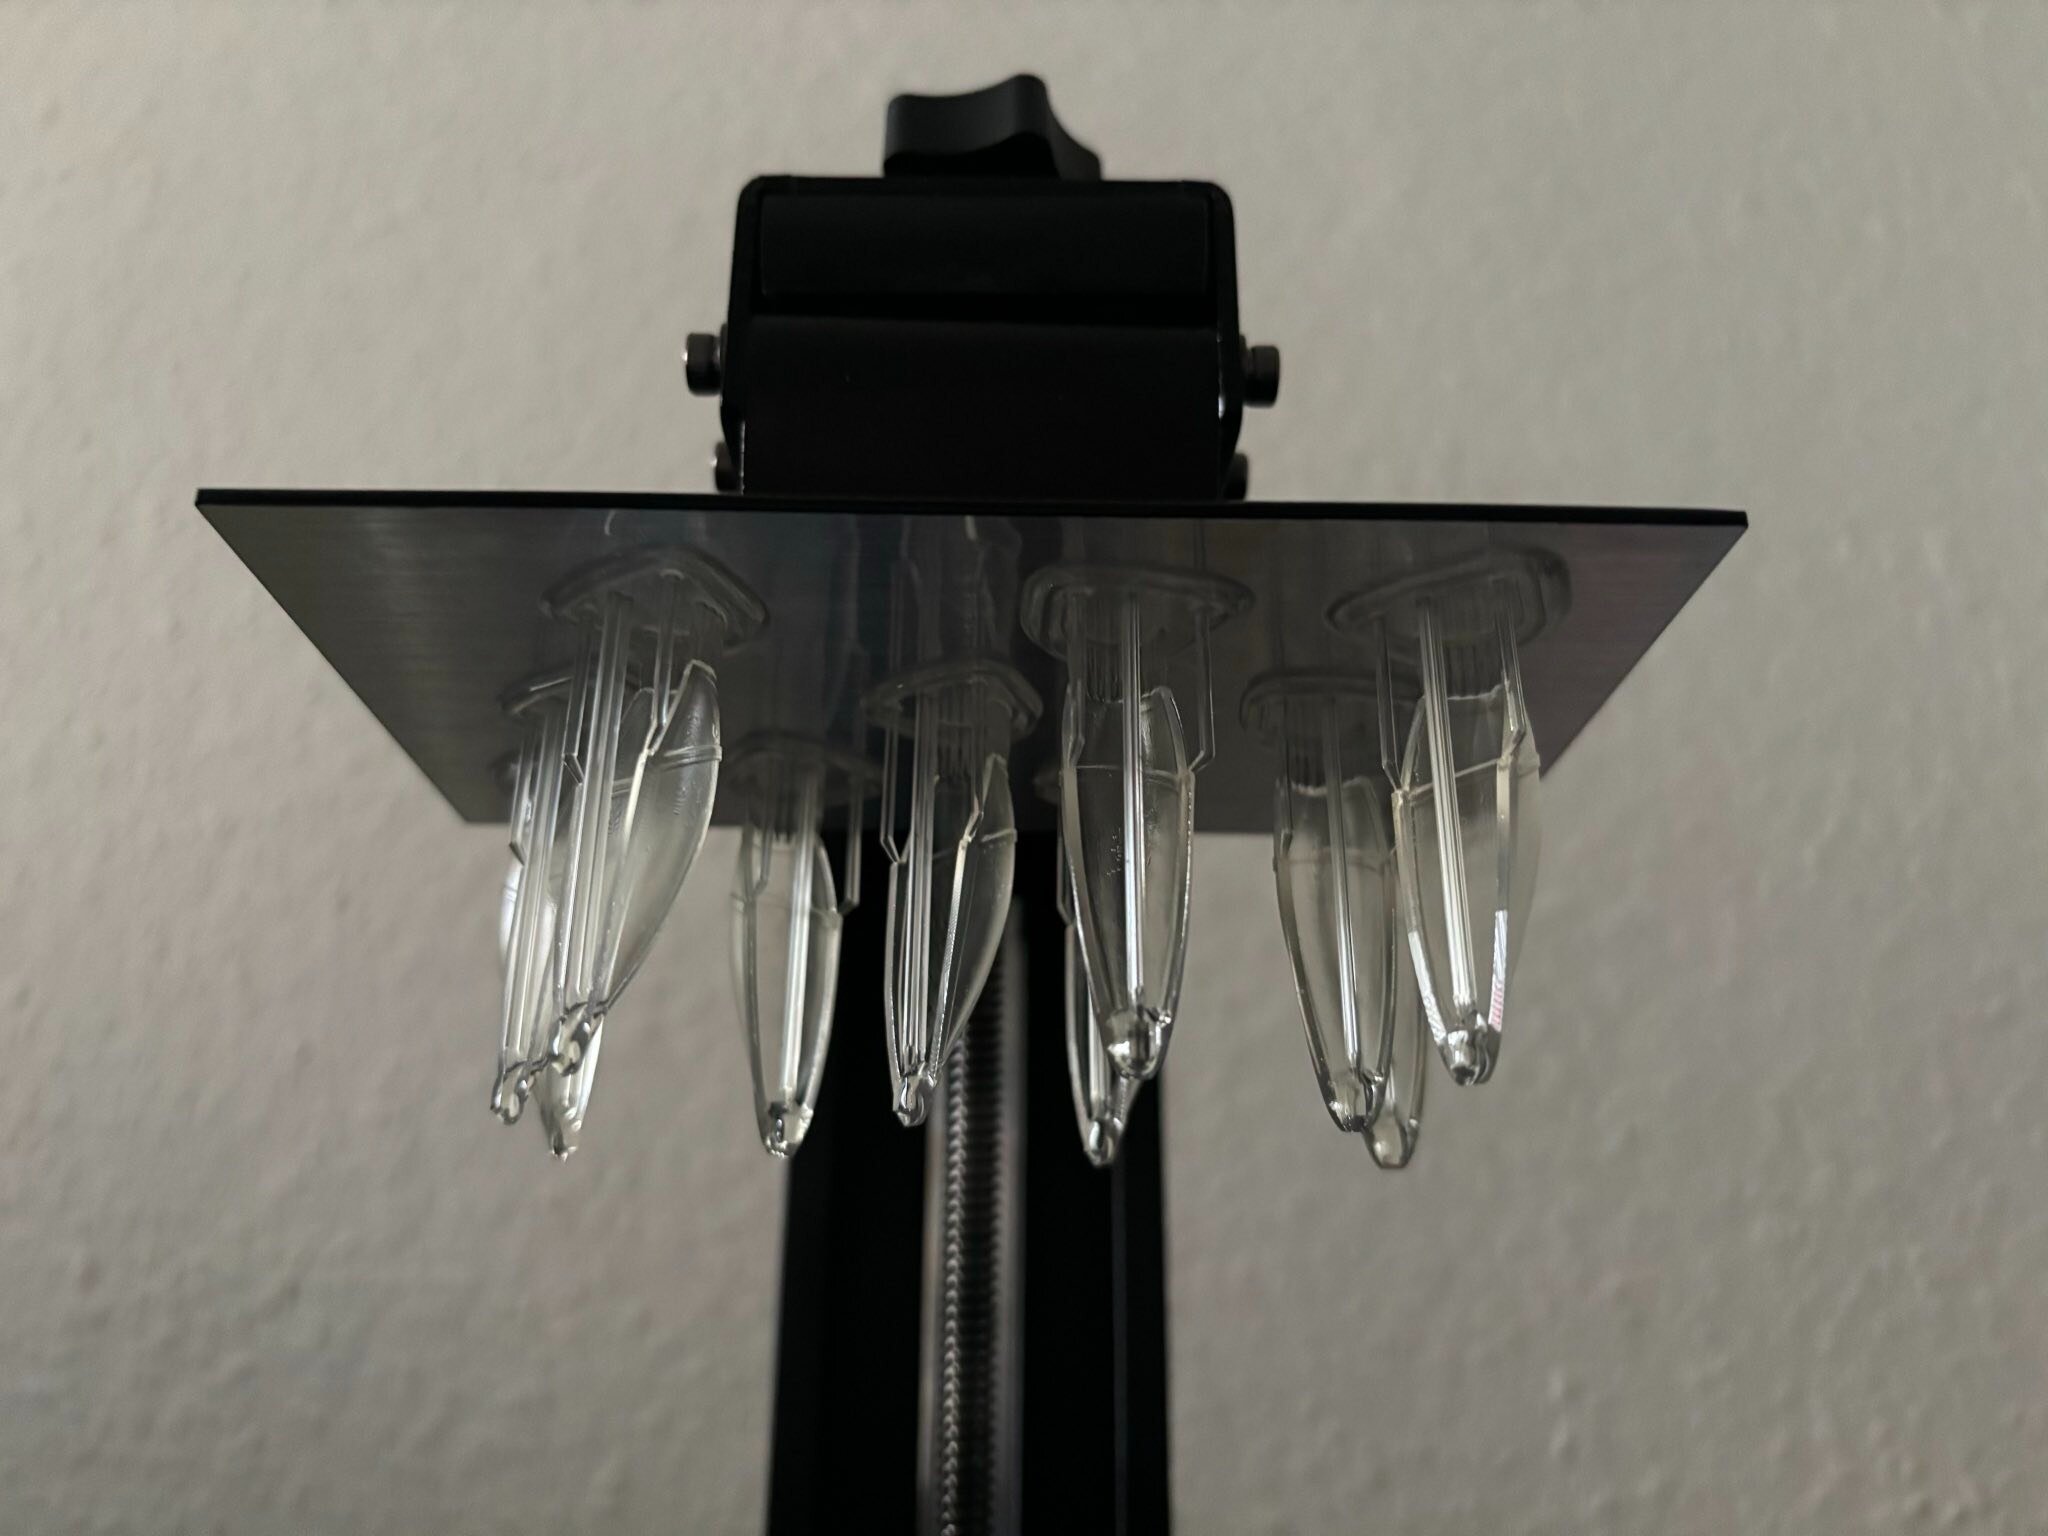
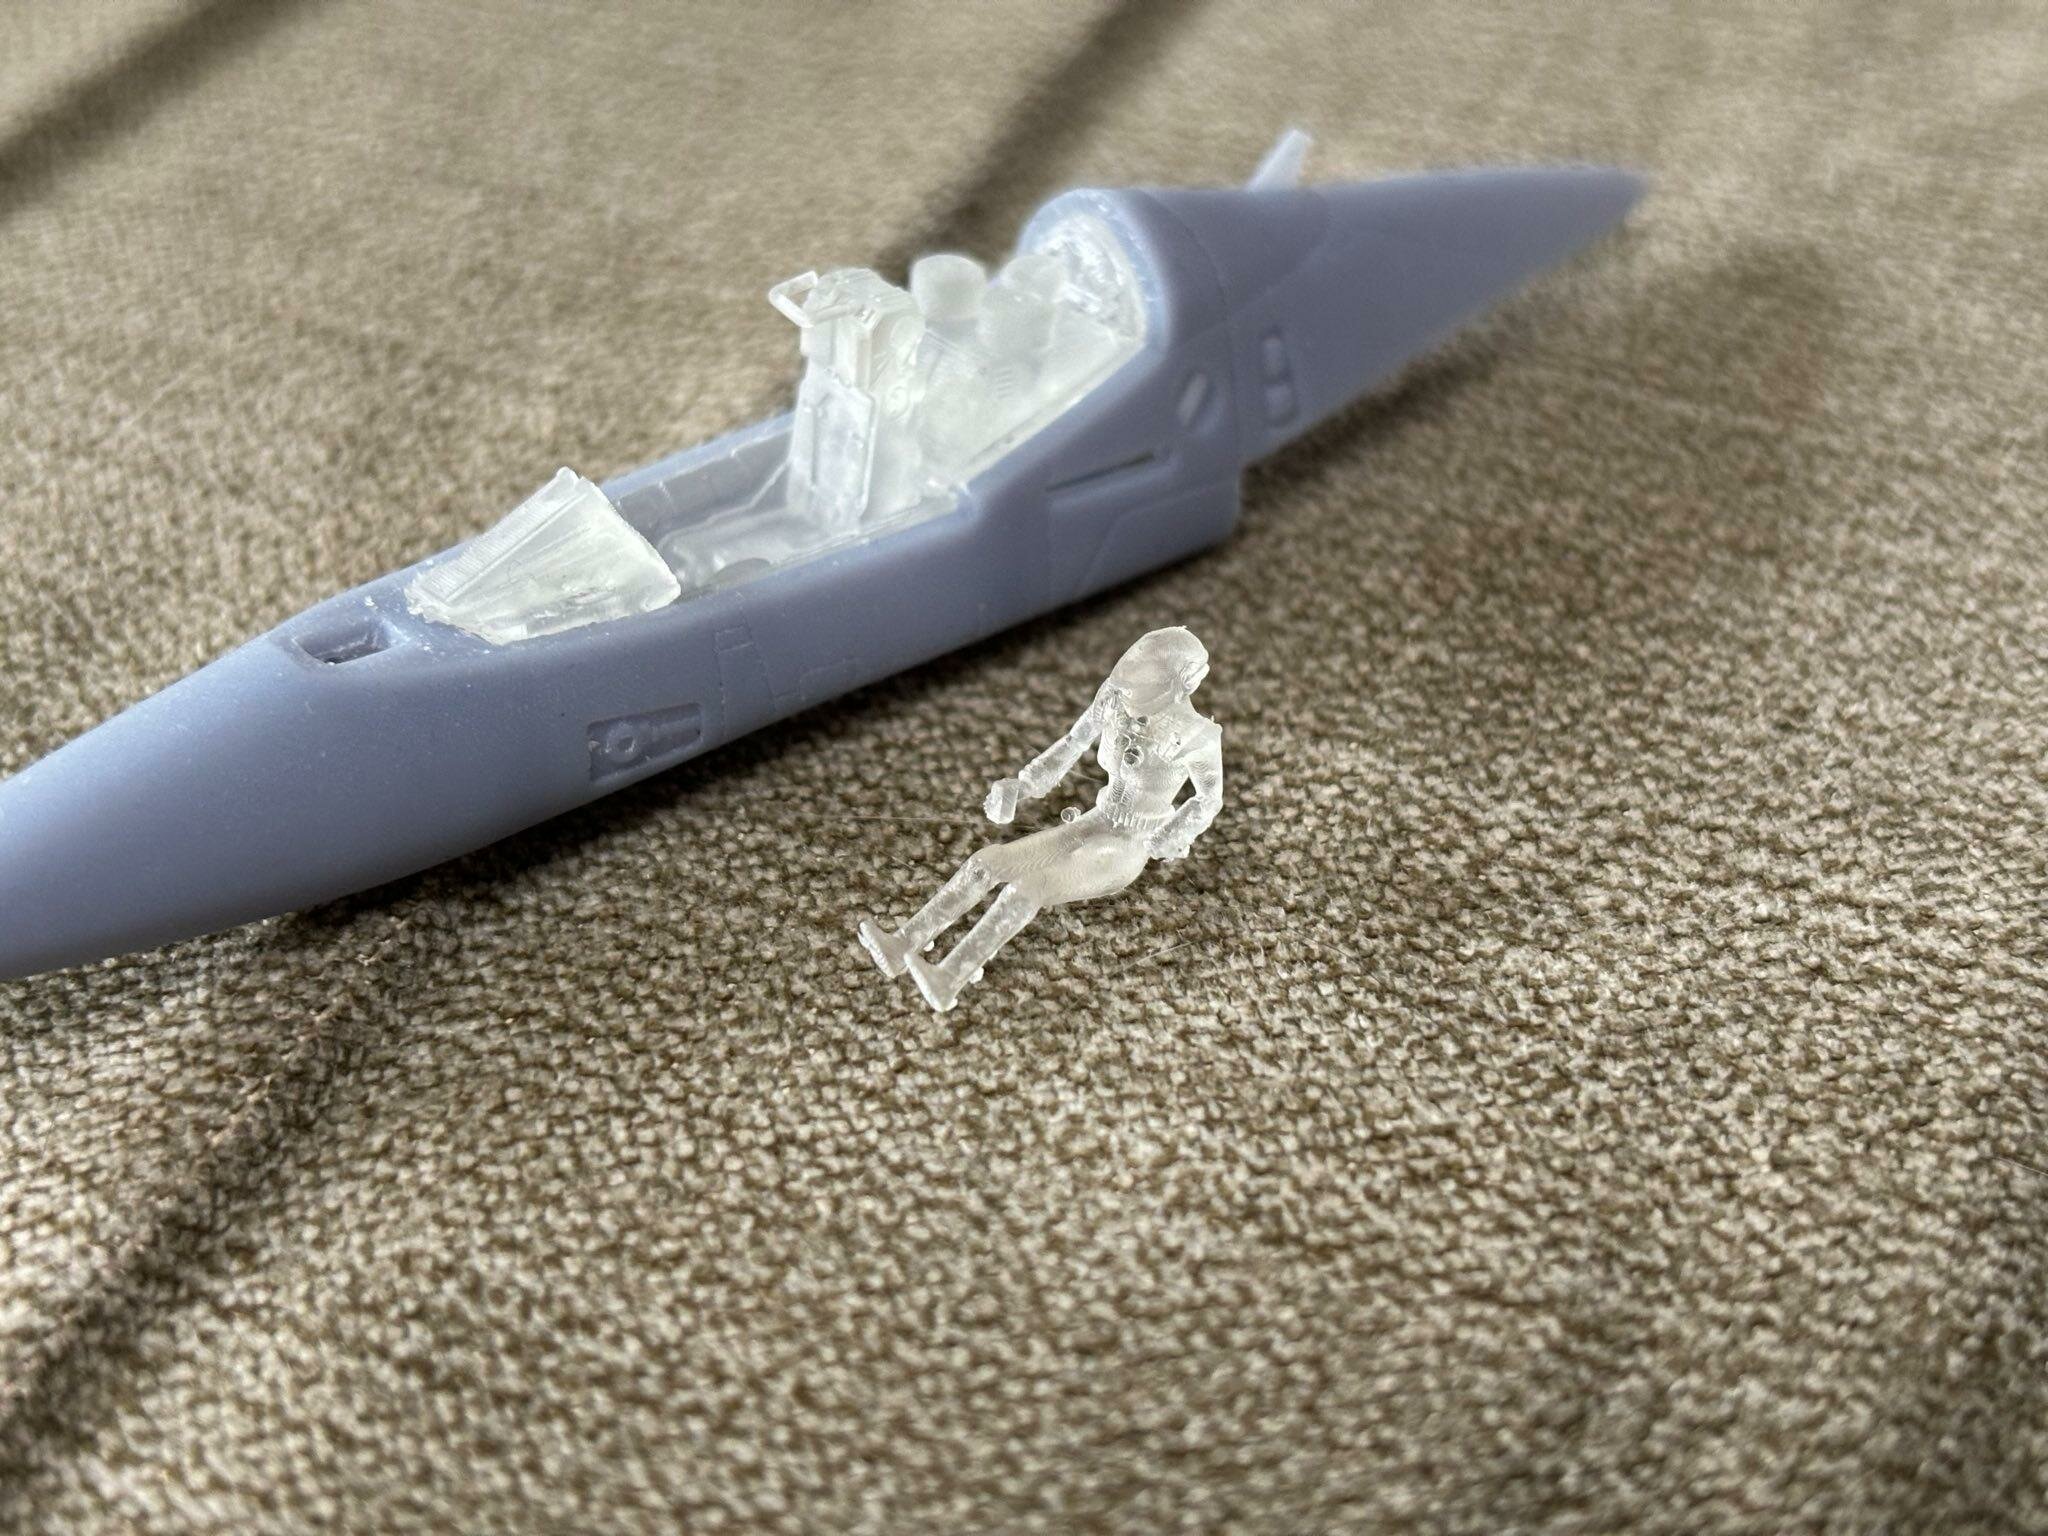
I found the .STL by navigating to the folder where I saved the exported STL. You probably haven't found one online because there is none out in the wild, I think. I created this pilot figure myself, because there are no Macross M3 suit pilots out there. I can send it to you after I fixed it. The proportions are a bit bad, as I basically created this with only little reference material (the Macross M3 intro and the back cover of the Macross M3 booklet in the disk case). She got a bit too ... "ample" as well. I am not good at 3D modelling people... I did it by low poly modelling the pilot and then running turbo smooth over it. Another thing... I wanted to print a bubbleless canopy for the VF-9, so I went by the "evolution approach". The more the merrier Here is what I did: - Filtered the liquid clear resin through a 0.05mm grid filter - Let it rest in the resin basin of the printer for 24 hours - made the print bed move really slow during printing From the visuals, it looks like at least three have bubbles inside. I will know more once I polish them all a bit. Any advice how to get rid of the bubbles? EDIT: @SteveTheFish I remembered that @Xigfrid was creating a set of male and female VF pilots. You can find them here: https://www.shapeways.com/product/VJ23S29SZ/1-72-scale-pilots-for-vf-1j?optionId=299297325&li=shops
-
Thanks a lot! That is the goal - getting as much detail as possible Your invader seems to be fun as well. So much putty... Have you tried Revell putty? I use that stuff mostly, but can be trouble as it sometimes "melts" styrene in the process of binding. It can be too thick and I usually thin it with revell Contacta glue 1:1. It can be brushed on with a brush when thinned that way and usually can give you smooth seam covering. For larger gaps I use milliput. Another hack for small seams is to use Mr. Color Primer 1500. Due to it's properties it fills small gaps easily. But don't use it in case you are using lacquer colors. It can crack.
-
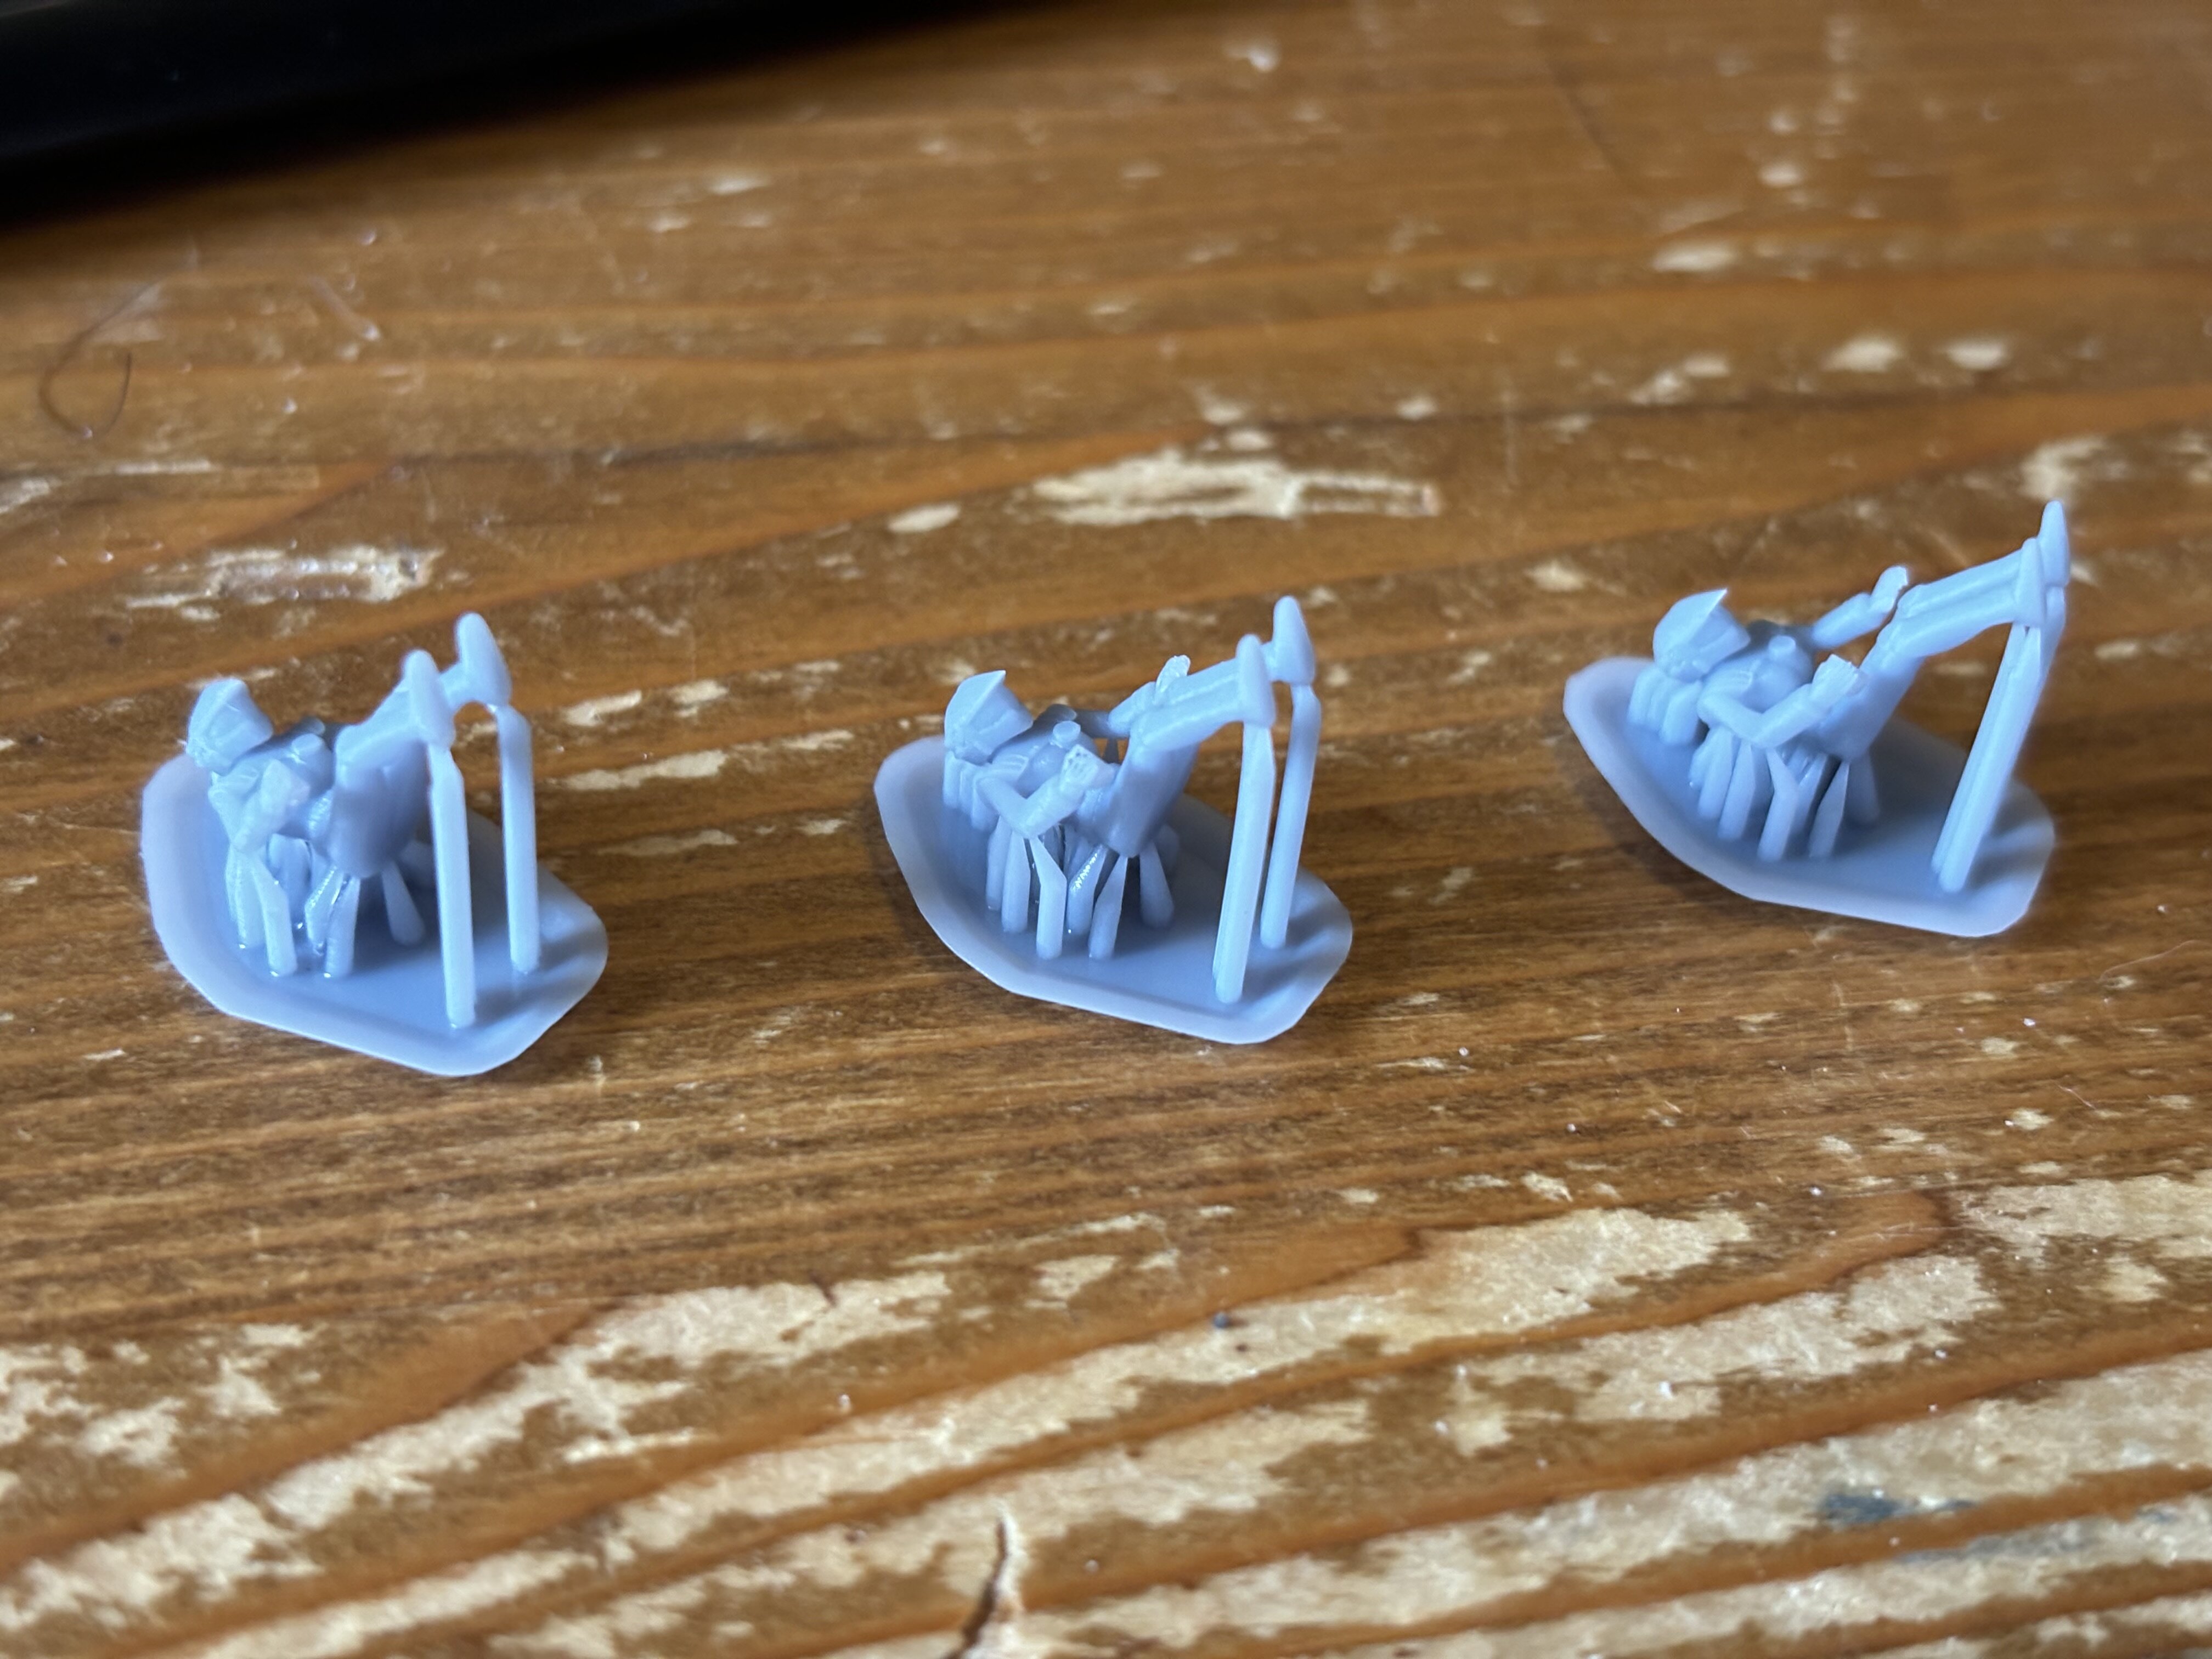
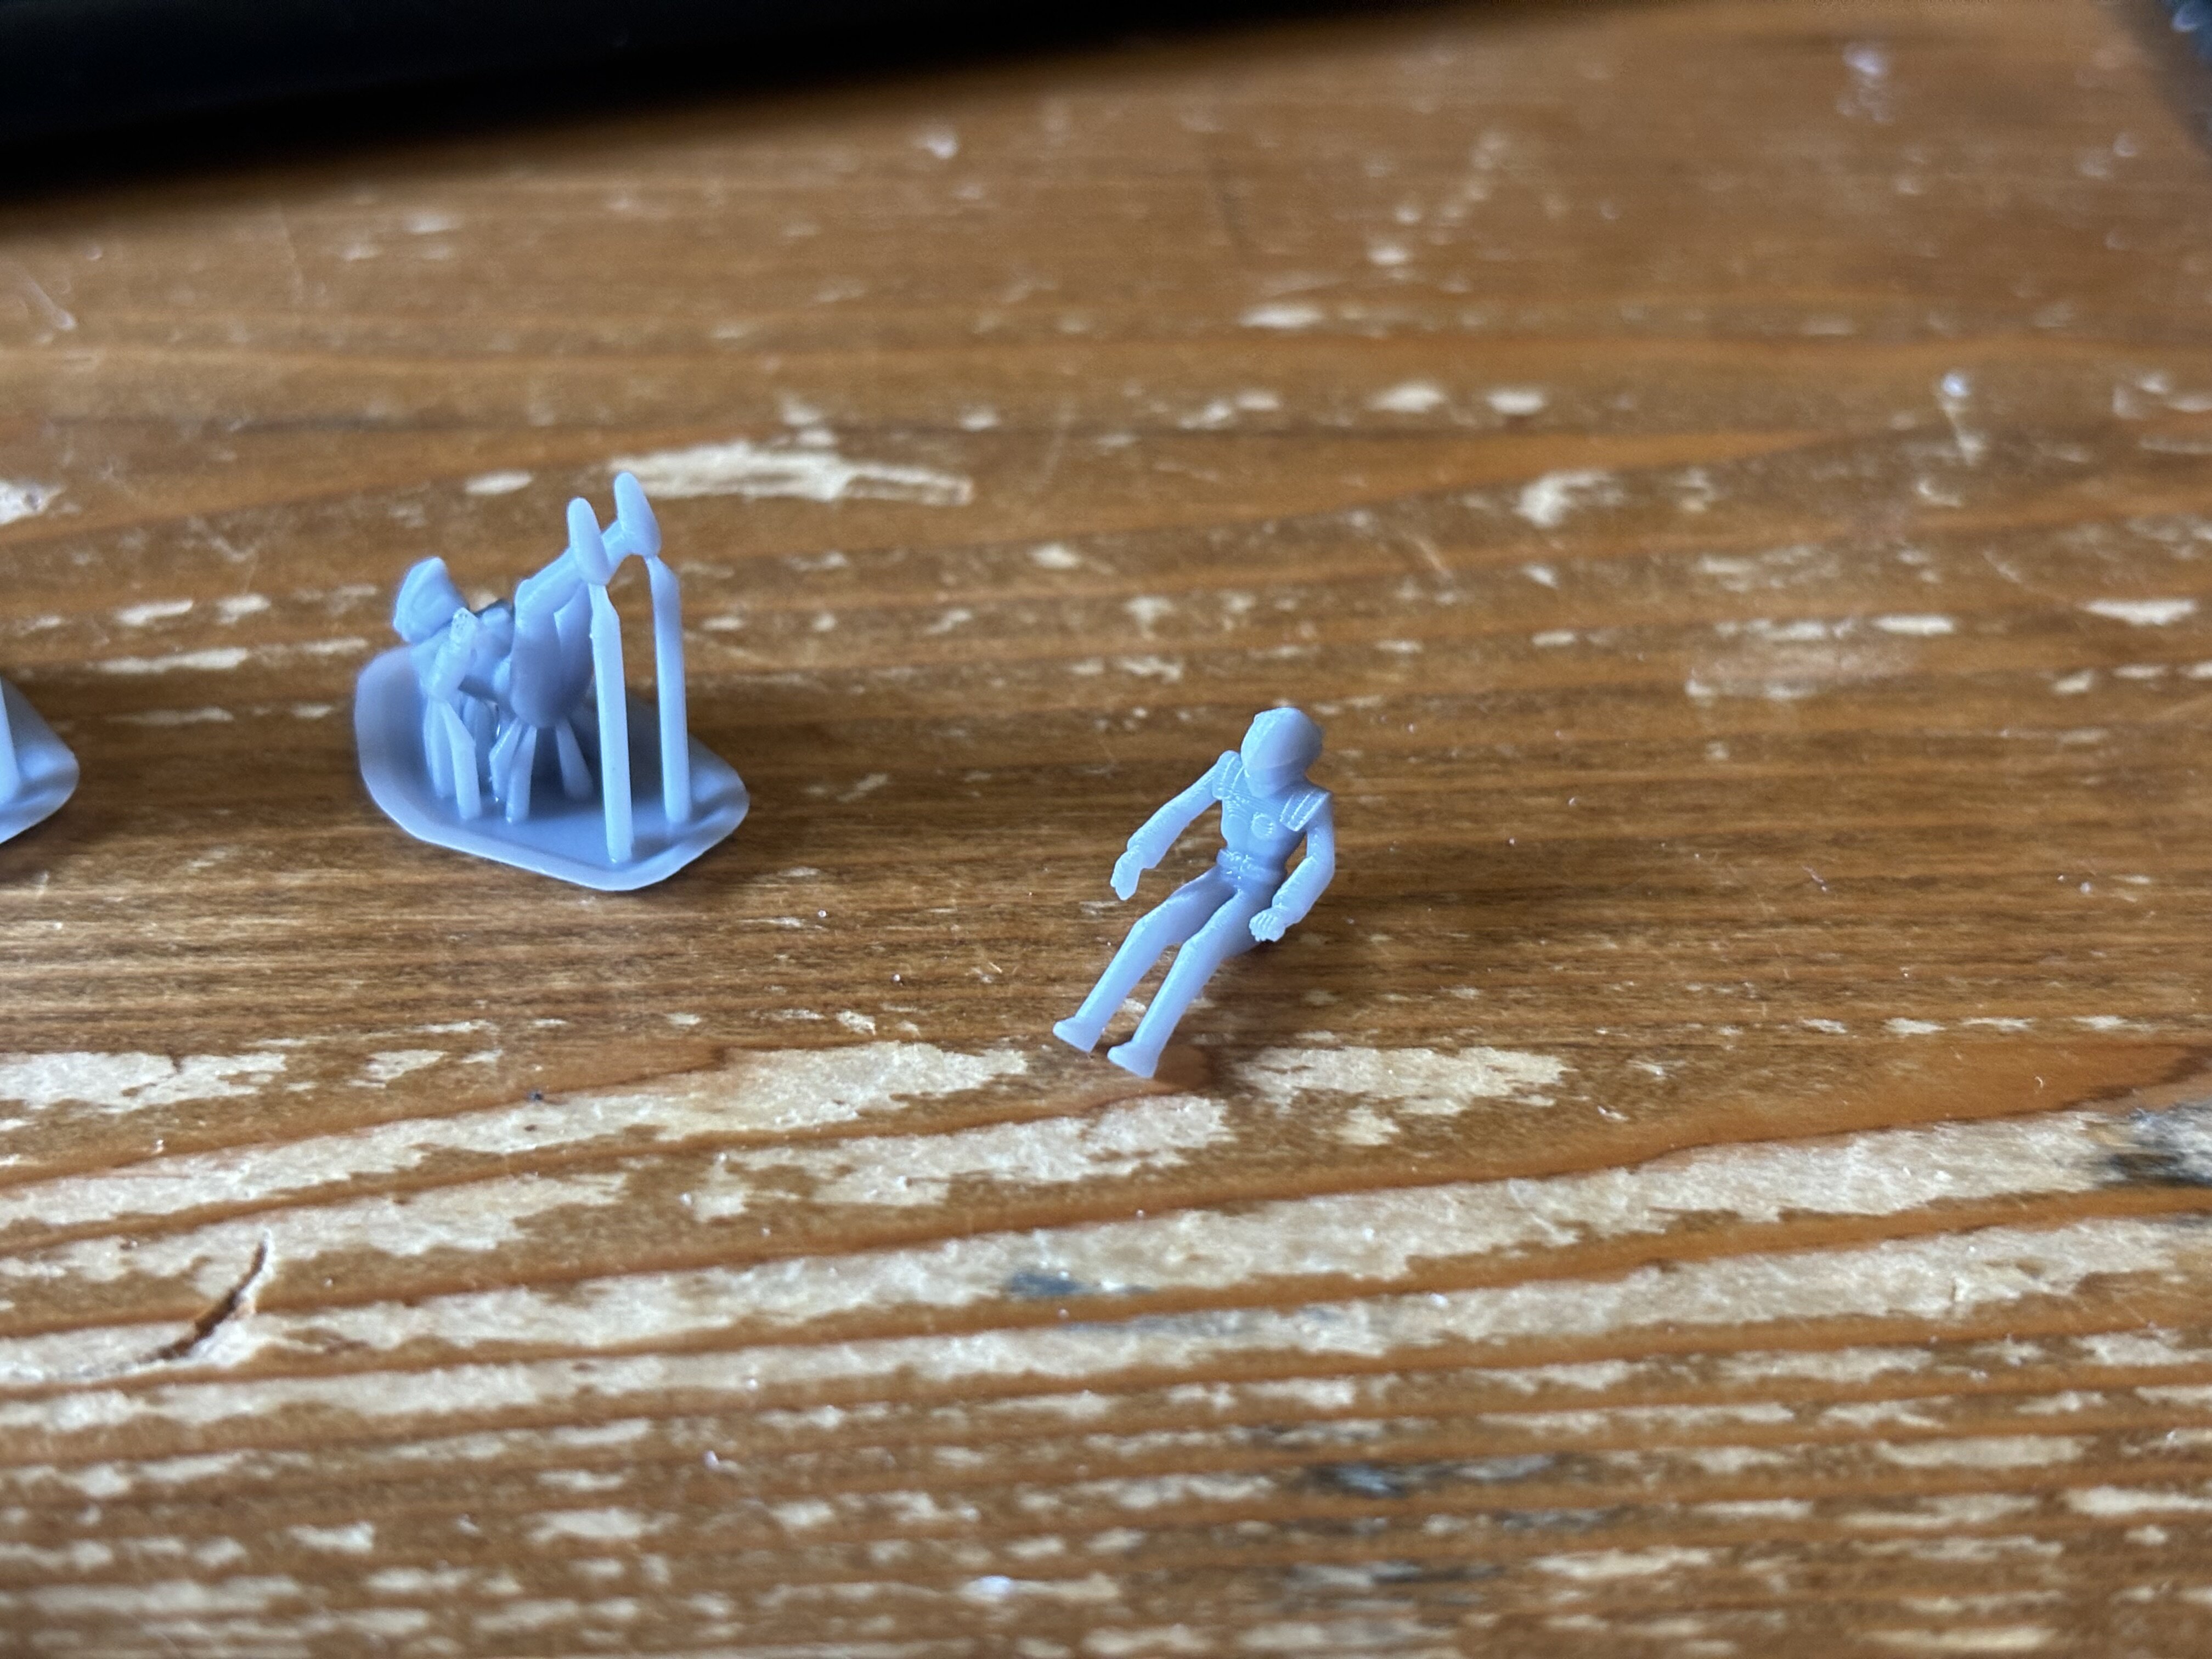
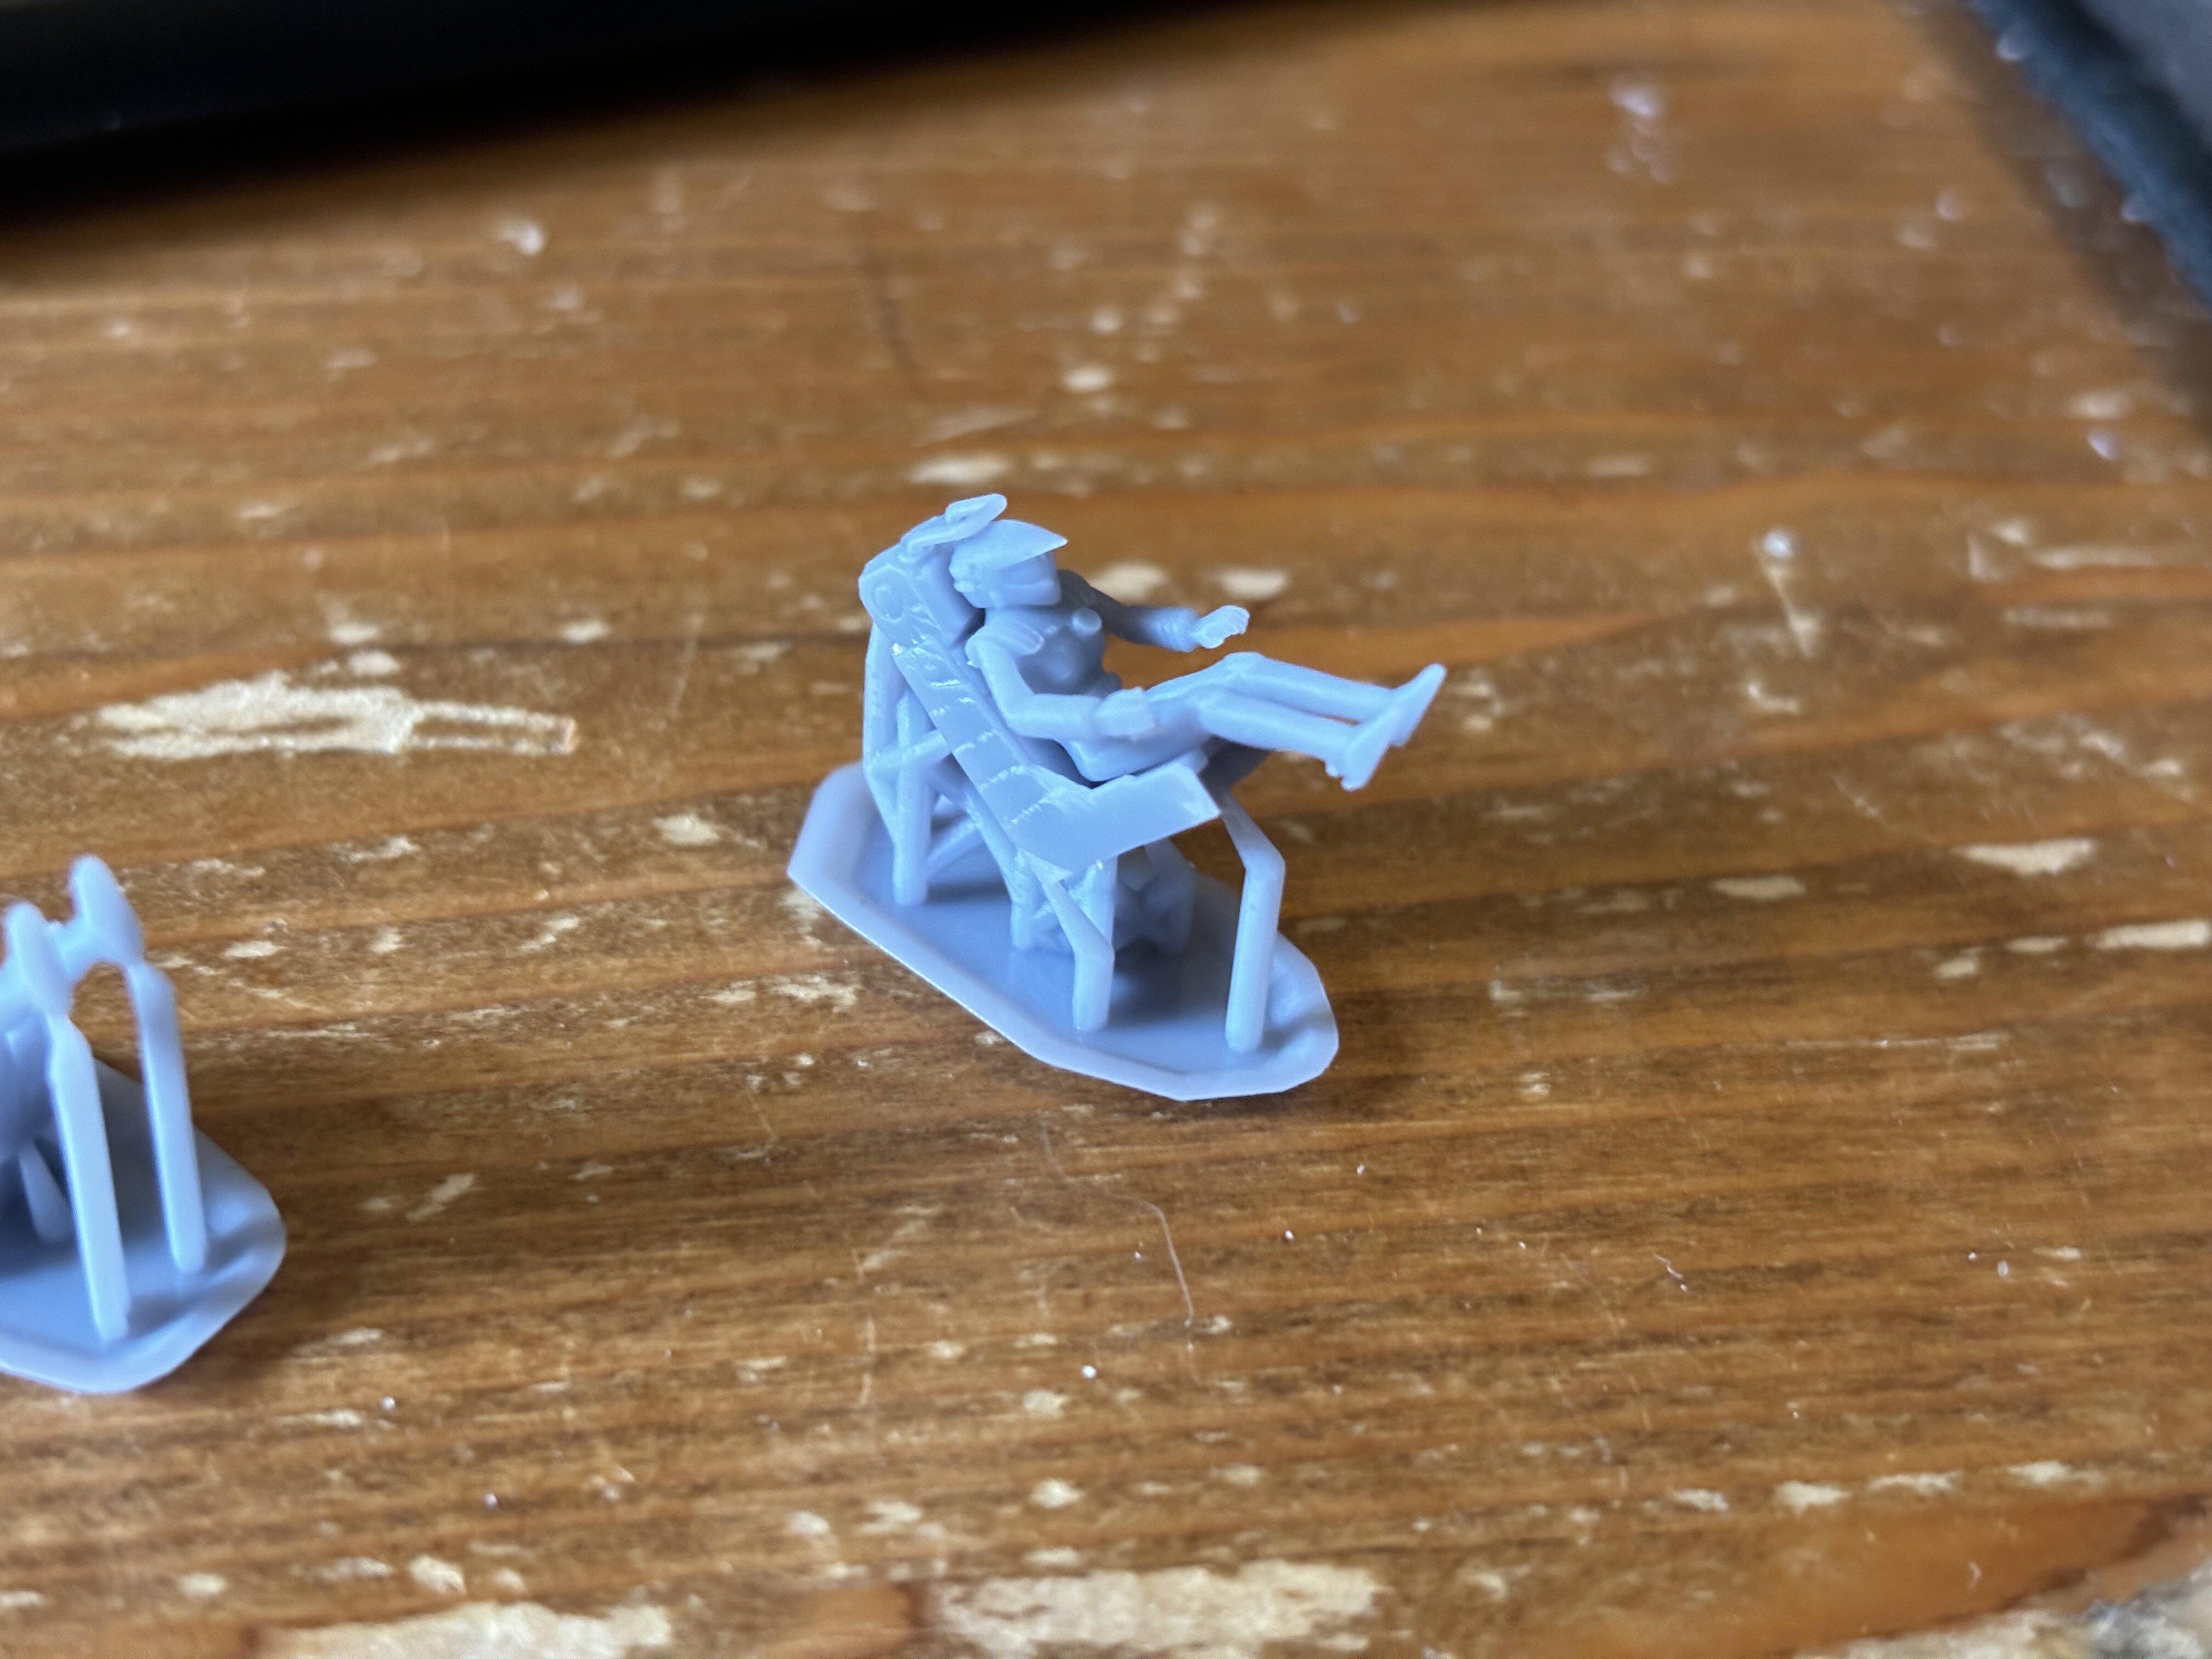
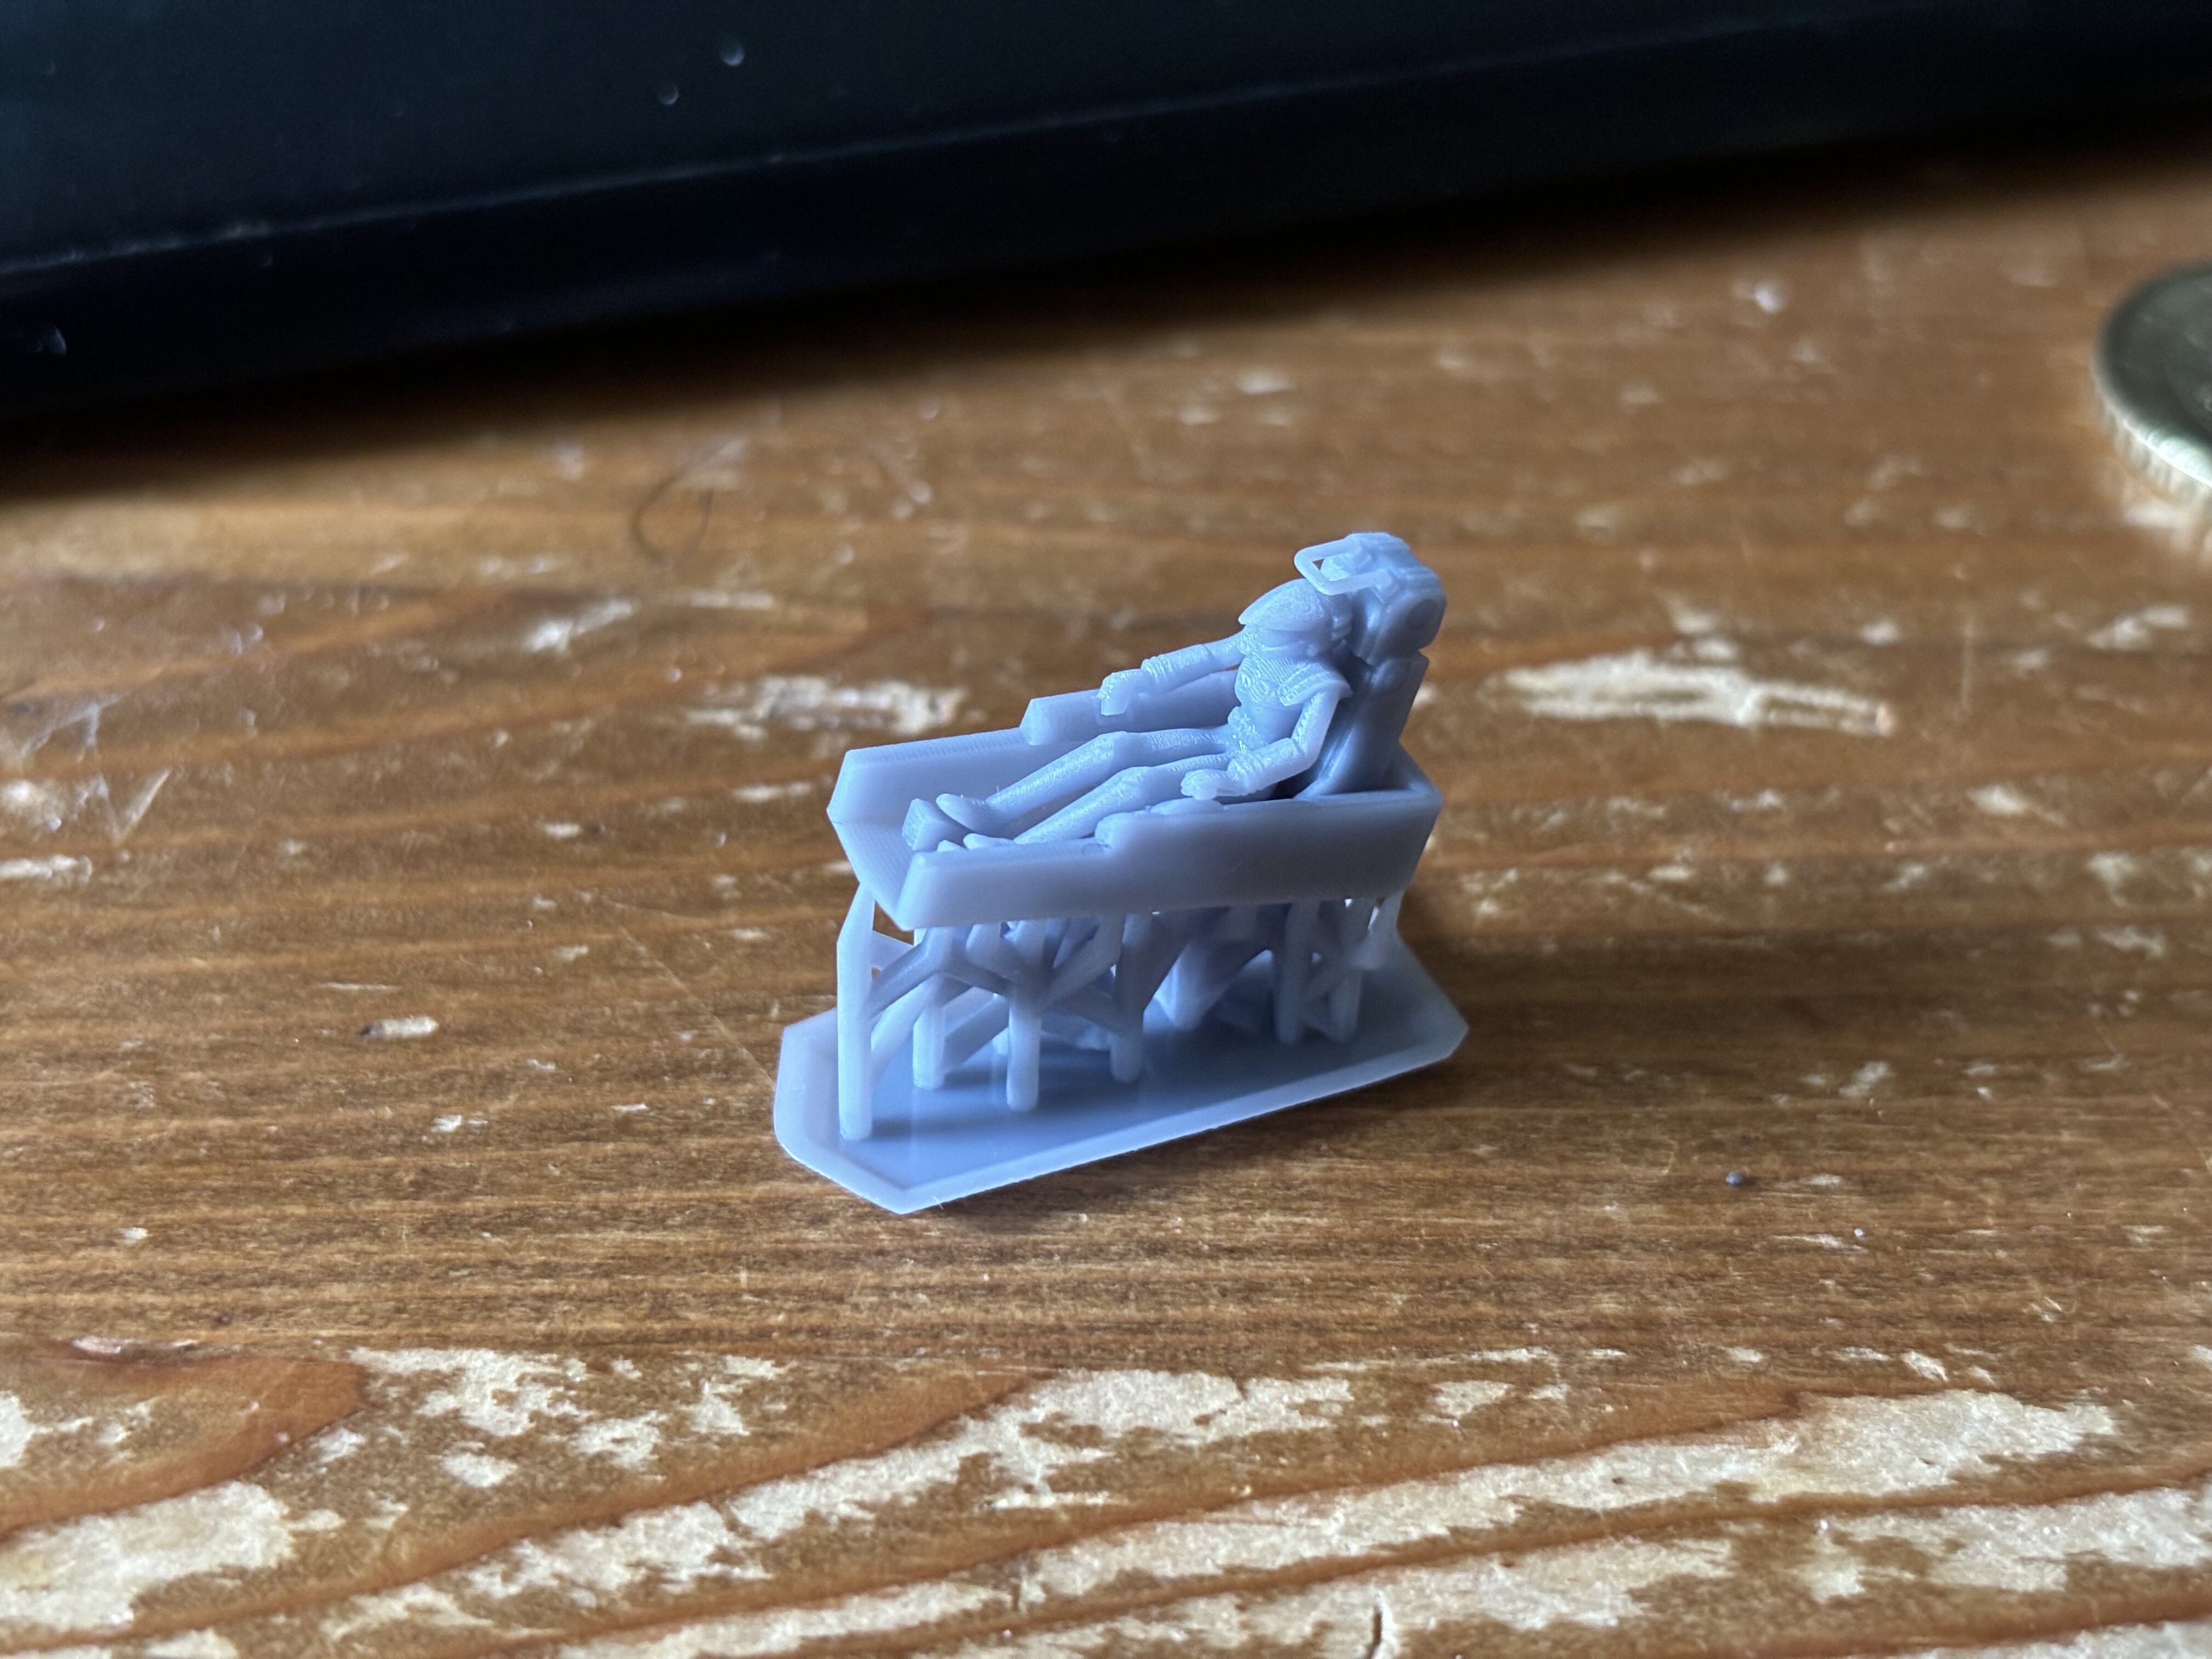
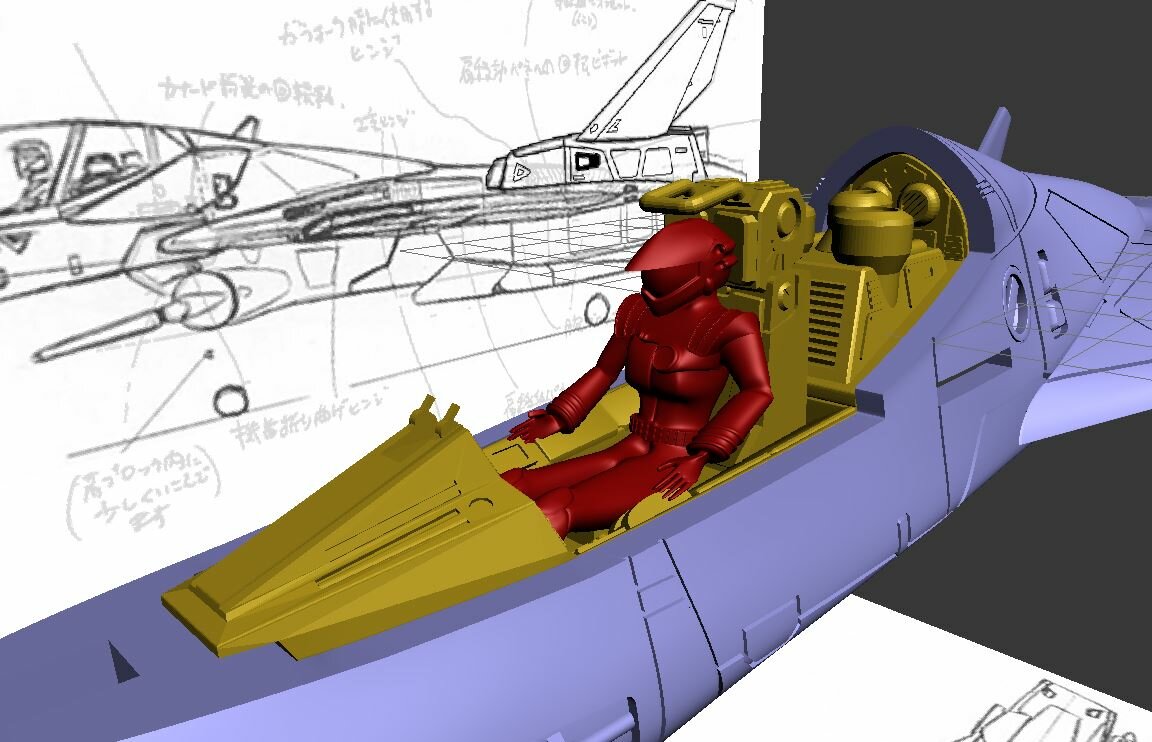
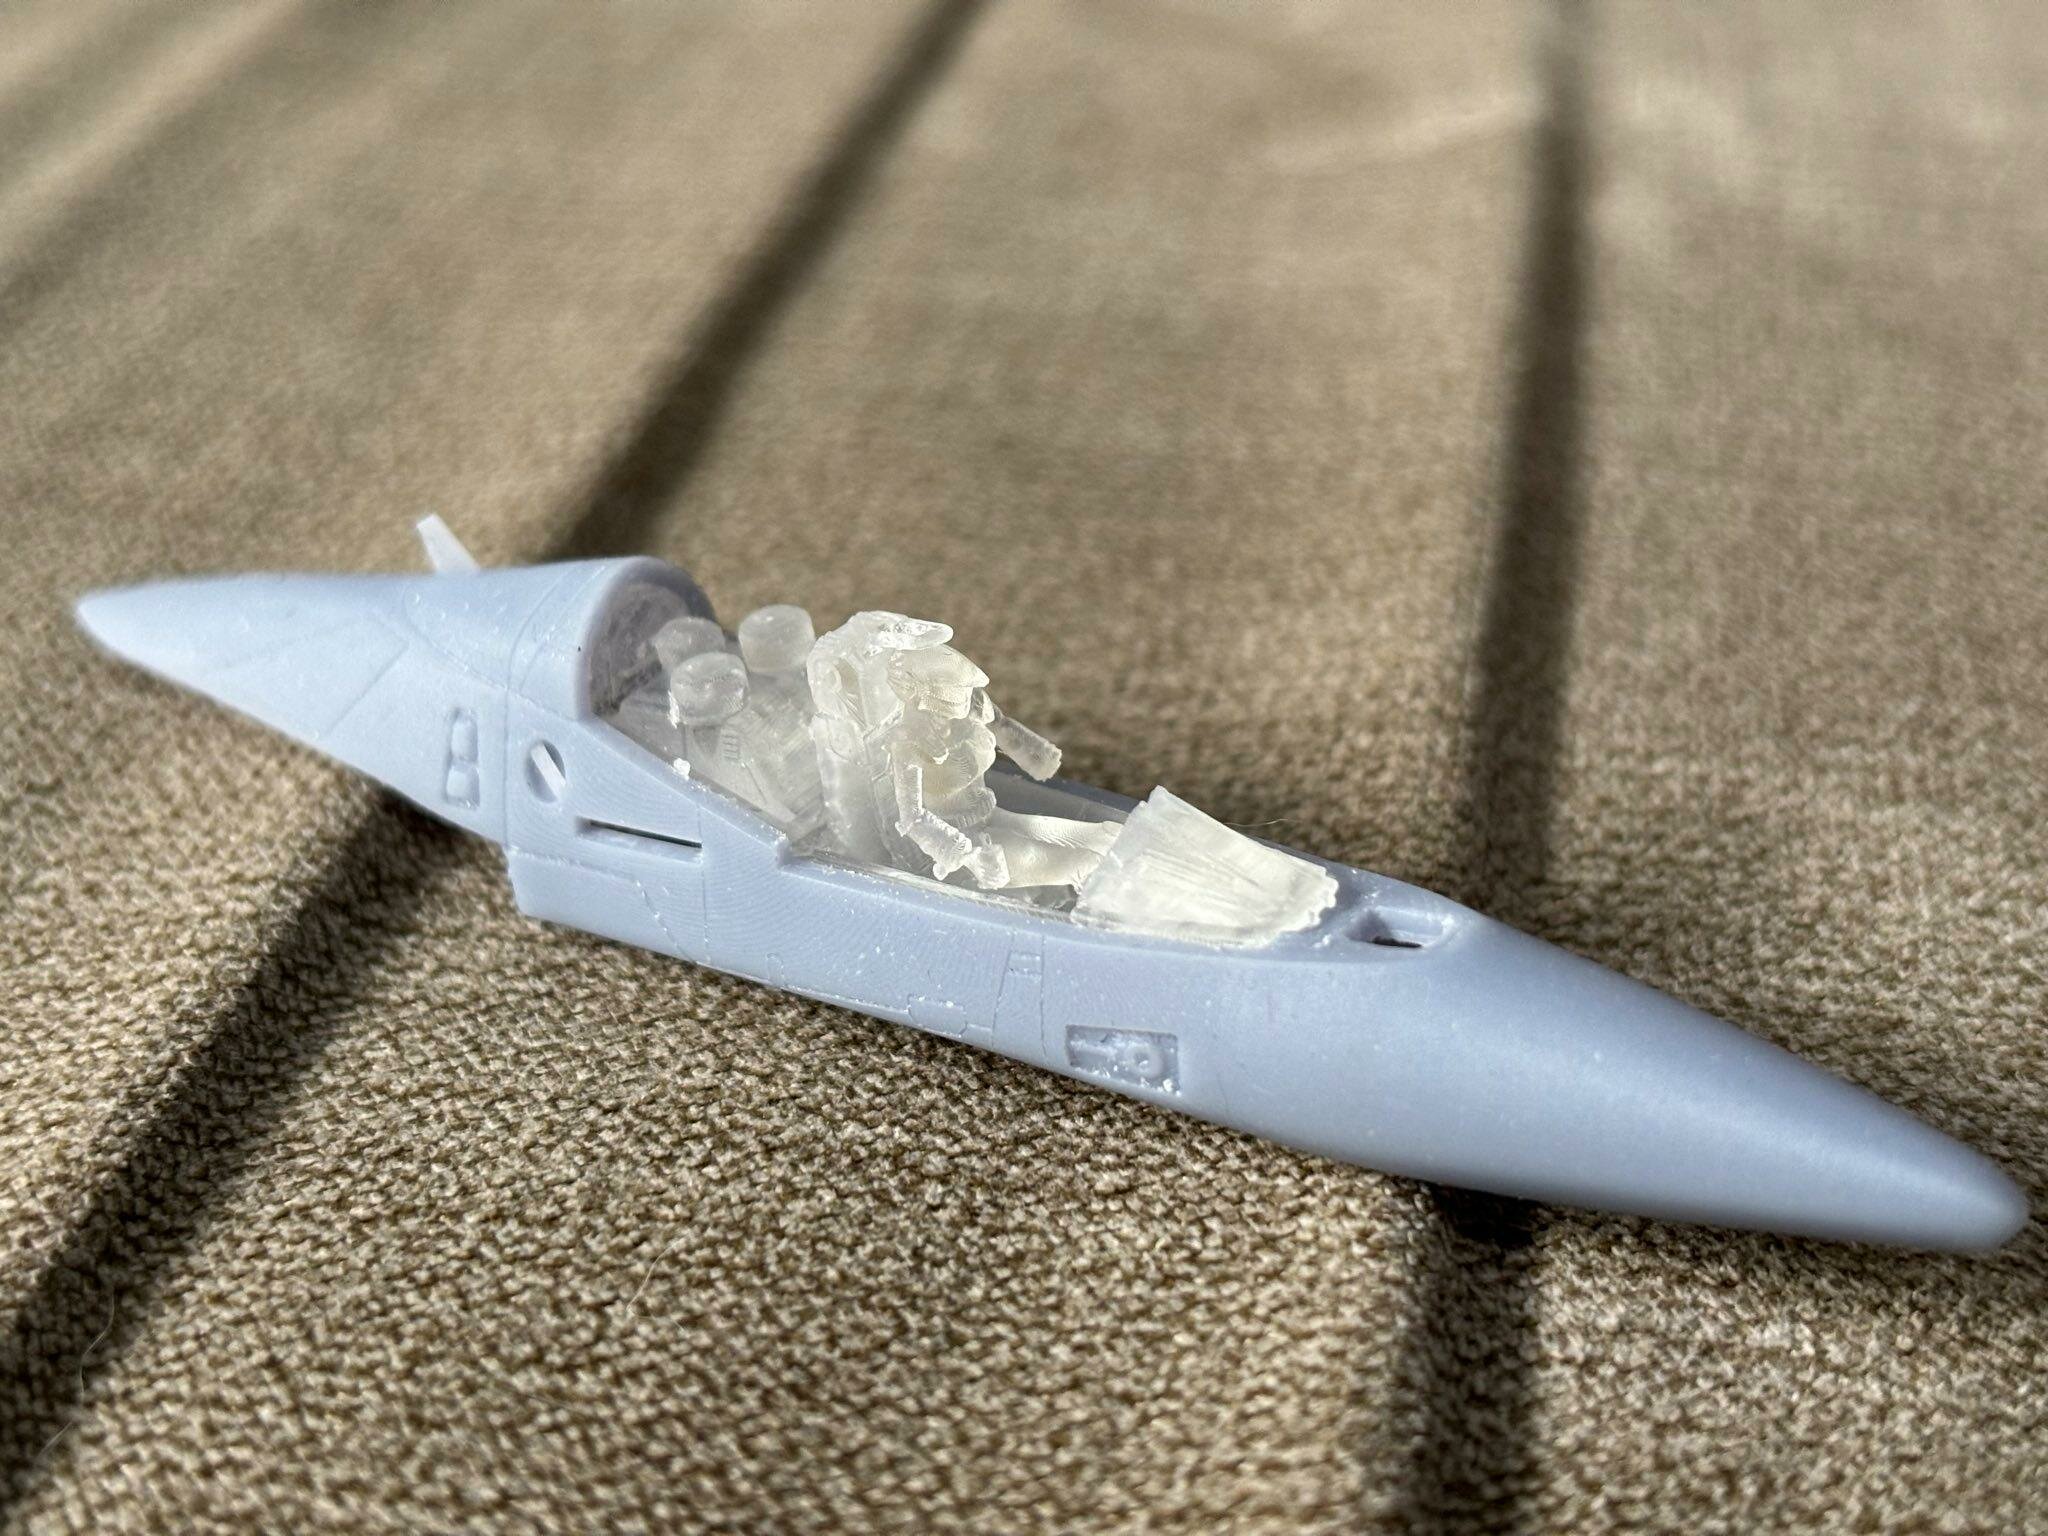
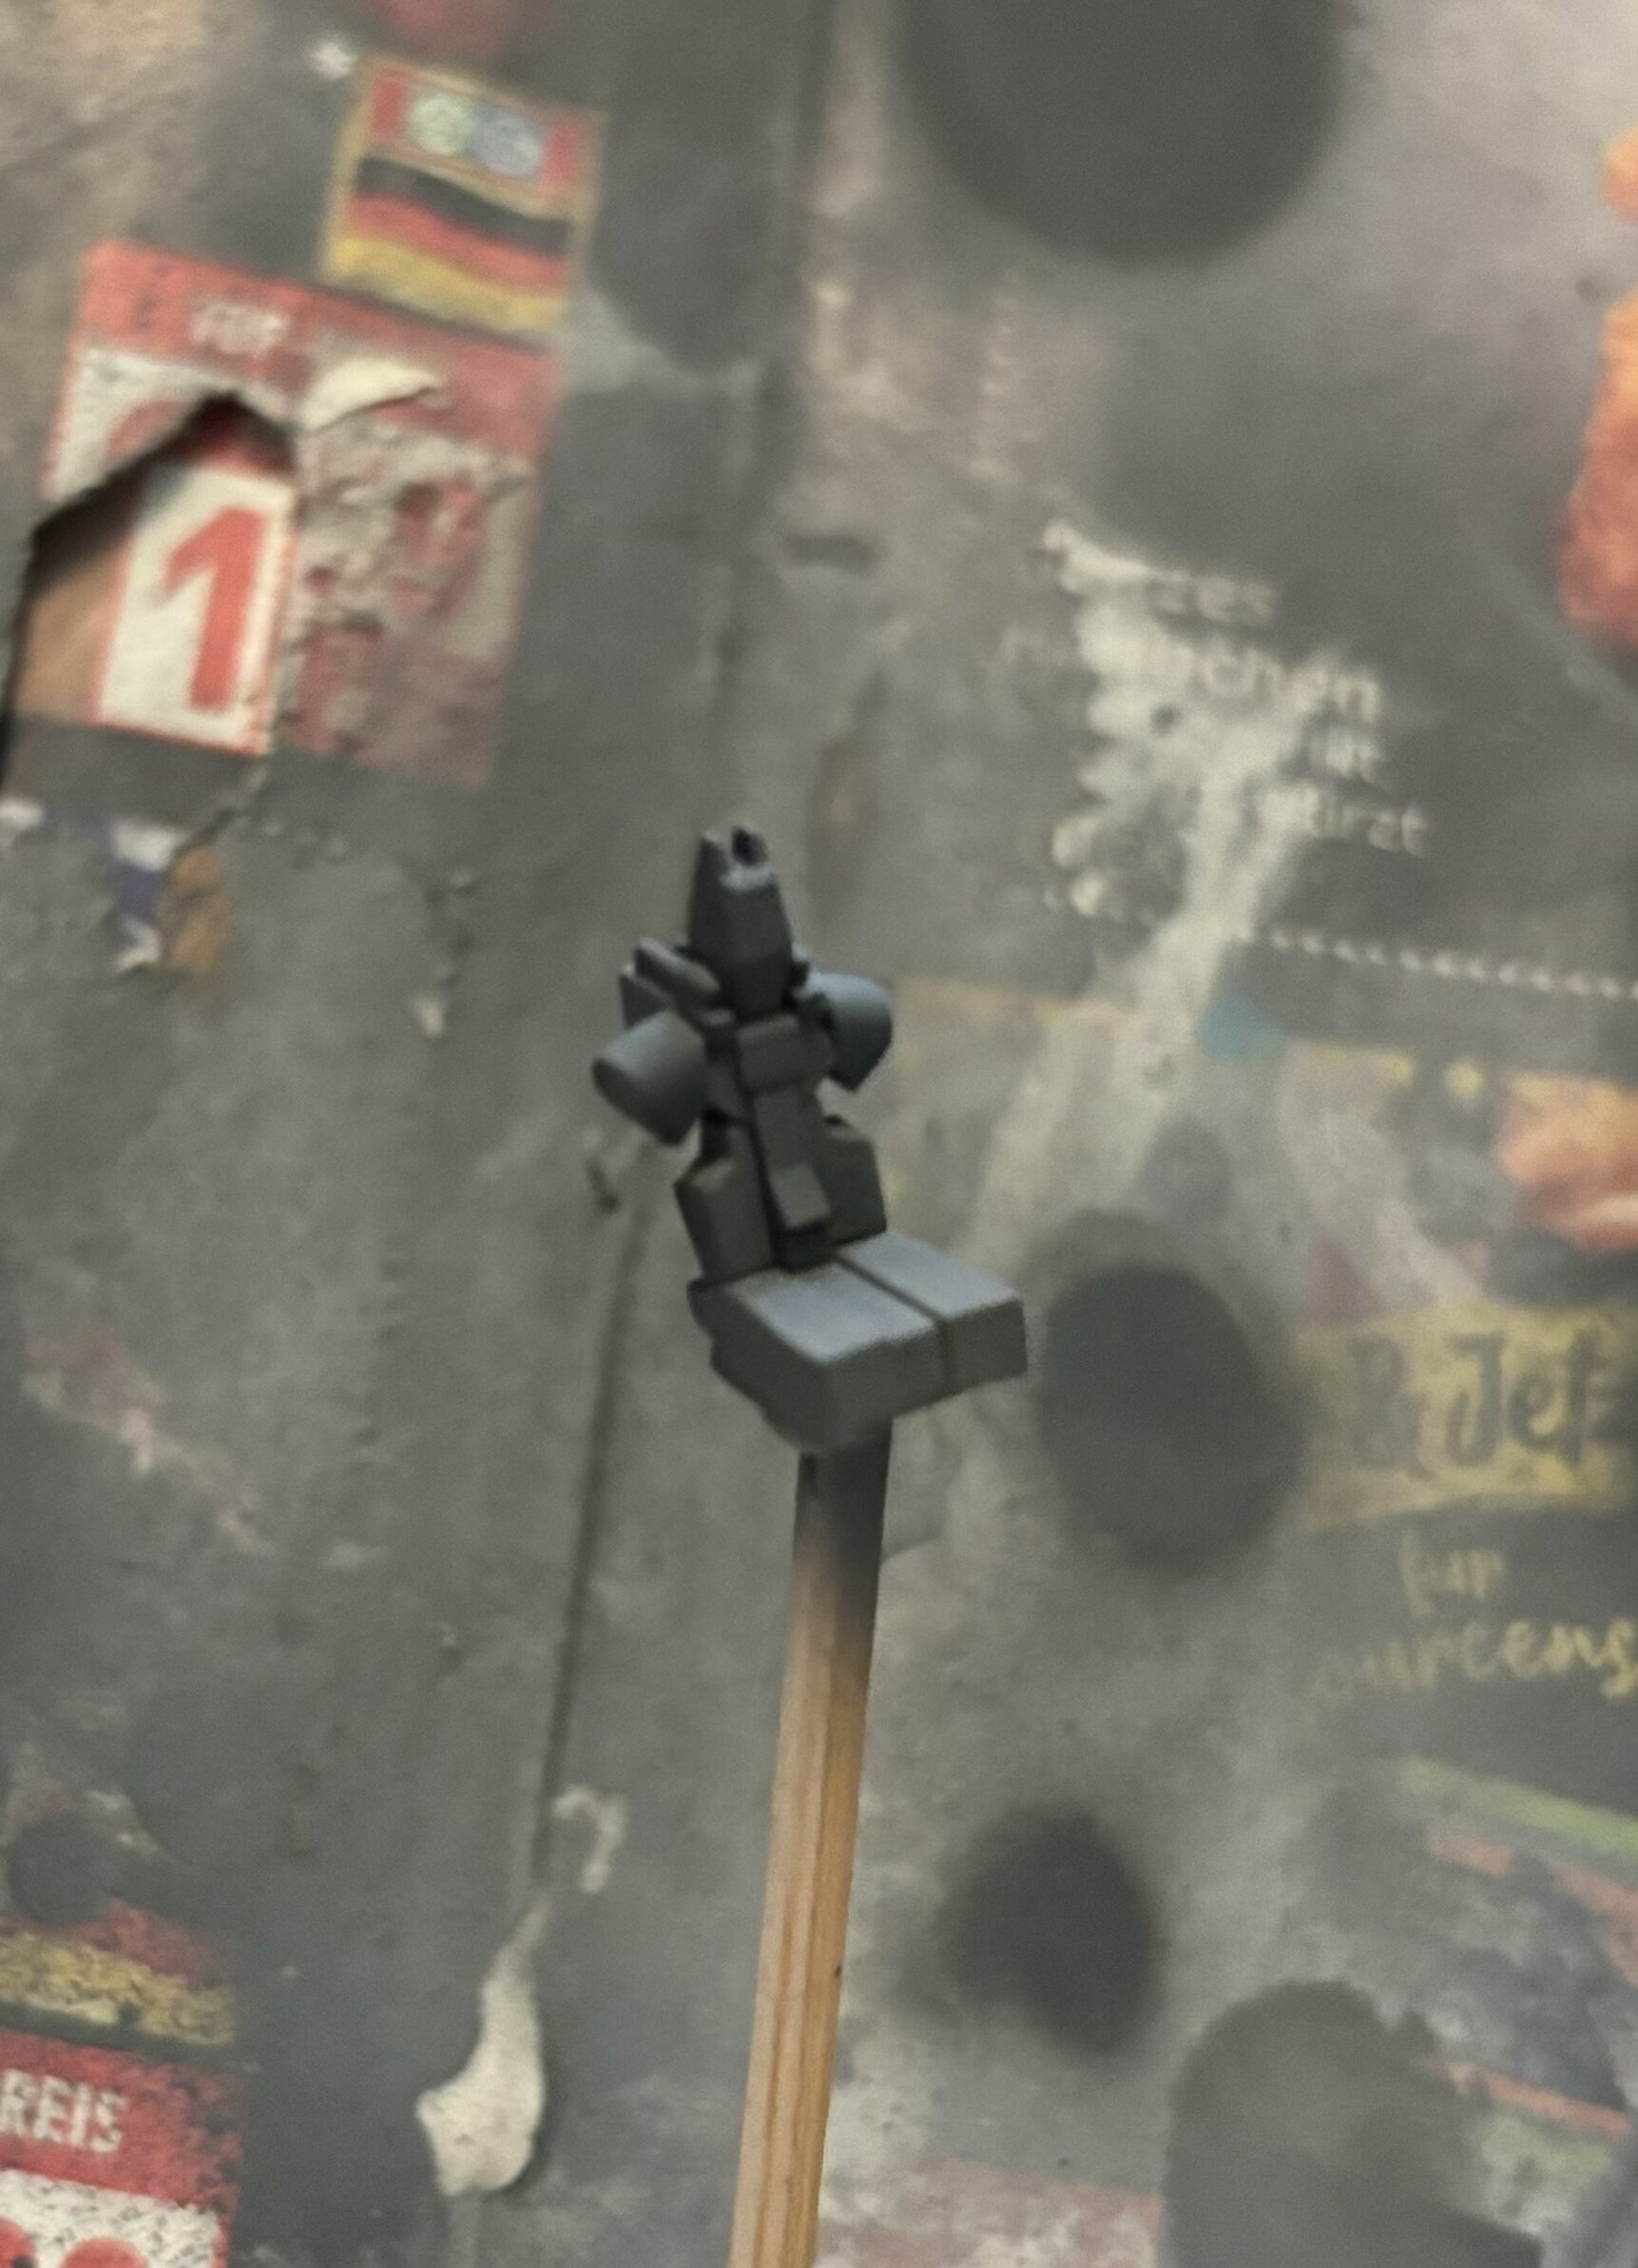
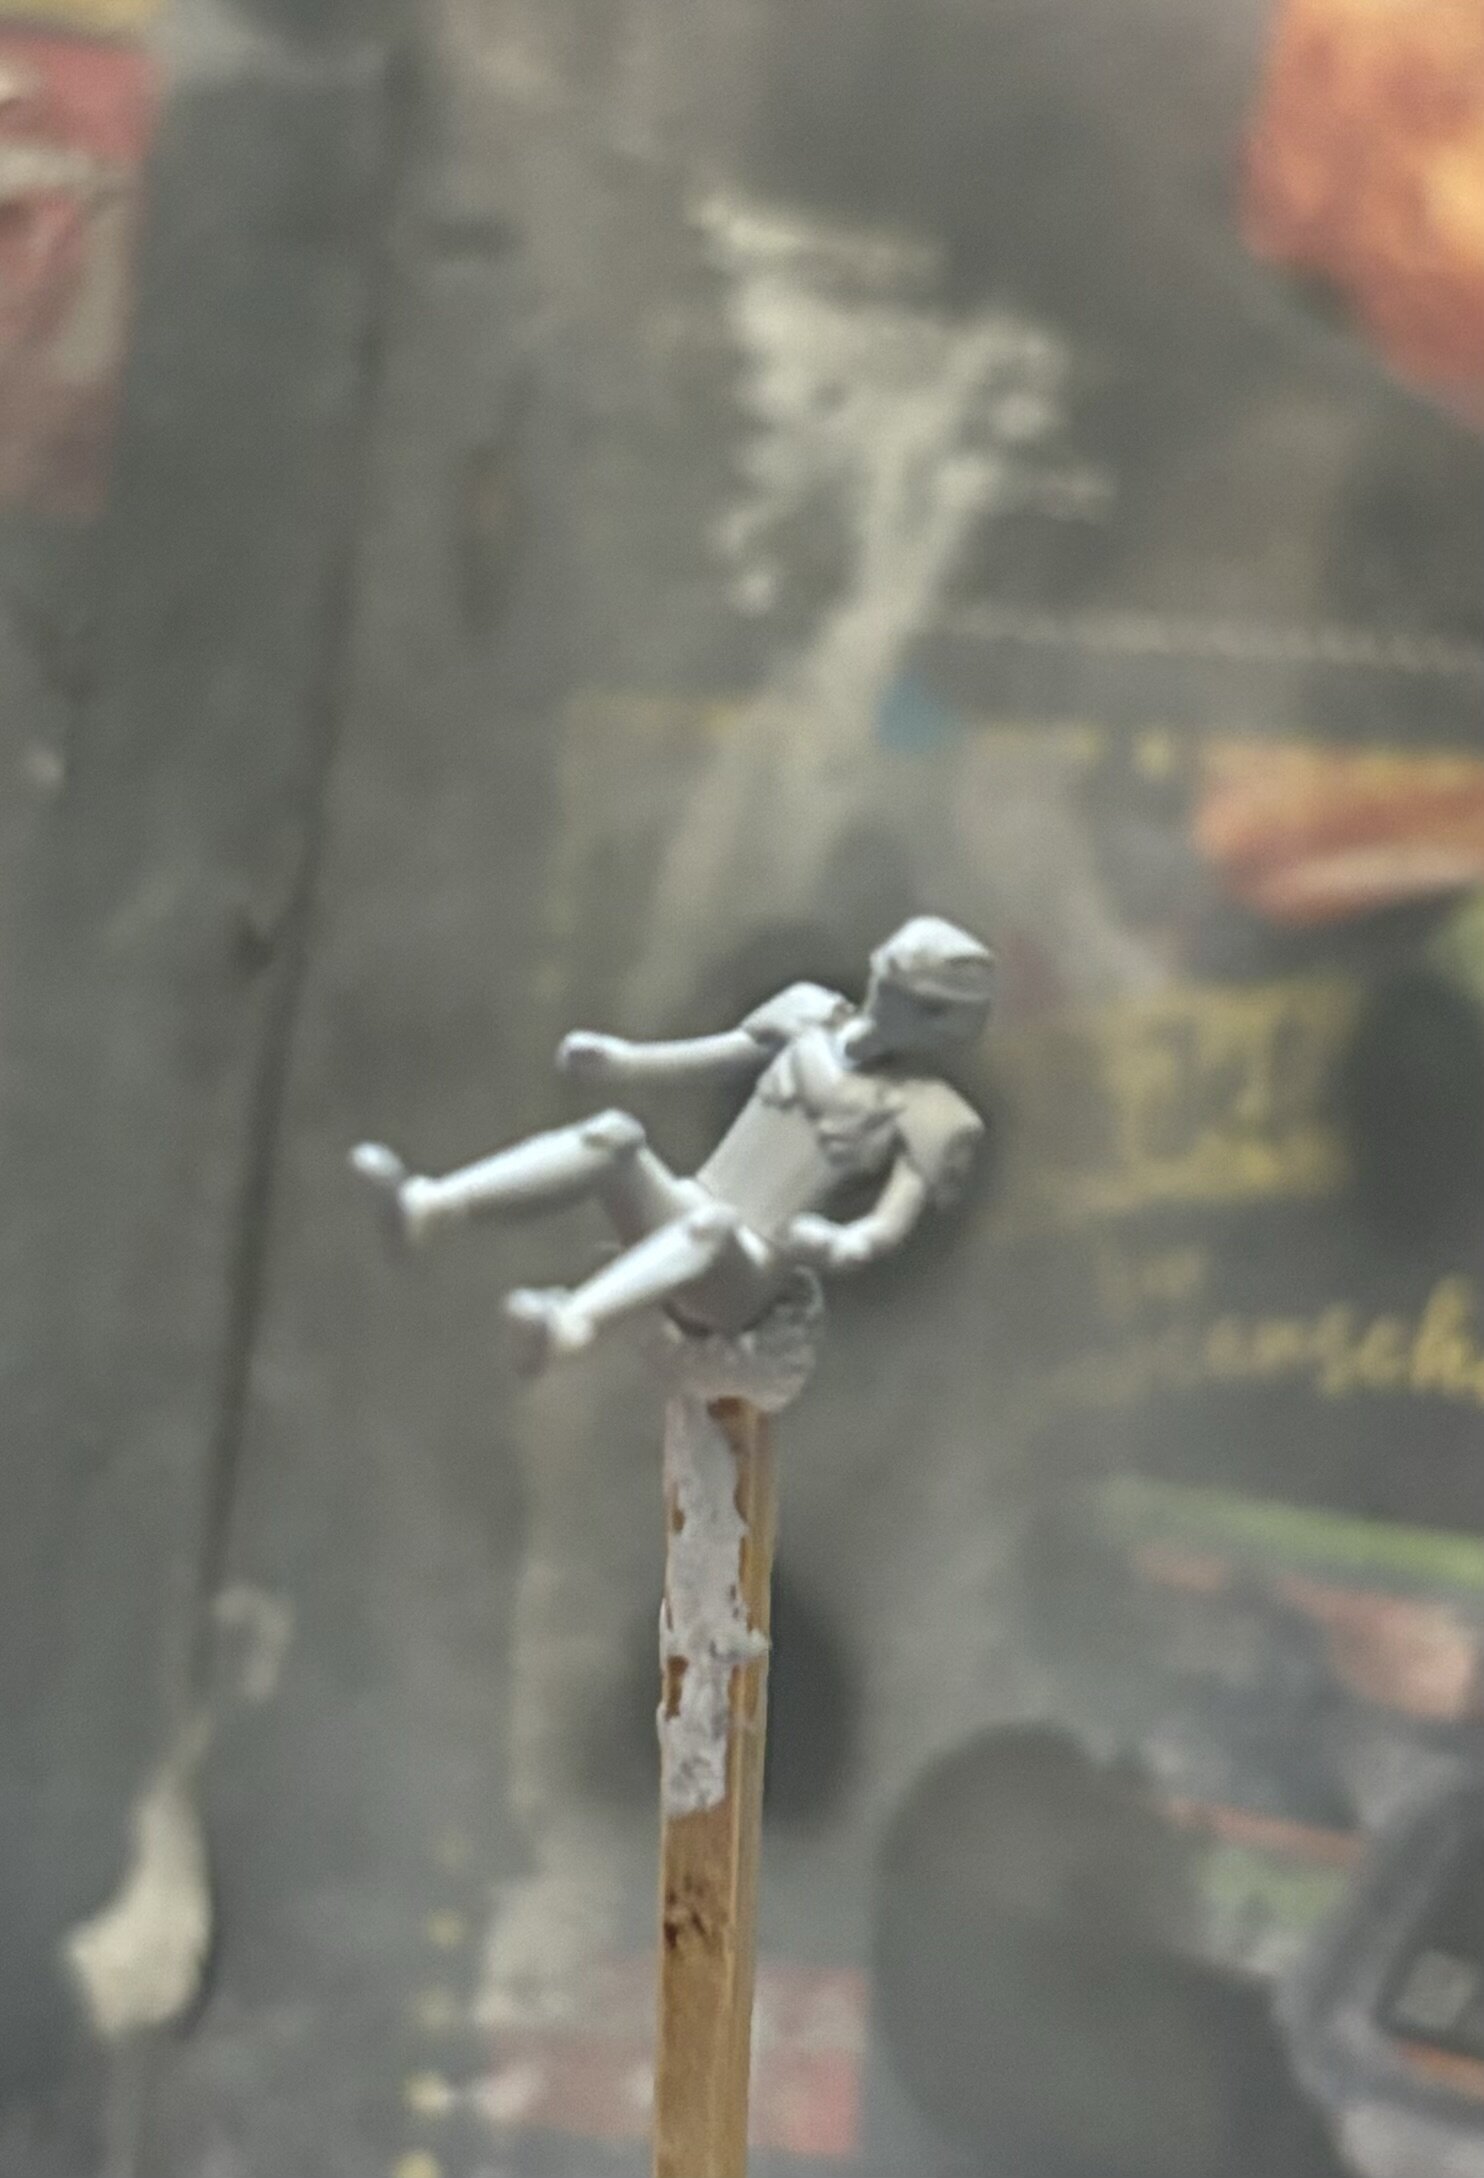
Printed the pilot figure for testing. It is Milia in a Macross M3 pilot suit (which for some reason is body tight...). Anyway - the wrists are to small and brittle and the torso is too long. One hand came off while detaching the supports. The figure barely fits and broke the seats ejection handle.
-
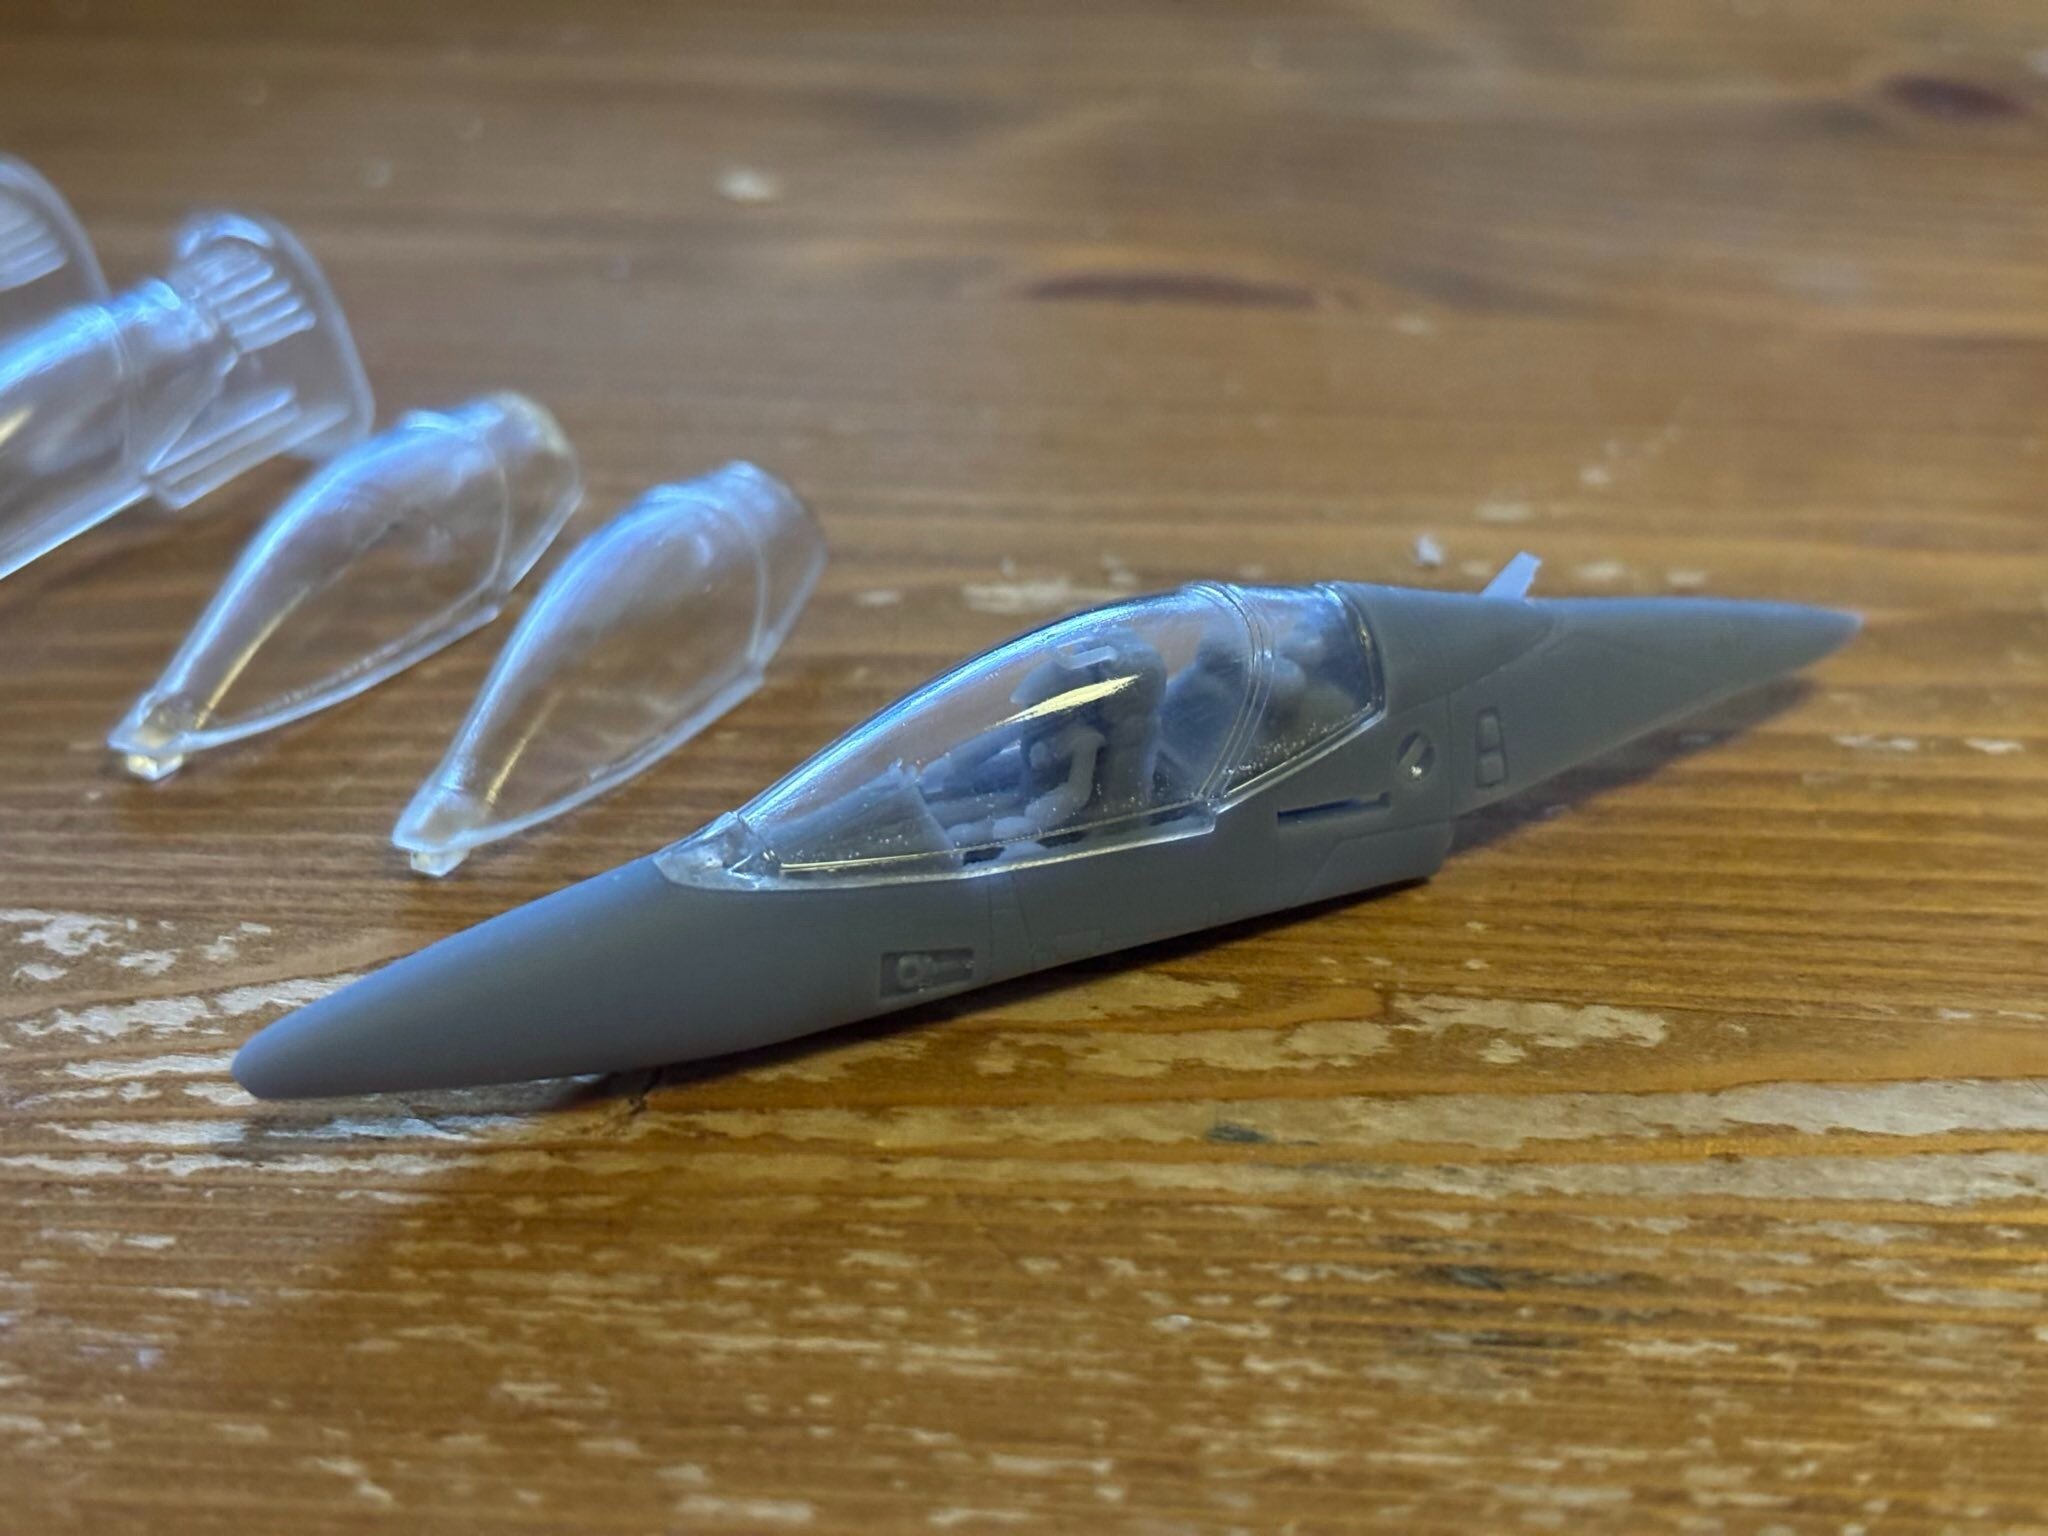
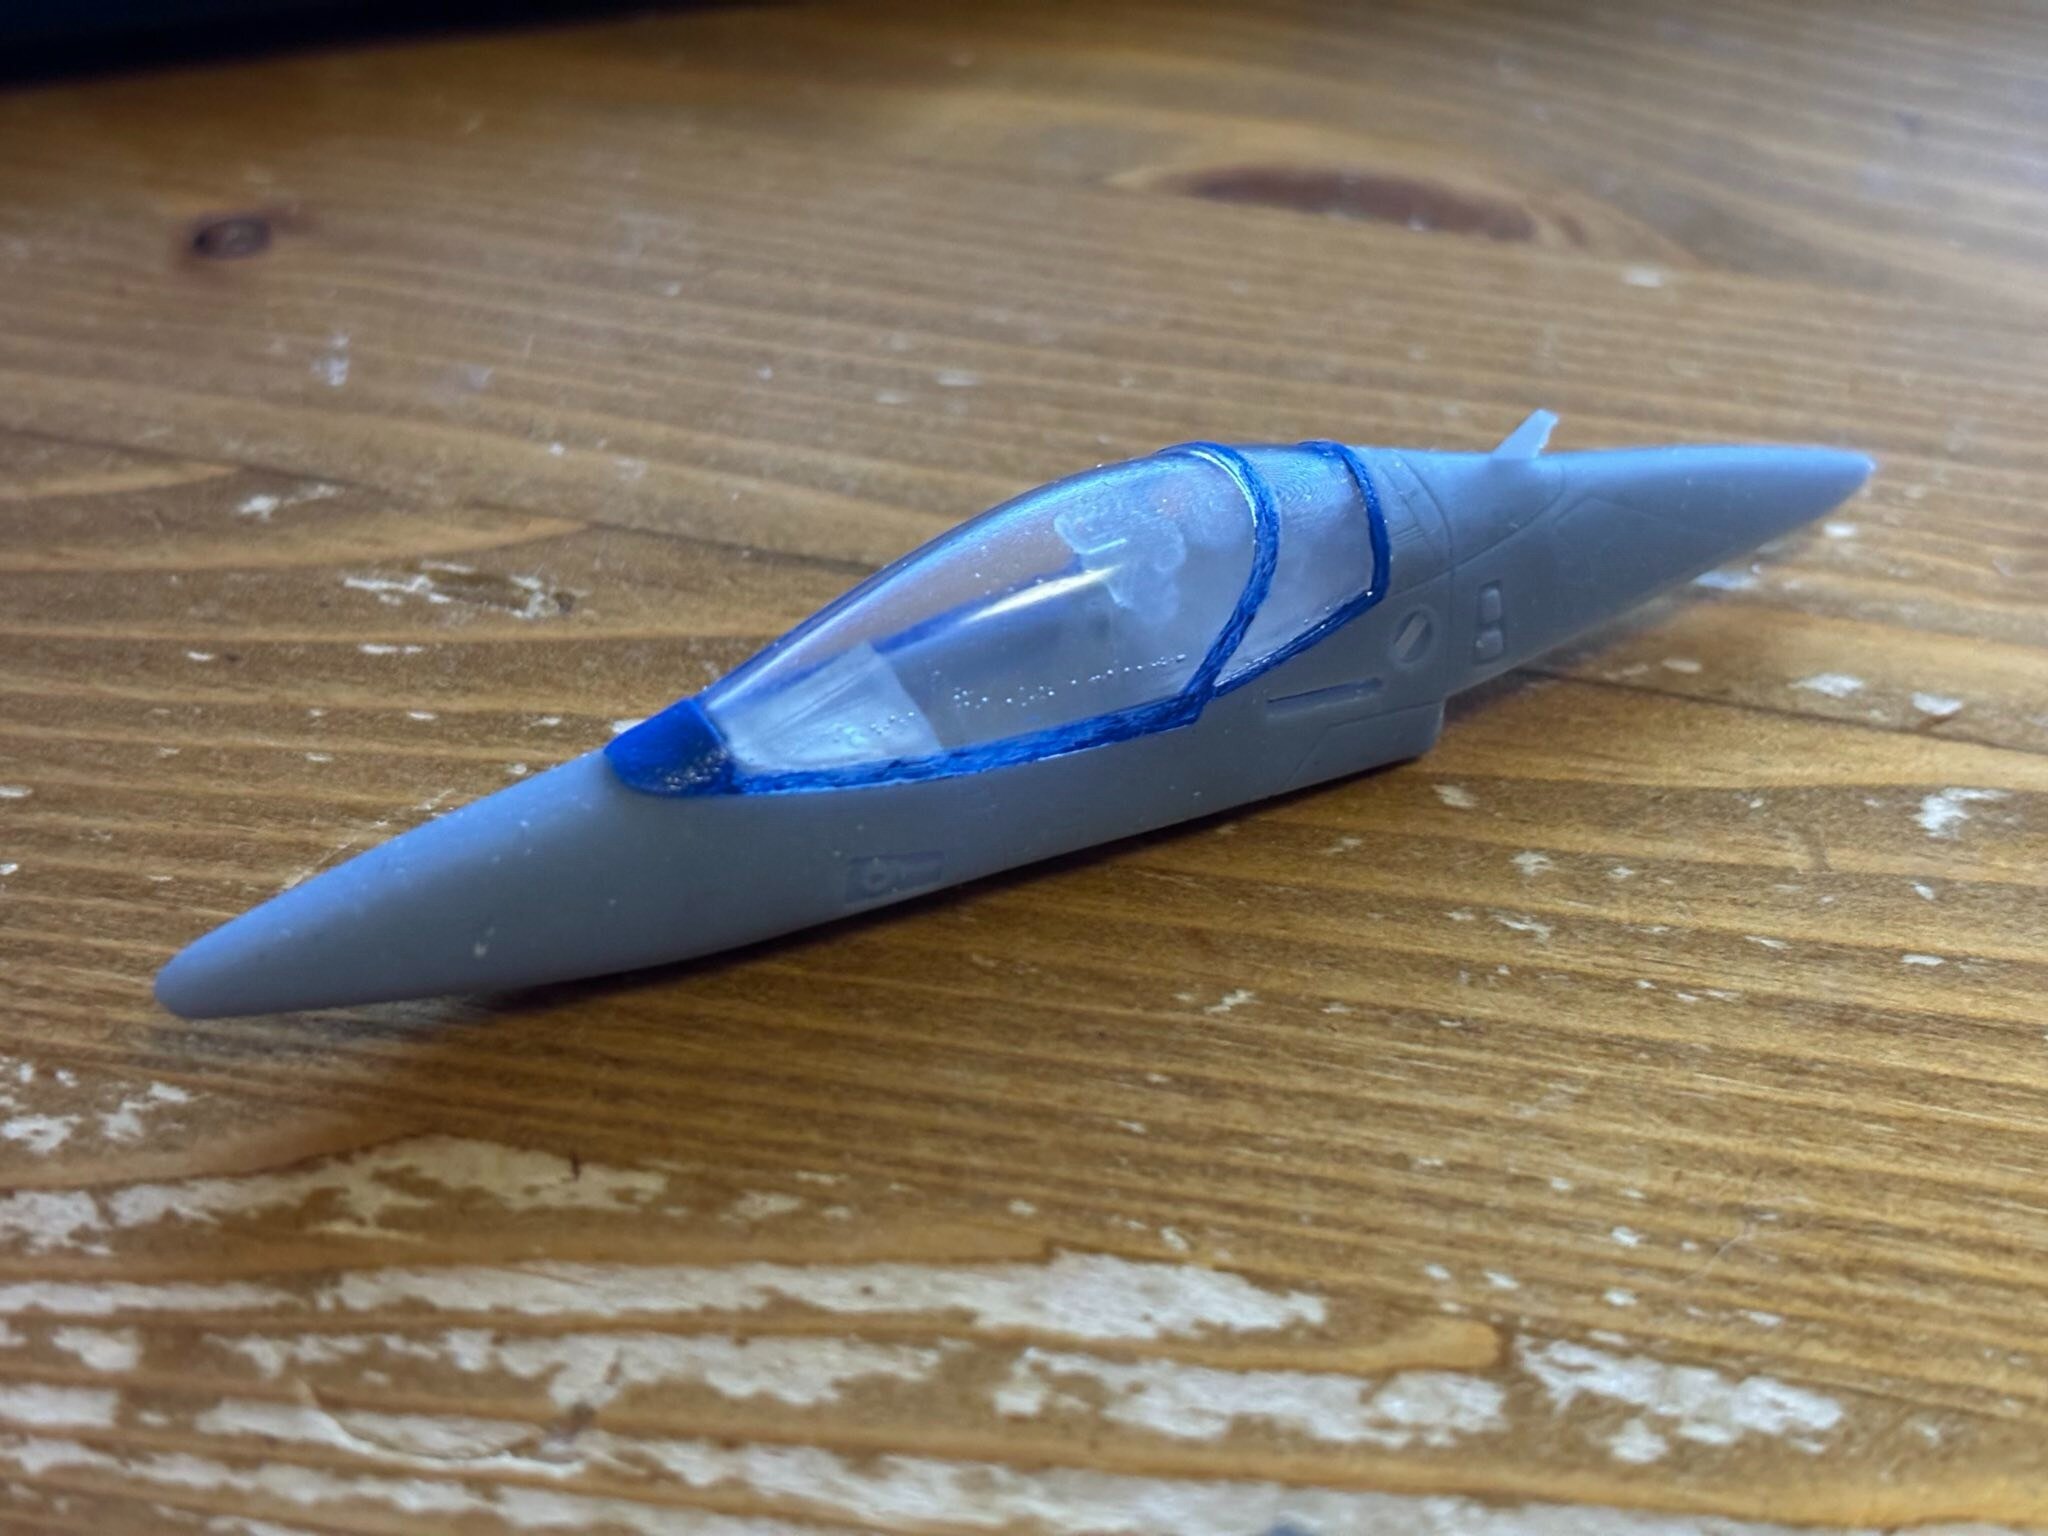
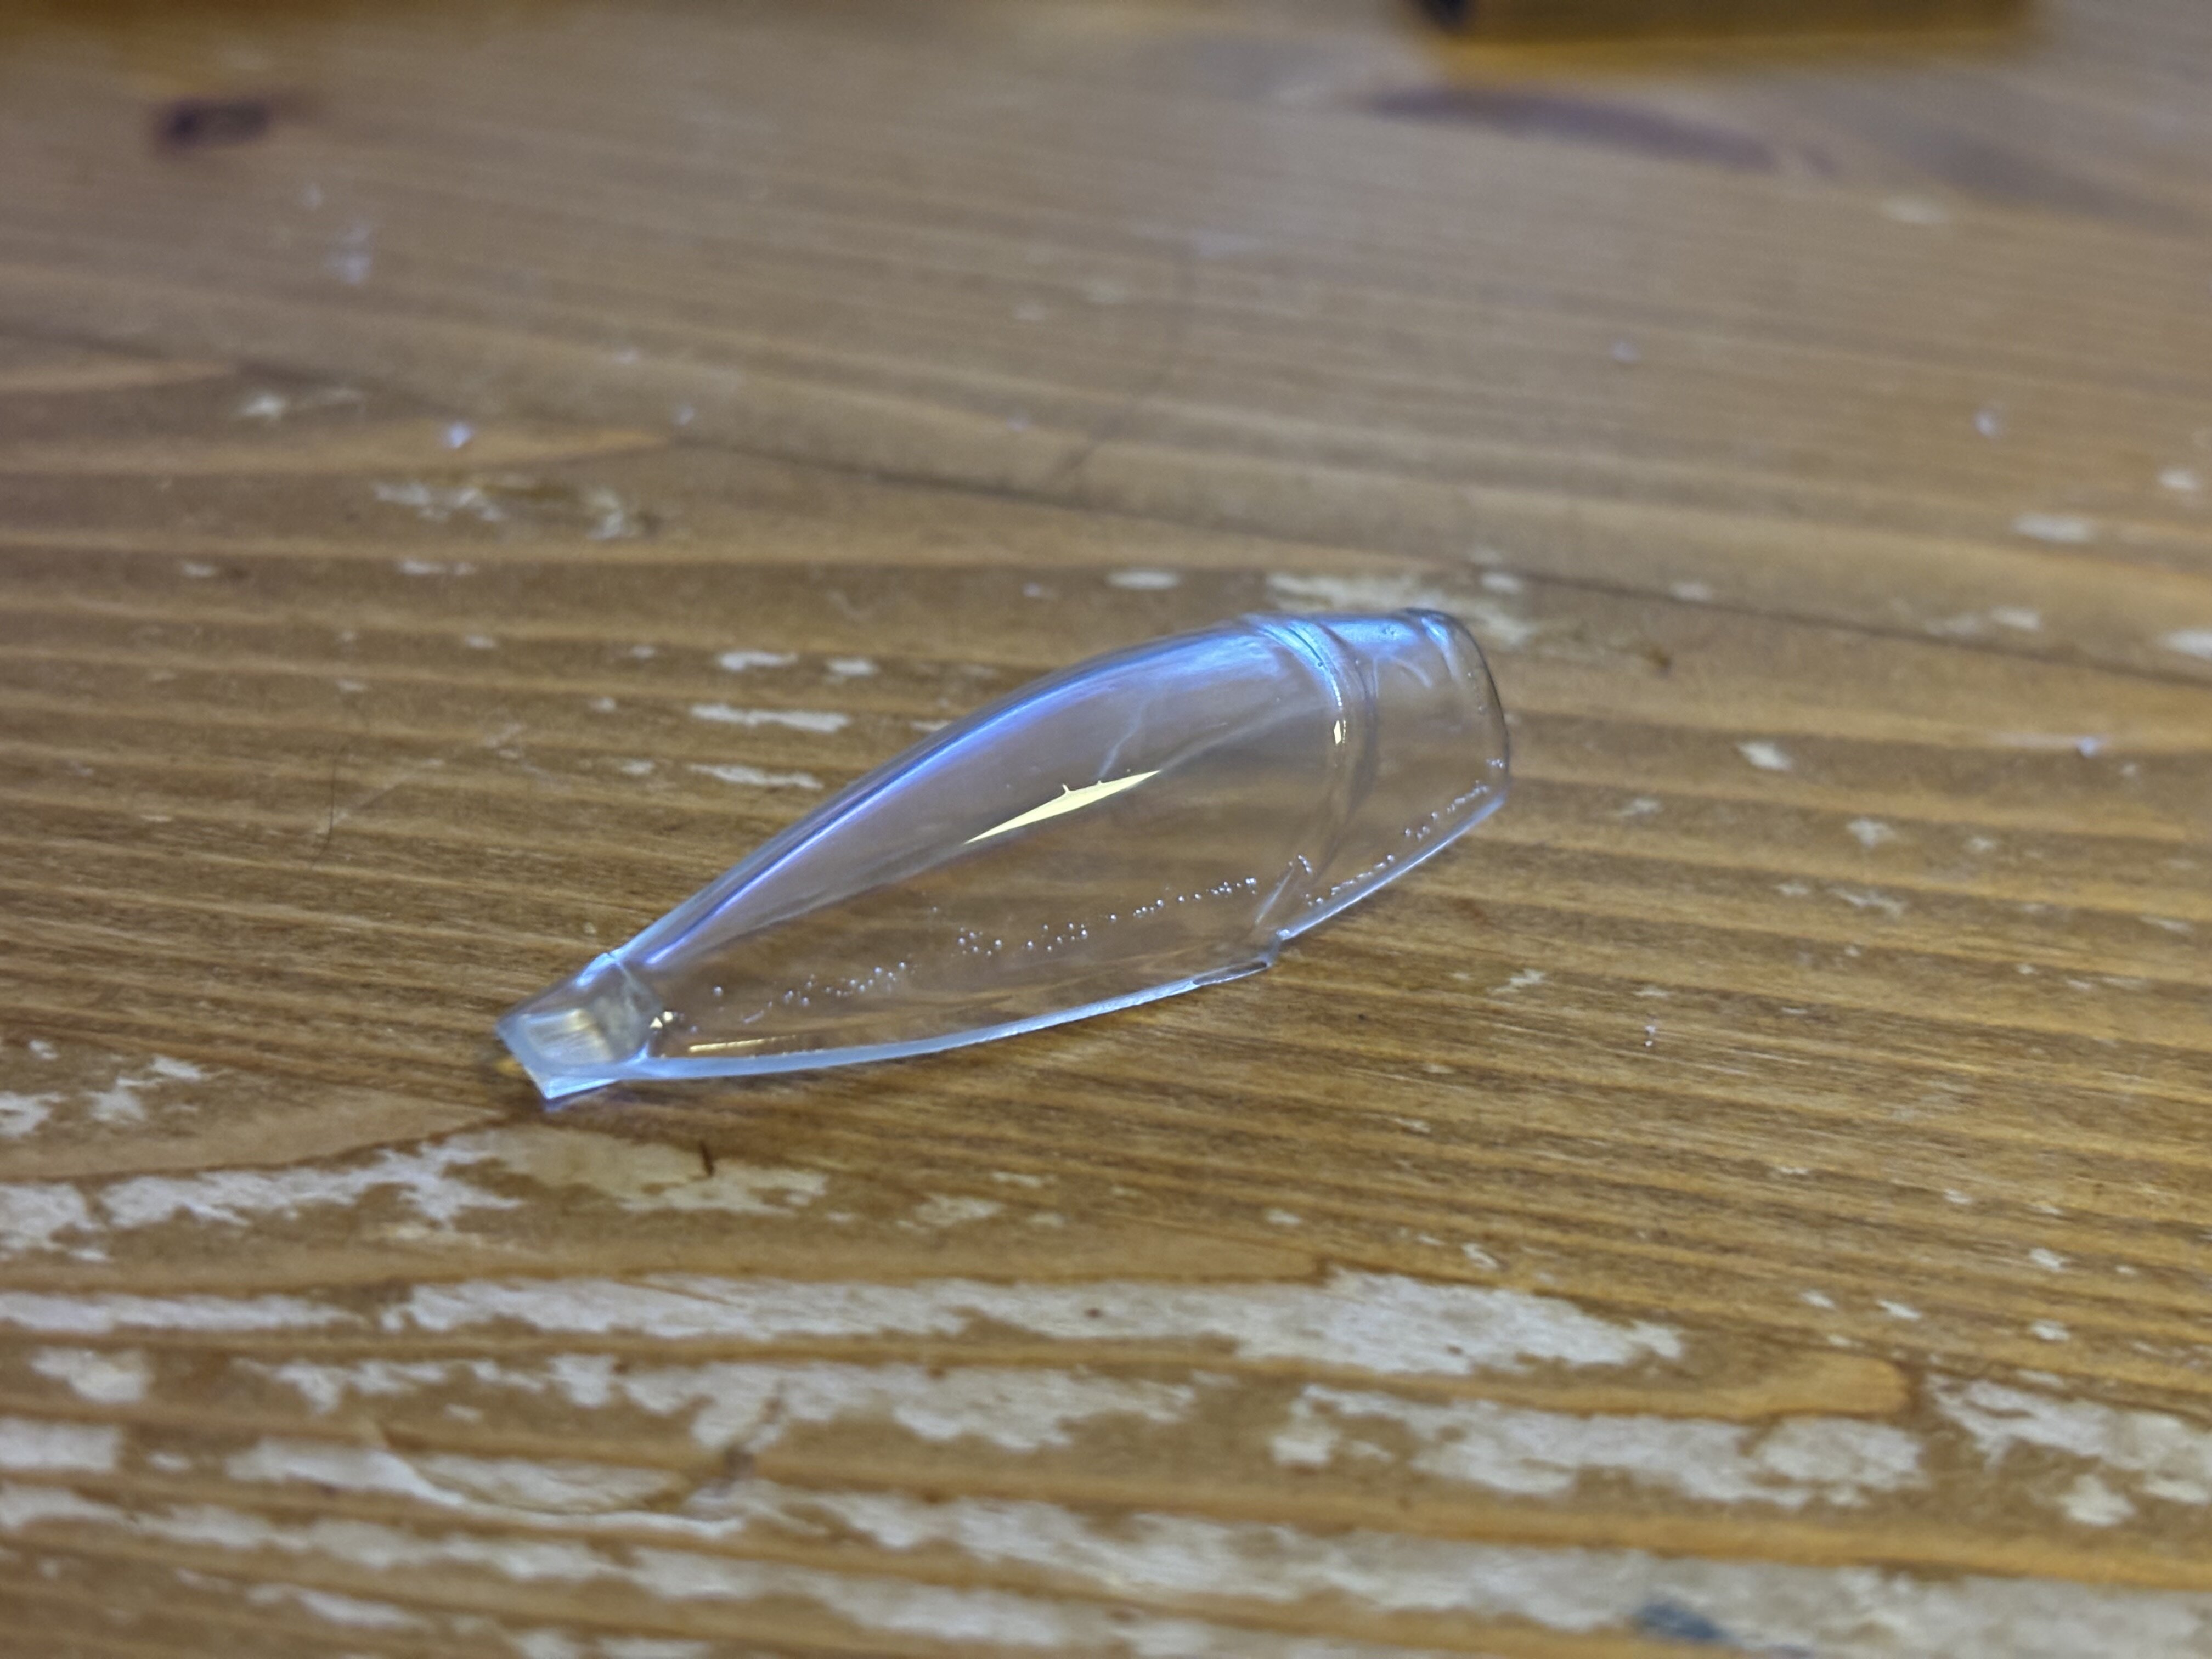
@MechTech Thanks! Floor polish haha. Yeah no, I was thinking more of actual polishing compound going from grid 2000 to grid 10k and stuff like that @Thom Ooooh yeah! Just to test, I printed another VF-9 nose, checking the fit and everything, and it works nicely. But as you can see, the canopy is rather "milky" and not full transparent. That is why I want to try with polishing compound, as dipping things in clear coat or polishing finish liquids doesn't work out fully.
-
Yeah… just tried it. Polishing kinda git me there, but I would need proper compound now, as the resin would just suck up my toothpaste. I gave it the clear coat treatment- et voilá: unfortunately, the print went bad. There are some bubbles in the resin. This one was for testing anyways
-
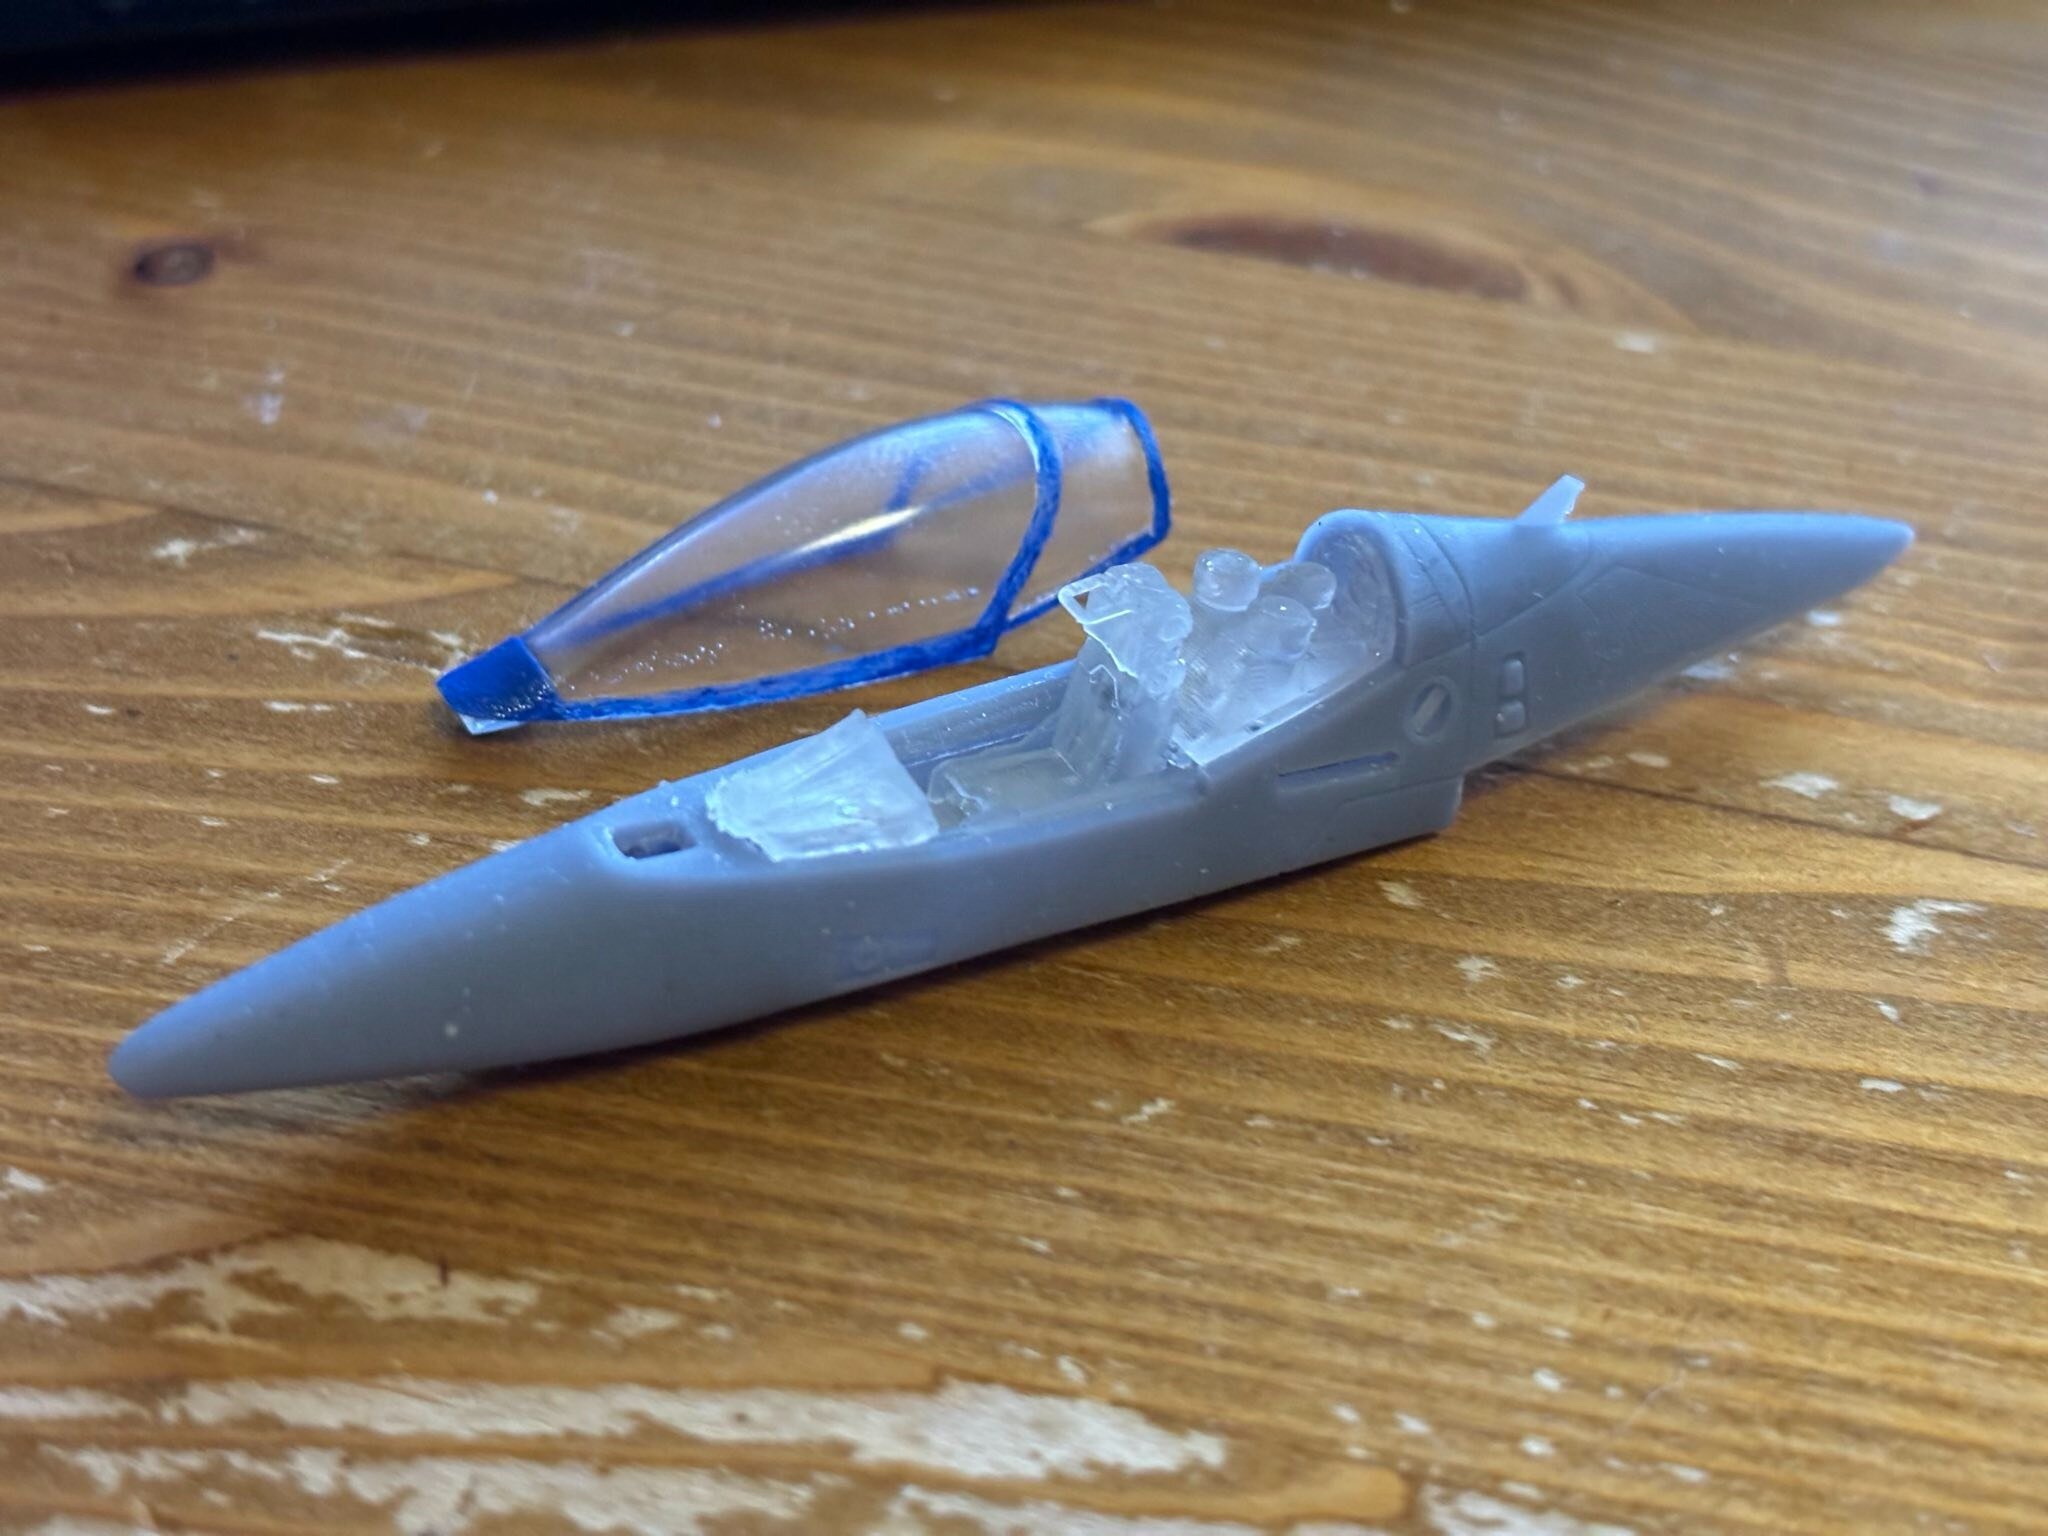
Thanks a lot! did some test printing with clear resin today. Printed the new cockpit pieces and the canopy. I think I need to polish the canopy. When still wet, it was clear and see through.
-
Almost looks like a 3D rendering, because auf the mirror surface.
-
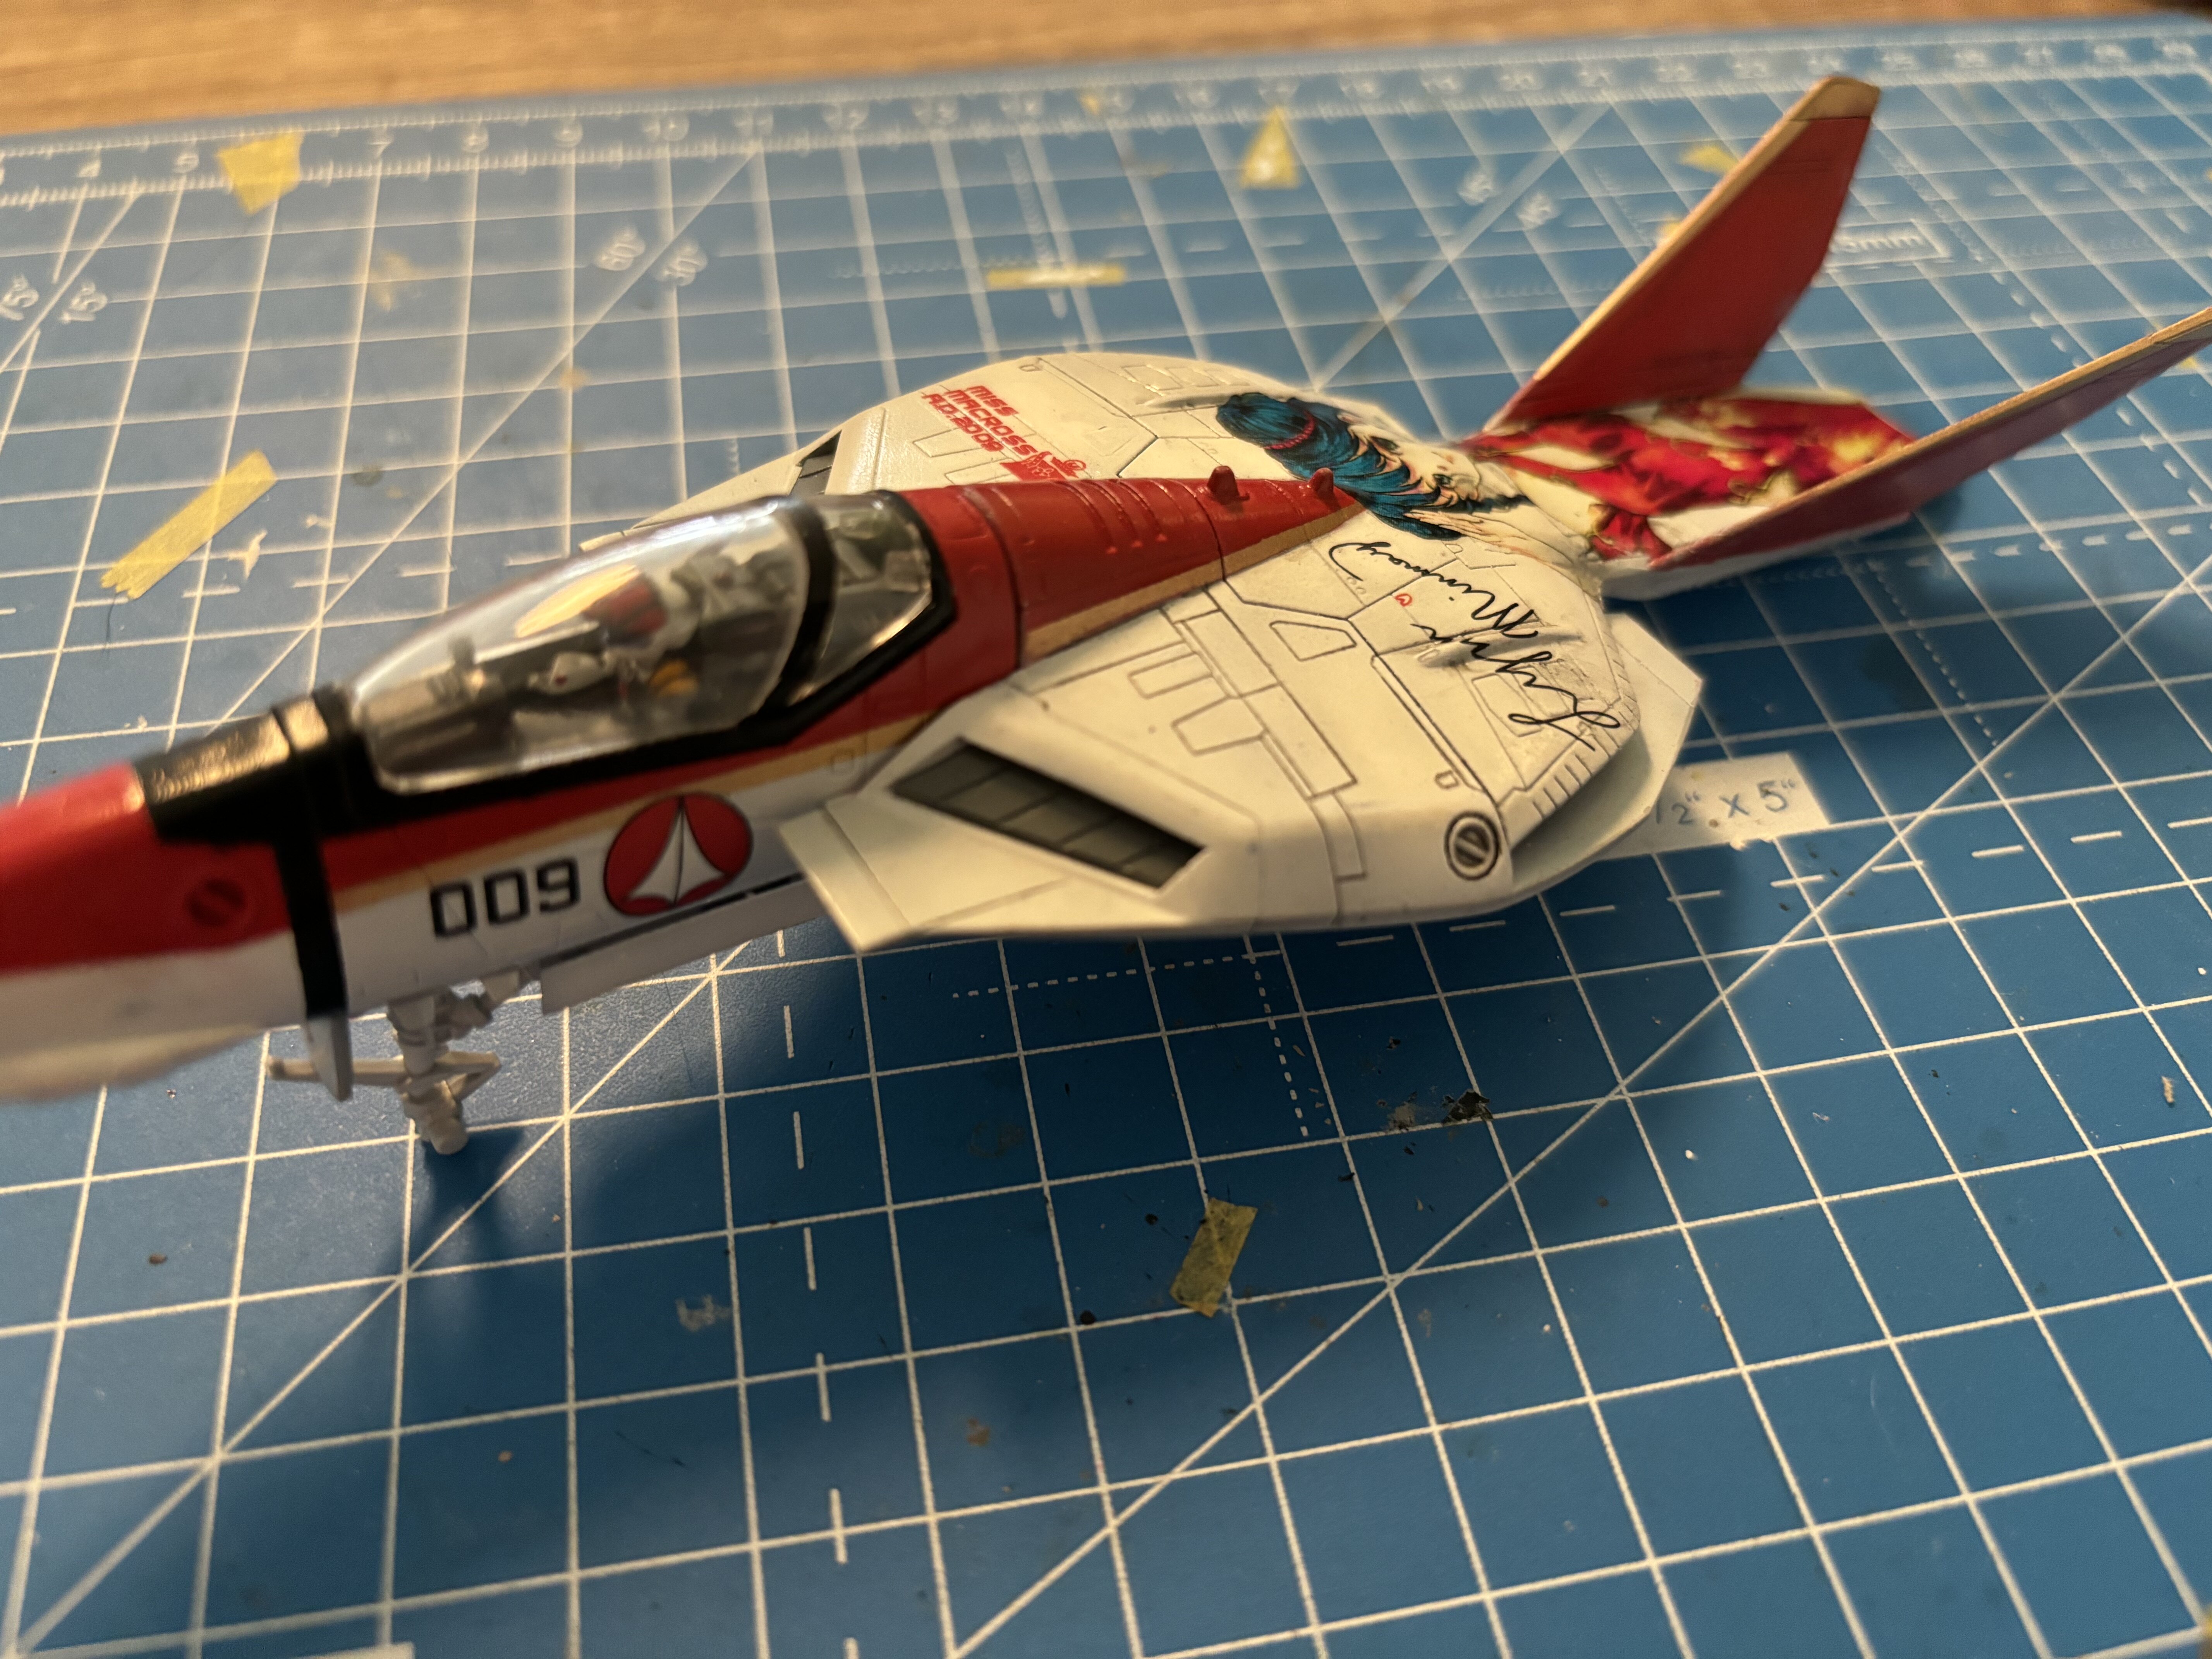
Finally got enough willpower to force myself to fix the botched panel lining on the plamax VF-1A. still looks a bit dirty but much better than before. I tried adding the wings and noticed that the main fuselage is scratching on the paint of the wings, so I had to carefully sand down the cover. Almost there… I want to 3D print better wheels for this one. The ones in the box are… not good. I did some priming on the Alto VF-171EX.
-
well ... technically you can do that, but you'd have to cut the canopy. I should do a little Mirage as well, so people can do this:

-
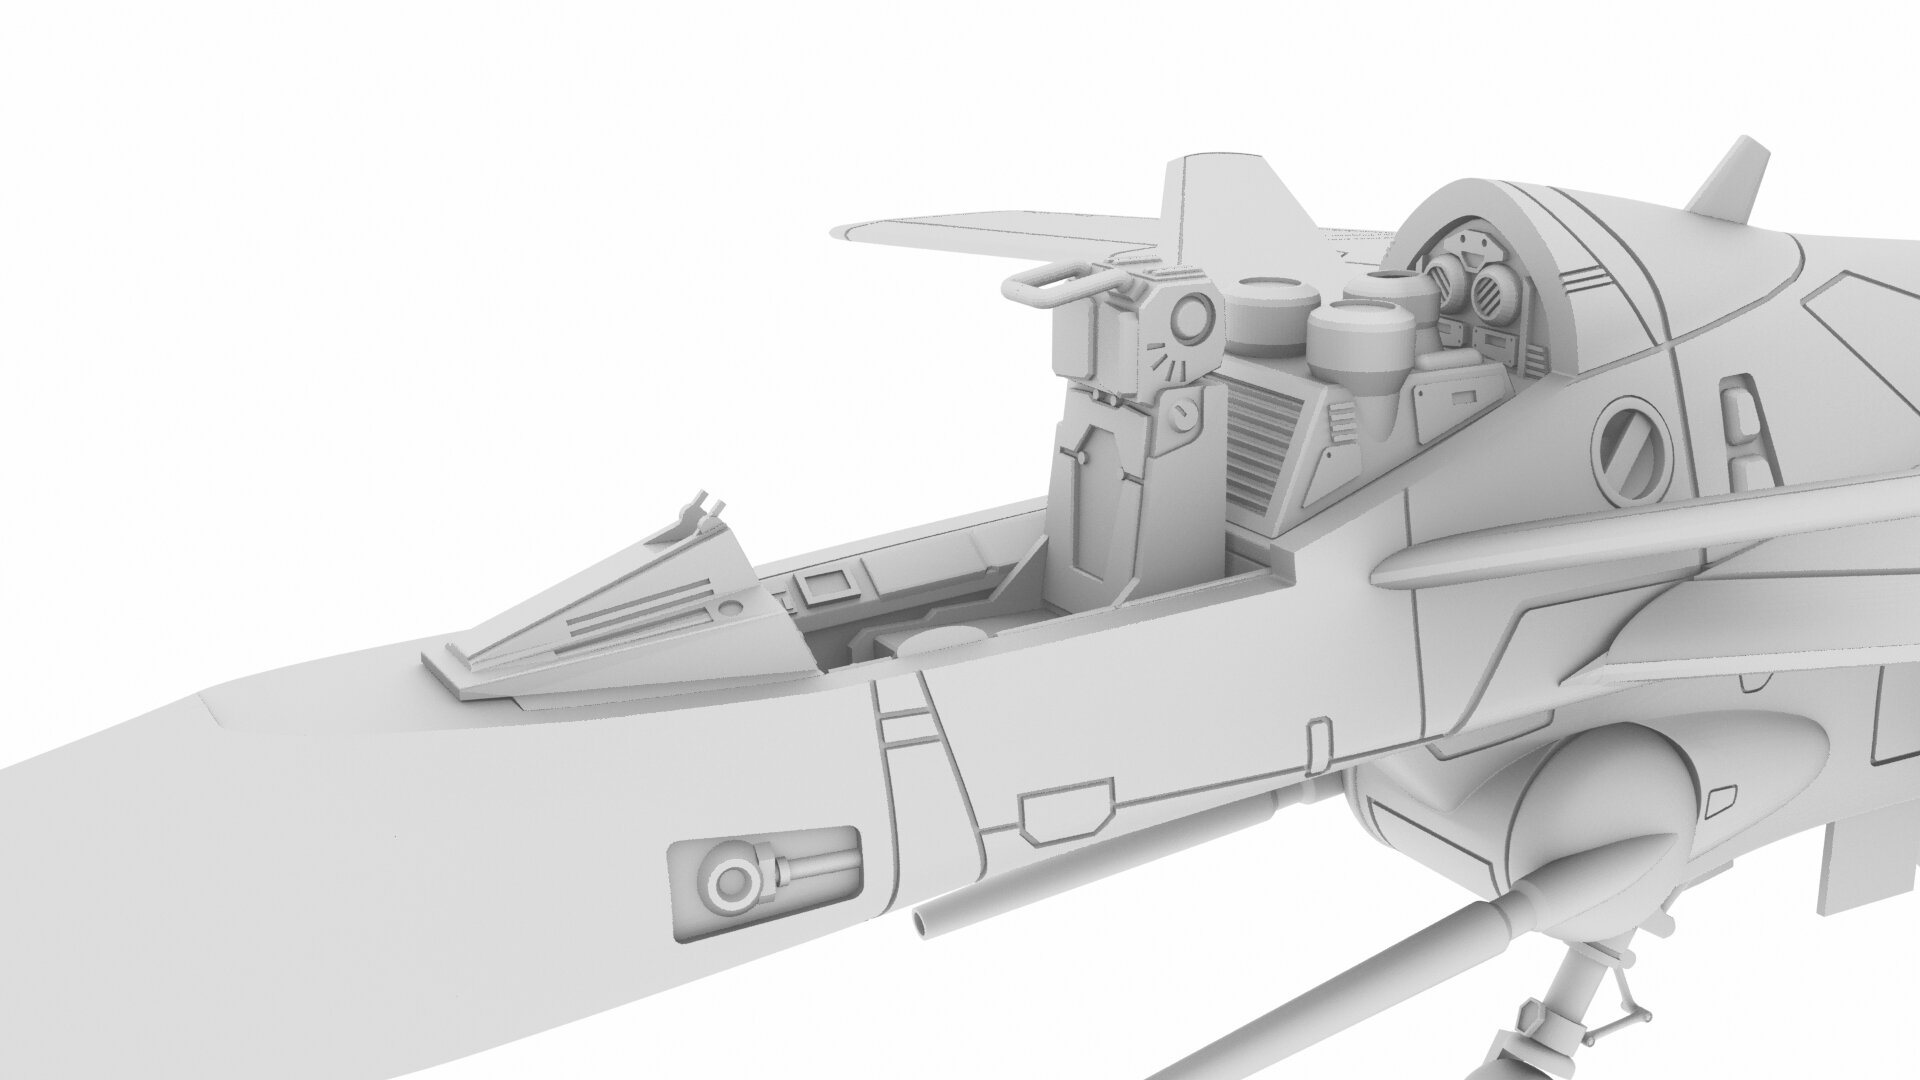
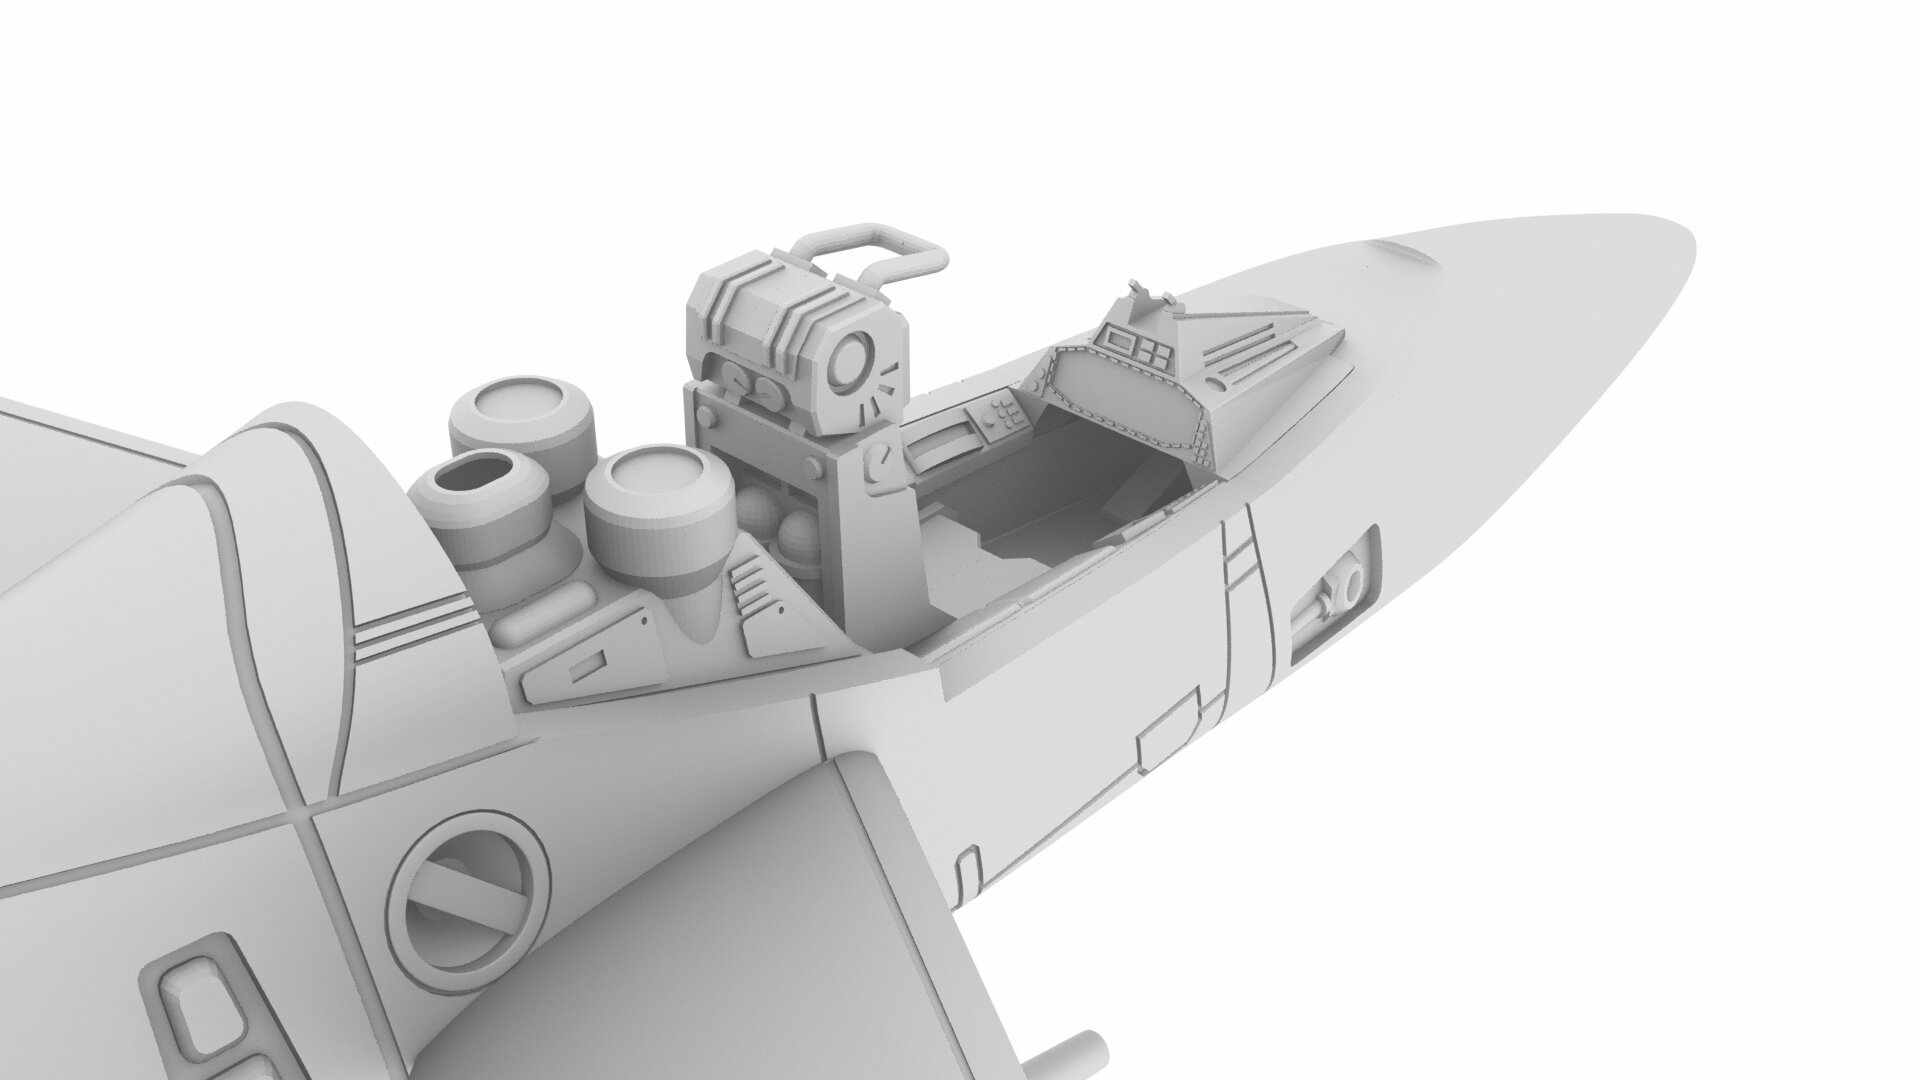
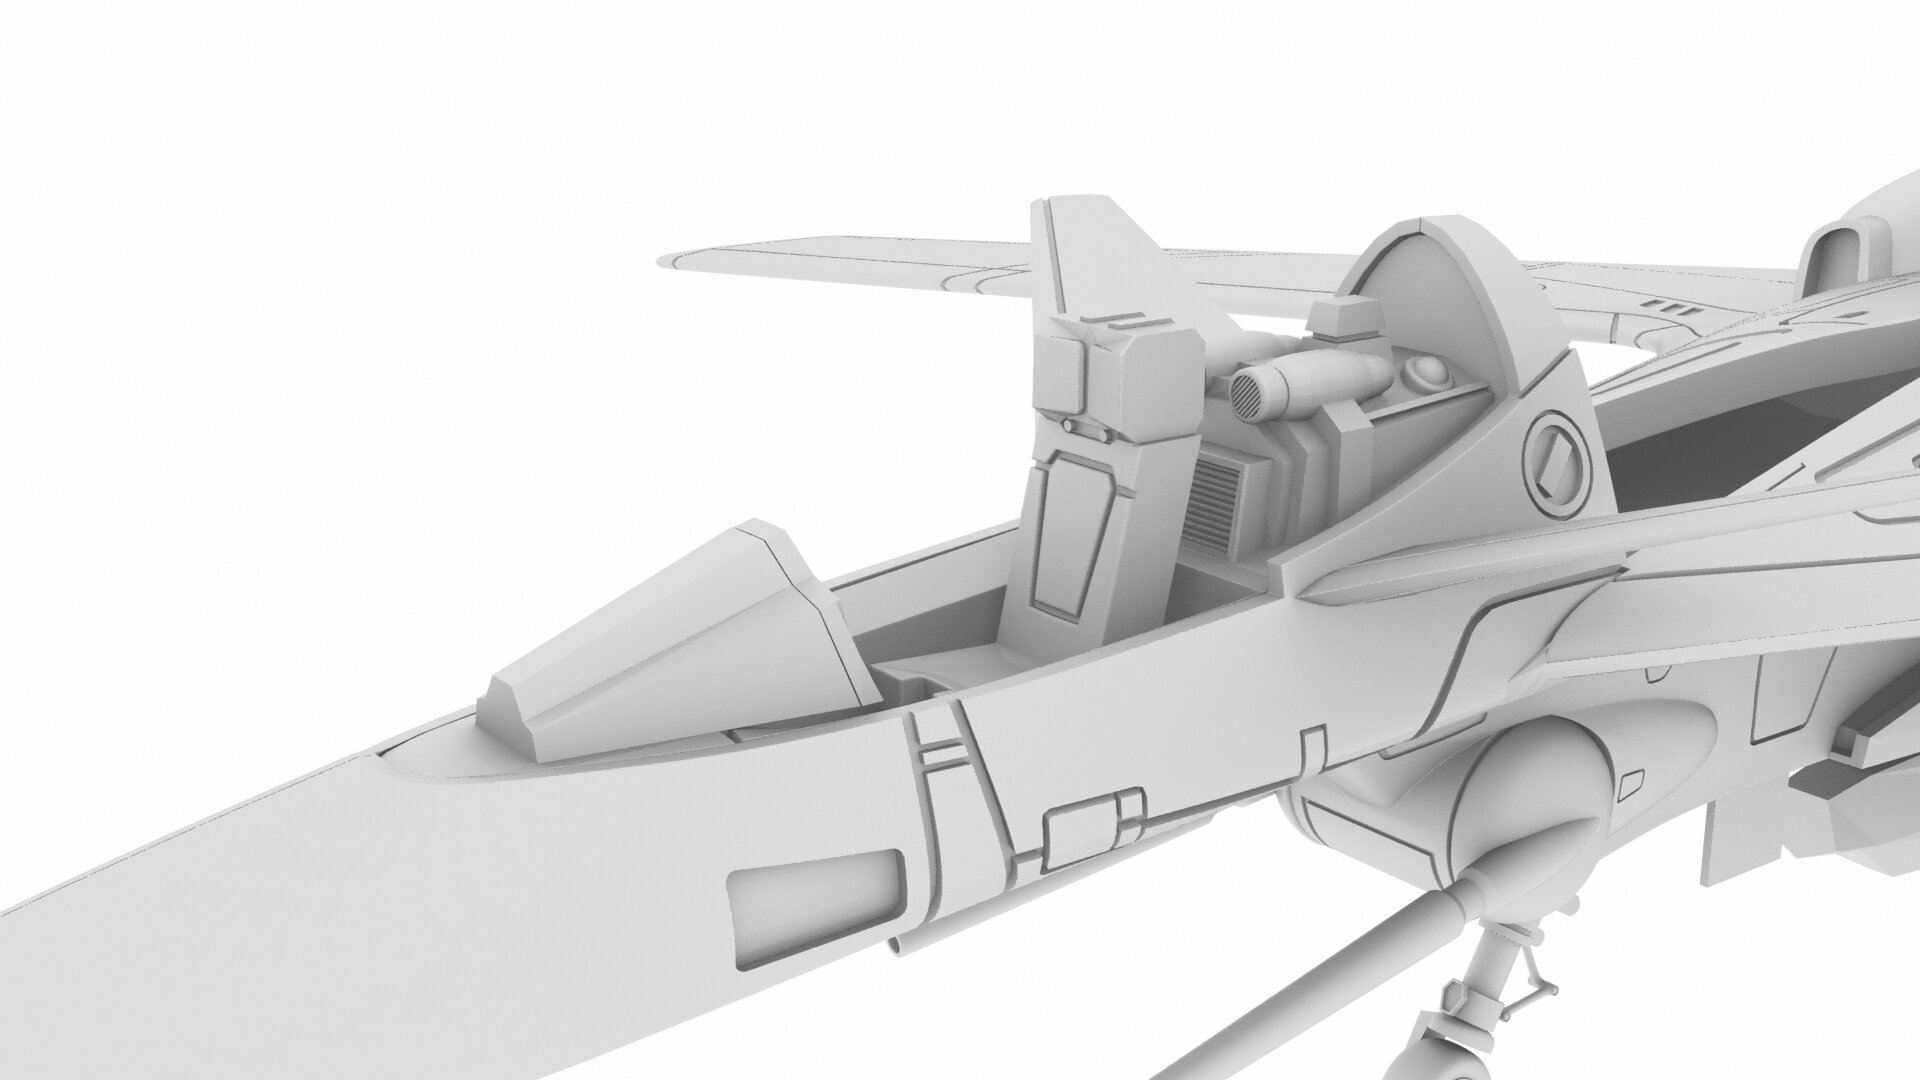
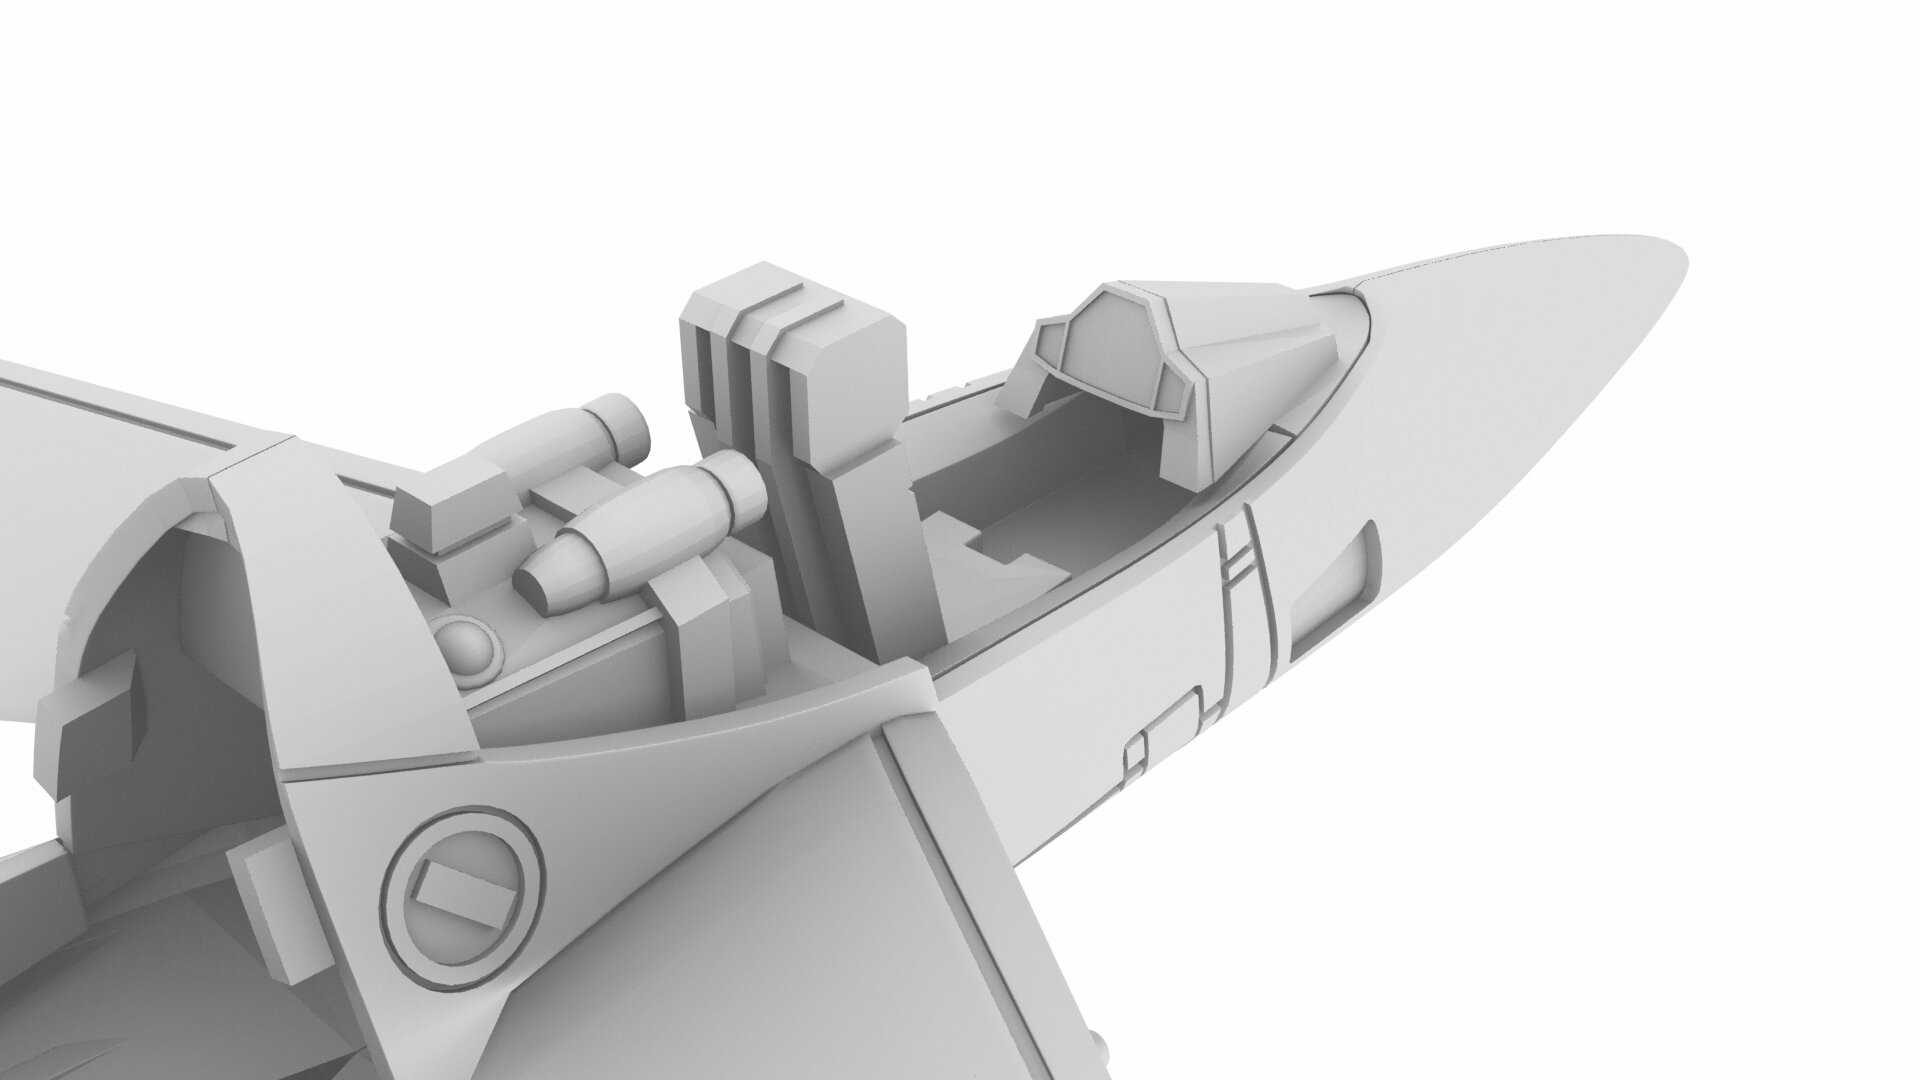
@wm cheng Awesome! I saw that thread about your VT-1 bakc in the days and wondered if you would ever finish that one Now to my stuff. I have been fiddling with my VF-9, not being ultra happy with the cockpit interior. Especially the panels weren't that good. Just be aware, there is basically little to no stuff about the the insides of the VF-9 cockpit except for what we can see on the VF-9 line art of the whole jet, and some stuff from the beginning of the Macross M3 intro, where things are kept rather vague (everything is just super dark). In my first version I was aiming to get something that kind of looks like the VF-1 cockpit and a bit VF-11. It wasn't too detailed though. Here are the renders of the old cockpit interior. And now, the new one. I was going more into the VF-11 direction and was looking at the macross delta stuff with Mirage in the cockpit of Mirias VF-9 during that short sequence. I didn't went as detailed as I could, because a bunch of the stuff is just too small to print properly. The main thing: I am satisfied with it and can go on rebulding the next parts or building new parts. Sometimes, something is bugging me so much, I cannot continue without fixing it first.
-
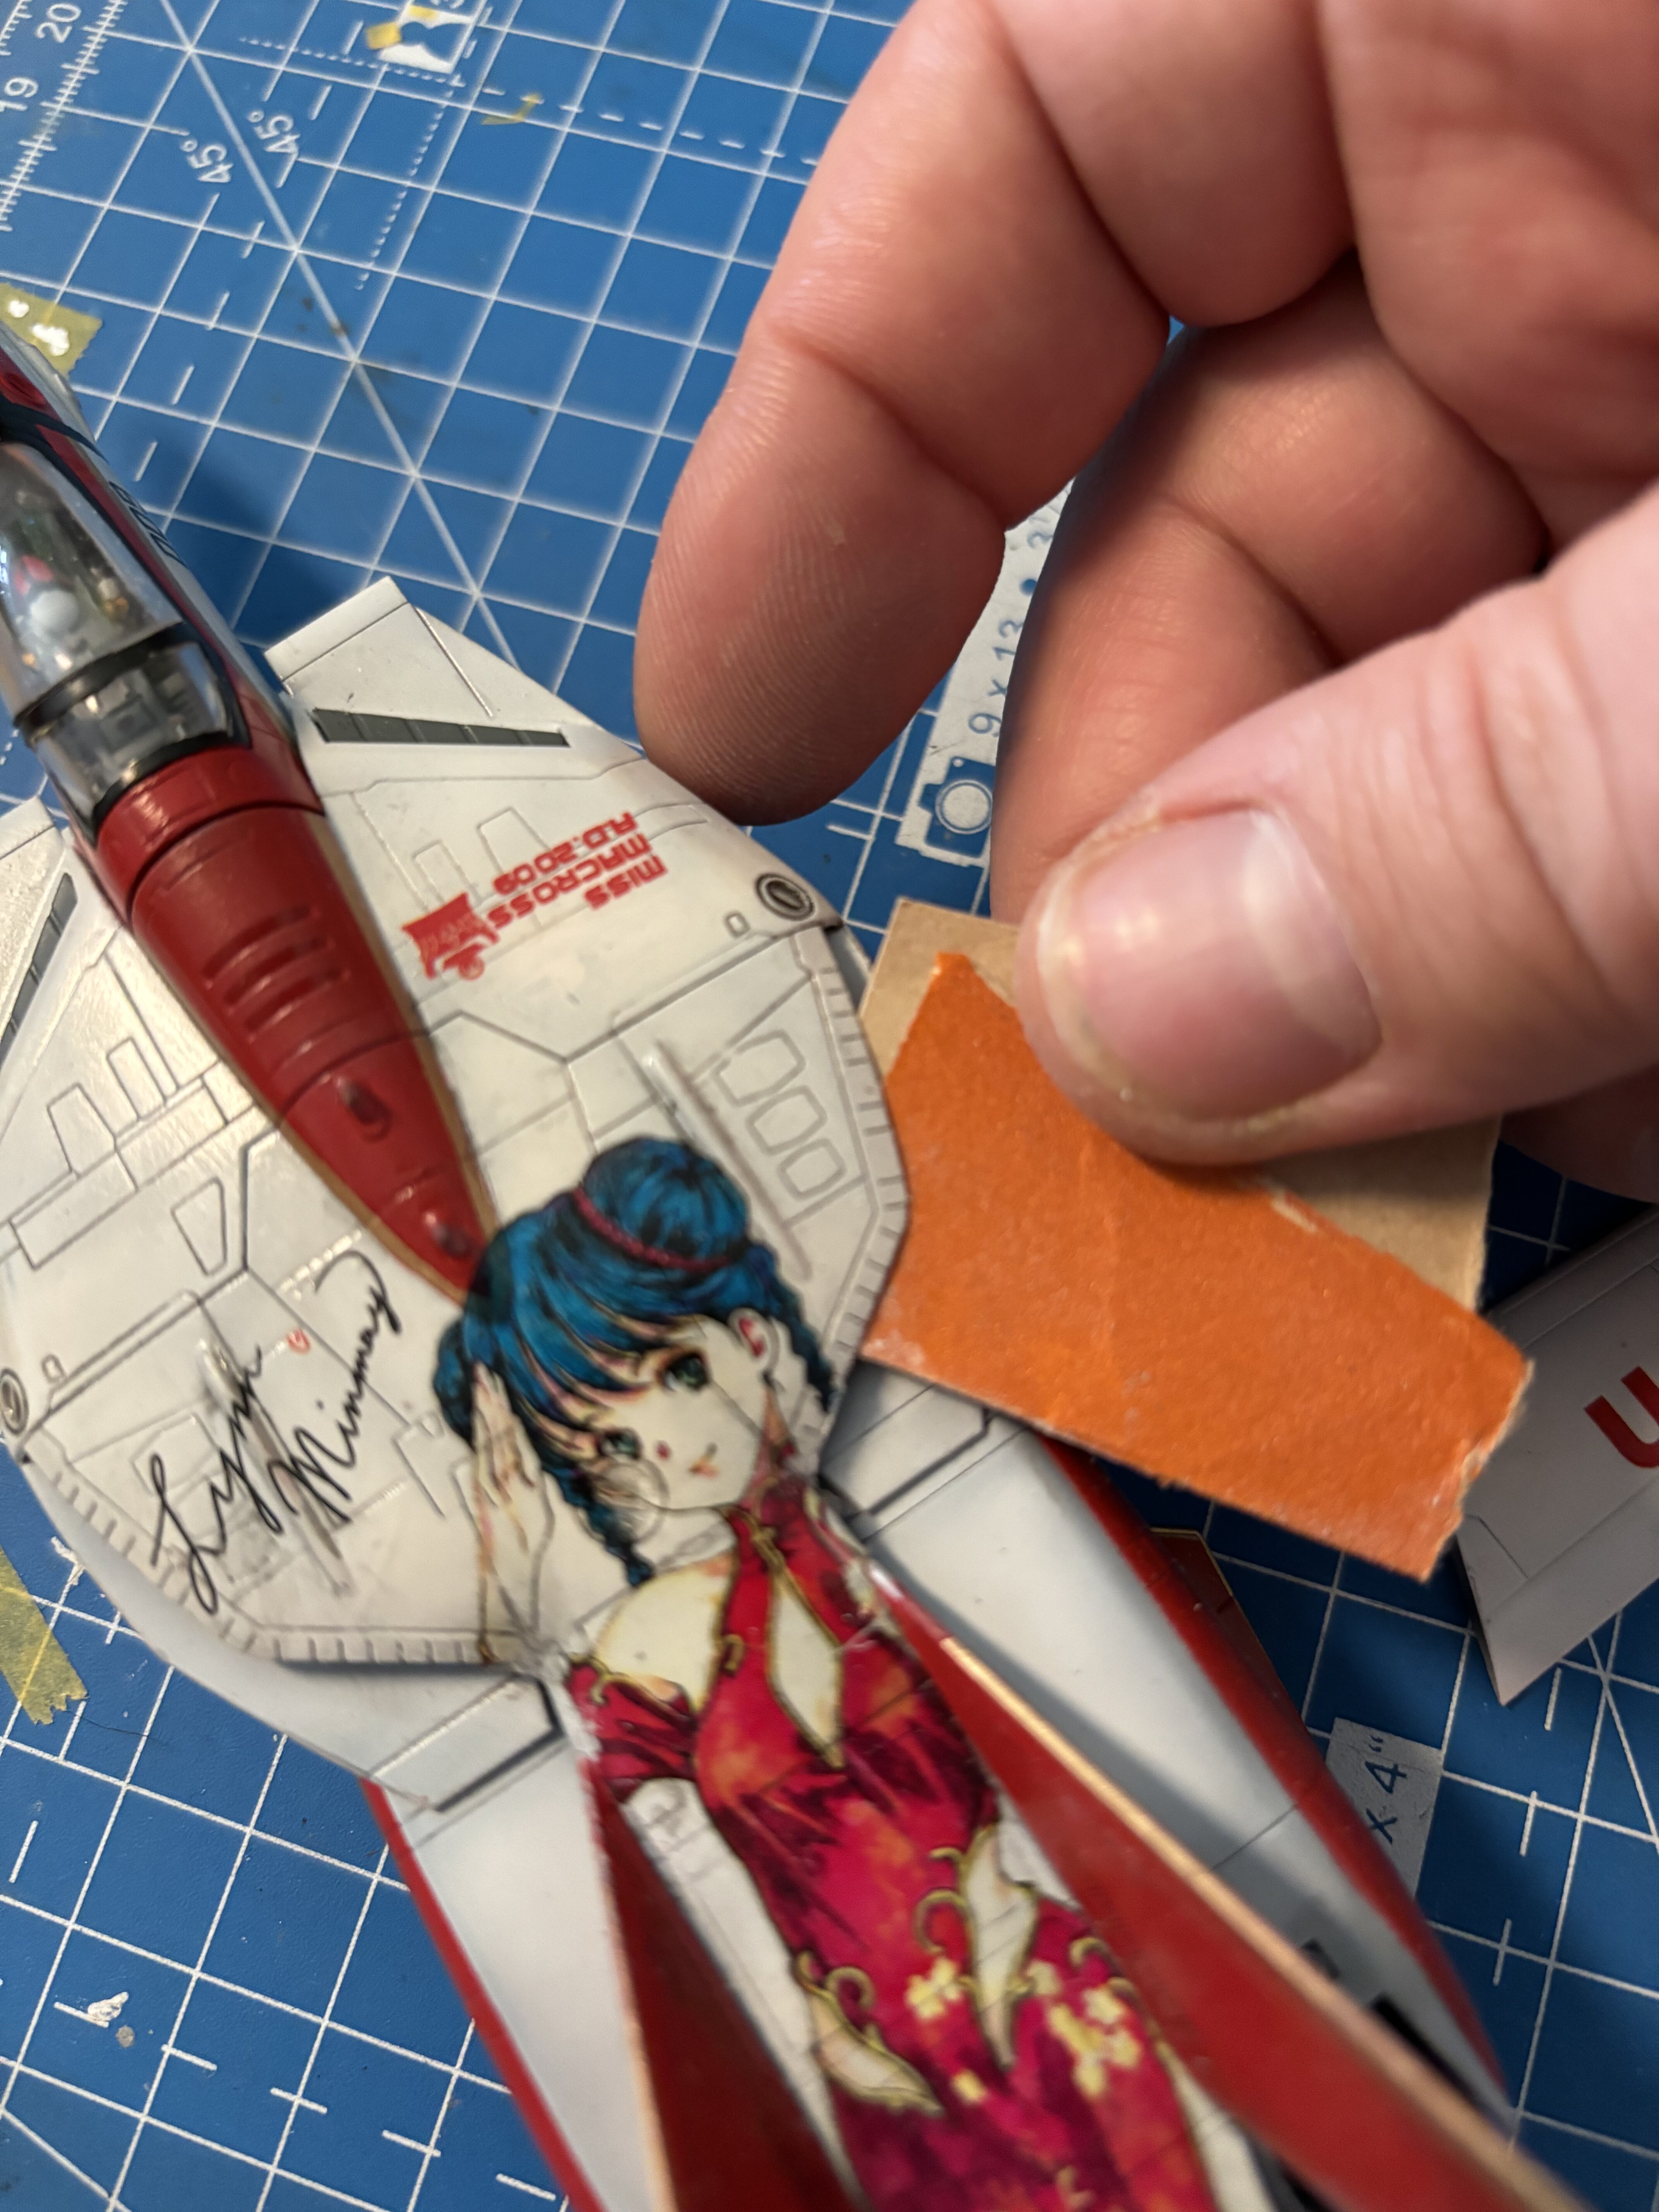
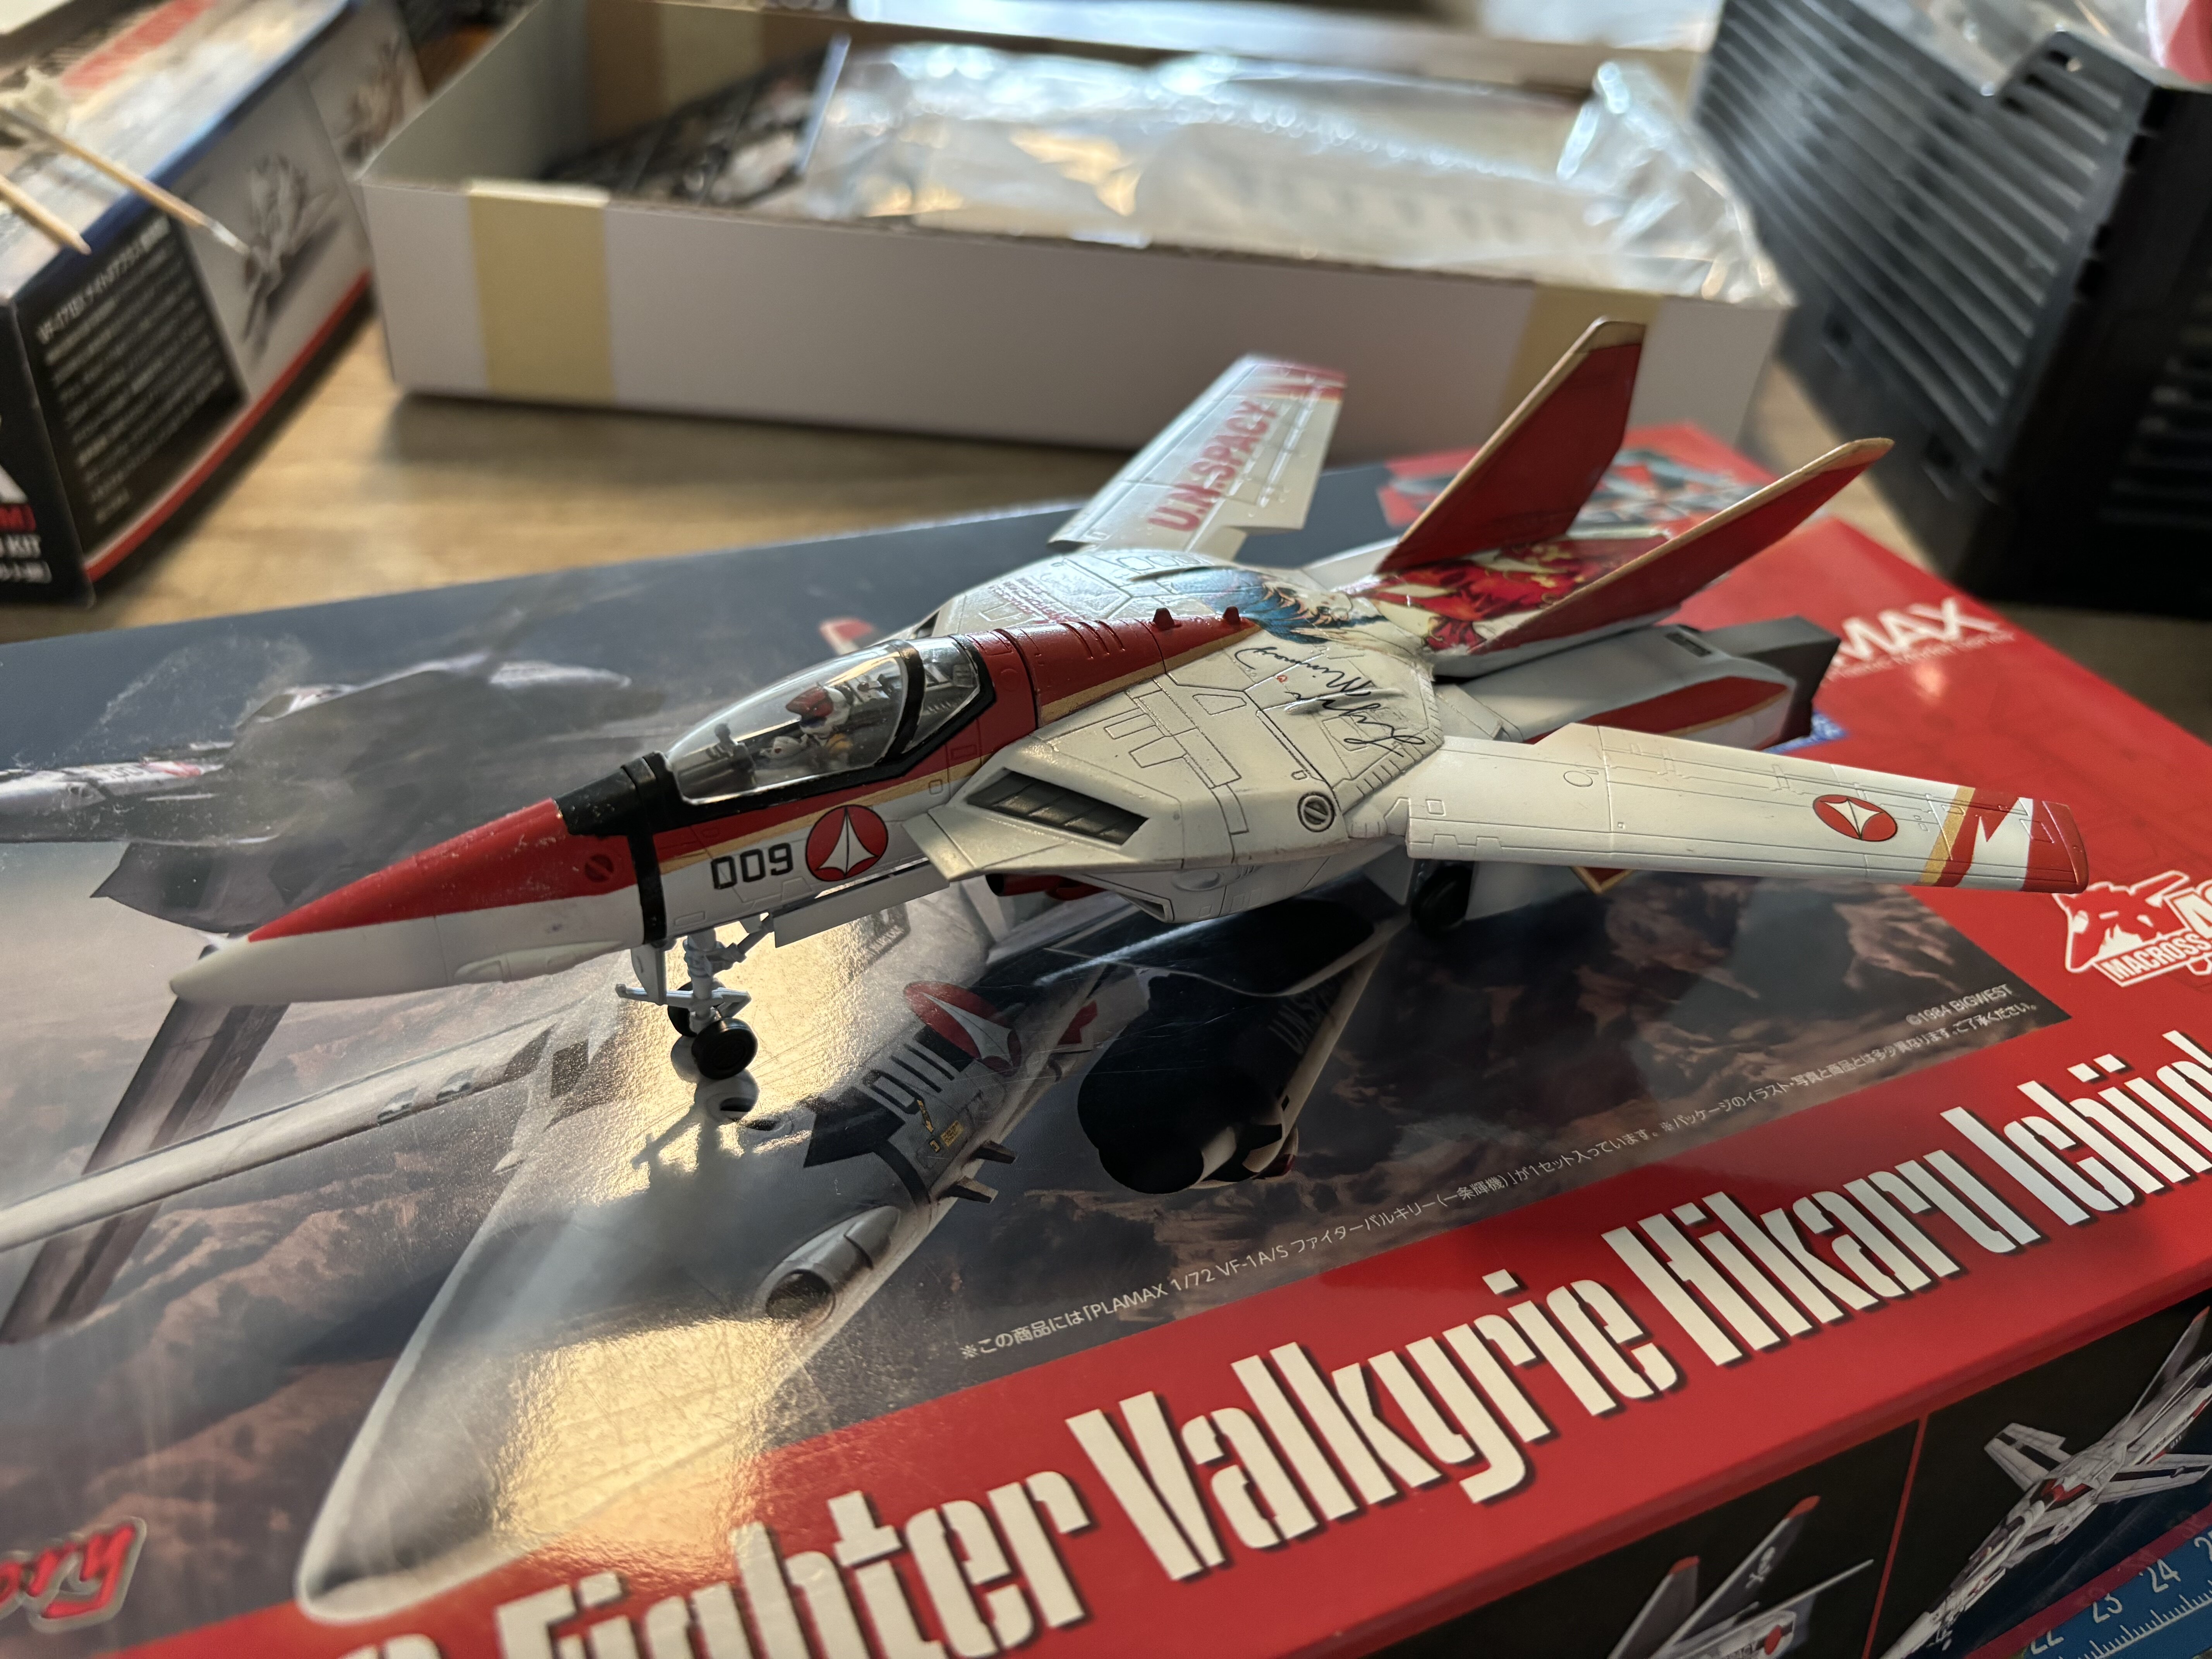
Just get the hasegawa decals. They work as well. I got a cheap sheet (~12€ including shipping) on eBay for the 2009 Minmay special VF-1.
-
In the words of the great Captain Kirk "I think he did a little too much LDS..."
-
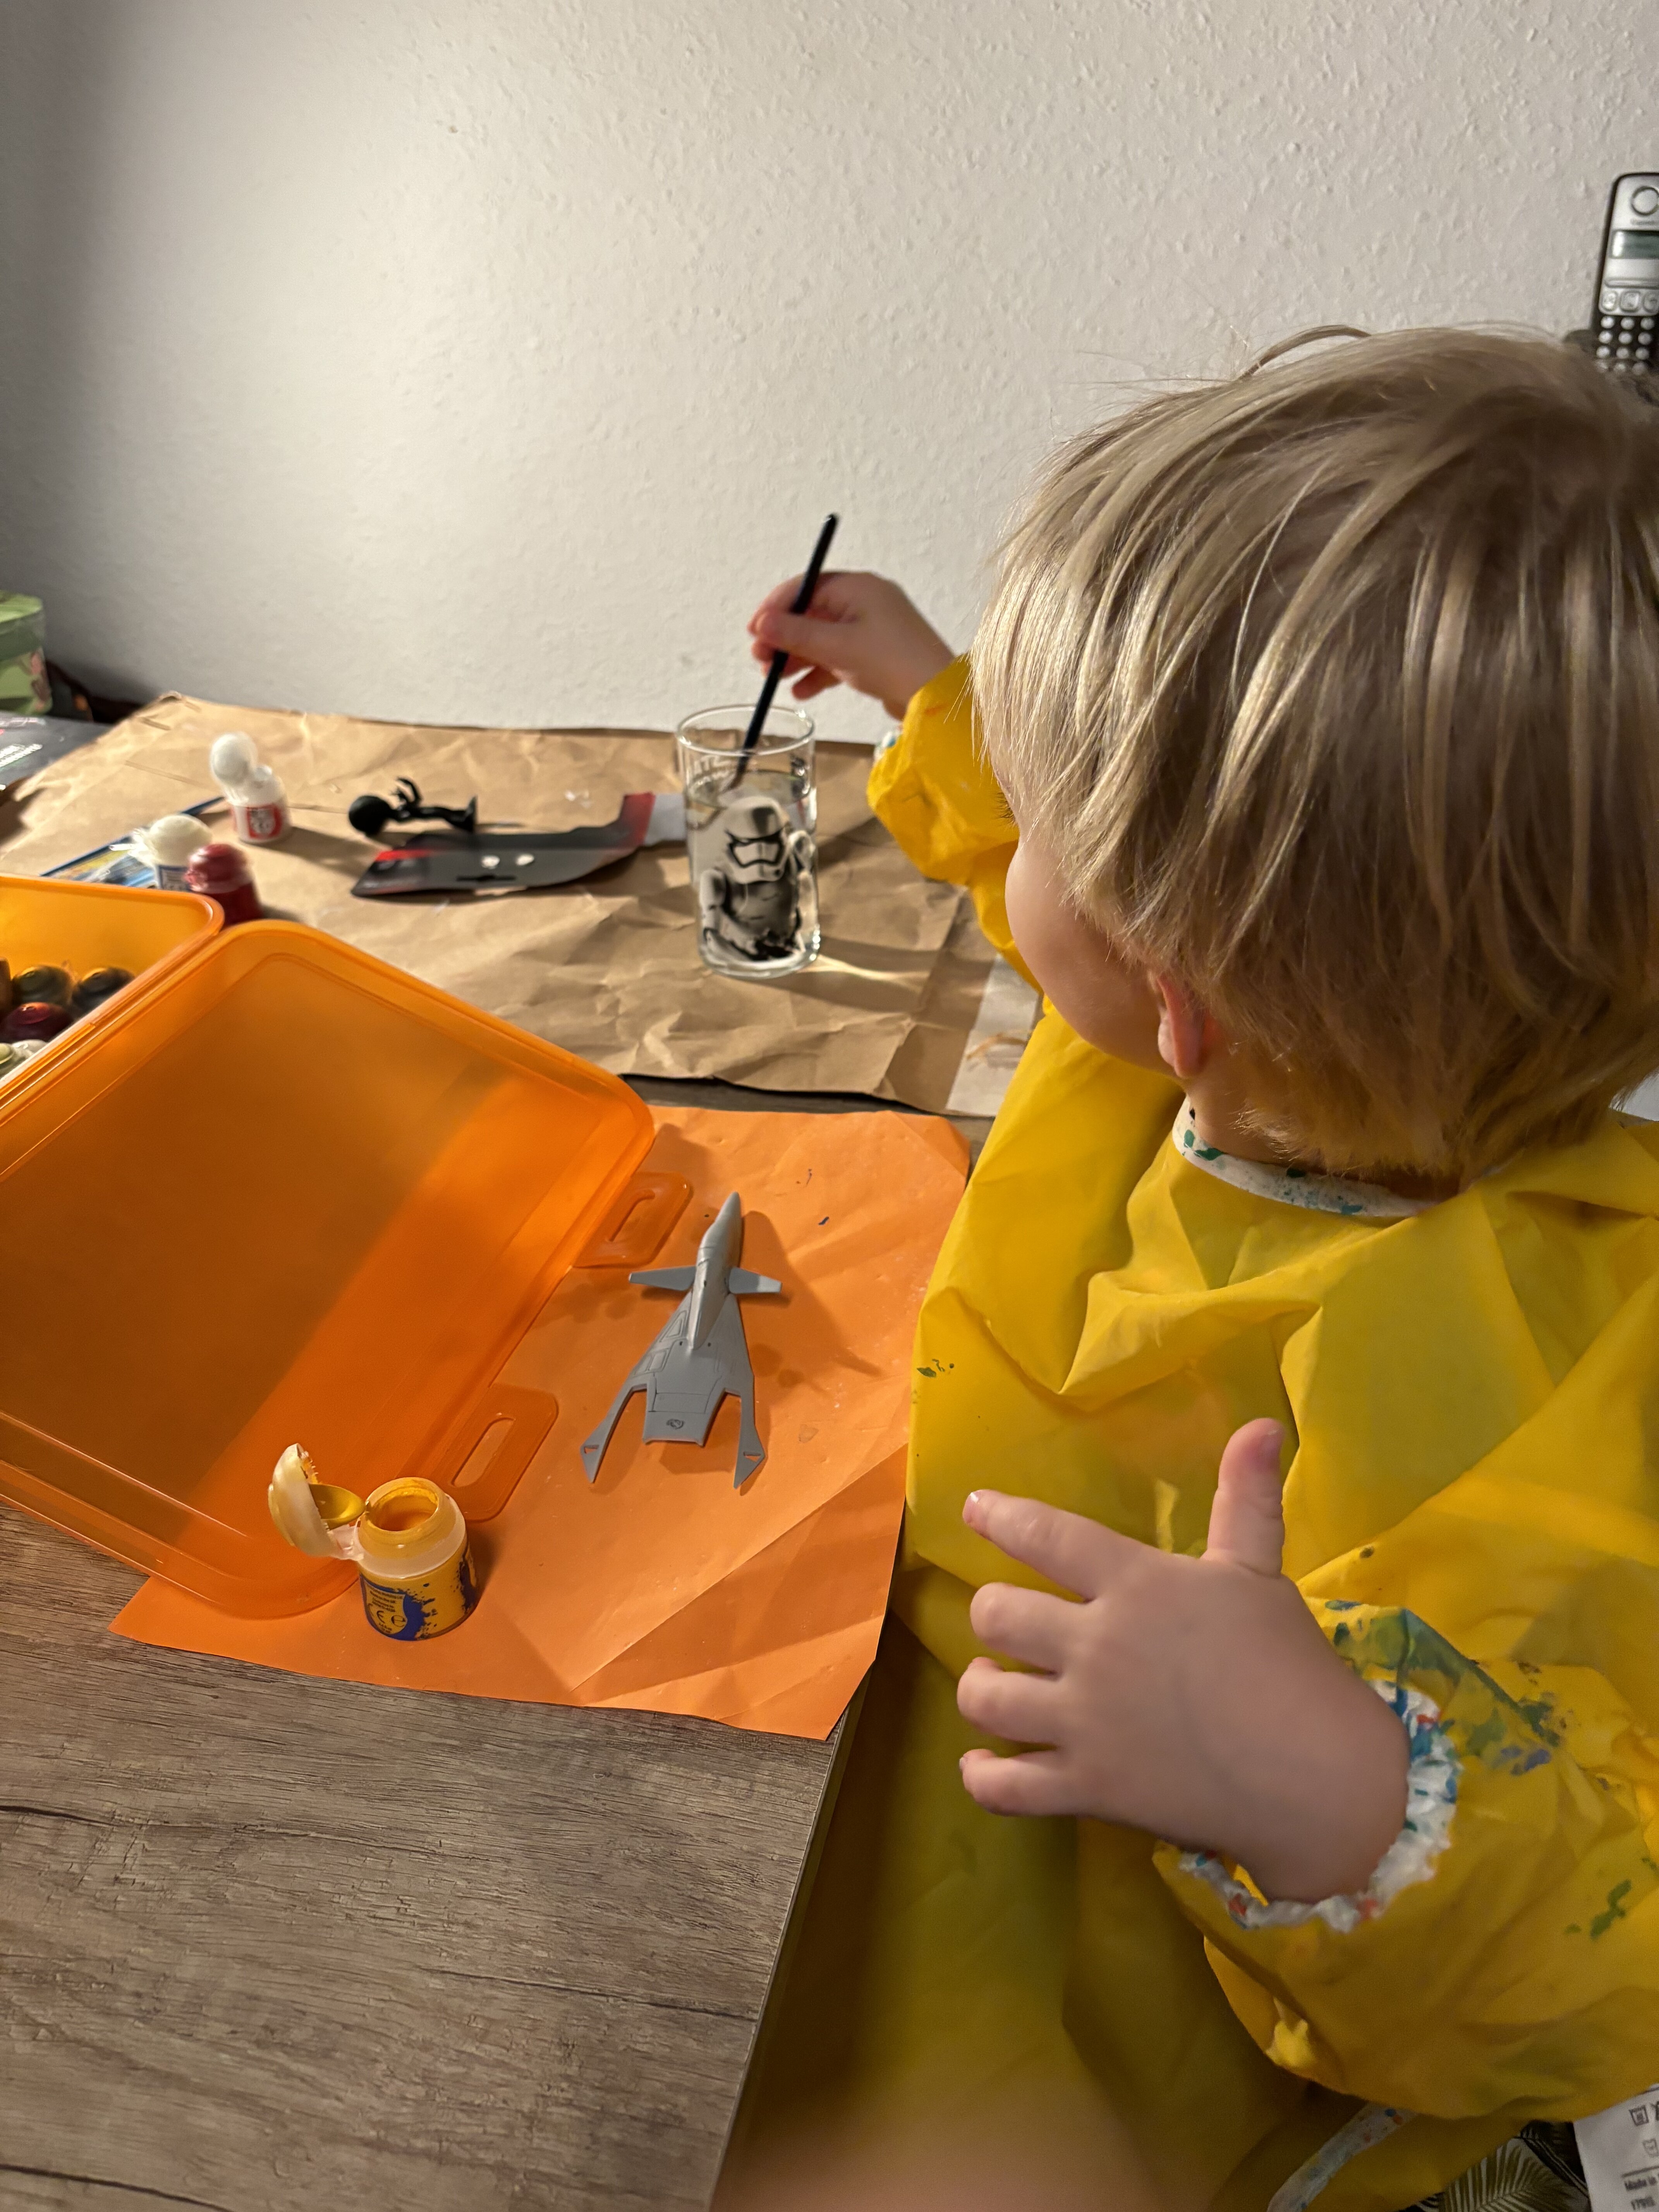
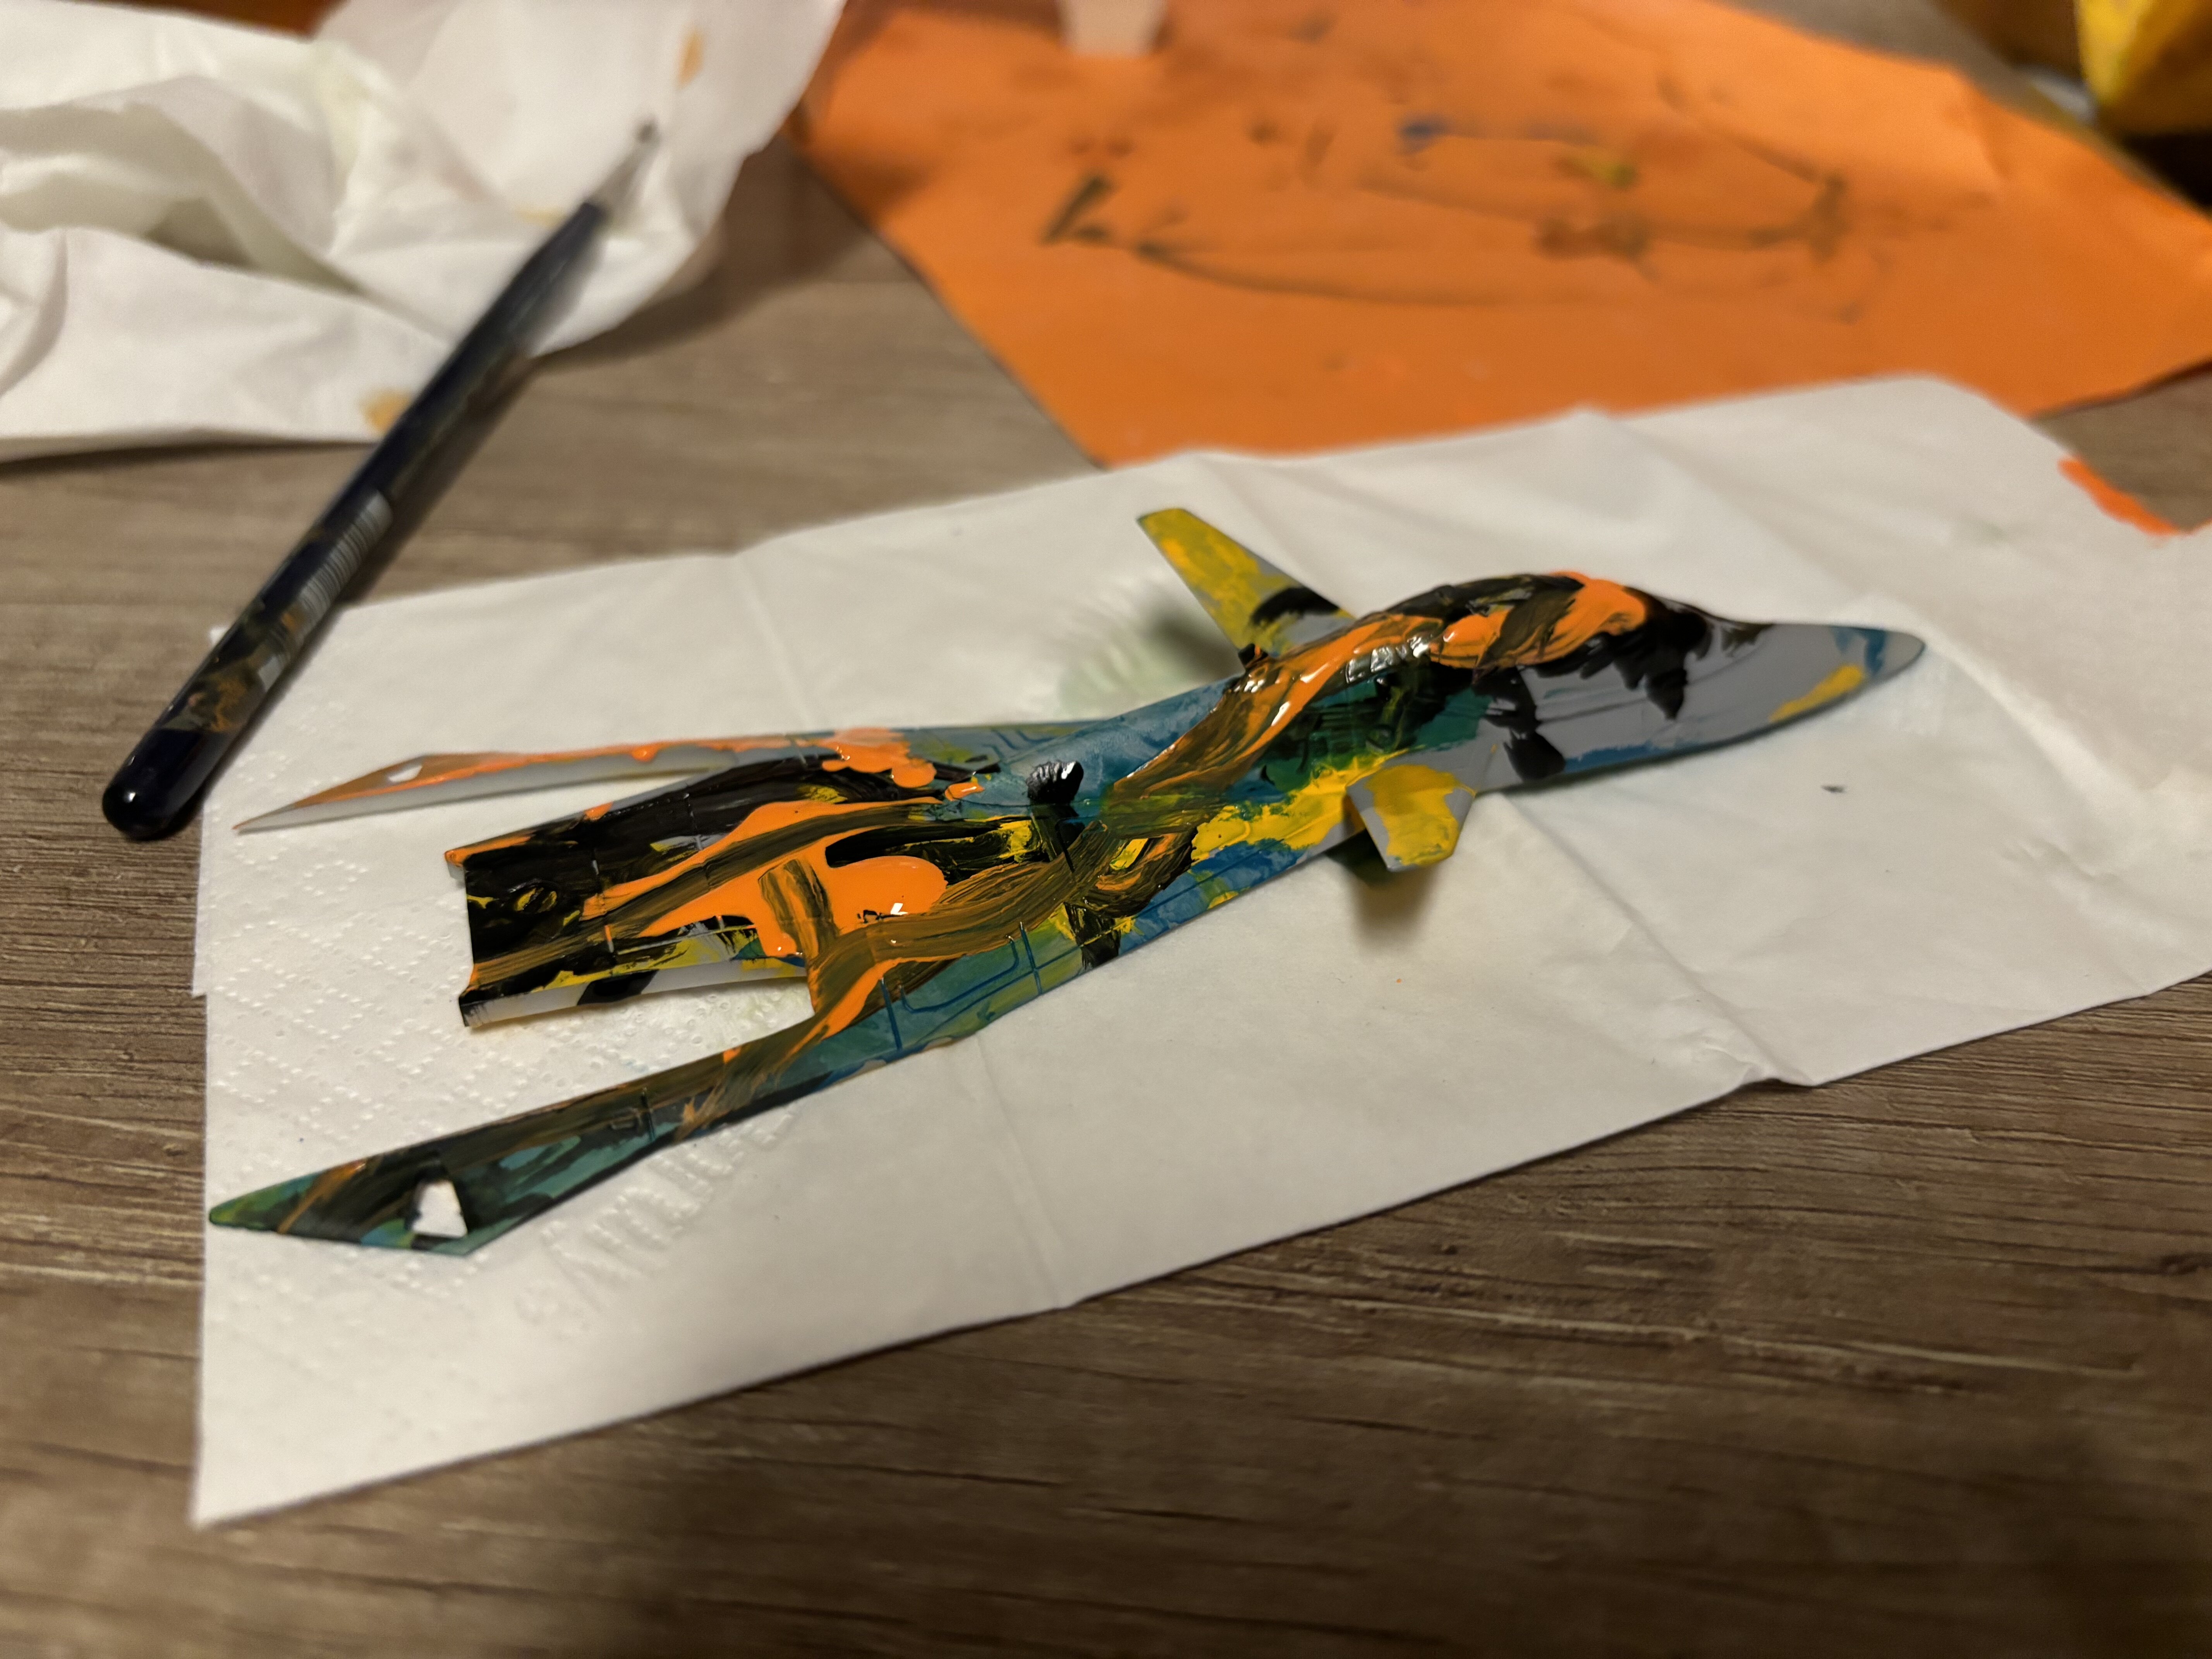
My wife 3d printed som toy stuff and is painting that stuff now. Kid wanted to paint something too. Gave him the VF-9 test print. interesting paint scheme…
-
That cat is actually eyeing the empty food bowl there ... XD
-
I think it is only the perspective.
-
VA-3M? Maybe?
-
yeah ... the orange canopy is a bit much, I agree. Maybe do a vacu-form copy of the canopy and use that? I'll stick with the orange one though. Looks nice
-

Advice wanted on building a Hasegawa VF-1 Fighter kit
Urashiman replied to SteveTheFish's topic in Model kits
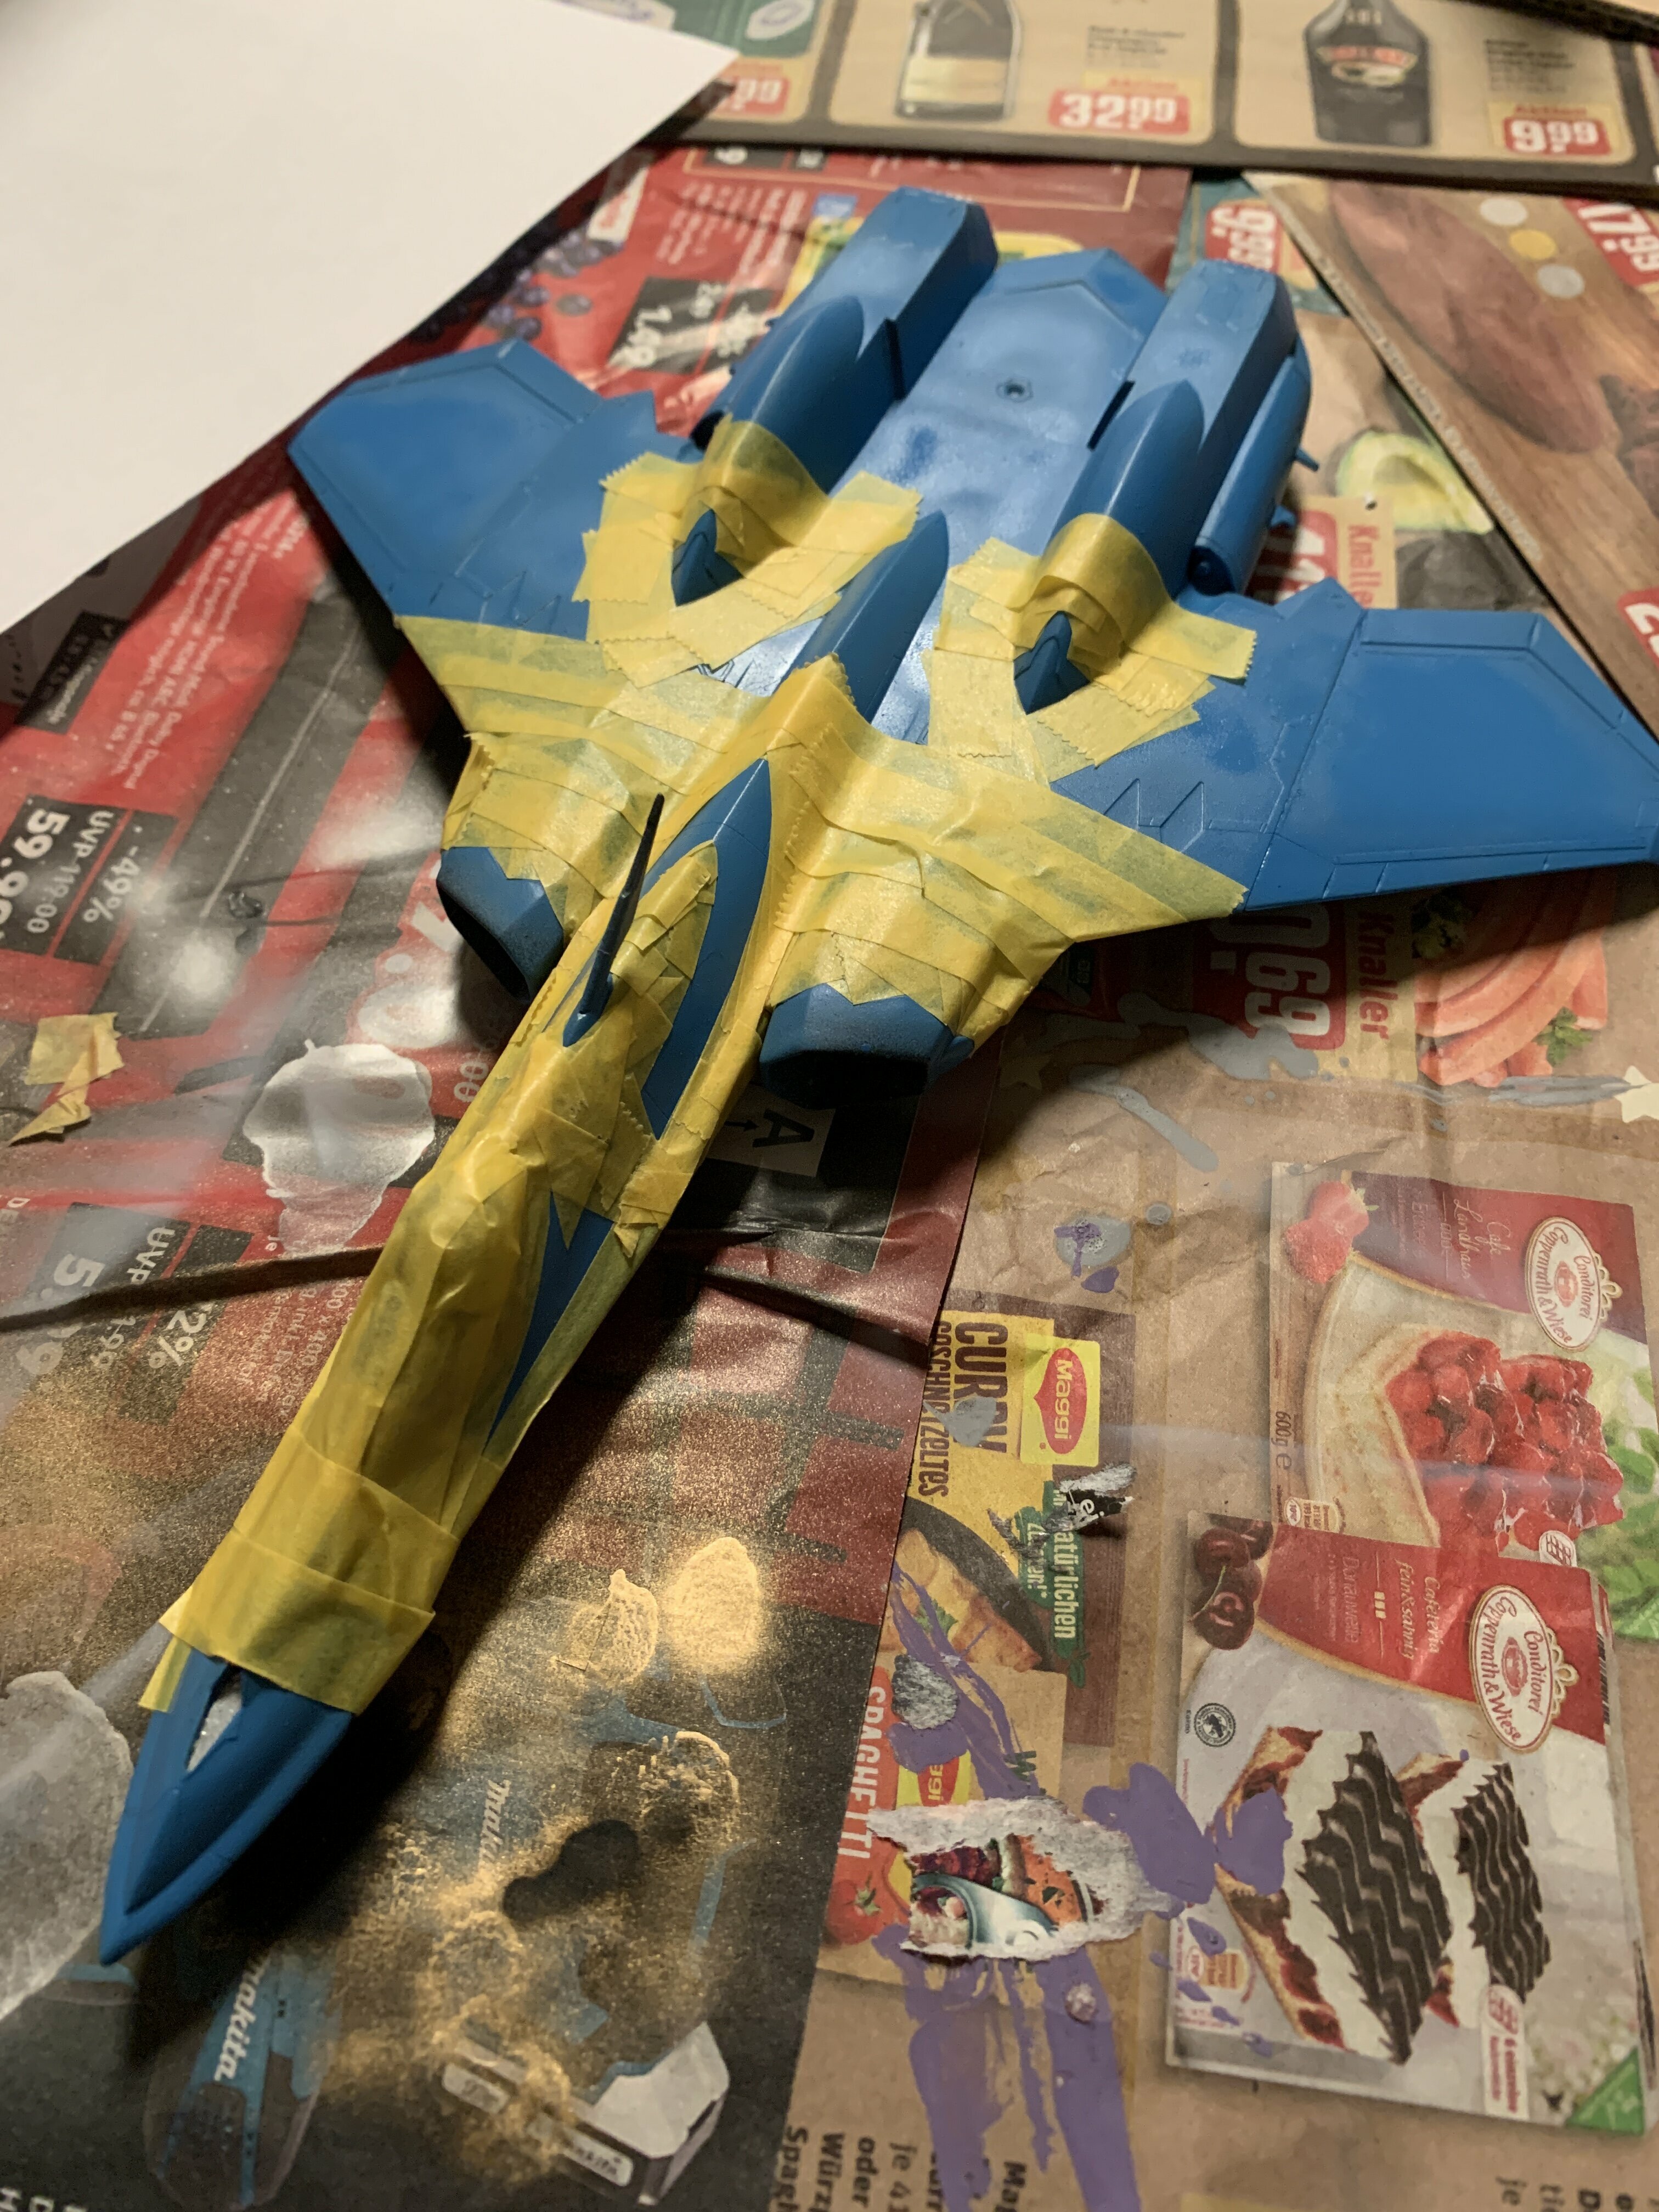
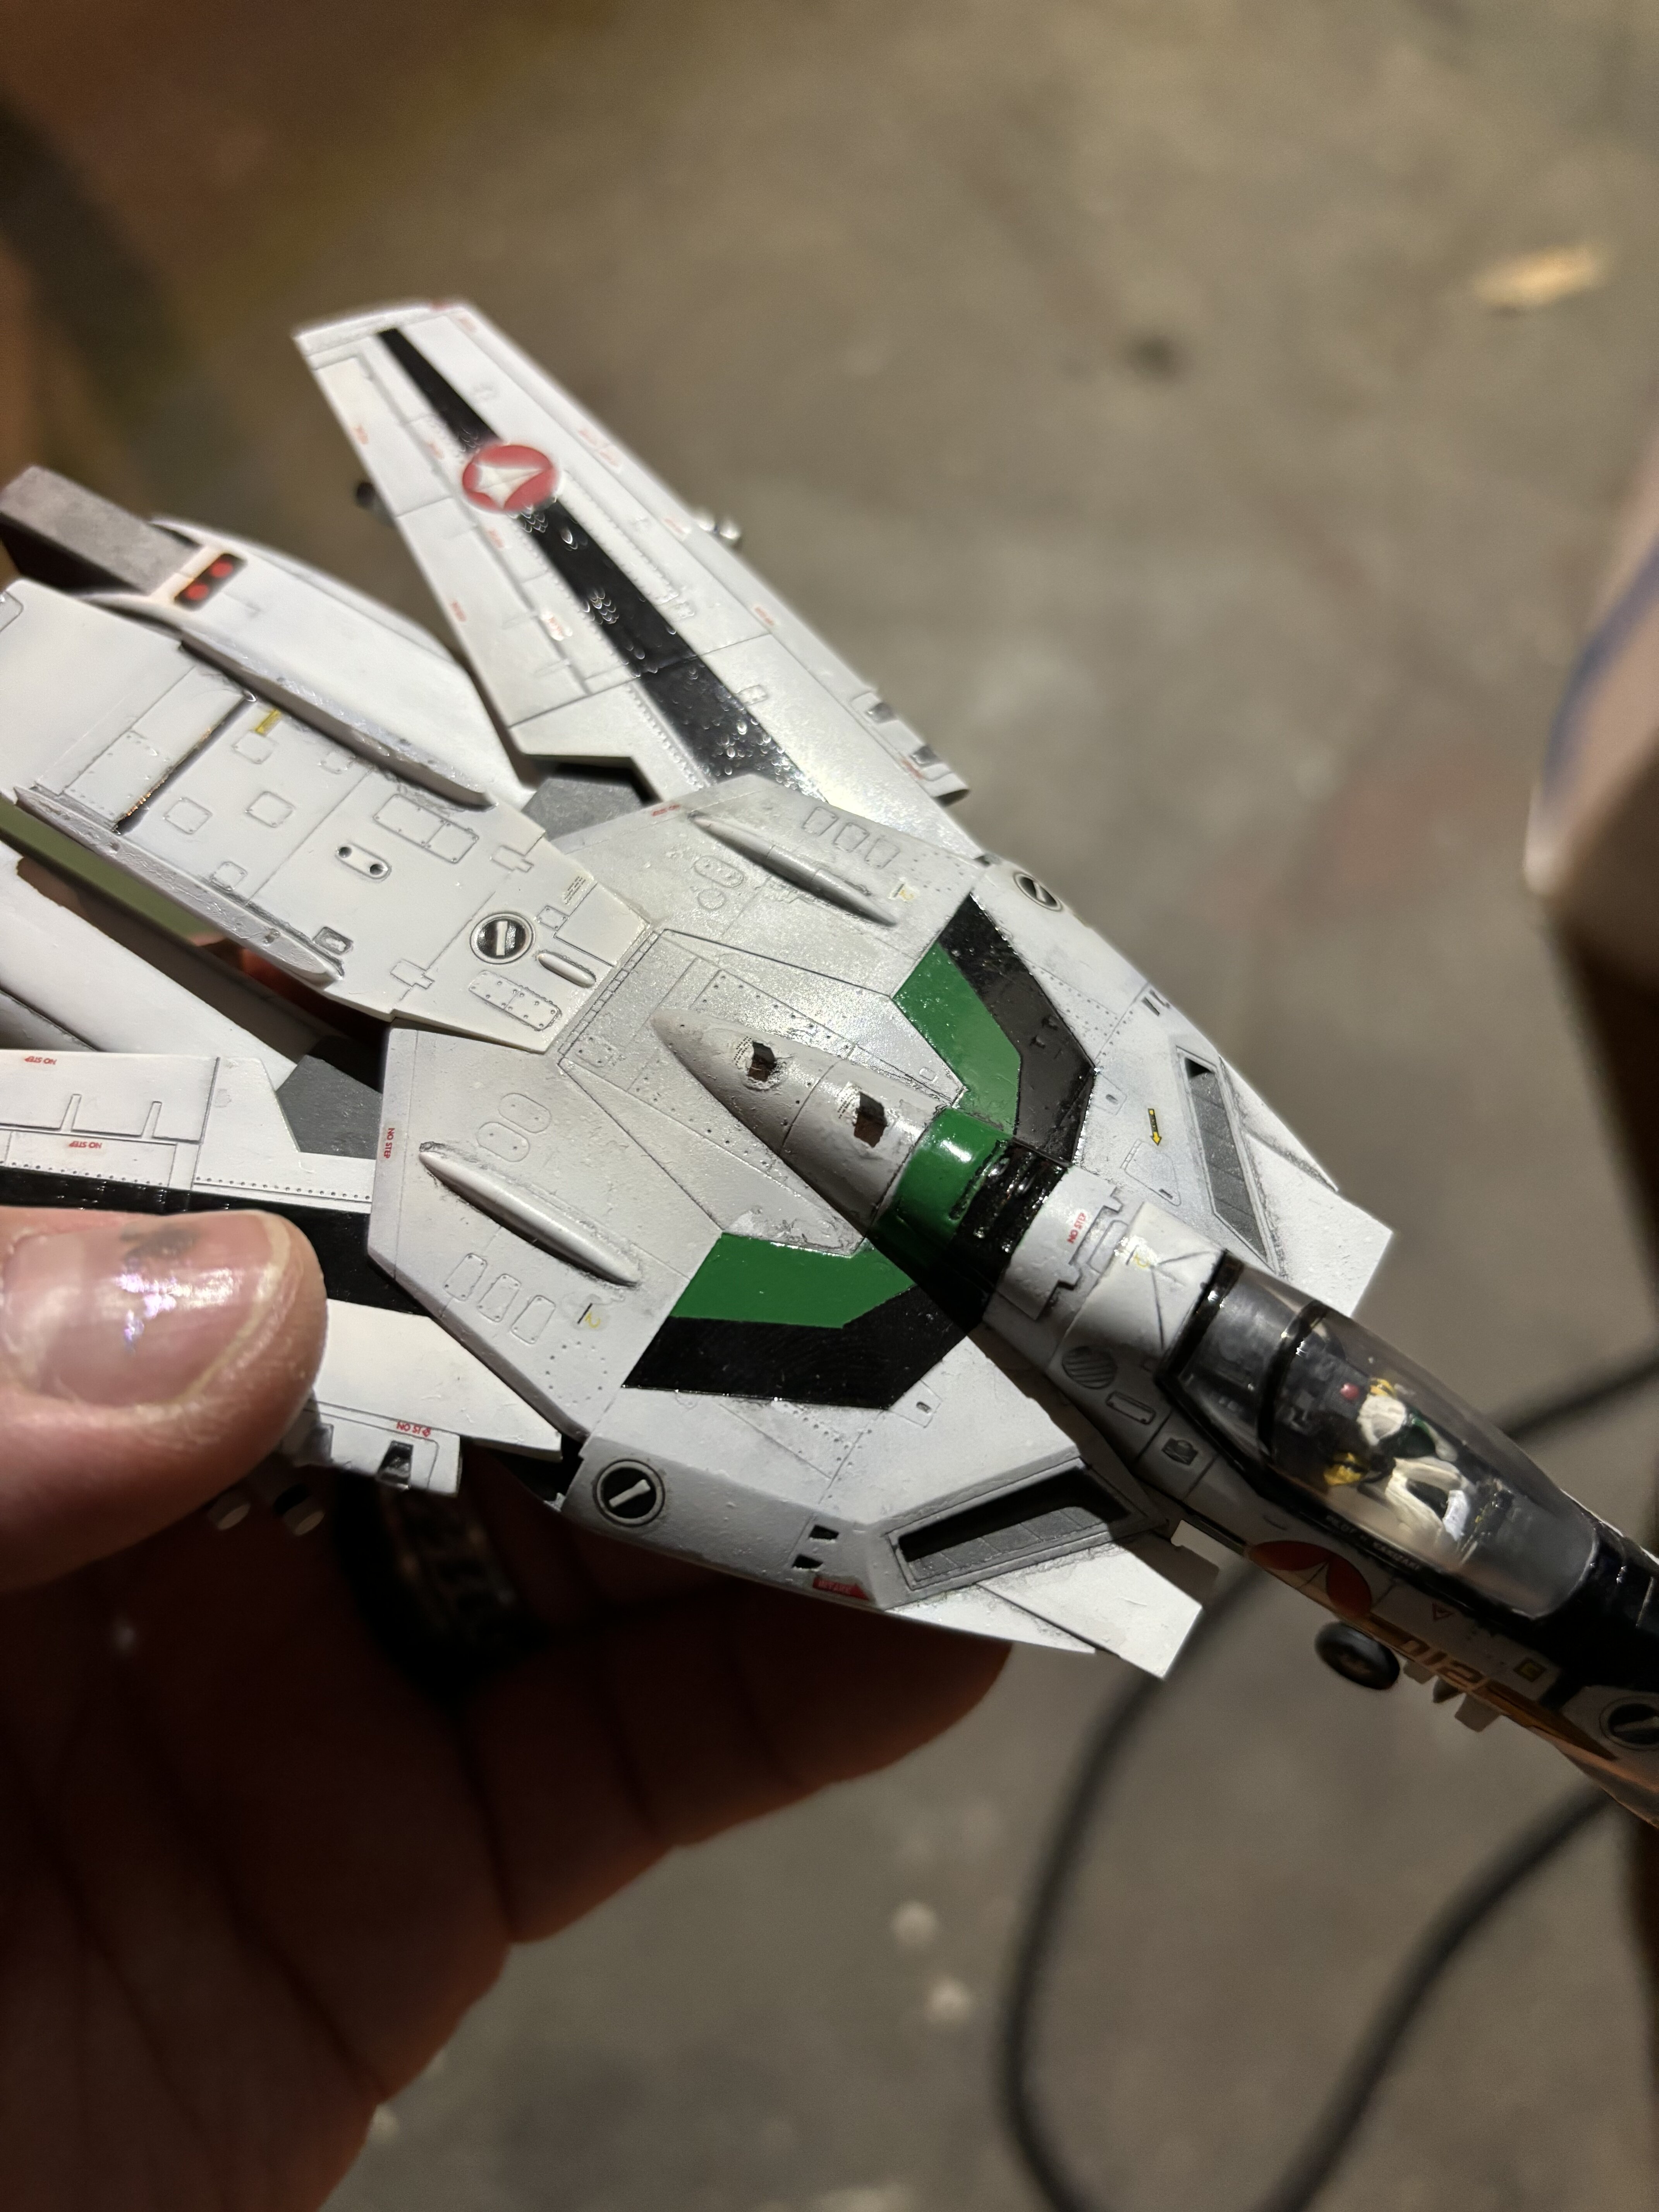
Well ... you have it in the other comment there. I use a clear sheet and tape the whole decal sheet to the other side, then carefully place masking tape on it and follow the outline. Here are two pictures of me doing that for the VF-22. It works quite well. Another method is measuring everything and placing by hand, or how I do it sometimes: just guessing the right position and putting it on. For the Kakizaki VF-1 I first marked the whole area for the top of the fuselage, then sprayed it green. Then I masked off the green areas and went on with black paint for the black portions. Went to the basement and took a picture. Unfortunately the vertical stabilizers went off in the storage. But here is my kakizaki vf-1a.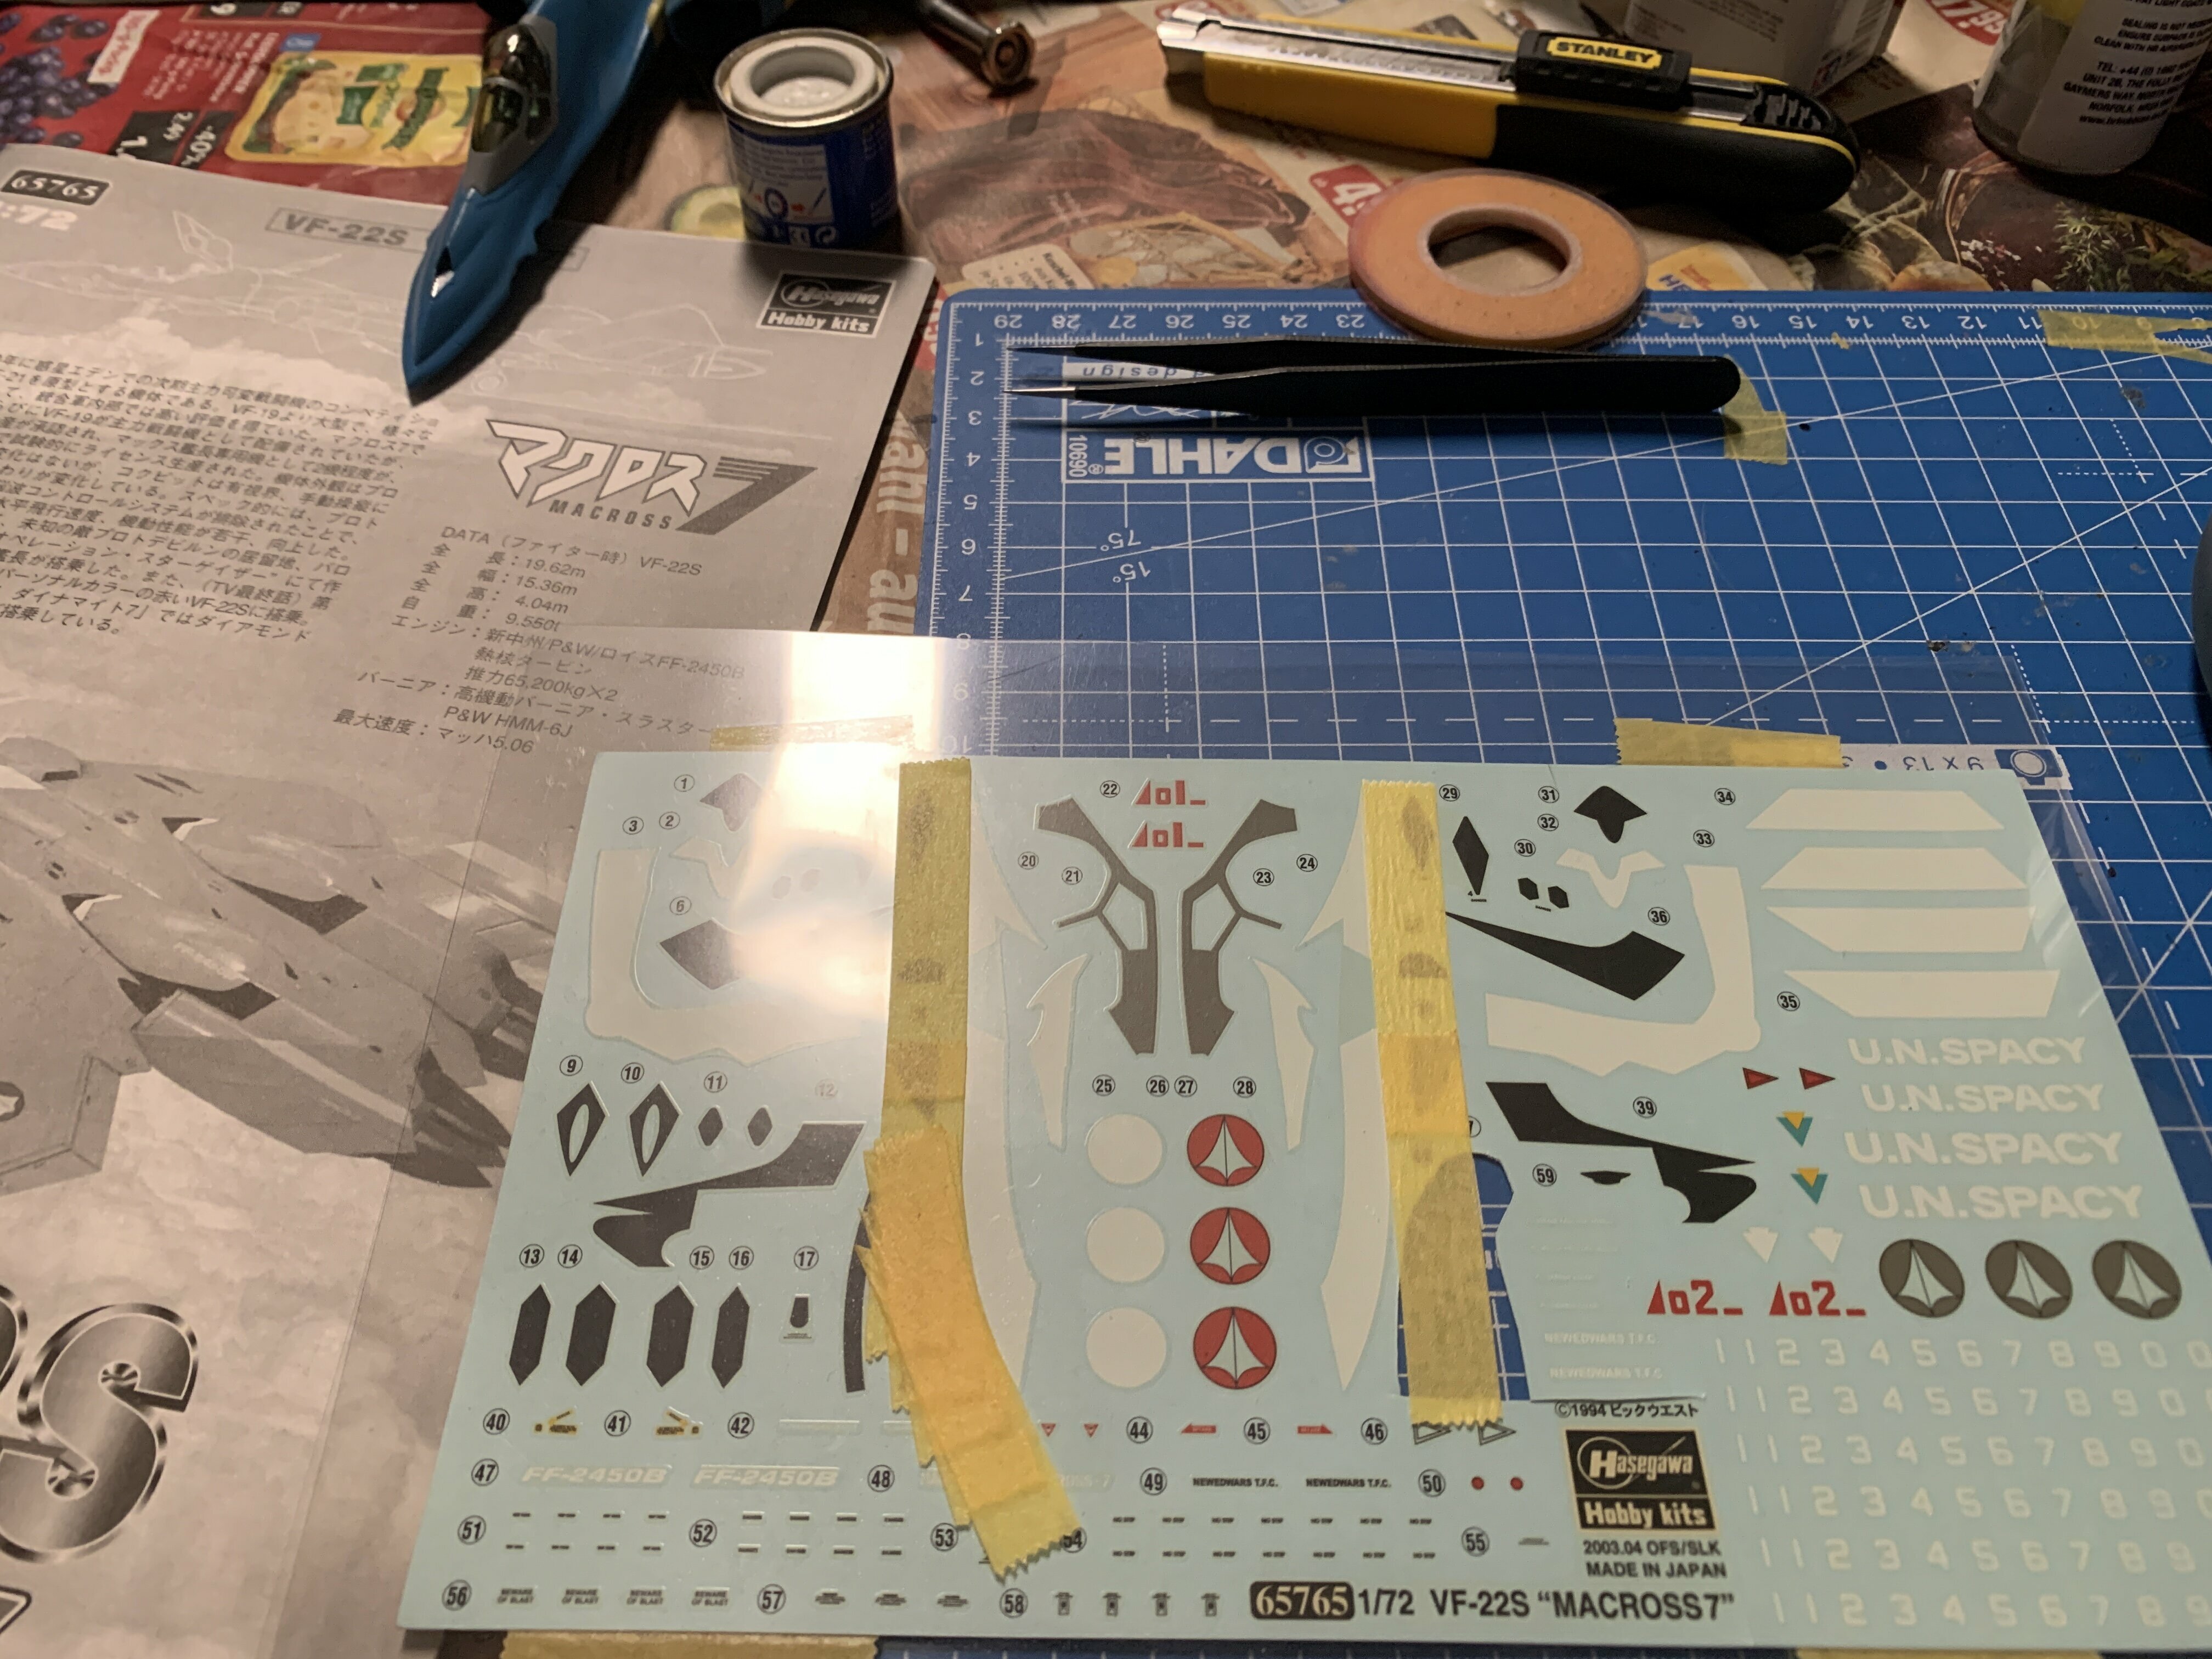
-
Advice wanted on building a Hasegawa VF-1 Fighter kit
Urashiman replied to SteveTheFish's topic in Model kits
that is how I did my Kakizaki VF-1A. I never use the giant black and colored decals. Too much of a hassle. Just mask the areas and airbrush it. I looks better imho. -
Lol, didn’t notice. Hahahah
