MacrossJunkie
-
Posts
3249 -
Joined
-
Last visited
Content Type
Profiles
Forums
Events
Gallery
Everything posted by MacrossJunkie
-
Working for me. Thanks for doing the pw reset. Was getting tired of seeing that For Sale forum spam coming into my email. Must have been the same person. Most people post all the things they're selling in a single post instead of making individual ones for each item.
-
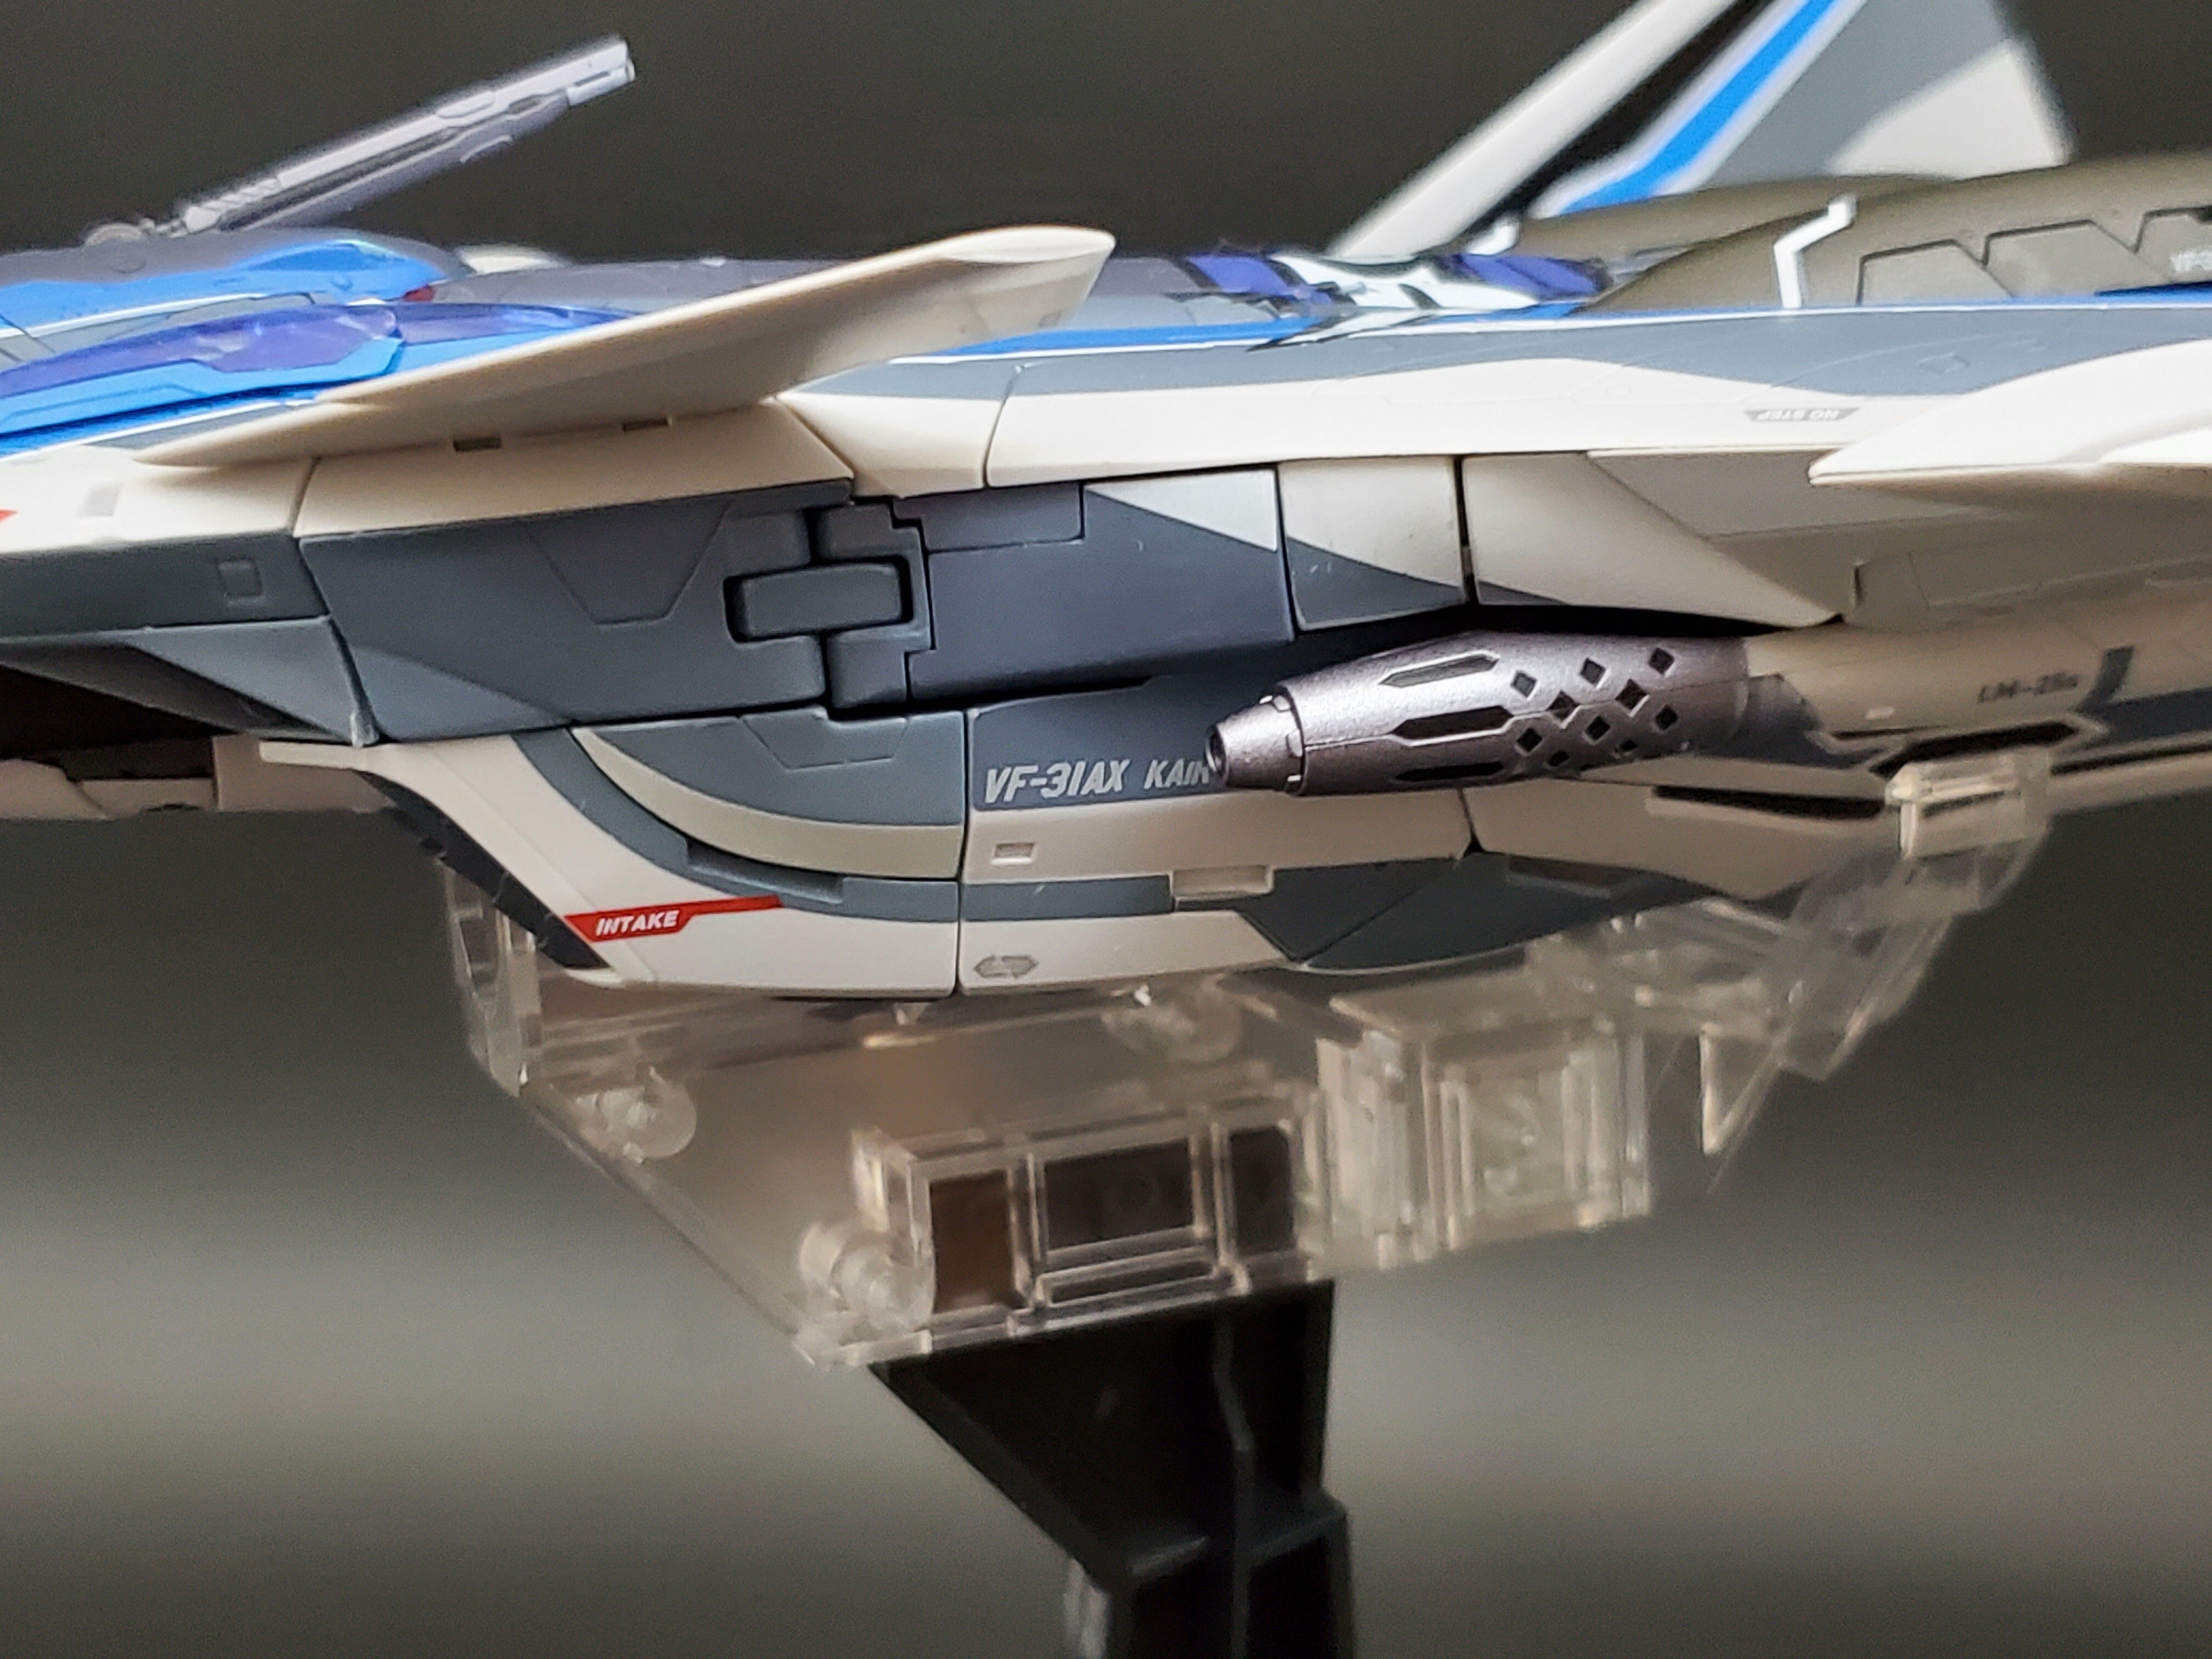
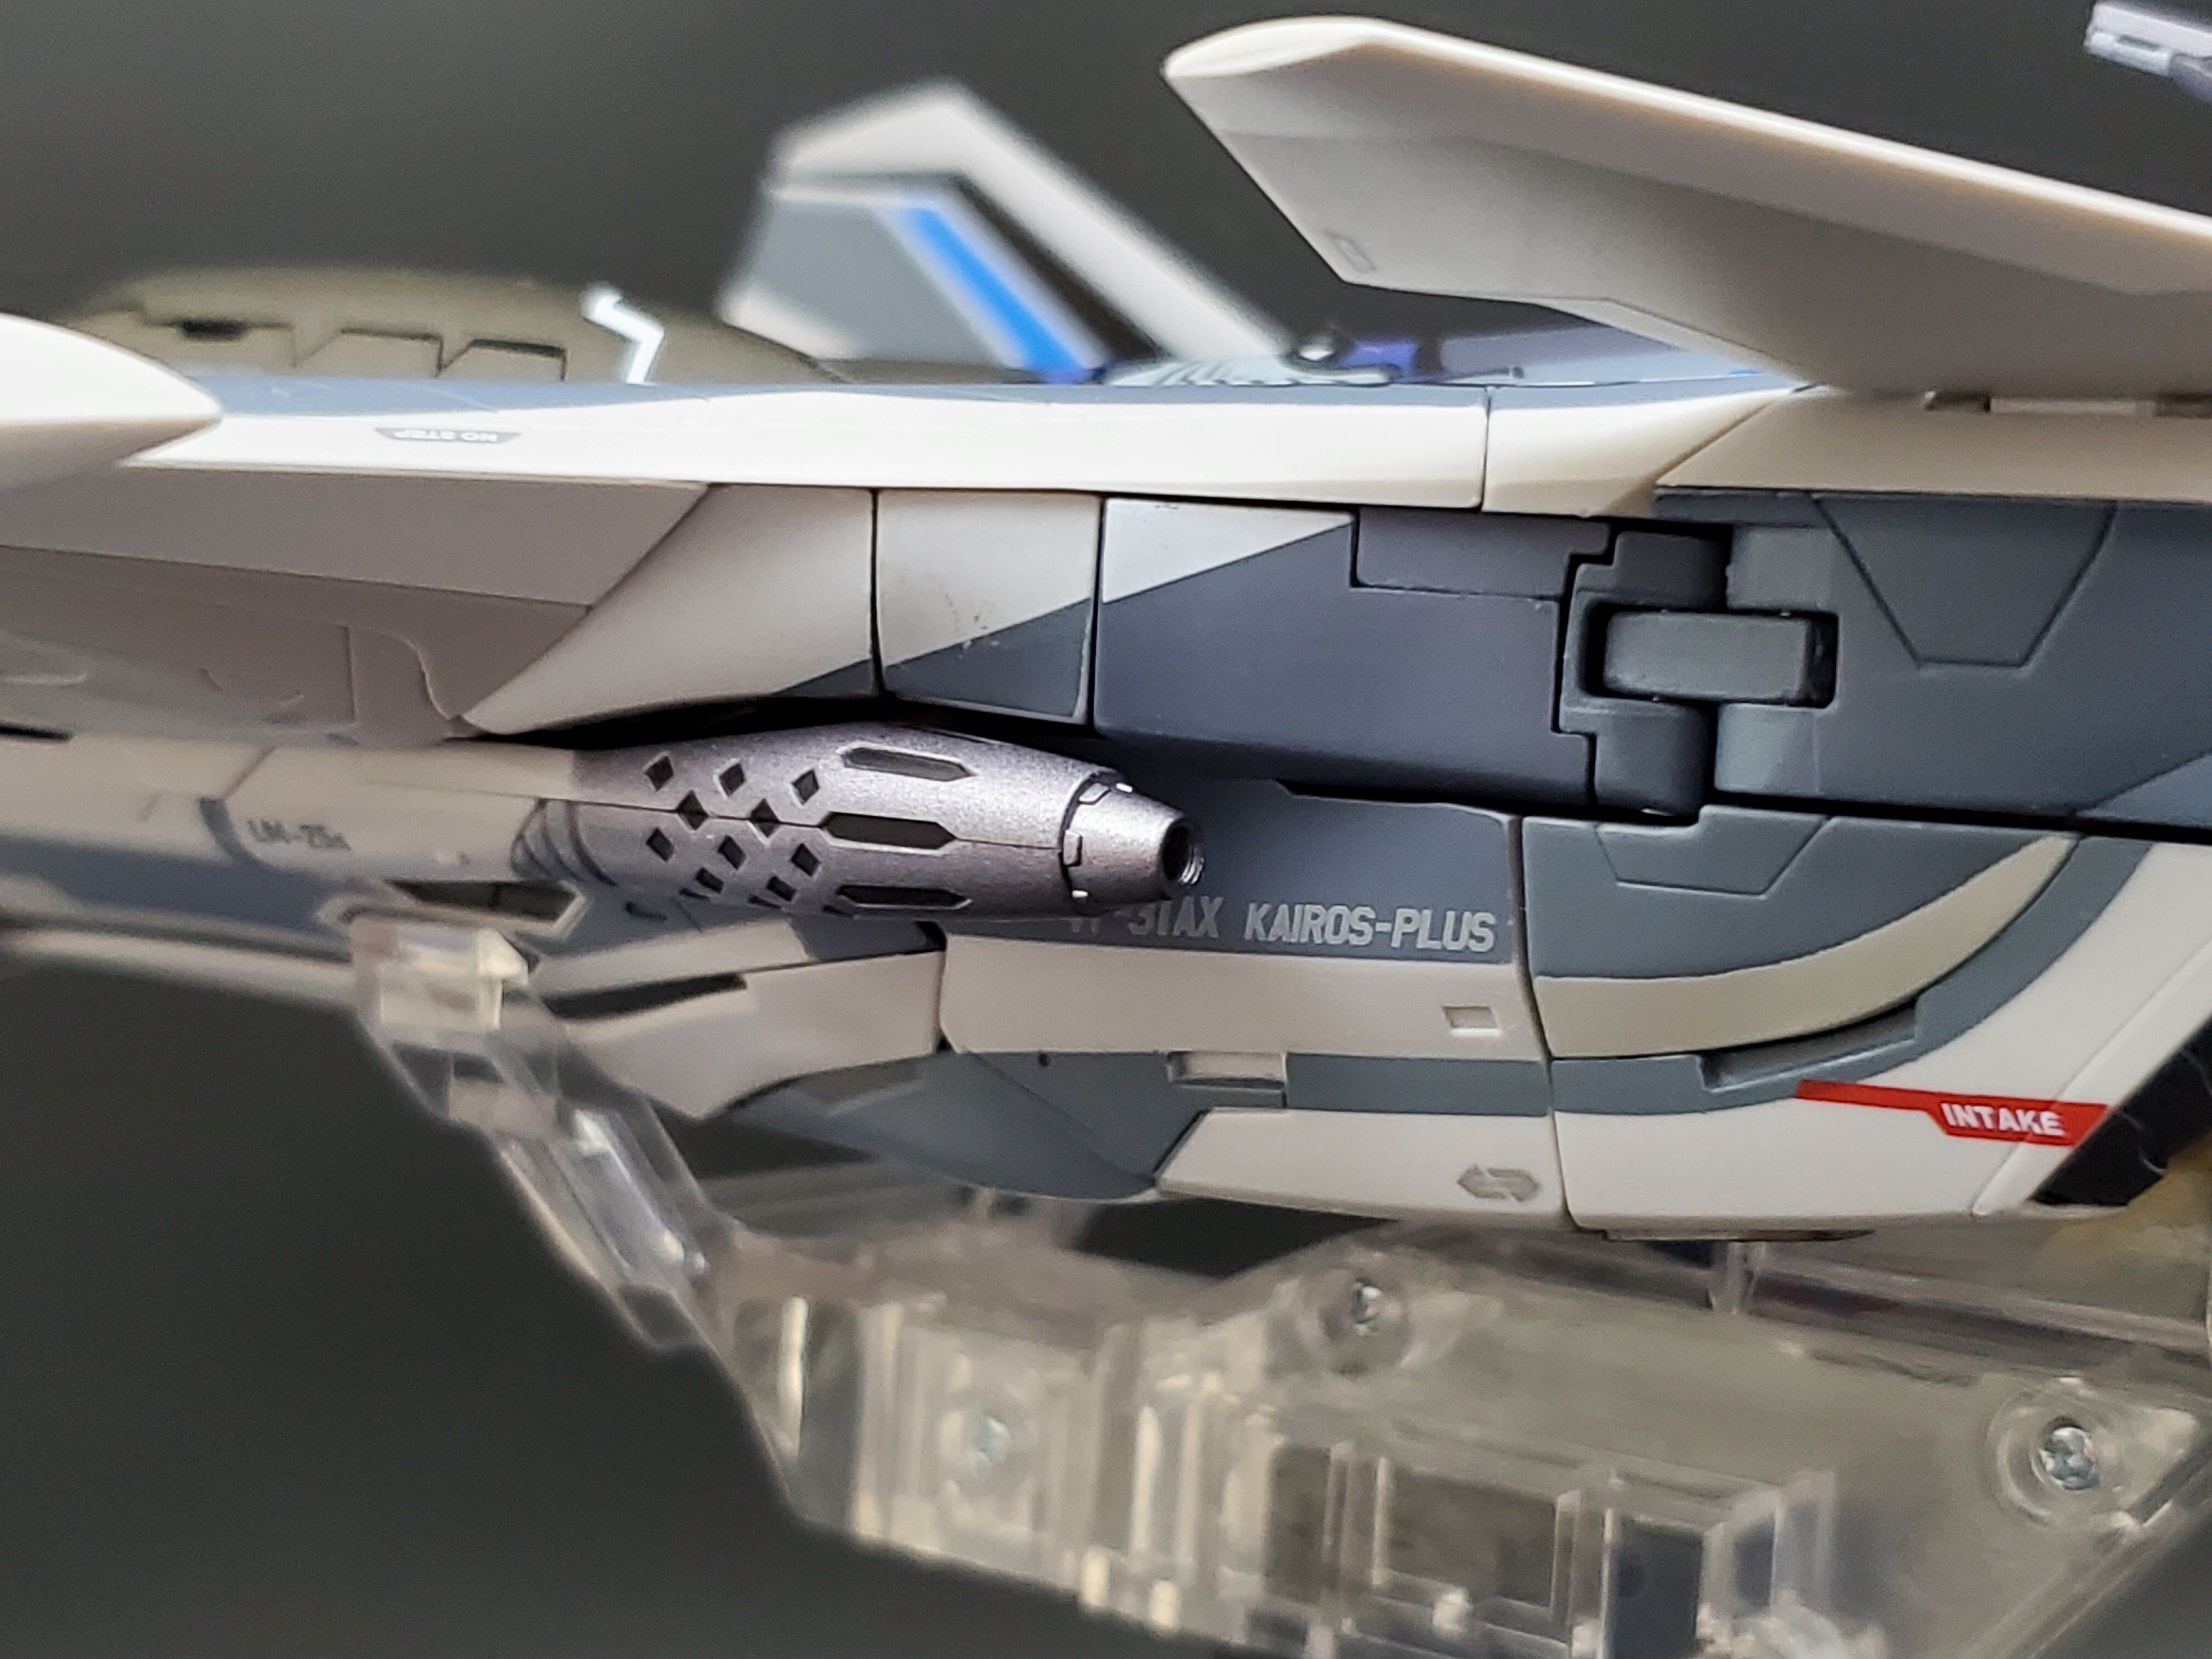
You're right about that. Mine are like that too. The outermost hardpoints are fine, but the arm ones do not fit properly because the plastic is thicker around the hole compared to the outer wing hardpoints. Edit: Nevermind, it does fit. The hard points are like this on the previous 31 releases also, where the plastic around the hole is a bit thicker. The part that appears to be making it more difficult to attach things to the hard points seems to be the hole for back rectangular peg. It might be a bit tighter on the 31AX. I just had to push in harder to get it to seat securely. The struts(?) should be able to make contact with the wing.
-
I got batteries and my digital caliper read 10.63 mm.
-
I do, but I found that the battery has drained after I took it out and tried to turn it on... I'll have to get new batteries.
-
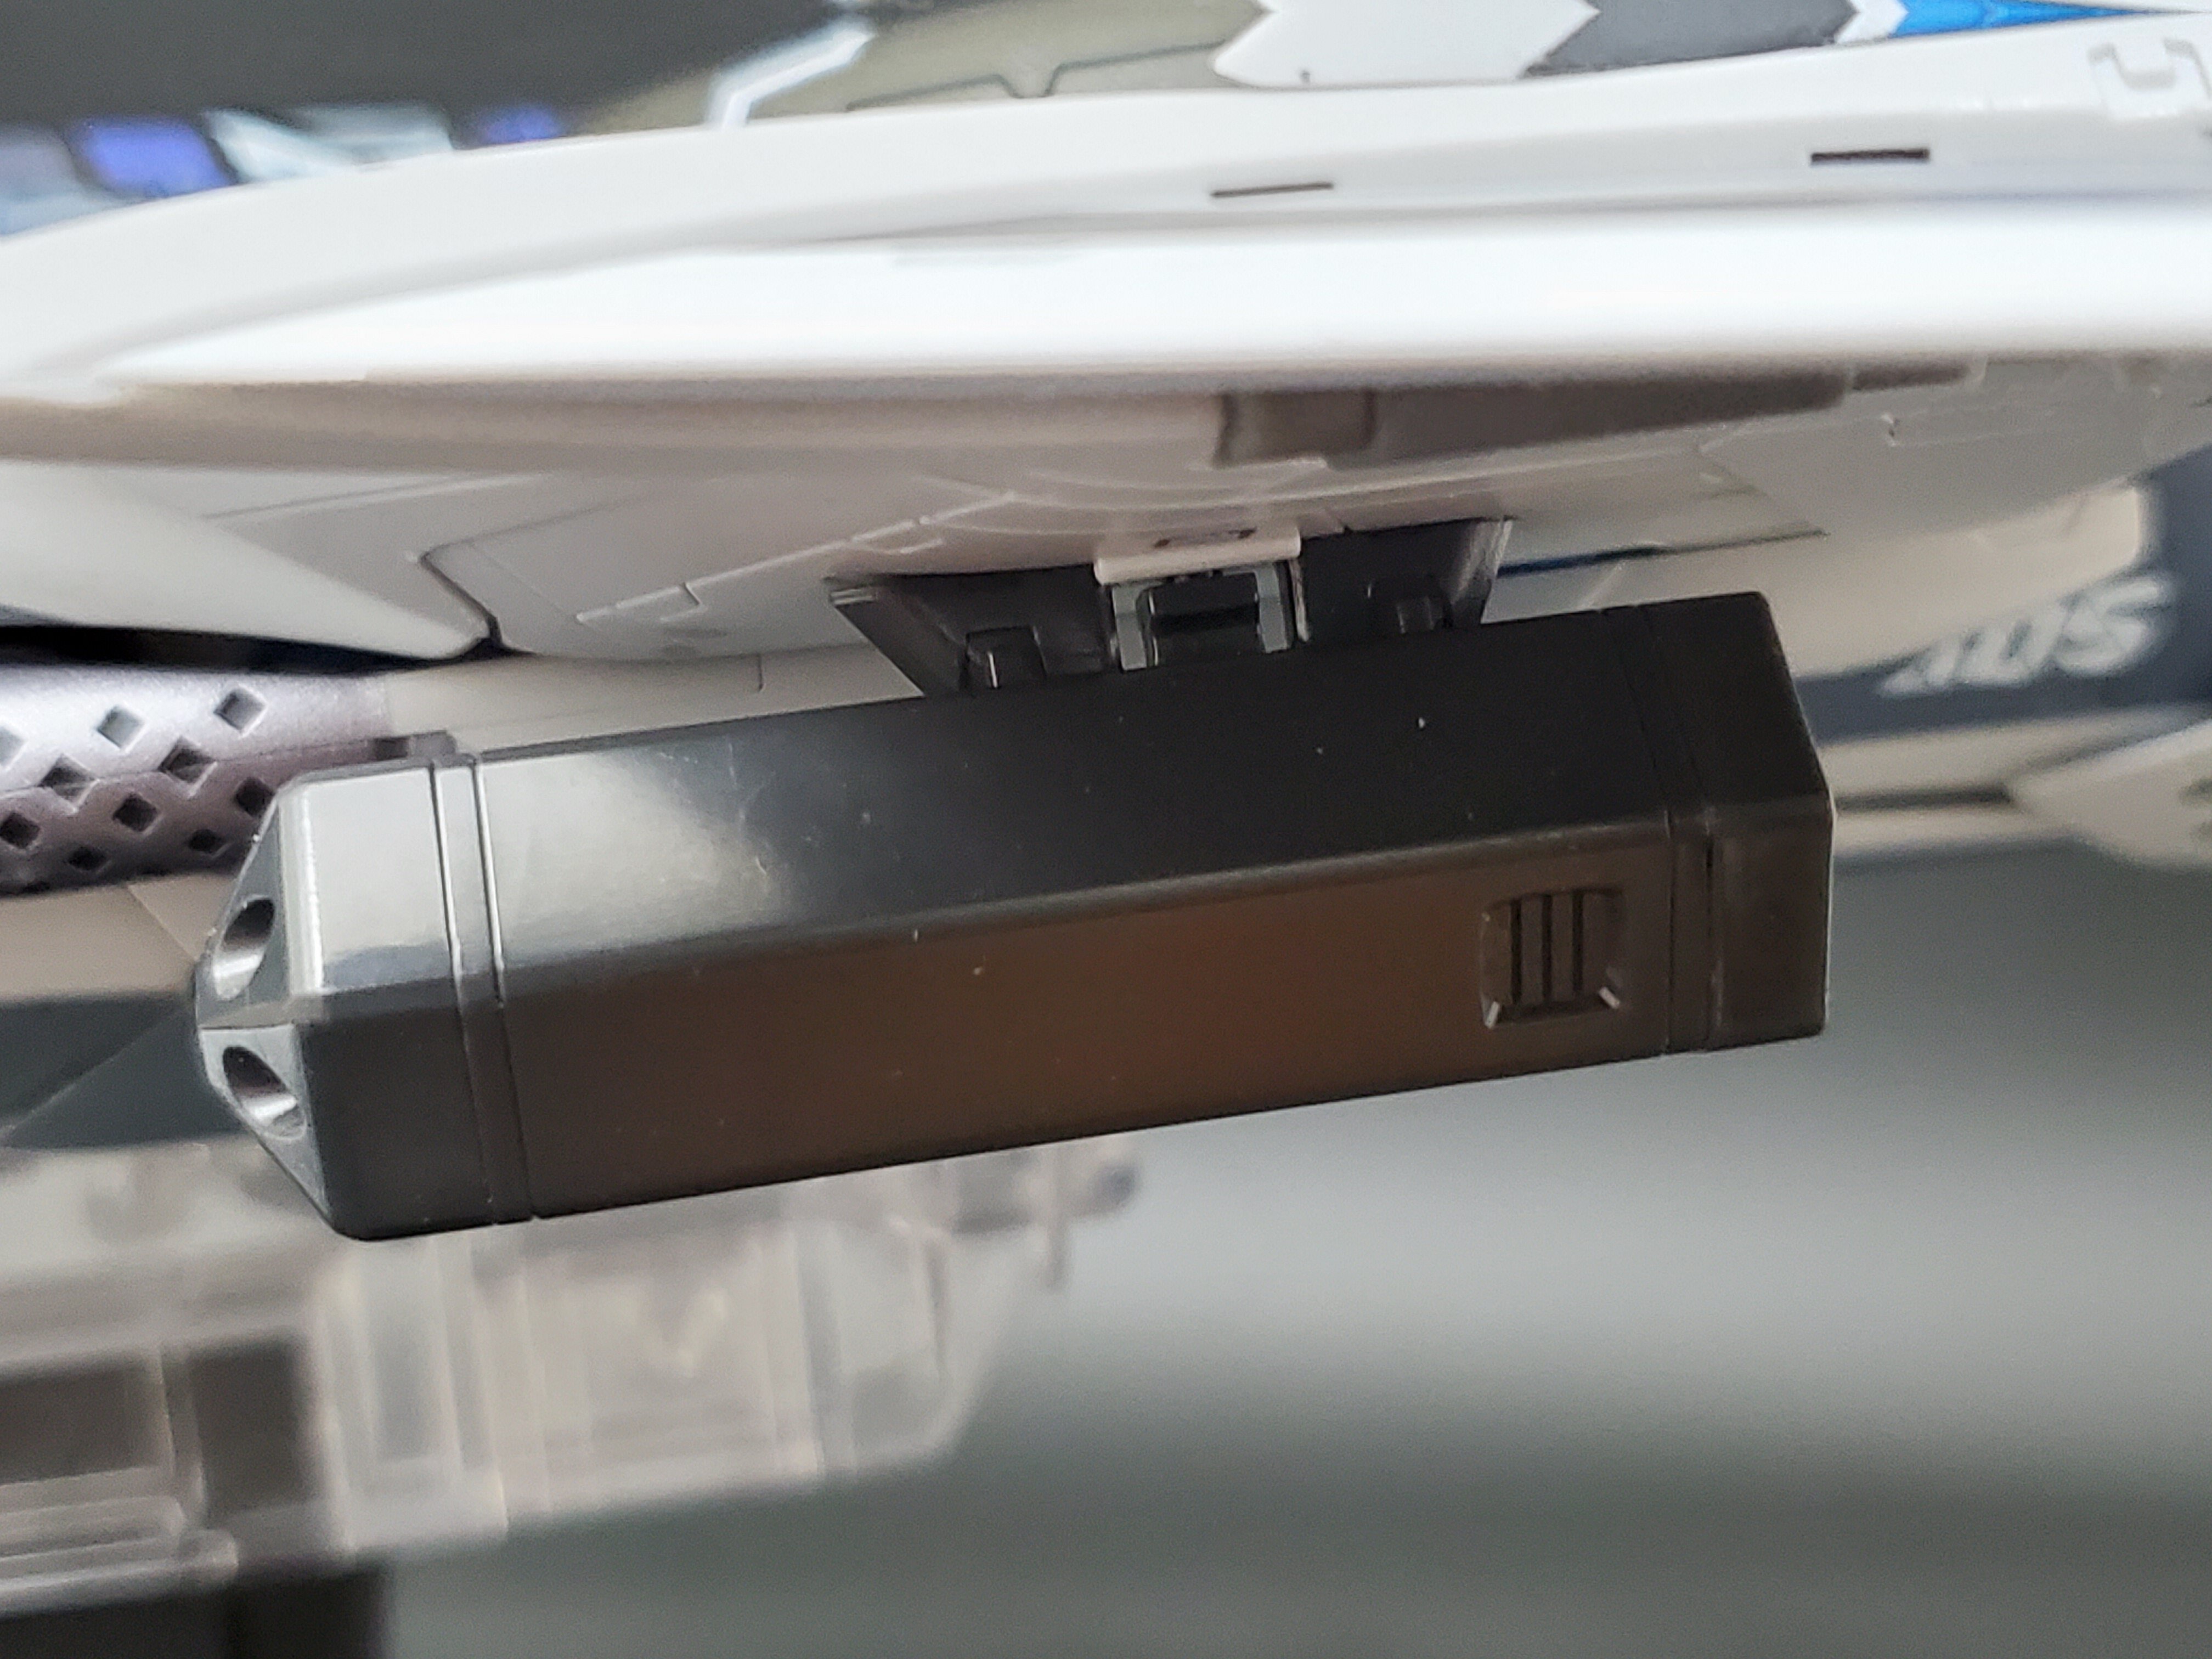
I used an Xacto knife to shave down the pegs in the wings some. No left over scratches and looks pretty clean that way. Now it fits in snugly. Fixing that I think also helped other fitment issues or maybe it's because I transformed it to battroid and back again. I don't have to extend the tip of the gunpod anymore to get the peg at the tip to slot into the hole at the underside. Also the arm/bicep covers now no longer really have a gap on either side or at least it's to a degree I find acceptable. It's mostly in how you position the arms. Instead of having the arms pushed up against the underside of the wings, I pulled it down at the elbows as much as I could.
-
Well, that's just disappointing to hear. Prior to the 31AX, the 31 series was, for the most part, pretty solid in terms of QC and such. They really dropped the ball on this one. Spent the money on that useless Walkure stand instead of paying the QC people.
-
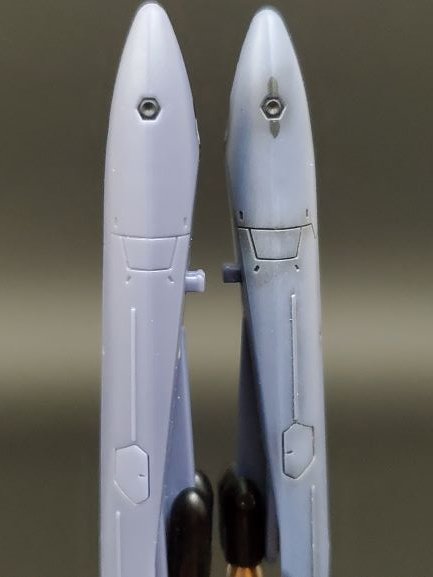
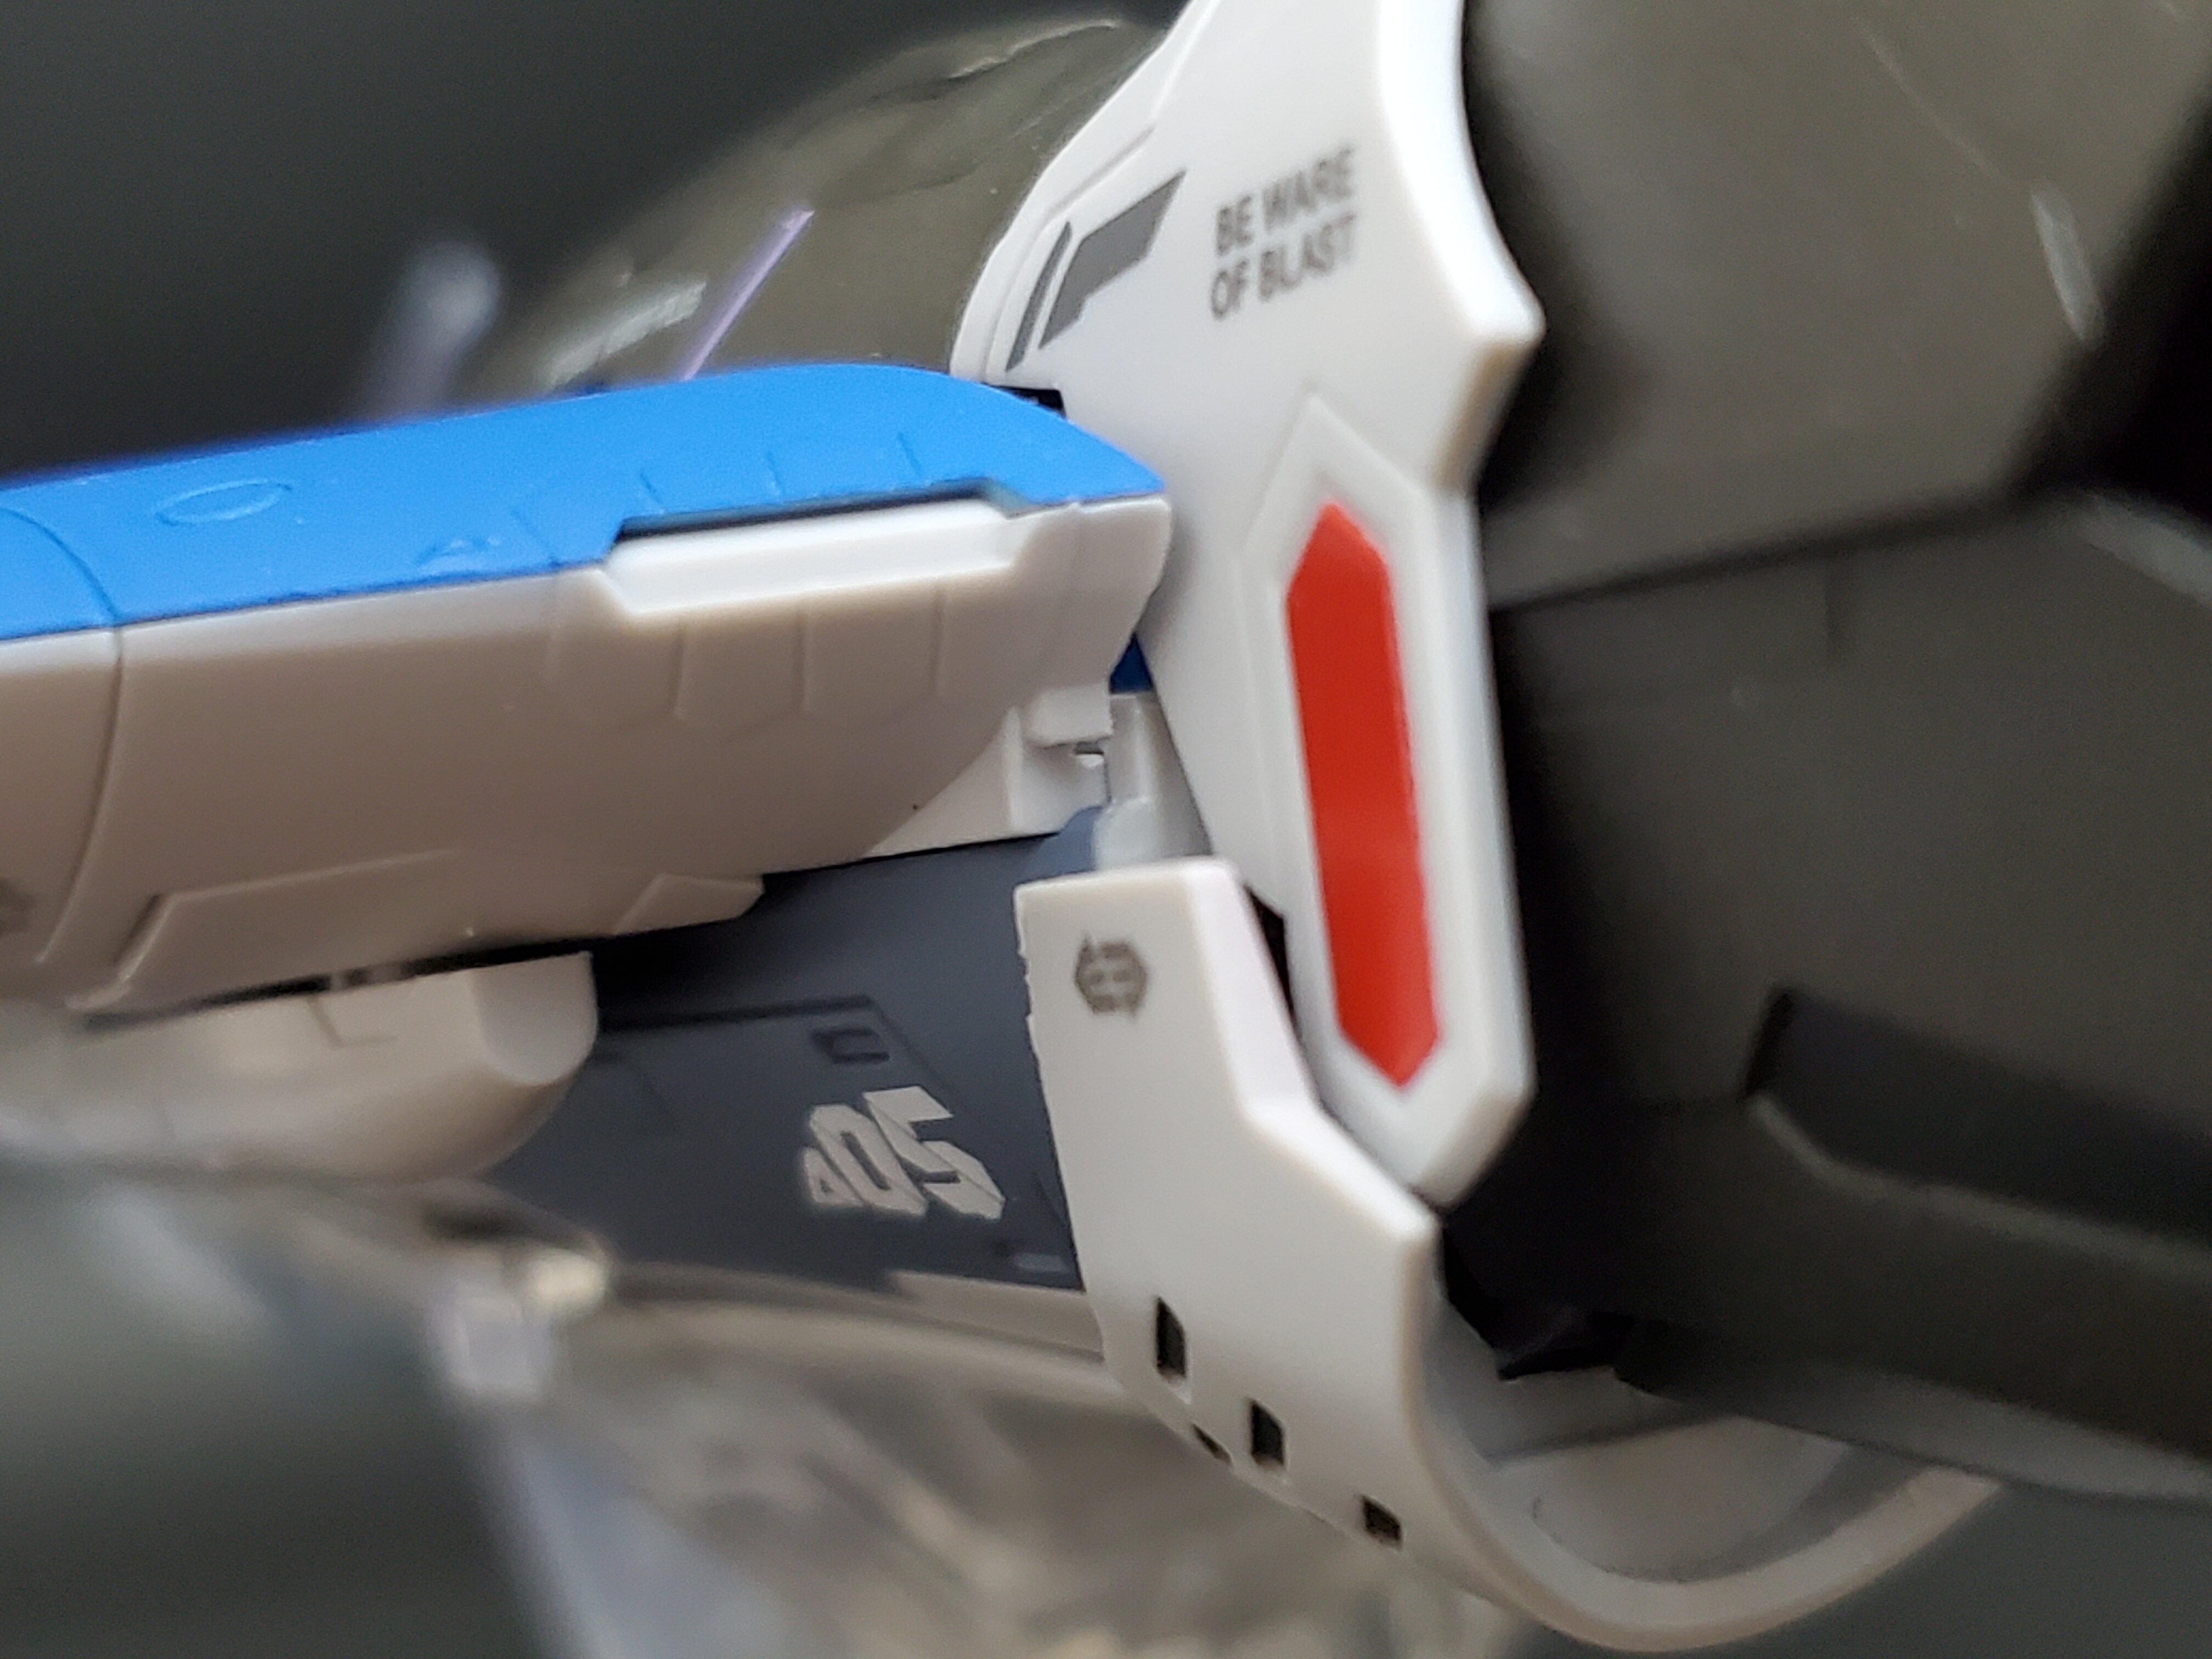
I finally got mine delivered yesterday. I like the look of it, but I have some issues with it from my brief time messing with it. I'm not sure if this is just a problem with my copy or if the first four I list below are more widespread. I haven't really had a lot of time to keep up to date with things. First issue: The part of the wings that peg into the legs in fighter mode don't really fit in the holes in the leg. Either the pegs are too large or the spacing is not wide enough. It might require some modification to fix. 2nd issue: the peg near the front of the gunpod doesn't go in properly because it seems the gunpod is a little short. I have to extend out the tip some in order for it to fit in properly. 3rd issue: a relatively minor gripe but it bothers me... the forearm cover leaves a large gap between it and the wing and no amount of massaging or repositioning the arms seems to fix that. 4th and most annoying: The friggin' fold up gray clips that keep the top half locked down in battroid mode are extremely weak and don't keep it in place. Any amount of movement makes the top half slip out of the clips. This was never an issue with any of the previous 31's I have. I basically have to keep it in fighter or gerwalk mode because battroid is hopeless as it is right now. 5th: I hate the gunpod design in terms of practicality for the toy. There's just no way for the poseable hands to hold it and I'm forced to swap to the fixed pose hands to hold it. That thick bar where the grip hinge is just gets in the way of everything and it has to be held at an odd angle. Also, it's heavy and, at least for my copy, it causes the arm to sag down from the weight. It can't hold it up at all. Edit: Just read some of the previous comments and it seems some of my issues are not just issues for me.
-
Obligatory meme

-

Arcadia 1/60 SV-51 Nora pre-order/released thread
MacrossJunkie replied to treatment's topic in Toys
Exactly why I wanted to go with HLJ. They helped me out with the Ivanov that had the two left feet even though it was like a year after I ordered it from them. Thanks! I didn't realize they still had some in stock. -
Arcadia 1/60 SV-51 Nora pre-order/released thread
MacrossJunkie replied to treatment's topic in Toys
Didn't we used to be able to see an estimate on shipping for HLJ? I can't seem to see it now and it would be nice to have an idea how much it would cost shipped. -
Same...
-
Well, good luck, everyone. I just can't deal with these site shenanigans anymore.
-
Got as far as getting through paypal, but when it returned to HLJ, it said order stop. They need to reserve the stock if you already get to the point that you've gone through the payment stuff...
-
1/48+fp's, 1/60+fp's, 1/72, 1/2k, 1/3k,1/100 and now 1/144
MacrossJunkie replied to VF-18S Hornet's topic in Toys
Haha, thanks! I wish I had time to do more as I have a backlog of stuff, but ever since a person on my team at work quit over the holidays in December, I've been stuck with like 3 people's worth of work and have had little time to do anything else. Perhaps someday I'll be able to get time to get back to things... -
Arcadia 1/60 VF-4A ‘Flashback 2012’ Premium Finish & Regular Release
MacrossJunkie replied to no3Ljm's topic in Toys
Got mine earlier today. I'm surprised at how many markings it got out of the box. They got all the major ones as far as I can tell and even has the pilot name on the canopy which I think is a first for a non-premium edition release for Arcadia. All that's really missing are the usual No Step, Danger, Beware of Blast, etc. and the nuclear reactor marking on the legs. In any case, a vast improvement over the VF-4G which had almost nothing tampo printed on, to my recollection. Hope someone can post comprehensive pictures of the premium finish version so that I can use it as reference for where to put the markings since the instructions don't even come with any diagram for the markings. Aside from that, the build seems pretty solid. The legs on mine are a bit loose. Arms are very stiff by contrast. Missiles still keep popping off during transformation so that hasn't really changed from the VF-4G either. -
Arcadia 1/60 VF-4A ‘Flashback 2012’ Premium Finish & Regular Release
MacrossJunkie replied to no3Ljm's topic in Toys
Got my shipping notification as well. Also a notification of a price reduction too! -
This thing looks really tacky and psychedelic with all the colorful neon lights, rings and wavy patterns. Has SK been experimenting with LSD while designing this?
-
Is anyone else beside me still waiting on their Sentinel ETA Legioss from BBTS? I can't imagine it taking nearly half a year for any sort of shipment to arrive even by the slowest method of shipping across the ocean. People have gotten theirs from BBTS months ago and I can't seem to get a helpful answer from them on if I should still be expecting to get one or not.
-
Marvelous weathering job on that!
-
DX Chogokin YF-29 (Alto) Durandal Valkyrie - Reissue
MacrossJunkie replied to joppewo's topic in Toys
Mine is in pieces right now as I took it apart to get at the green clear piece in the nose section. Trying to figure out a better way to paint the frame as the way I did it before was a pain in the butt. On another note, is it just on mine that the addon fuel tanks are missing the black arrow markings on the bottom vernier thrusters? The original has them on all three (top, side, bottom).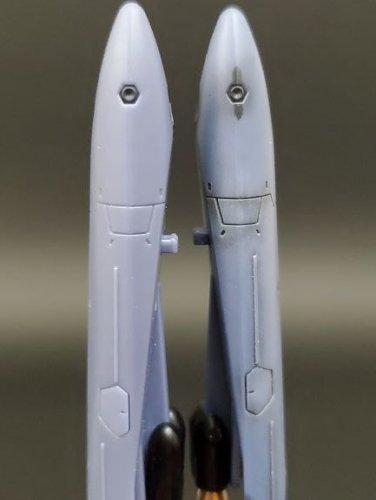
-
Maybe they will return to Delta once the 2nd movie is right around the corner. Chuck didn't even get his supers yet.
-
DX Chogokin YF-29 (Alto) Durandal Valkyrie - Reissue
MacrossJunkie replied to joppewo's topic in Toys
Mine aren't really flush either, but not as bad as that one on the bottom of your pics. Here's mine. Original on the left. New on the right.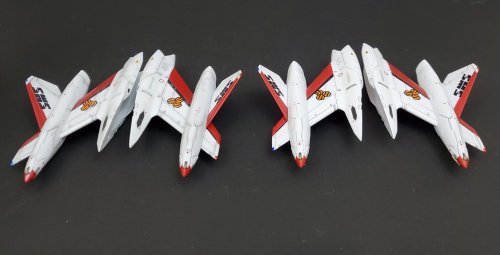
-
Arcadia 1/60 VF-4A ‘Flashback 2012’ Premium Finish & Regular Release
MacrossJunkie replied to no3Ljm's topic in Toys
That deep black panel lining is definitely way too much contrast on white. Personally, I use different colors depending on the color of the area I'm panel lining. I would only use that level of black on white where it's actually justified, like at the root of the flaps and ailerons and along lines where I think dirt or oils might collect more. The rest of the panel lining is using varying shades of grey. Like so: I don't expect them to go that far with the panel lining, just pointing out one of the only times when I think using black on white is acceptable. They just need to use a shade of grey instead. It makes me glad I didn't go with the premium finish either. Trying to undo that heavy panel lining would be a huge pain in the butt. Also, honestly, I don't know why they don't just make waterslide decals the default to begin with. They've shown they can produce waterslide decals in the past. Well, okay, that was when they were Yamato, but is printing on waterslide decal paper prohibitively more expensive than printing on sticker sheets AND pre-cutting them? There's probably more to it than just swapping out the printing medium, but still. They're selling to collectors, not kids, so the argument of decals being more fragile goes out the window. We're not banging these things around. Decals look way better and don't have edges lifting or peeling like stickers do. I'd pay the $10-20 more for them to ditch the sticker sheets and include waterslide decals instead. -
Arcadia 1/60 VF-4A ‘Flashback 2012’ Premium Finish & Regular Release
MacrossJunkie replied to no3Ljm's topic in Toys
+1 I both hate having to buy waterslide decals because their stickers suck and having to apply them myself. I would rather that the markings are all there from the start. They should call the weathered versions something like "extra premium finish" or "premium finish plus". Maybe an very limited run of ones where they had someone spend more time to do the weathering better and call it "extra premium finish plus ultra" -
Don't forget belly plates that don't lock in place in fighter mode and relies solely on joint friction to keep them there. While we're at it, might as well add in some paint rub/flaking goodness like the SV-262.