MacrossJunkie
-
Posts
3247 -
Joined
-
Last visited
Content Type
Profiles
Forums
Events
Gallery
Everything posted by MacrossJunkie
-

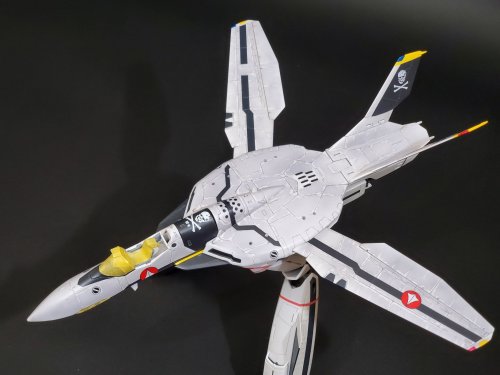
DX Chogokin YF-29 (Alto) Durandal Valkyrie - Reissue
MacrossJunkie replied to joppewo's topic in Toys
Looks like mine came a day early. Looking it over. the joints, including the arms, seem tight enough and don't flop around. What does flop around on mine is the right hip gun, which is a first for me with the line of VF-25, 27, and 29 toys I've had. I checked the elbows and see no stress marks or cracks (so far). -
DX Chogokin YF-29 (Alto) Durandal Valkyrie - Reissue
MacrossJunkie replied to joppewo's topic in Toys
I'm not going to go fully into it like with the Macross Zero valks. The 29 was a brand new and experimental machine and was only really deployed in space, but ignoring that, I might still add some subtle effects here and there. Maybe as if it's been through atmosphere or something like in the master file books. Not sure yet. -
The DX 1/48 VF-1S I got from them was also rated as damaged box, but I couldn't find a single ding or scratch on the box (not that I cared). I didn't have as much luck with an opened item I got from them though. It was the super parts for Alto's YF-29. One of the "petals" on the extending fold wave emitters was missing and I had to scavenge a piece off an anniversary edition version super part to replace it and repaint the little arrow marking to red.
-
DX Chogokin YF-29 (Alto) Durandal Valkyrie - Reissue
MacrossJunkie replied to joppewo's topic in Toys
Mine's set to arrive Thursday as well. I'm looking forward to the mechanical and structural improvements to the toy, but a bit worried about the reported breakage... I color matched my original Alto 29, but it seems like this new one might be harder to do. I want to do a better weathering job on the new one as I was still exclusively using the Tamiya weathering kits back when I got the original and can probably do a better job having more experience now.
-
DX Chogokin YF-29 (Alto) Durandal Valkyrie - Reissue
MacrossJunkie replied to joppewo's topic in Toys
They did seem to charge tax. It originally showed something like 22 something thousand yen, plus tax was ¥ 25,455, and then ¥2444 for shipping. Shipped, total was ¥ 27,899 -
DX Chogokin YF-29 (Alto) Durandal Valkyrie - Reissue
MacrossJunkie replied to joppewo's topic in Toys
Got one from Amazon Japan, sold by Amazon. 6 left if anyone is still looking to get one. https://www.amazon.co.jp/-/en/DX-Chogokin-Macross-Sayonarano-Durandal/dp/B0897ZW6HZ Edit: and now they're gone. -
1/48+fp's, 1/60+fp's, 1/72, 1/2k, 1/3k,1/100 and now 1/144
MacrossJunkie replied to VF-18S Hornet's topic in Toys
Thanks everyone! If you want to see more of the 51, I have more posted here http://www.macrossworld.com/mwf/topic/48129-macross-weathered-releases-diy/?do=findComment&comment=1547384 http://www.macrossworld.com/mwf/topic/48129-macross-weathered-releases-diy/?do=findComment&comment=1547422 -
1/48+fp's, 1/60+fp's, 1/72, 1/2k, 1/3k,1/100 and now 1/144
MacrossJunkie replied to VF-18S Hornet's topic in Toys
Finished taking pics of my VF-0S last night. Fighter Arcadia and Yamato VF-0S GERWALK Battroid -
Actually that wasn't the reason I didn't put it up with the 0D. I was just waiting until I had the leg conformal fuel packs done. Fortunately, most of the damage was on the underside of the wings, so I masked off the panels, cleaned it all off and redid those sections then continued my photo shoot. Original post has been updated.
-
Sure thing! I was in the middle of taking picture though when the overlapping wings ended up scraping some paint off each other. sigh. I wish they weren't designed to squeeze together so tightly so that they're scraping against each other. I have to redo some parts due to this. Might have to sand some to rough up the surface before I redo.
-
1/48+fp's, 1/60+fp's, 1/72, 1/2k, 1/3k,1/100 and now 1/144
MacrossJunkie replied to VF-18S Hornet's topic in Toys
Happens to me sometimes too. Spend all that time doing subtle effects and it disappears under the clear coat... Sometimes you almost have to overdo it just so when you clear coat it it gets toned down and looks how you wanted it to look, but that's hard to judge. I had that issue with my Sv-51. Most of my subtle effects disappeared and I had to redo it not so subtly to get it to show more. Just as annoying is when you can see it with your eyes but the camera won't pick it up, but it sure as heck is able to pick up and emphasize those specks of dust you couldn't see instead! -
This is an explanation on how I weathered the Arcadia VF-0D. While I've repeated many of the steps used for the VF-0S, there are differences due to the pre-applied filter and the fact that the markings were already tampoed on. Tools I used: Airbrush and compressor. Various fine brushes A small stencil brush Painting stand base with holes and sticks with alligator clips and protective clip sleeves. (like this https://smile.amazon.com/gp/product/B07GWFCRHZ) Paints and supplies I used: Acrylic paint thinner Weber Odorless Turpenoid (for the oil and enamel paints) AMMO by Mig Oilbrushers (Black, White, Medium Grey, Gunmetal, Aluminum) AMMO by Mig Shaders (Ash Black, Navy Grey, Marine Blue AMMO by Mig Acrylic Crystal (Blue and Red) AMMO by Mig METAL Acrylic Color (Gun Metal, Jet Exhaust Burnt Iron, Silver) AMMO by Mig Transparator Vallejo Mecha Color (White Grey) Vallejo Mecha Varnish (Satin and Gloss) Vallejo Airbrush Flow Improver Tamiya Craft Cotton Swab, Triangle Small 50 pc, TAM87106 Fine stipple sponge (like for cosmetics and makeup effects) Tamiya masking tape (10mm, 18mm) Plastic pipette droppers Paper towels Nitrile gloves (optional. I just wear on the hand that's holding the toy just to be on the safe side and not leave fingerprints/oils on the surface if I can avoid it.) My goal was to make the VF-0D look close to how it did in Macross Zero. Preparation: Remove the pitot tube. Remove the conformal fuel tanks on the chest and back. Take the head off and mask the canopy and the clear sensors on the sides of the nose. Pull off the vertical stabilizers from the legs. Pull off the canards from the hips/intakes Extend wings out as far as they will go. Using a tamiya swab and thinner, I removed the very poor looking oil streaks from the airbrakes and vents on the back. This is likely to remove the black filter that's been sprayed over the entirety of the blue areas of the valk. I ended up removing the black filter off the whole panel section where the vents where and masking it off and respraying. In hindsight, I should have just left the filter on the sides alone and tried to duplicate wear the pattern from the show from the start. In the white sections, Arcadia misted a blue color for shading or something and it looks kind of bad. You can try to scrub it off with thinner or isopropyl alcohol amd paper towels and cotton swabs, but I had limited success in doing so. It's like it had stained the white plastic and won't come off without a bit of sanding. Weathering: The filters Arcadia had applied on the PF 0D are difficult to remove and required more scrubbing and resulted in far less precision removal. I put some acylic paint thinner in a soda/water bottle cap. I then took a Tamiya craft swab and dipped it into the thinner and wicked off the excess onto a paper towel. More force and scrubbing is needed to remove the filter compared to the self applied filter used for the 0S. I found myself going through swabs faster due to them losing their shape and usefulness more quickly. I removed the filter with the swab dampened with thinner using reference pictures as guidelines. The panel lines don't really match up between the show and the toy so just try to keep to the spirit of it since you can't do a 1:1 copy. Continue with the fuselage. At this point the entire fuselage section as well as the exposed top half including the wings have been done using this method. You can mask the clear parts of the head and spray the white areas of the head. the canards and vertical stabilizers, and the white flaps on the wings with the shader and use this same technique of stategically cleaning away parts of the filter or shader with the swab. Do the conformal fuel tanks as well. After this, I took a new swab and dipped it in thinner and pressed down and did swipes down the wings with it, parallel to the length of the fighter. I did this to break up the eveness of the filter along the wings. Do the same with the canards and rear stabilizers and optionally a little on the heat shield as well. The result after these first steps was like this (shown with fuel tanks, canards and stabilizers back on): The result was not as precise as on the 0S due to the effort it took to rub off the black filter and there is high contrast between the painted areas and the bare plastic which is a light powder blue. We can worry about that later. Next, I added some mottling to the areas I've done using the ash black, marine blue, and navy grey shaders. Alternating between them gives more subtle variance and variety to the tones. Just add a couple drops of a color to the airbrush and spray at a low psi and slightly pulling back on the trigger so not much is coming out. Spray close to the surface and with erratic movements. I would recommend sealing this work in with a gloss coat and let it dry for a day. My mixture of choice was the Vallejo Mecha Gloss Varnish mixed with some airflow improver and sprayed at around 18-20 psi. YMMV. I suggest keeping the hidden tab part of the vertical stabilizer, canards, head, and the underside pegs of the fuel tanks clipped to alligator clips on sticks so they can be sprayed easily without spraying your fingers and also so they can safely dry. After the clearcoat is dry, the next areas I would recommend doing are the parts of the backpack that weren't done yet by swinging it up perpendicular to the horizontal line of the top of the valk (just so it's out of the way and you don't accidentally spray the top), and the underside of the wings. Clear coat that and let it dry. I recommend the legs next. Bring the arms out like you would for GERWALK to get them out of the way. Detach the legs from the hooks that keep them in place and straighten them out like they would be in battroid mode. You can stand it like this: VF-0S used for illustration. Now they are clear of obstructions and you can do the same technique as has been done on everything else thus far. Spray the white areas with the ash black shader to produce a light grey filter over top and wipe away the unwanted parts with the tamiya swabs. Do the same with the factory black filter on the blue areas. Seal it with the clear coat and wait til next day. I added some additional mottling here using the same techniques as before on the blue areas and used the white paint from the white Oilbrusher stippling it on the grey areas with a liberal use of turpenoid. Keep working with it until it looks how you want it. Personally, I made the legs a little too dark for my tastes and used the grey white Vallejo Mecha paint mixed with AMMO by Mig Transparator and thinner and sprayed on an additional filter layer to lighten it up. Spray a clear coat over top of this to protect the work. Next, we add a white filter to the top half of the pseudo GERWALK. I pre-dampened the entire top section with turpenoid and brushed on the white oilbrusher paint that was thinned in a bottle cap all over the areas I dampened. I squeegeed most of it off with careful strokes with the sides of the brush hairs working from one side of a piece to the other and always in the same direction of where you visual texturing to go. Here, I was sort of going for the look of brushed metal on the fuselage as it sort of had that look in some scenes. Clear coat and wait after finishing this step... Now transform it to battroid mode so the arms are clear of obstruction and the shoulders and heat shield are fully exposed. Do the arms, add any desired mottling effects and seal in your work with a clear coat. At this stage, optionally, you can take some aluminum Oilbrusher and coat a stencil brush with it. Keep dabbing and wiping onto a paper towel until hardly any is coming off it anymore. You're now ready to dry brush some highlights/paint wear. I brush the fingers, the round black sections of the upper arms and elbow joint, heat shield, and the top grey shoulder parts and neck to bring out some highlights to them and make them look more like they're made of metal. After that's done, seal in your work with a clear coat and wait a day. For the streaks on the wings, air break, and those vents on the back, I recommend using the black Oilbrusher, dabbed with fresh dabs 5-6 times in a cap and a drop of turpenoid. Get some on the thinnest pointiest brush you have and wipe some off on a paper towel. Make steady strokes with it to the areas you want it at. Feather it out using a Tamiya swab. Seal it in if you want to avoid accidentally rubbing it off while handling. Lastly is the feet. Mask off the surrounding areas of the leg to avoid getting overspray on it. I used the feet's factory dark metallic color as the base and started spraying the Jet Exhaust Burnt Iron color onto it. Then I used the Gun Metal paint and sprayed around randomly with it using the same mottling technique. Next, take a stipple sponge, tear a small piece off of it, tear tiny bits off that so it's even more uneven and load it up with the gunmetal Oilbrusher and dab off most of it on a paper towel. Now stipple it onto the feet, particularly along raised edges and some on the flat surfaces as well. Seal that in with a clear coat. Next I further tone all that down and dirty it up using the black Oilbrusher. Dab some of the black oil paint onto the feet and with a brush loaded with turpenoid, spread it around. Work it around until it looks right to your eyes and seal it in after it dries. Finally, we tone down the contrast of the light blue plastic and blend in those areas better. Just use... a mechanical pencil! Yup. It actually works. I was surprised too when I tried it for the heck of it. Color over those areas that look too contrasty and blend it. It's easy to use and you have far more control over it than pretty much anything else. Coat the whole thing with the Vallejo Mecha Satin Varnish or Matte Varnish or whatever else you prefer. You can remove all the masking after this and put any parts still detached back on.. Optional: Make the navigation lights brighter and more reflective. Paint over the blue and red navigation lights on the wing tips and the vertical stabilizers using the metal silver acrylic paint. After that dries, use the acrylic crystal blue and red to paint over the silver. May require several coats. Remember that starboard is blue and port is red. The VF-0D is done! Edit: Added some finished pics as examples Refer to this post if you want to see more pics of this: http://www.macrossworld.com/mwf/topic/40552-arcadia-160-perfect-transformation-vf-0d-for-2015/?do=findComment&comment=1552448


-
At the request of @wm cheng and @Dobber, I've done a write up of what I used to do the weathering and how I did it. The first is for the VF-0S. I'll make a second post right after for the VF-0D. ---------------------------------------------------------- This is an explanation on how I weathered the Arcadia VF-0S. Tools I used: Airbrush and compressor. Various fine brushes A small stencil brush Painting stand base with holes and sticks with alligator clips and protective clip sleeves. (like this https://smile.amazon.com/gp/product/B07GWFCRHZ) Paints and supplies I used: Acrylic paint thinner Weber Odorless Turpenoid (for the oil and enamel paints) AMMO by Mig Oilbrushers (Black, White, Medium Grey, Gunmetal, Aluminum) AMMO by Mig Shaders (Ash Black) AMMO by Mig Acrylic Crystal (Blue and Red) AMMO by Mig METAL Acrylic Color (Gun Metal, Jet Exhaust Burnt Iron, Silver) Vallejo Mecha Varnish (Satin and Gloss) Vallejo Airbrush Flow Improver Tamiya Craft Cotton Swab, Triangle Small 50 pc, TAM87106 Fine stipple sponge (like for cosmetics and makeup effects) Tamiya masking tape (2mm, 10mm, 18mm) Decals for the 0S Microscale Industries Micro Sol and Micro Set Plastic pipette droppers Paper towels Nitrile gloves (optional. I just wear on the hand that's holding the toy just to be on the safe side and not leave fingerprints/oils on the surface if I can avoid it.) ---------------------------------------------------------- Objective: My goal was to make the VF-0S look close to how it did in Macross Zero. Additional reference pics for the feet, leg packs, and shoulder areas: I tried a few ideas and used an old Yamato VF-0S as a test bed and for proof of concept for various effects I wanted to have but didn't know how they might turn out. The main thing I wanted to duplicate was the lighter wear areas where the dirt had worn away as shown in the show. Mainly around panels and certain other parts like exposed raised surfaces as such. For this, after some tries that didn't work out well, I thought about spraying over an area and then removing paint to get what I wanted. This worked pretty well and became my starting point with my 0S. Preparation: Remove the pitot tube. Remove the conformal fuel tanks on the chest and back. Bring the legs down like for GERWALK mode. Take the head off and mask the canopy and the clear sensors on the sides of the nose. Pull off the vertical stabilizers. Extend wings out as far as they will go. Note: Due to unfortunate experiences with the wings when they overlap in battroid mode where they grind and scrape against each other, I recommend scuffing up the white sections of the wings with maybe 600-800 grit sand paper before doing any work on the wings just to rough up the surface a little and help aid with adhesion of paint and clearcoats. I had so little paint adhesion on the wings for some reason that it was lifting off the surface with just low tack Tamiya masking tape and leaving air bubbles where it lifted or came right off entirely. Weathering: I used the AMMO by Mig Ash Black Shader thinned further and with some drops of Vallejo flow improver and sprayed a light layer over the area I intended to work on. In this case it was the top part in fighter mode, everything behind the fueslage. Make sure the result is just a light gray and not too dark. You want it dark enough so that you can see a contrast between the unsprayed area and the area you just sprayed. The next step can be done after this is semi-dry or simply dry, in other words you don't have to wait long to start after spraying. I put some acylic paint thinner in a soda/water bottle cap. I then took a Tamiya craft swab and dipped it into the thinner and wicked off the excess onto a paper towel. Start etching away the paint with the angled tip of the swab. These swabs have a stiffness to them that makes it good for precision work. They quickly get caked in paint, but I found the best way to extend the use out of them is to dip it into the thinner every so often and wipe it off onto the paper towel and continue until it's just hard to get a good result out of it any longer. Be sure to use both ends (obviously)! Swap out for a new one when you feel it's at the end of its usefulness. The result was like this: Continue with the fuselage. At this point the entire fuselage section as well as the exposed top half including the wings have been done using this method. You can mask the clear parts of the head and spray it and the vertical stabilizers with the shader and use this same technique. Do the conformal fuel tanks as well. I suggest keeping the hidden tab part of the vertical stabilizer, the head, and the underside pegs of the fuel tanks clipped to alligator clips on sticks so they can be sprayed easily without spraying your fingers and also so they can safely dry. I would recommend sealing this work in with a gloss coat and let it dry for a day. My mixture of choice was the Vallejo Mecha Gloss Varnish mixed with some airflow improver and sprayed at around 18-20 psi. YMMV. After the clearcoat is dry, the next areas I would recommend doing are the parts of the backpack that weren't done yet by swinging it up perpendicular to the horizontal line of the top of the valk (just so it's out of the way and you don't accidentally spray the top), and the underside of the wings. Clear coat that and let it dry. I recommend the legs next. Bring the arms out like you would for GERWALK to get them out of the way. Detach the legs from the hooks that keep them in place and straighten them out like they would be in battroid mode. Extend out the legs fully so that the kneecaps are clear of obstruction as well. You can stand it like this: Now they are clear of obstructions and you can do the same technique as has been done on everything else thus far. You can hold the areas you've already done and sealed in or hold onto the metal bar the legs are attached to. Seal it with the clear coat and wait a day. If you want to and/or have decals. this is a good time to apply them. Personally, I did not like the way the yellow stripes on the head looked. They were far too short. I ended up painting over them with black paint and stealing decals from a Hasegawa 1/72 VF-0A/S battroid kit I got from many years ago. The decals actually fit PERFECTLY despite the difference in scale. I found many of the other decals also fit just right as well. Even the decals for the fuel line connection points on the conformal fuel tanks fit decently well. Surprisingly they were a little on the large size compared to the fuel tank instead of being too small. Remember to seal them in with a gloss coat afterwards and wait a day. Now transform it to battroid mode so the arms are clear of obstruction and the shoulders and heat shield are fully exposed. Do the arms and seal in your work with a clear coat. Time to add a white filter to the heatshield and the black shoulder parts on top as well as the black painted areas on the legs. With a pipette dropper, put some turpenoid in a cap and dab a fine brush into it and pre-wet a a black surface with it. Using the white color Oilbrusher, dab a tiny drop onto the surface and start spreading it around evenly. If it looks too white, squeegee some off with the side of the brush hairs and continue. As it starts to dry, use the brush to make strokes and dabs for texturing. Not texturing like having bumps and ridges, but visual texturing like streaks and mottling effect and such. It's hard to explain with words. This may take some practice and trial and error to get it to look right, but you can wipe it off easily and do over as the oil paint comes right off with some turpenoid on a paper towel and has no reaction to the acrylic clear coat. Do this wherever applicable on any fully exposed black painted area, including the vertical stabilizers. Seal in your work with a clear coat and wait. Next is mottling effects on the lighter colored areas. For this, I used the same mixture of the ash black shader and thinner for the 0S. The key here is randomness and subtle sprays. Test on a paper towel or piece of white paper to check the flow of the paint. At around 15 psi or lower, keep the airbrush very close to the surface you're spraying and spray with random erratic motions with no pattern to the movement. It might be good to test this technique out on something else if you're not sure about it. I suggest doing the legs, arms, backpack, top and bottom of the wings fully extended, and head with this first. Then you can add extra streaks and mottling with this black shader mixture to the black areas where you applied the white filter. Alternatively, you can dab or stroke around some extra thinned black Oilbrusher paint that's been premixed in a cap (or do both!). Might as well do the fuel tanks too at this point or can do later if you feel like it. Also at this stage, optionally, you can take some aluminum Oilbrusher and coat a stencil brush with it. Keep dabbing and wiping onto a paper towel until hardly any is coming off it anymore. You're now ready to dry brush some highlights/paint wear. I brush the fingers, the round black sections of the upper arms and elbow joint, heat shield, and the black shoulder pieces and neck to bring out some highlights to them and make them look more like they're made of metal. After that's done, seal in your work with a clear coat and wait a day. Transform it back to GERWALK mode but with the backpack in the same position it would be in fighter mode. Now that the fuselage is fully exposed again, add the mottling effects to it and the top side minus the wings unless they haven't been done yet. Seal it in. You know the deal. For the streaks on the wings, air break, and those vents on the back, I recommend using the black Oilbrusher, dabbed with fresh dabs 5-6 times in a cap and a drop of turpenoid. Get some on the thinnest pointiest brush you have and wipe some off on a paper towel. Make steady strokes with it to the areas you want it at. Feather it out using a Tamiya swab. Seal it in if you want to avoid accidentally rubbing it off while handling. Lastly is the feet. Mask off the surrounding areas of the leg to avoid getting overspray on it. I used the feet's factory dark metallic color as the base and started spraying the Jet Exhaust Burnt Iron color onto it. Then I used the Gun Metal paint and sprayed around randomly with it using the same mottling technique. Next, take a stipple sponge, tear a small piece off of it, tear tiny bits off that so it's even more uneven and load it up with the gunmetal Oilbrusher and dab off most of it on a paper towel. Now stipple it onto the feet, particularly along raised edges and some on the flat surfaces as well. Seal that in with a clear coat. Next I further tone all that down and dirty it up using the black Oilbrusher. Dab some of the black oil paint onto the feet and with a brush loaded with turpenoid, spread it around. Work it around until it looks right to your eyes and seal it in after it dries. Pics from my 0D for illustration of results: Spray a satin or matte varnish to finish it off! Once dry, remove all the masking that had been applied and put any parts still detached back on. Optional: Make the navigation lights brighter and more reflective. Paint over the blue and red navigation lights on the wing tips and the vertical stabilizers using the metal silver acrylic paint. After that dries, use the acrylic crystal blue and red to paint over the silver. May require several coats. Remember that starboard is blue and port is red. The VF-0S is done! (aside from the leg super parts) ---------------------------------------------------------- Leg Super Parts/Fast pack: This is how I did the weathering on the conformal fuel and micro missile launcher leg attachment. After decaling, panel lining, and clearcoating my super parts (pretty sure I got all the markings going by both the Hasegawa guide and the pics I took for reference), I was ready to do the weathering. There were three main things I wanted to capture in my version with regards to the weathering that you can see in the reference pics: the vertical streaking smoke stains from the micro-missile launcher ports the black speckling on the surface of the armor. For the vertical streaking, Put some odorless mineral spirits/turpenoid in a cap and dip a fine brush in it and spread it over the surface of the super part. Dab a few spots of the black oilbrusher onto the super part and then with your brush, spread it all over. It should turn into a black filter covering the entire thing. Don't worry about it looking even. Next start carefully squeegeeing the filter off vertically with the side of the brush hairs, from top to bottom or bottom to top and keep doing that as you work your way from right to left or left to right, your preference. If you're getting pooling along the edges, dry your brush off on a paper towel and wick away the excess liquids with your brush as you continue to do the vertical squeegee strokes and dry the brush off on the towel as you go. repeat until there's not a whole lot left or until you're satisfied with the result. you can finish off with some touch up brushing with quick strokes using the tip of the brush for extra streaking if you find there's not enough. Spray it with a clear coat to lock in your work. You can quick dry it with a hair dryer and it should be dry enough for the next step. Now we do the speckling. If you don't want to stain your fingers and fingernails black on this step, you might want to wear a latex or nitrile glove. Tear off a small piece from a stipple sponge. From the side you decide to stipple with, make it more uneven by pinching and tearing off very tiny bits from it. Take the black oil brusher and brush on the black paint onto the stipple sponge until the surface is coated with it. Now dab it onto a piece of paper or paper towel until you stop getting blobs and start getting small scattered specks. Once you have that, start dabbing it around randomly on the super part. Keep going until you're happy with the result. If you screw up somewhere, just rub it off with your finger and redo it. Clear coat when done and blow dry to speed up the drying process which should be enough for this next step. Again with the black oilbrusher, dab a bunch (6-7 times with the applicator loaded) into a cap and then with a pipette, drop a drop of turpenoid into the cap and mix it with the brush you intend to use. I suggest a fine tip brush. Unload some from your brush onto a paper towel, then start making streaks from the micro-missile launcher ports. Once you get the basics of it, you can spread and refine it further using a tamiya swab and moving it in the direction of the streaks. At this point, you can probably add some staining around the vent areas if you want. Clear coat when done. Optionally, I added some subtle mottling like I did with the VF-0S and a tiny bit of dry brushing with silver on a very very dry brush, though I find that neither show up well in pictures, but it's subtly noticeable in person which is what matters. Do a final clear coat with a satin or matte varnish. ---------------------------------------------------------- Edit: Added finished pics Edit 2: Removed pics and put a link for the rest because the number of pics to show the finished result was overkill. Edit 3: Added how I did my super parts for the legs. See this post for more pics of the finished VF-0S http://www.macrossworld.com/mwf/topic/35121-148fps-160fps-172-12k-13k1100-and-now-1144/?do=findComment&comment=1552857


-
You could try Plastruct Plastic Weld. There's no actual adhesive left over when it dries. You apply some to the affected area and hold the pieces together. It melts the plastic and they bond together. Works on ABS, styrene, butyrate, acrylic, plexiglass, and probably some other plastics.
-
That looks pretty good. The scenery could actually pass for the island of Mayan!
-
Really nice repaint of the GBP-1S armor. Very cleanly done and even some extra attention to detail like putting the SVF-37 on it which was only in small print in the description.
-
1/48+fp's, 1/60+fp's, 1/72, 1/2k, 1/3k,1/100 and now 1/144
MacrossJunkie replied to VF-18S Hornet's topic in Toys
@Lolicon It looks great! The extra decaling you took the time to do adds a lot to it as well! -
Arcadia 1/60 Perfect Transformation VF-0D for 2015
MacrossJunkie replied to Dark_Ghost's topic in Toys
You can get a preview of it here in GERWALK mode in this thread: http://www.macrossworld.com/mwf/topic/35120-whats-lying-on-your-workbench-mk-iv/?do=findComment&comment=1552367 That's all I took of it for now while the clearcoat is curing and I work on the super parts. -
Anyone is welcome to give it a shot with putting in a background! I did it once with this old pic of my YF-25 Prophecy and it took me forever to do. I didn't even do the lighting right. The worst part was trying to isolate the valkyrie and trying to blend any anti-aliased pixels that were a mix of the valk's colors and the original backdrop's so that it didn't show in the new background. I'm no expert with photo editing (I wouldn't even call myself an intermediate user) and there's probably much easier ways to do that than going magnified pixel by pixel, but I really have no idea what that would be or if there are tools that make it a lot easier. I guess I could try getting a green chromakey backdrop and see if that makes it easier to isolate...
-
Arcadia 1/60 Perfect Transformation VF-0D for 2015
MacrossJunkie replied to Dark_Ghost's topic in Toys
Thank you! I'll do a write up for the 0D as well as the one already requested for the 0S. -
Arcadia 1/60 Perfect Transformation VF-0D for 2015
MacrossJunkie replied to Dark_Ghost's topic in Toys
The 0A is planned. My 0S already does look like this, but I'm waiting to finish the conformal fuel tanks for the legs before I take more pics of it. -
Arcadia 1/60 Perfect Transformation VF-0D for 2015
MacrossJunkie replied to Dark_Ghost's topic in Toys
Posted these in the workshop thread but I figured it would be appropriate to share here also after mentioning how I went down that rabbit hole. I couldn't leave it as is anymore and went all in, so I worked on mine a little bit here and there over the span of the past few weeks. My inspiration being to make it look like this more or less
-
I thought it was snowing there for a second when I looked at the thumbnail. I'd love to see the finished thing in action. Perhaps you could take a quick vid when you're done? Thank you! It doesn't feel like it, but I guess it's been some time when I started. Seeing your work on the models and people's custom VF-1 toys back in the day really inspired me to try my hand at weathering and in general just make my toys look less... toy-like. My few years' break from MW and from weathering my growing backlog of toys was for a couple reasons. I was burned out and felt like I wasn't doing anything new or improving and I was just churning crap out in a few days. Also, I was getting major neck tension headaches every time I worked on something. The break did me some good as I thought about how I wanted to approach doing weathering and customizing going forward. I had new ideas, new techniques I wanted to try, and new products to test. I still get the headaches though... I've finally finished my 0D and 0S (aside from the conformal FAST pack for the legs, that's still in progress). I've taken some pics, but I'm waiting for the clear coat to cure before I do a full proper photo shoot. The wings on the 0S have already suffered some scratches because there are sharp scrape-y points inside the wing glove... Seems like a bad place to have such things. I sanded them down some so hopefully that won't be an issue anymore. I need to do that write up I promised you and will get to that after I finish up the super parts for the 0S.
-
I'm curious about how the fitment issues look as well.
-
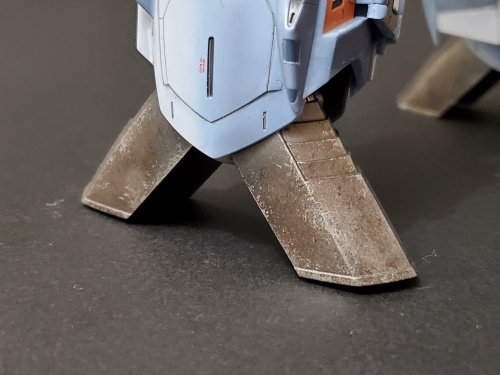
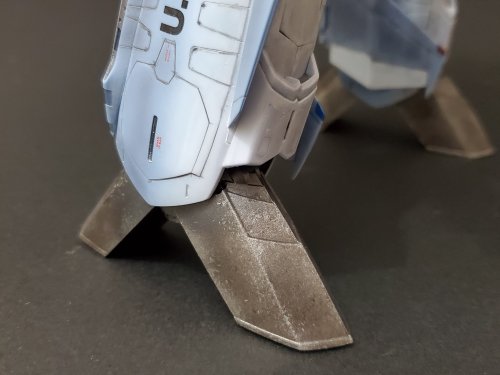
Finished the hands and feet for my 0D. I was pretty pleased with how the feet turned out. I got the look I was basically going for. All that's left is some final touch ups and weathering the gunpod and I should be done with the 0D.