Angel's Fury Posted June 10, 2004 Share Posted June 10, 2004 Awesome Datterboy!!! Simply awesome!!! Link to comment Share on other sites More sharing options...
Angel's Fury Posted June 15, 2004 Share Posted June 15, 2004 Seems like Rodavan's busy. He hasn't posted an update for some time now. Link to comment Share on other sites More sharing options...
Rodavan Posted June 16, 2004 Share Posted June 16, 2004 Just a bit Today is a public( bank) holiday , I am @ work ........ Link to comment Share on other sites More sharing options...
The_WOZ Posted June 20, 2004 Share Posted June 20, 2004 Been working on the textures... Link to comment Share on other sites More sharing options...
Ignacio Ocamica Posted June 21, 2004 Share Posted June 21, 2004 Looking very good WOZ! The proportions of your model are simply brilliant, a great rendition of the VF 1 Link to comment Share on other sites More sharing options...
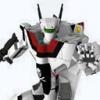
DatterBoy Posted June 30, 2004 Share Posted June 30, 2004 This thread must not die! Did this custom of Crazy Canuck's Macrossworld paint scheme for one of the toy threads: :Dat Link to comment Share on other sites More sharing options...
Amped Posted June 30, 2004 Share Posted June 30, 2004 WOW, beautiful work throughout this thread. You all rock! Link to comment Share on other sites More sharing options...
Angel's Fury Posted June 30, 2004 Share Posted June 30, 2004 WOW, beautiful work throughout this thread. You all rock! INDEED!!!! Link to comment Share on other sites More sharing options...
EXO Posted July 1, 2004 Share Posted July 1, 2004 The Macrossworld scheme is so cool it flies itself! Link to comment Share on other sites More sharing options...
Knight26 Posted July 1, 2004 Share Posted July 1, 2004 very sweet, I just don't why you used the picture where I had to bend over and grab my drink, lol Link to comment Share on other sites More sharing options...
IroHide Posted July 1, 2004 Share Posted July 1, 2004 That looks REALLY good. i do mean really. Link to comment Share on other sites More sharing options...
DatterBoy Posted July 1, 2004 Share Posted July 1, 2004 modes shot Link to comment Share on other sites More sharing options...
Angel's Fury Posted July 2, 2004 Share Posted July 2, 2004 Man, that's even SWEETER!!! Link to comment Share on other sites More sharing options...
Gorgo Posted July 2, 2004 Share Posted July 2, 2004 So let me understand this correctly...... You guys are building these Valkyerie and SDF-1 as 100% CGI ? I like the smoothness of movement with CGI but texture mapping "in general" with any CGI still looks CGI. I really like the CGI Valkyerie but the SDF-1 looks pretty digital. (something with the colors didn't quite seem right) Did you somehow scan the Yellow Submarine resin kit or was that built entirely in the computer? I'm just curious.... what programs were used? I llike to explore other options in animating. For me the easy way is to take a hole bunch of pictures from all angles of a model/toy ,cut them out in adobe photoshop.....and animate them with adobe after effects. Before I got after effects though......I did it one frame at a time.....it took FOREVER !!! If you missed my other post here's a link to the shorts http://home.comcast.net/%7Ejpyre/movies/Meltrandiship001.mp4 The Zaku II Special forces one & and the Gatchaman (G-Force) were done the old way!!! You guys have some pretty awesome work though !!! Link to comment Share on other sites More sharing options...
DatterBoy Posted July 2, 2004 Share Posted July 2, 2004 Some texture mapping is pretty convincing, I just don't think many of us are at that level yet. After all, we're quite amateur as far as the greater world is concerned. The way you're doing must be harder... frame by frame.. geesh. :Dat Link to comment Share on other sites More sharing options...
Gorgo Posted July 5, 2004 Share Posted July 5, 2004 Those Valkyerie transformations are fantastic!! You could easily do something with that in Adobe after effects ! In the computer world.... I'm still pretty new as well !! I was trained in model minitures,costume design,SFX make-up and stop motion...... I had a taste of some 3-d studio "when it first came out" ( I had made a Regult standing in a city!) I didn't have the time to animate it though !!! I have found it more fun to take photos of the models and toys and put them into motion !! Wish I could work on some awesome T.V. comercials for Yamato or Bandai !!! Again I must say your transformation composition is outstanding !!! -Gorgo- Link to comment Share on other sites More sharing options...
Gorgo Posted July 5, 2004 Share Posted July 5, 2004 Some texture mapping is pretty convincing, I just don't think many of us are at that level yet. After all, we're quite amateur as far as the greater world is concerned.The way you're doing must be harder... frame by frame.. geesh. :Dat It's looks just as good (if not, better)than that Macross PS2 game! Or just as good as Macross Zero! (in texture) Link to comment Share on other sites More sharing options...
Chronocidal Posted July 7, 2004 Share Posted July 7, 2004 K, thought I'd bring a little new material into the thread. Started this last thursday, and it's going surprisingly fast. Enjoy. Link to comment Share on other sites More sharing options...
Chronocidal Posted July 7, 2004 Share Posted July 7, 2004 #2.... Link to comment Share on other sites More sharing options...
Knight26 Posted July 7, 2004 Share Posted July 7, 2004 wow, very nice YF-21, an shots of the underside, is it transformable or strictly fighter mode right now? Link to comment Share on other sites More sharing options...
Chronocidal Posted July 7, 2004 Share Posted July 7, 2004 Here's one underside shot... So far, the model's stuck in fighter mode, and it's probably going to stay that way. It's based off the Hasegawa kit, so the battroid proportions wouldn't be quite right, and I don't know enough about the YF-21's transformation sequence to model it anyway. It's only 5400 polygons at the moment, and I'm hoping to keep it low. This'll be my second Flight Sim model, I just need to build the control surfaces and landing gear in, as well as the cockpit... oh, and the head laser, didn't even notice that until now. I'll probably do a few versions of this model, there are only a few differences between the YF-21 and VF-22, so it'll be really easy to do both. Link to comment Share on other sites More sharing options...
Knight26 Posted July 7, 2004 Share Posted July 7, 2004 very nice, will be sweet to fly. Link to comment Share on other sites More sharing options...
Rodavan Posted July 7, 2004 Share Posted July 7, 2004 Excellent work Chronocidal I've been itching to finish my VF-19 , but work seem sto keep me from it at the moment , I gave my old valk model to a friend ..... He used a new module in Cinema4d , Sketch & toon to create Sketch like images , I tought it looked nice . What do you think ? Link to comment Share on other sites More sharing options...
Rodavan Posted July 7, 2004 Share Posted July 7, 2004 Next one is a first try Thanks for the pic Hunter ! Well lets get on with the job , goto pay the bills and the car and the ........ Link to comment Share on other sites More sharing options...
DatterBoy Posted July 11, 2004 Share Posted July 11, 2004 RODAVAN, Before I saw the text I thought it was an actual drawing. Looks relaly authentic. Nice stuff. :Dat Link to comment Share on other sites More sharing options...
mighty gorgon Posted July 11, 2004 Share Posted July 11, 2004 It's only 5400 polygons at the moment, and I'm hoping to keep it low. It's very nice! and at 5400 polygons, it has a lot of detail. Regds, G Link to comment Share on other sites More sharing options...
The_WOZ Posted July 11, 2004 Share Posted July 11, 2004 Some progress in the textures. Link to comment Share on other sites More sharing options...
The_WOZ Posted July 11, 2004 Share Posted July 11, 2004 Another view Link to comment Share on other sites More sharing options...
The_WOZ Posted July 11, 2004 Share Posted July 11, 2004 And start modelling the head and front landing gear Link to comment Share on other sites More sharing options...
The_WOZ Posted July 11, 2004 Share Posted July 11, 2004 Landing gear: Link to comment Share on other sites More sharing options...
The_WOZ Posted July 11, 2004 Share Posted July 11, 2004 A couple of parts borrowed from my fan racer model Link to comment Share on other sites More sharing options...
DatterBoy Posted July 15, 2004 Share Posted July 15, 2004 Wonderful model, looks so clean. What app are you using? Does it xform? :Dat Link to comment Share on other sites More sharing options...
Chronocidal Posted July 20, 2004 Share Posted July 20, 2004 I noticed something that might make weathering textures simpler for some people... While working on my flight-sim YF-19, I was having trouble getting the black markings to look right... See, I drew the textures, then added a slightly transparent black area over them to do the markings. But it never looked quite right. I realized why the other day. Black areas don't get darker when they get weathered.. they get lighter. I found a very easy way to do it though... I just left all the areas that would be black as bright white, and weathered them lightly in black as I would any normal white surface. Then, when they were done, I selected that particular area, and inverted the color values. It turned out better than I expected. The light weathering turned lighter than the rest of the area, which was a good solid black, and it made it appear as if the black paint had been slightly worn and dulled, rather than getting dirty. Here's a pic of the results. Link to comment Share on other sites More sharing options...
Rodavan Posted July 21, 2004 Share Posted July 21, 2004 Nice work Chronocidal , that will help in the future . Link to comment Share on other sites More sharing options...
Angel's Fury Posted July 22, 2004 Share Posted July 22, 2004 Nice work indeed Chronocidal!!! That should help you with yours, right Rodavan? Link to comment Share on other sites More sharing options...
Recommended Posts