Chas
-
Posts
877 -
Joined
-
Last visited
Content Type
Profiles
Forums
Events
Gallery
Everything posted by Chas
-
Yeah that scoop has been bugging me for a while. I've hesitated redoing it, cus it's so much work to rip it out and replace it and I work so slowly that I hate to take such a big step back, UT I know if I don't It'll bug me forever. Thanks for the kick in the pants!
-
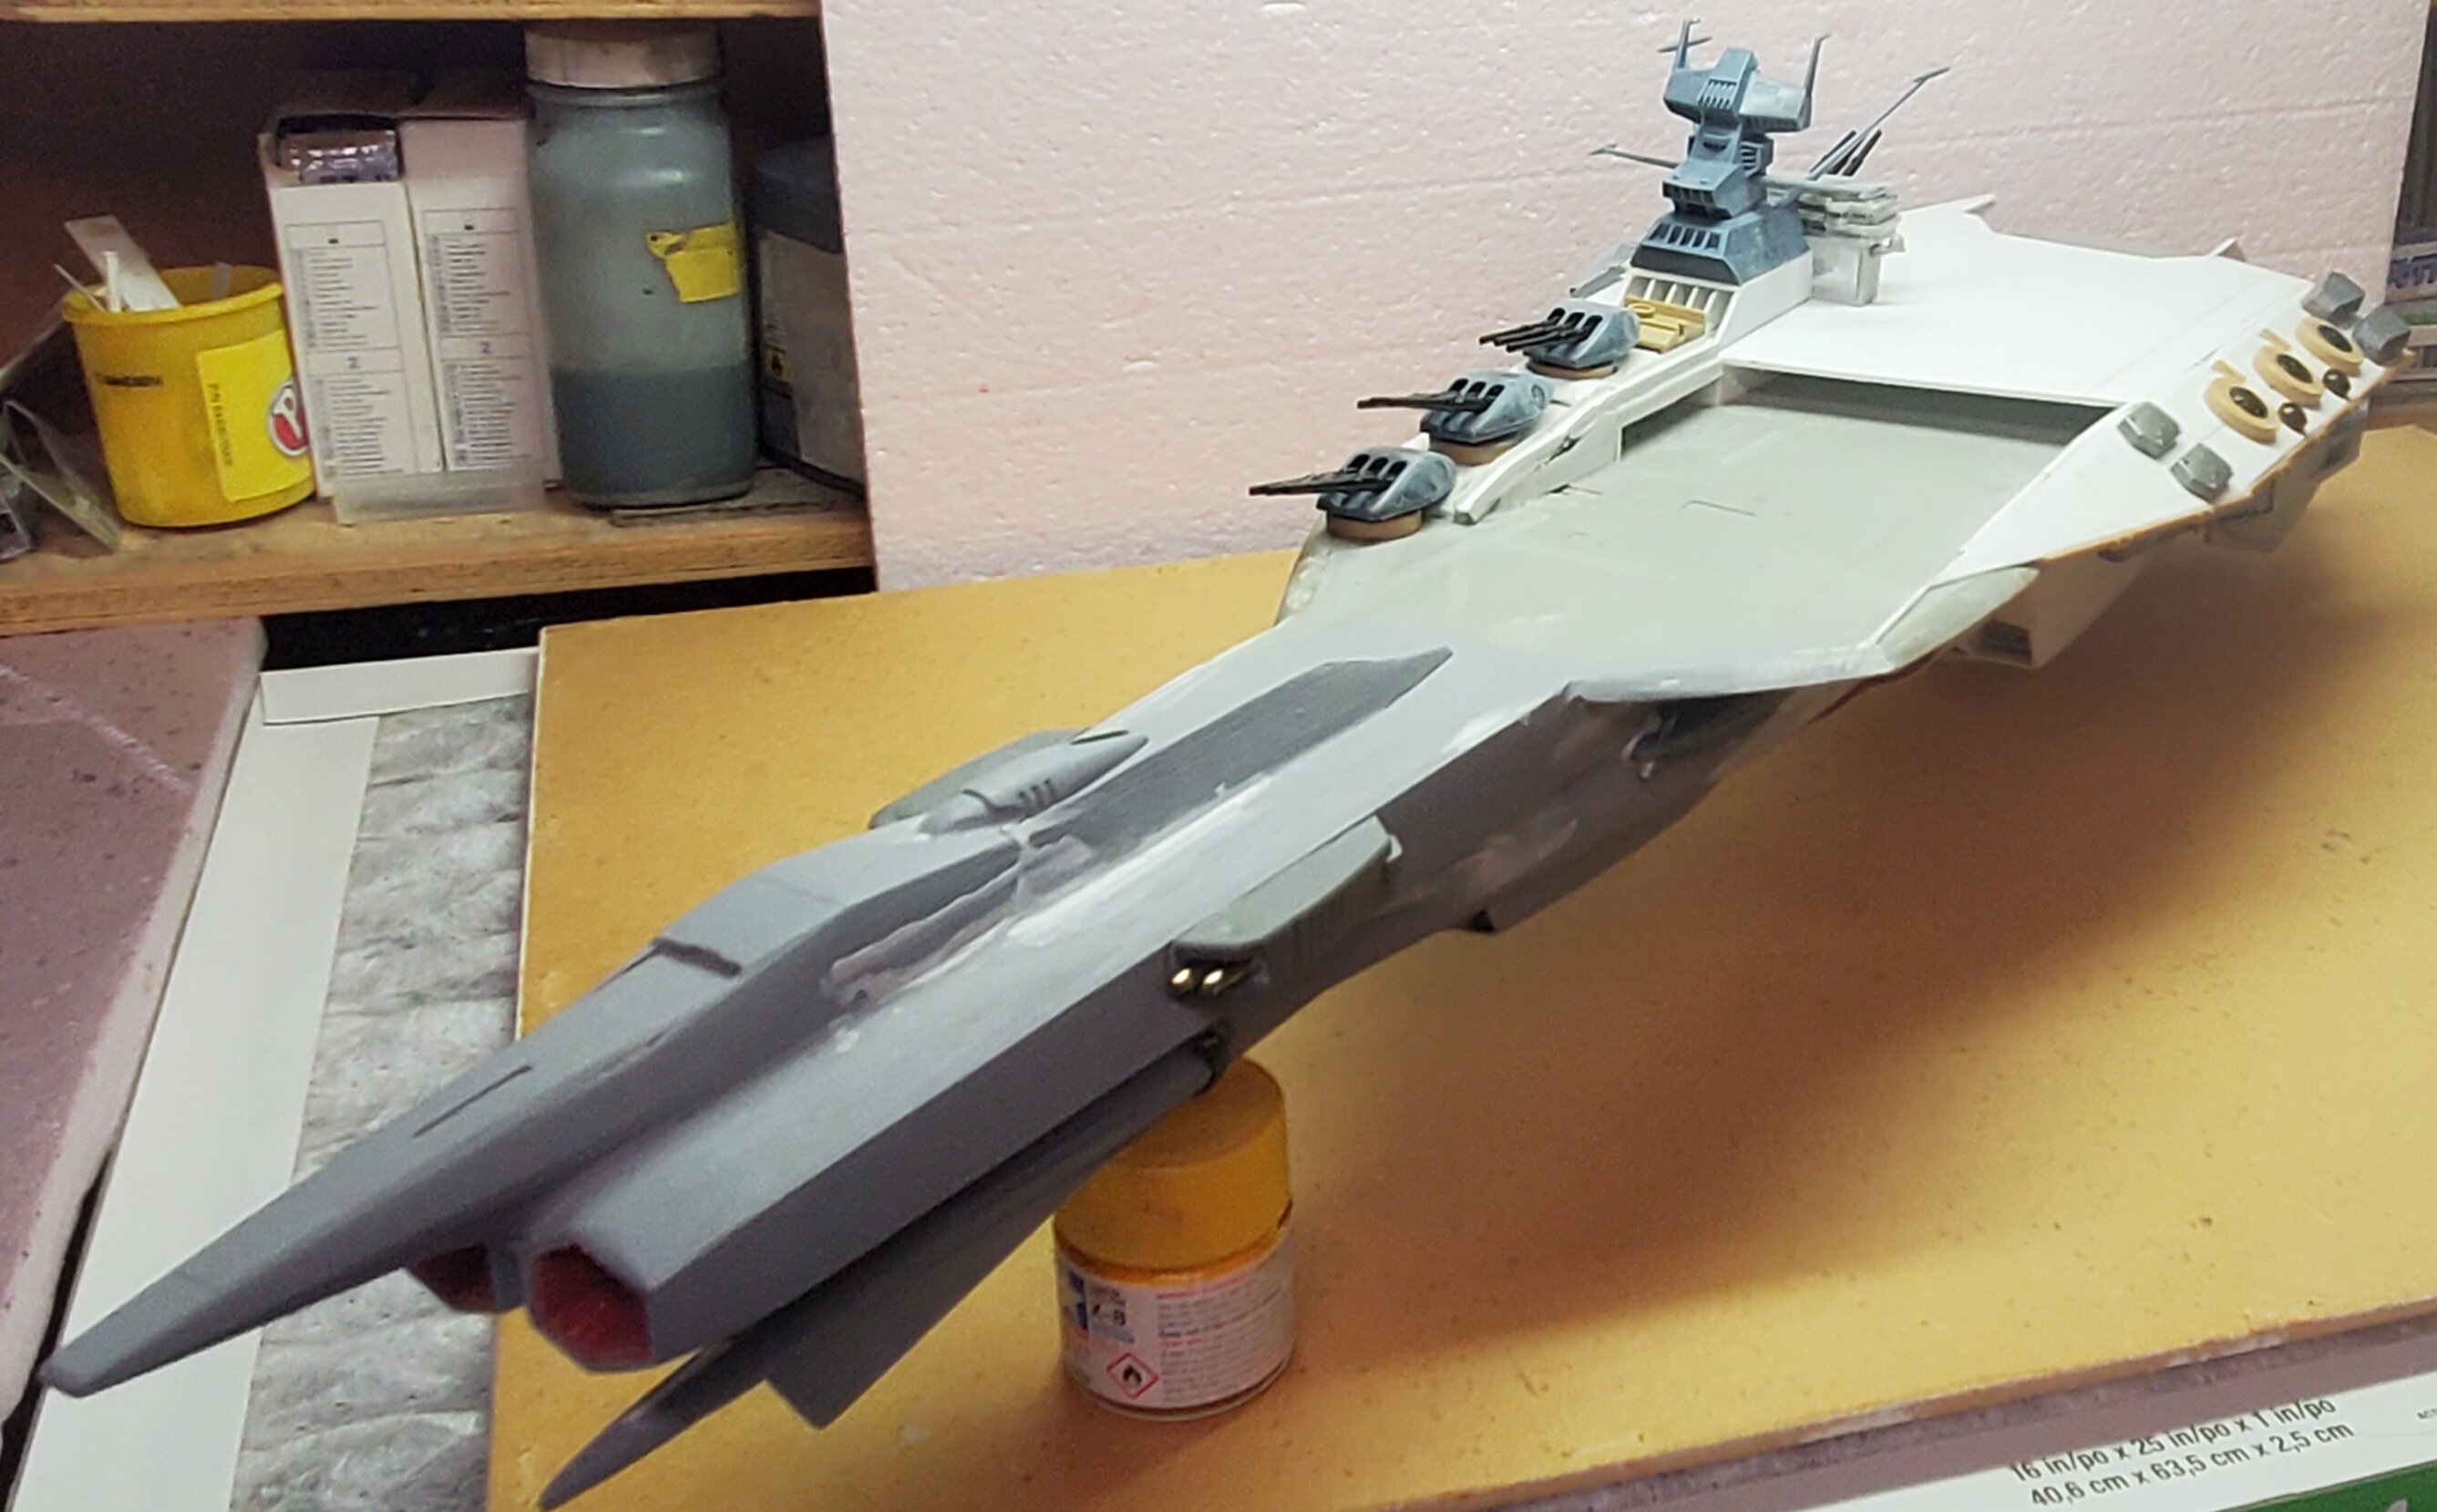
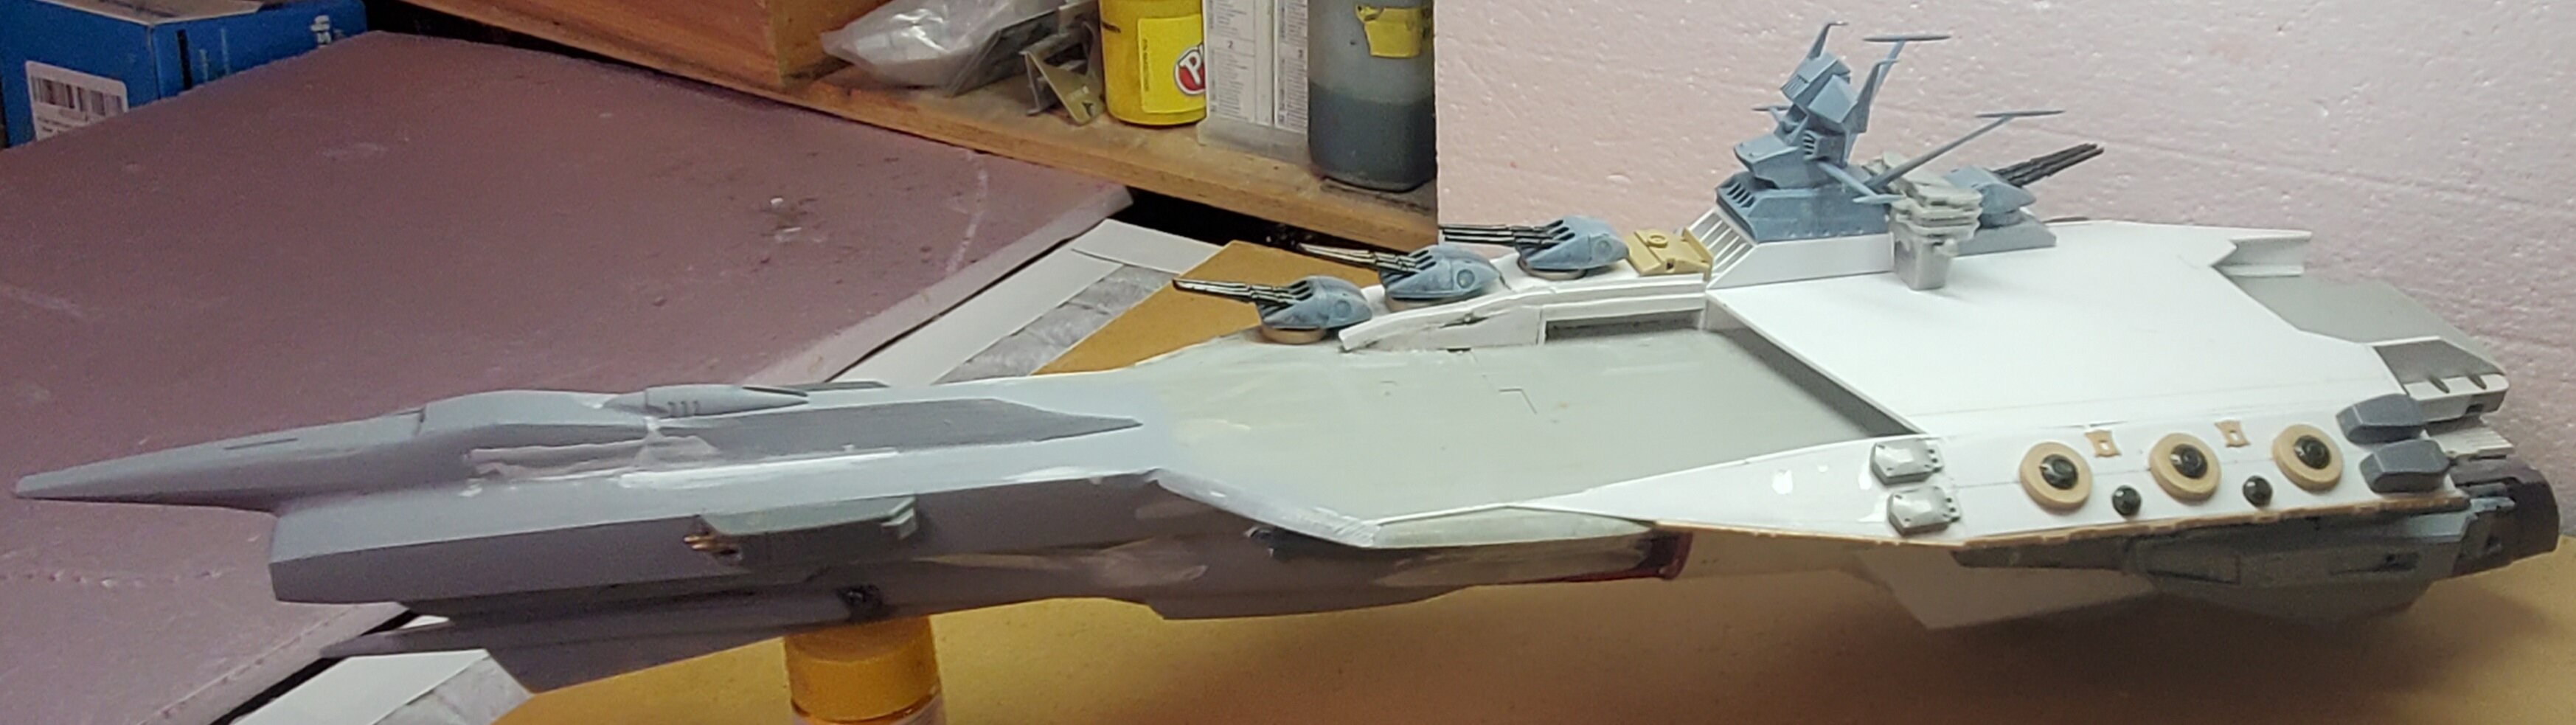
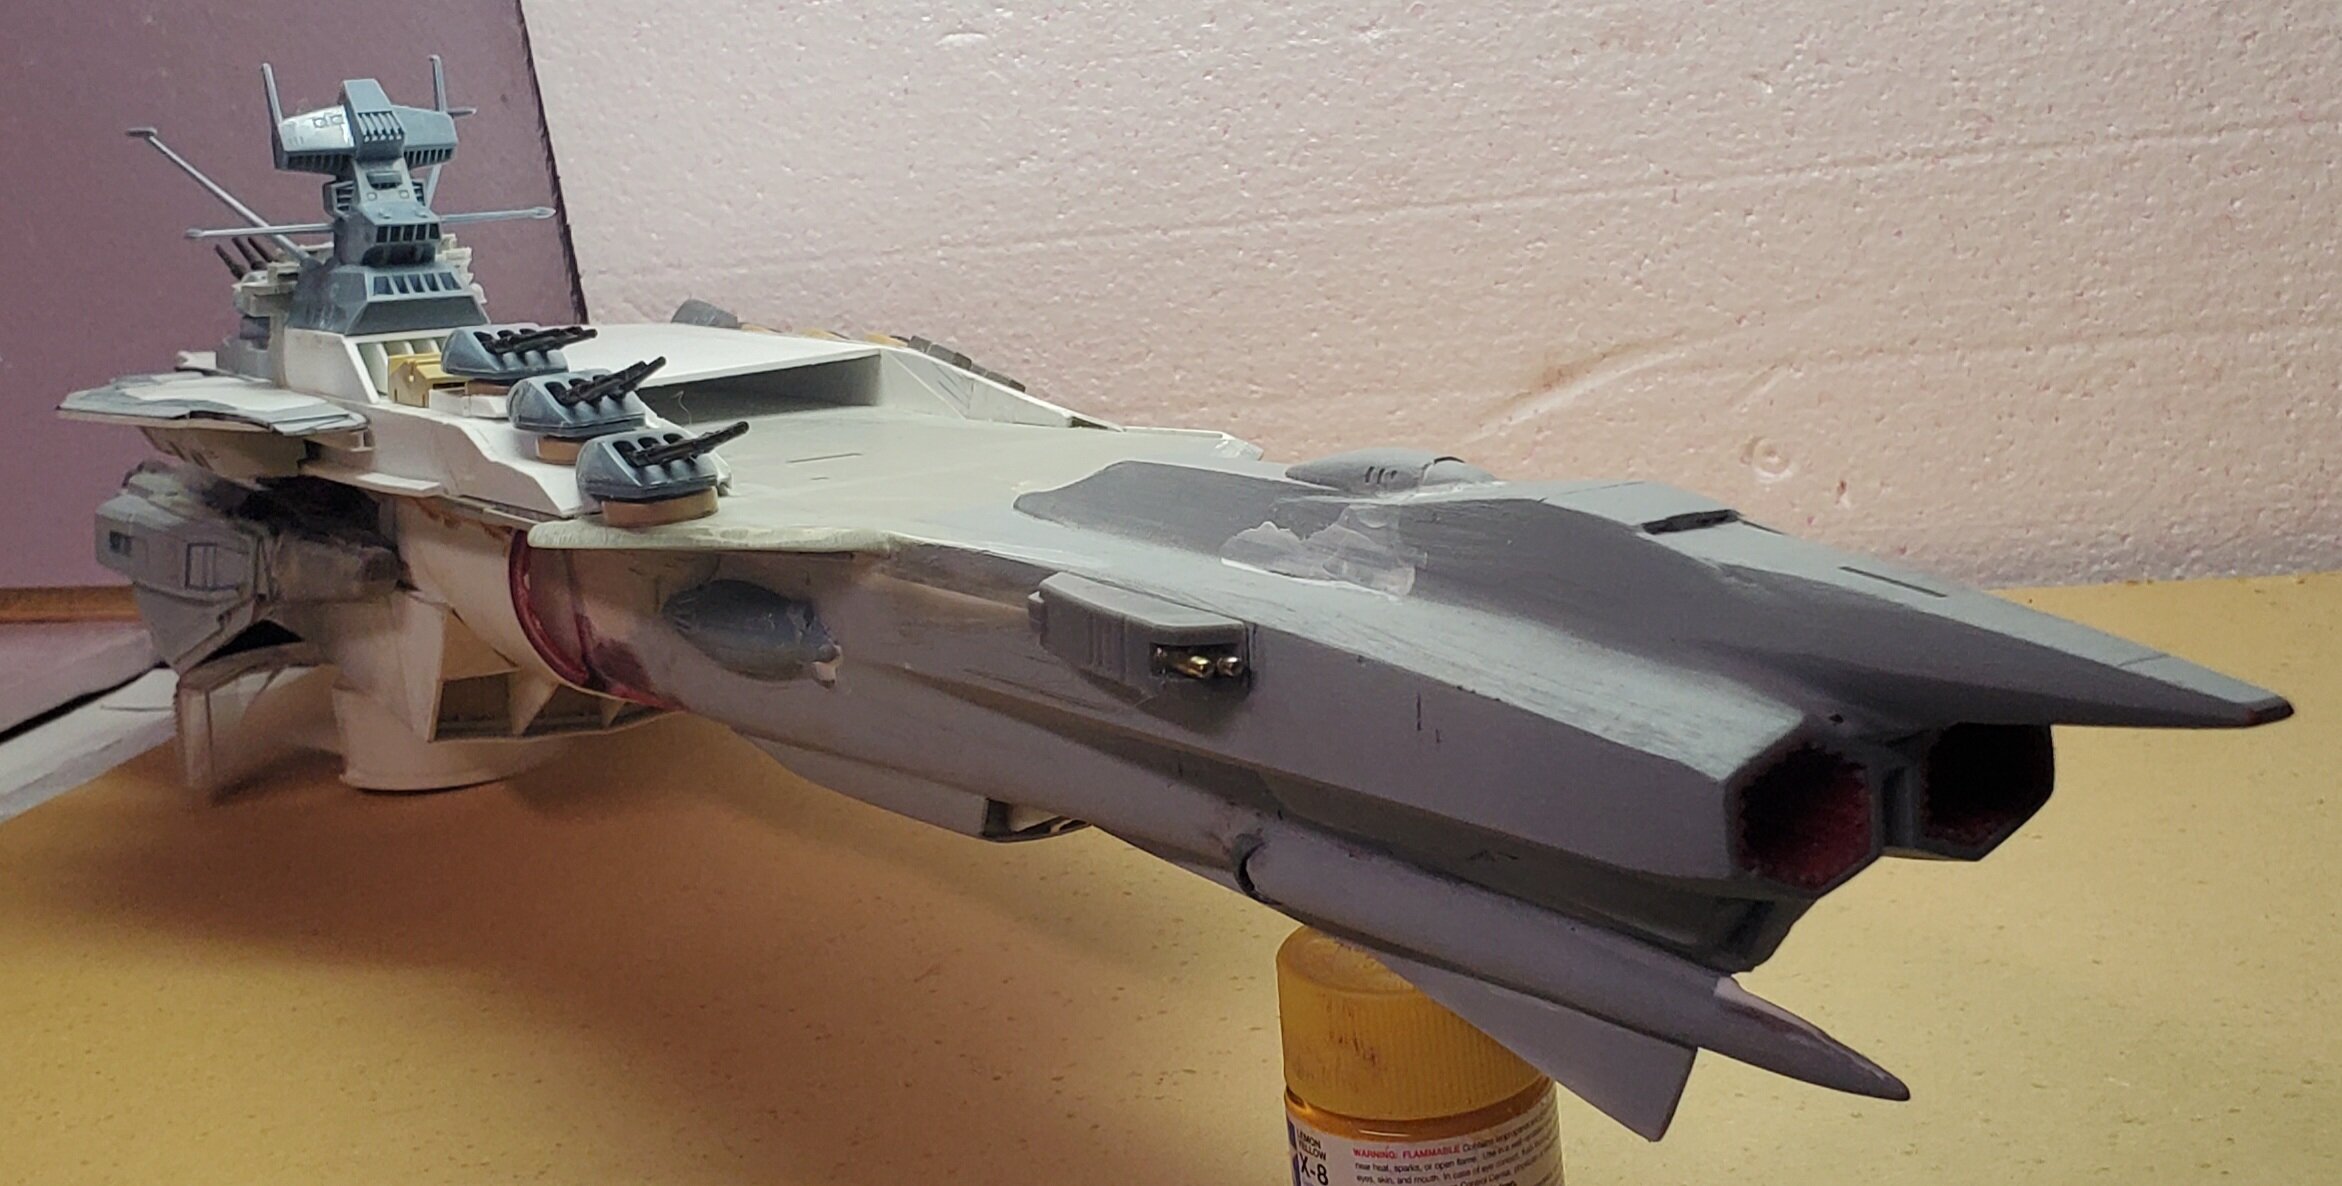
Definitely replace with styrene sheet. The cardboard and Styrofoam are used to quickly work through ideas. When I settle on a shape I like it is used as a pattern to build a styrene Part. Then bonds, or Apoxy sculpt is used to smooth out the mating boundaries between the scratched pieces and kit parts.
-
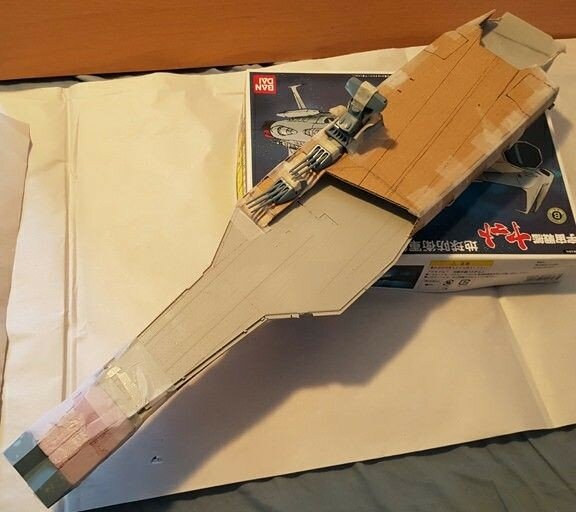
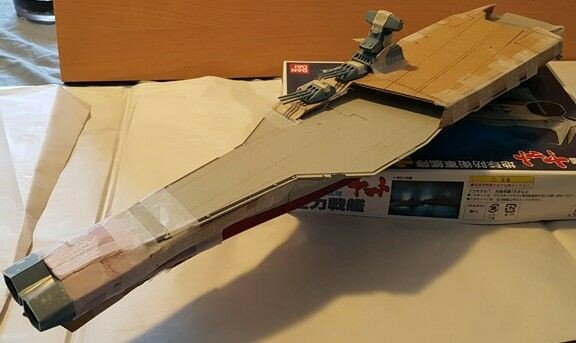
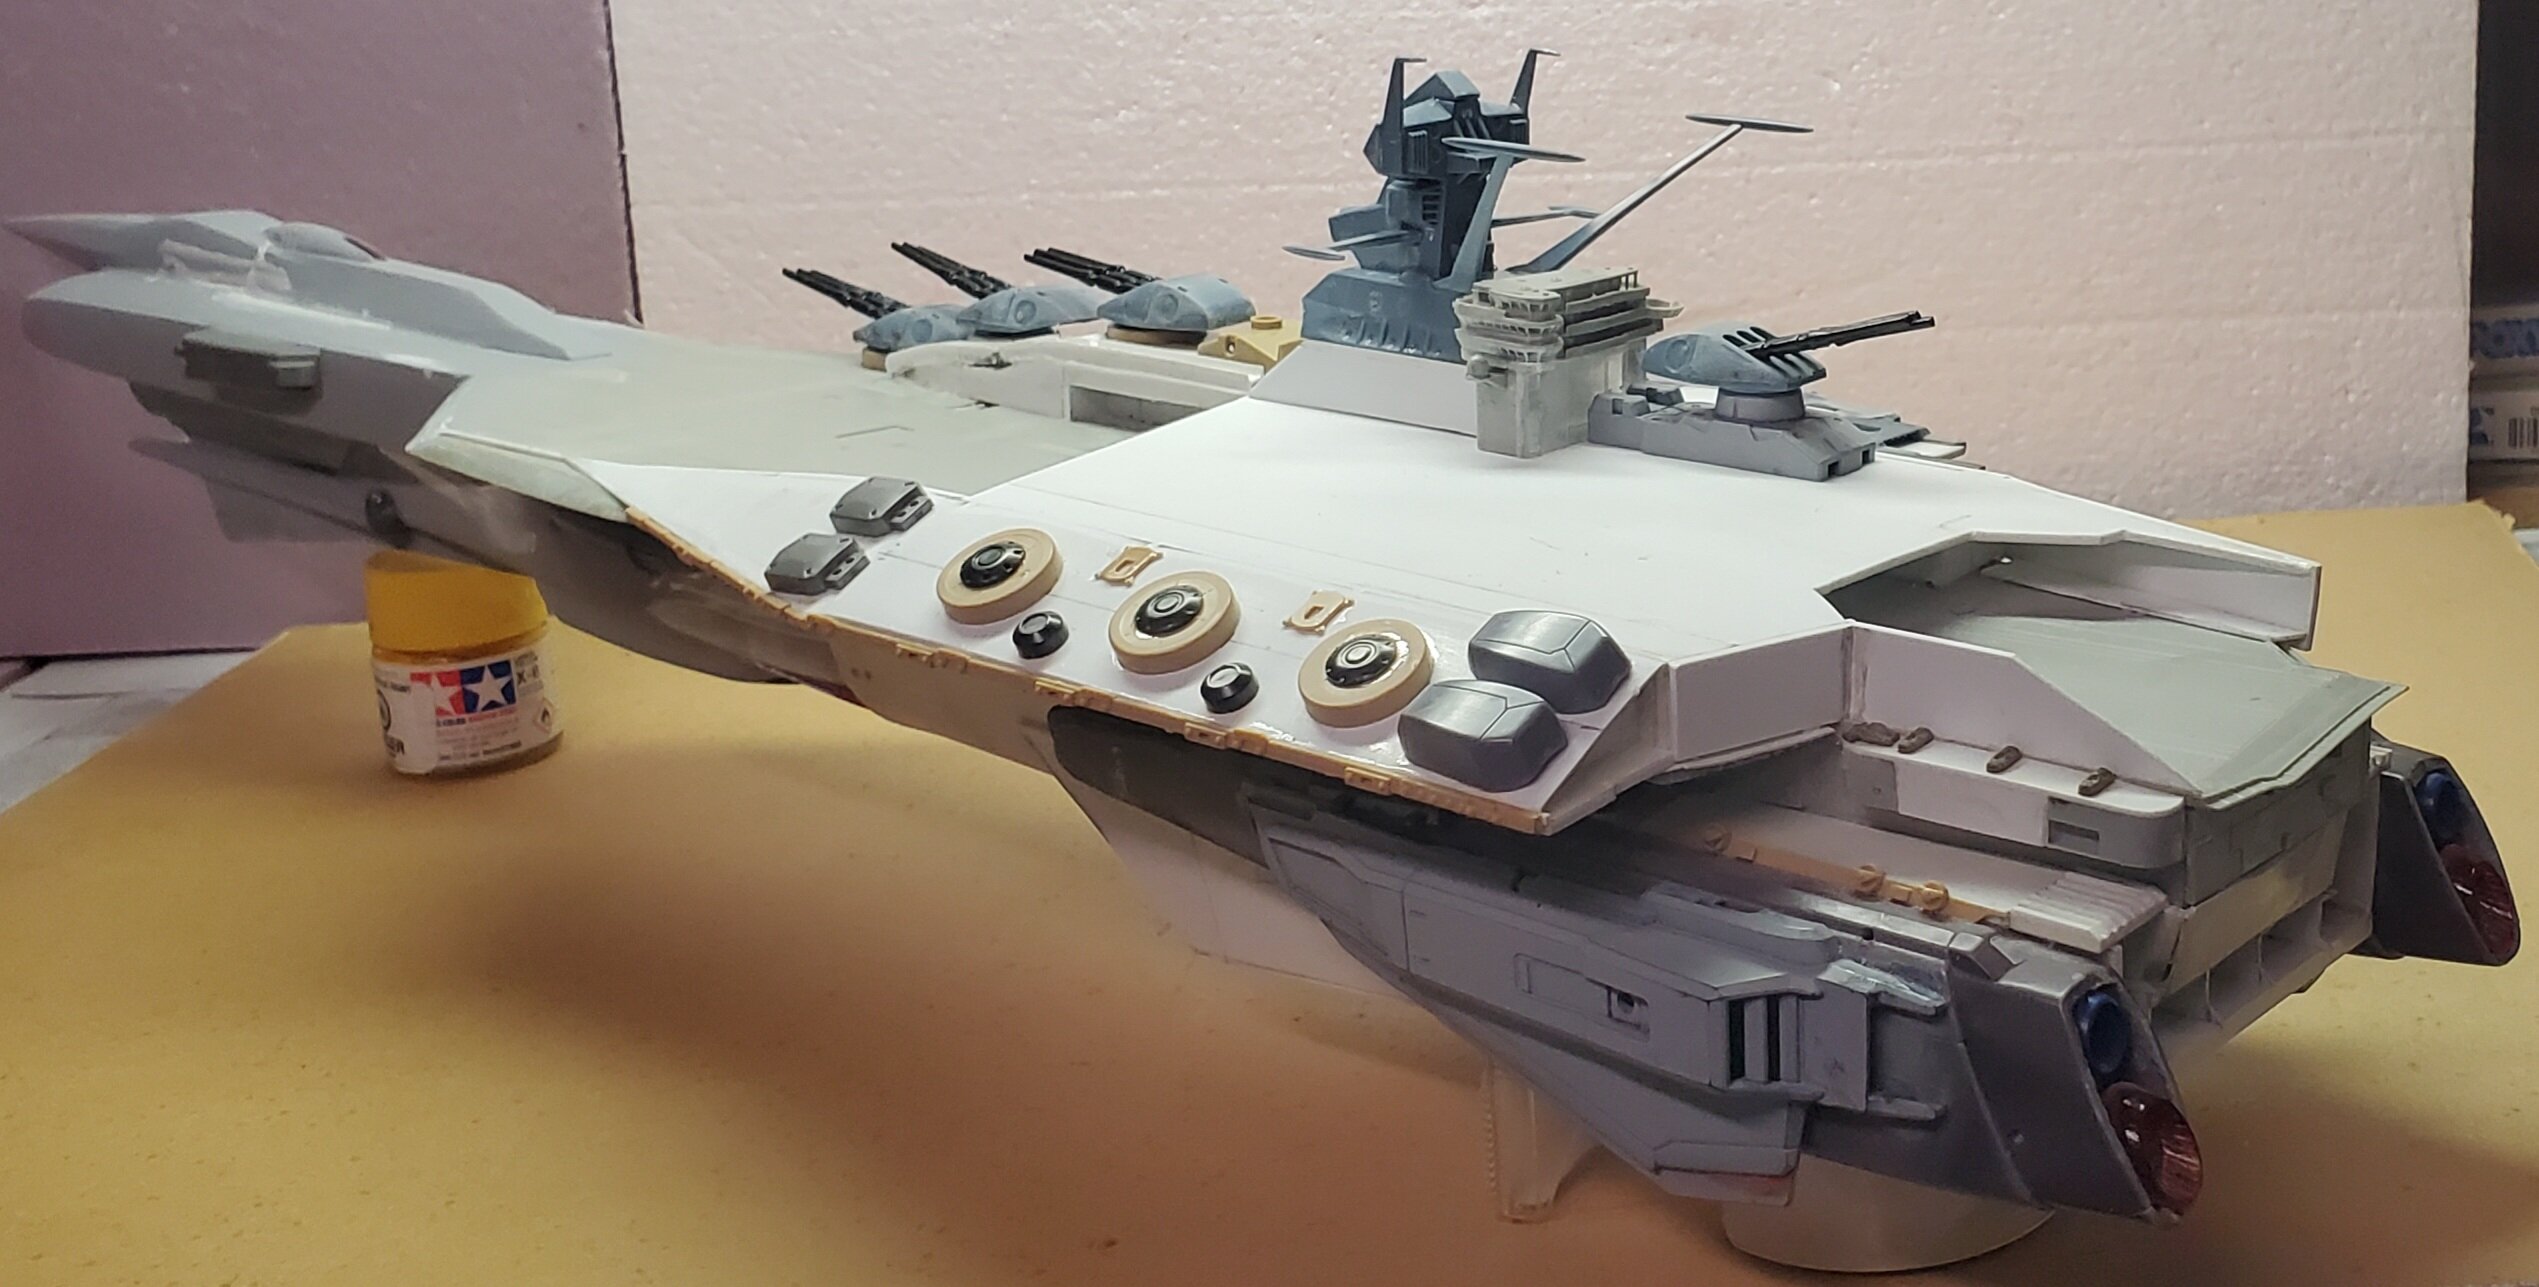
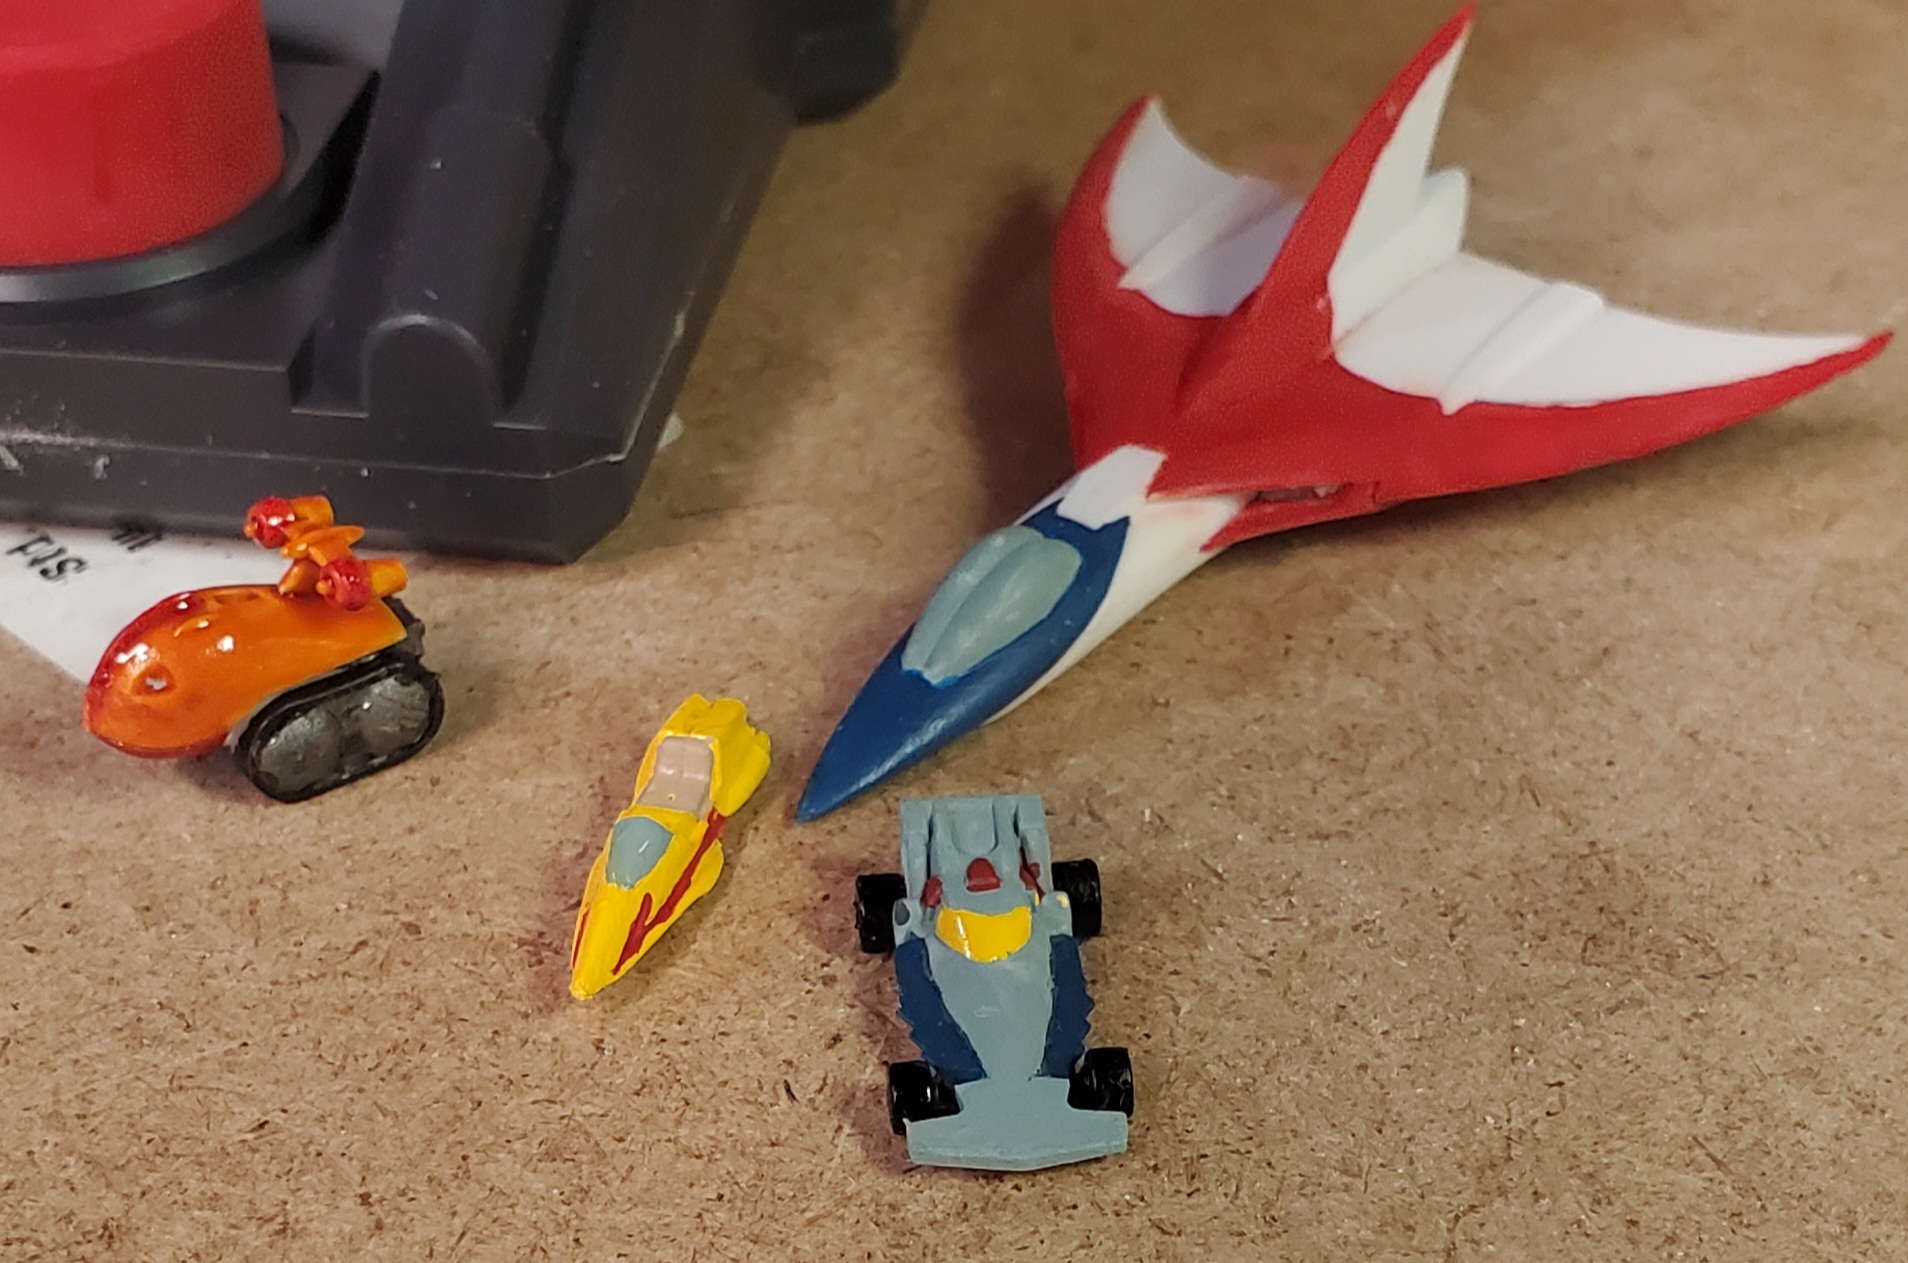
Thanks for the compliment, but I am nowhere near professional level at scratch building/ kitbashing. Plus I am really, really SLOW! Here are a couple of early pics to show a bit of my ad-hoc process. Cardboard and Styrofoam were used to get a quick and dirty idea of basic forms that had to be scratched.
-
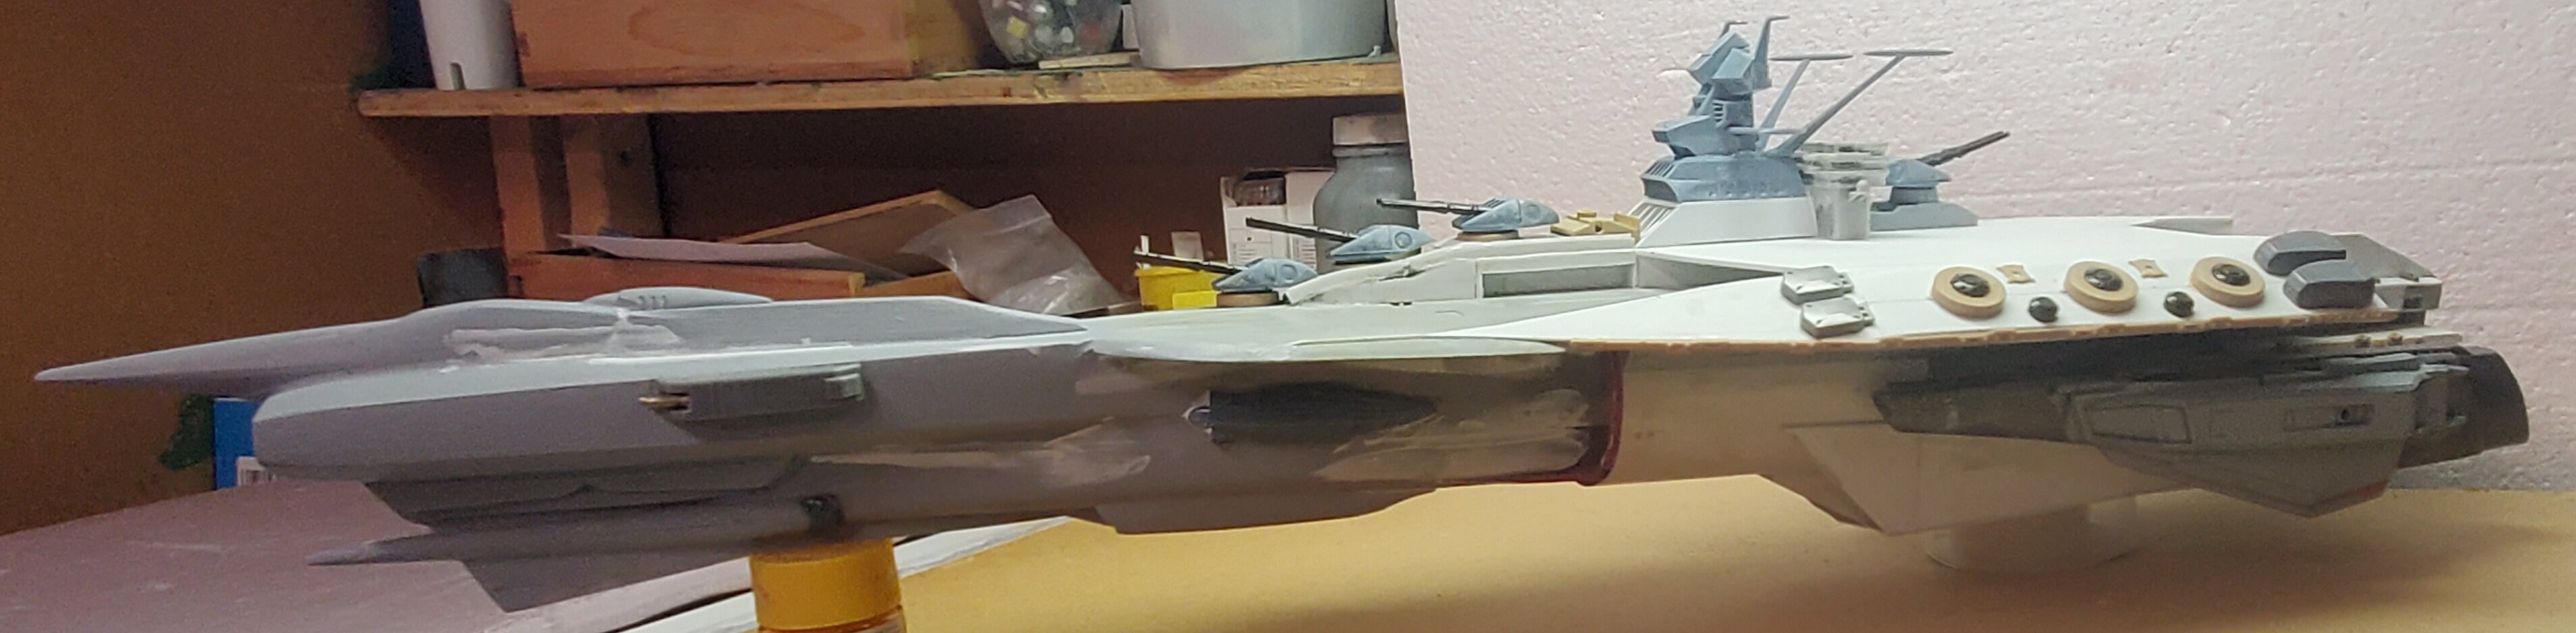
Wow! You guys are all pumping out some really great builds. After a really, really long hiatus I've been bitten by the bug again and gotten back into building. Well After moving my workbench and stash around a bit. I started this scratch/bash many years ago and decided to break it out and see what I could do with it. It started out life as a Trumpeter 1:700 scale USS Abraham Lincoln CVN 72 aircraft carrier, but I decided to make it my own version of a EDF carrier from the Space battleship Yamato universe. There's a bunch of parts from all sorts of stuff in here so far. I've ued bits from Gundam kits, Macross, Armoured Core, S.B.Yamato, a Trumpeter 1:35 Morsar Karl, a Revell Magnaguard fighter from Star Wars and more. I've taken inspiration from a few Japanese scratch builds I've seen, but I sort of making it up as I go along. The super structure and guns are just placed there for now to mock things up to get a sense of where I'm headed.


-
Rest well in the sea of stars sensei, your spirit and influence will continue through all those your stories have touched. Thank you for everything.
- 16 replies
-
- 1
-

-
- leiji matsumoto
- rip
- (and 5 more)
-
Just logged on for the first time in many months and OMG! this is absolutelyincredible news! It's like that recurring dream we've all had where you walk into this random, unknown hobby shop and you turn down one of the isles only to find a treasure trove of all of your vintage grail anime kits - Except this is REAL! UNFREAKINGBELIEVABLE! As for spreading the word, if there is any Starblazers/SB Yamato stuff I would think the folks over at ourstarblazers.com CosmoDNA would love this story and be very interested in letting their readers know about available vintage kits etc. Now you'll have to excuse me while I go search for some grail kits I have yet to add to my collection.
-

The 'Hey look at this really cool model build I saw' post
Chas replied to Shawn's topic in Model kits
Holy crap! What is that? ( I mean other than frikin' amazing , of course!) -
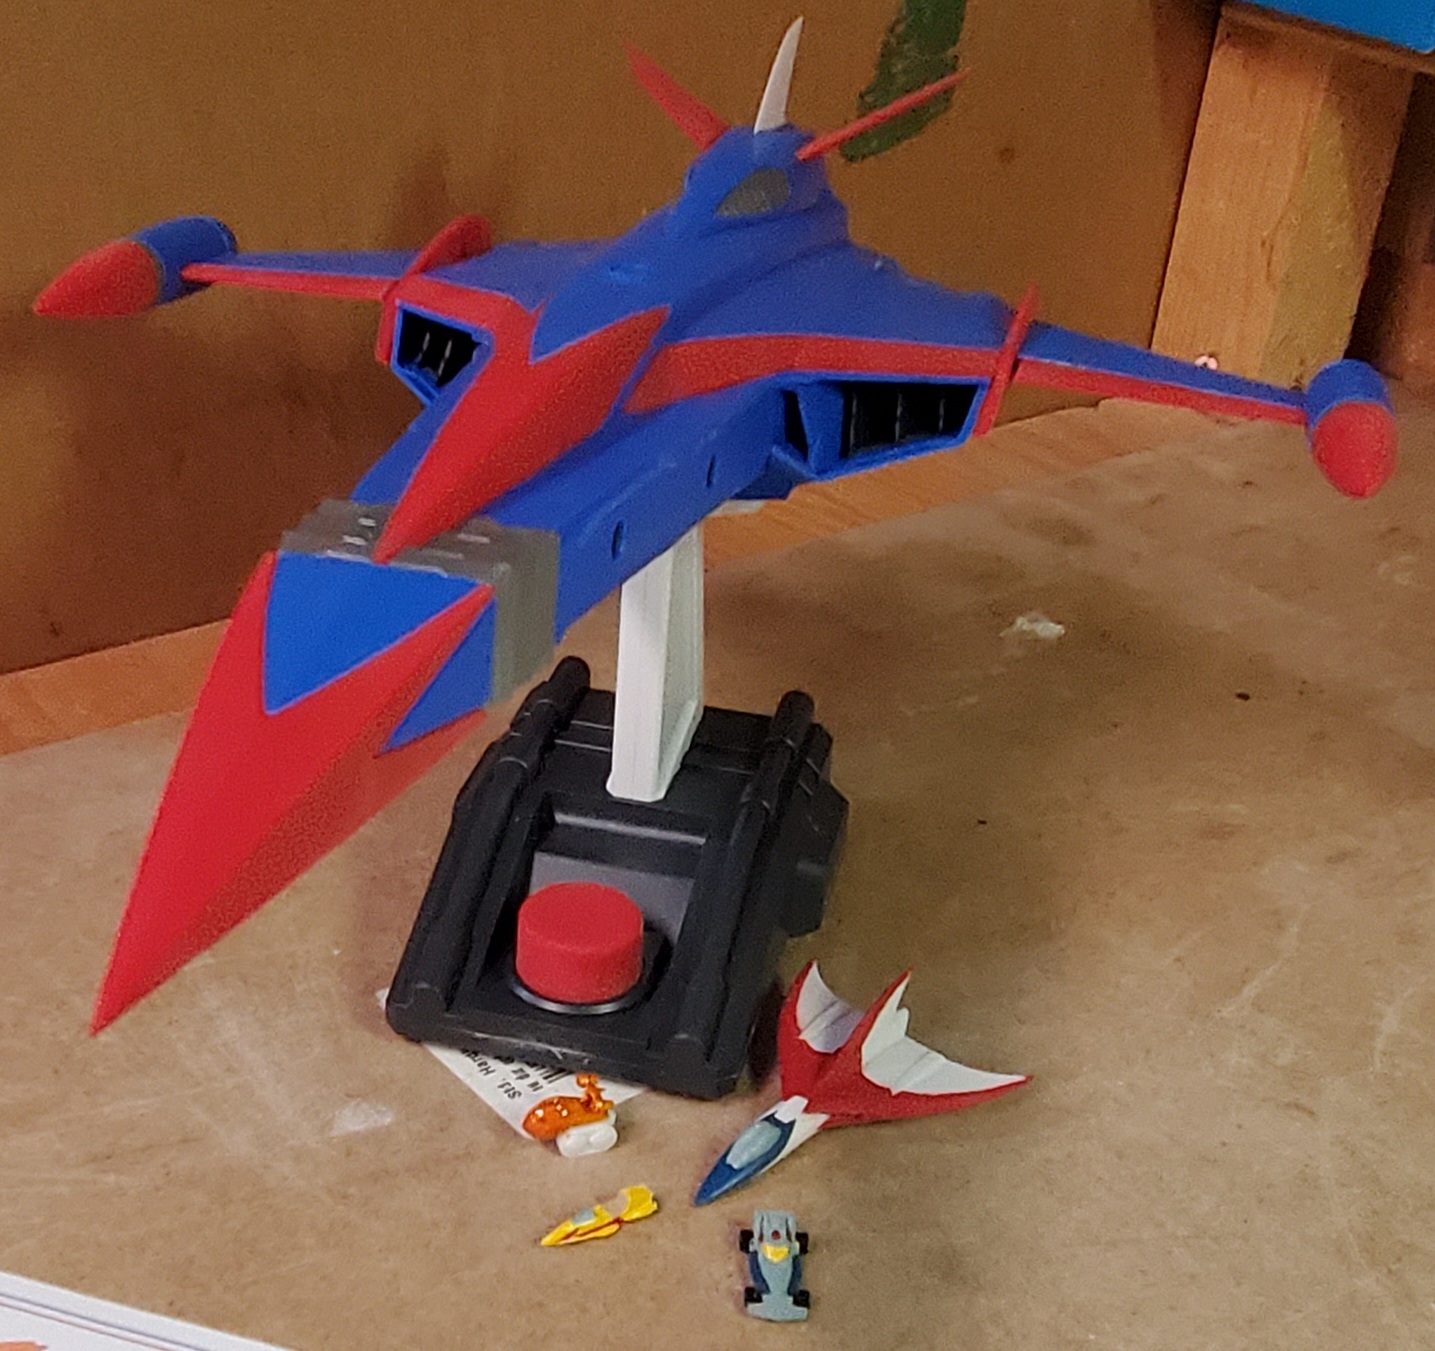
Finished the preliminary build of the Academy, Gatchaman God Phoenix. Just need to putty a few small gaps, paint and decal. Close-up of the little guys Had to use clear orange for Jinpei's tank 'cus I didn't have any other orange.
-
The 'Hey look at this really cool model build I saw' post
Chas replied to Shawn's topic in Model kits
Yep. That's it. I've said it before, and I'll say it again I'm done. I quit. This is an absolutely, jaw droppingly stunning display of ingenuity, craftsmanship and creativity. Unf#@king believable! -
Wow! That's really nice Thom! What medium is that, digital or traditional? If it's traditional What size? Really nice work on those mountains! I really like the treatment you chose.
-
The 'Hey look at this really cool model build I saw' post
Chas replied to Shawn's topic in Model kits
OK, that's it. I quit. I give up. With builds as stunning as these how can I get excited about my crappy little excursions into kit assembly. Absolutely stunning work. 😍 -
The 'Hey look at this really cool model build I saw' post
Chas replied to Shawn's topic in Model kits
Absolutely Fabulous! The colours are jus spot-on and the technique . . . remarkable. The finish is nothing short of stunning 😍 -
The 'Hey look at this really cool model build I saw' post
Chas replied to Shawn's topic in Model kits
God! That paint job is beautiful!😍 -
The 'Hey look at this really cool model build I saw' post
Chas replied to Shawn's topic in Model kits
So that's like what 1:300 scale? I wonder what the little Nichimo Valks would look like with that??? -
First of all, I know some folks thin it before application but I shoot it straight from the bottle. When you apply Future, you're better off applying a number of light coats than trying to do one heavy coat. When spraying straight try lowering the pressure below 15psi,( 15 is the max that I use with it ) and spray closer to the work.
-
For a Yamato of that size that thing is severely lacking in detail. Not worth it in my eyes, not when I've seen models less than half that size with way more detail.
-
Mikimoto only did the character design for Eve Tokimatsuri. (For all 3 parts) Toshihiro Hirano handled the other characters in pt1. Yasuomi Umetsu handled them for pt2. and Hiroyuki Kitazume for pt.3.
-
The 'Hey look at this really cool model build I saw' post
Chas replied to Shawn's topic in Model kits
Unbelievable!😱 -
That's a good deal- nice find! Now you need to get the paints and find the time to build it!
-
The 'Hey look at this really cool model build I saw' post
Chas replied to Shawn's topic in Model kits
Very nice weathering overall! well done build for sure. -
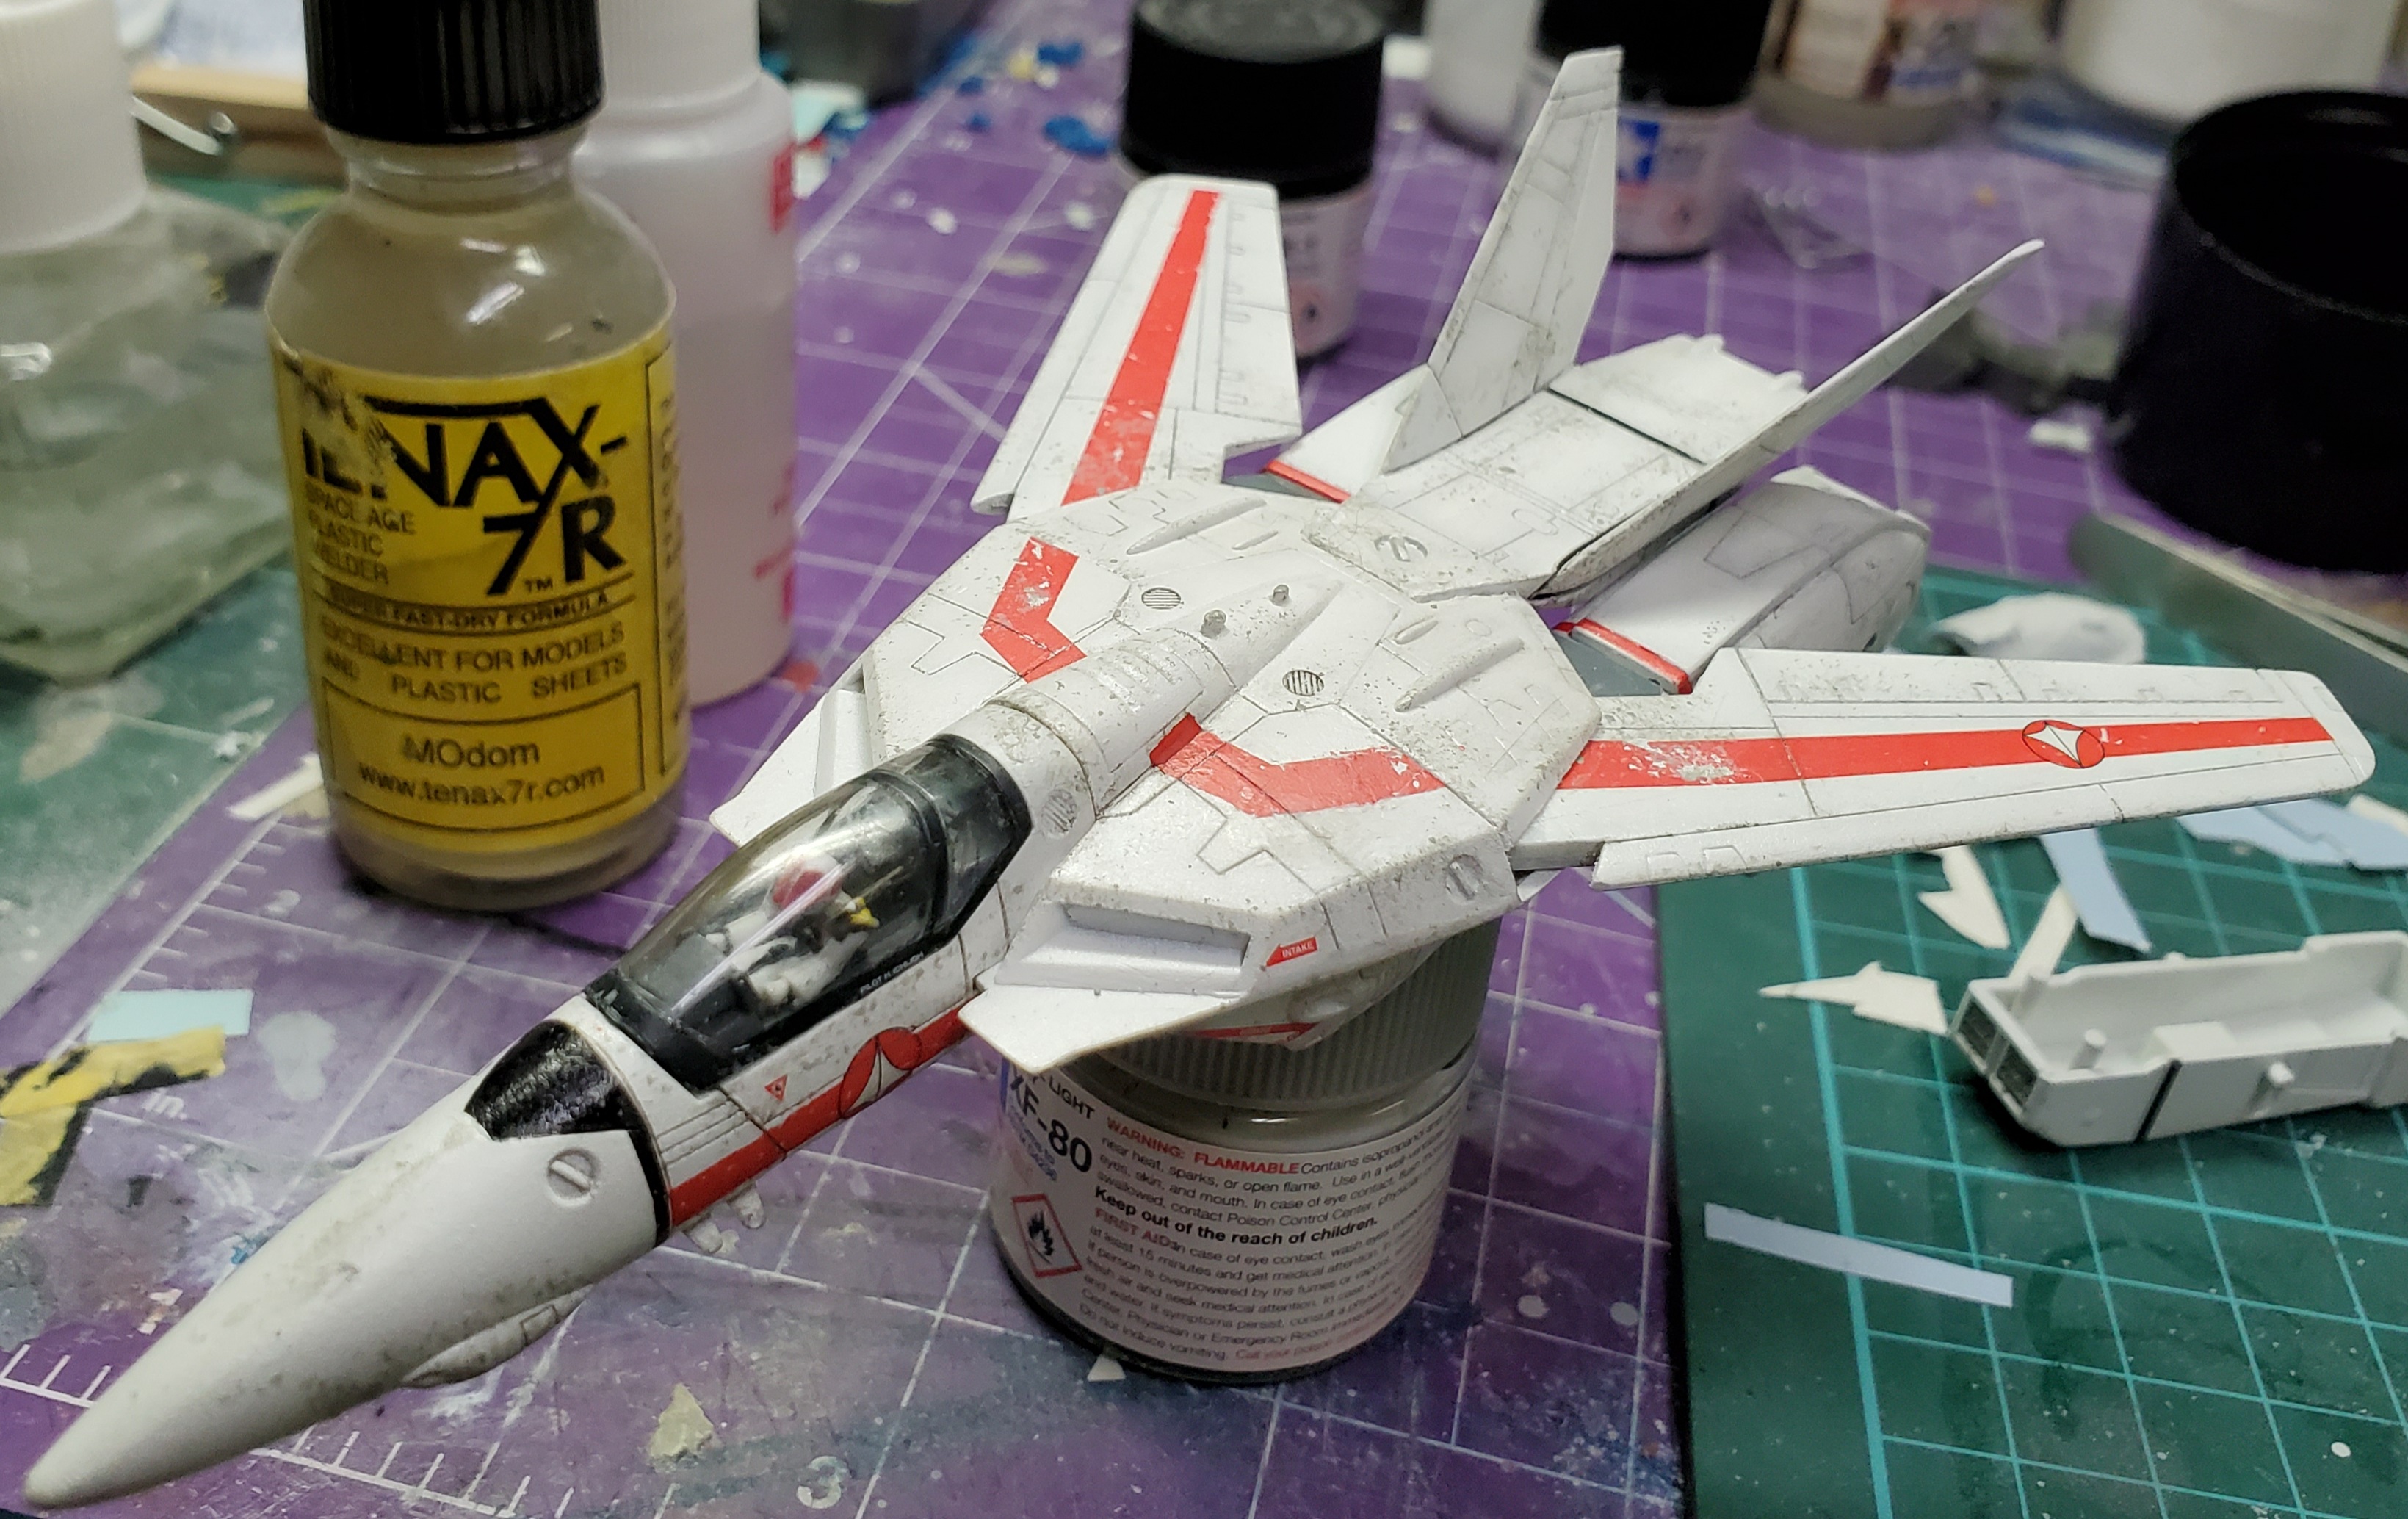
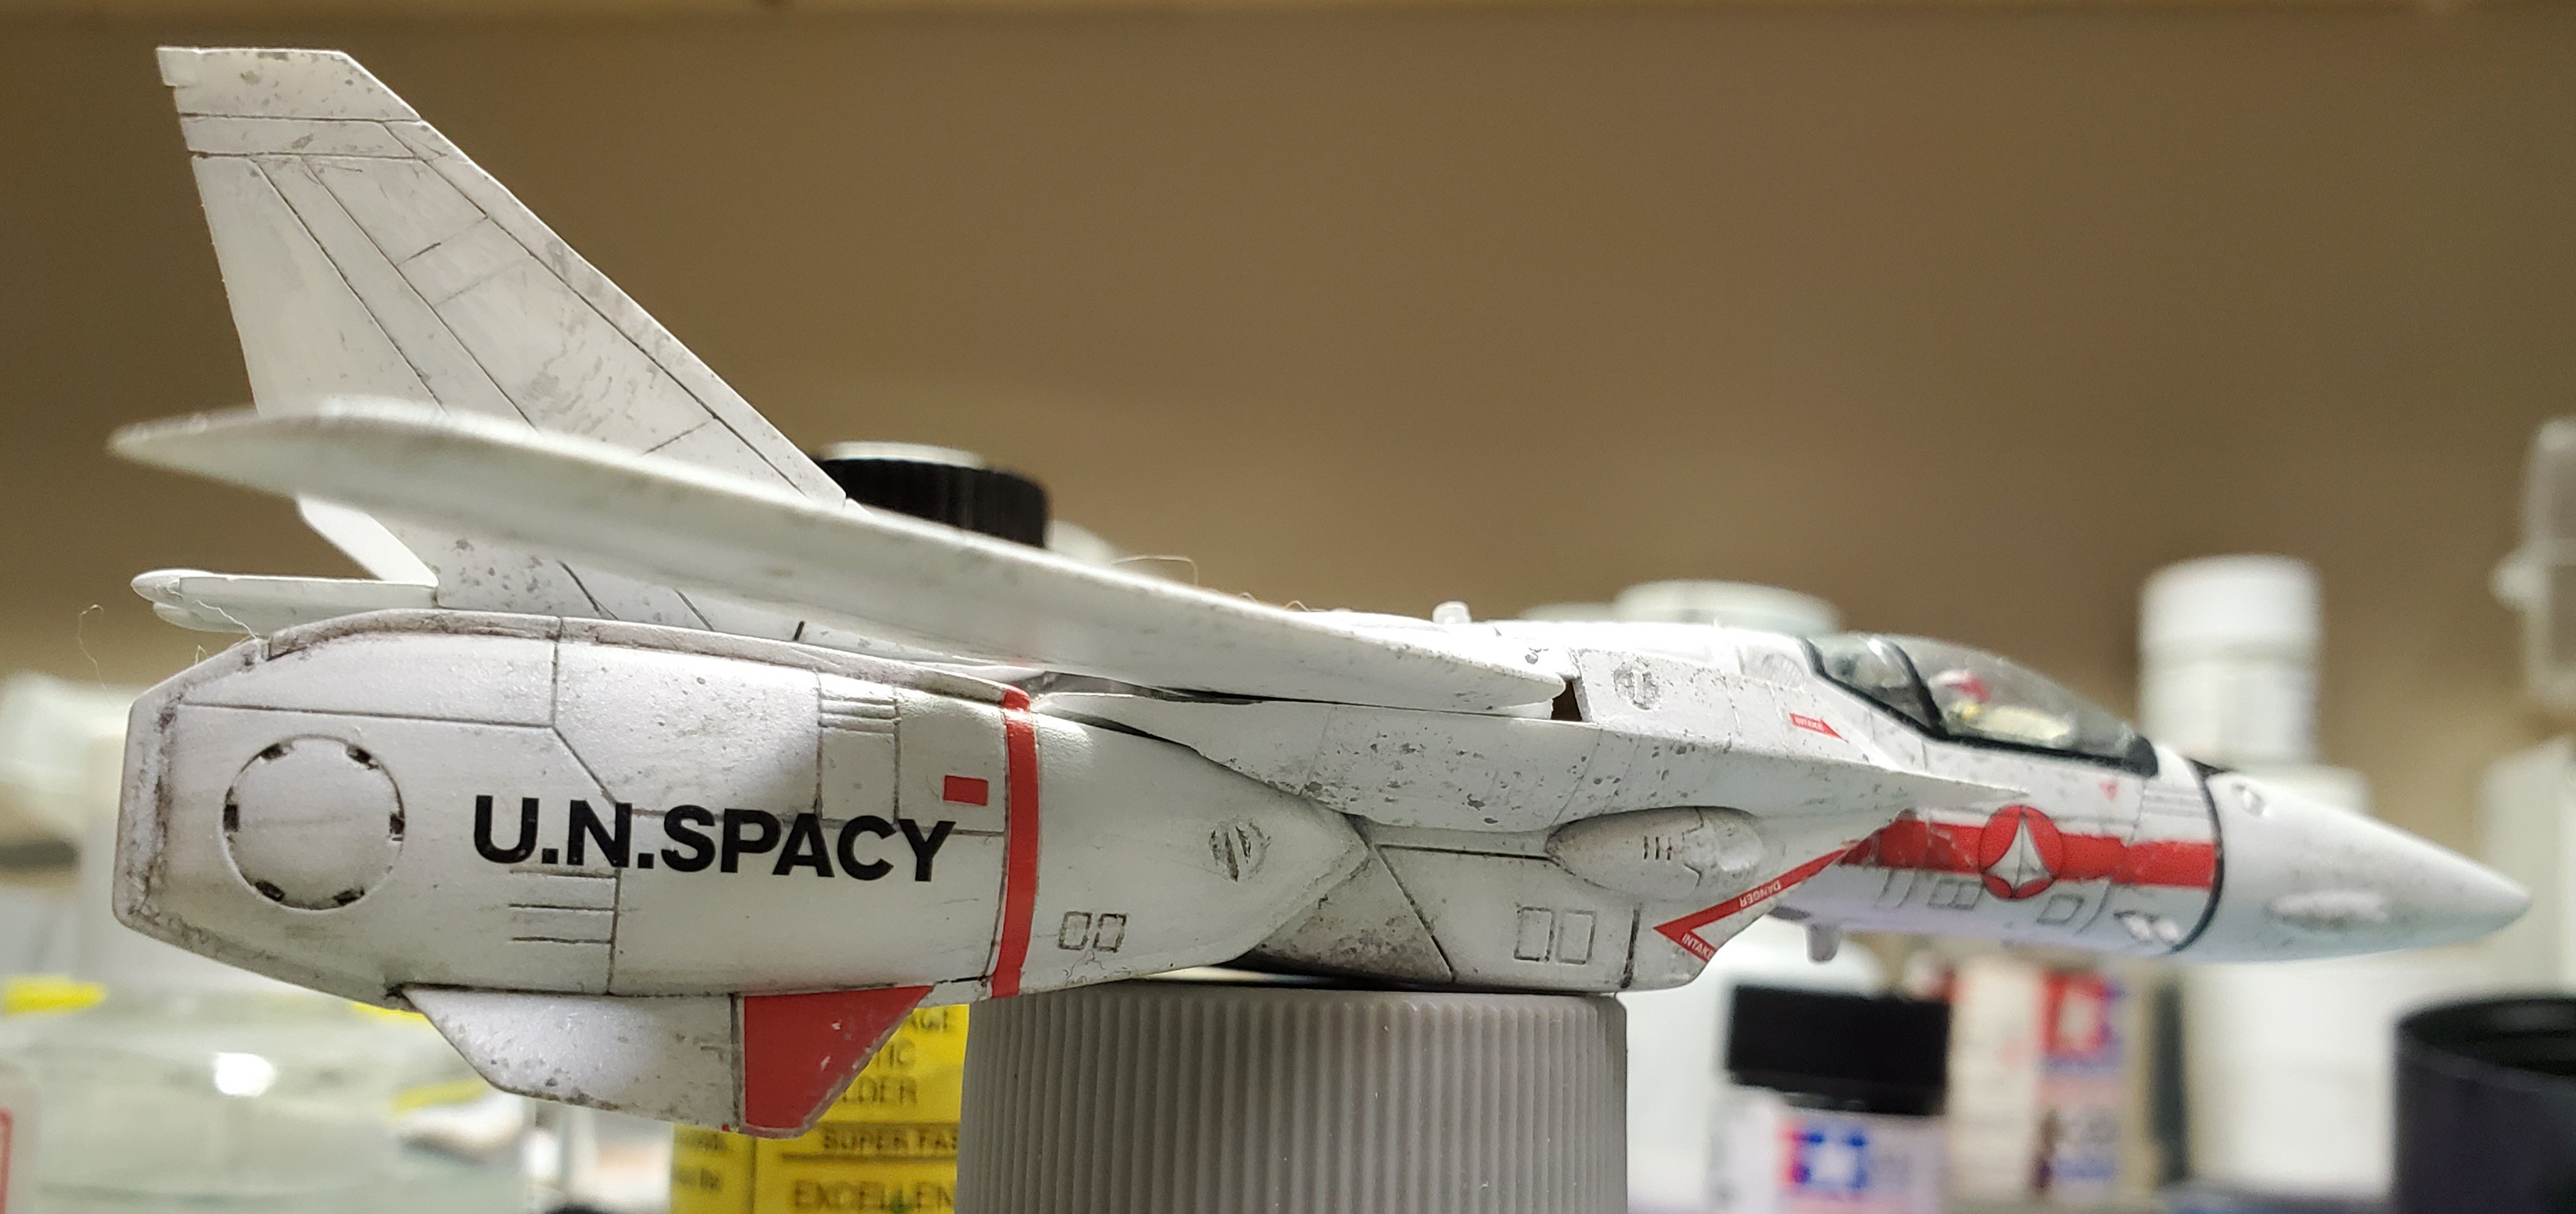
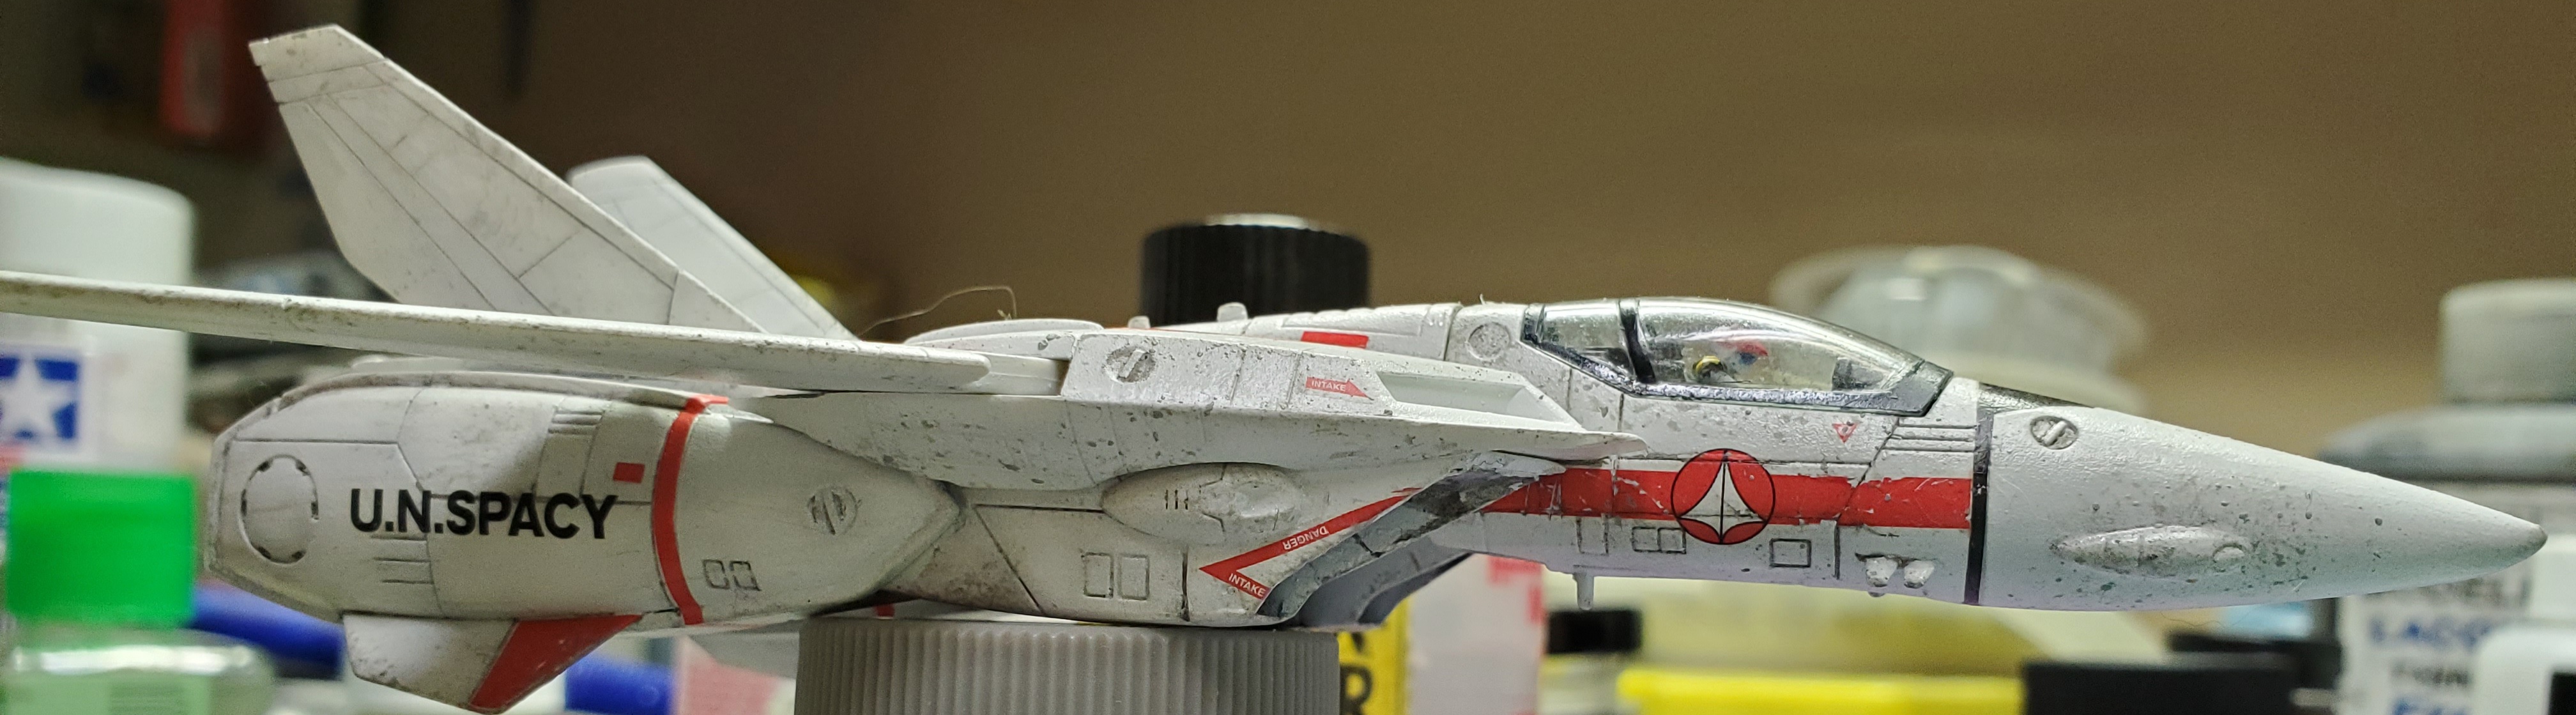
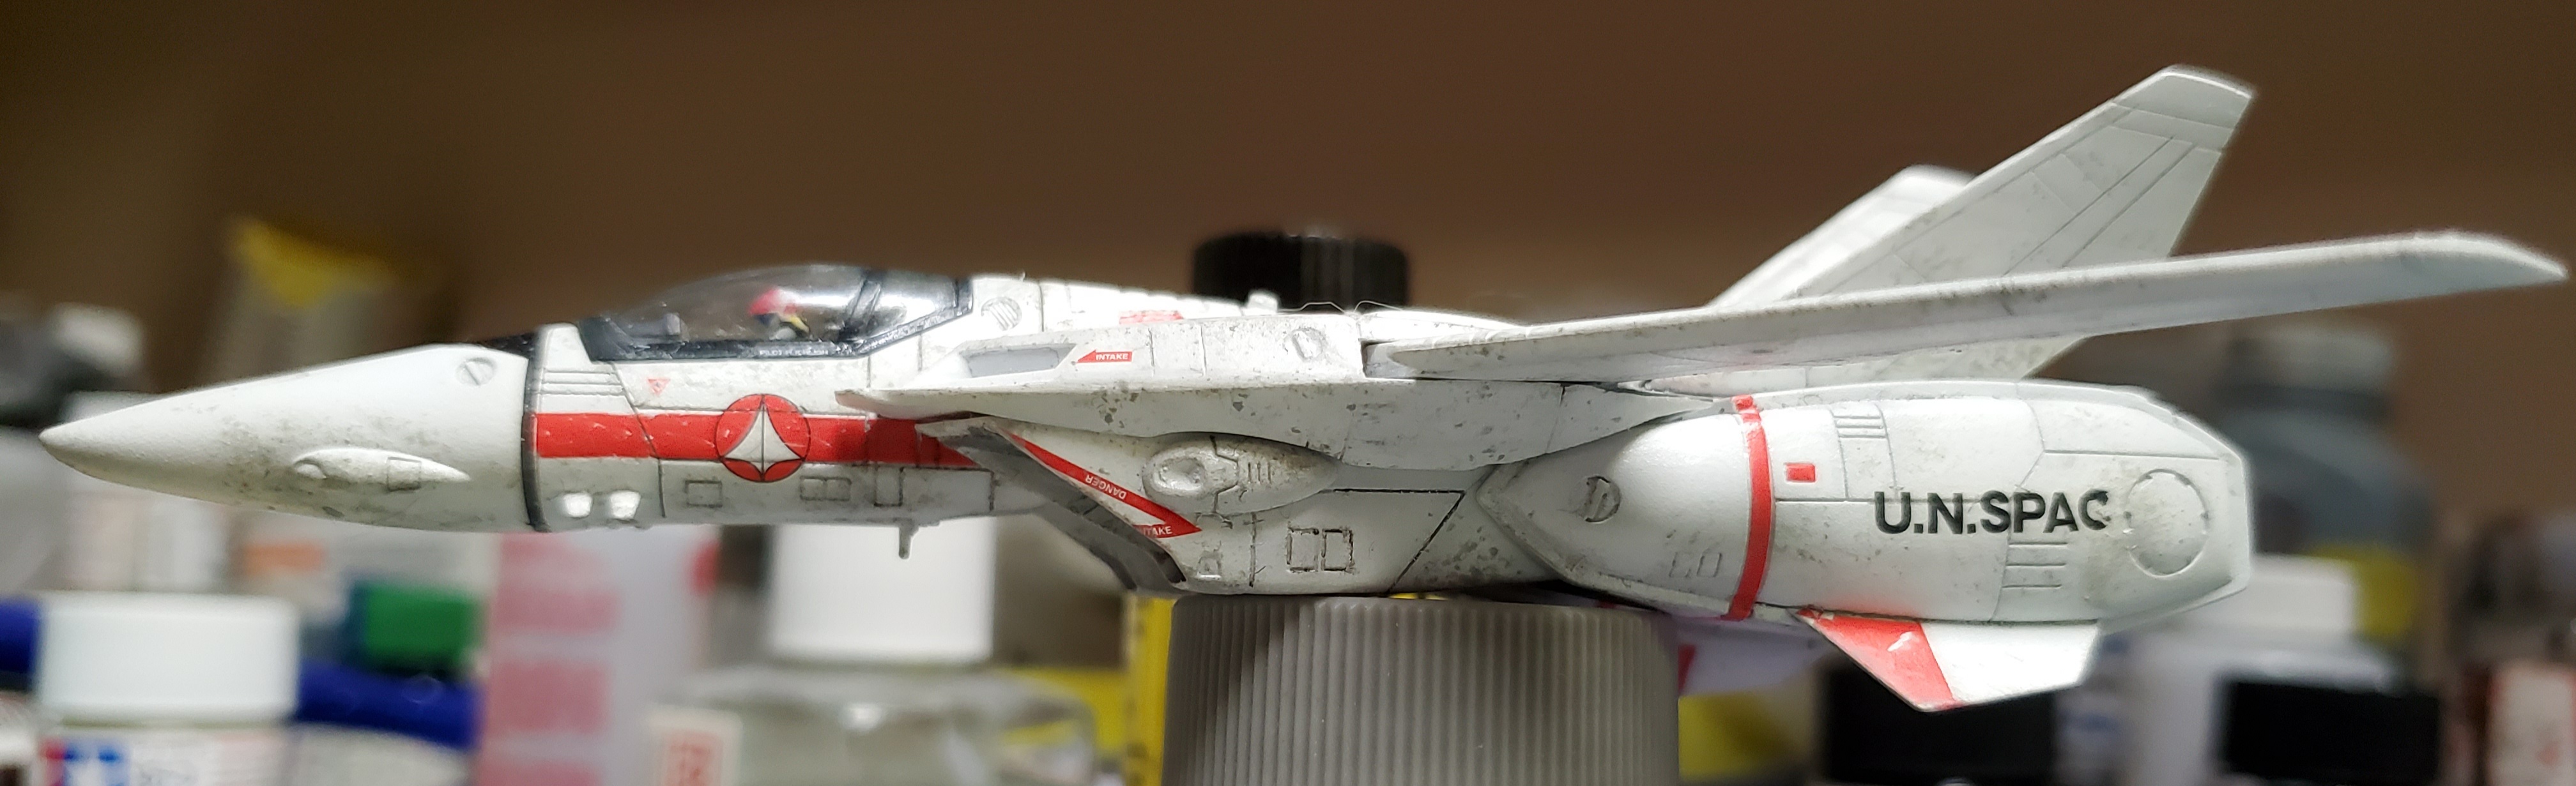
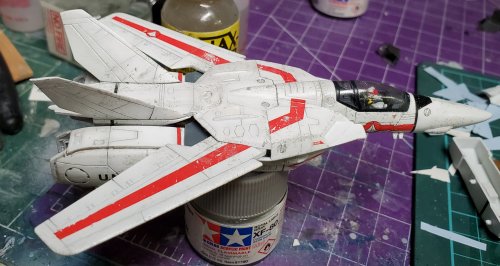
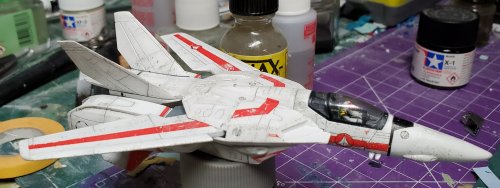
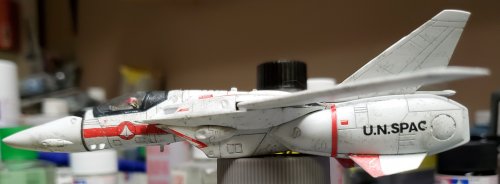
Working on a 1:100 Wave VF-1J fighter. I figured seeing as we all get worried about paint chipping and scratching with transformative models, then the 'real' thing would necessarily have a fair bit from all the moving parts, so that's what's informed the weathering so far. Had an accident with the 'UN SPACY' decal on the left leg. As you can see it shifted, twisted a bit and I completely lost the 'Y'. Don't know how I'm gonna recover from that. I'll just have to figure something out. Still a ways to go.


-
LOL . Thanks Again Gabe! Hey, maybe we should start a group build! (JK) But seriously, thanks for the scan!
-
That would be great! Thank you so much. I just need the sheet from the Armo Fightet set.
-
Yep that's them all right.
-
Yeah they are the same, save for the numbers. I have a copy of the blue that I scanned, so I could just try to create the correct numbers in illustrator, but I thought I'd take a shot and ask here. I suppose if someone had a scan of the decals John provided for his 1:48 Legioss I could resize those and make a go of it. Thanks to you and Conectuoso for checking though.