

Chas
-
Posts
953 -
Joined
-
Last visited
Content Type
Profiles
Forums
Events
Gallery
Everything posted by Chas
-
🤣 With that blue tape I would have guessed it was Max's Valkyrie, in which case that should probably read "position 639 of the Kama Sutra" 😉
-
Nice Job! Is that a custom mix blue, or straight from a jar? Looks perfect.
-
Preorder In! Been waiting for these!
-
To late for me, but if anyone wants inspiration:


-
That's what sold me. Pre-order in.
-
Holly crap! That is a stunning amount of detail! don't think I've ever seen the like in any toy or model of the VF-1 that's ever been produced. Forget the old Club M 1/48. THIS is the Ultimate Detail 1:55 VF-1! Congratulations on such a wonderful piece so far!

-
Just got the payment request for Hikaru's VF-1S strike from Hobby Search. Can't wait for the armored 1-J to go up for pre-order.
-
The pic with the 72nd scale Minmay is Hikaru's 1-S from DYRL. The figure at the bottom of the pic does not look like swimsuit Minmay to my eye. The VF-1S kit is supposed to come with a fig. Of Minmay in her dress from the end of DYRL. As seen in promo pics for the kit here. The swimsuit Minmay likely does come with the Armored Valk kit as they were seen in the same ep.


-
Well whatever pics and footage you got, I will greatly appreciate all of it.
-
Thanks for the pics Greg! Plastic figures with the VT-1 is fine with me. In fact I prefer it that way. 😁
-
Go to the dollar store and look for bead organizers, or take the easy way and get something like these from Amazon https://www.amazon.ca/Pure-Future-84-Piece-Bead-Organizer/dp/B0DY7WTQL8/ref=asc_df_B0DY7WTQL8?mcid=45aac5890169360cbae523b9328bd091&tag=googlemobshop-20&linkCode=df0&hvadid=752810048793&hvpos=&hvnetw=g&hvrand=13313951402467629014&hvpone=&hvptwo=&hvqmt=&hvdev=m&hvdvcmdl=&hvlocint=&hvlocphy=9000702&hvtargid=pla-2420512250336&psc=1&hvocijid=13313951402467629014-B0DY7WTQL8-&hvexpln=0&gad_source=1
-
All that trailer shows me is that this show in NOT for me. Hope they get the new fans they want, 'cus I don't think they'll be getting any old ones back with this.
- 182 replies
-
- 1
-

-
- star trek
- starfleet academy
- (and 2 more)
-
Hopefully more pics at the All-Japan Model Hobby Show coming up.
-
Anyone hear or seee any news about the Moderoid ride armor? Just wondering if maybe it has become vapor-ware.
-
That's terrific Greg! Thanks for letting us know. Now I won't have to searching in hopes of finding pics of those figures!
-
Great job! Looks good. Did you anneal the photo etch before folding? I've found that makes things much easier, as it removes the spring-y-ness. Of course annealing doesn't help much when you drop a piece.
-
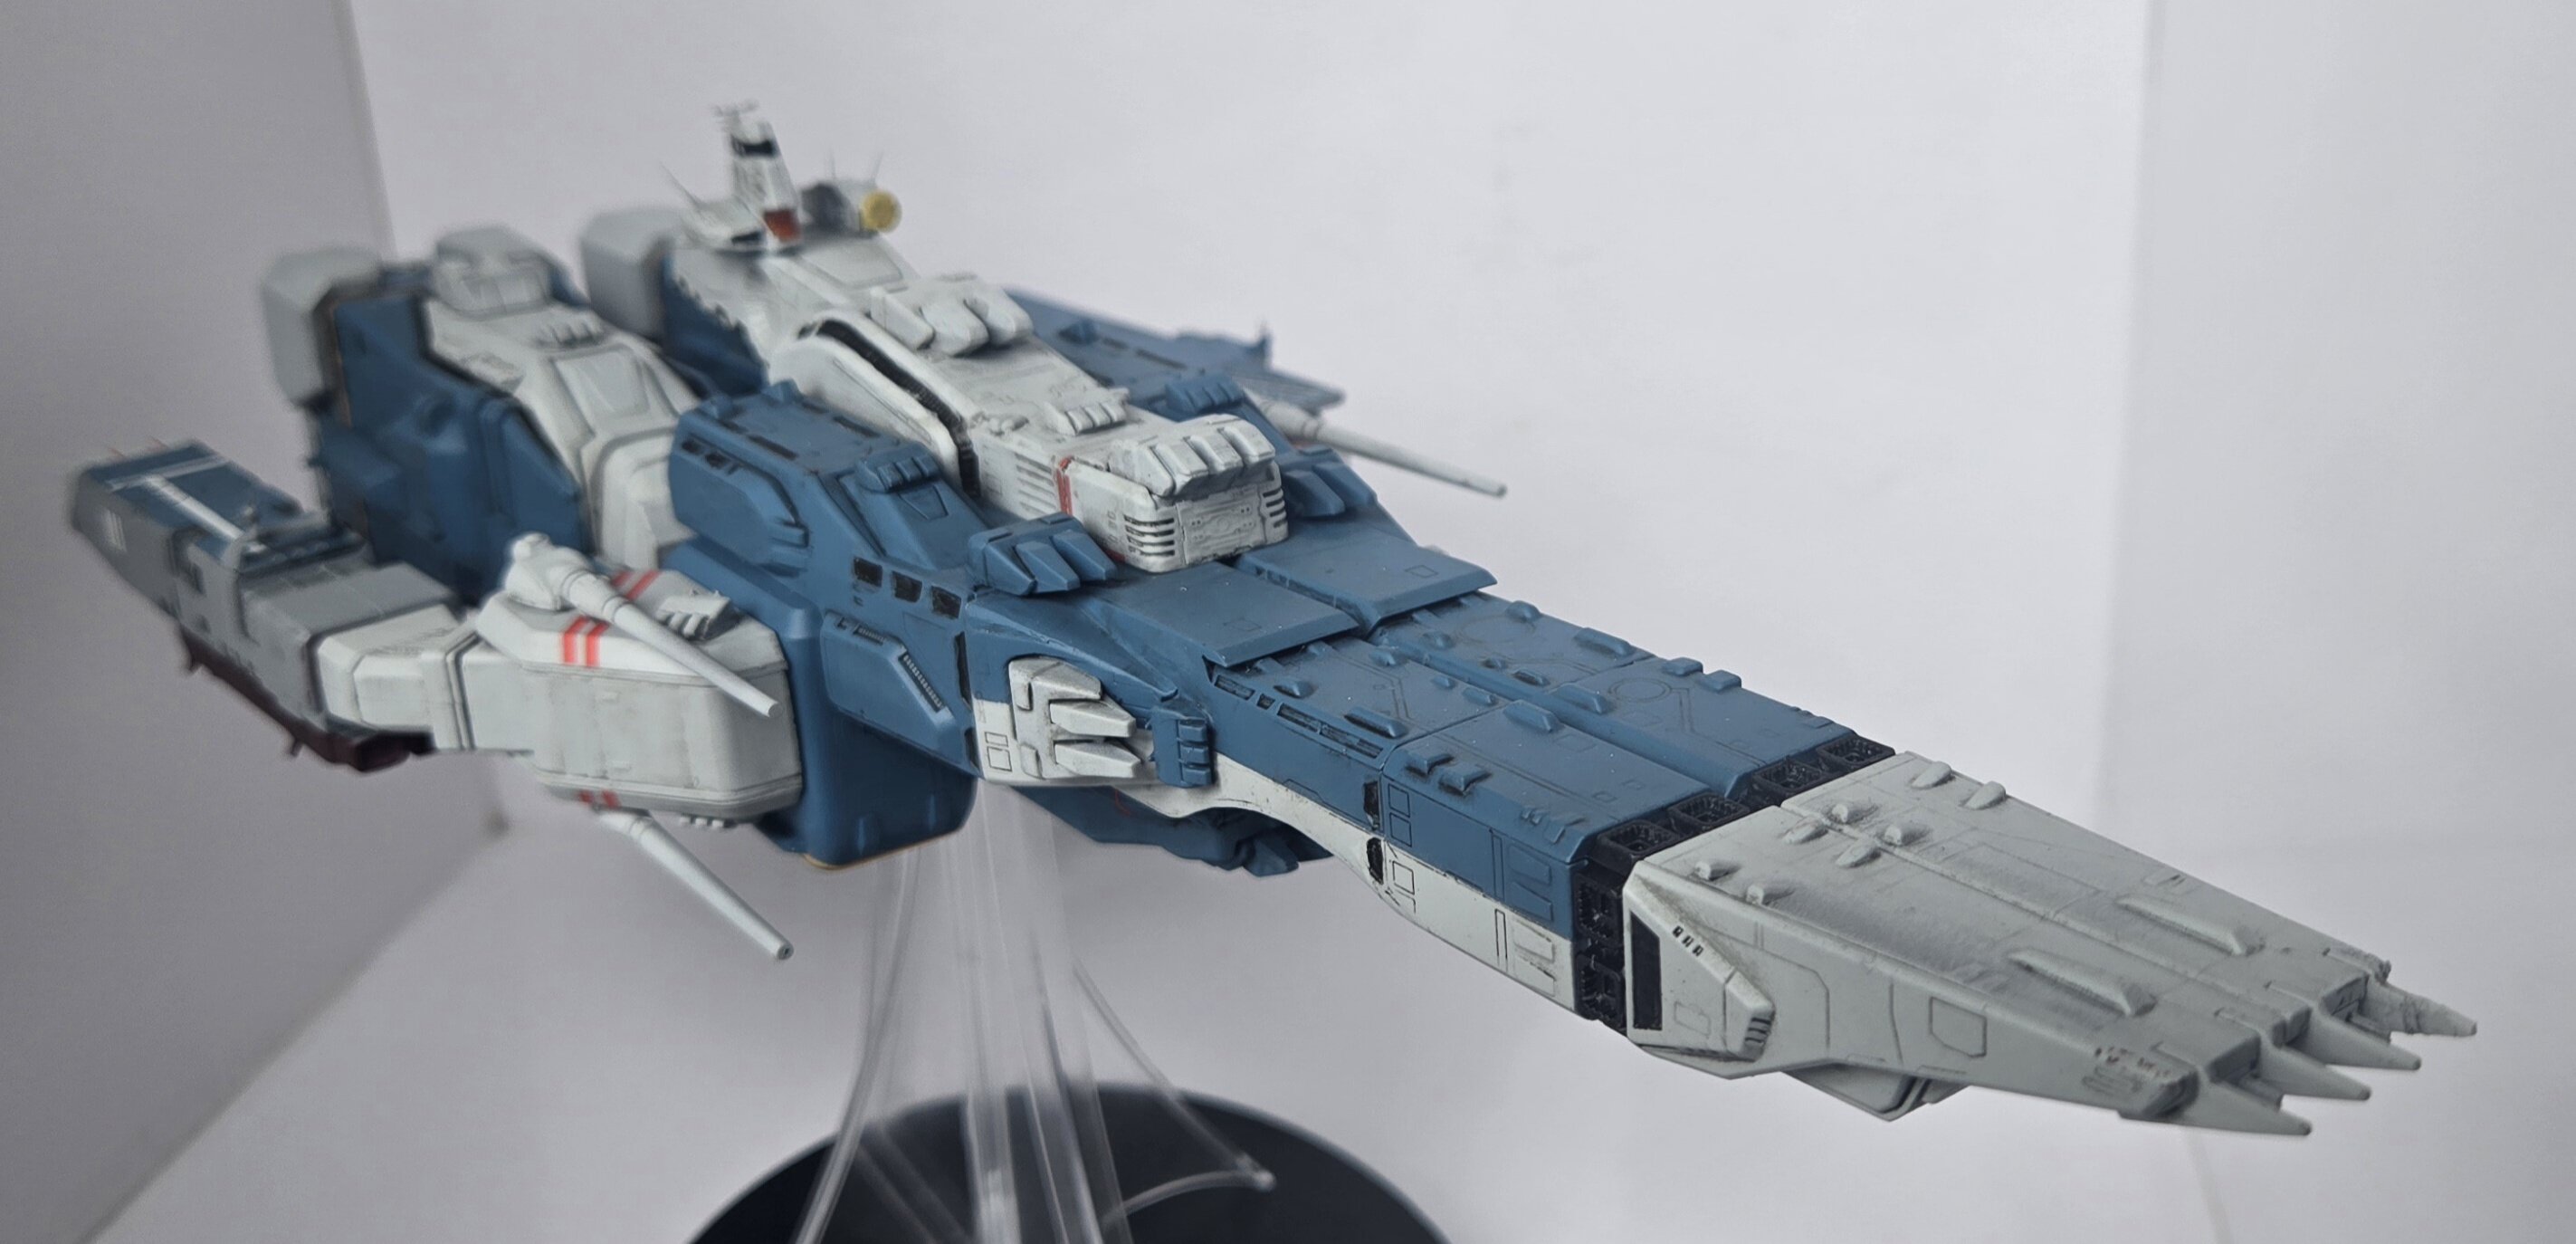
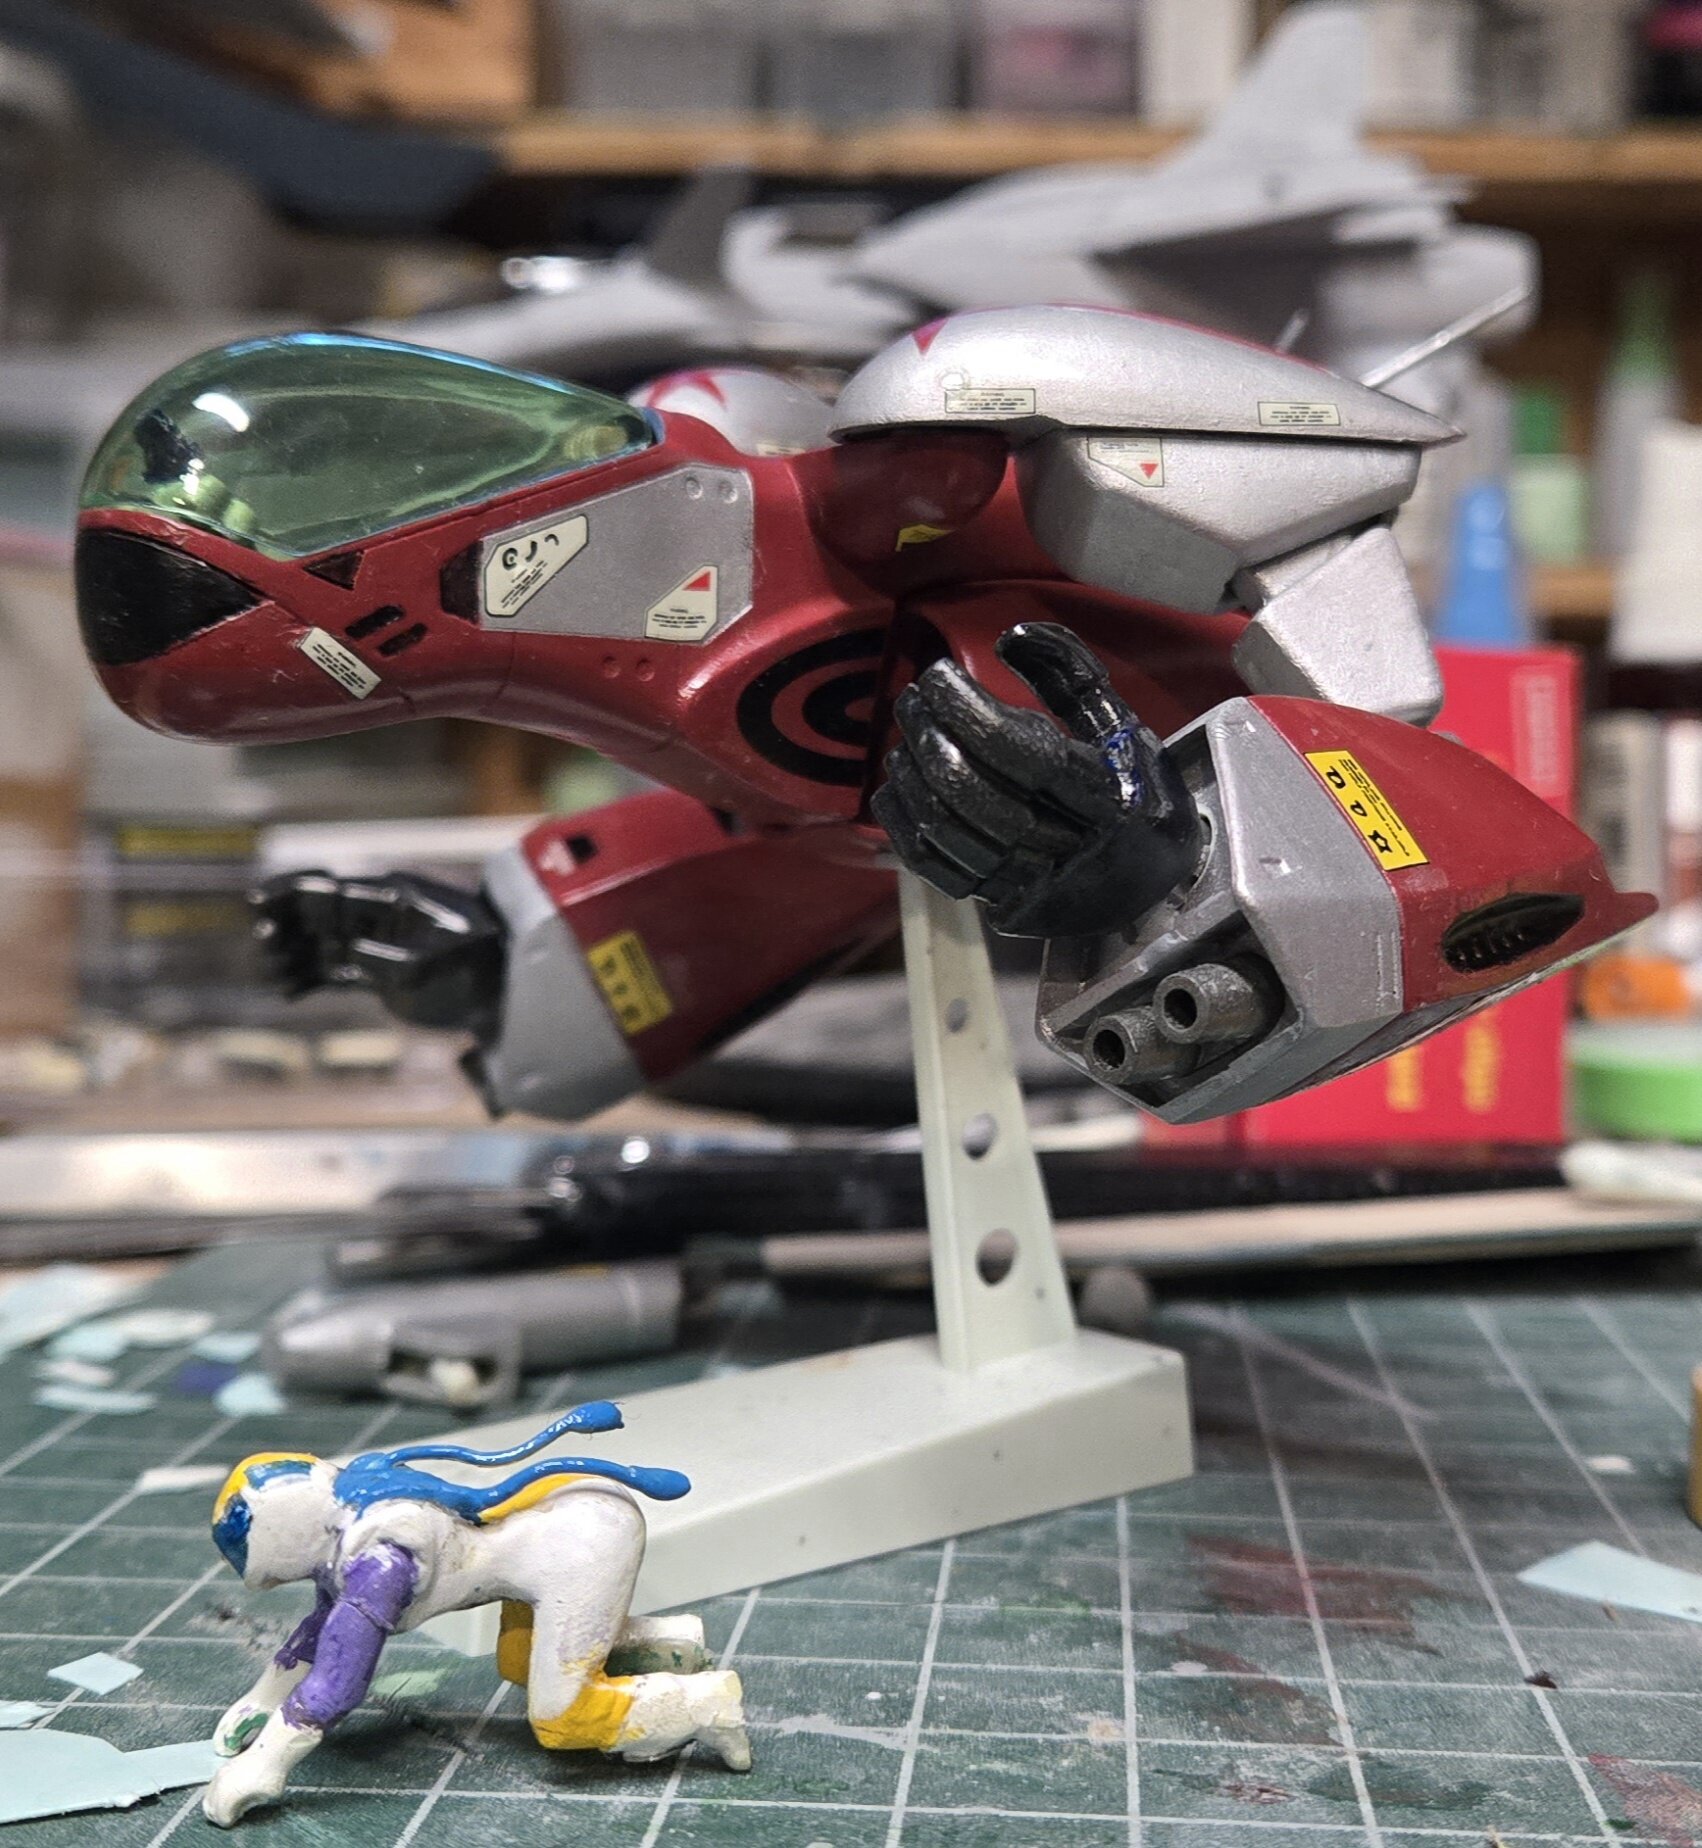
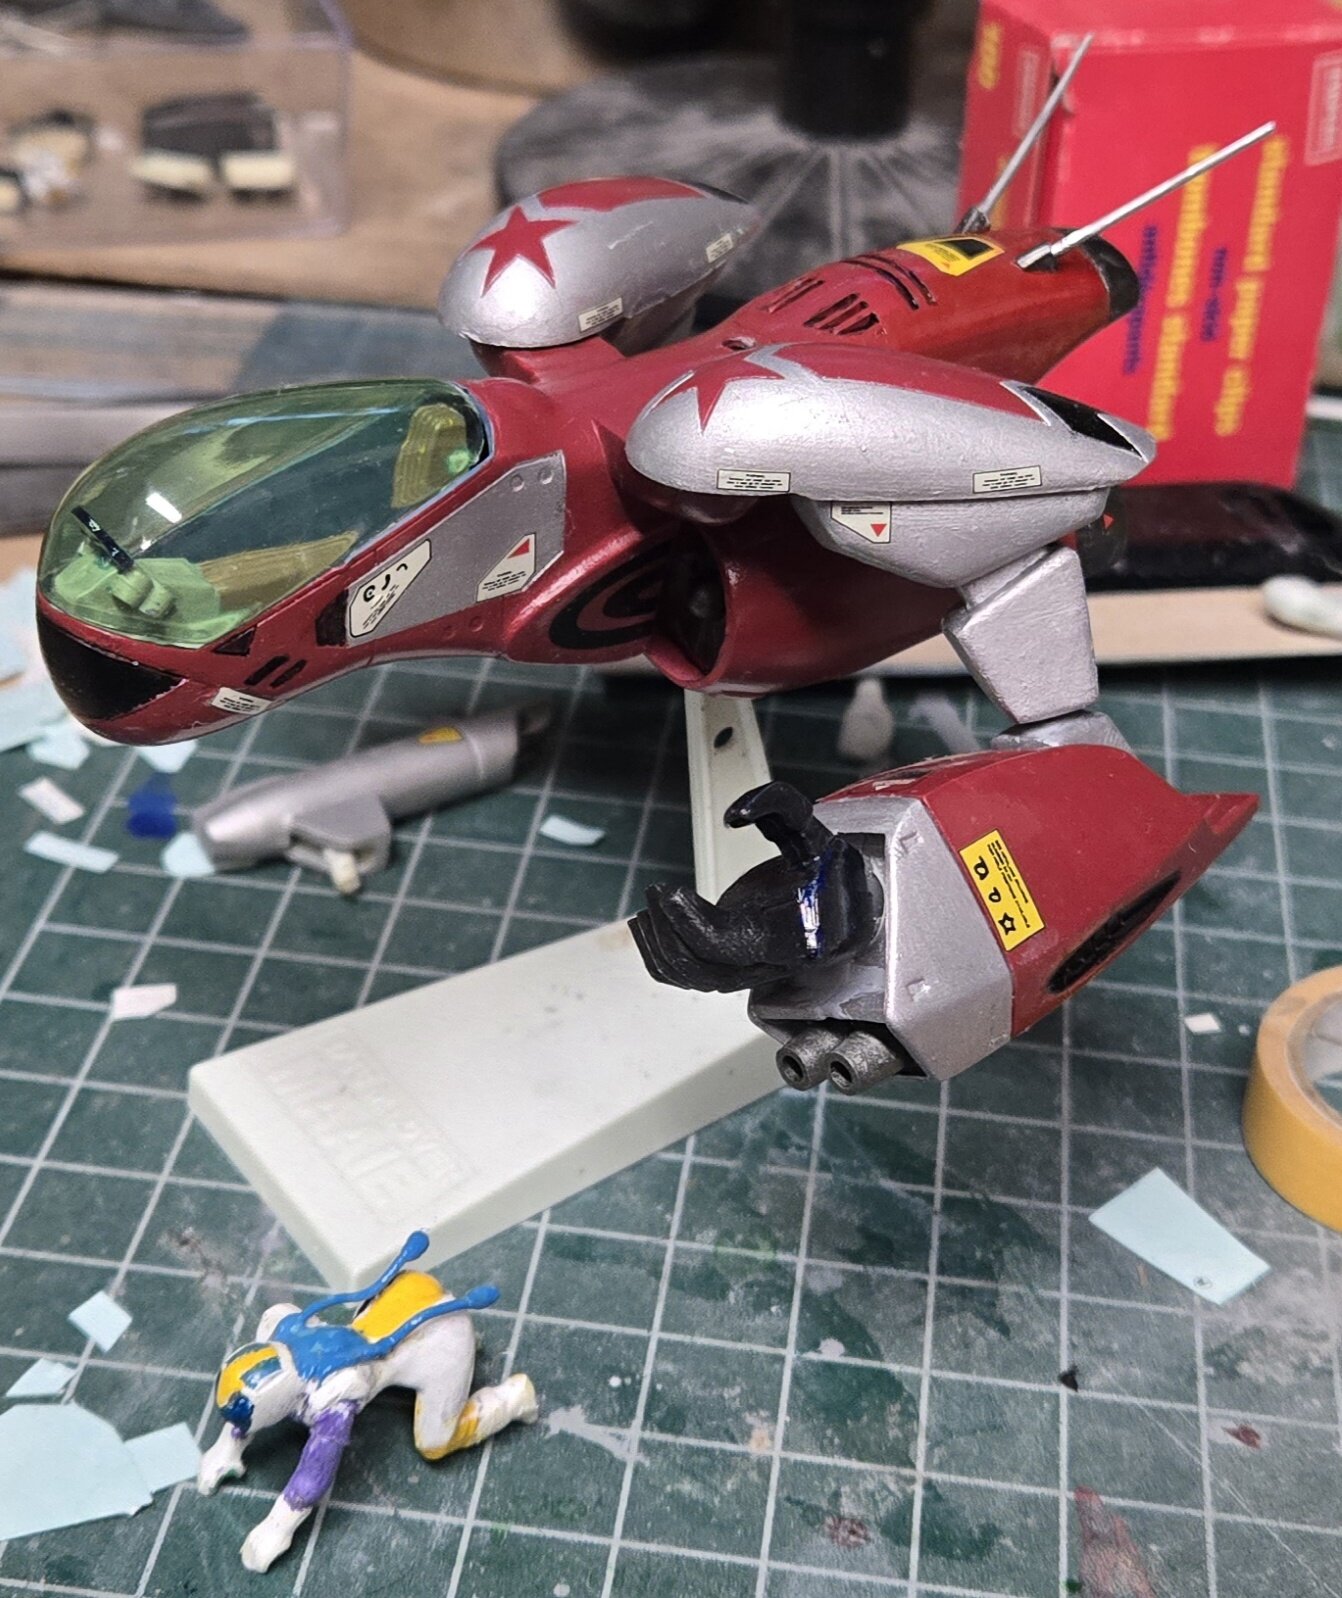
Another reissue of an 80's kit. This time a 2000 repop of Imai's Super Dimension Century Orguss M.Lover Maaie from '83. Getting close to finishing this up. Just gotta finish off some work detailing the pilot, do a little weathering and dull coat.
-
The 'Hey look at this really cool model build I saw' post
Chas replied to Shawn's topic in Model kits
Goly crap! Now THAT is a thing of beauty. -
Honestly, I'd be just as happy with either. But I really liked the sculpt and pose of this garage kit from the 2022 summer Wonderfest. It probably a little too large though.

-
These recent pics pushed me over the edge - couldn't resist any longer --preorder in! I would love to see Hasegawa release an in scale TV Milia figure like they did with the Movie version!
-
Description from HobbySearch: The phantom comic adaptation of the Macross series The OVA series "Super Dimension Fortress Macross II -LOVERS AGAIN-" was planned to commemorate the 10th anniversary of the birth of "Super Dimension Fortress Macross". Its comic adaptation was handled by Tsuguo Okazaki, who also worked on "Justy", and it was serialized in "Weekly Shonen Sunday" from the May 1992 special issue to the December 1992 special issue. Now, after more than 30 years, it is being republished in a new edition that has been scanned from the original manuscript and makes full use of the latest digital technology. It also includes rare color illustrations that were published in the magazine when it was serialized. In the year 2009, a girl performed a miracle. A miraculous singing voice spread across the despair of outer space, putting an end to an unprecedented, gigantic battle. 80 years later, a new battle has begun! While covering the battlefield, a TV reporter boy named Kanzaki Hibiki rescues Ishtar, a singing shrine maiden of the alien army... Number of pages:314 ( This is a machine translation. Please allow for possible misinterpretations in the text. )
-
Posting this here, cus it is in regard to a Playmax kit I've had trouble acquiring. Anyone have experience ordering from Lunapark? I've never heard of them before, so want to find out 1. Are the legit? And 2. What kind of cust. Service they have. ( shipping times, packaging etc.).
-
hey @pengbuzz I'm gonna put this link here and you can look it over. The reviews seem genuine, and it looks like it may not be too bad. https://www.aliexpress.com/item/1005009086983955.html?spm=a2g0n.detail.platformRecommendH5.13.23e1UFQbUFQbf4&gps-id=platformRecommendH5&scm=1007.40196.439370.0&scm_id=1007.40196.439370.0&scm-url=1007.40196.439370.0&pvid=37193928-332e-4ee1-9b6a-acefb37d6148&_t=gps-id:platformRecommendH5,scm-url:1007.40196.439370.0,pvid:37193928-332e-4ee1-9b6a-acefb37d6148,tpp_buckets:668%232846%238107%231934&pdp_ext_f={"order"%3A"21"%2C"eval"%3A"1"%2C"sceneId"%3A"8499"}&pdp_npi=6%40dis!CAD!88.56!61.99!!!62.69!43.88!%40210337bc17572906776303282e37e4!12000047861122705!rec!CA!!ABXZ!1!0!n_tag%3A-29910%3Bd%3Add452cad%3Bm03_new_user%3A-29895 I know it's aliexpress but a lot of the stuff I've gotten from them is actually not too cheaply made - but you need to be vigilant. Maybe other folks could have a look and give an opinion? Or another version that comes with a hose. https://www.aliexpress.com/item/1005008290480304.html?spm=a2g0n.detail.platformRecommendH5.4.2bf17Jgc7JgcIi&gps-id=platformRecommendH5&scm=1007.40196.439370.0&scm_id=1007.40196.439370.0&scm-url=1007.40196.439370.0&pvid=ec90b1d1-f692-4fb8-a9e7-d73453afff07&_t=gps-id:platformRecommendH5,scm-url:1007.40196.439370.0,pvid:ec90b1d1-f692-4fb8-a9e7-d73453afff07,tpp_buckets:668%232846%238109%231935&pdp_ext_f={"order"%3A"41"%2C"eval"%3A"1"%2C"sceneId"%3A"8499"}&pdp_npi=6%40dis!CAD!62.68!62.68!!!44.37!44.37!%402101ead817572912473822552ed01c!12000044499794004!rec!CA!!ABXZ!1!0!n_tag%3A-29910%3Bd%3Add452cad%3Bm03_new_user%3A-29895
-
Well I pre-ordered the VT-1. I've had it in mind to do a dio of the tent scene for years now. Plus I couldn't pass up those figures. Now I just gotta figure out what I'm gonna do with the two VT-1 fighters I have in my stash.
-
Oops!