
MechTech
-
Posts
4701 -
Joined
-
Last visited
Content Type
Profiles
Forums
Events
Gallery
Everything posted by MechTech
-
@VertexNebula Welcome aboard! I know you said you had fit issues. It looks like there is a lot of glue oozing out of the joints. You can use baking soda as an accelerator and filler too if it comes down to that. I'm guessing that's a 1/265th gaming piece? @Urashiman WOW! you get extra bonus points for not only being a good dad AND passing on the hobby, but for completing THREE kits! That's about one a month so far. Can he keep up!?😁 - MT
-
@pengbuzz Sorry about that! You got that vintage heli at a good price, though. - MT
-
@pengbuzz I hate when they cheat - whoever they are!😁 How about these dudes? Chopper Pilots @Kurt Your paint is looking good! Don't chip it too much. A lot of those parts are actually composites. The good news is if it's going in a desert setting, it just needs a LOT of dust on it. Ours was ALWAYS dusty! Even the windshield! I probably ate as much dust as food over there - 😝 - MT
-
That - ting - is - 'uge!!! I would need a new case to put it in - and a new wallet to replace my old wounded one too😁 - MT
-
@pengbuzz I see what you mean. Could it be that "anime magic" is also present in live action shows😕 - MT
-
@Thom That's great! @Bolt Where old Valks go to die or get parted😁 - MT
-
@pengbuzz They STILL look great - and not too close together. The Bell 222 has side entry doors, so nobody's really going to go between them. - MT
-
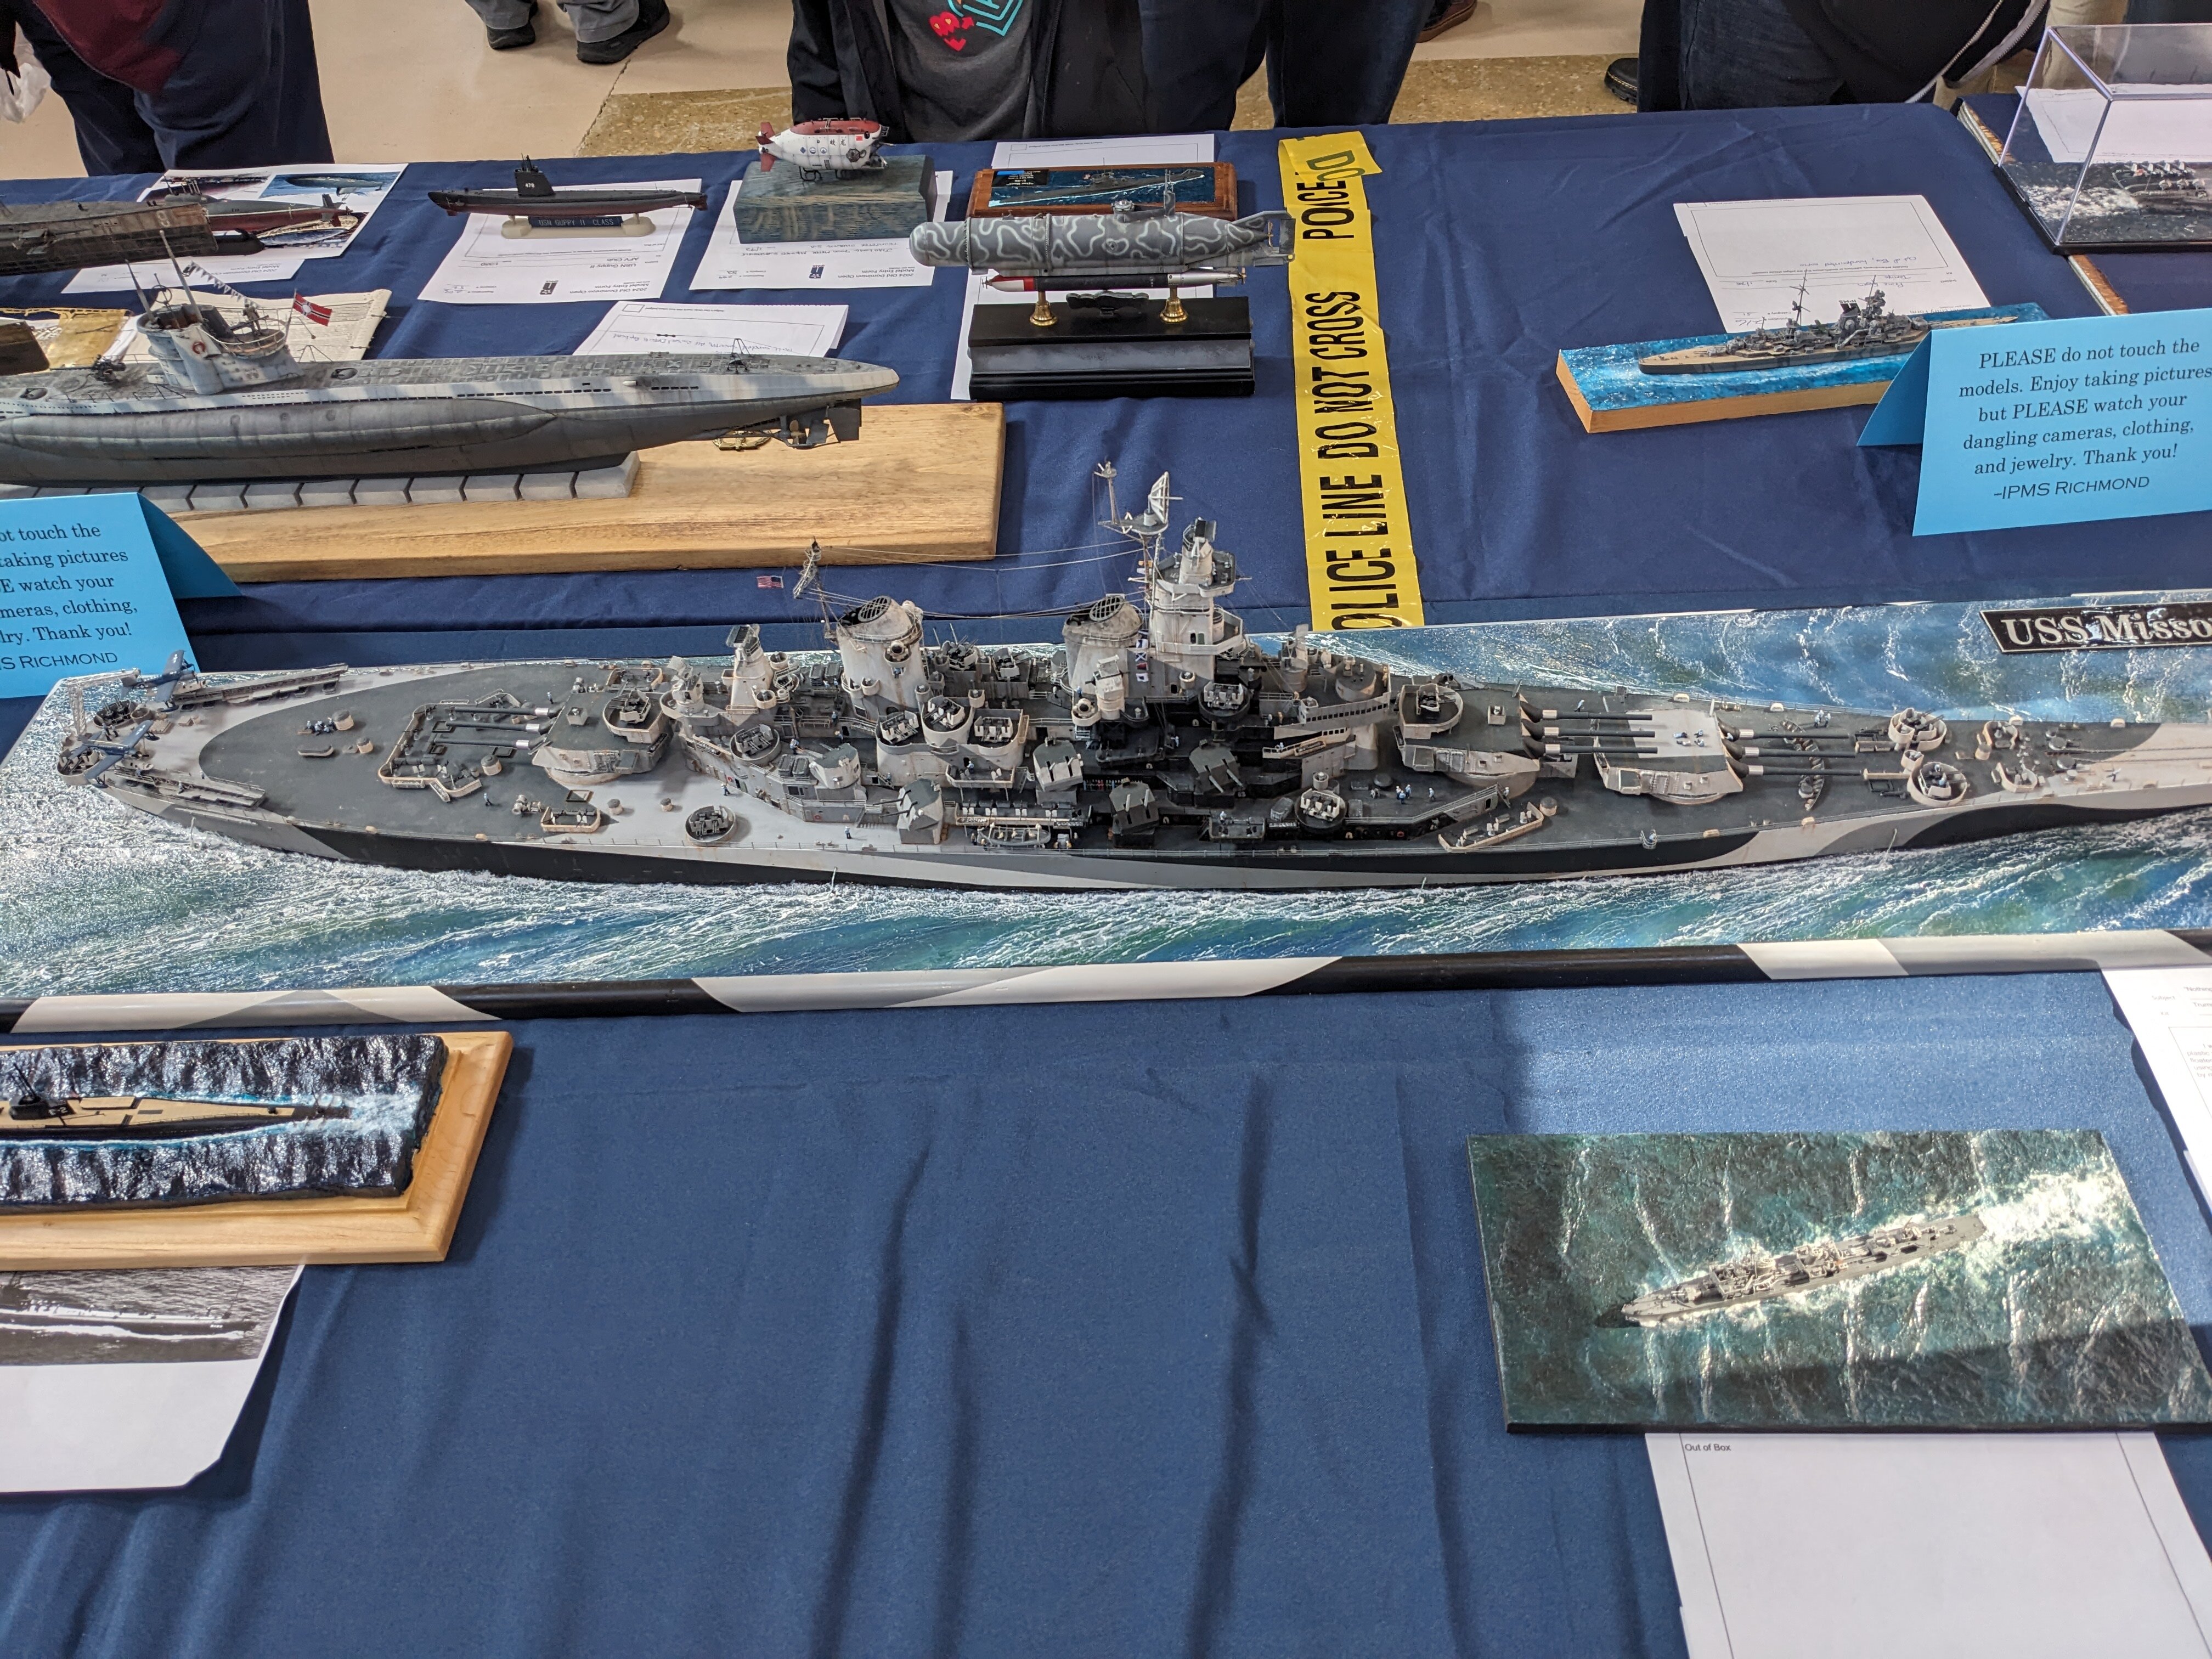
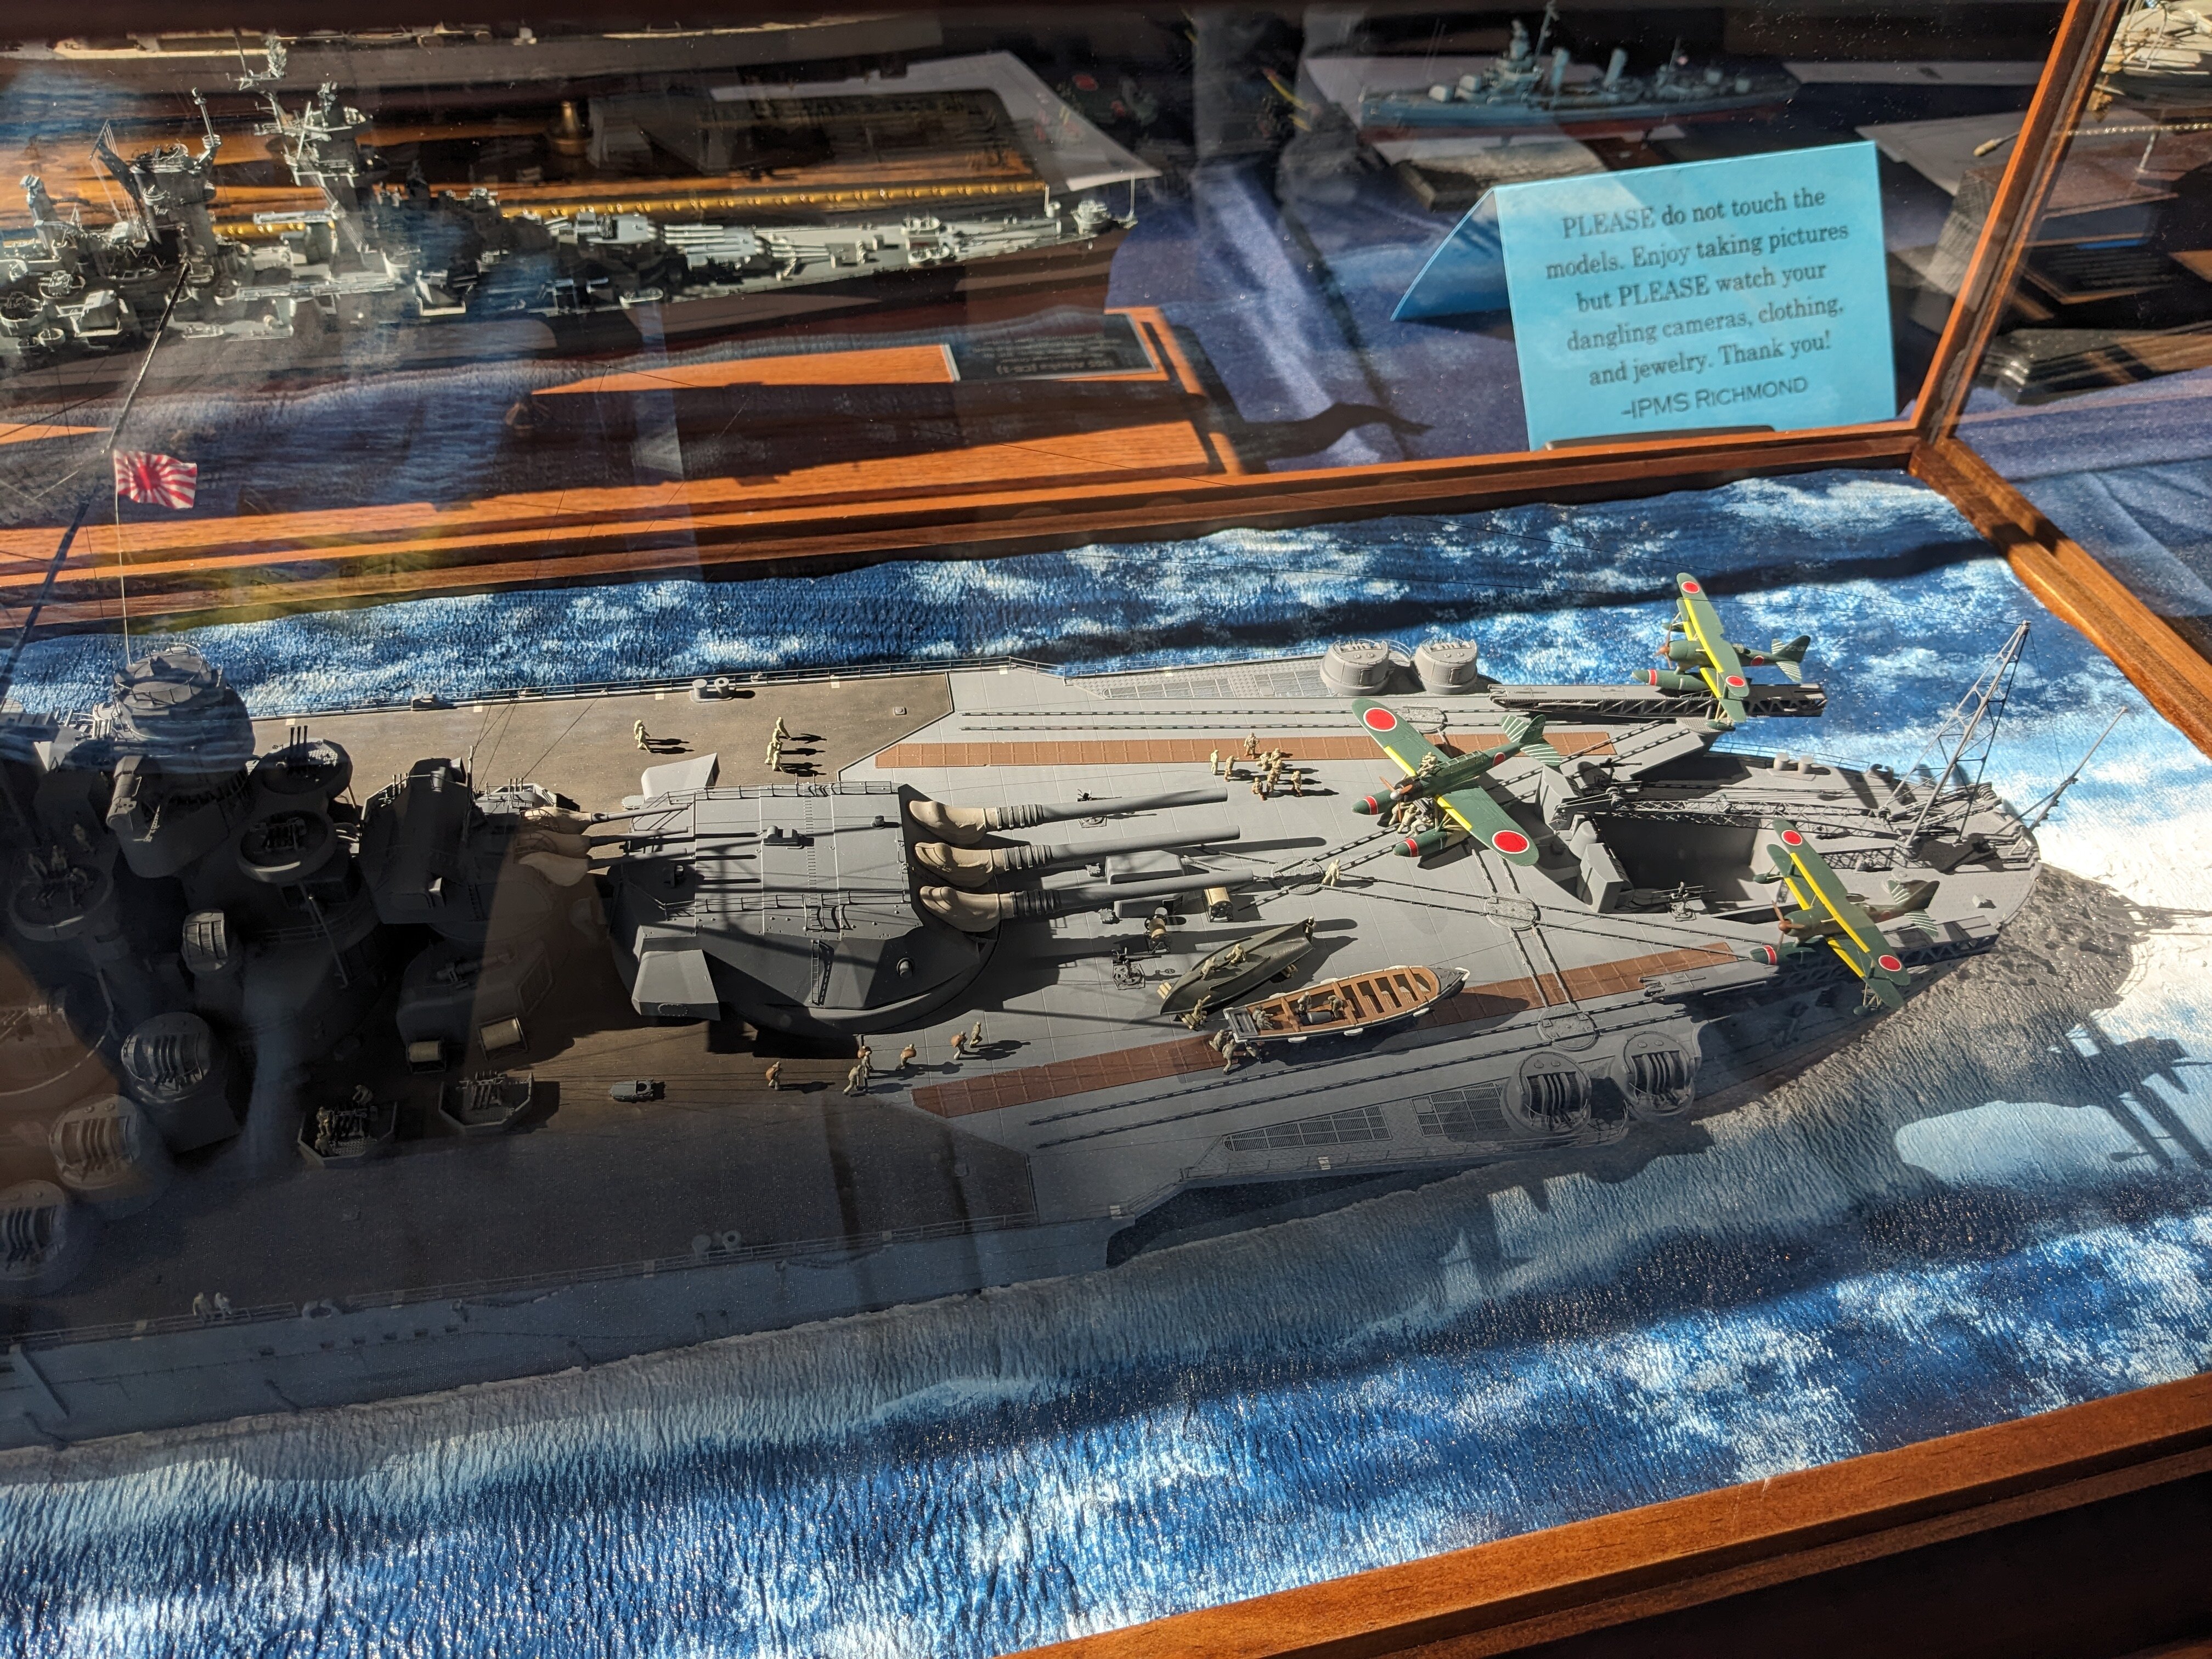
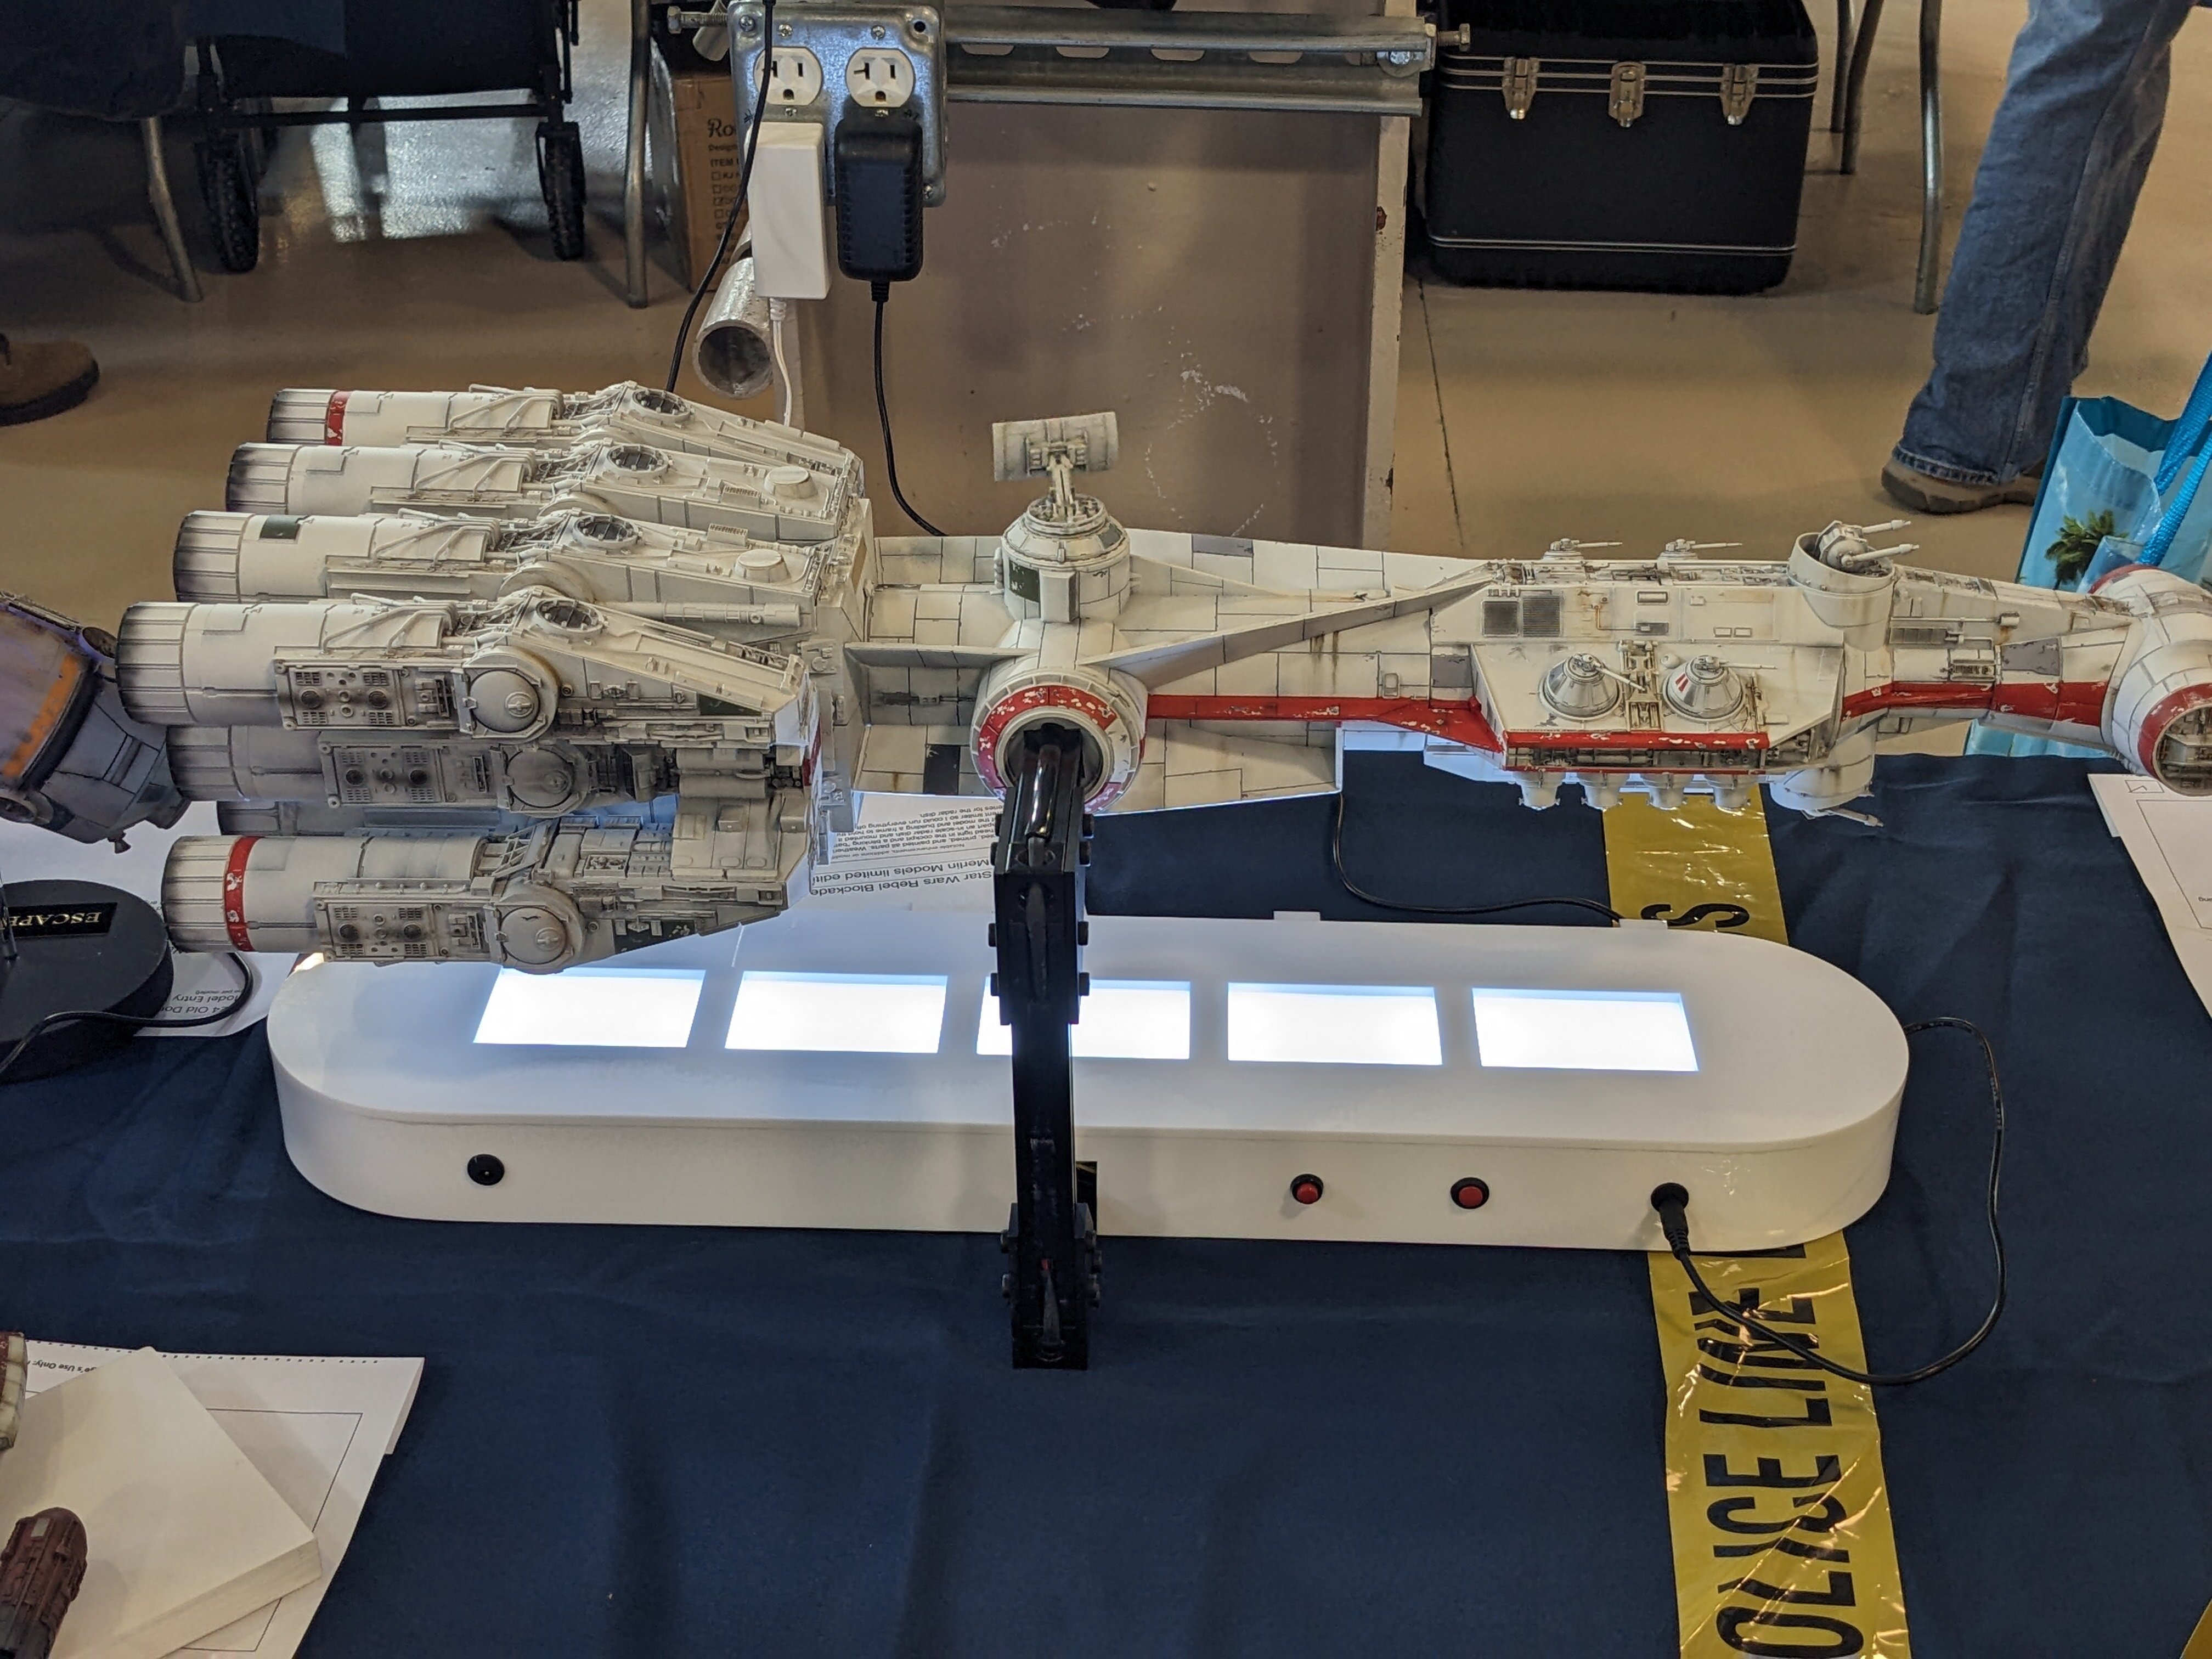
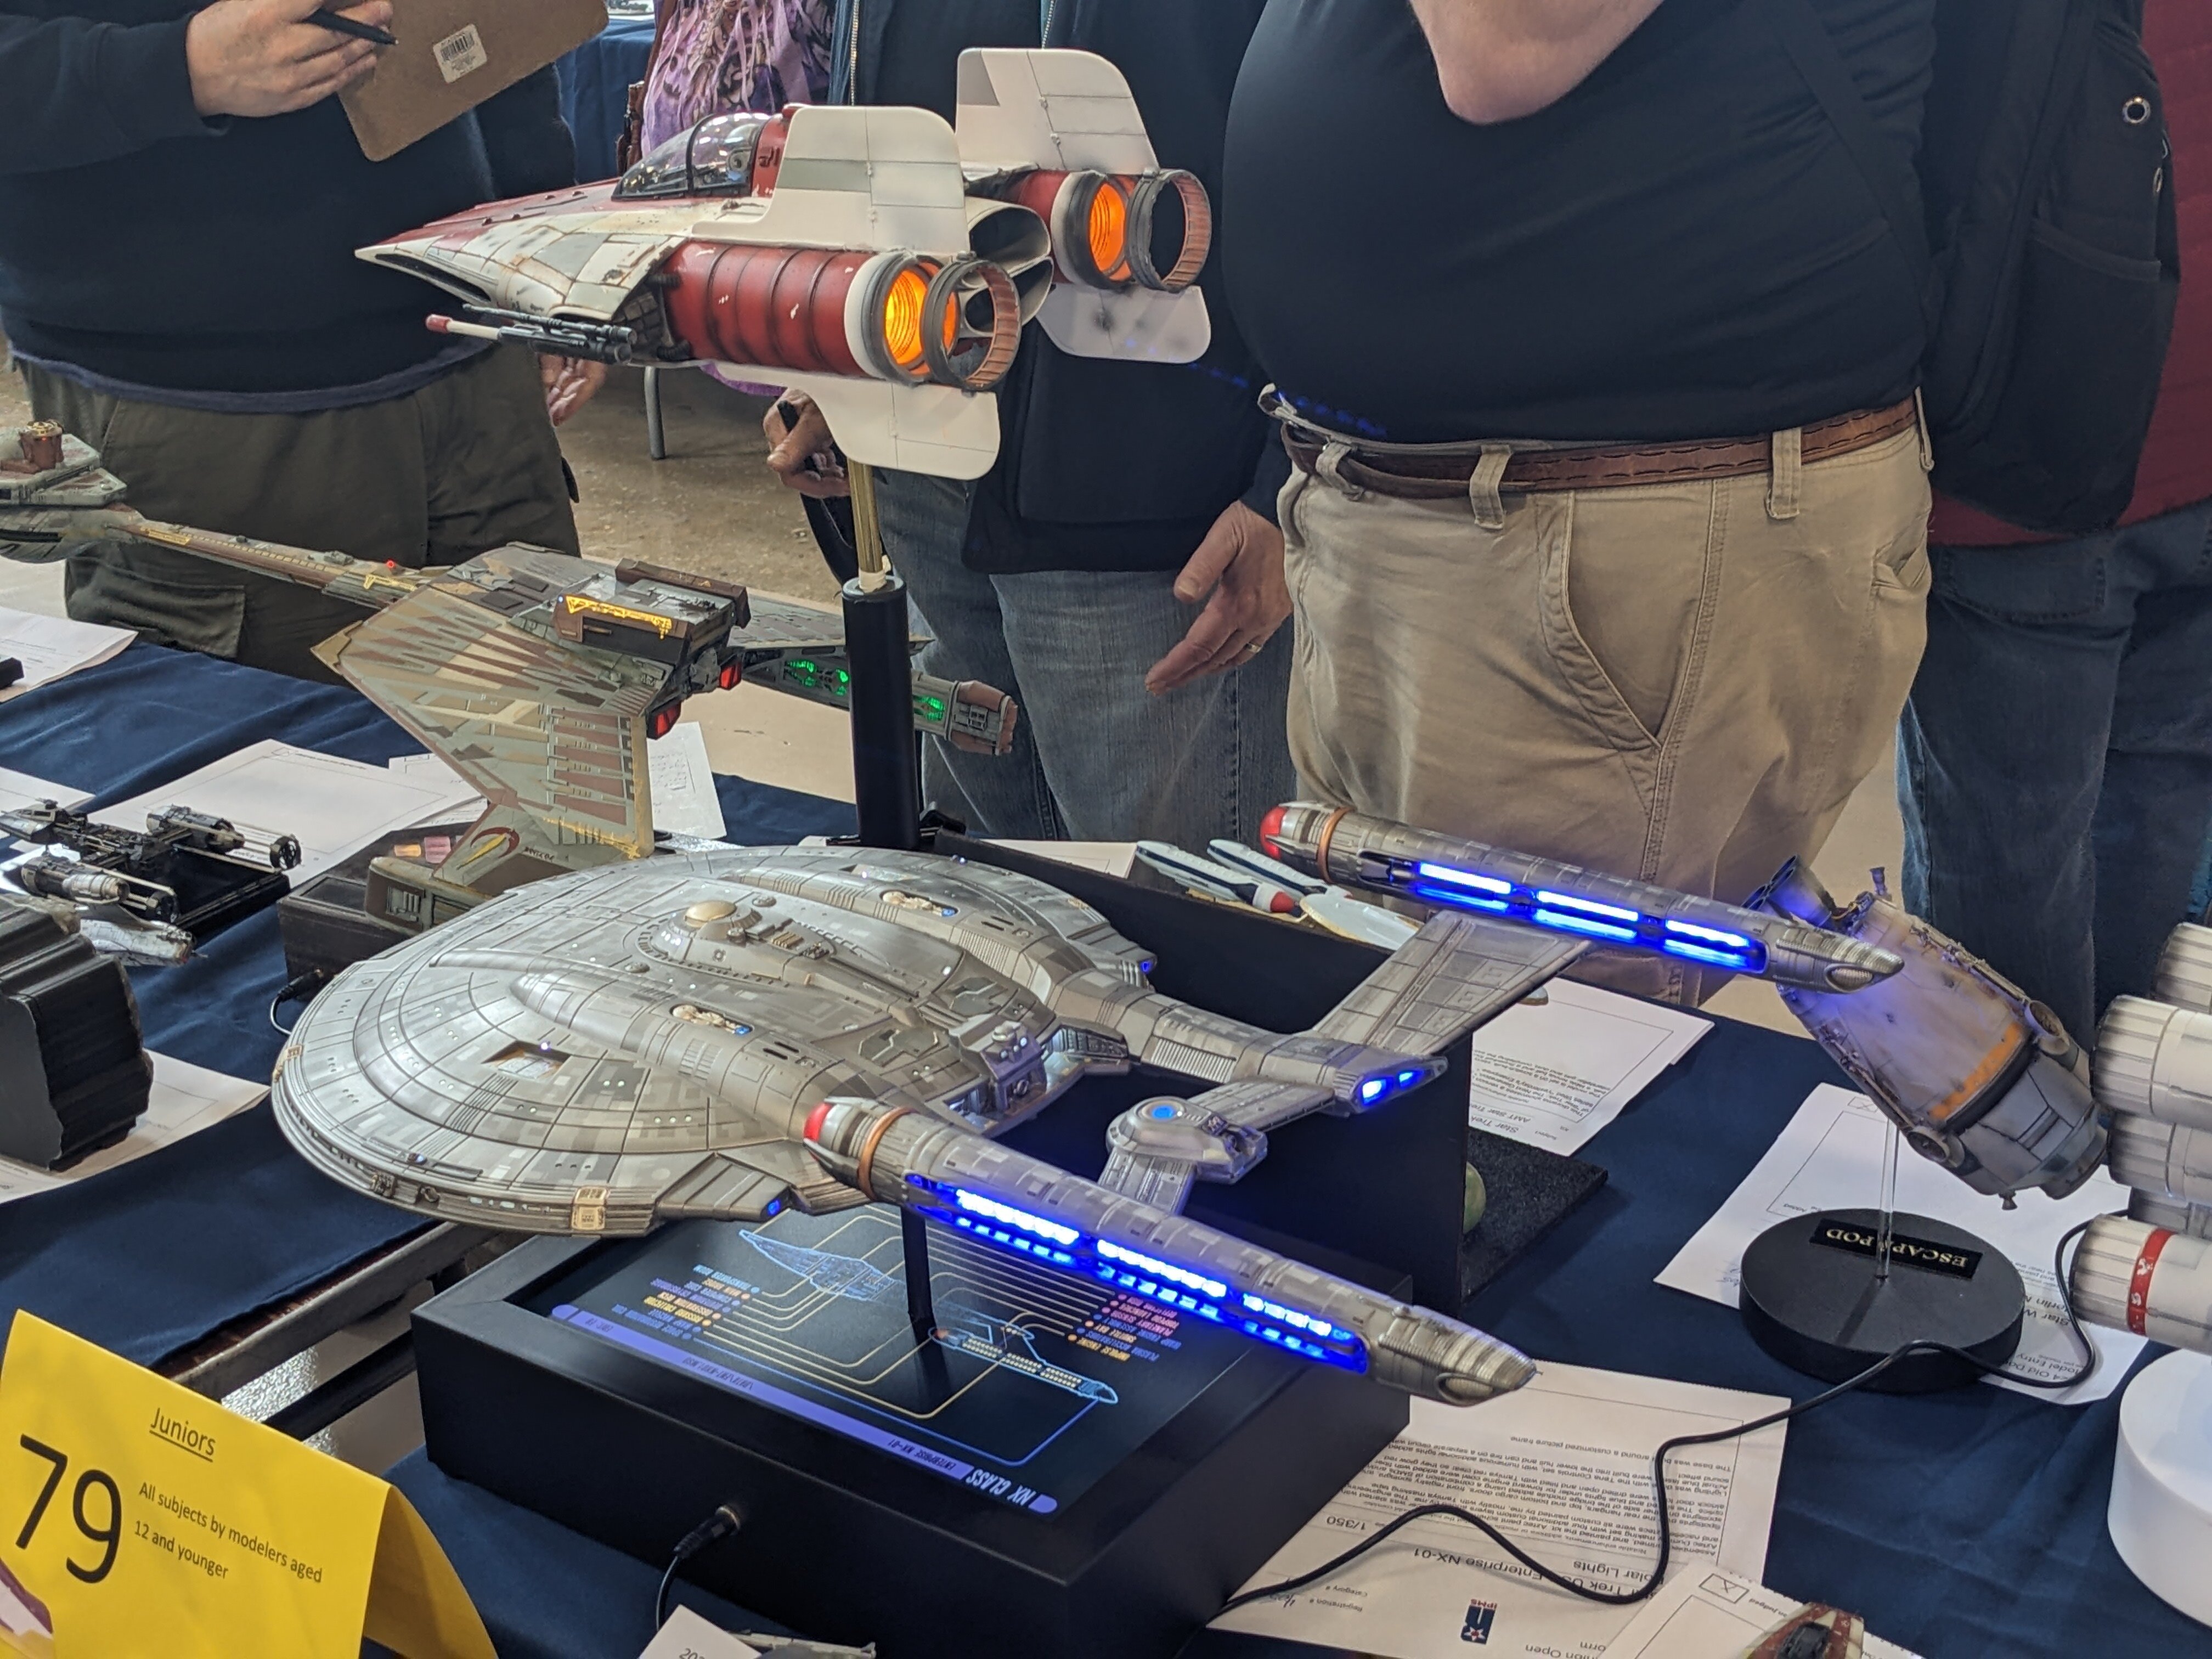
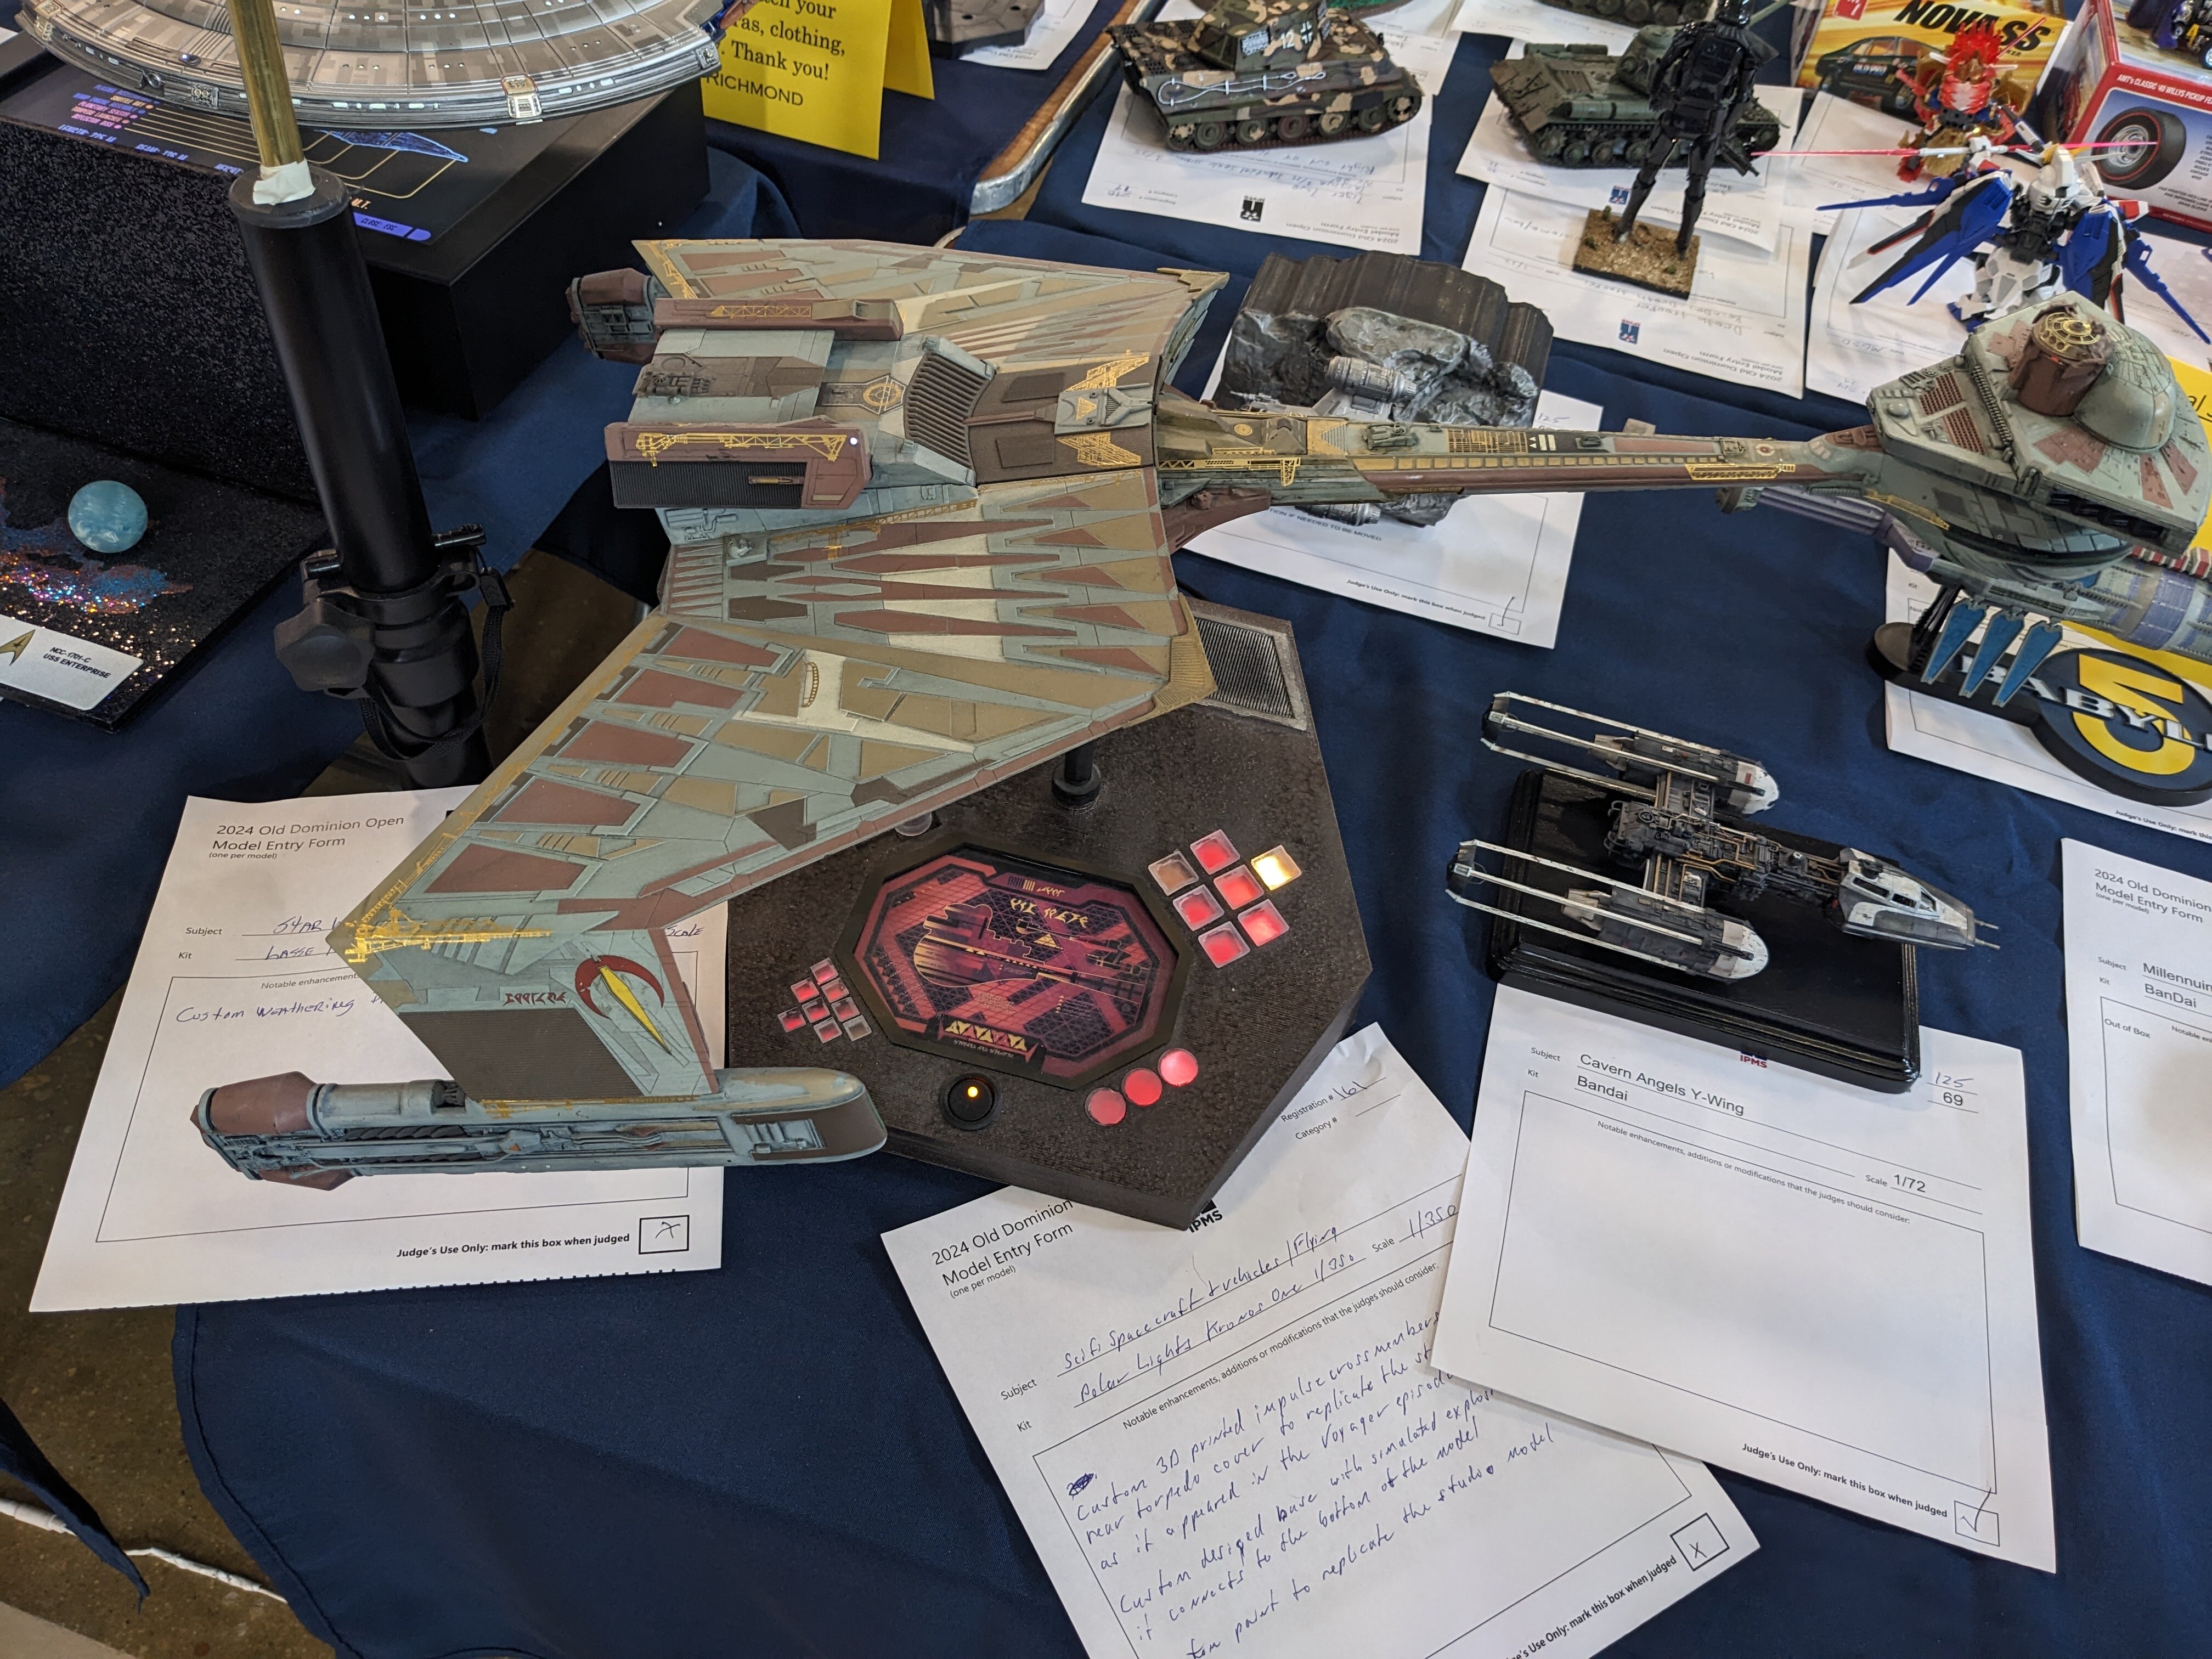
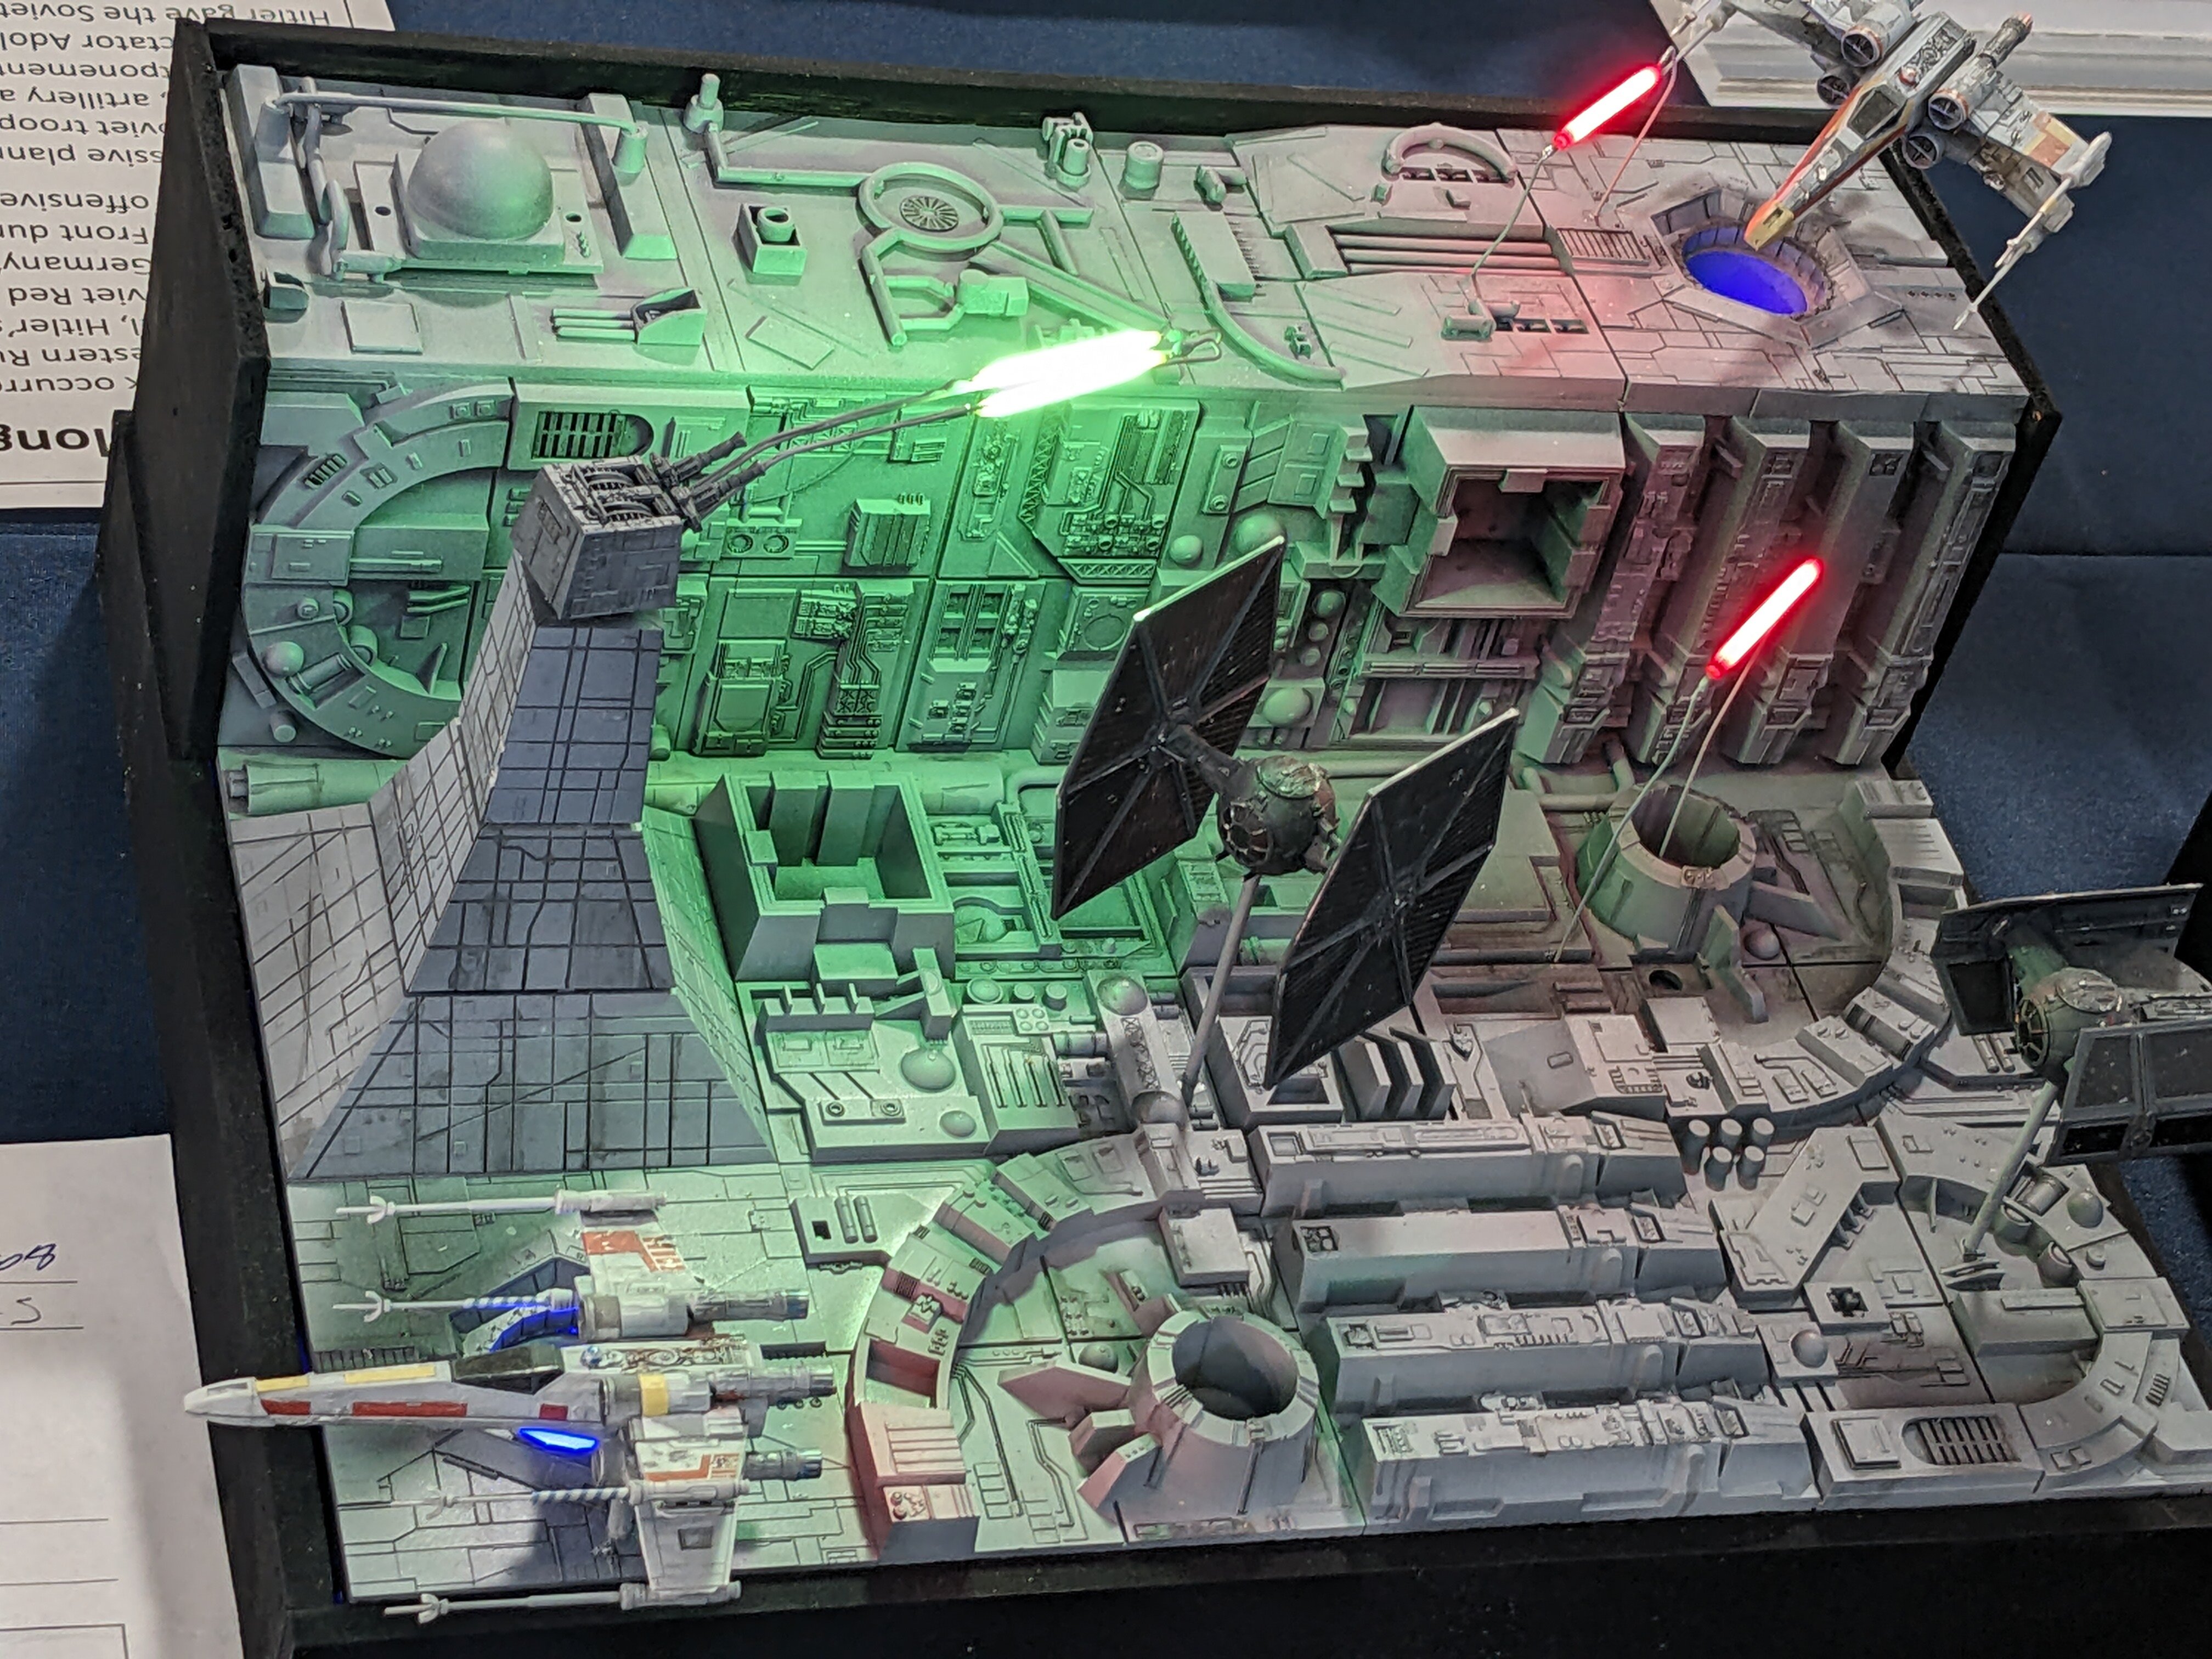
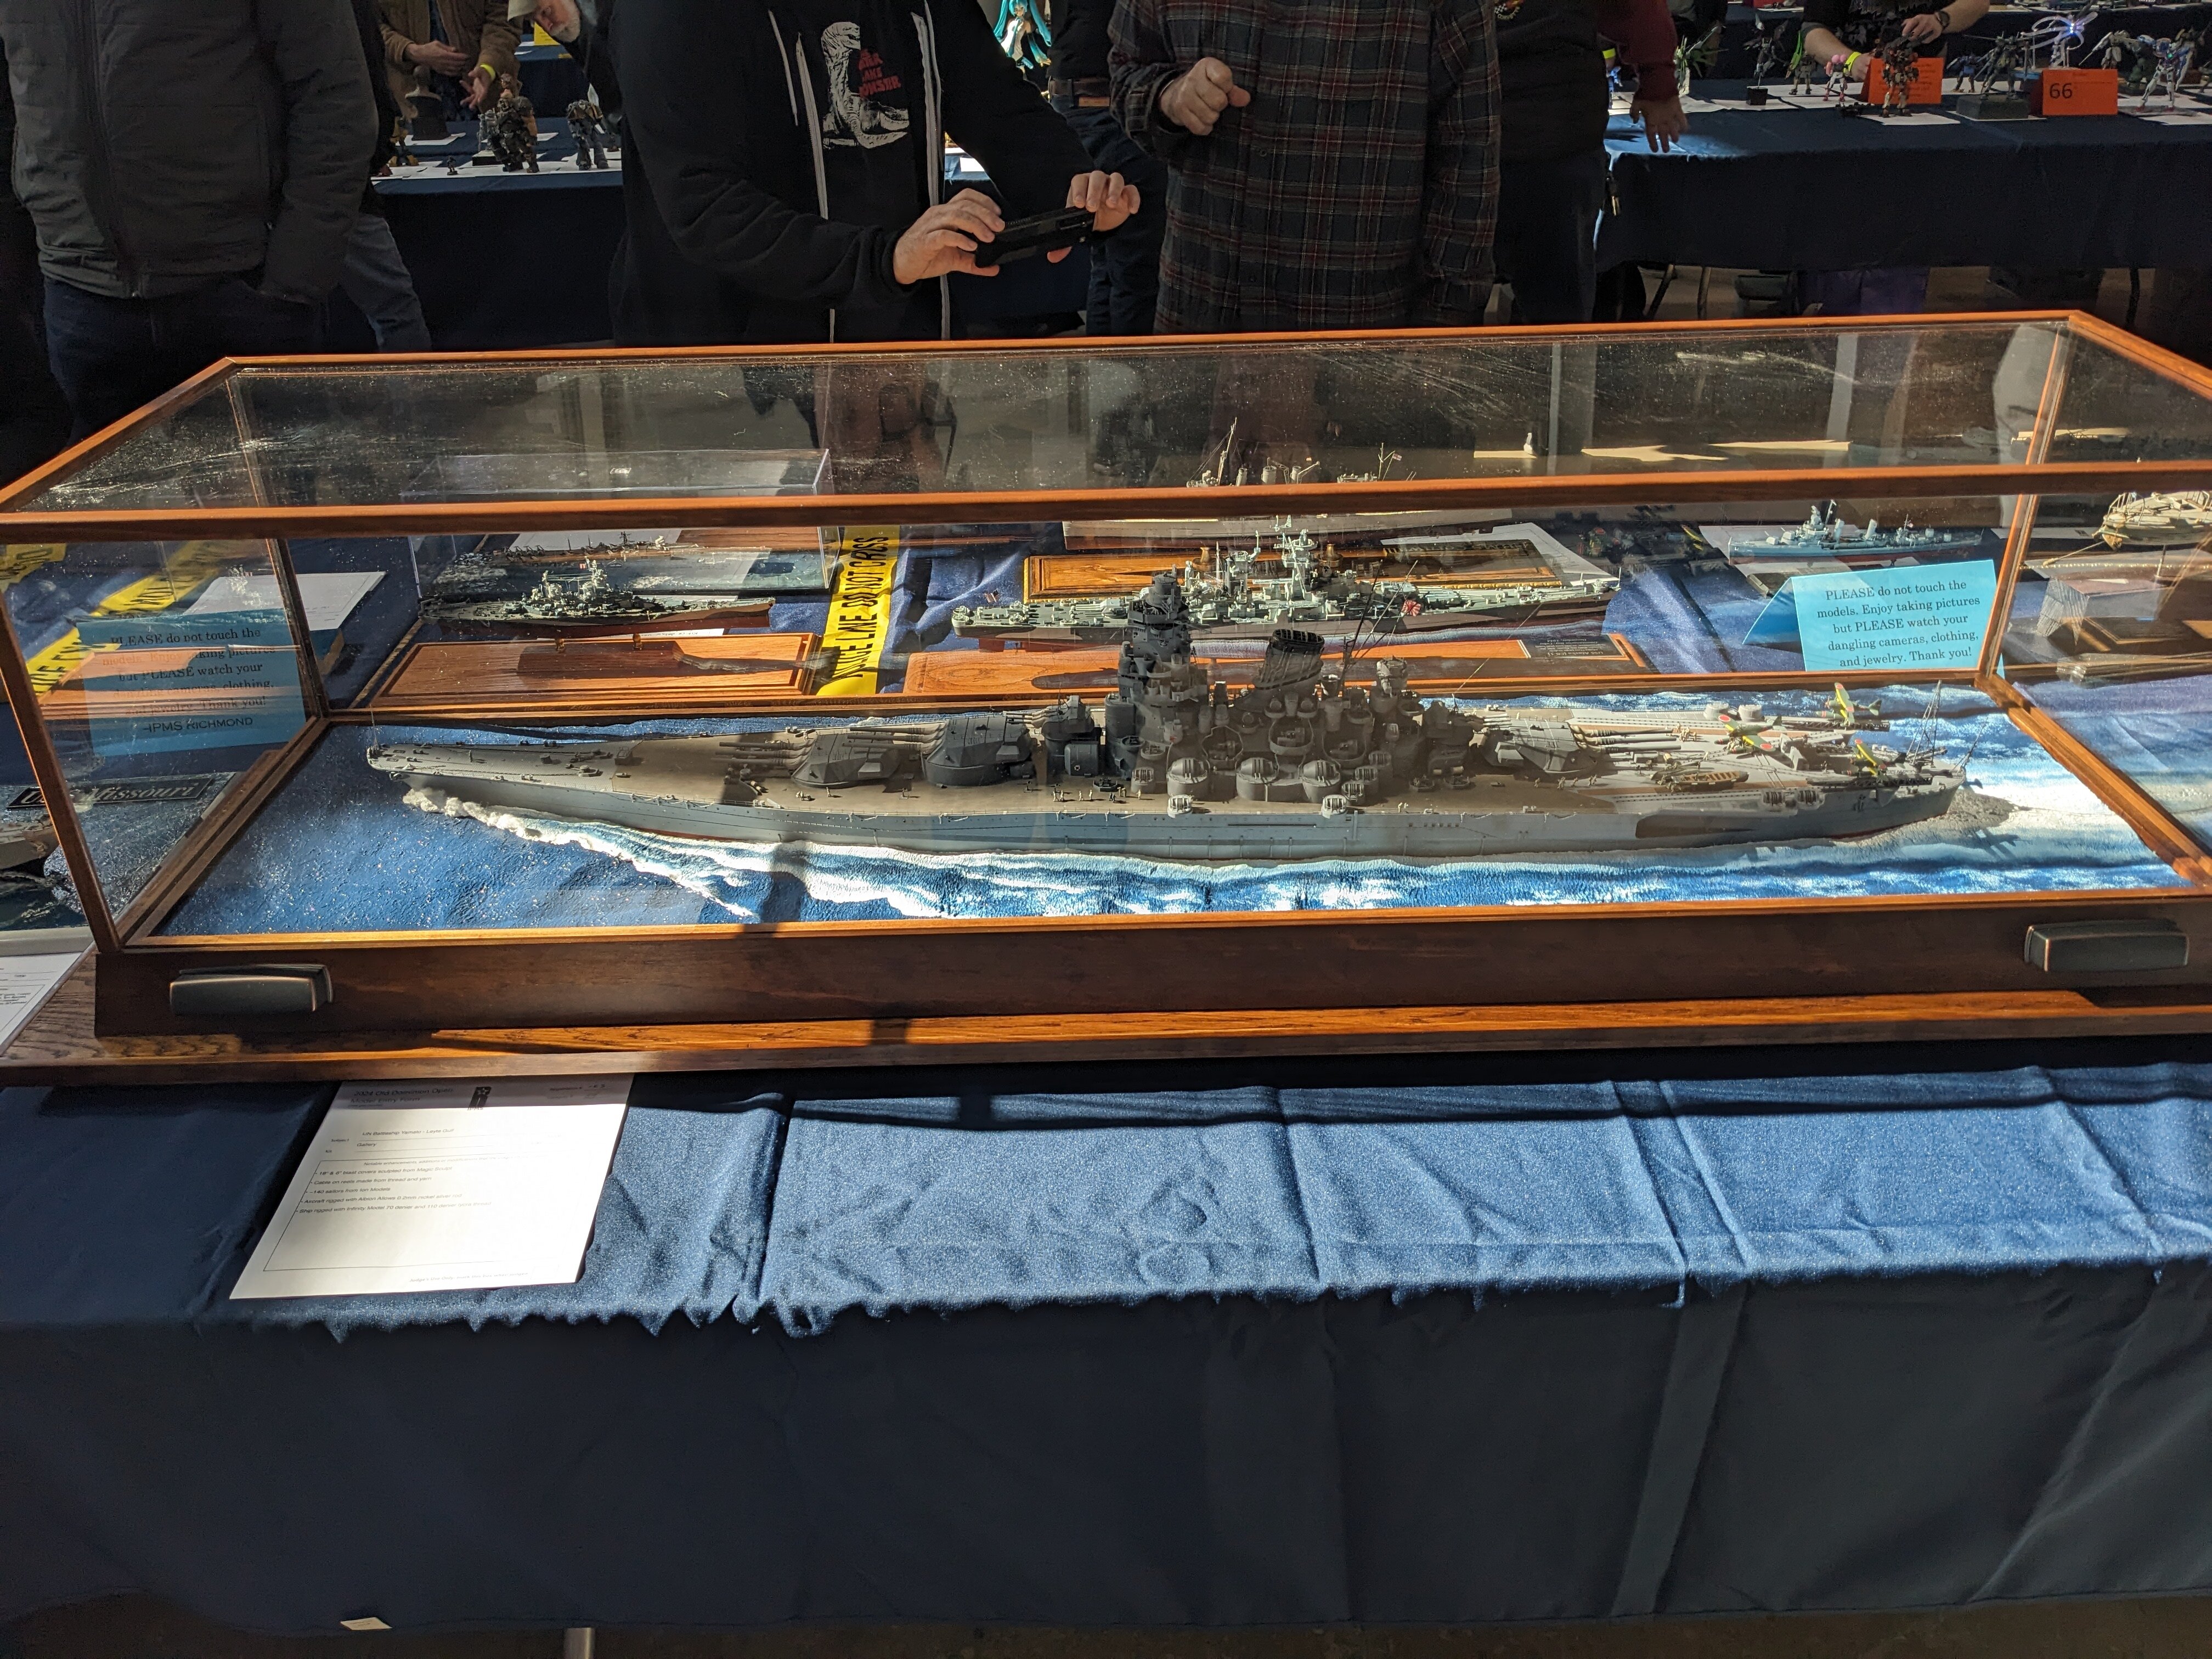
You're welcome, everyone! A lot of people don't know that there are shows right in their home area, and what they're missing out on! I forgot to say, that 1/200 Yamato (Gallery Models) won best in class for ship. I believe it was that tiny Y-wing that also won best in it's class. This show was tough. They judge all the models, then the best are given medals (gold, silver, bronze). Our local rules are the same, but to include nothing. We judge each model on its individual merit. Only best in class gets a "best over all" medal. So many more people get medals, and judging takes half the time! These judges took FOUR hours! - MT
-
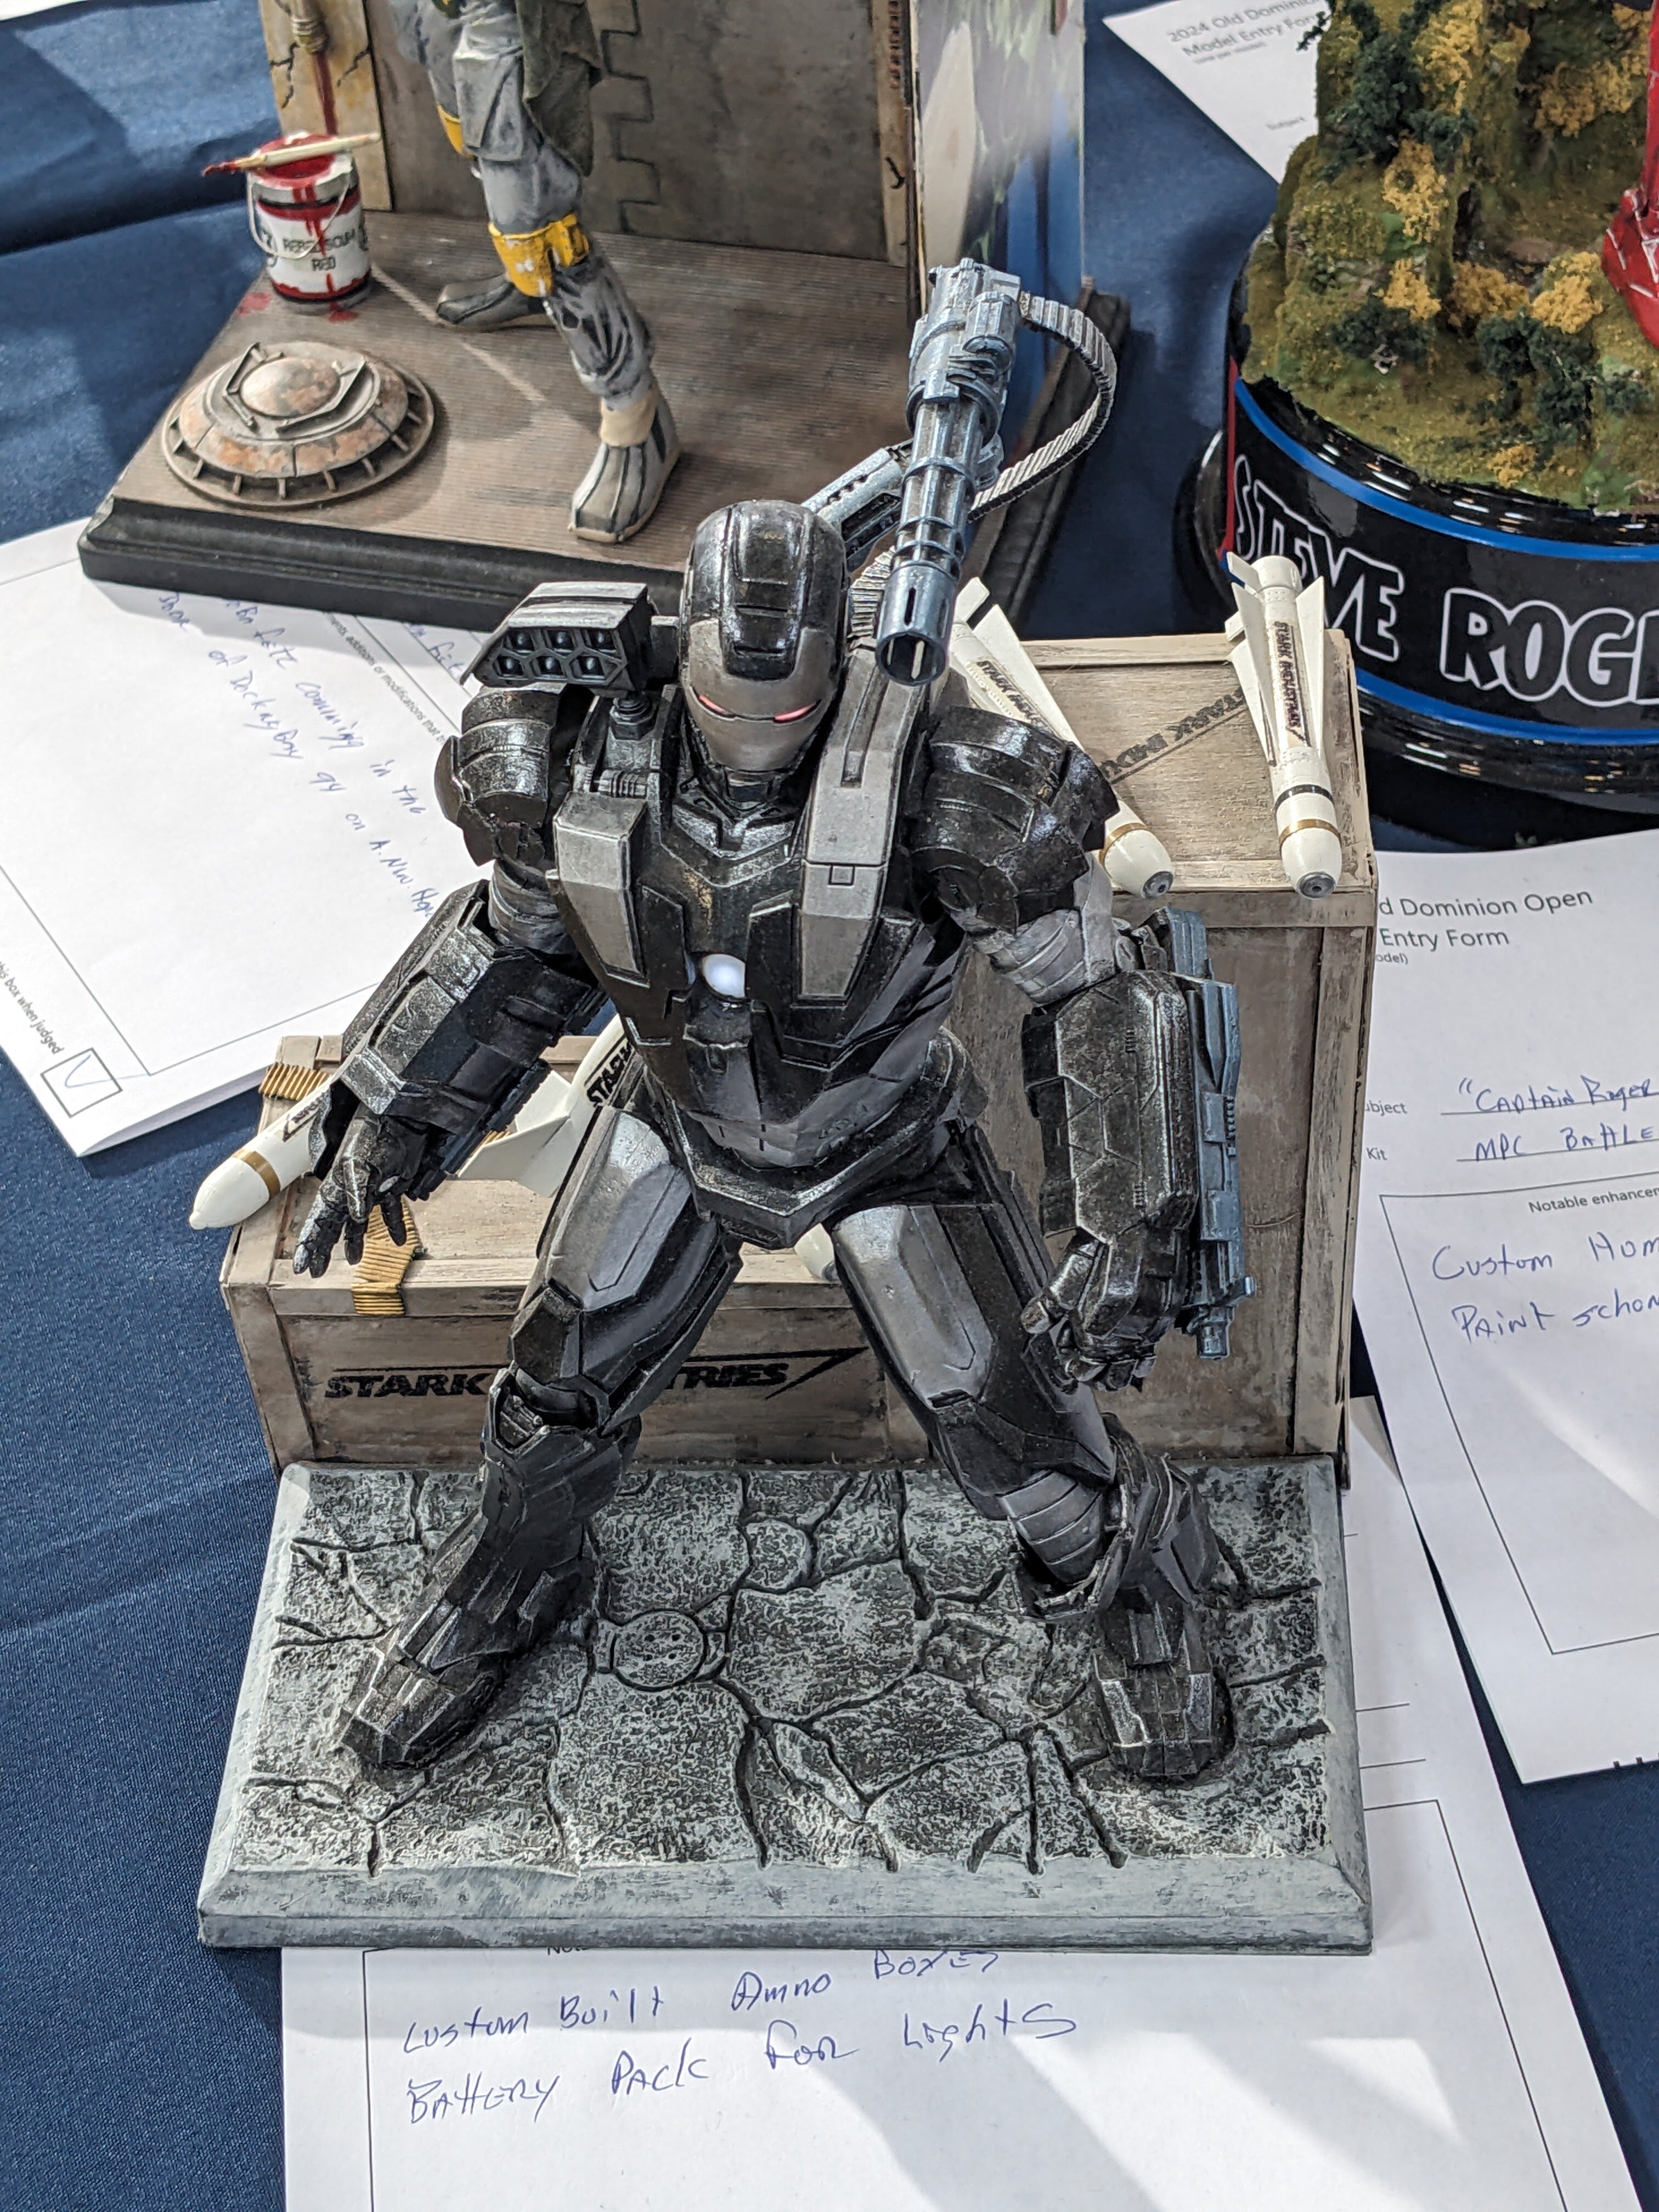
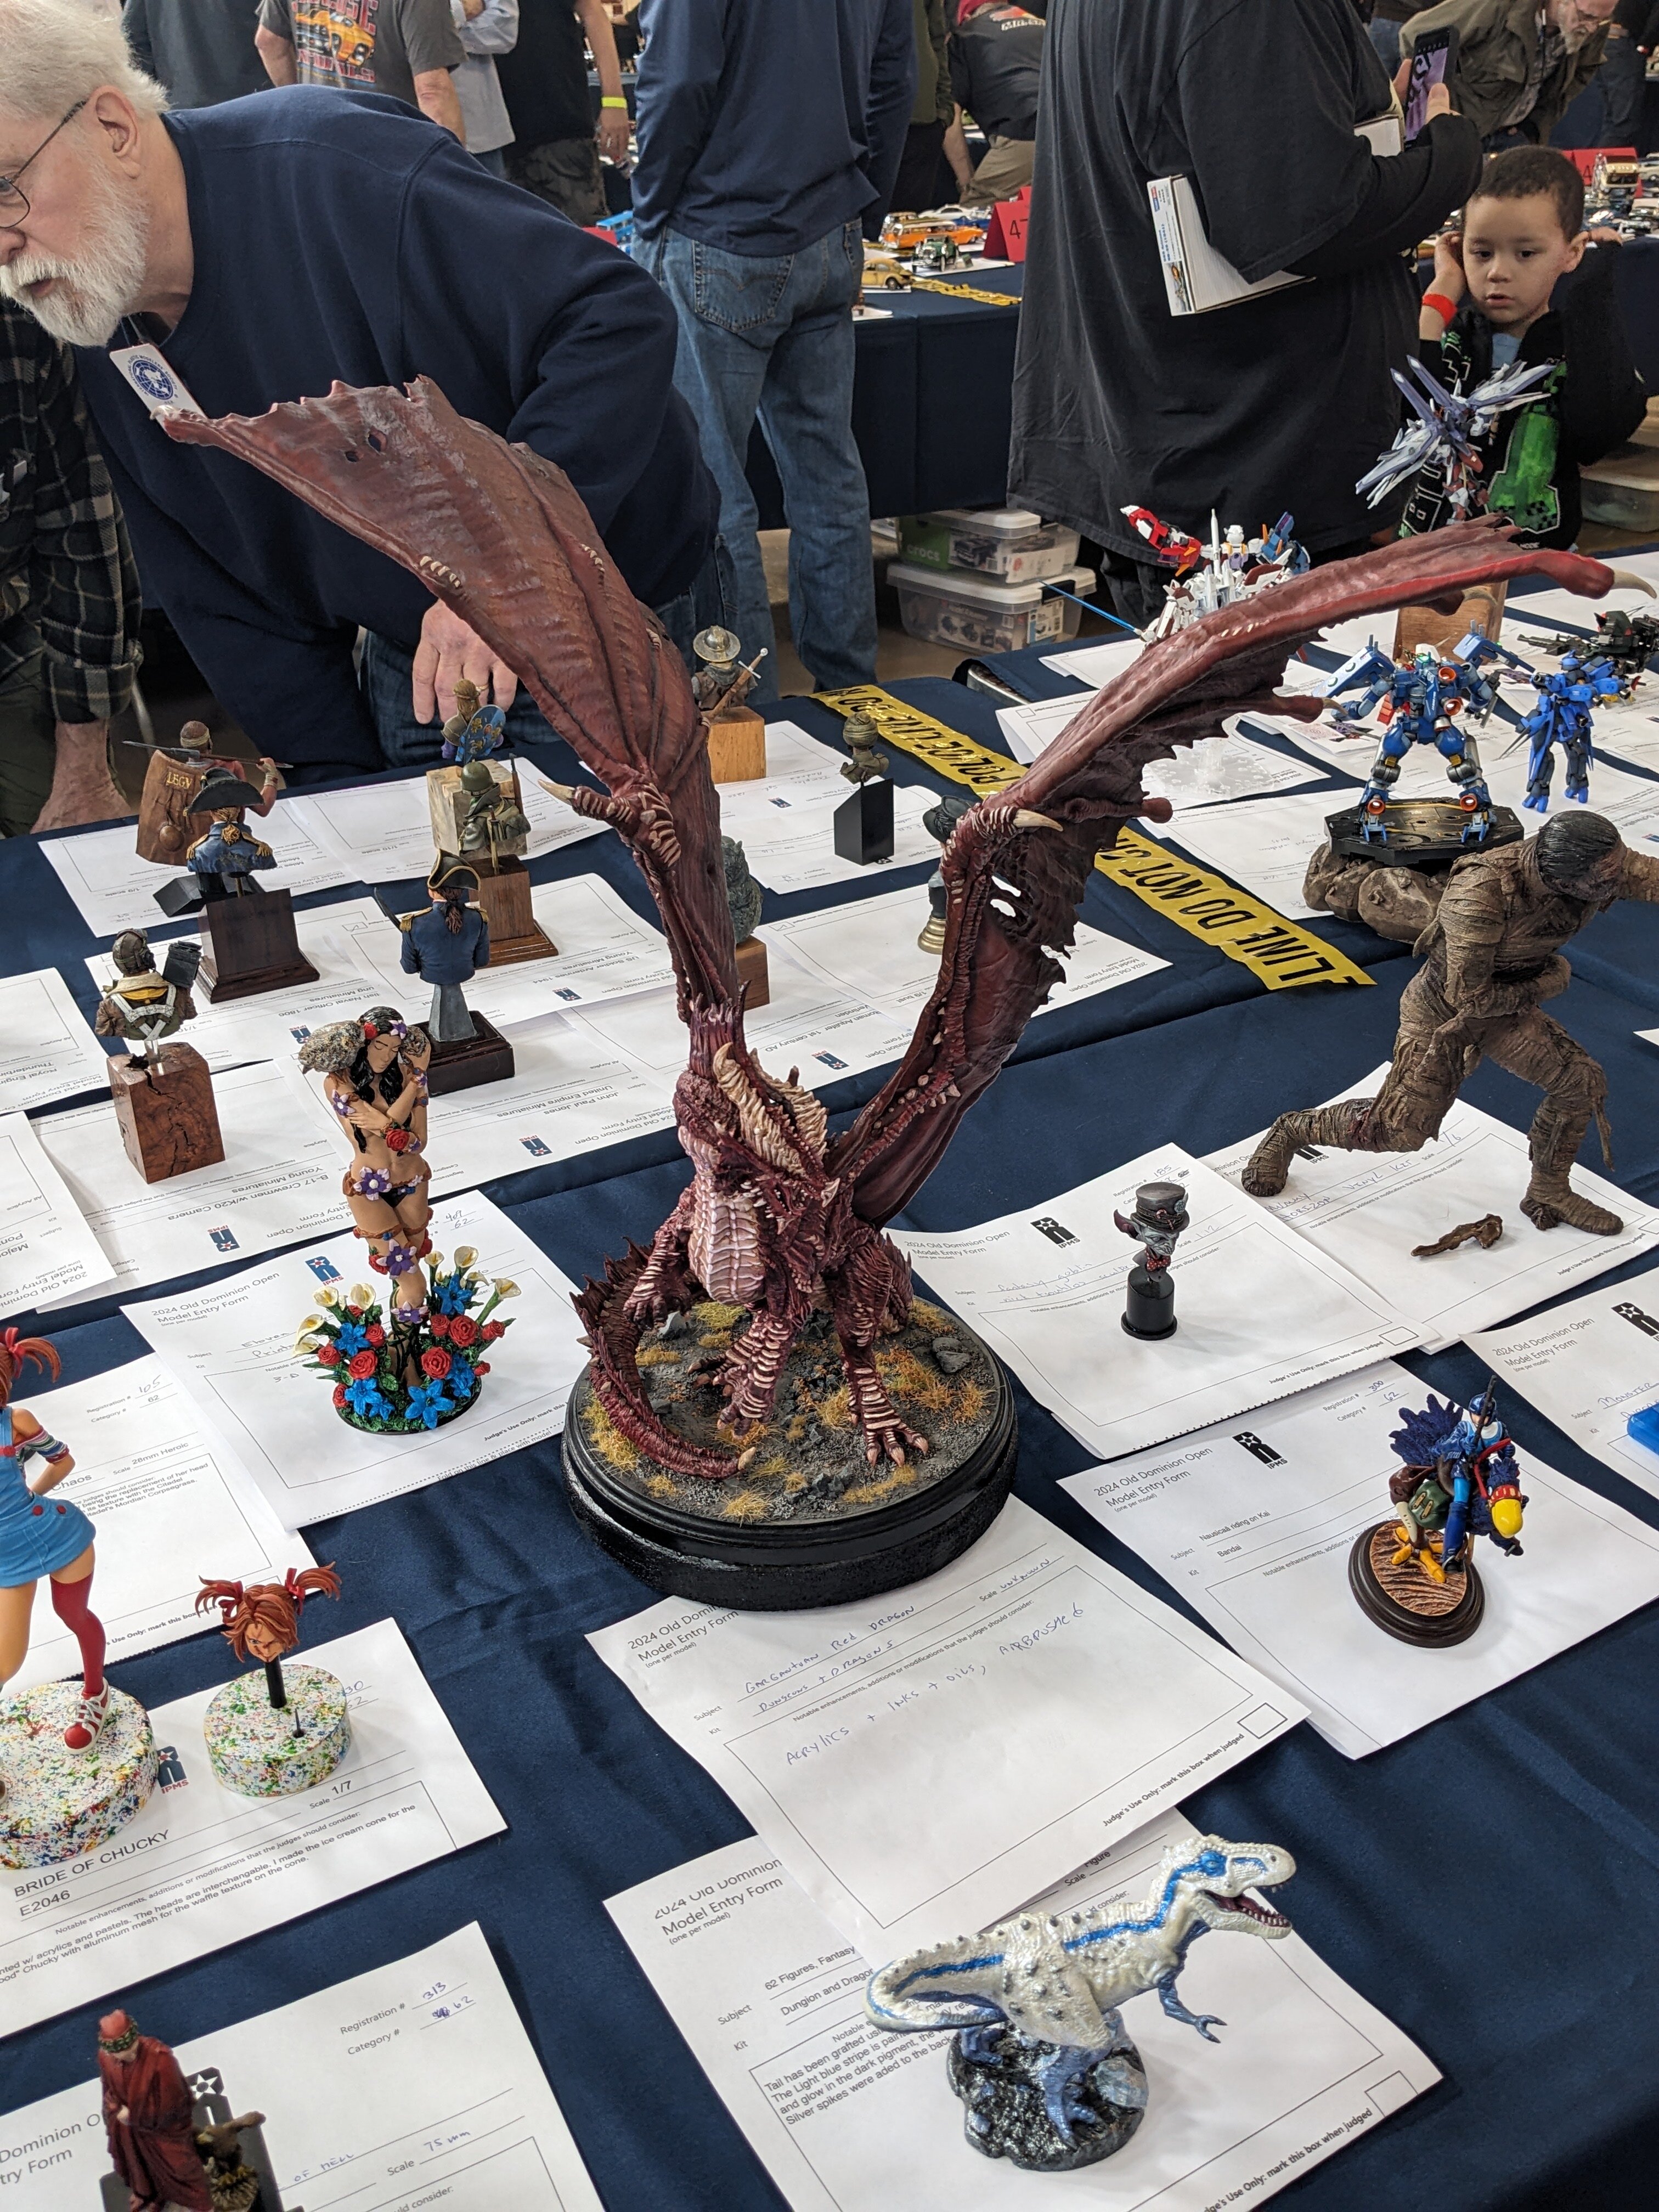
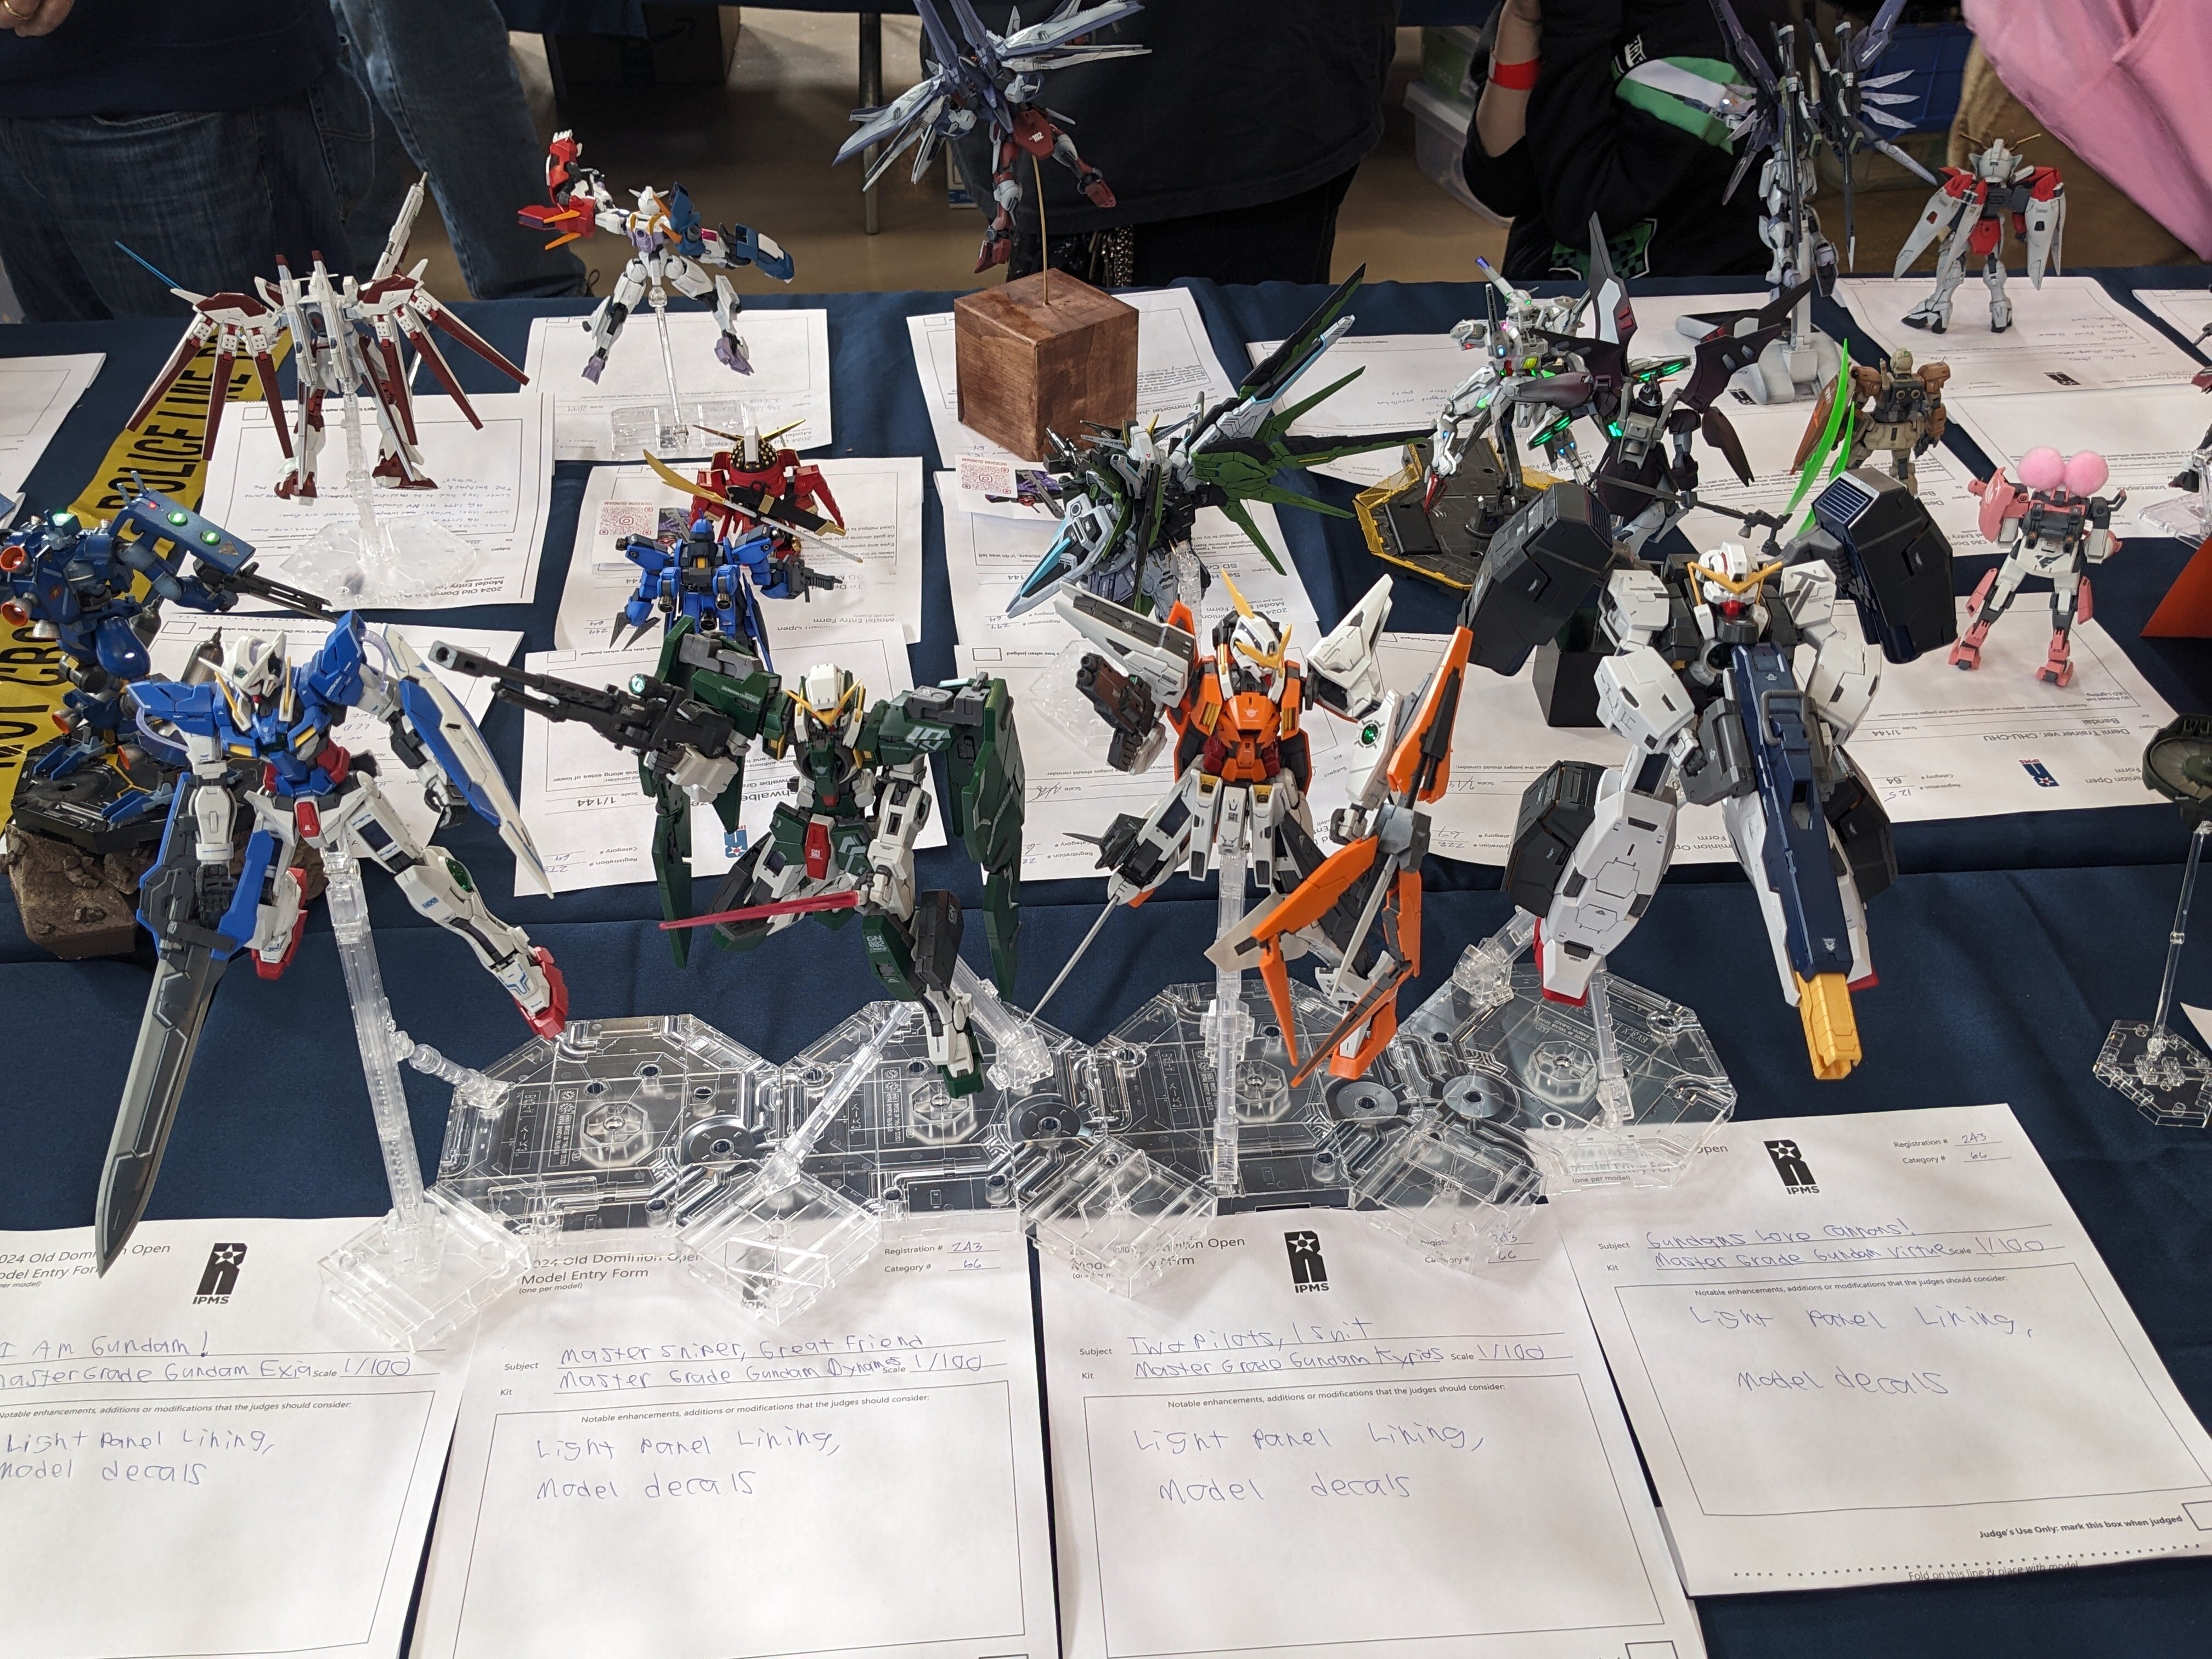
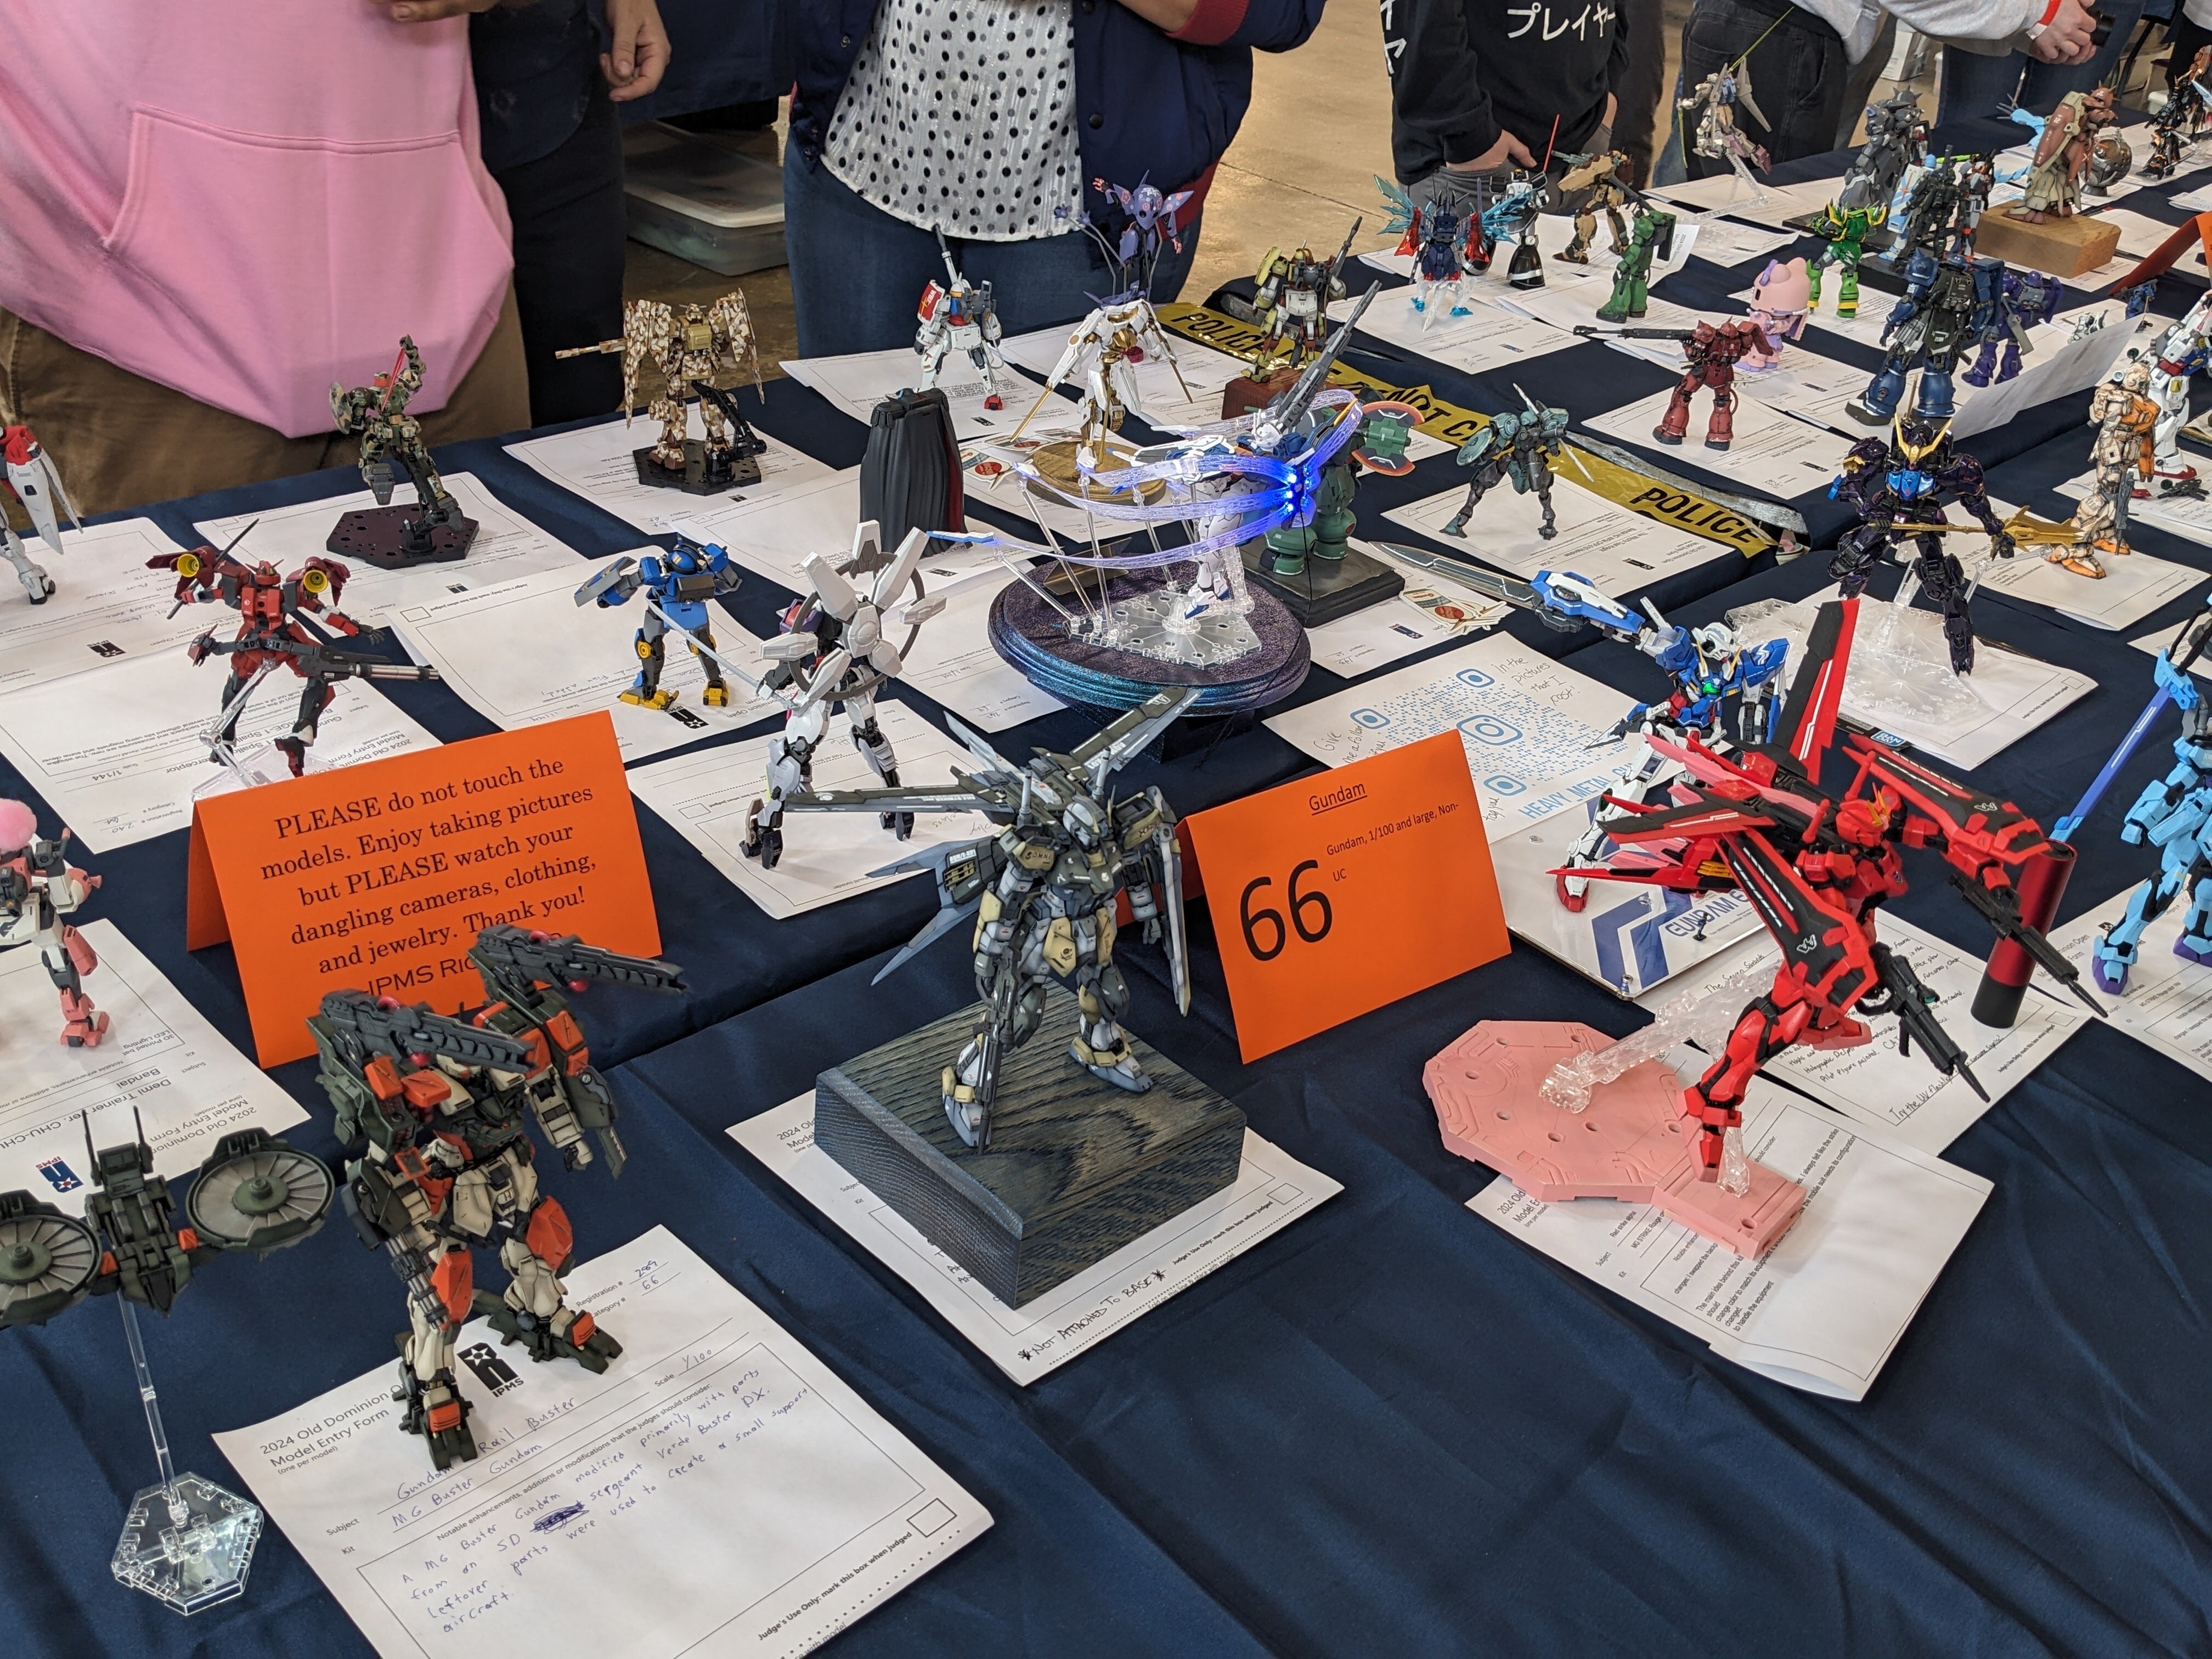
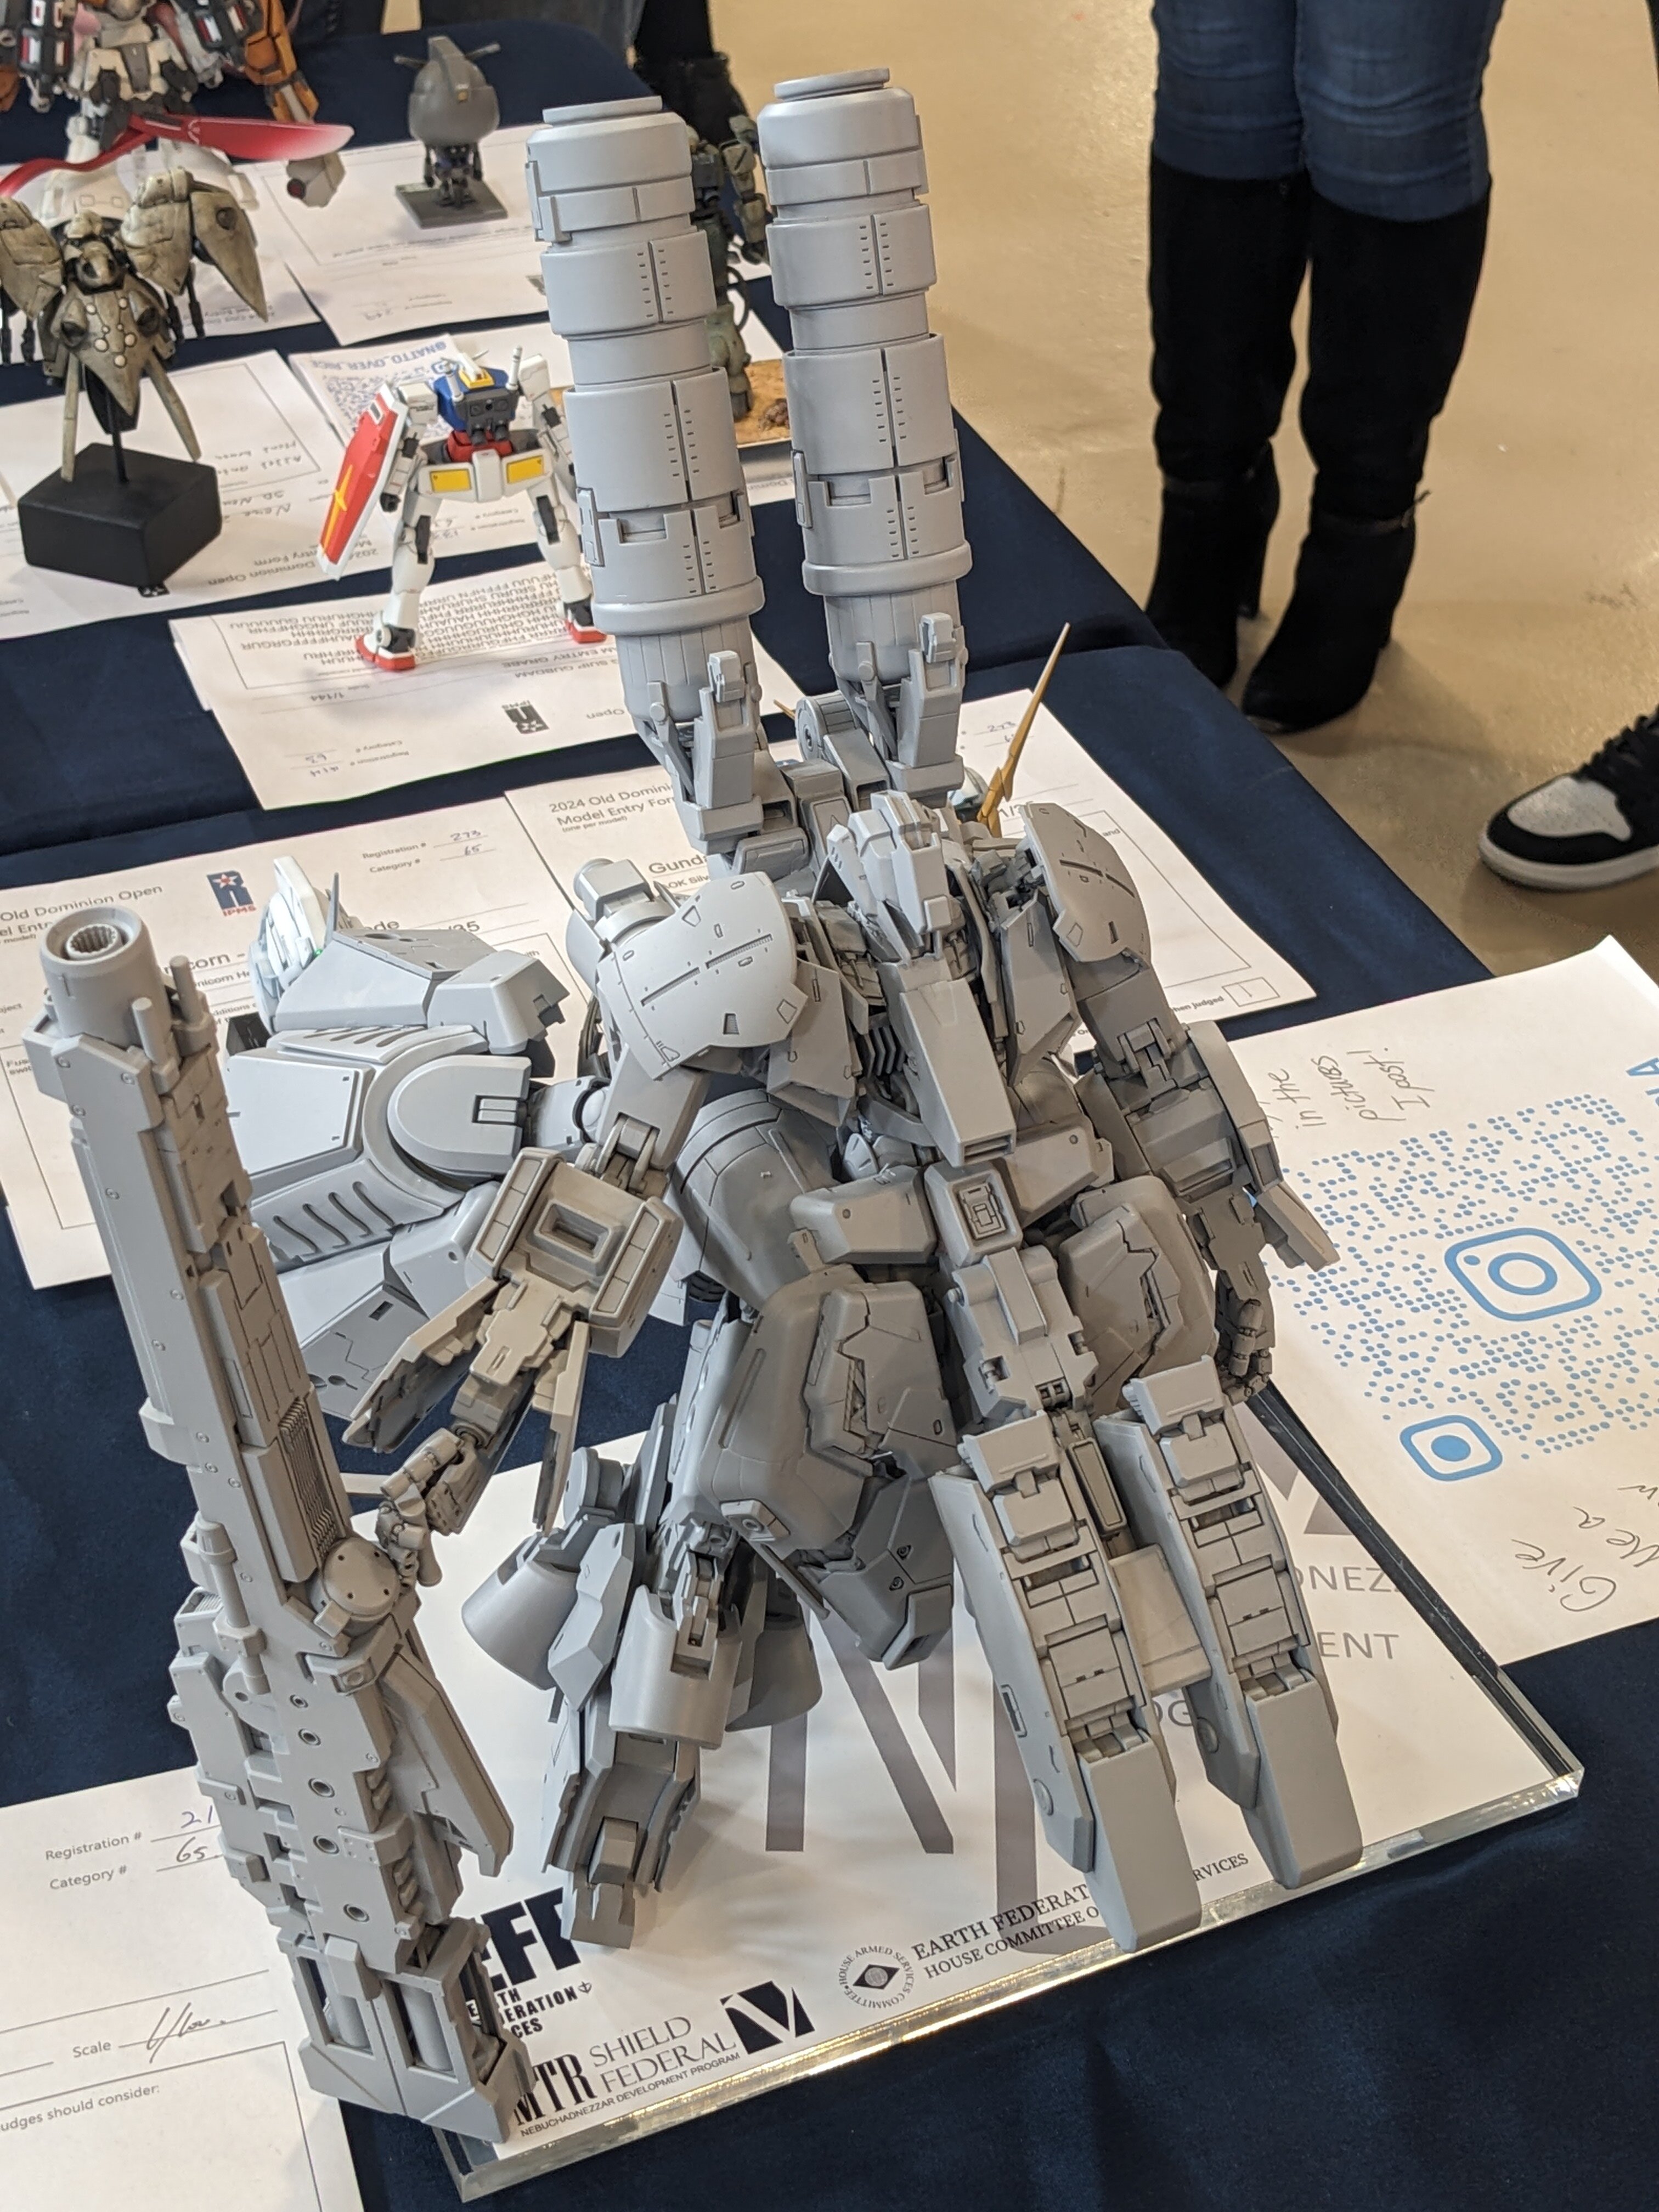
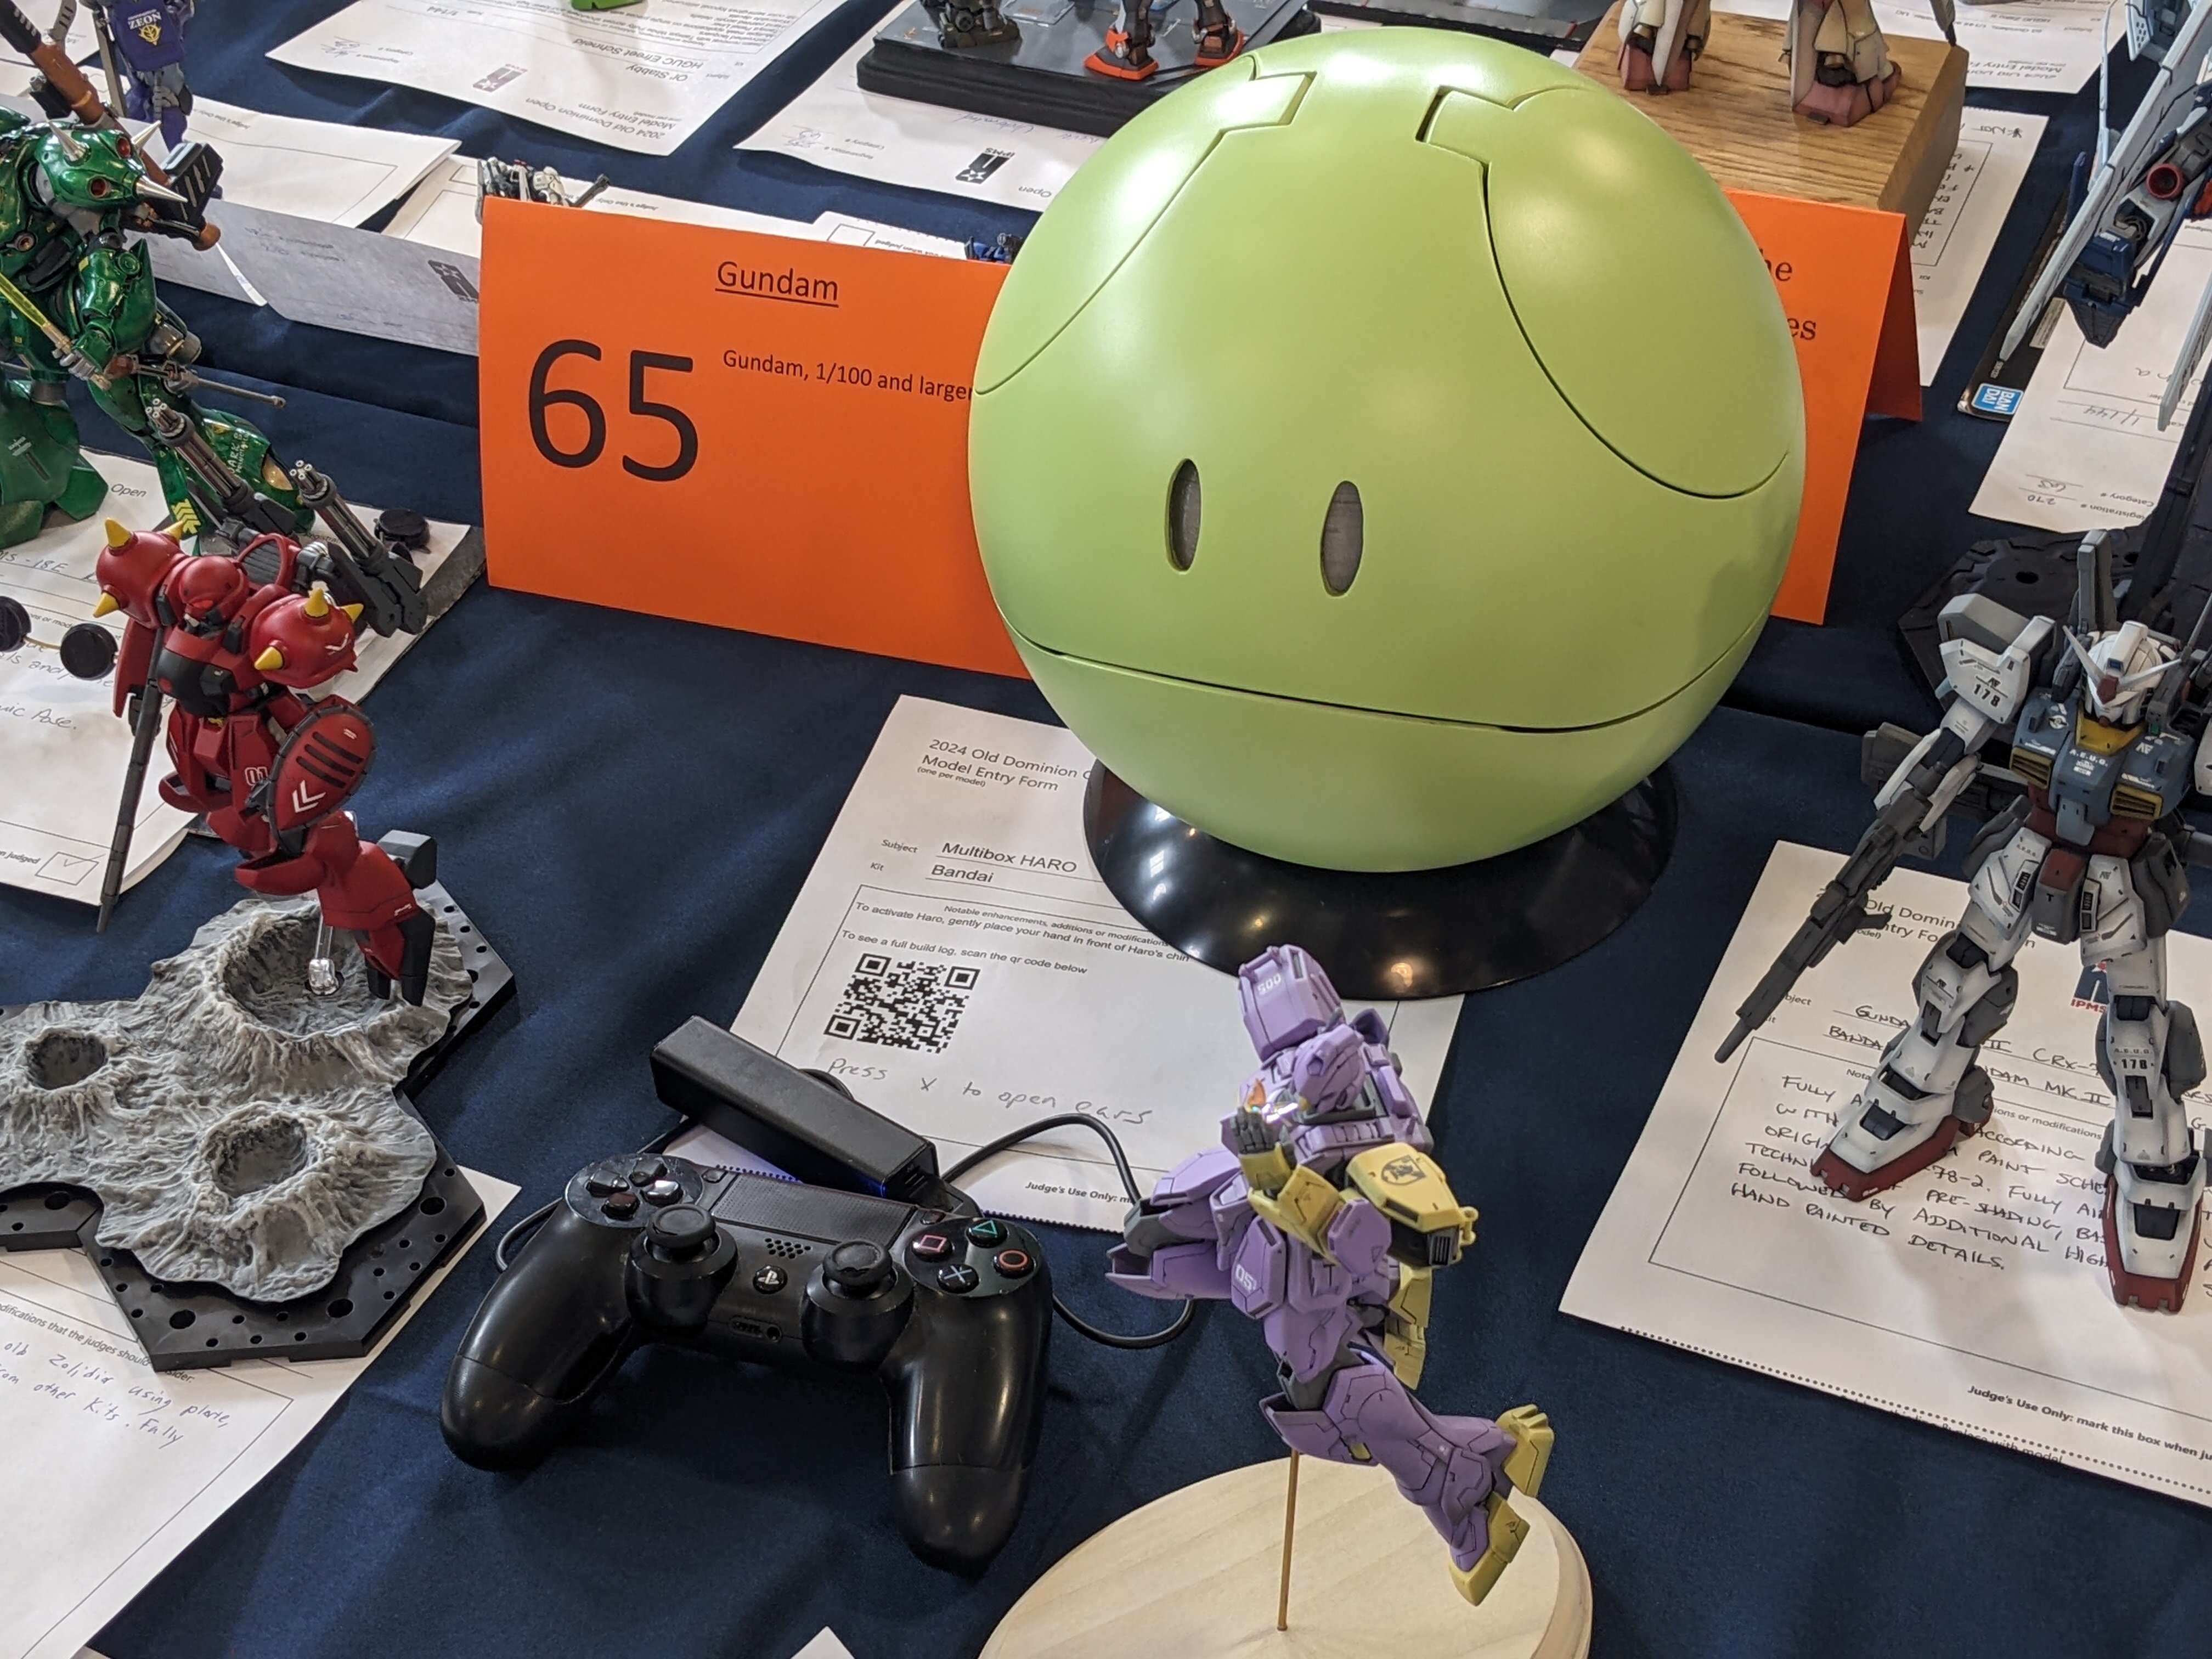
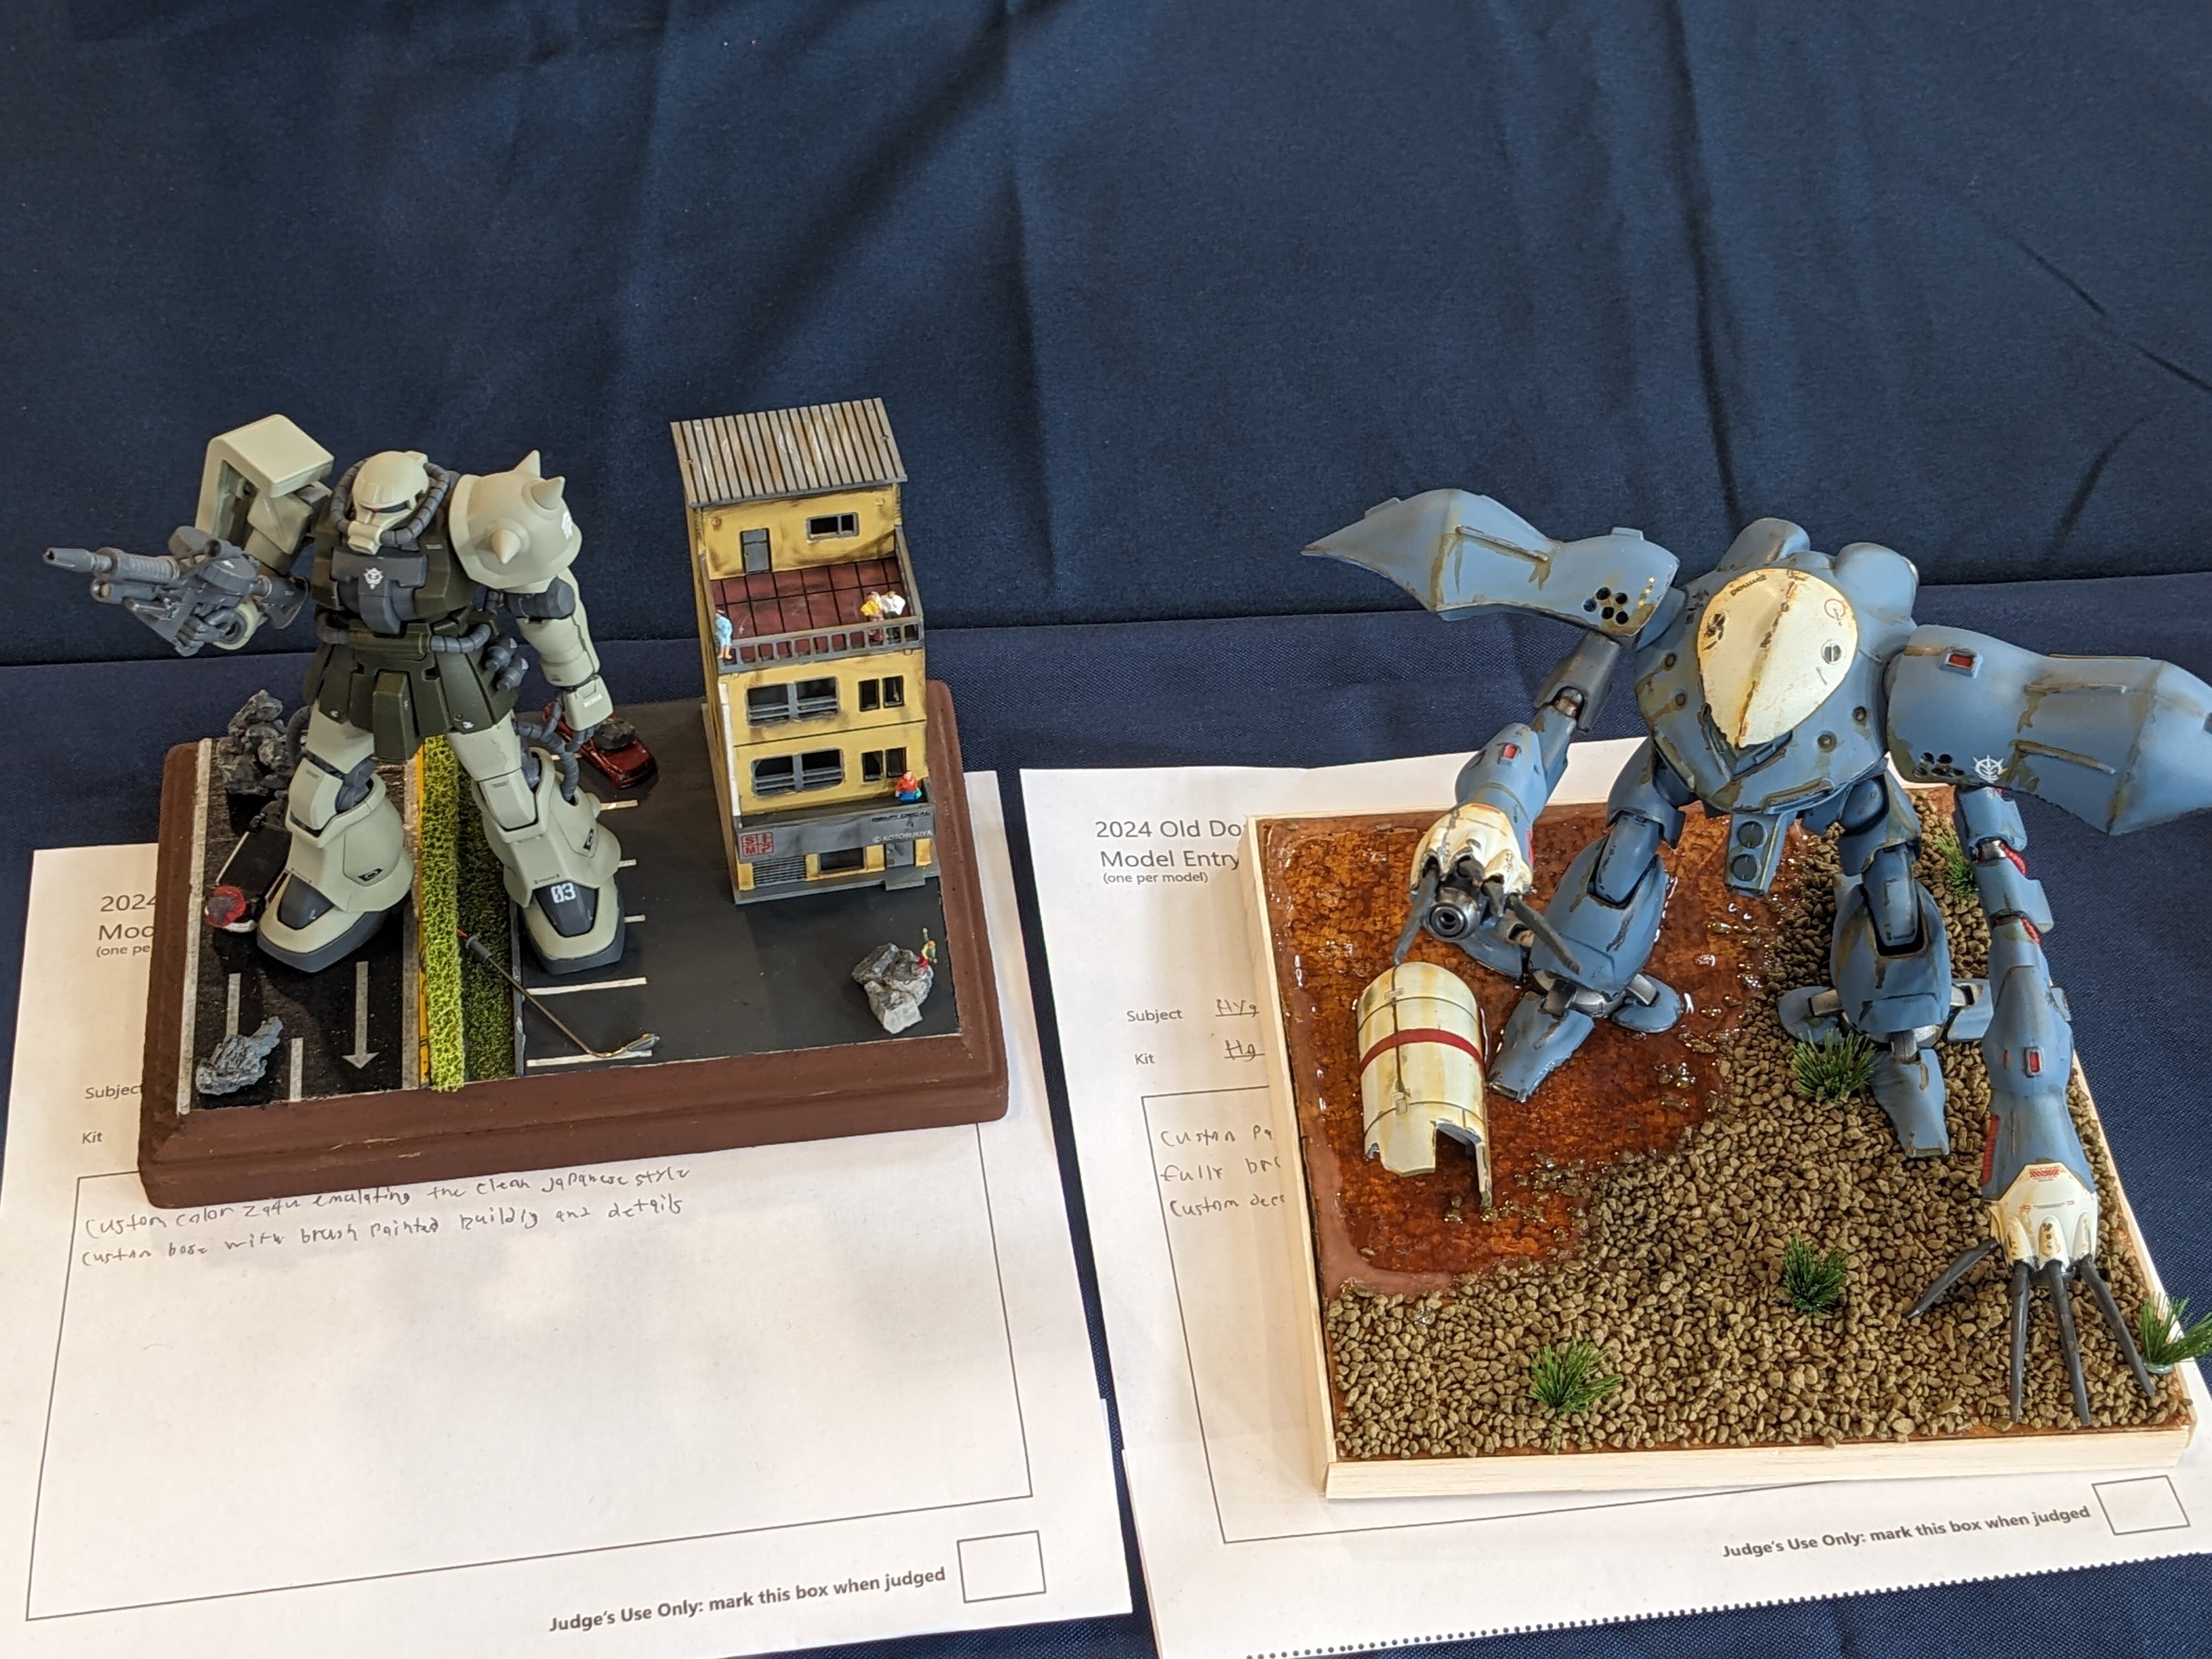
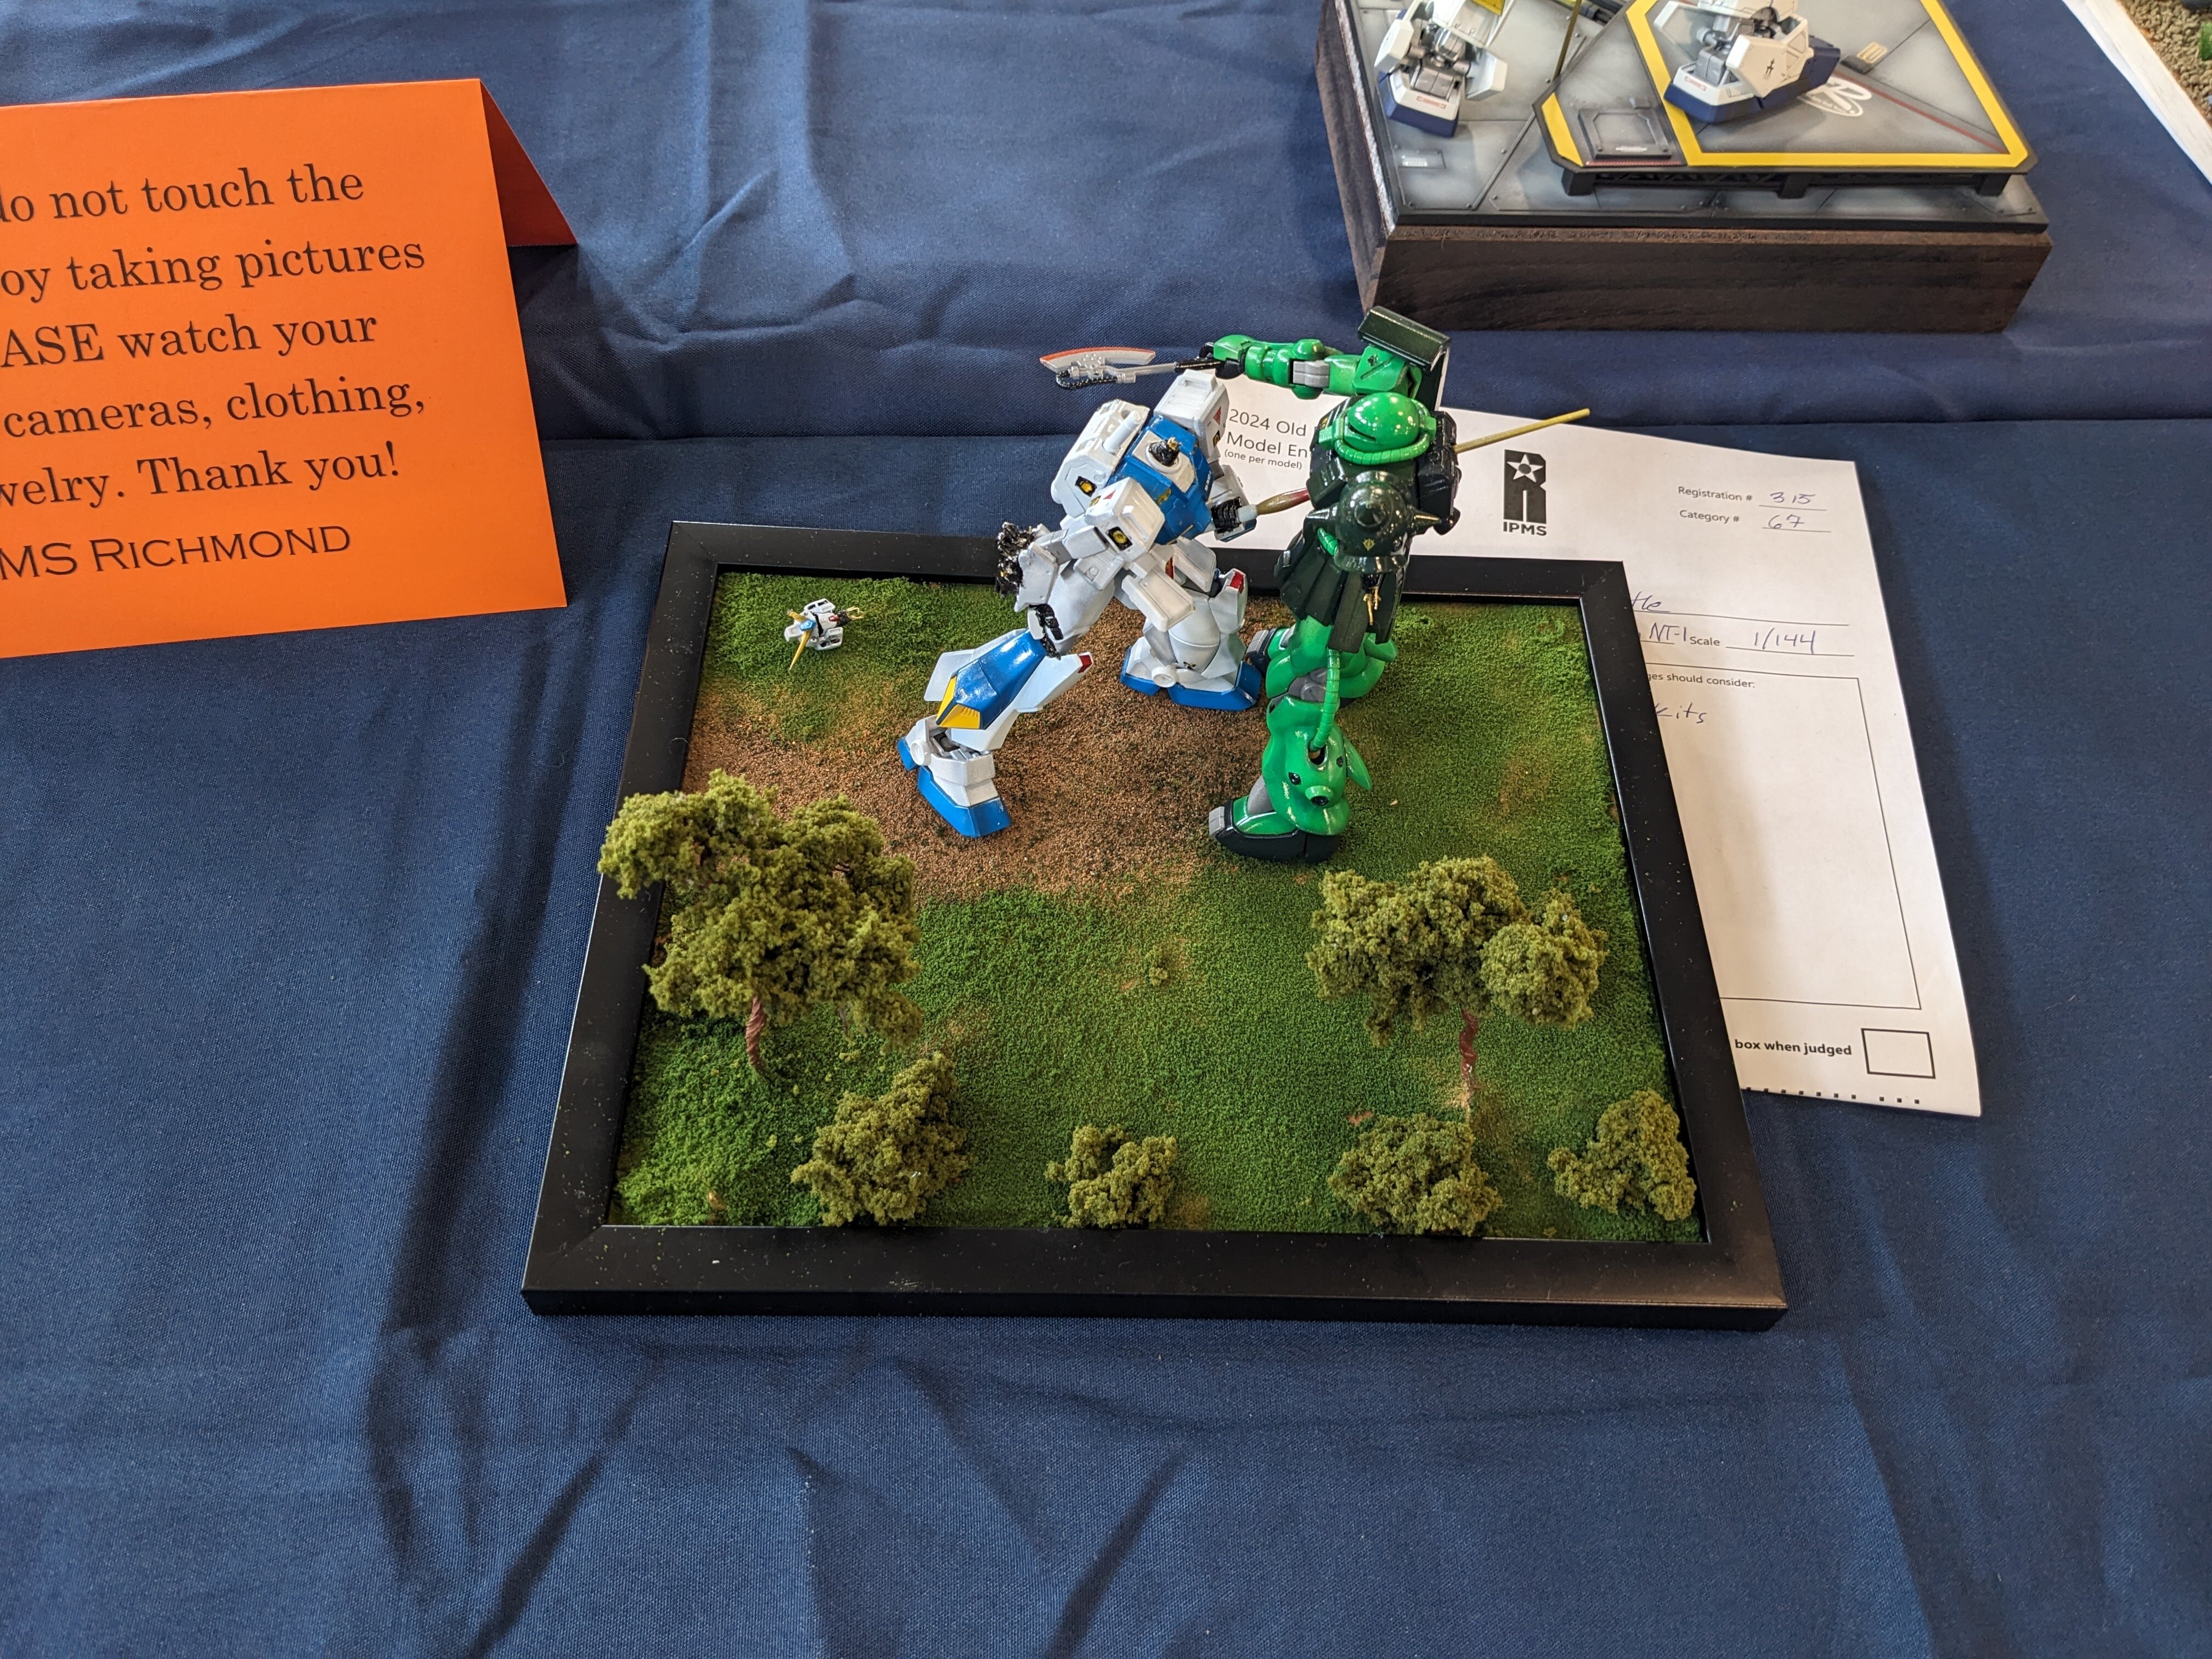
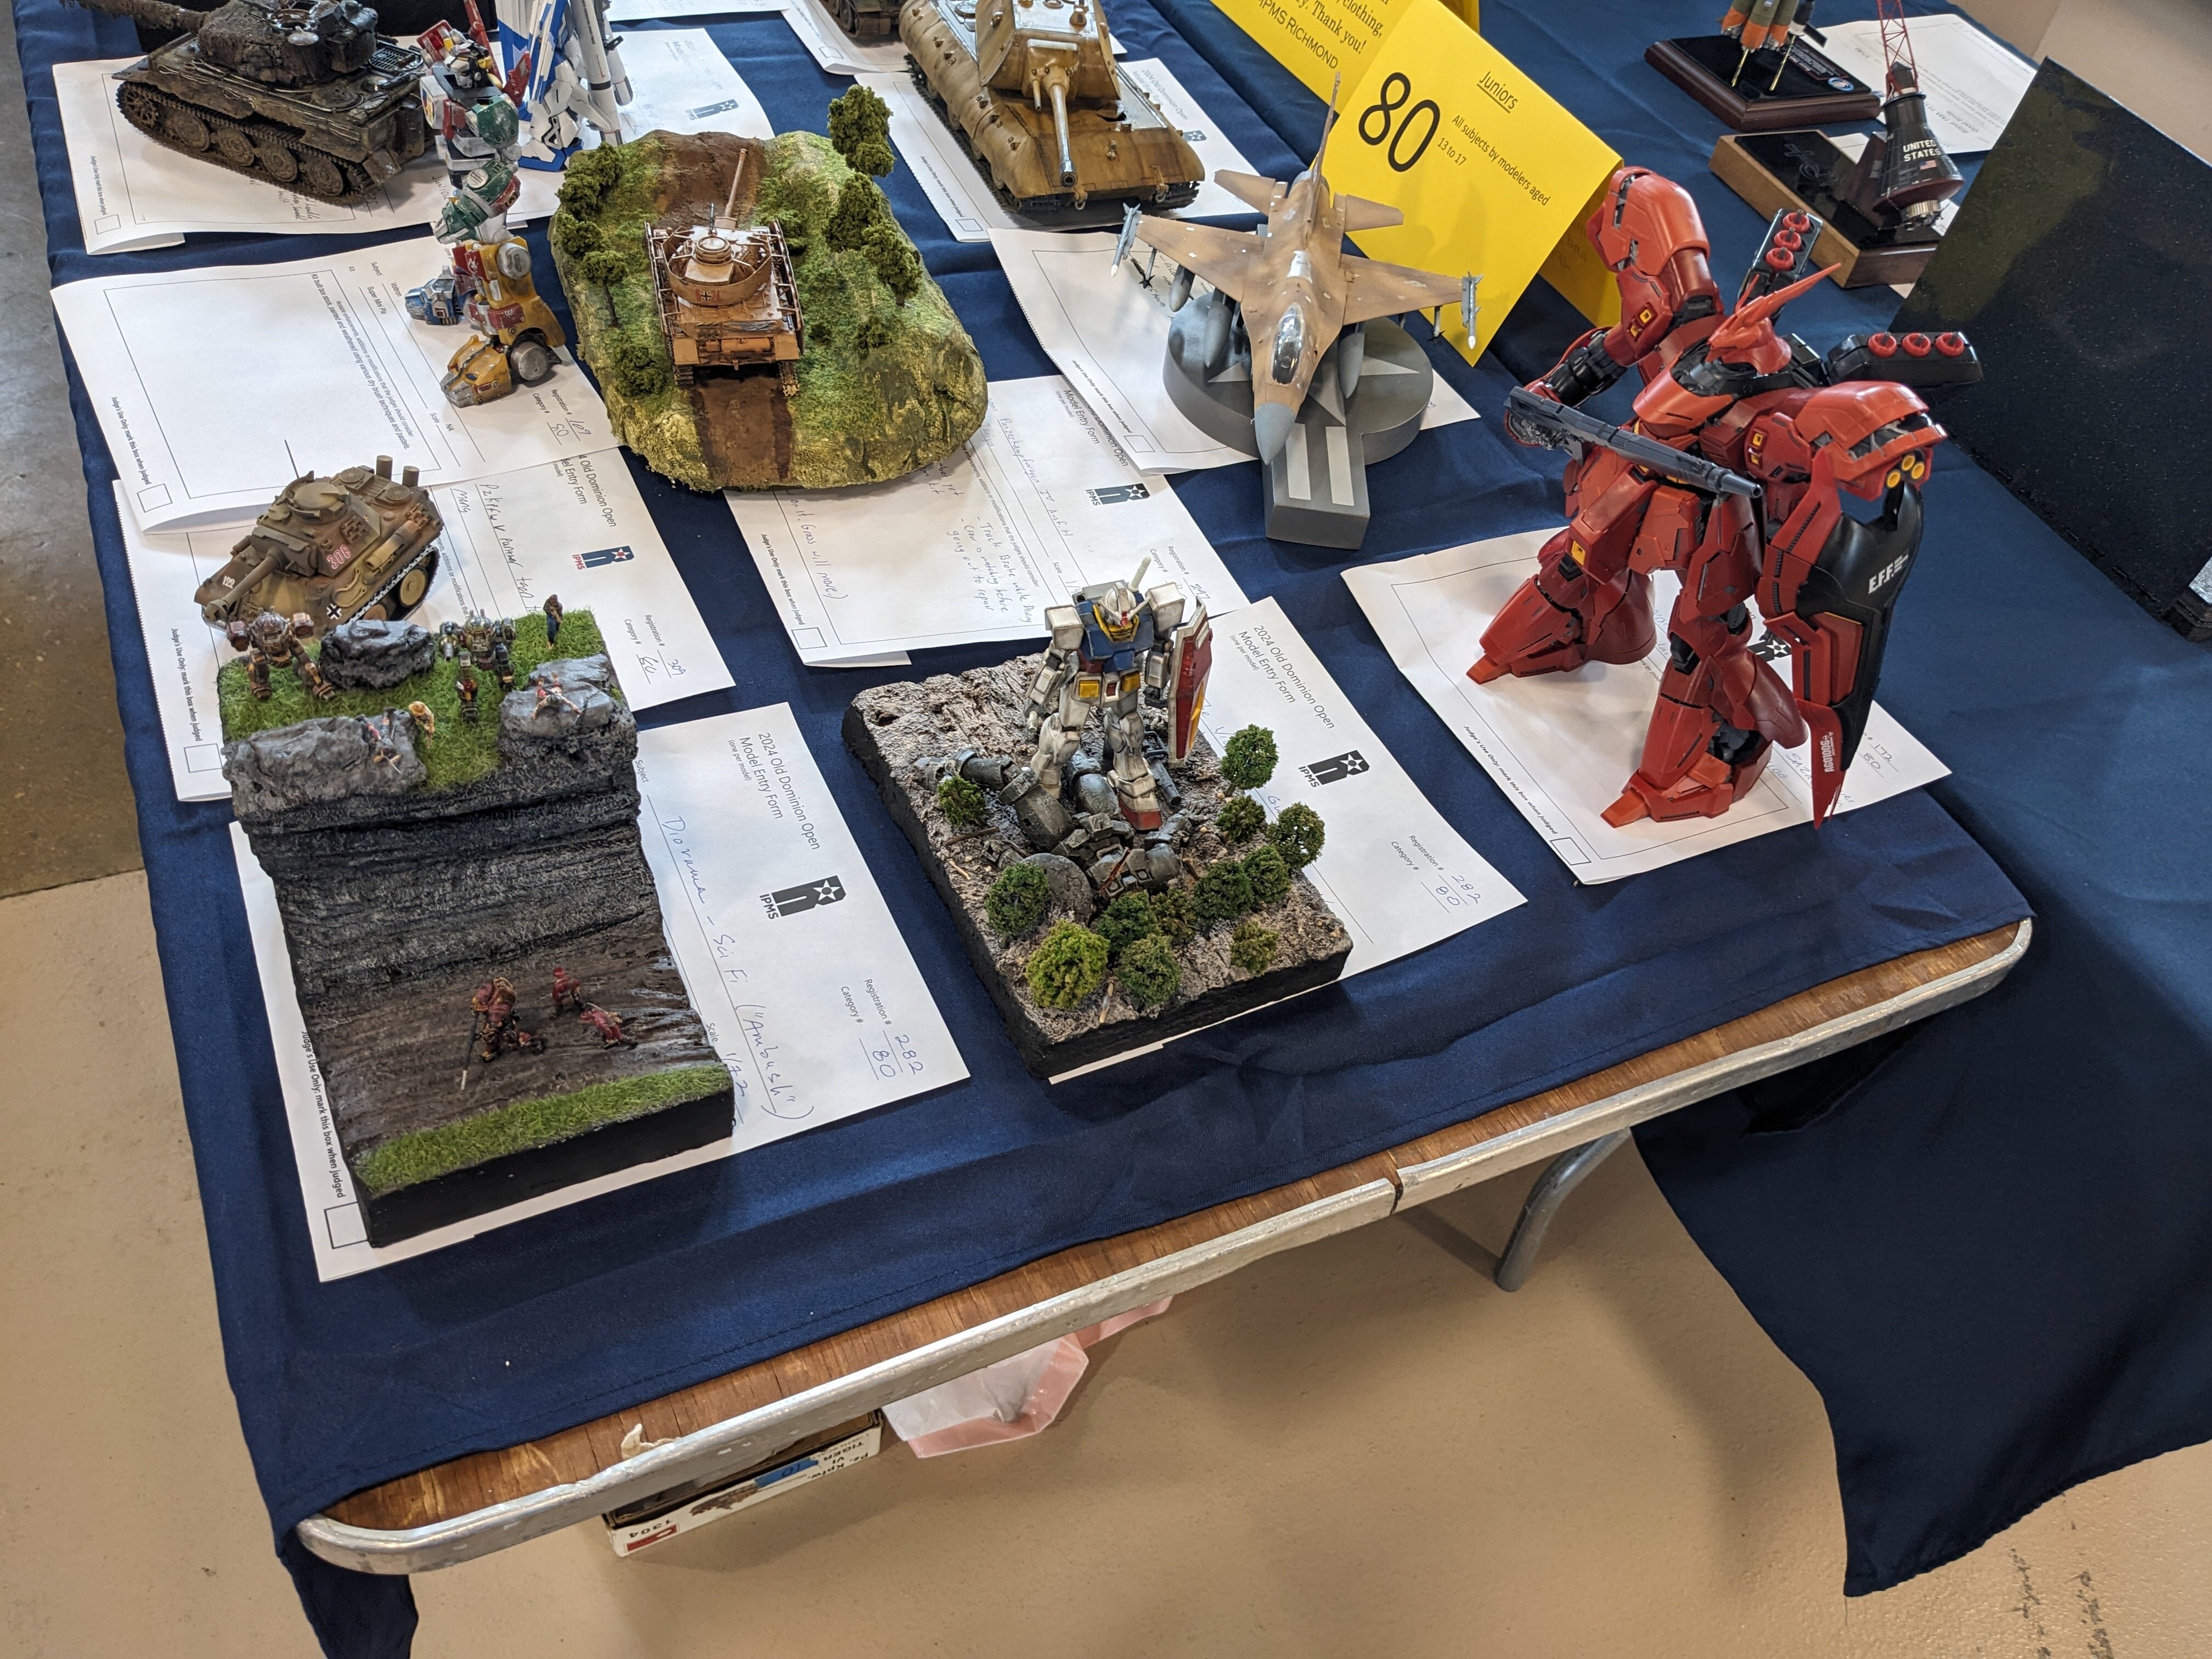
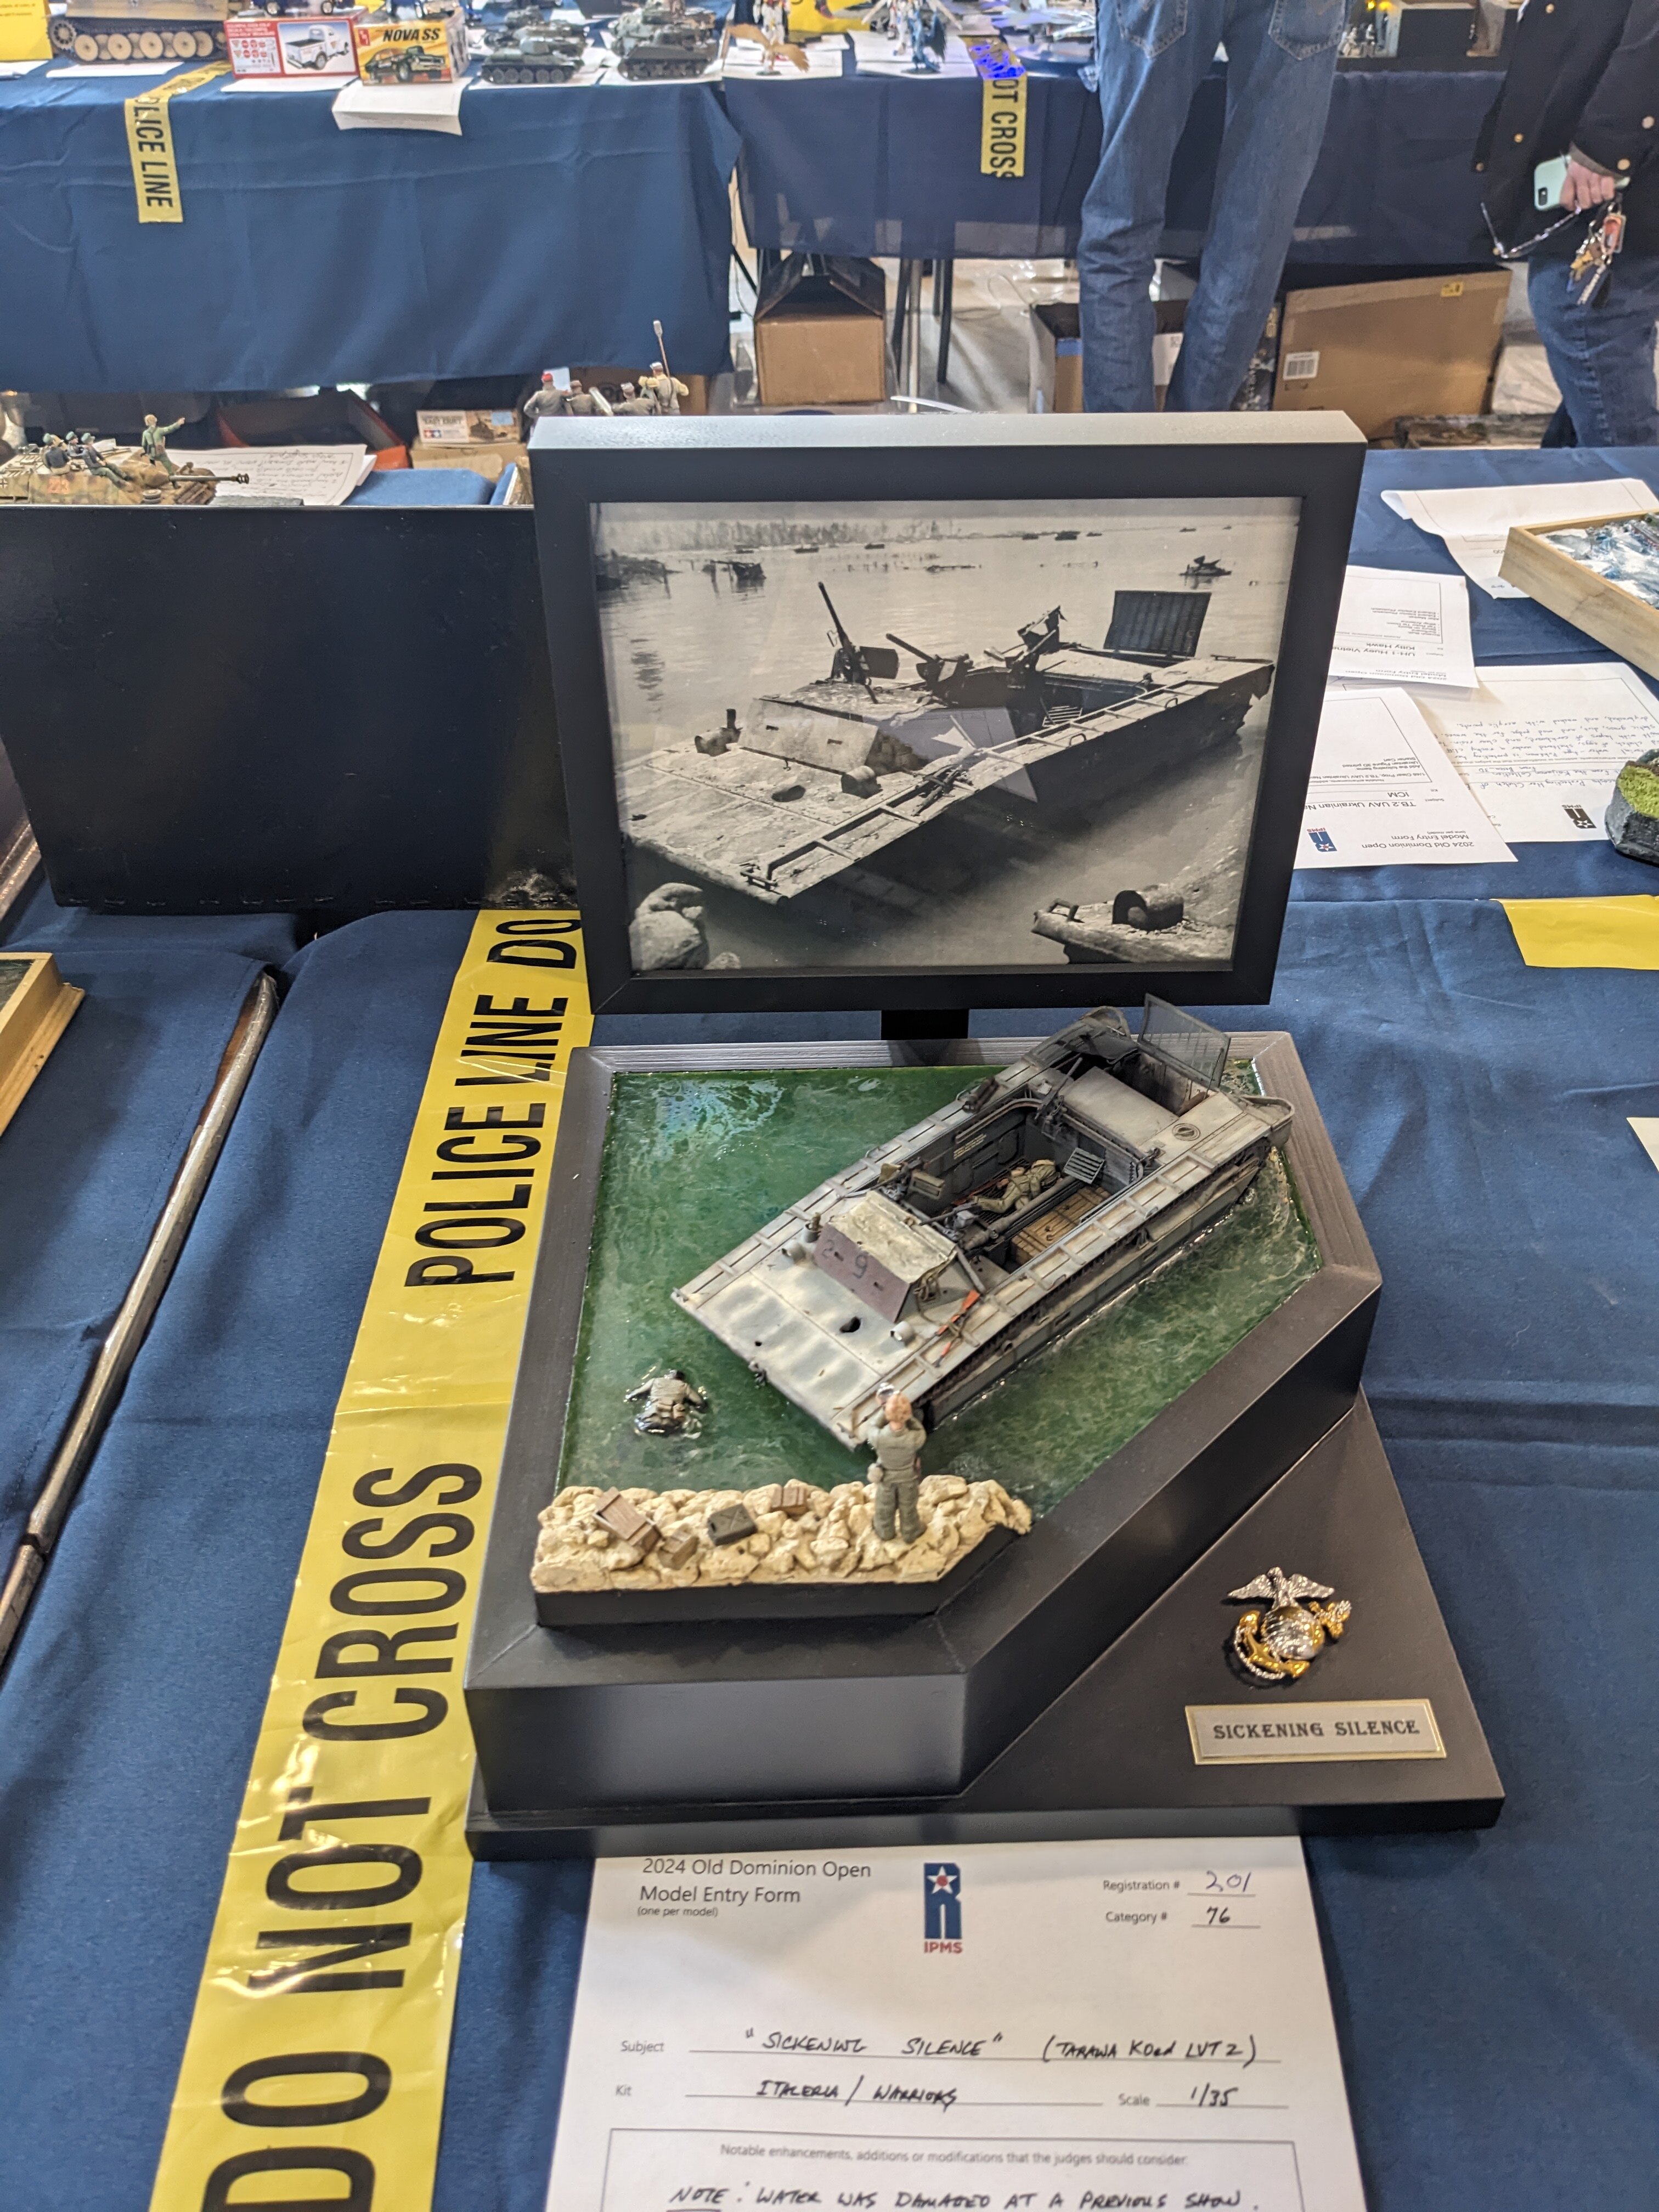
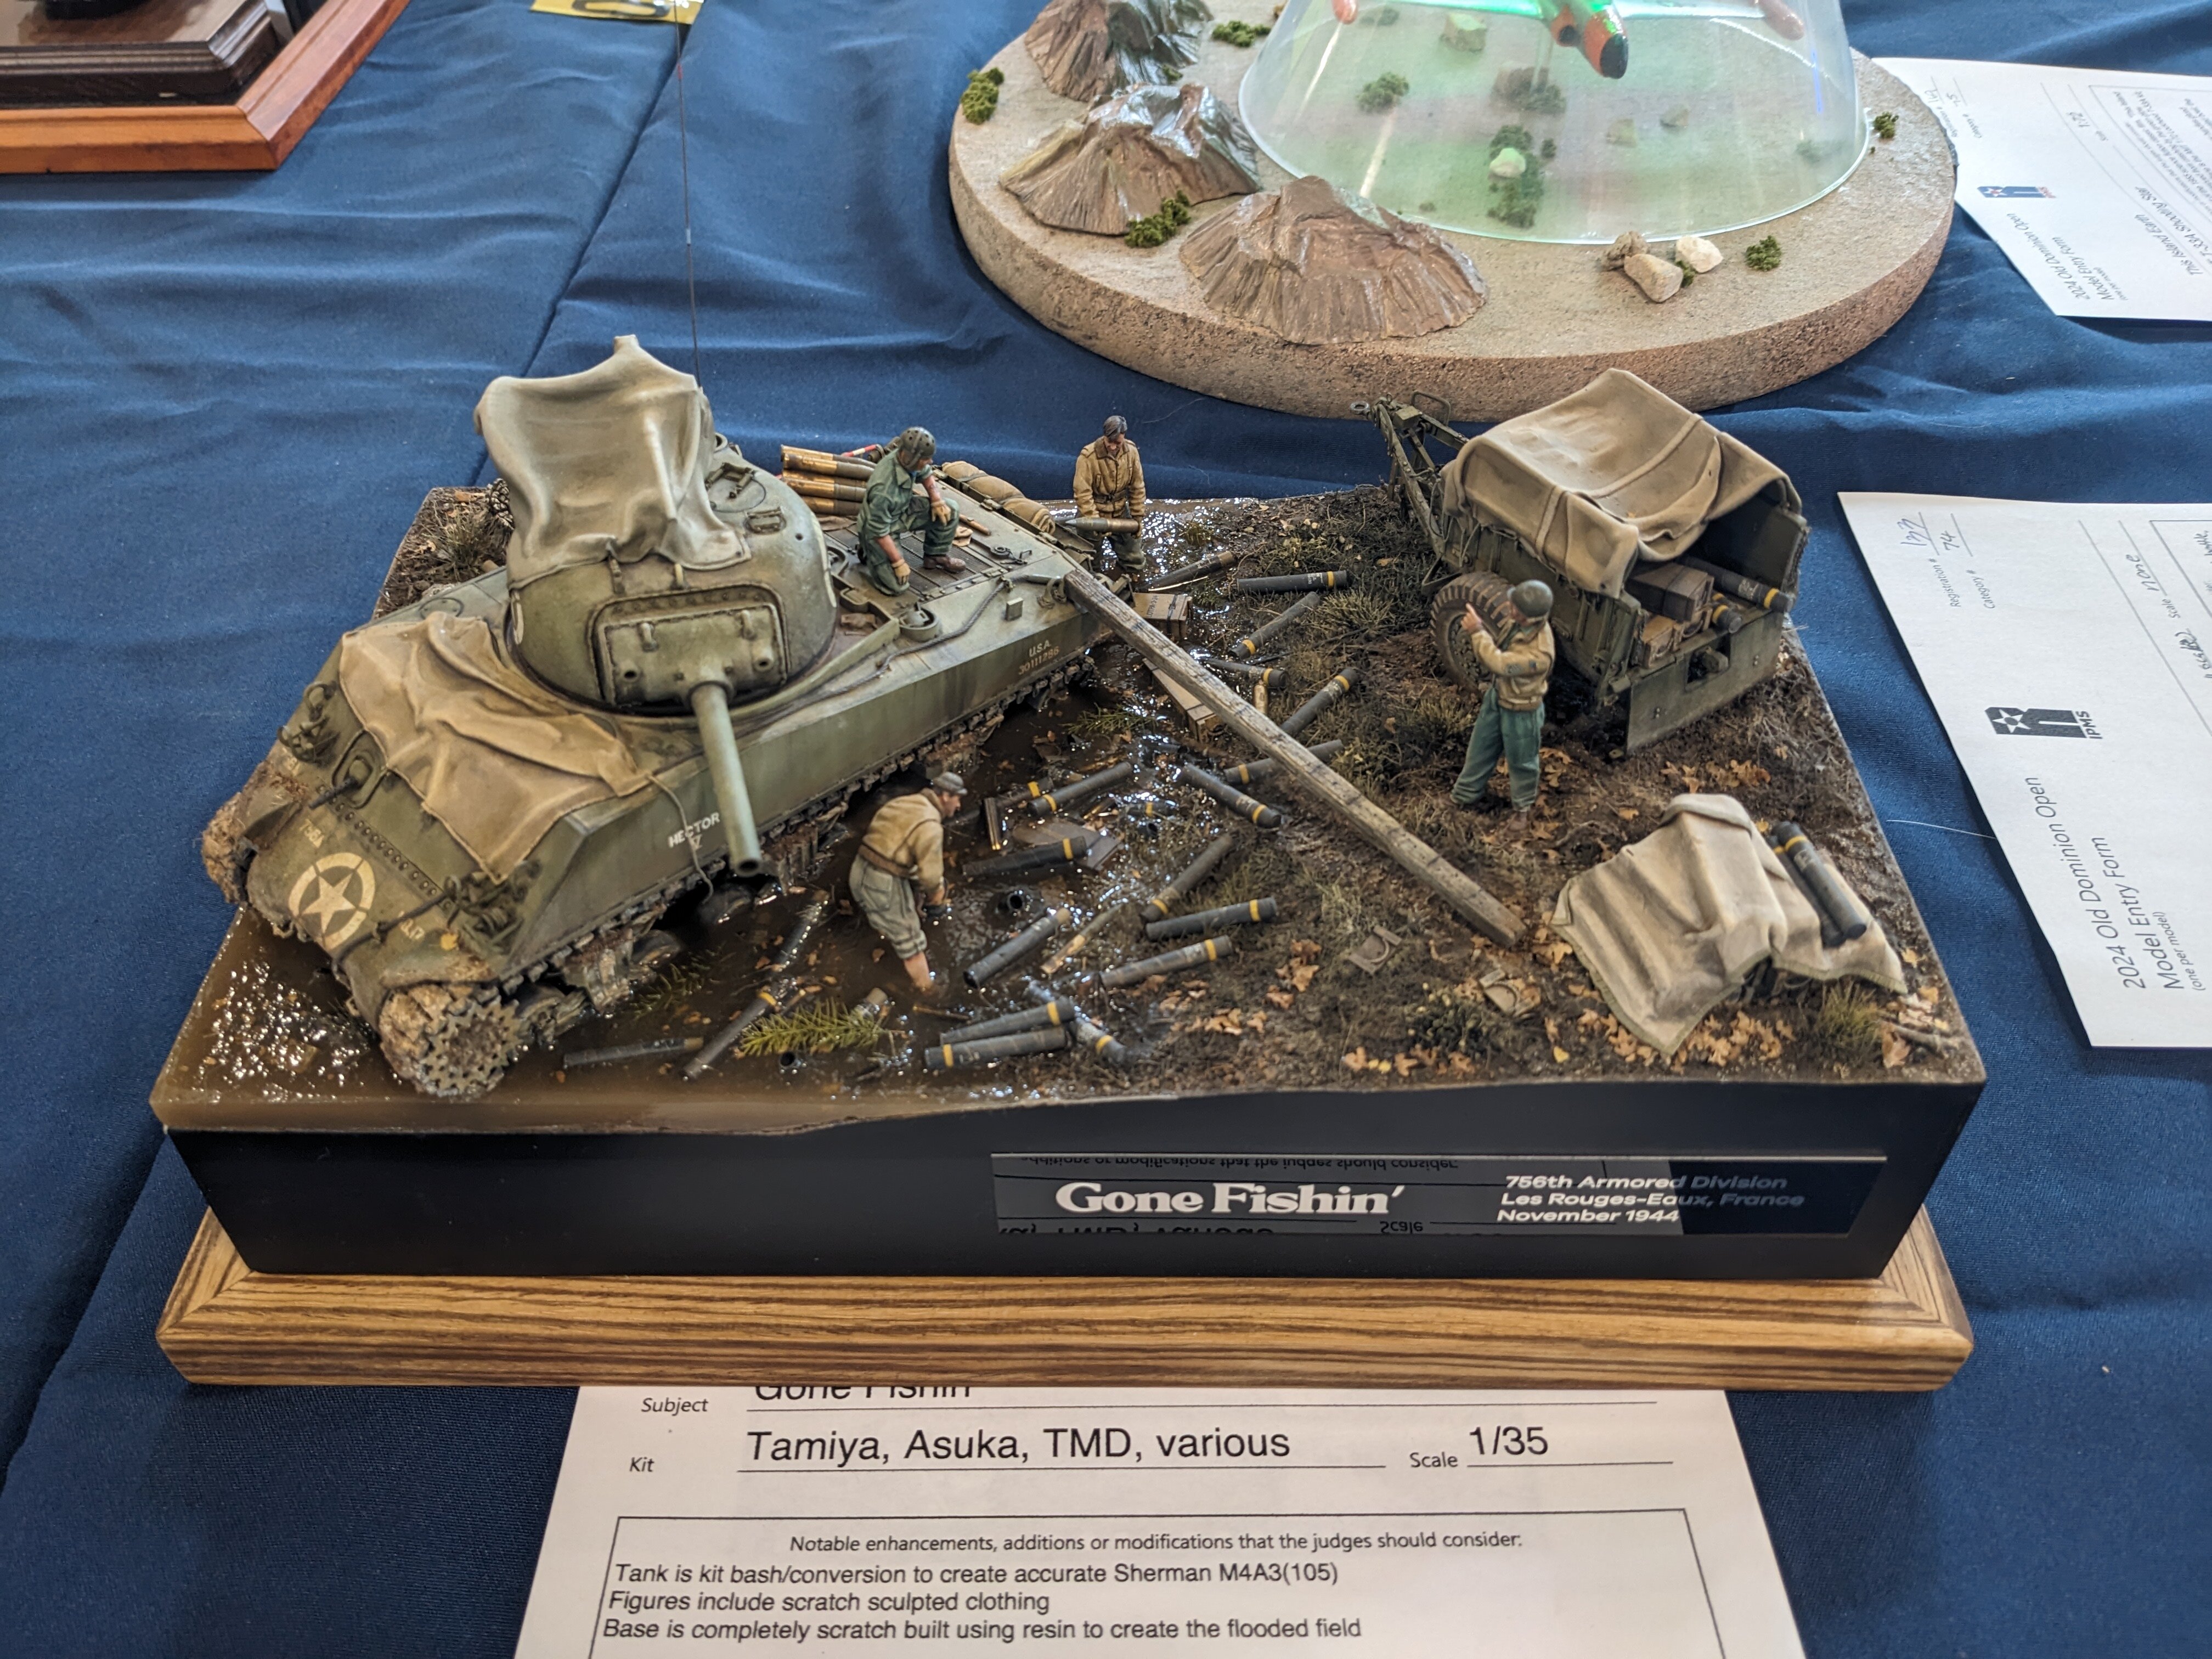
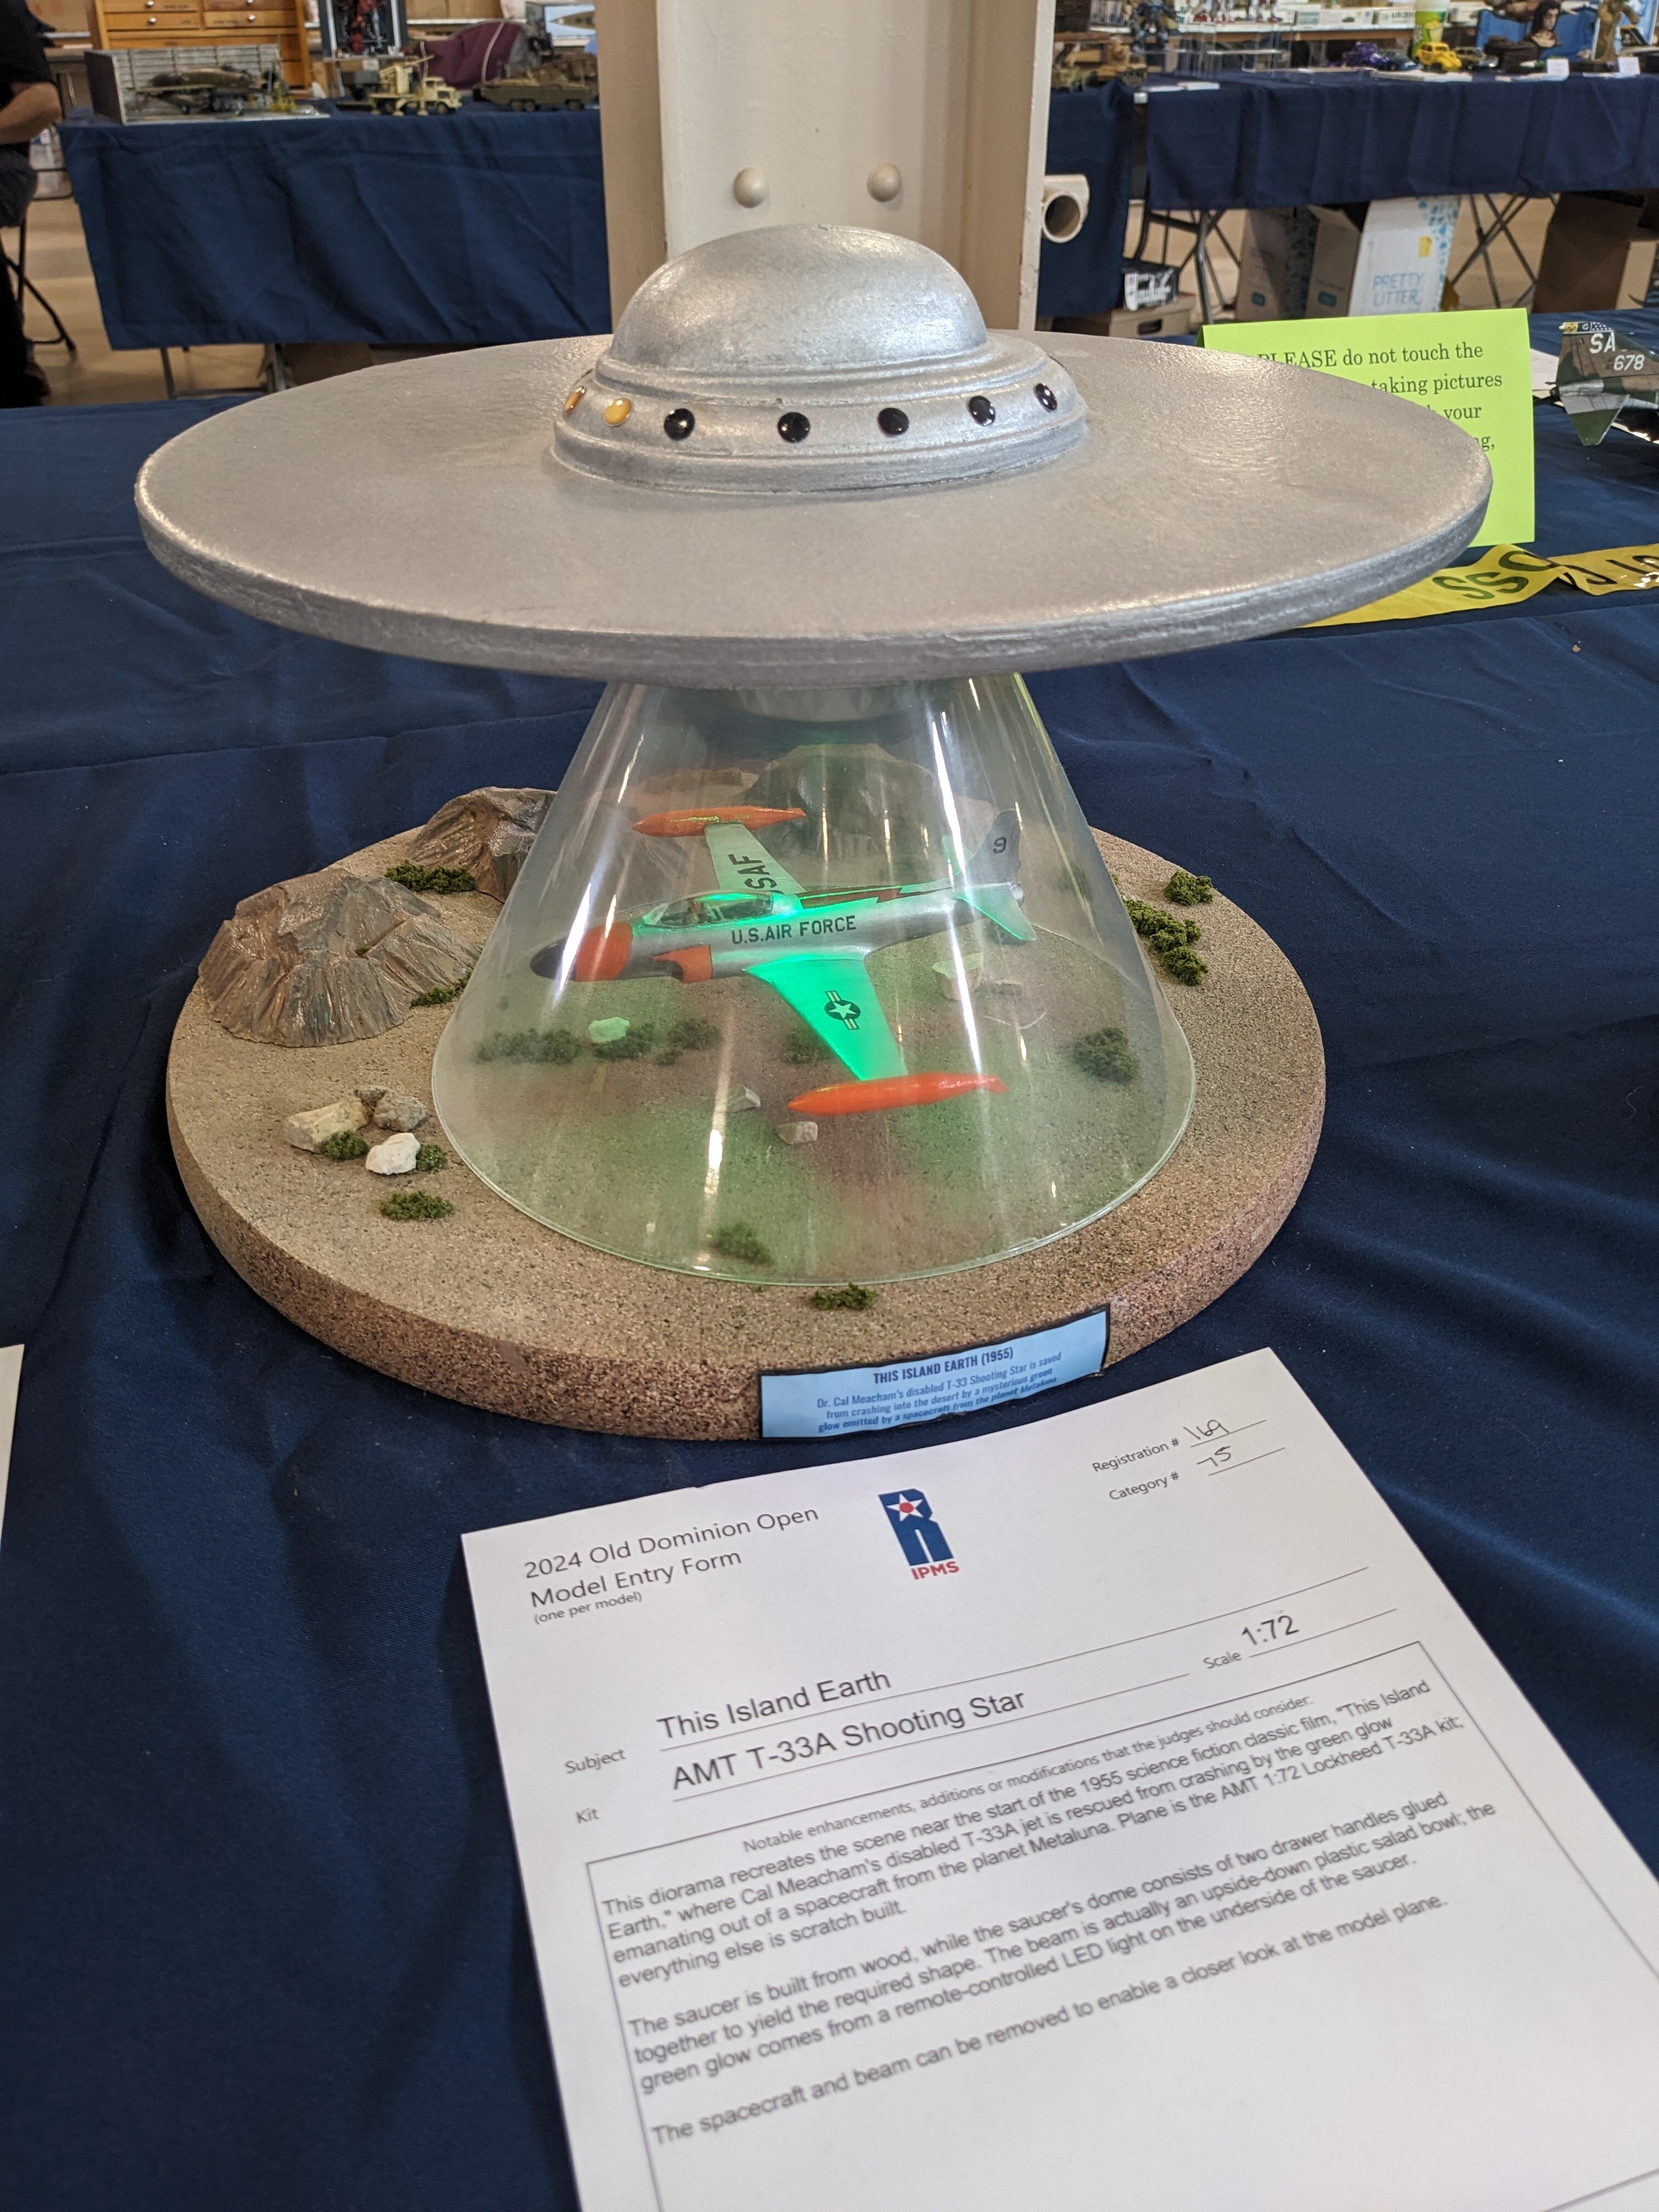
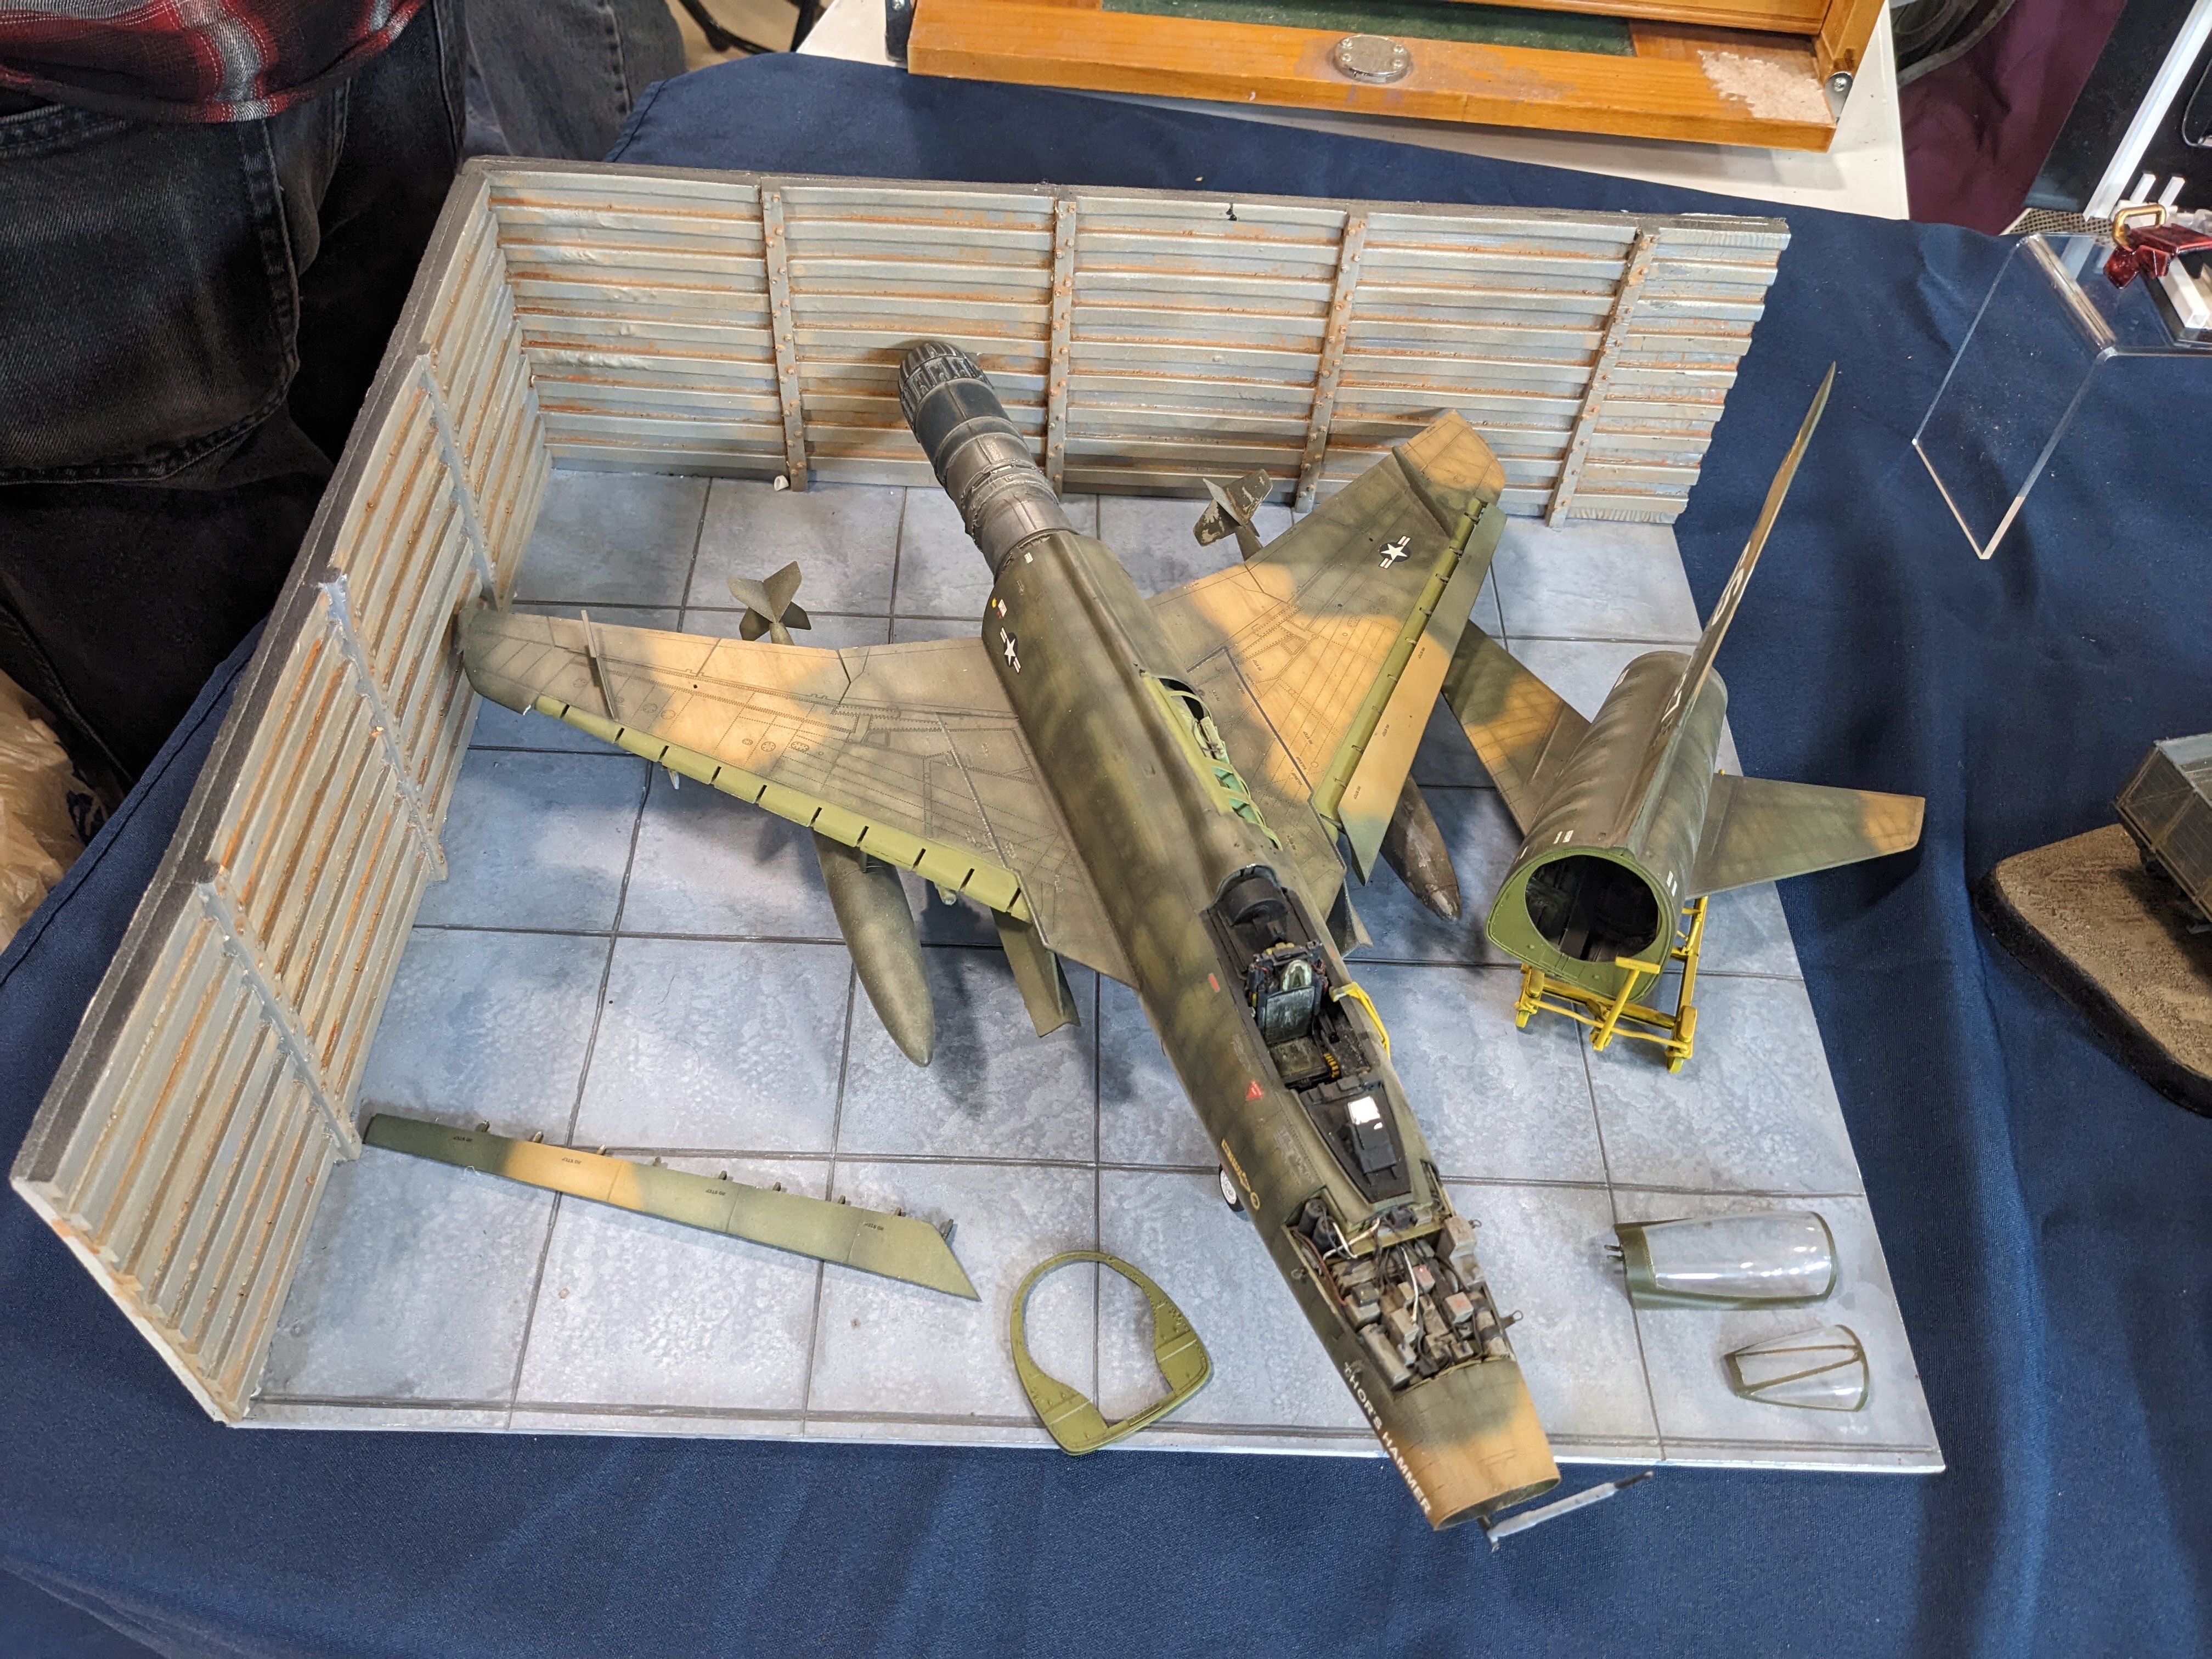
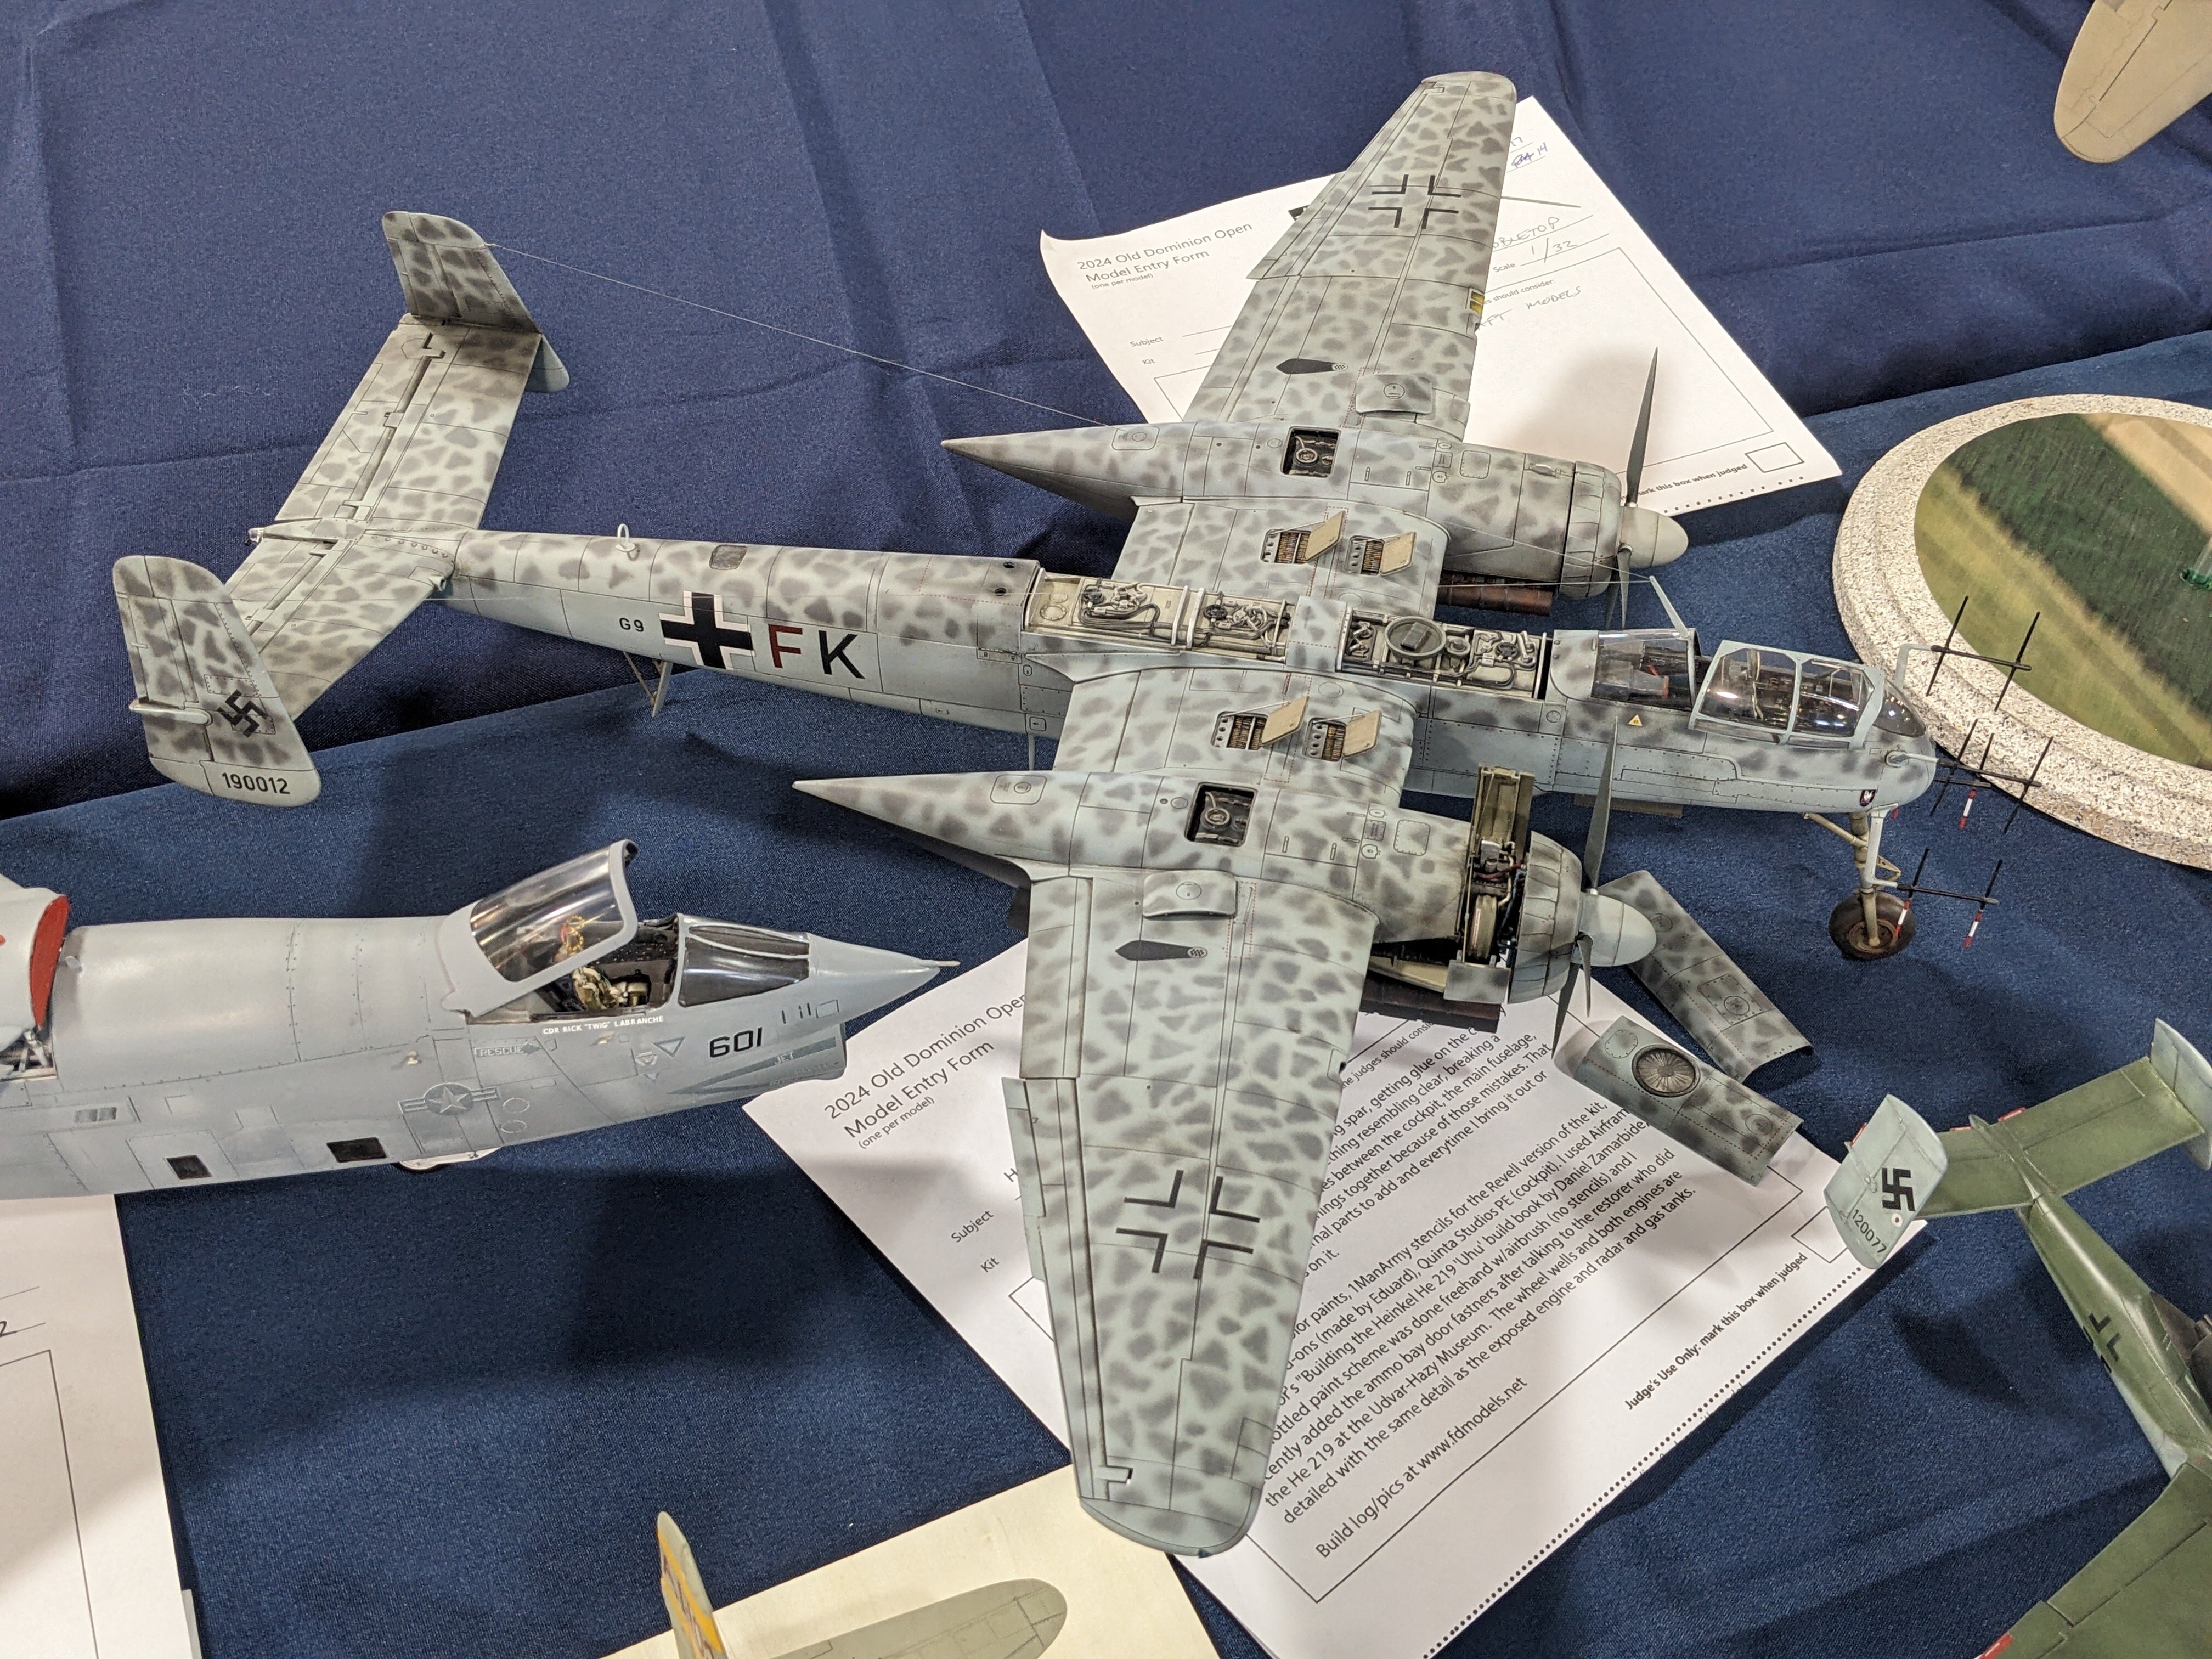
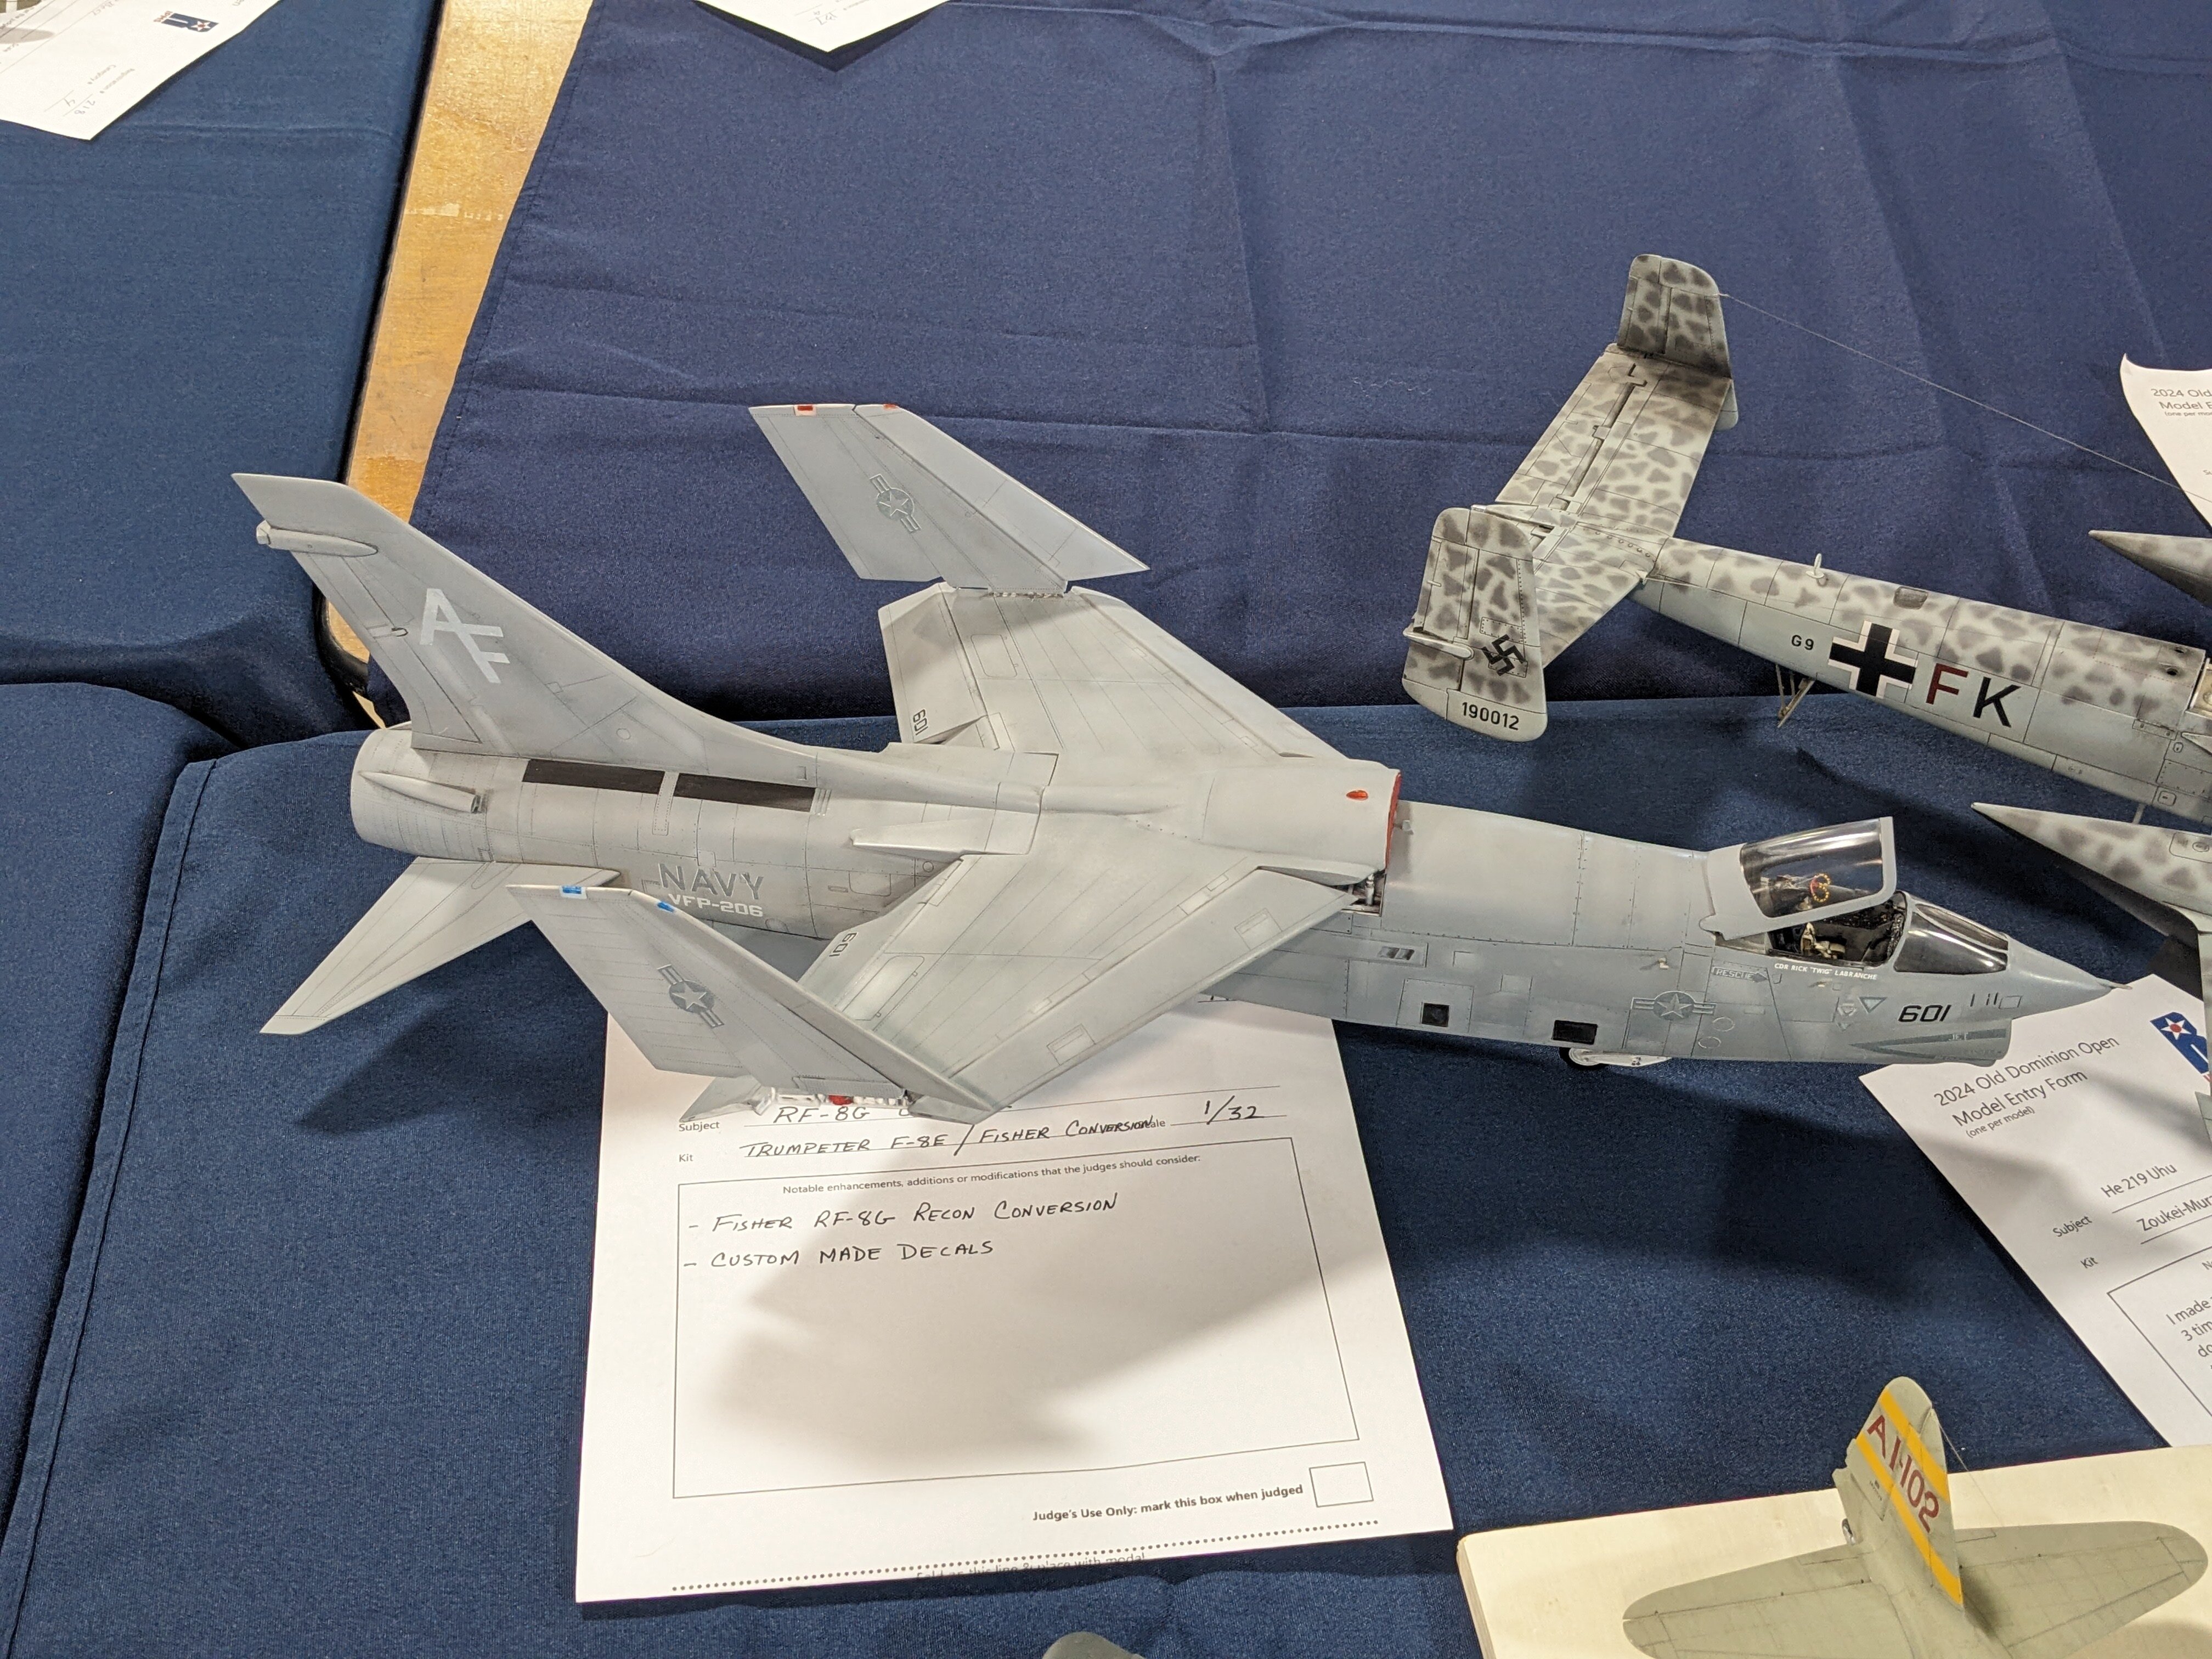
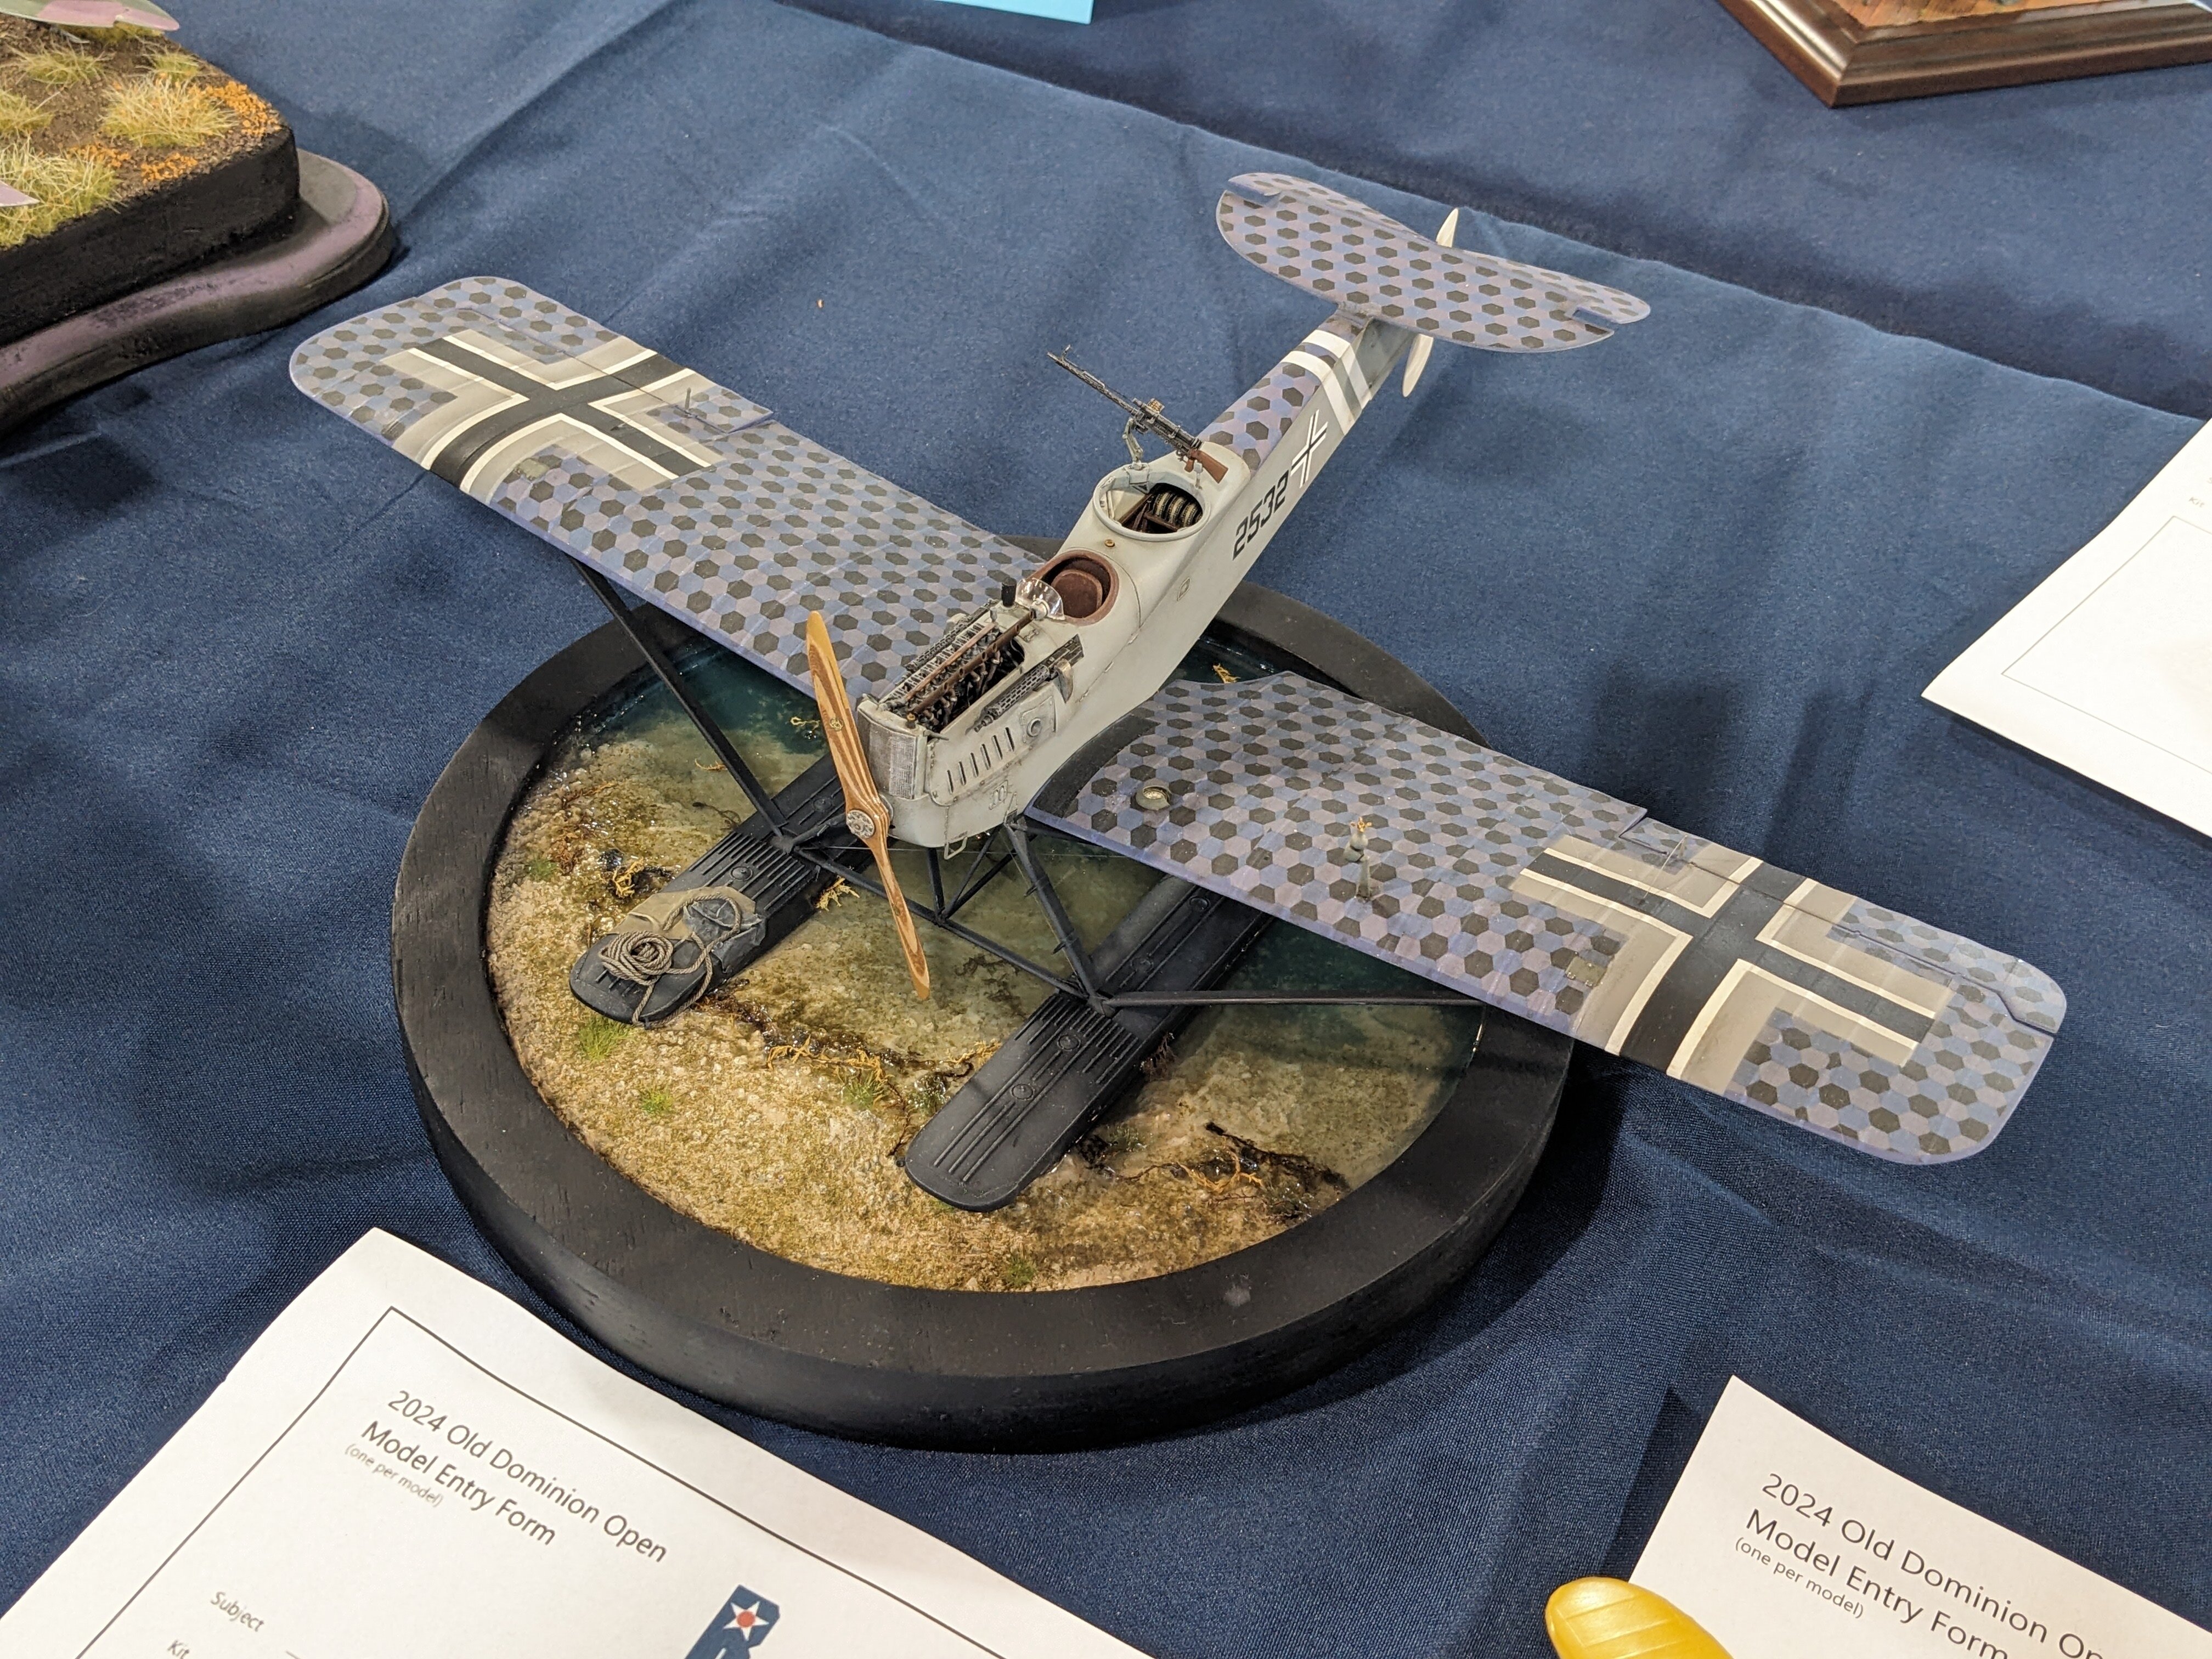
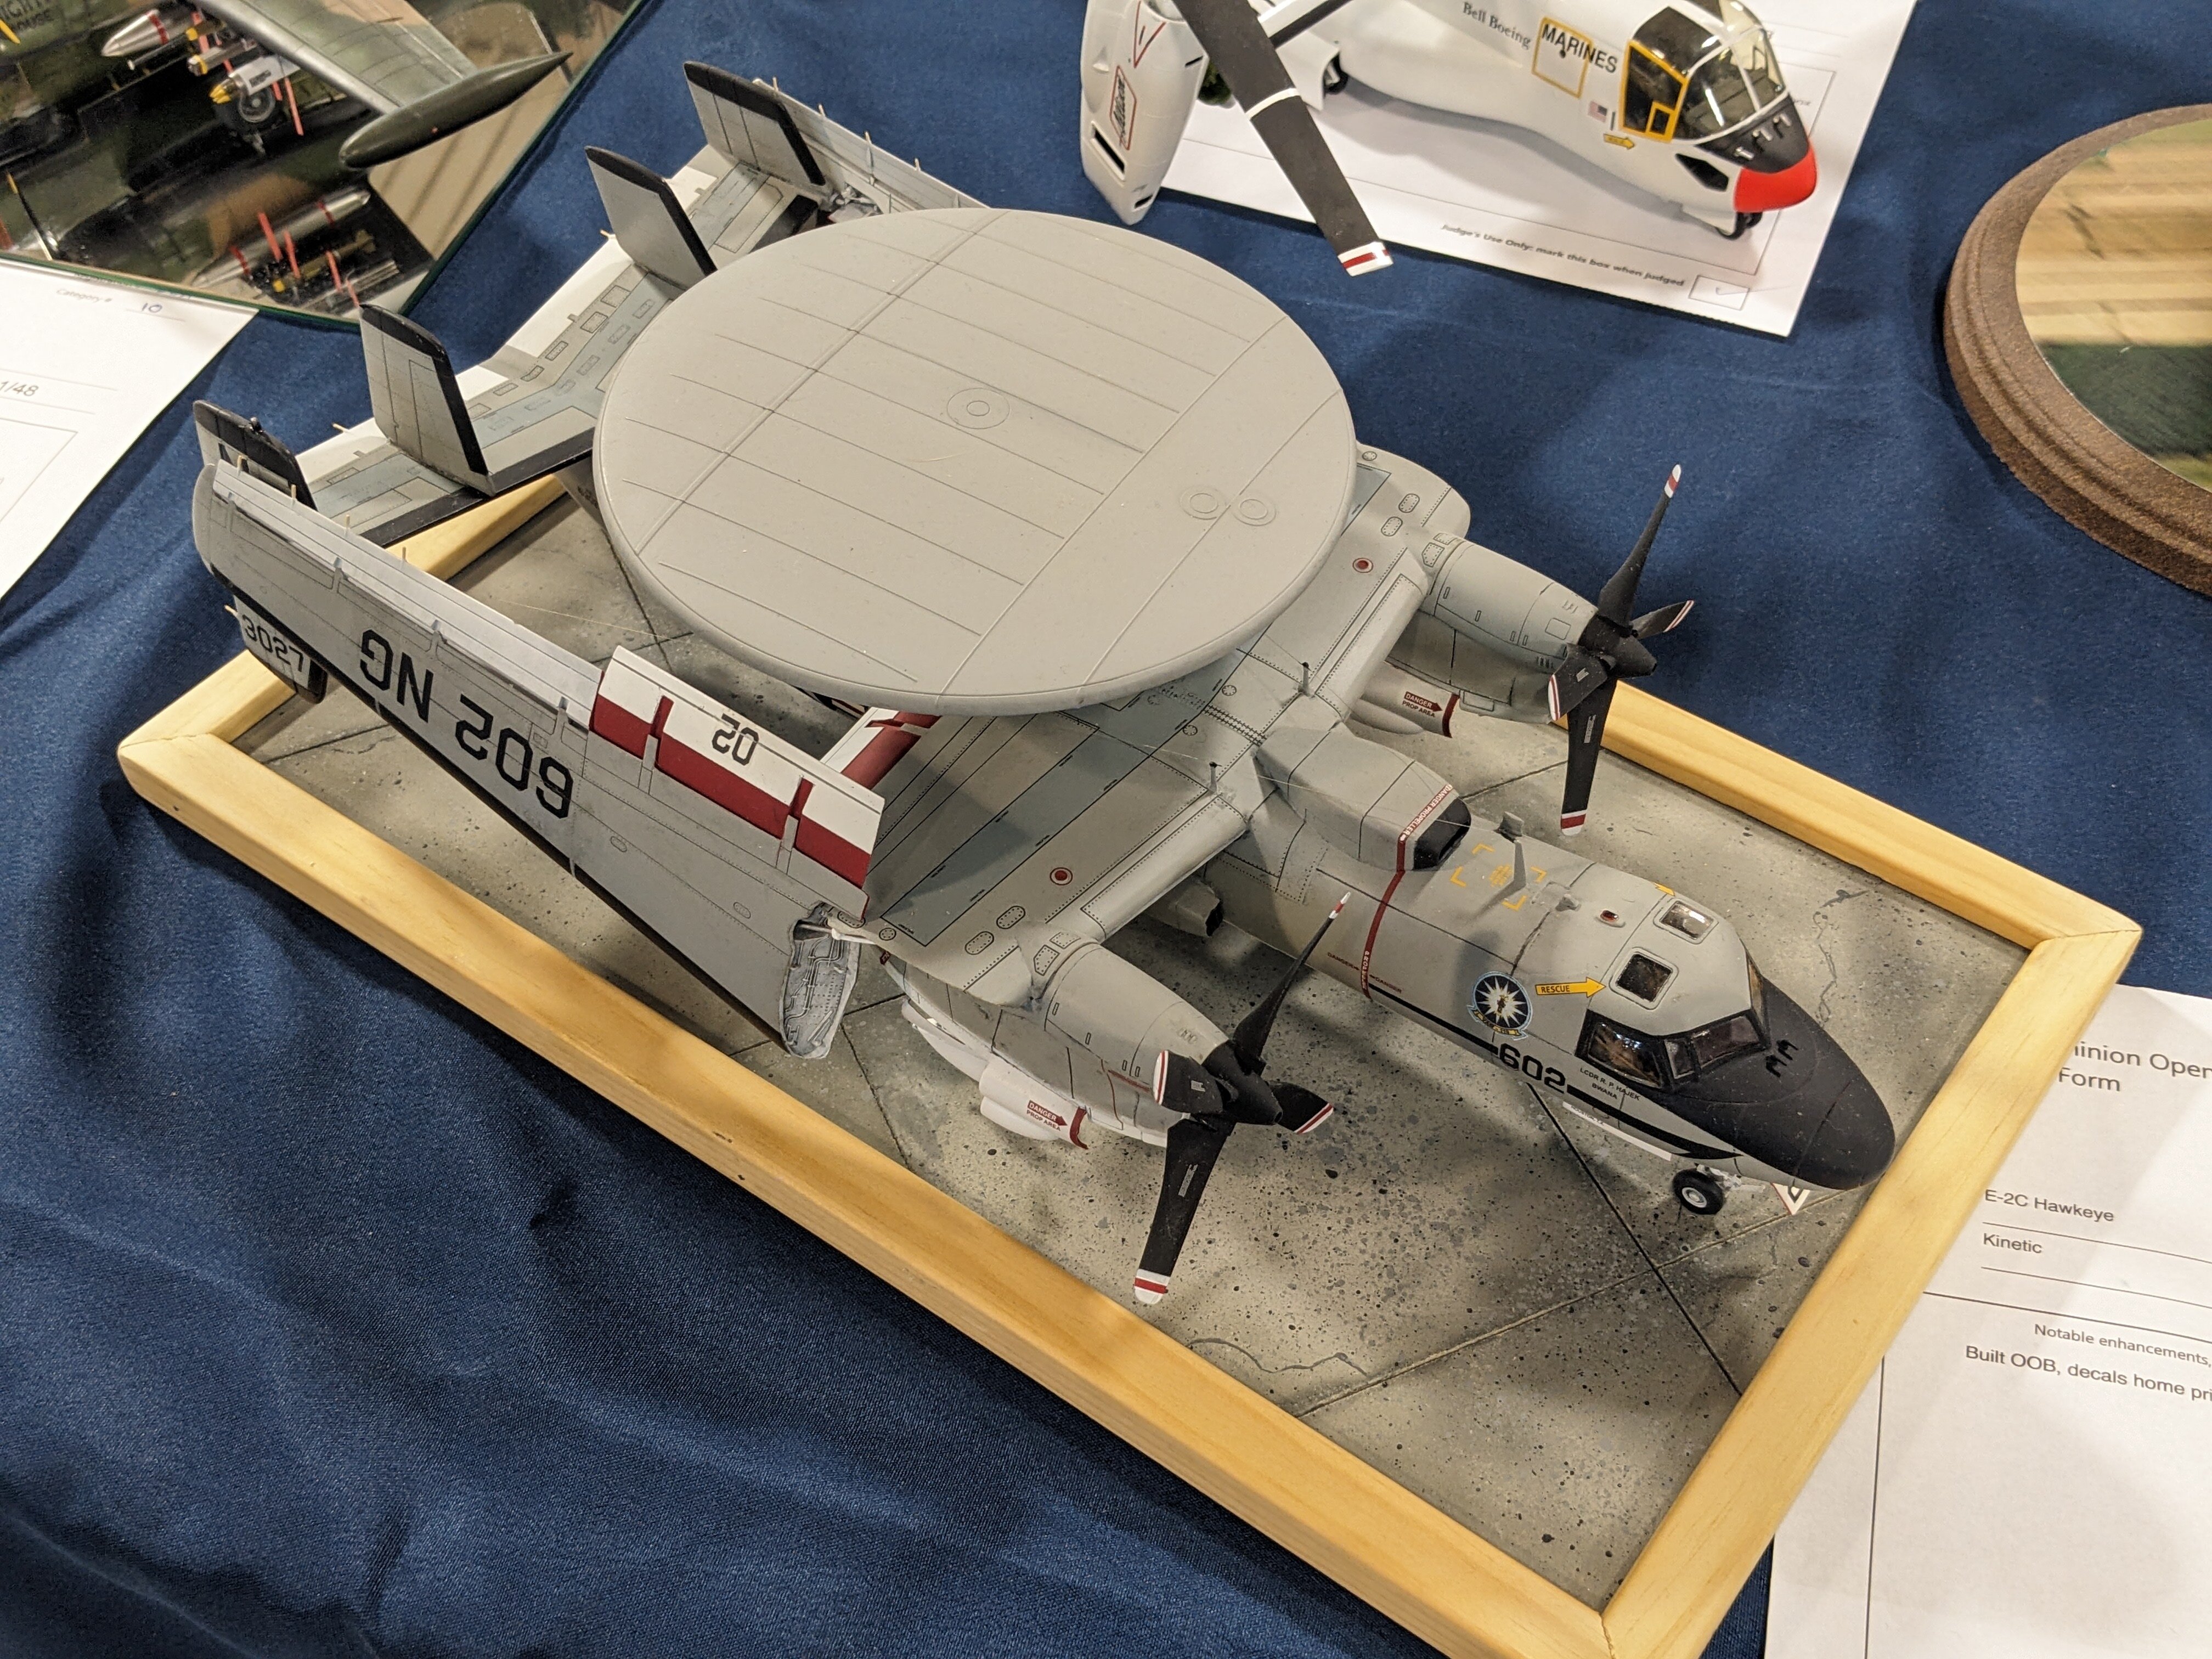
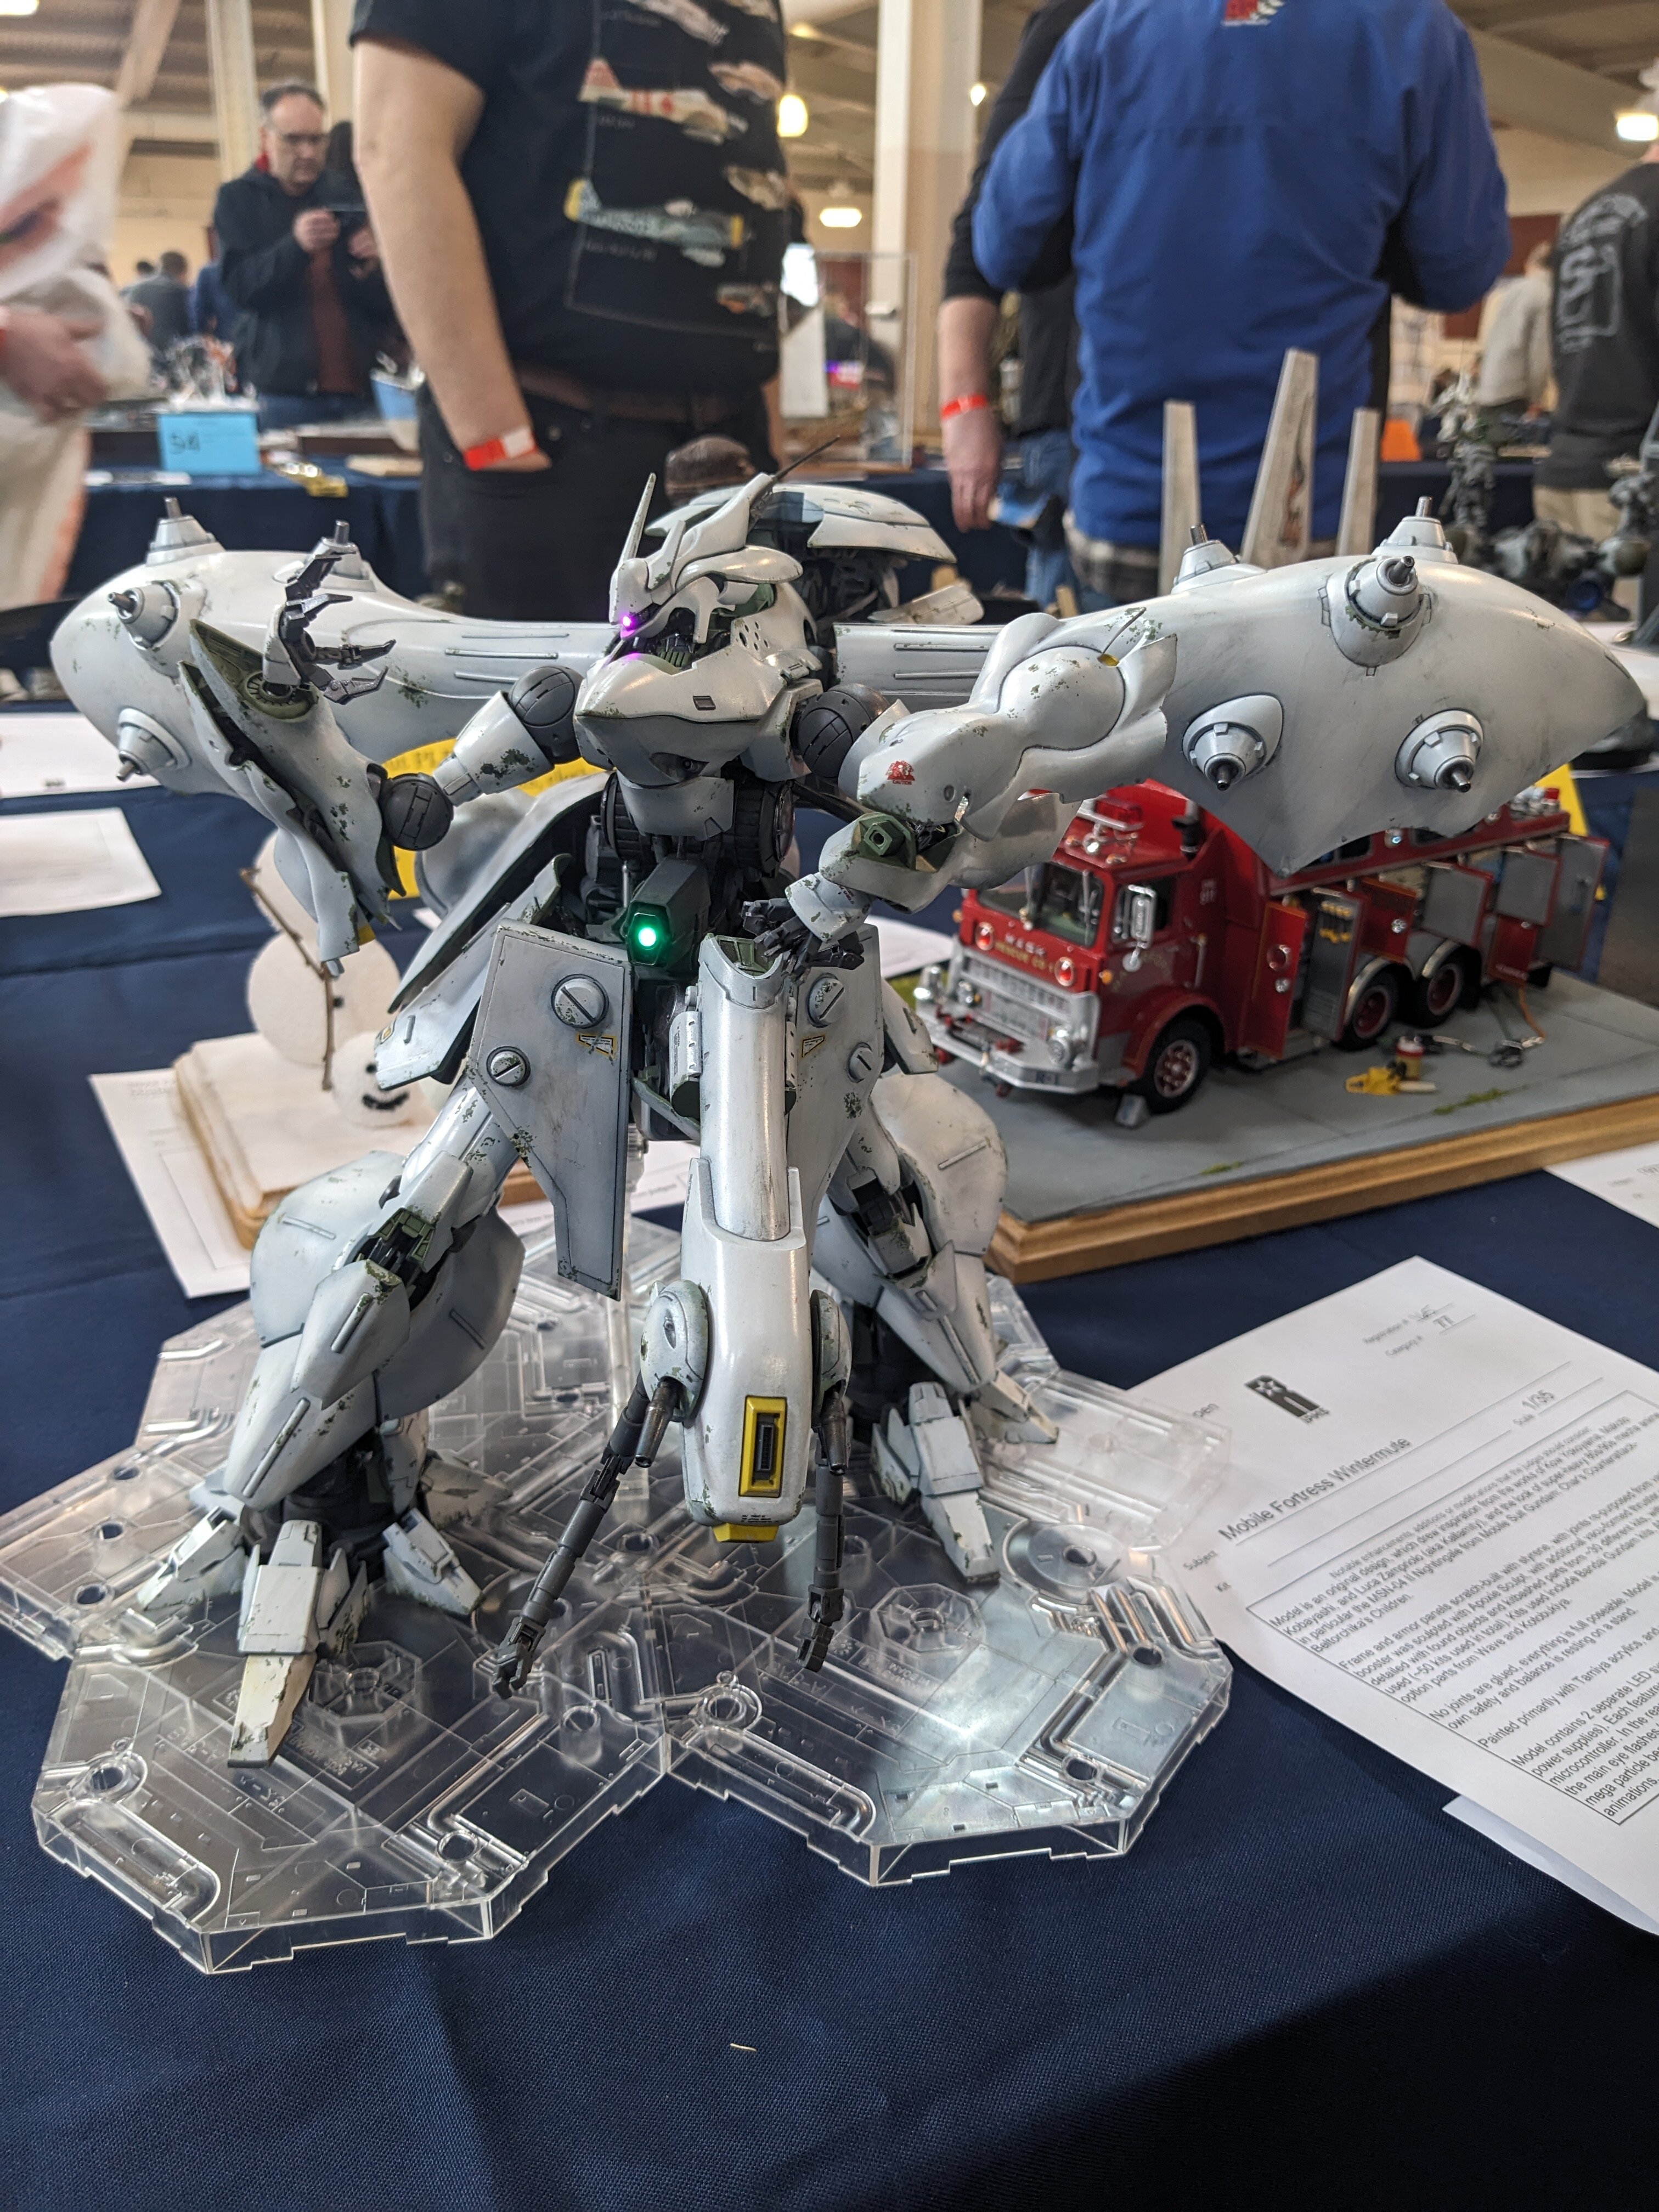
ALCON - I just posted photos from this past weekend Old Dominion Open Show: @derex3592 That Super Hornet is looking Super so far! @pengbuzz You're gonna make the network sorry they cancelled that show! - MT
-
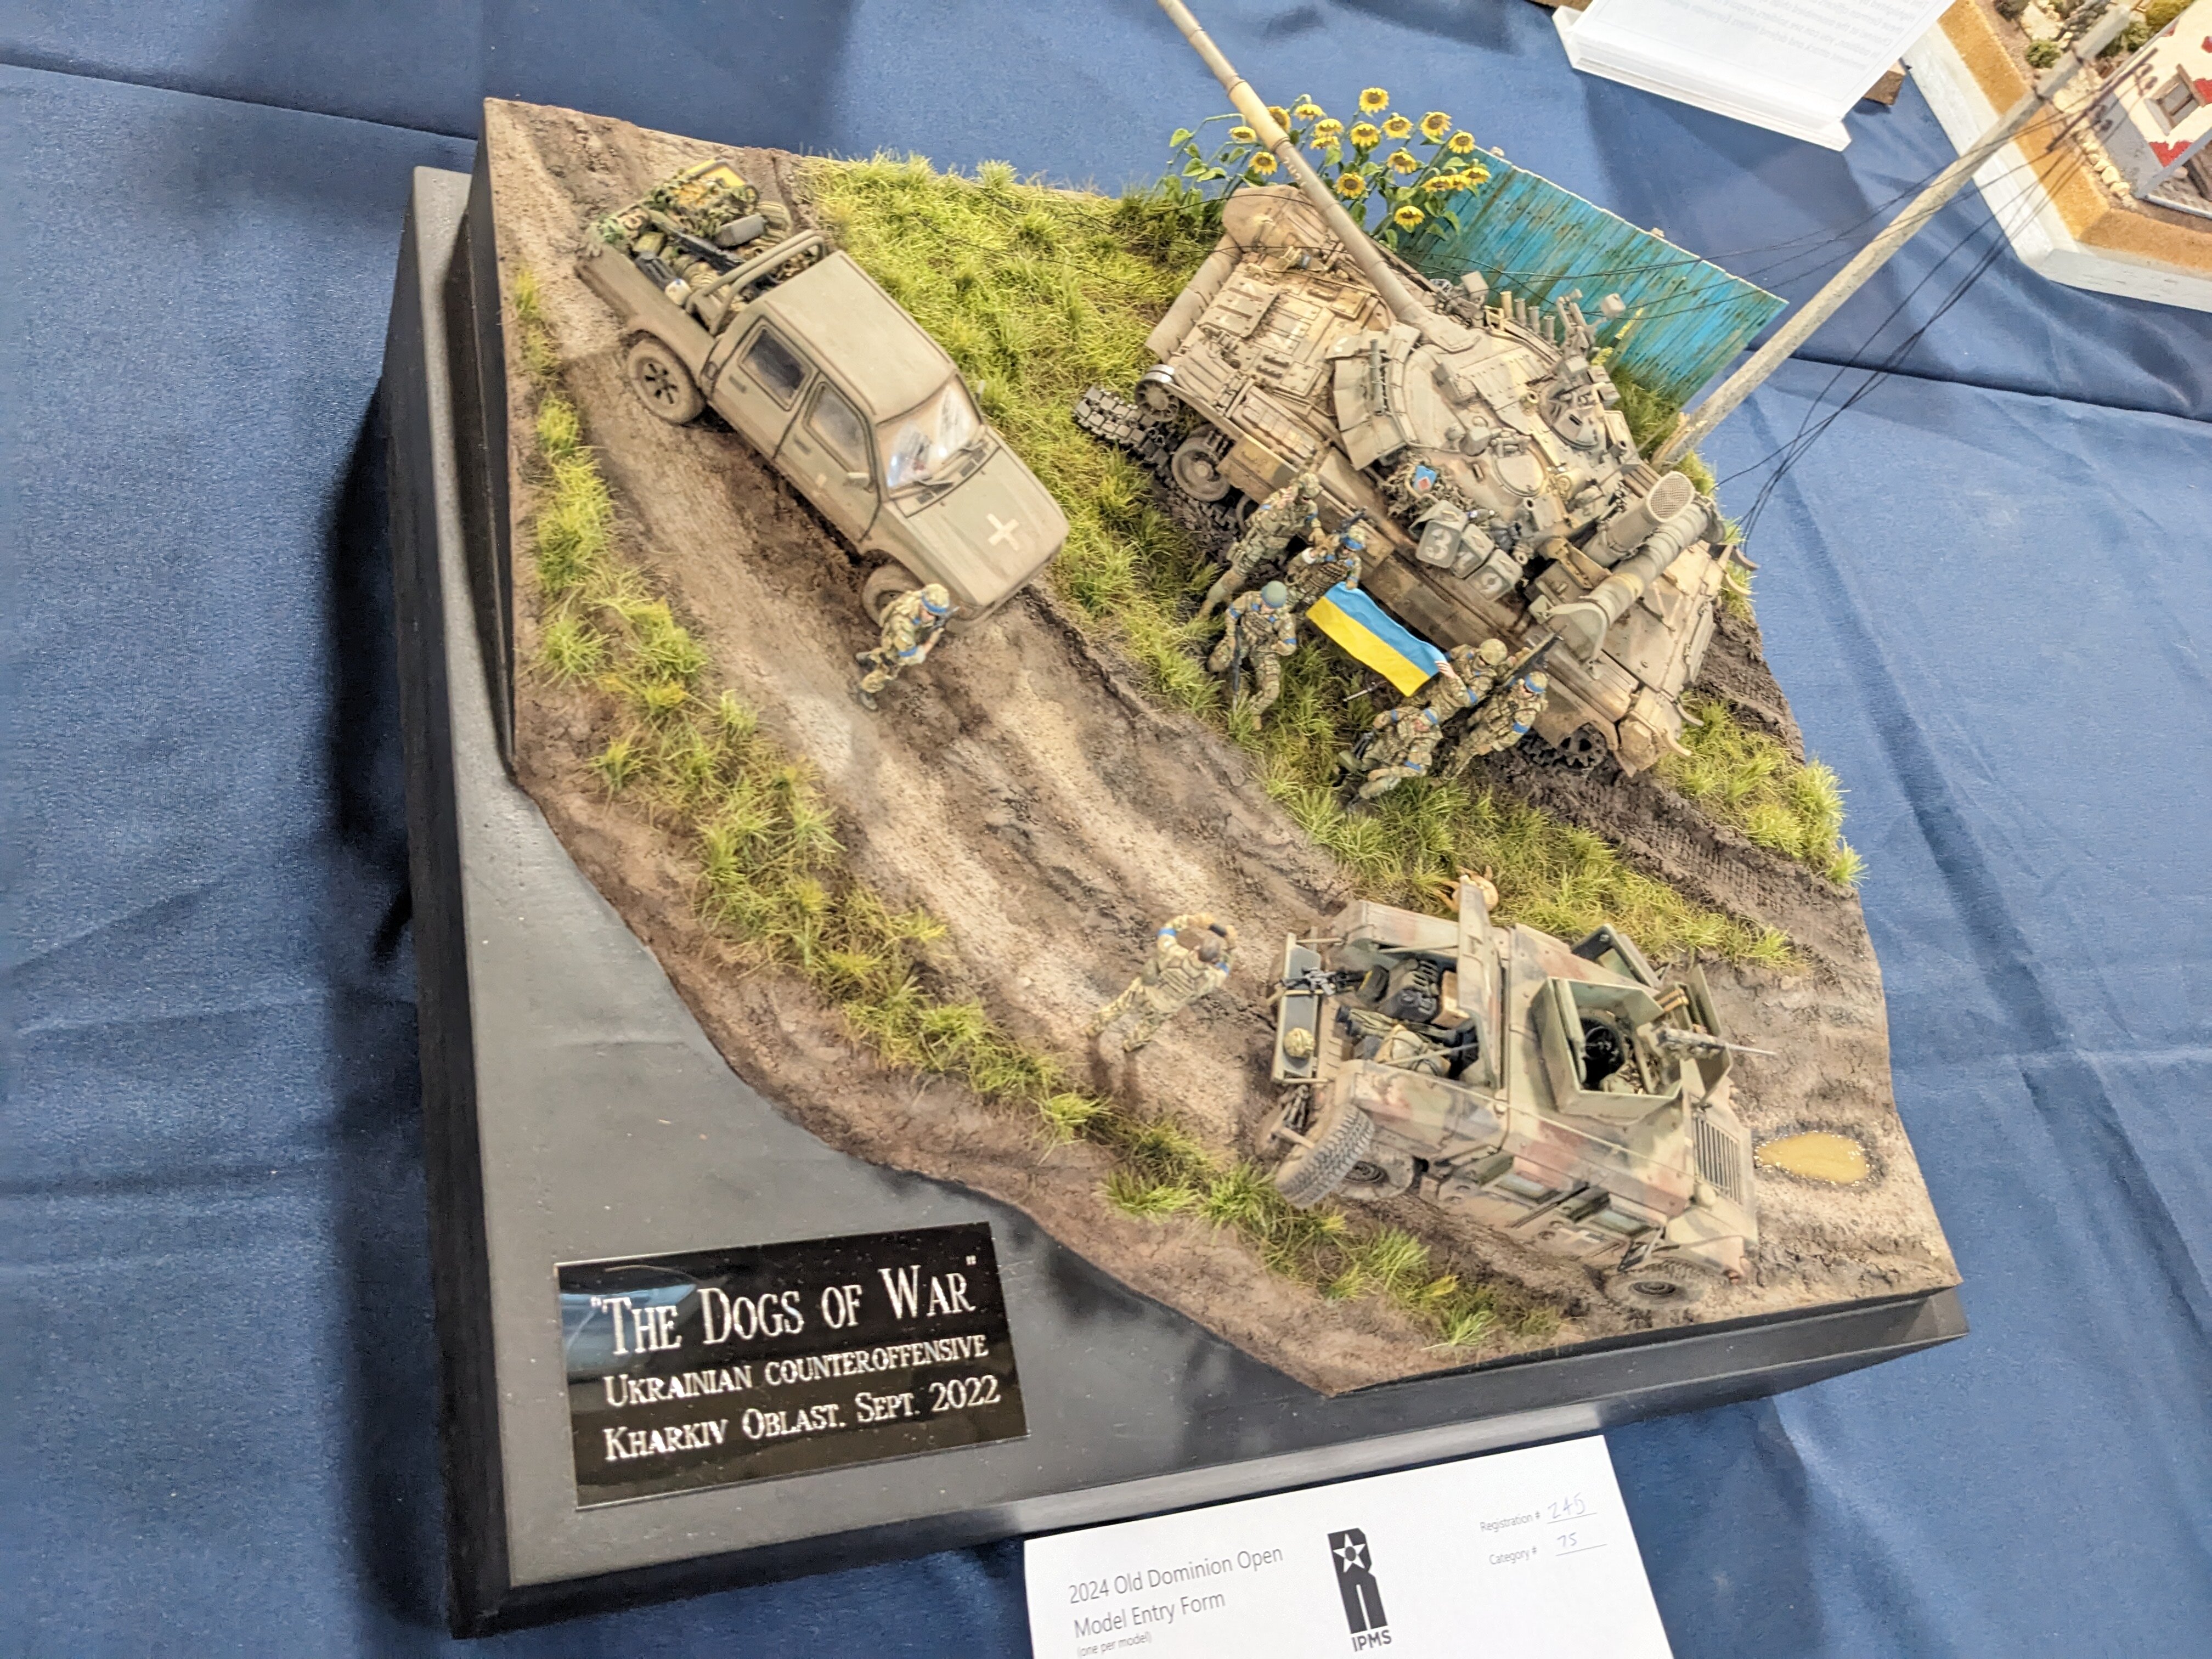
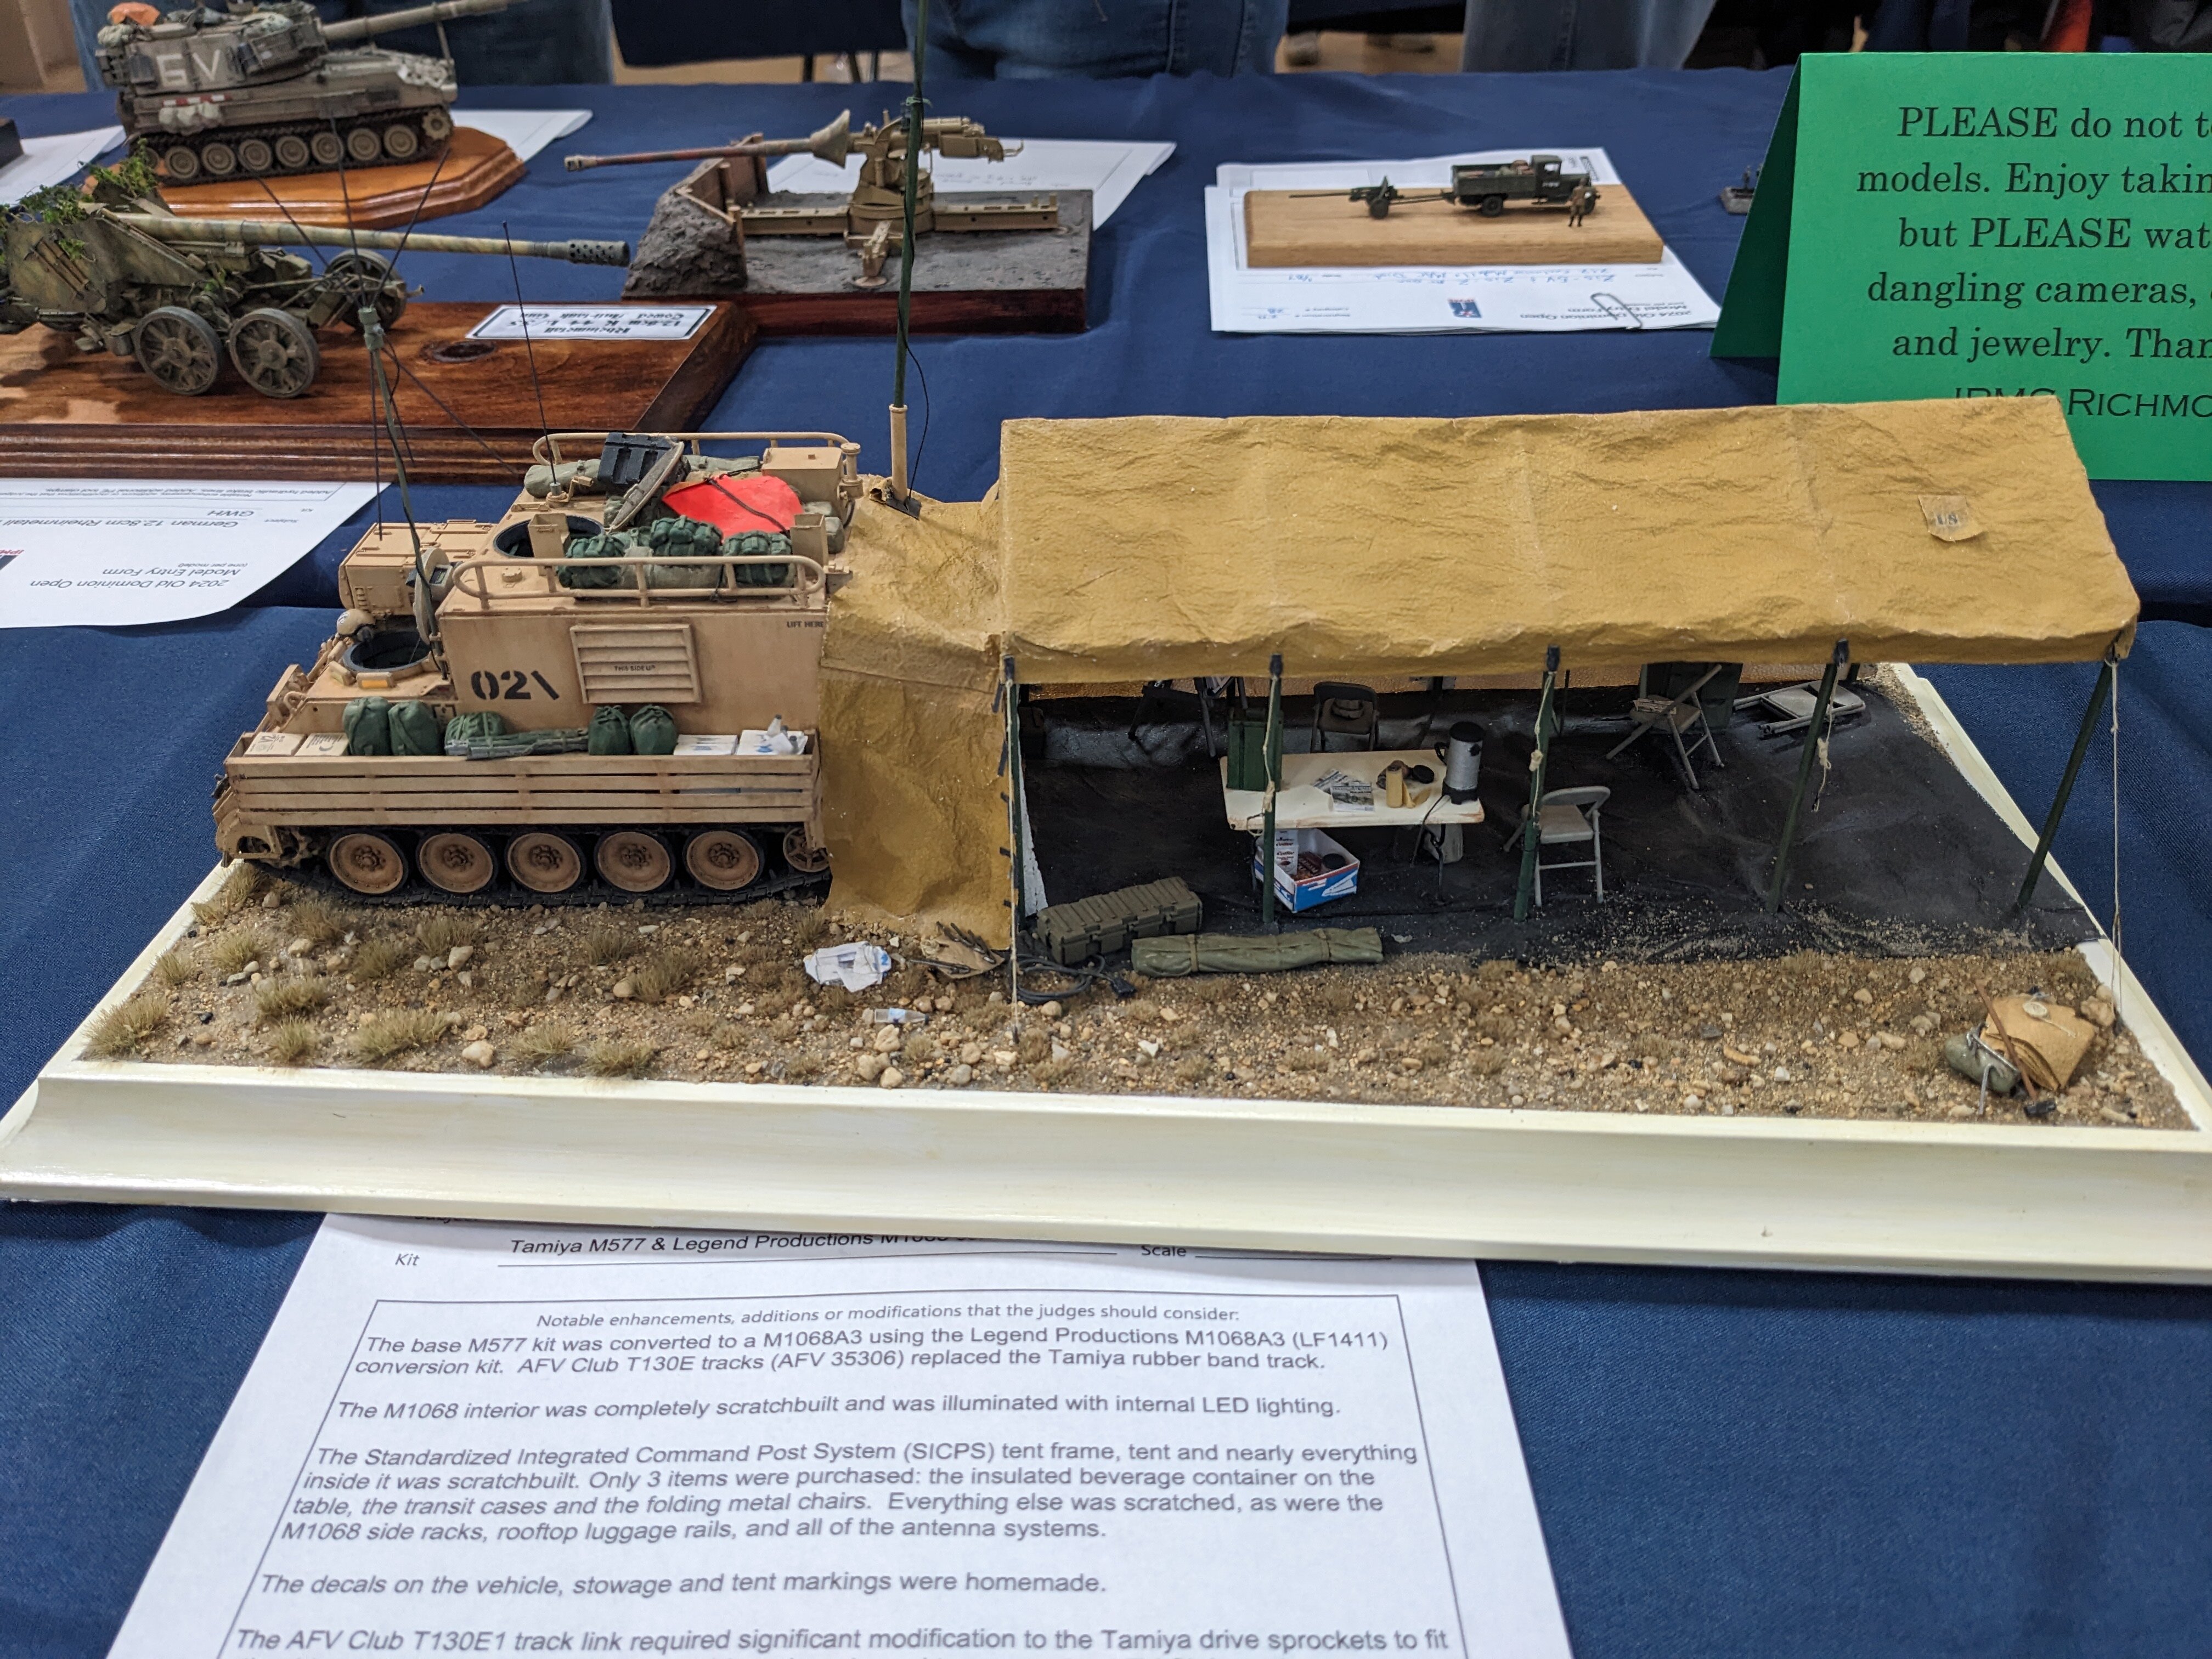
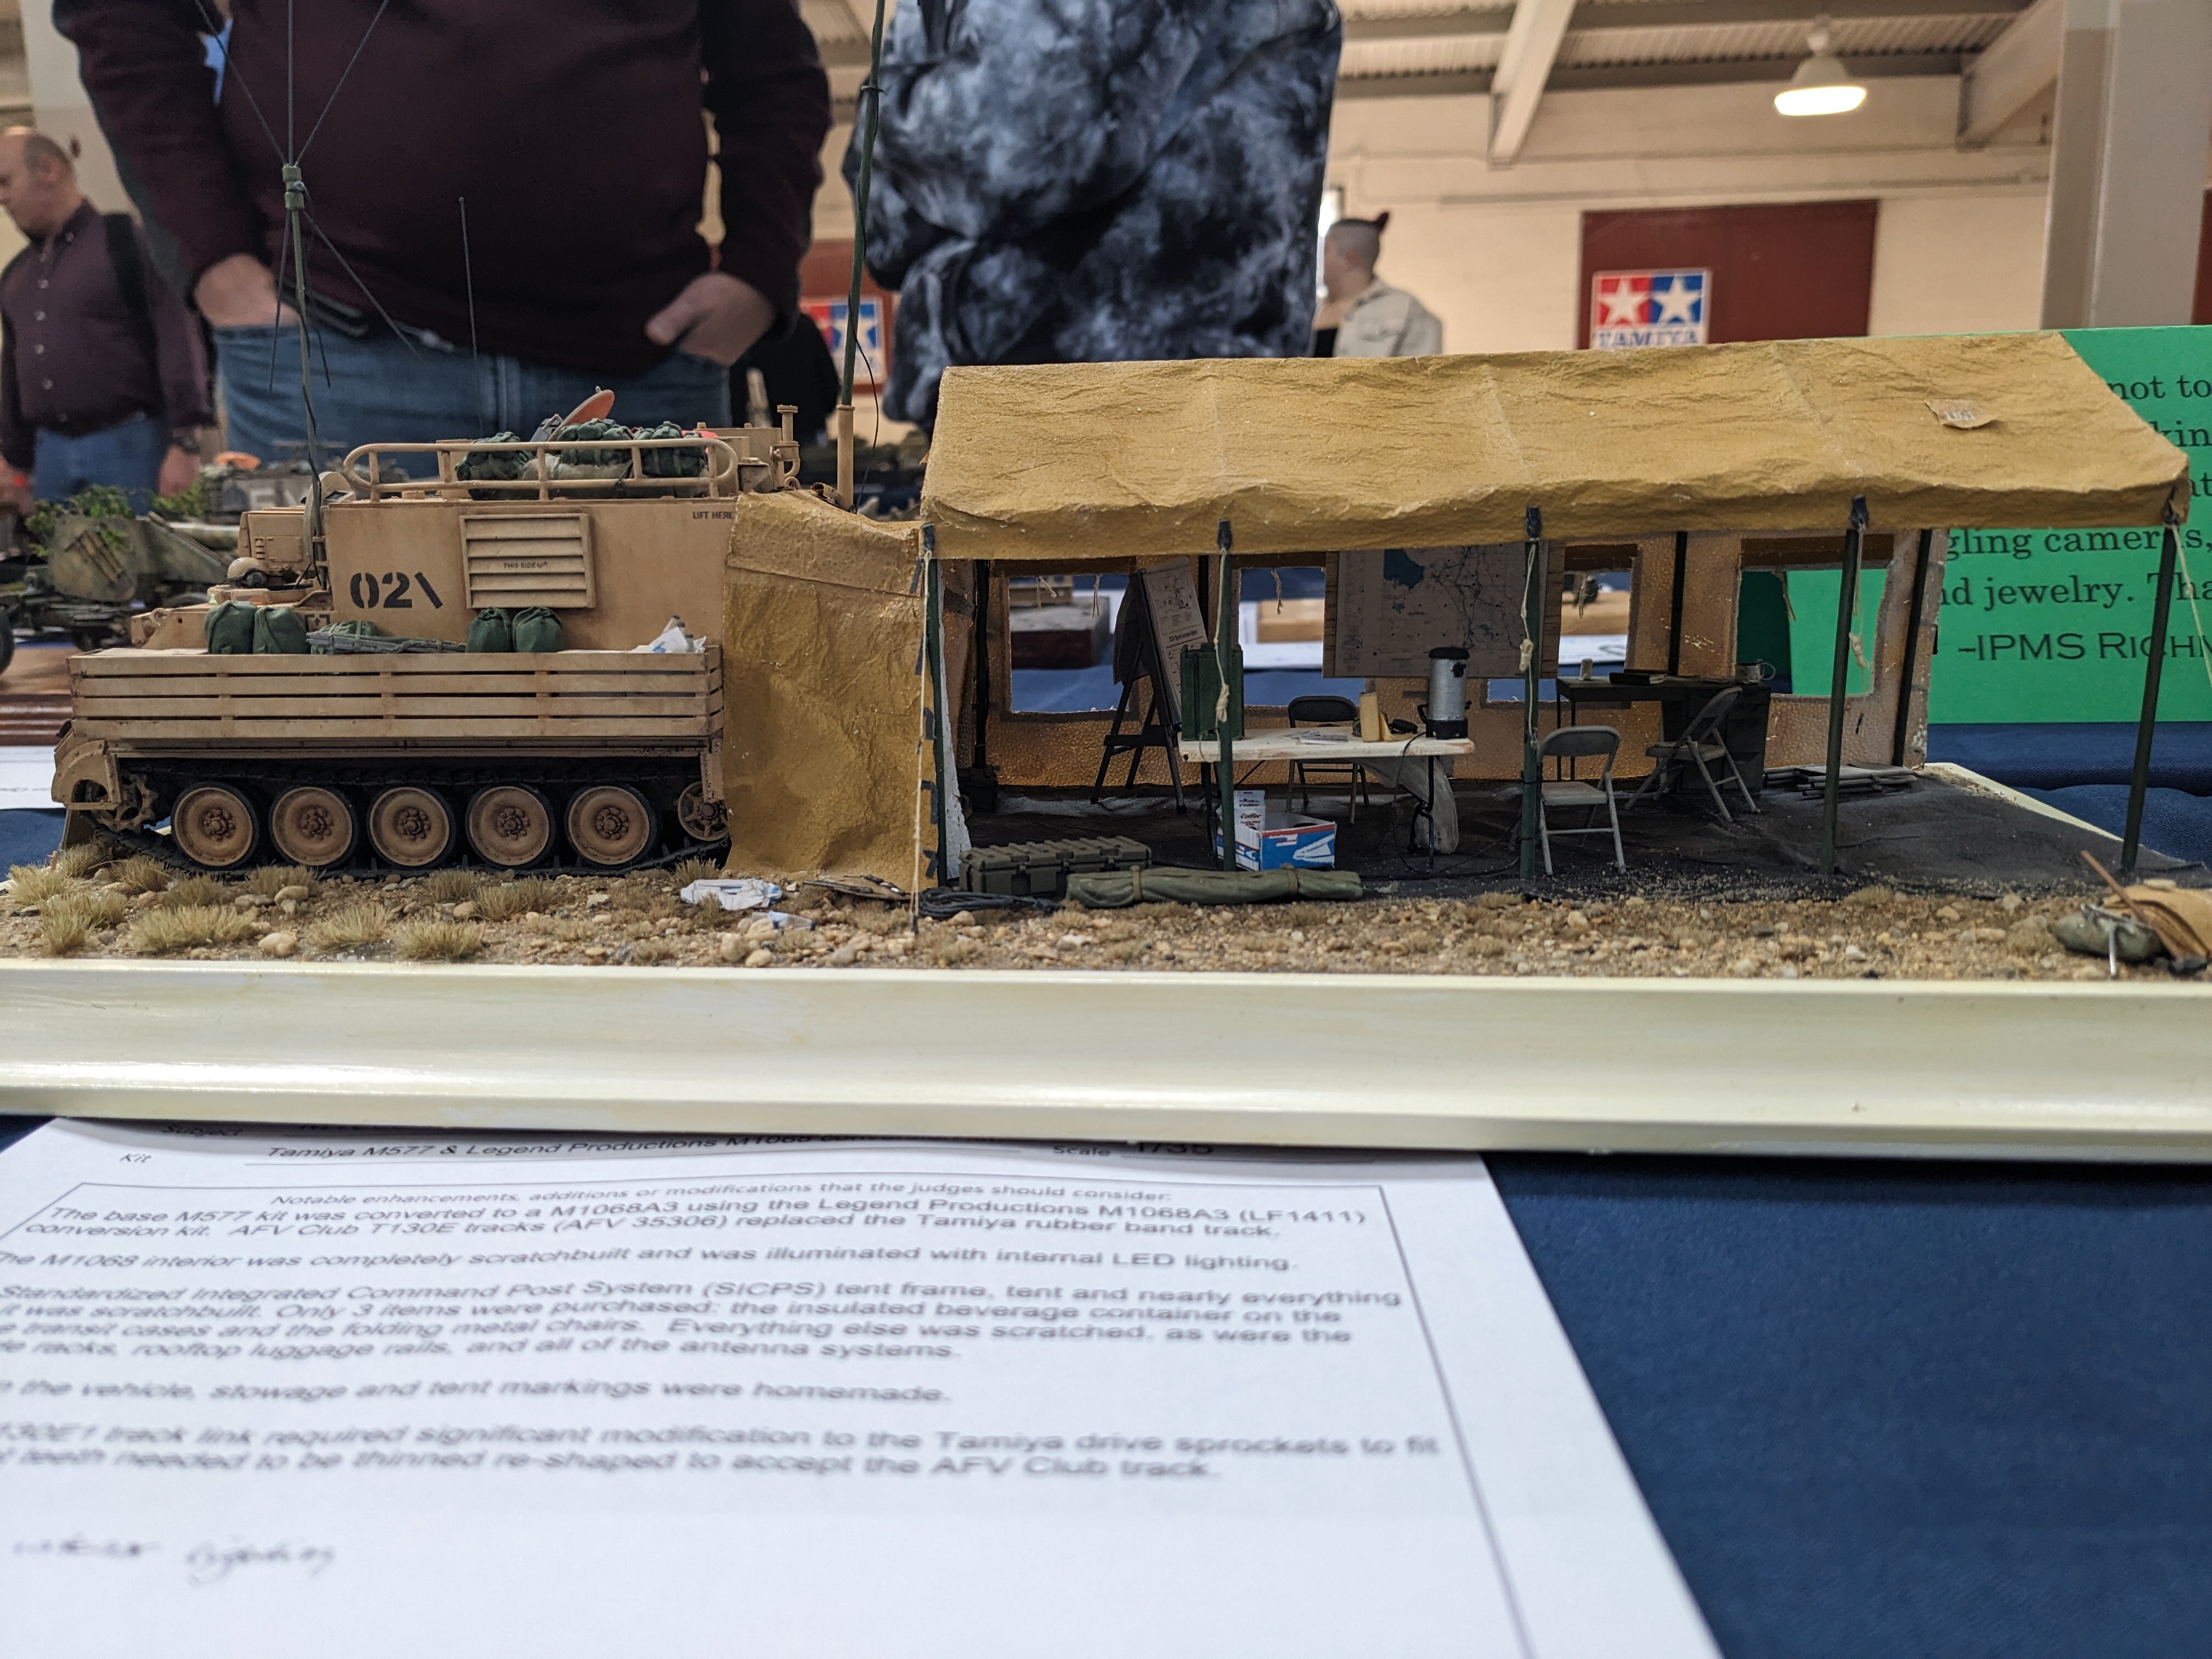
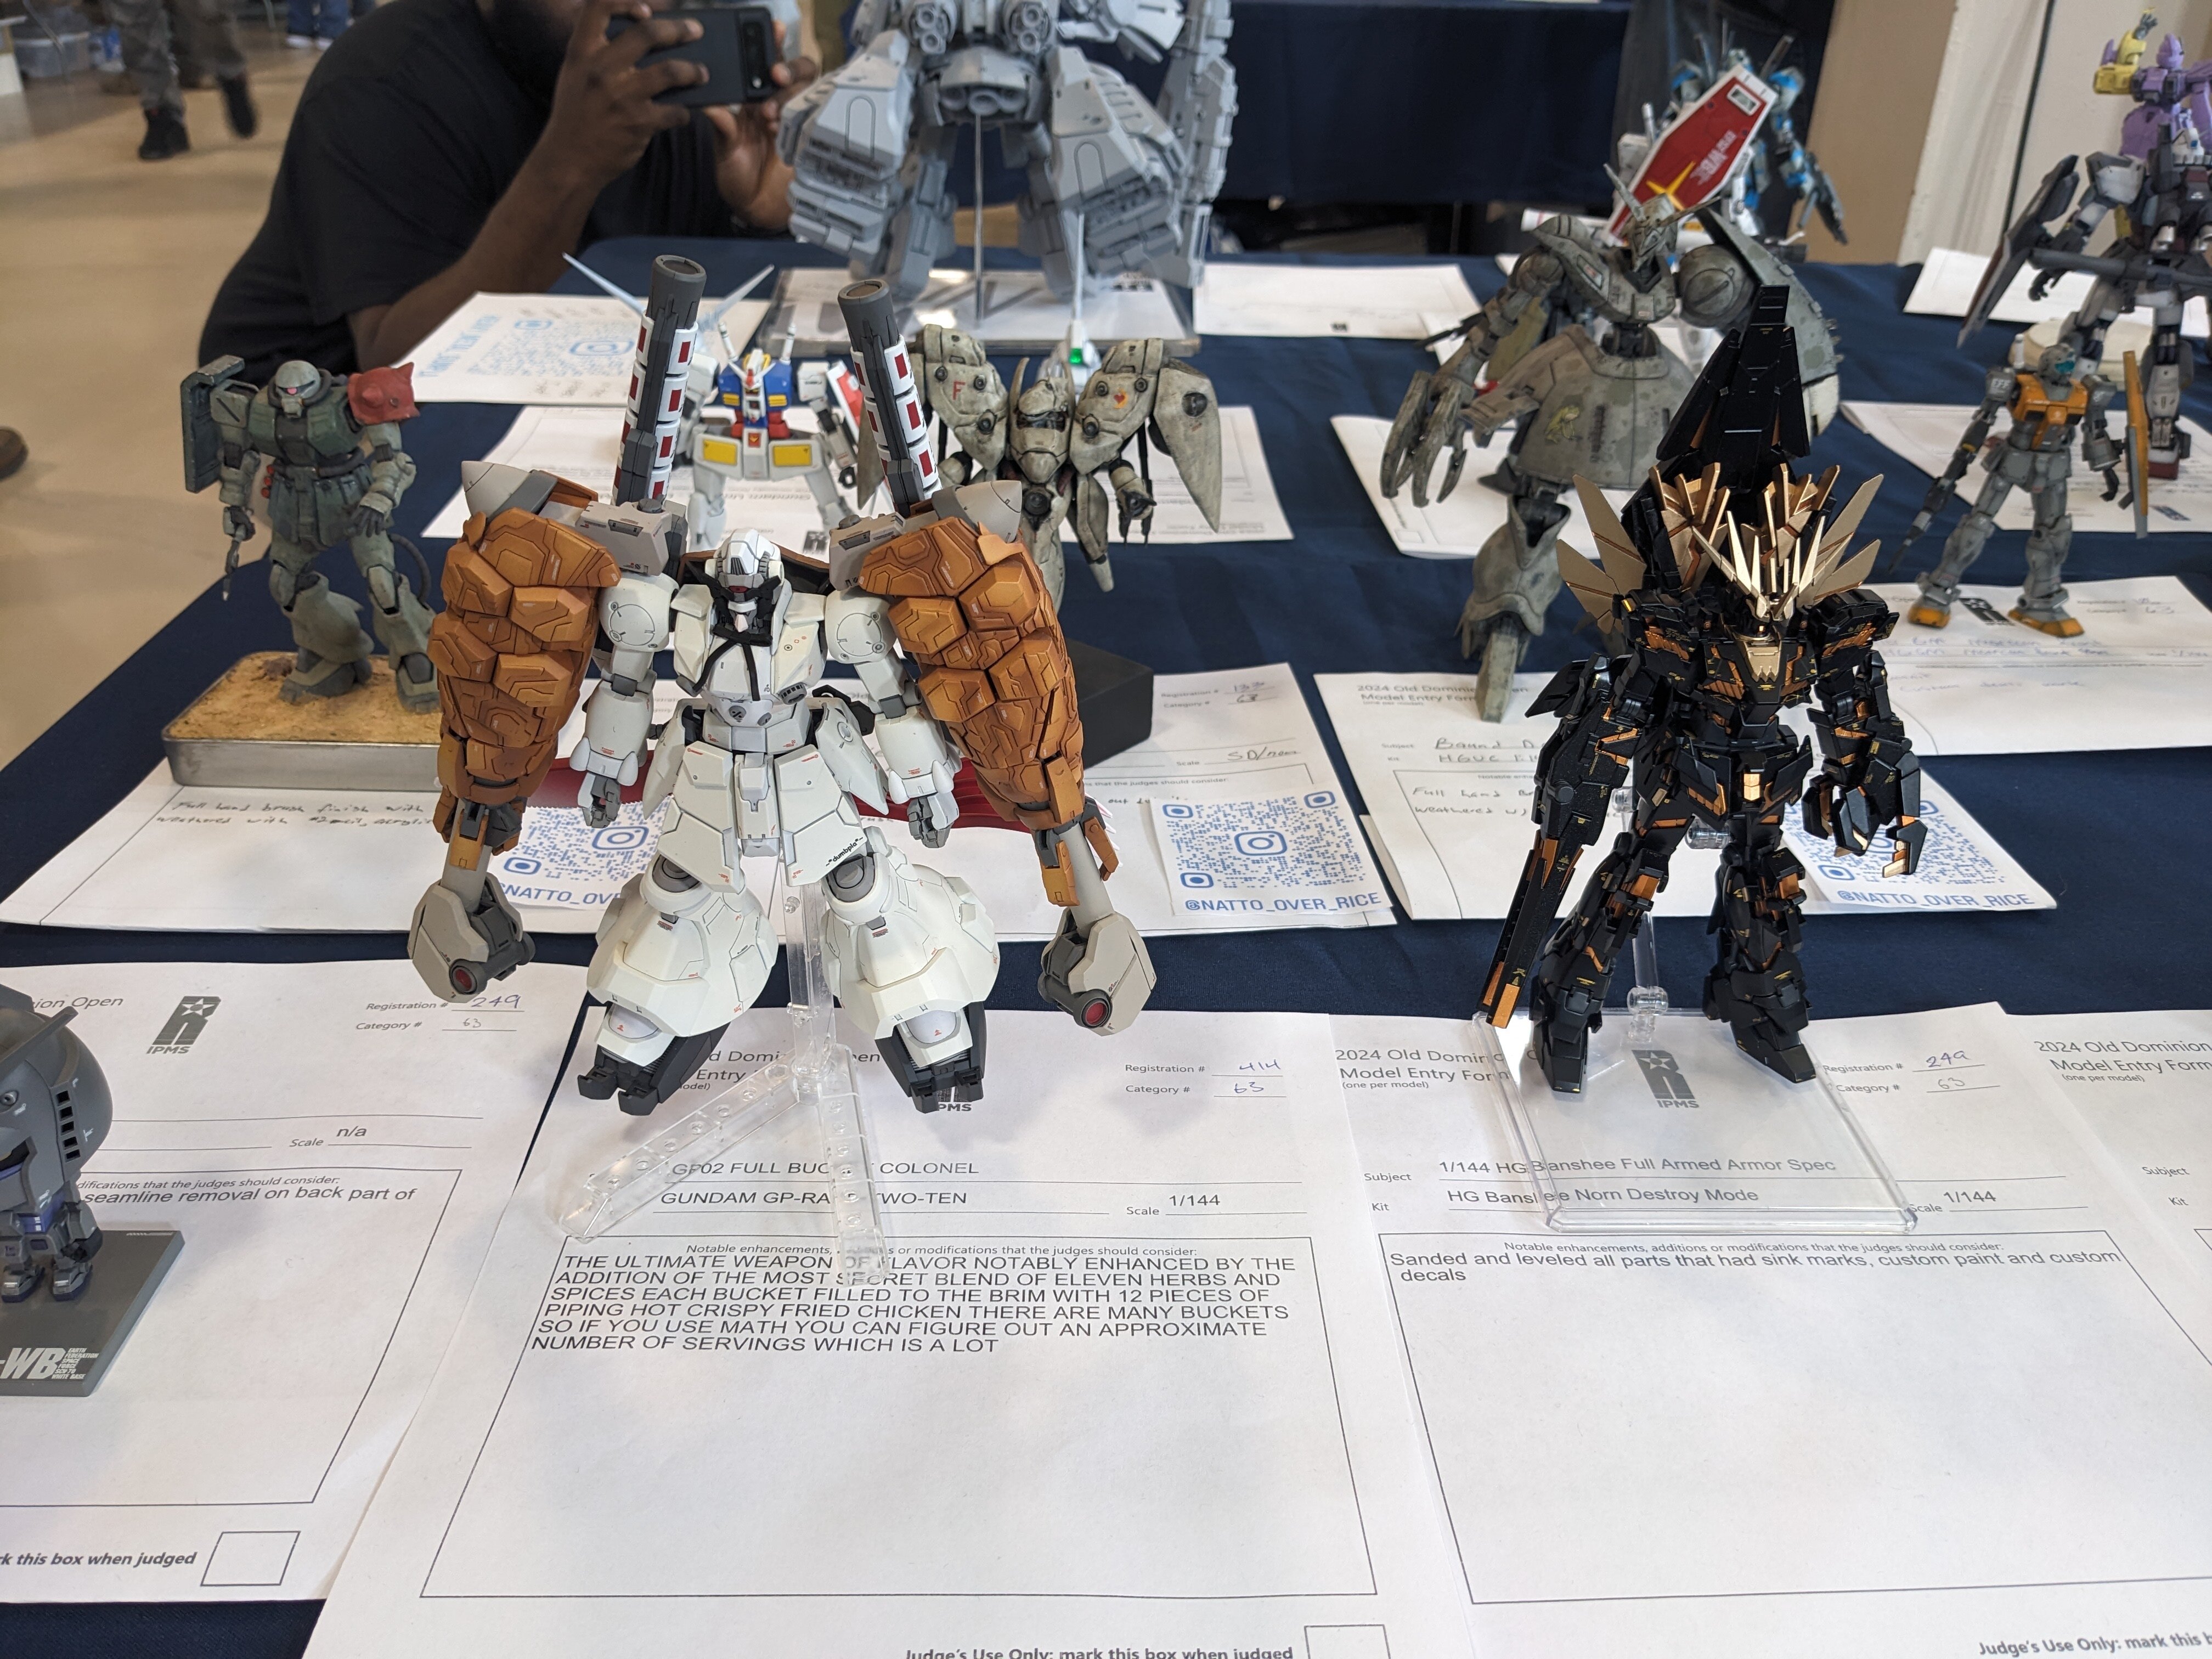
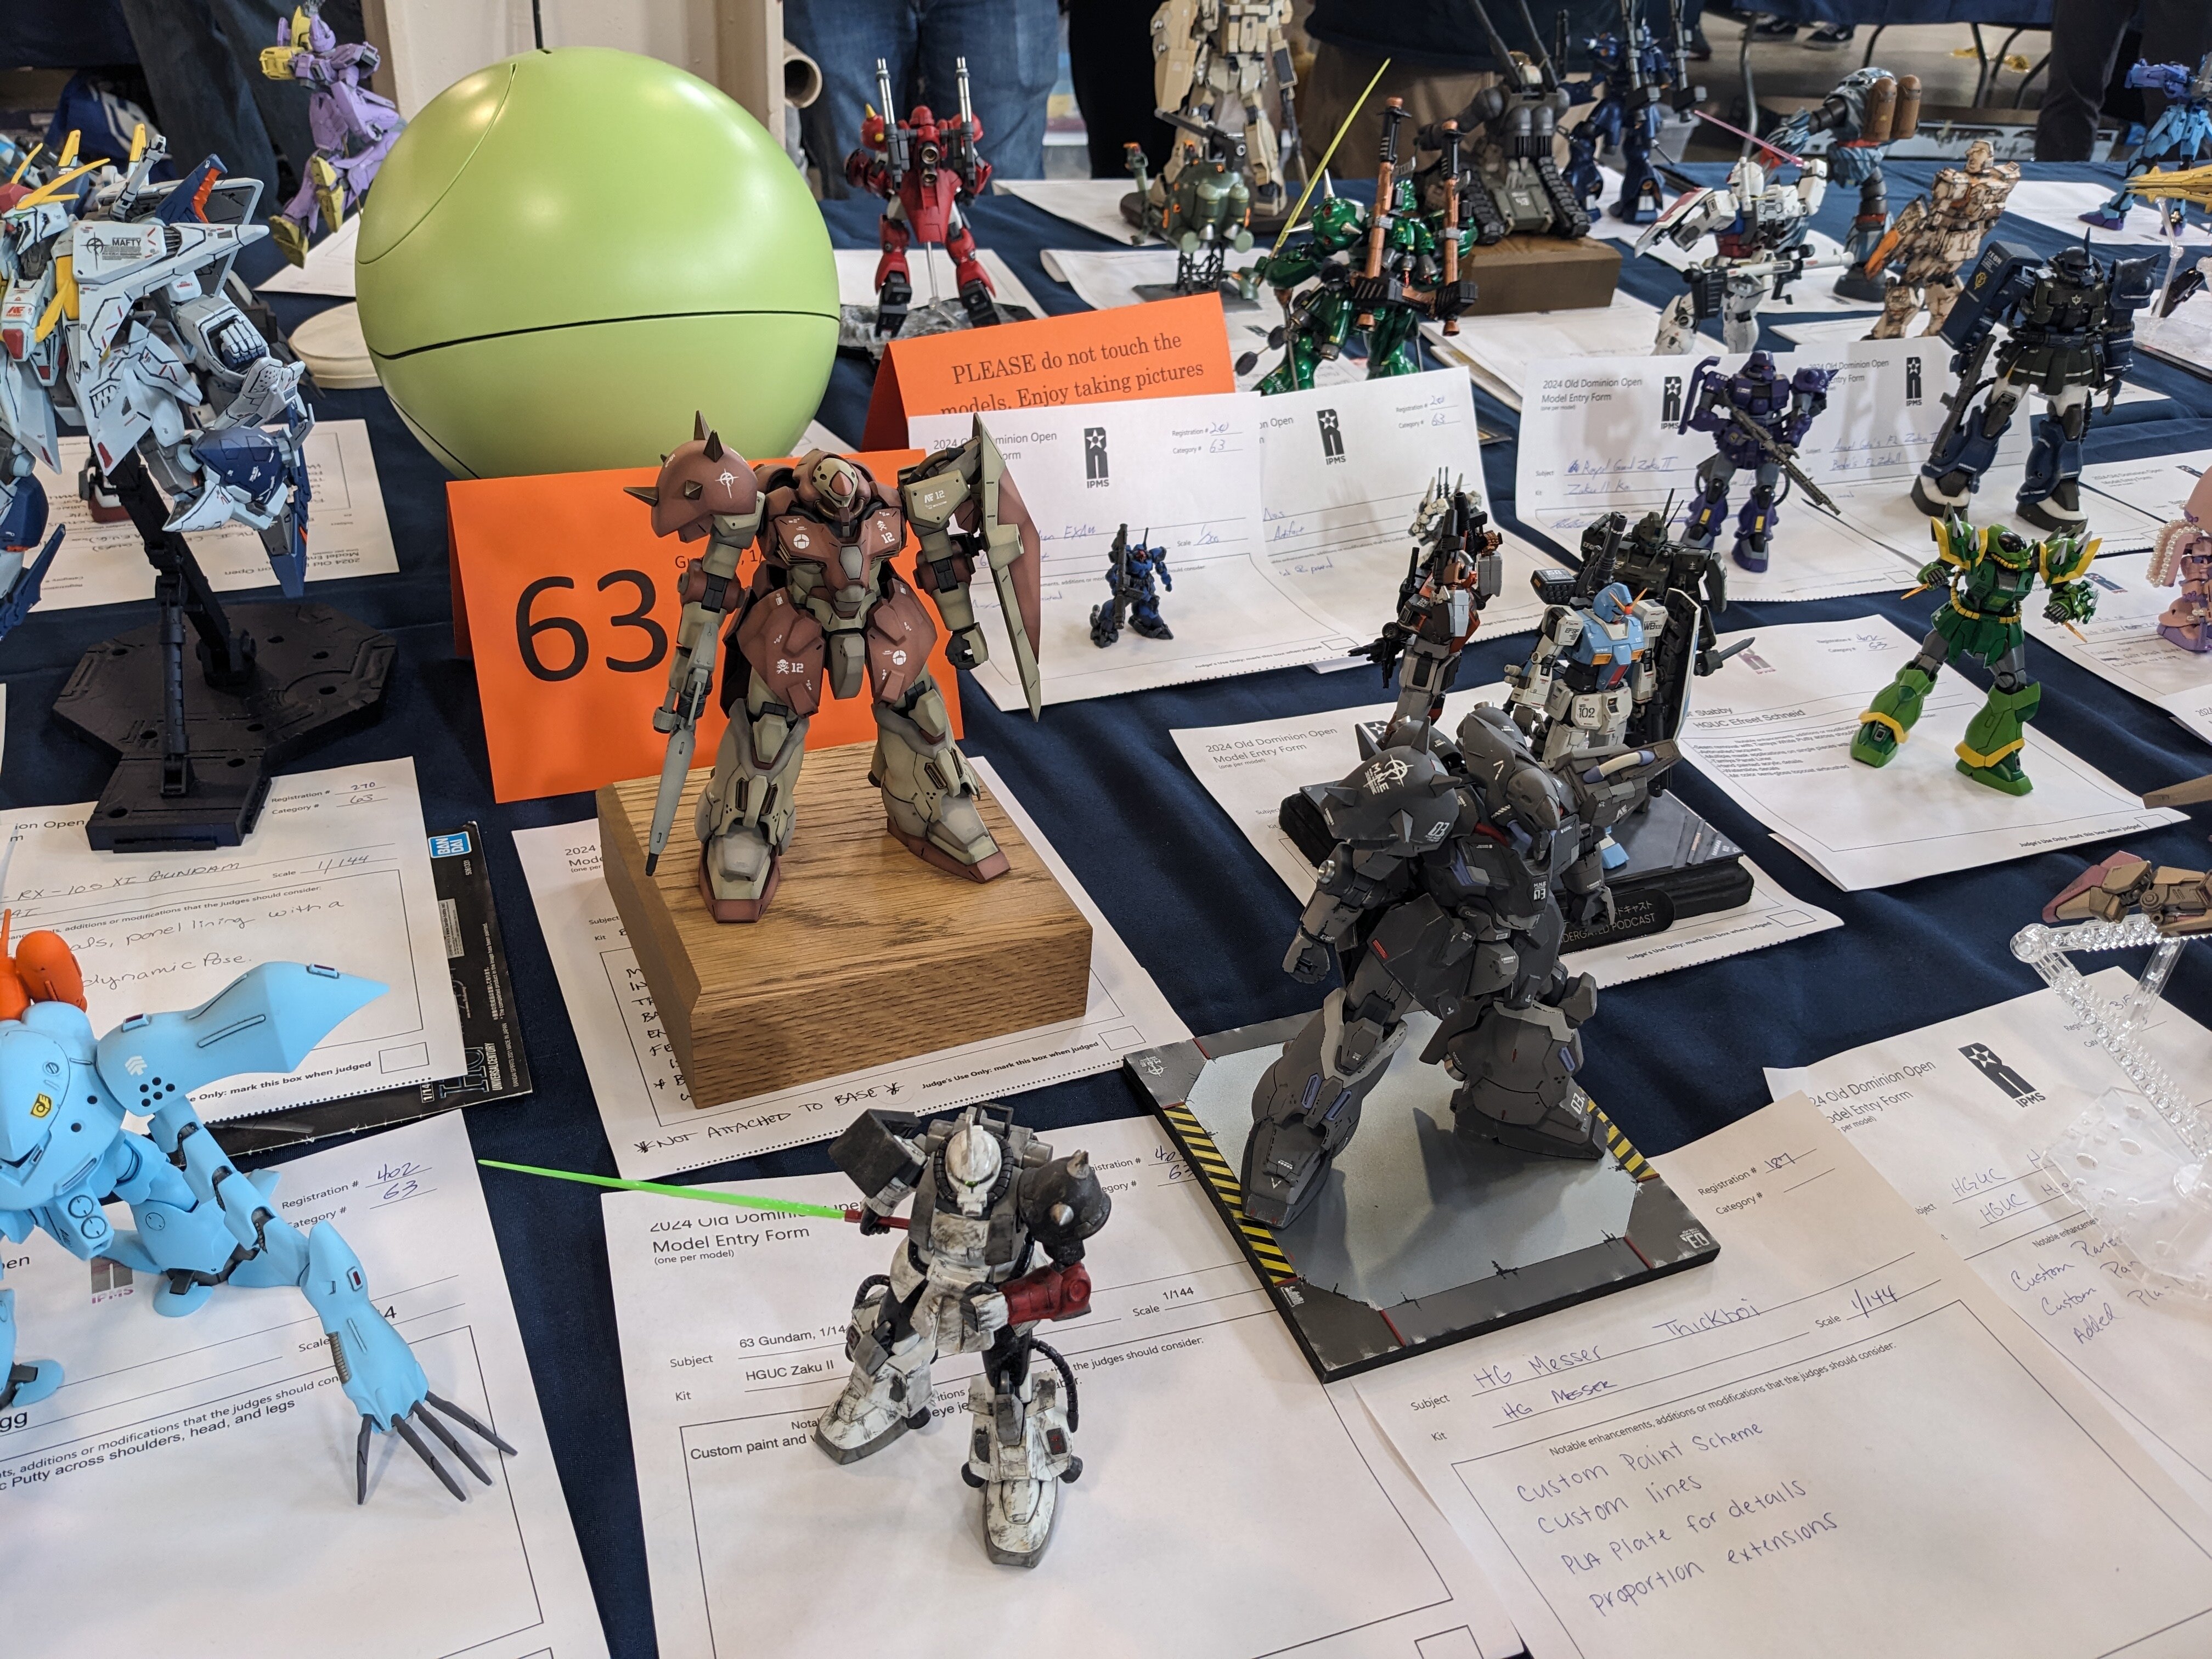
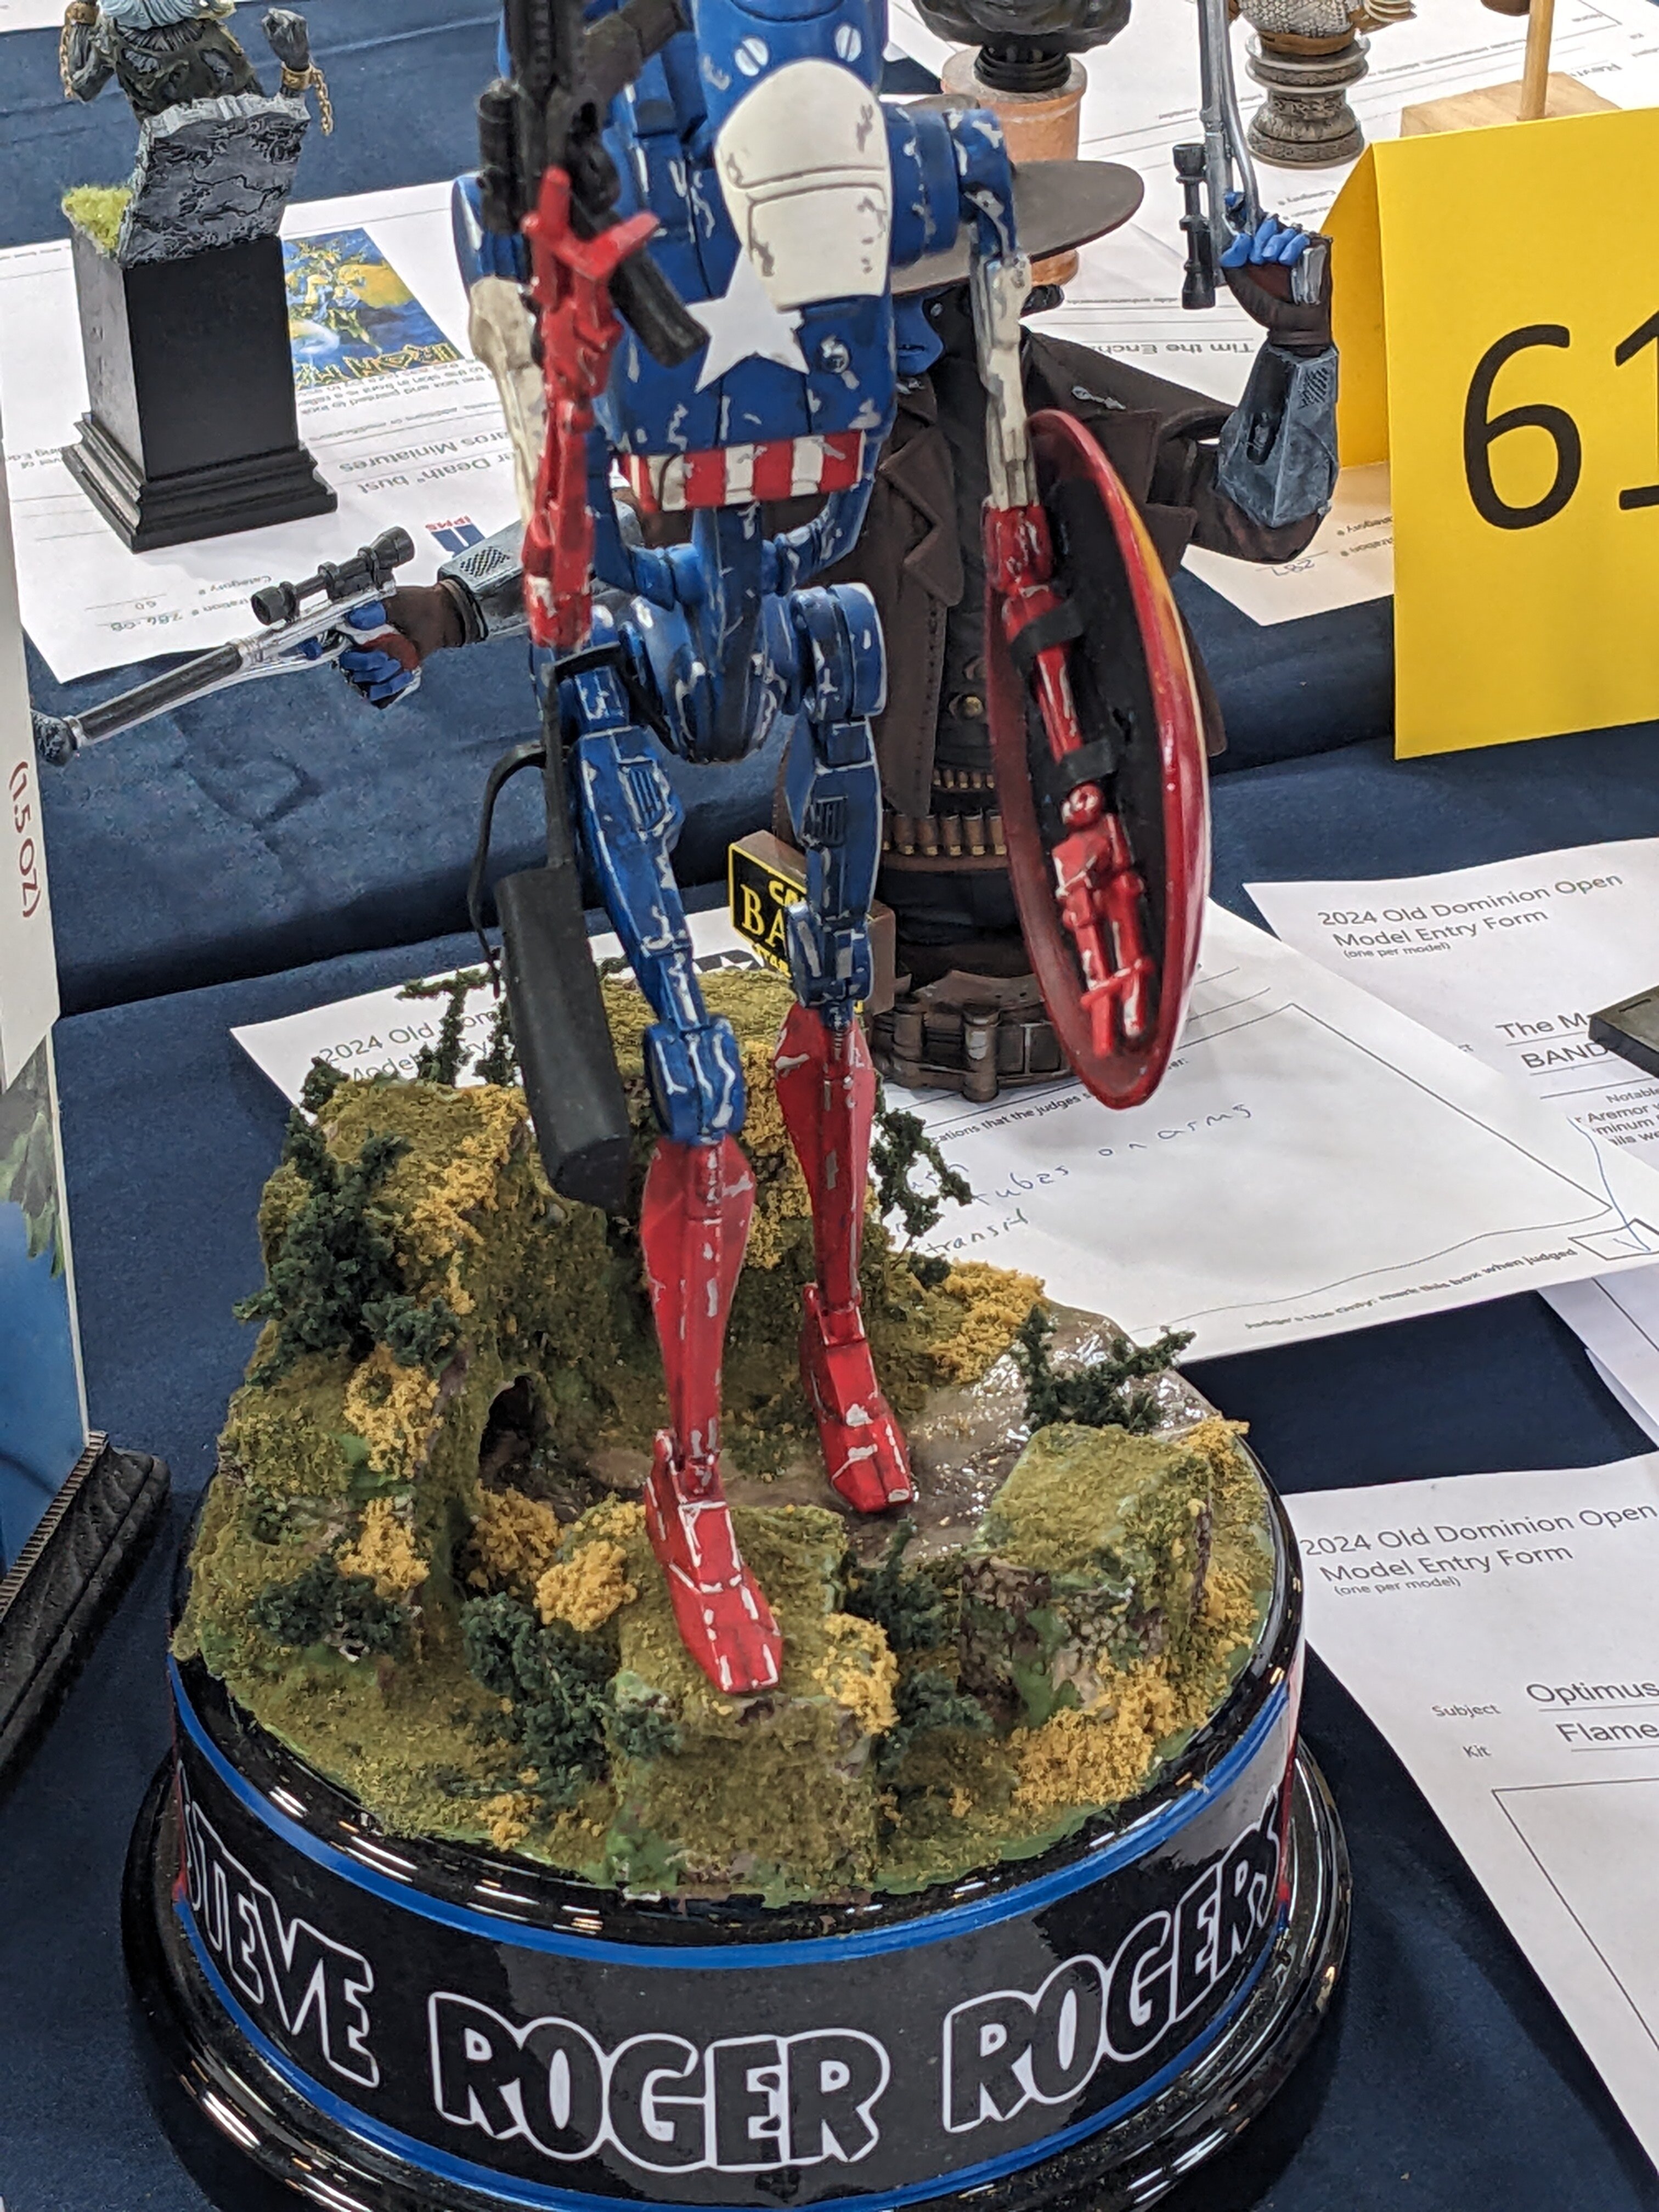
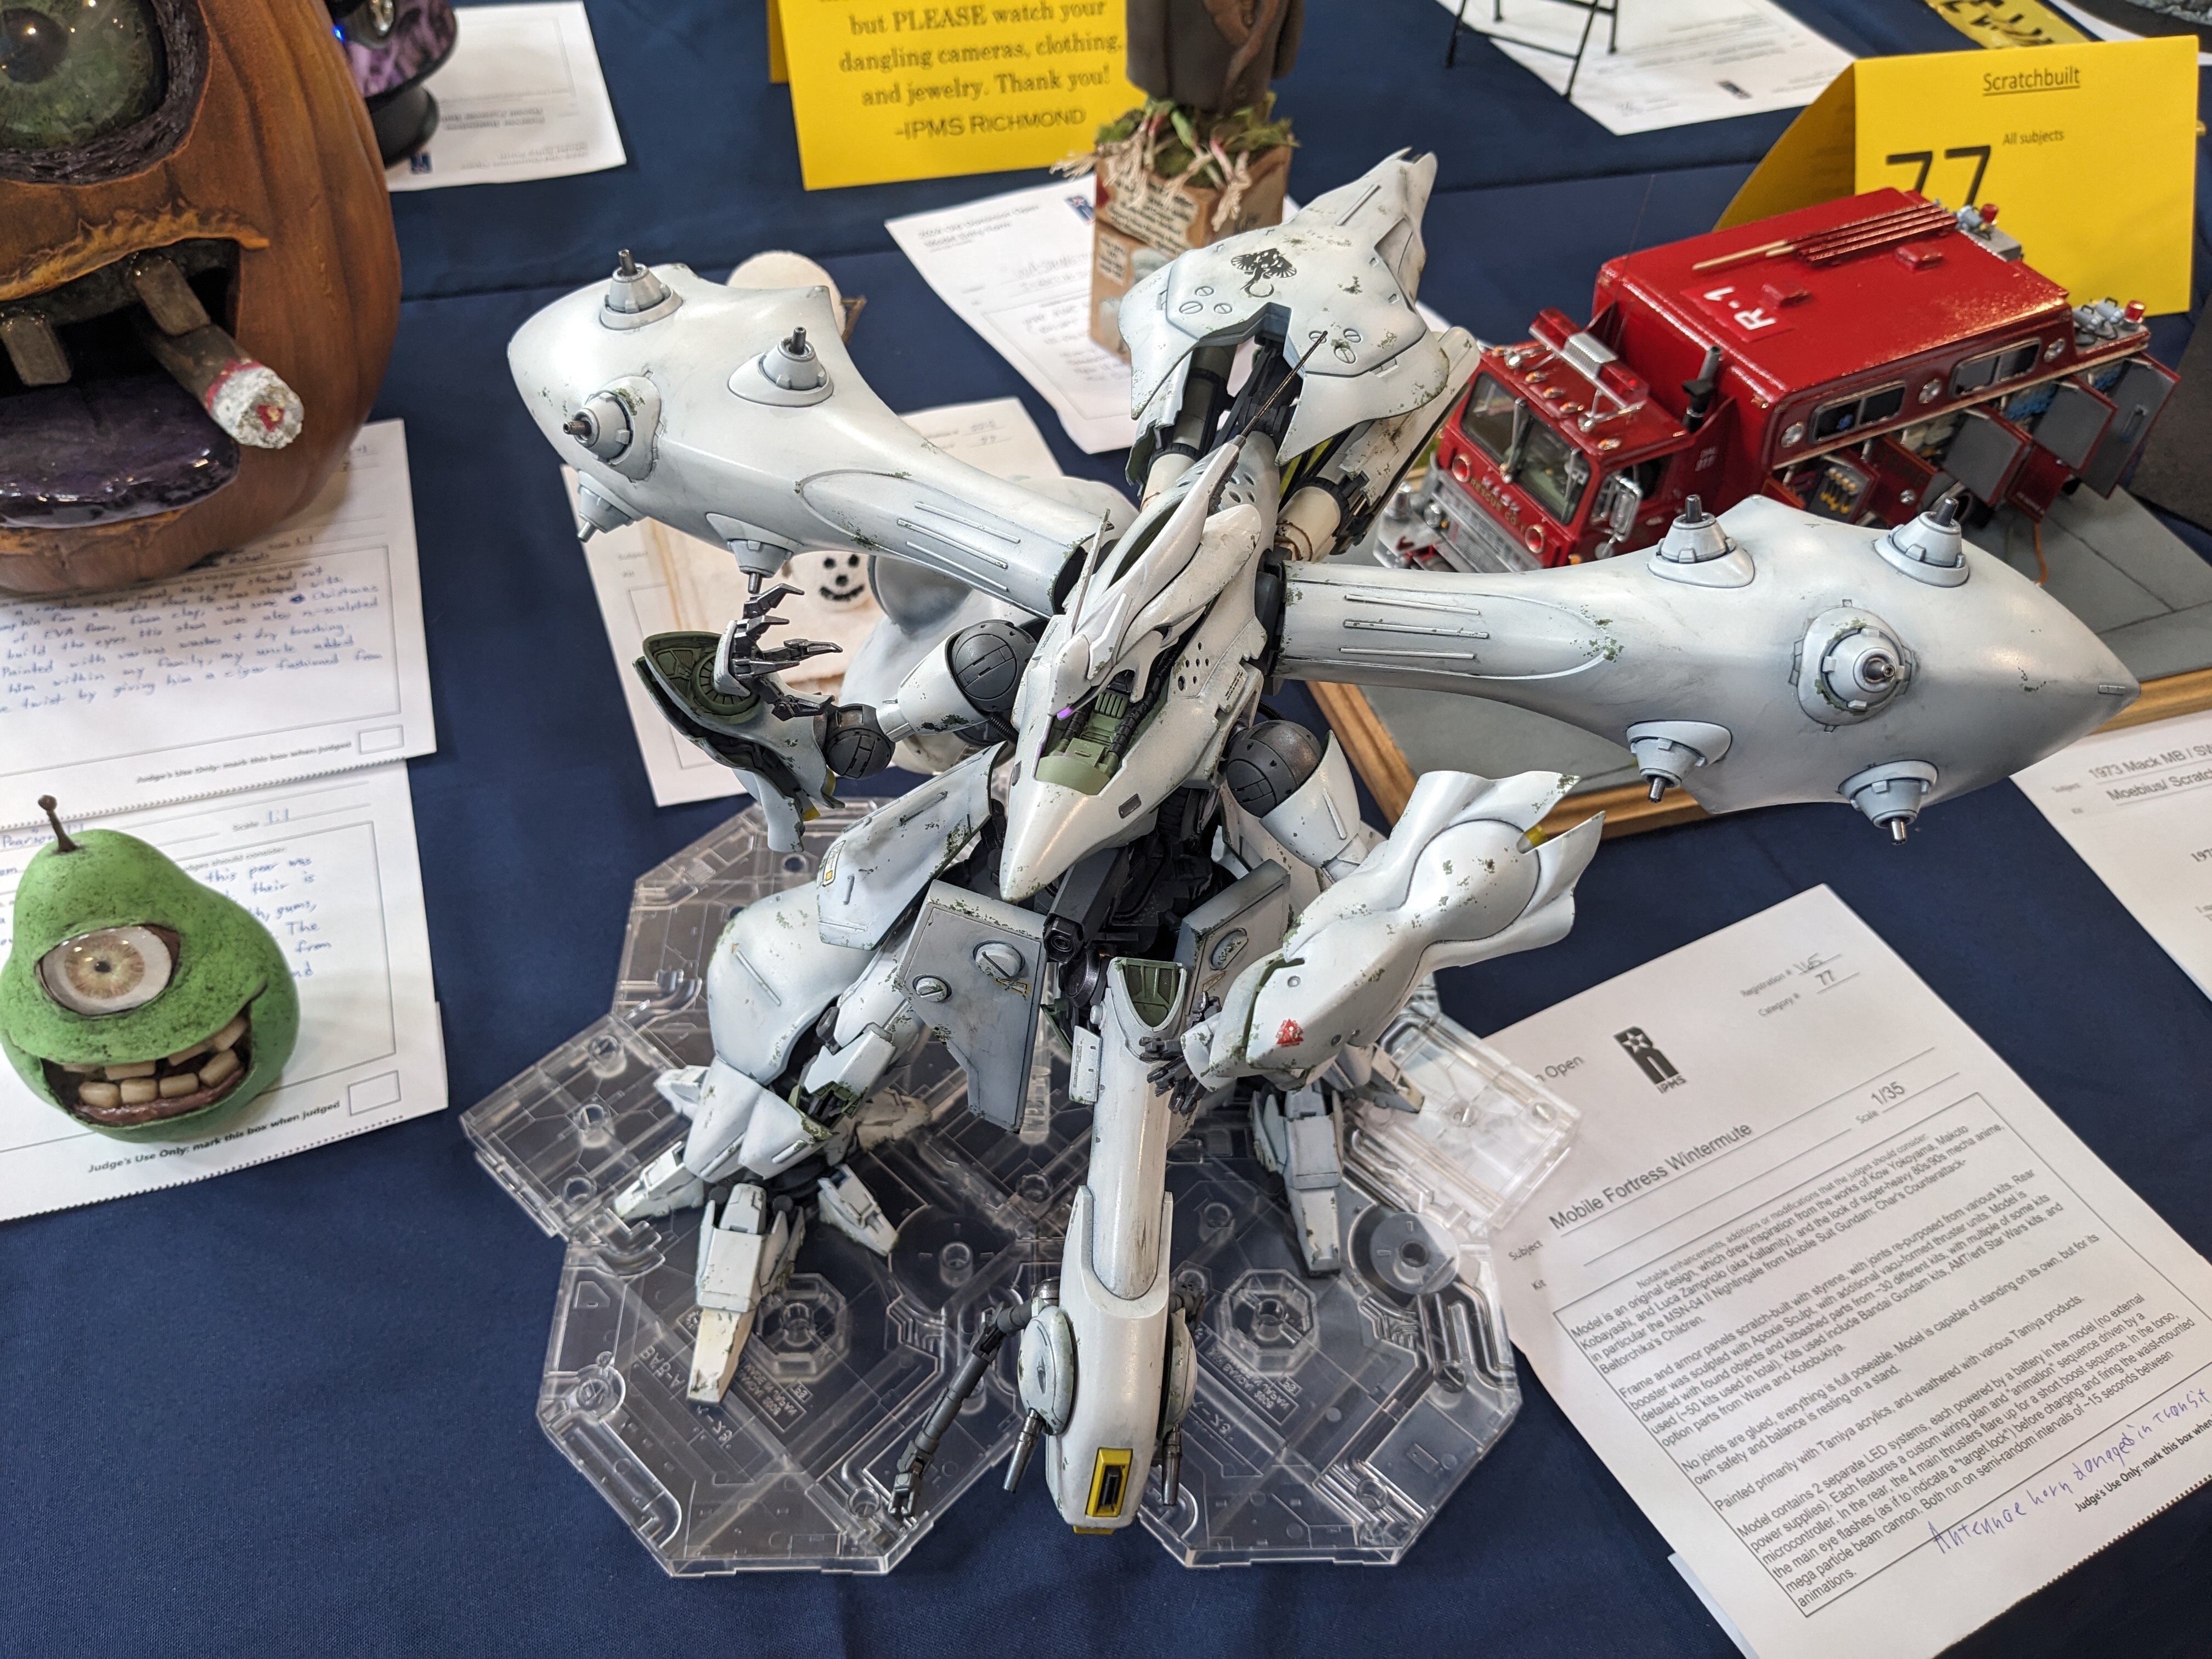
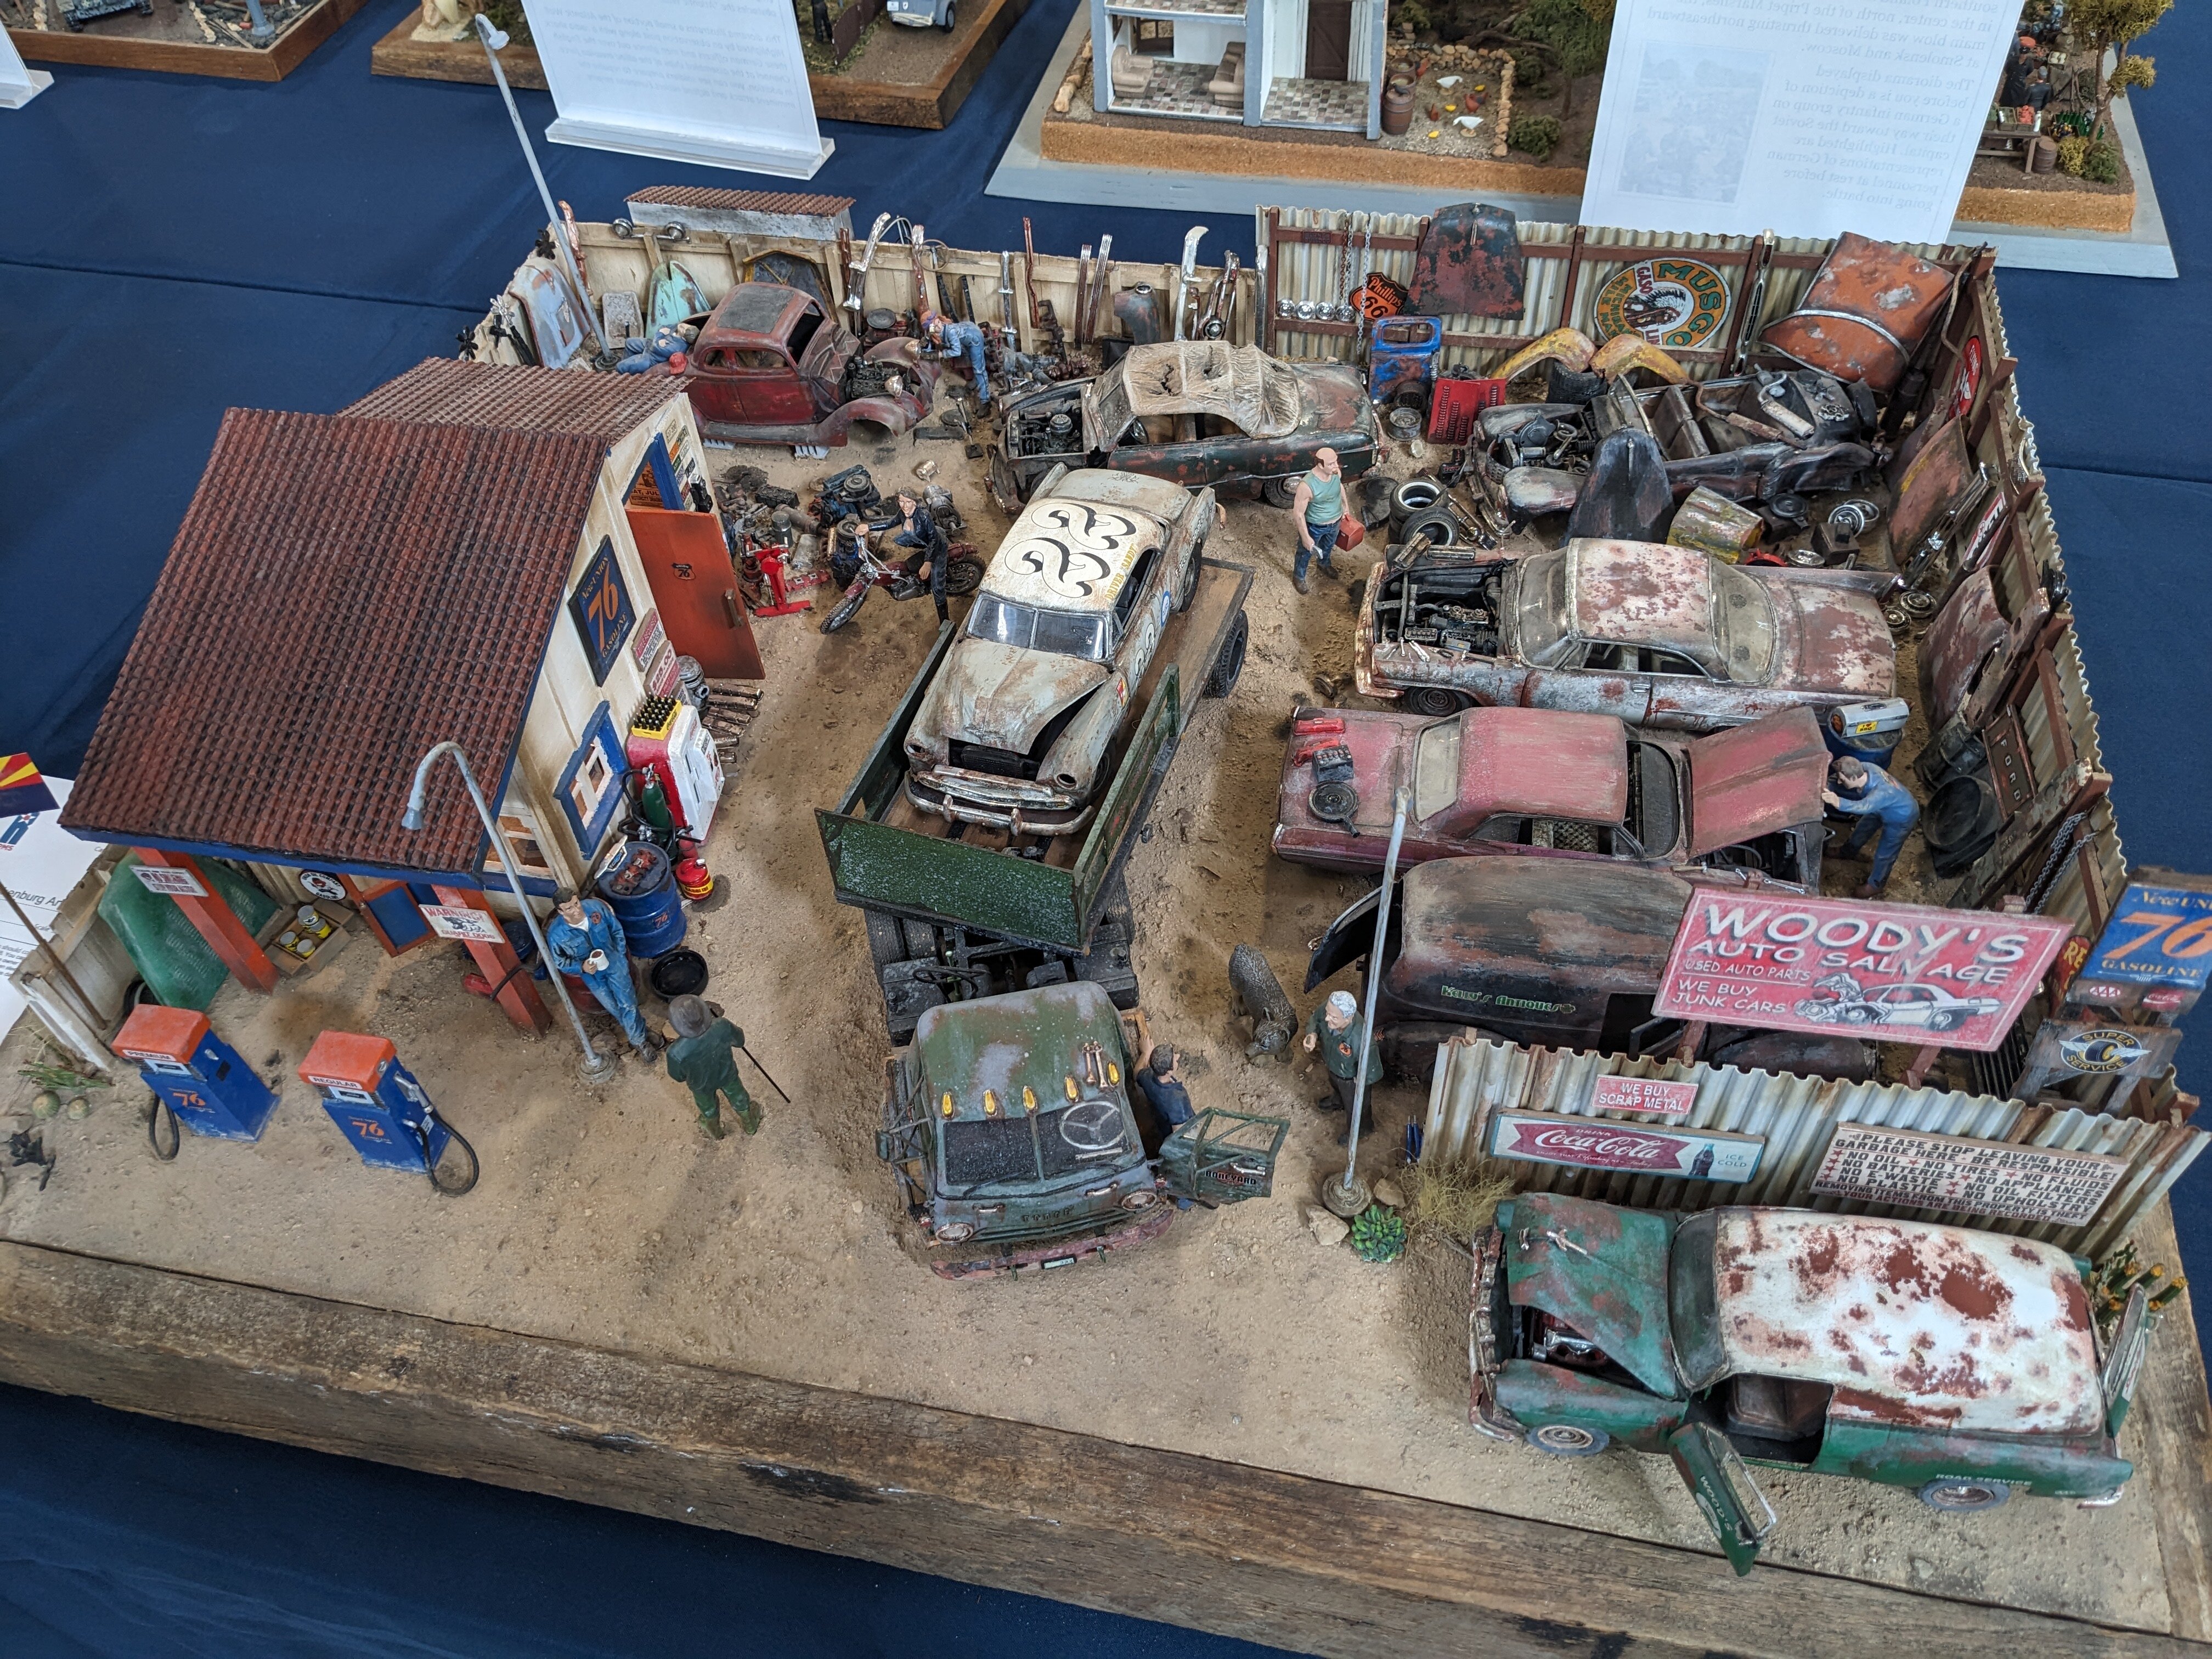
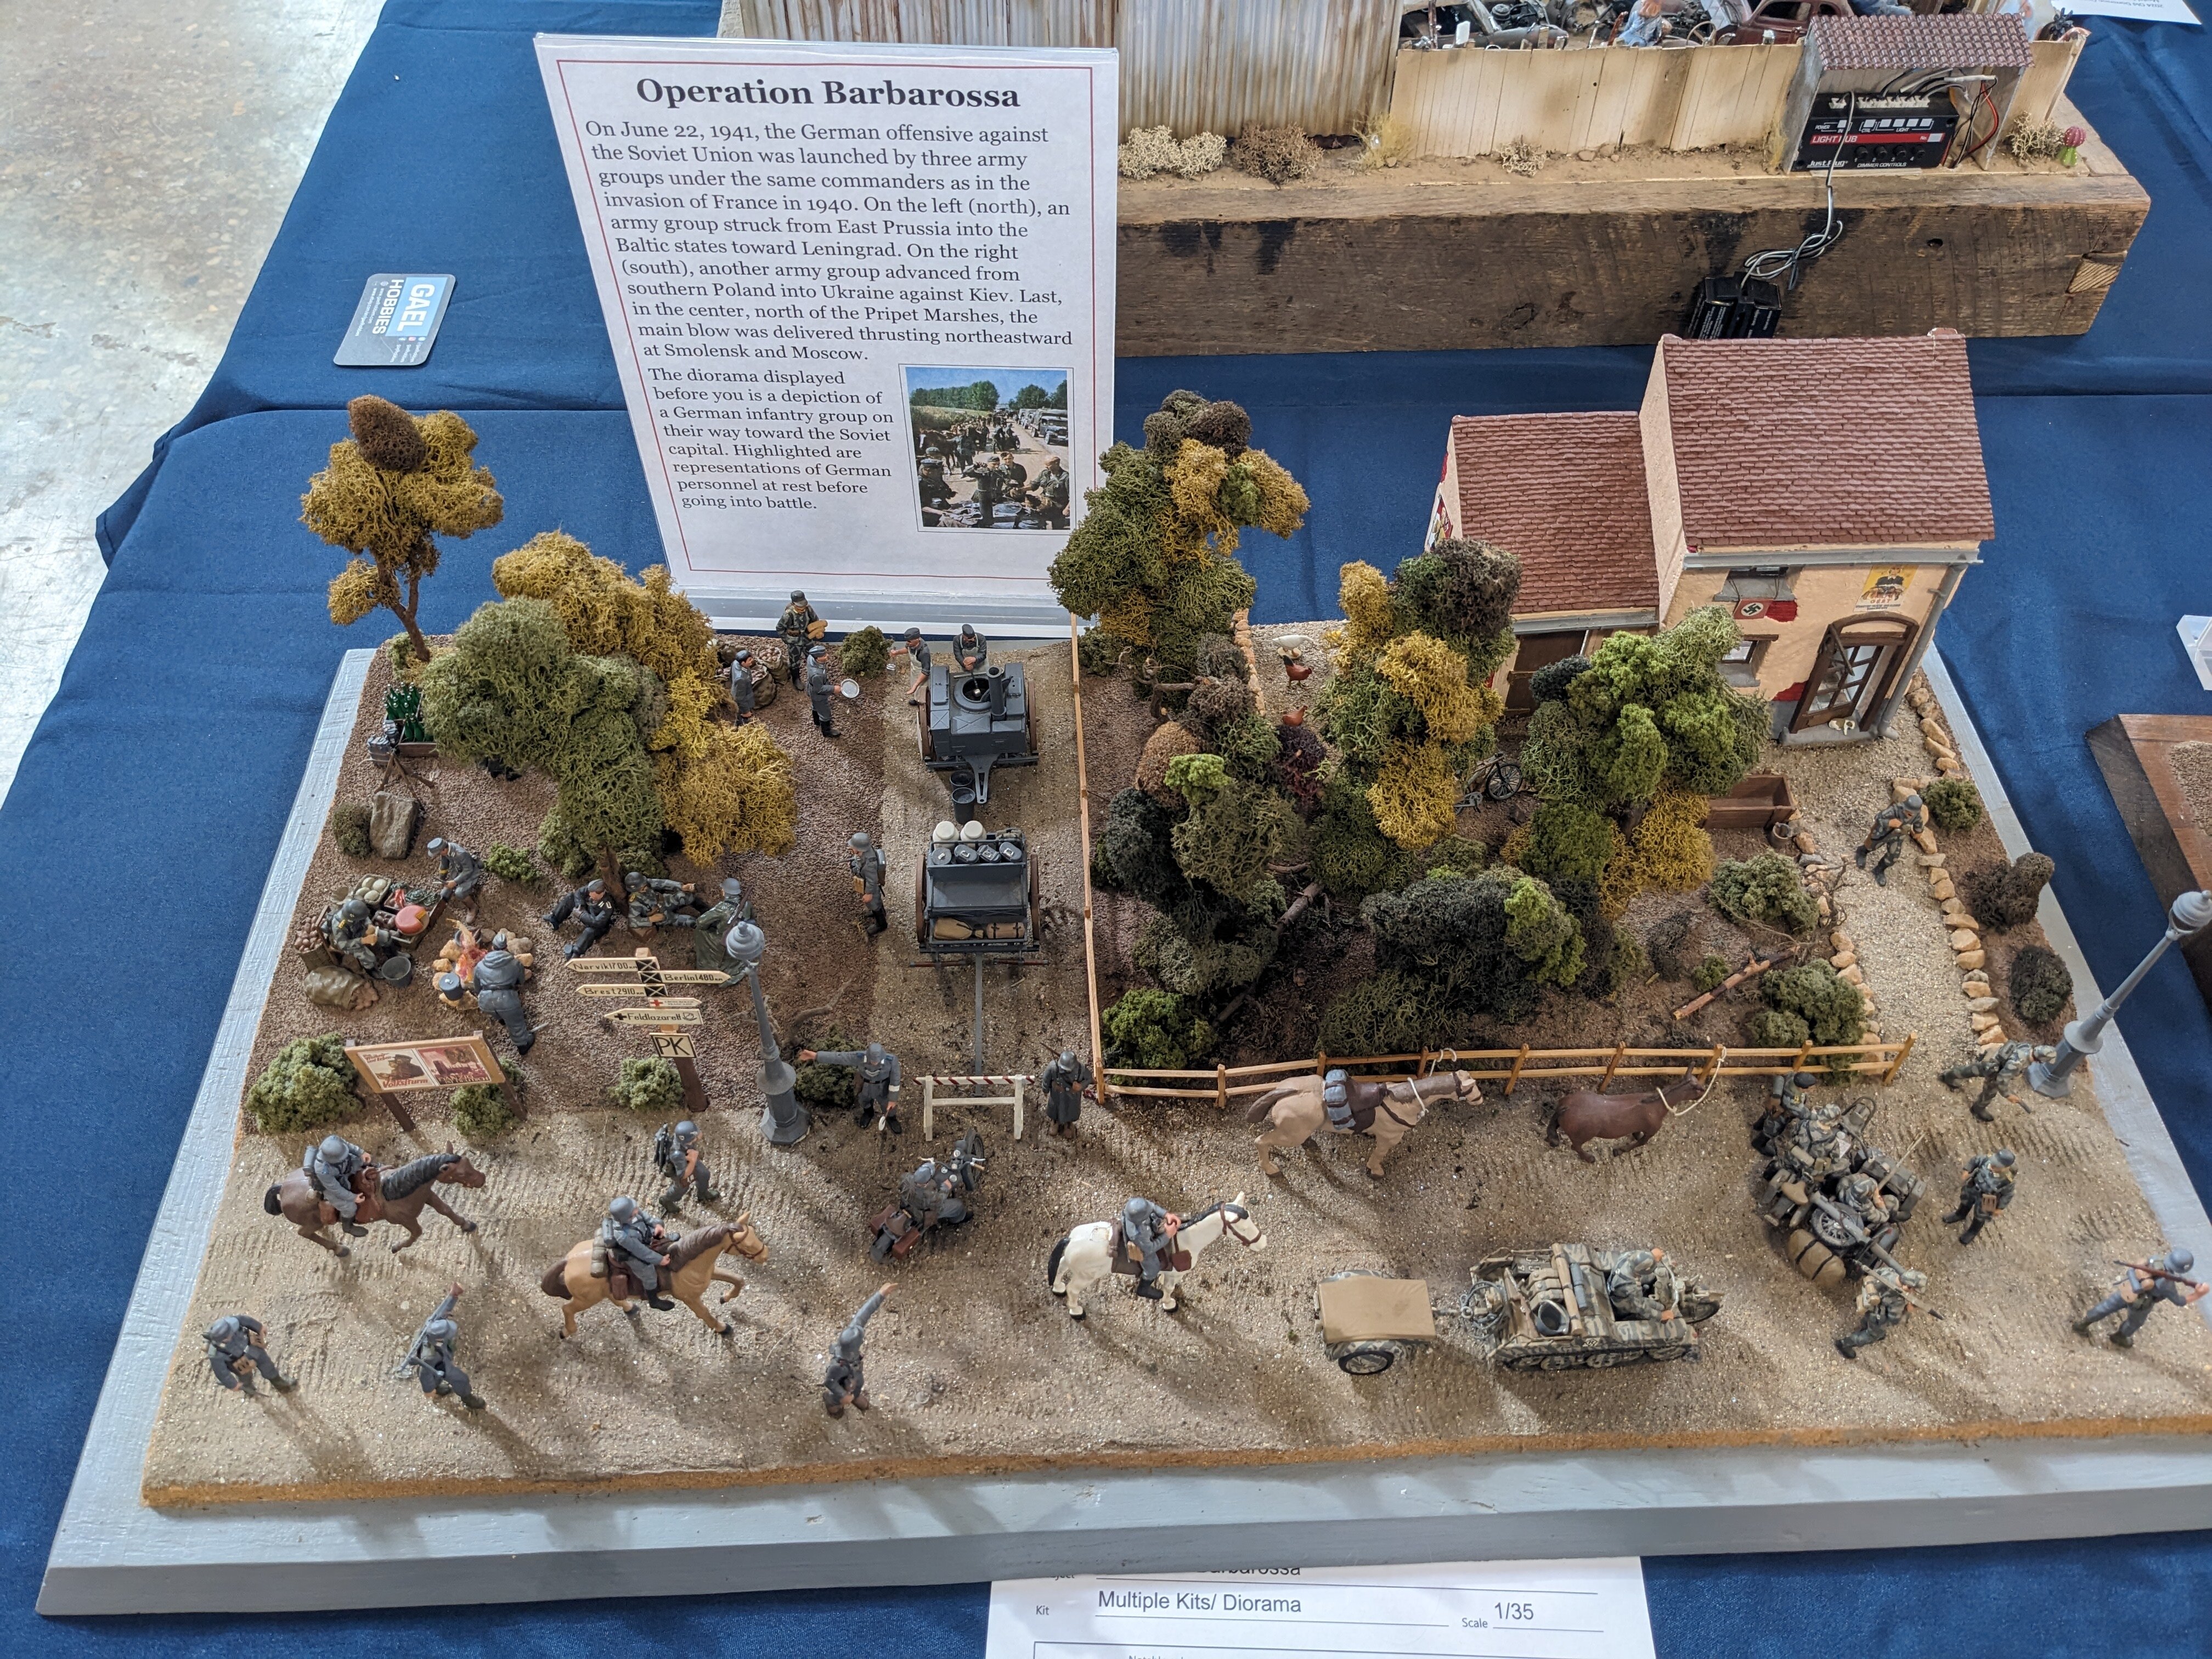
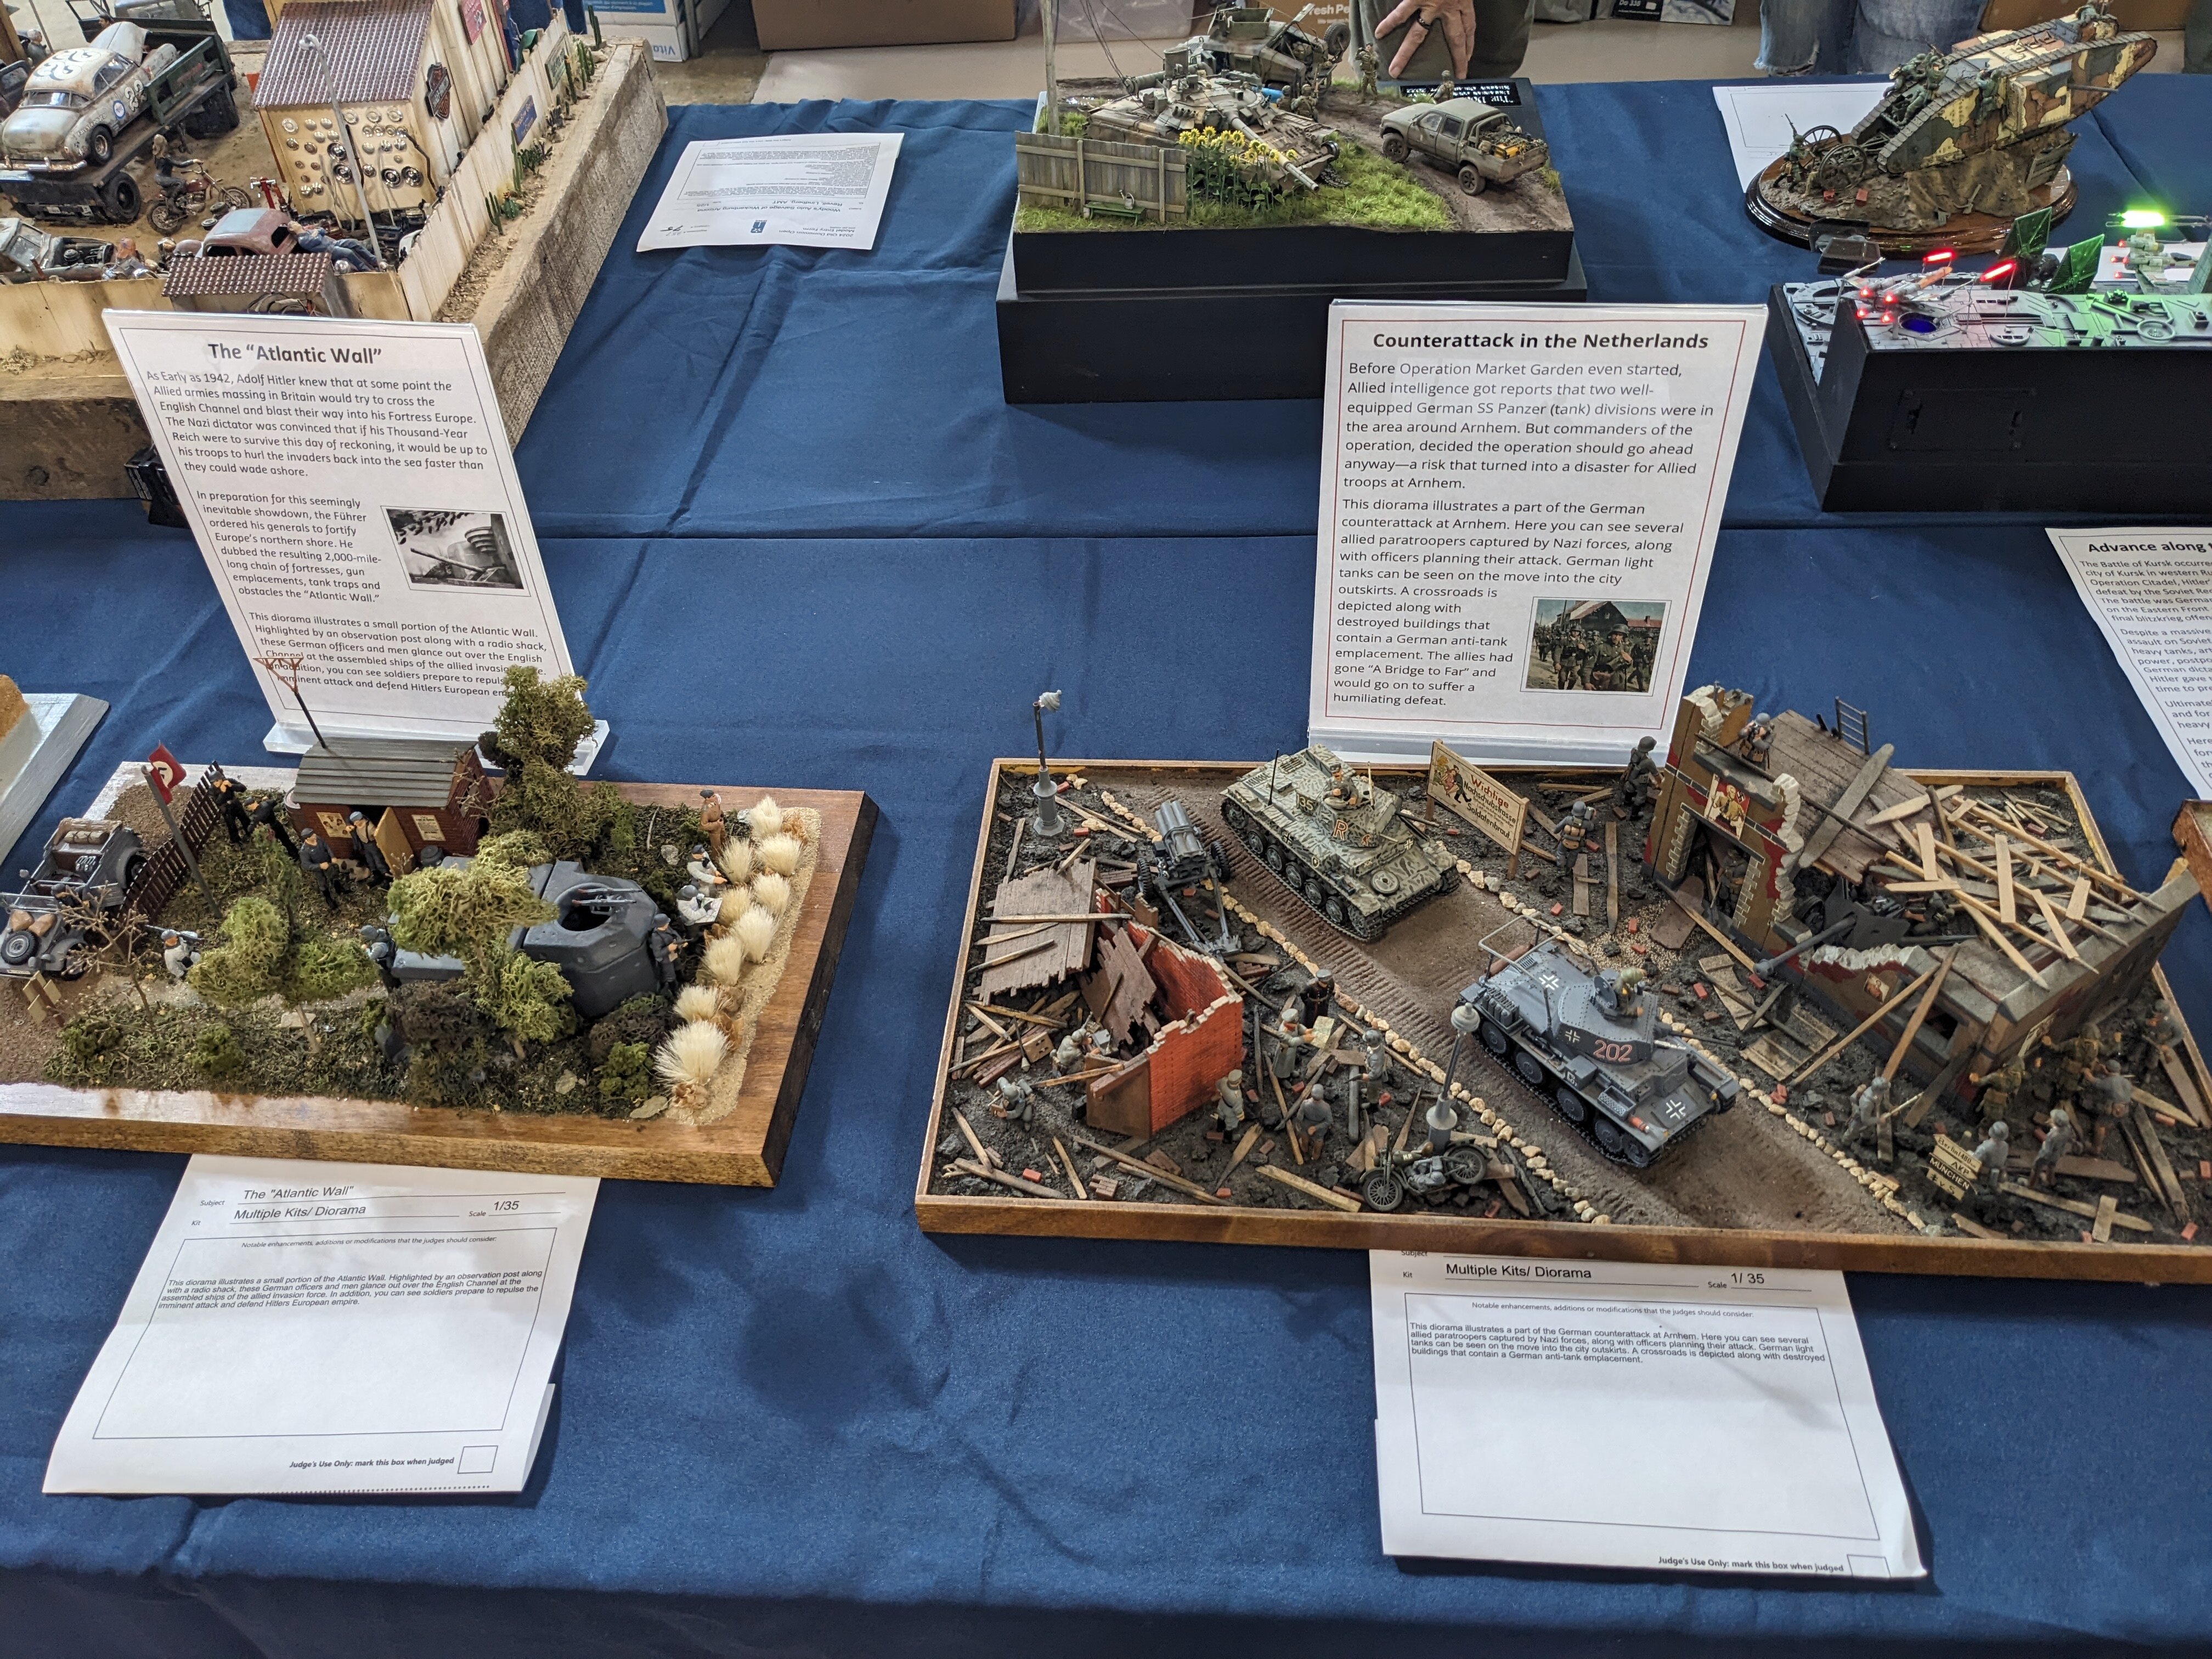
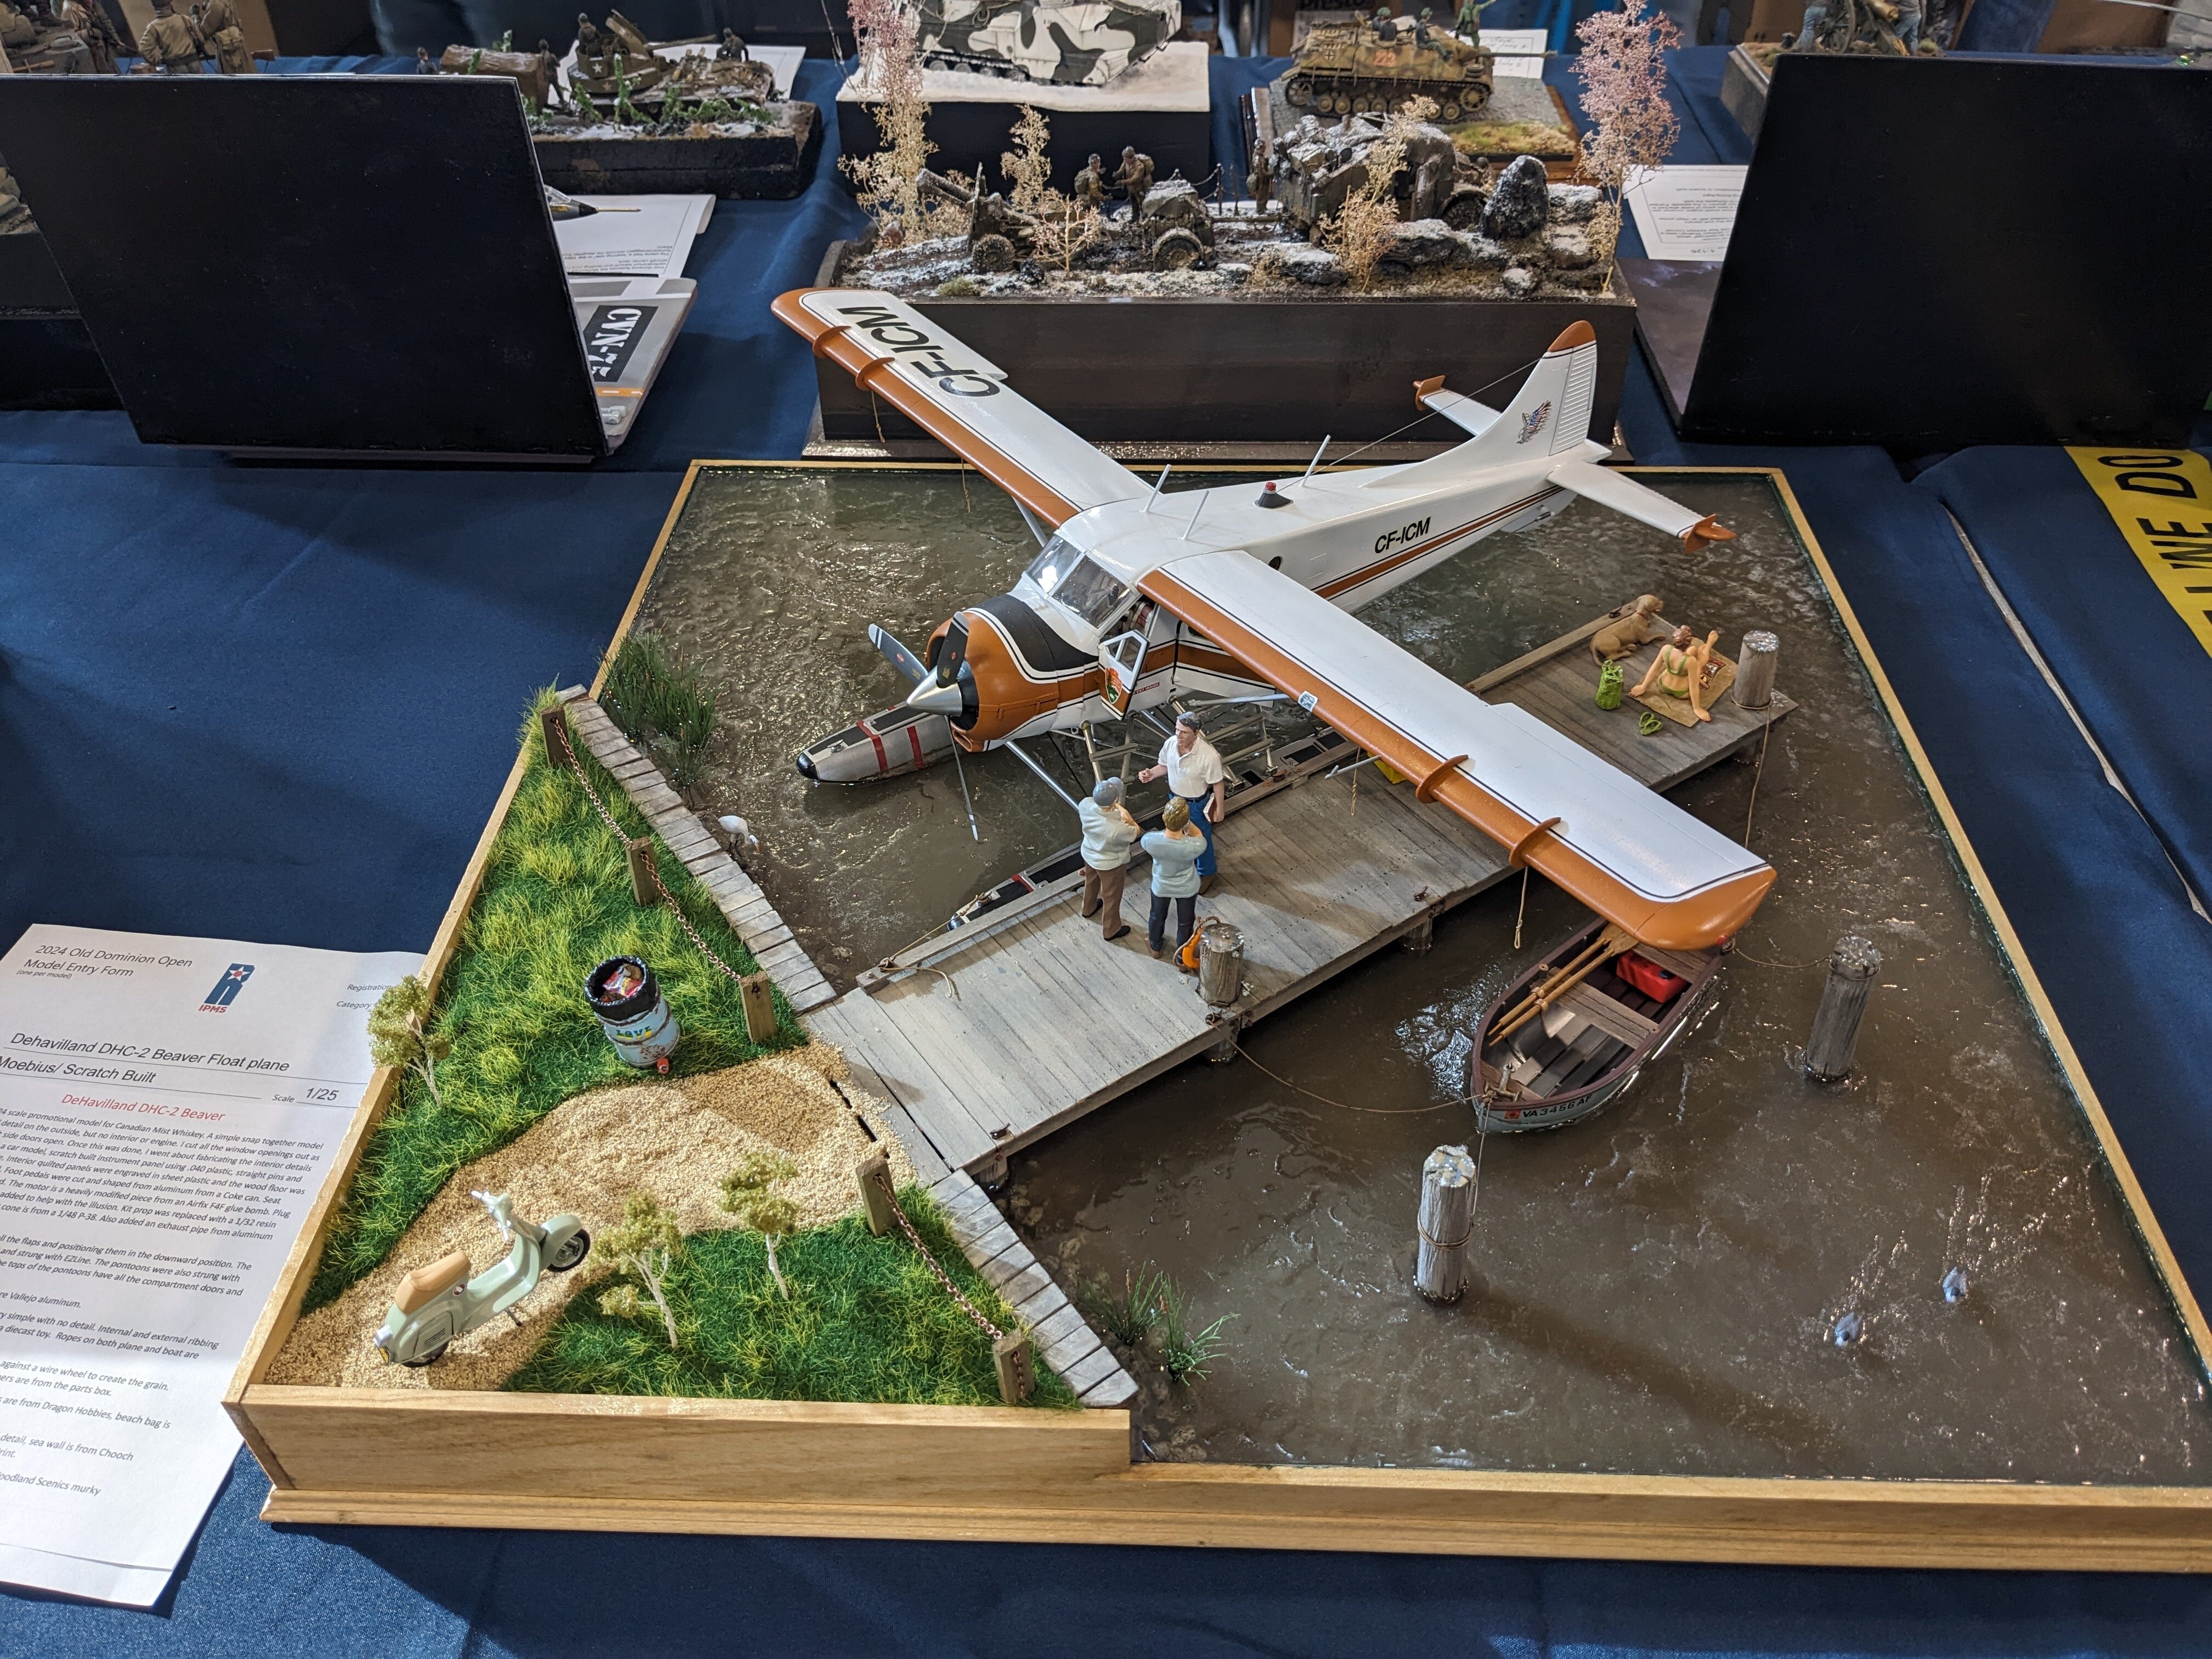
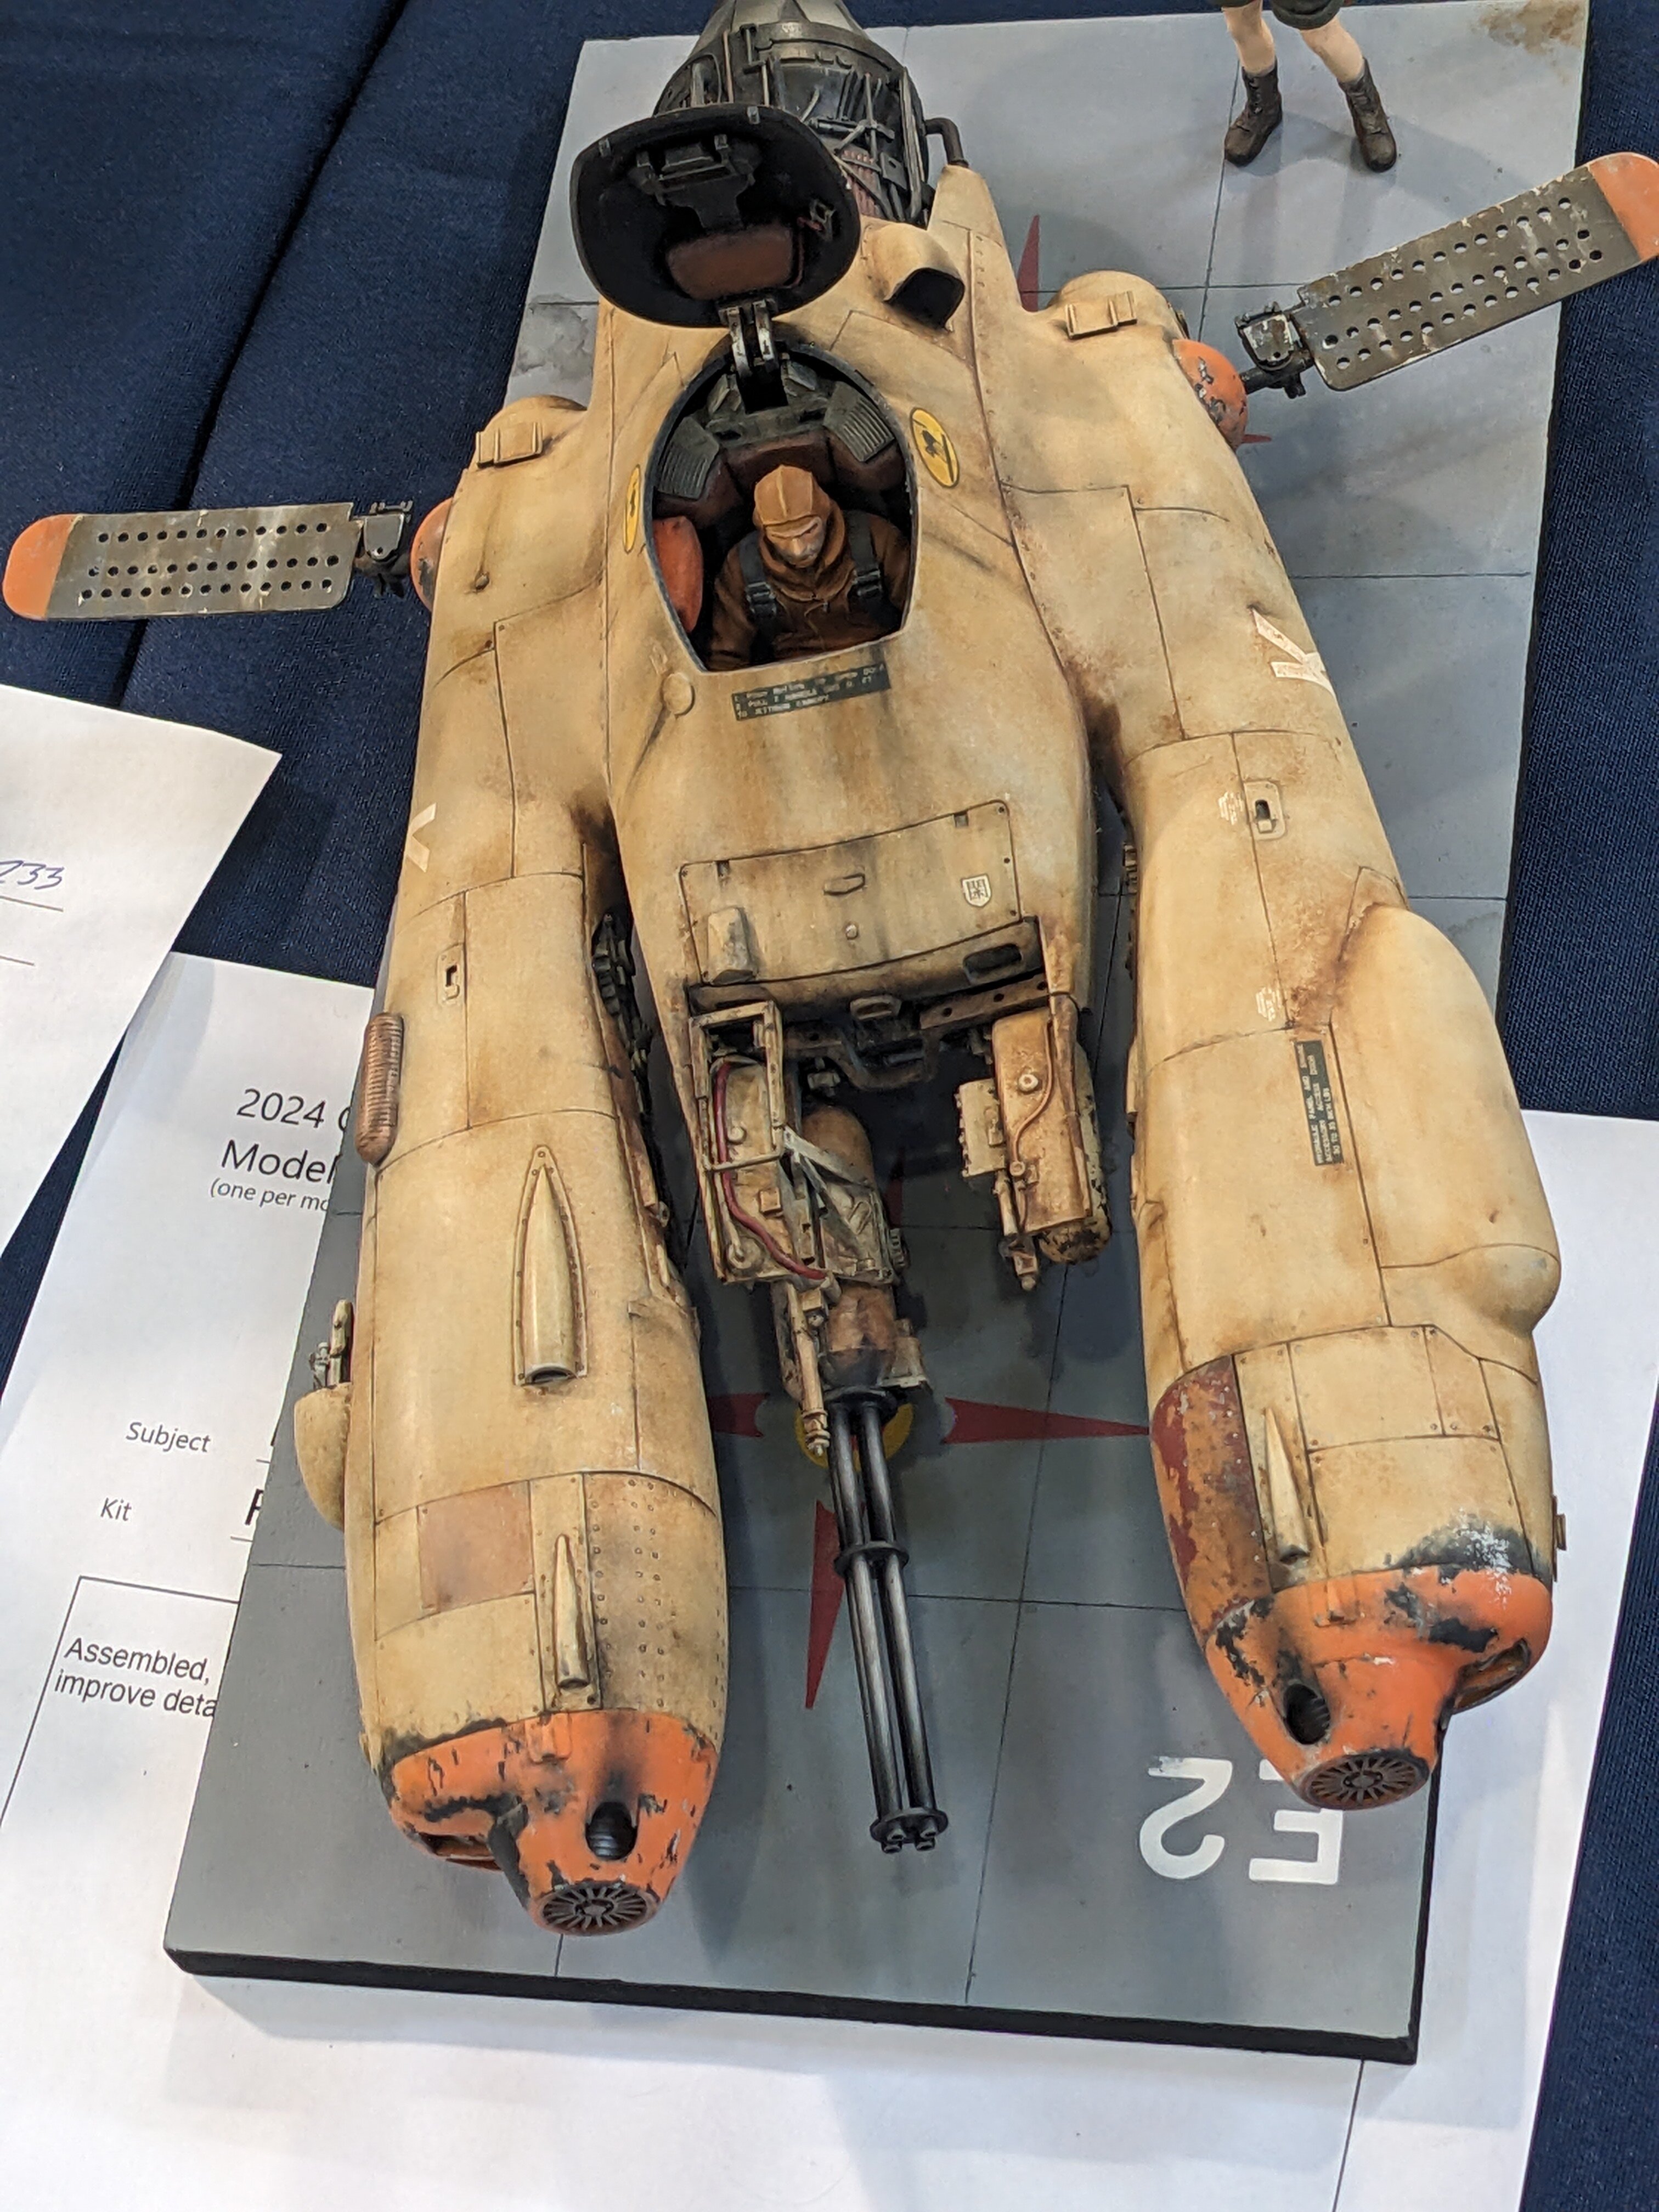
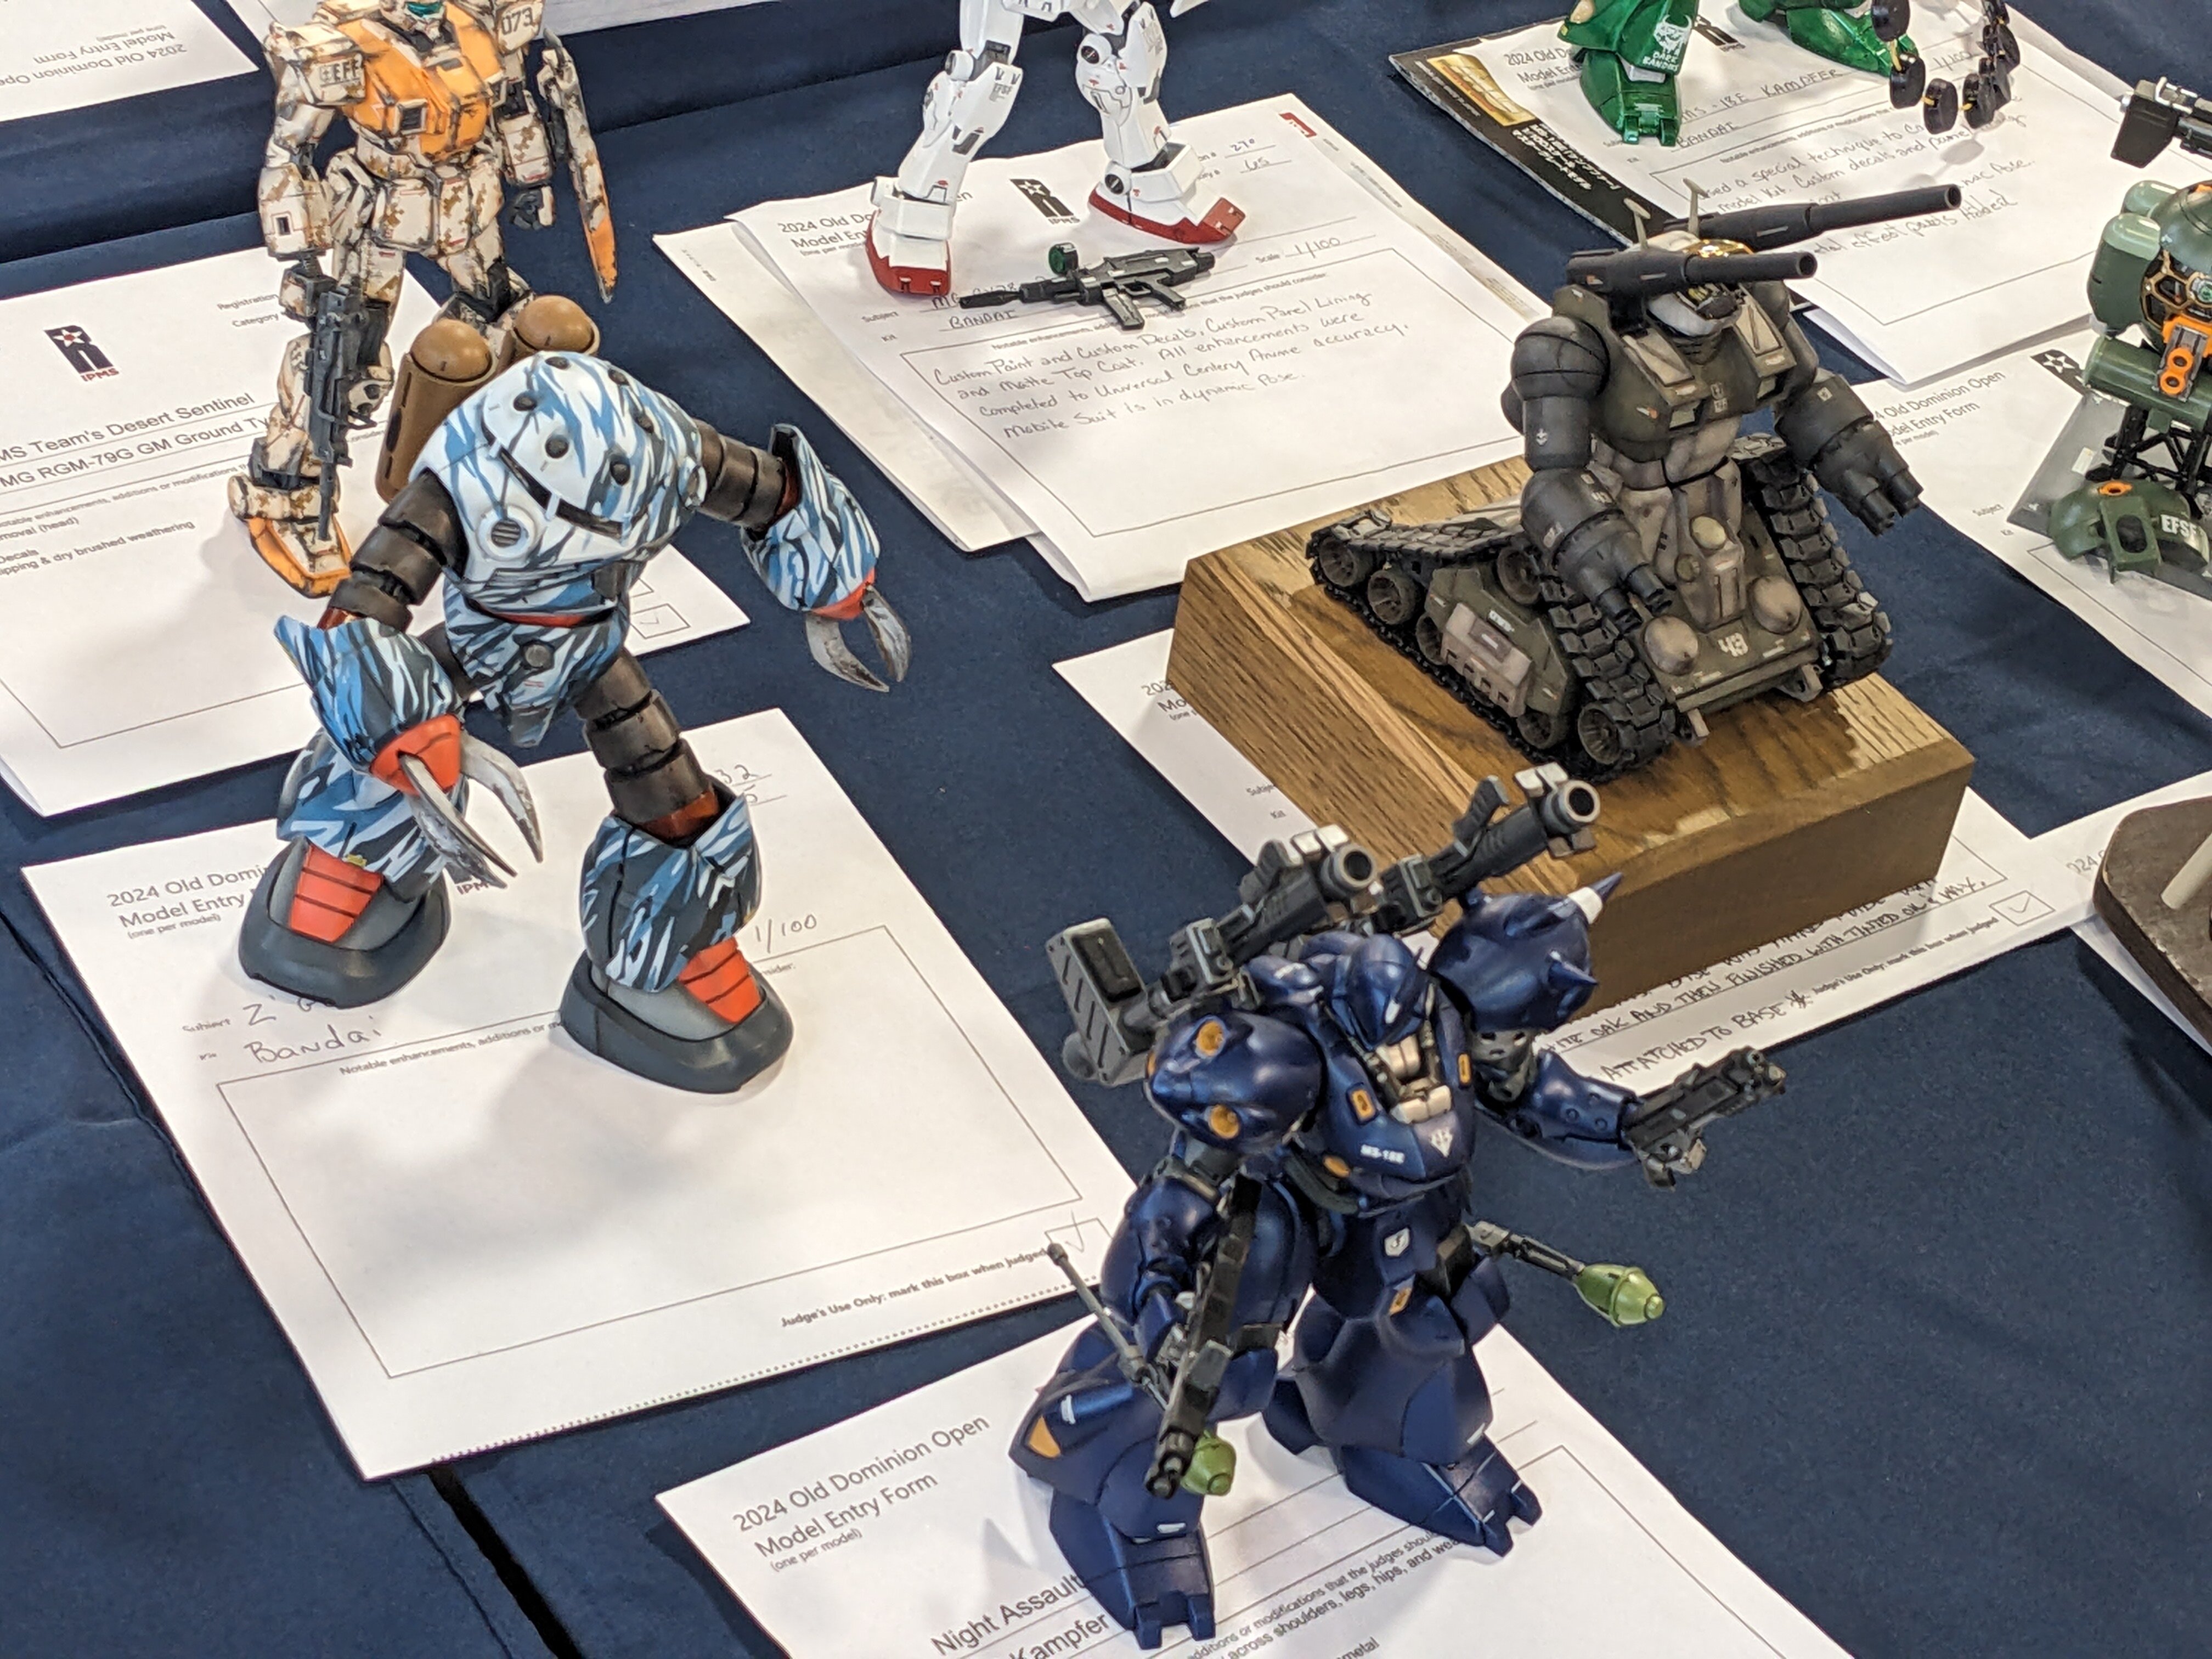
For those of you who don't know, the model show season has started. If you haven't gone out to a show, you are REALLY missing out on: the contests, the vendors selling great models and supplies (often at CHEAP prices), and all the great models on display and in competition. IPMS branches usually hosts these contests. They also have branches in Canada, Germany, and other places world-wide. Do a search for them. NO - you DON'T have to be an IPMS member to enter the events or competitions. I FINALLY made it to the IPMS Old Dominion Open in Richmond Virginia this past weekend. It was a GREAT experience! There was about 80 different categories and over 900 models on display! I can't post the whole thing, but here are some highlights. I hope you enjoy the photos; I left them full size so you can zoom in on them. - MT


-
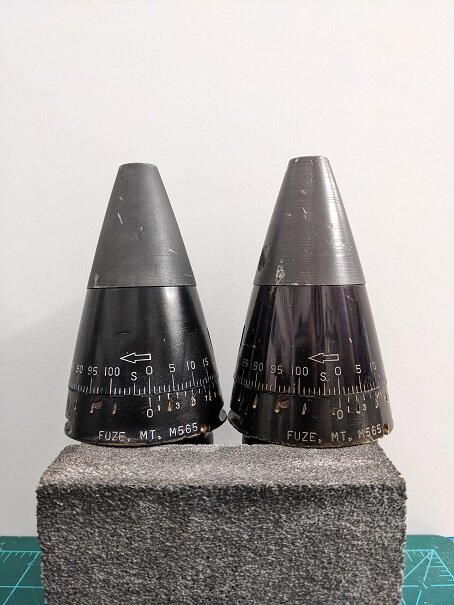
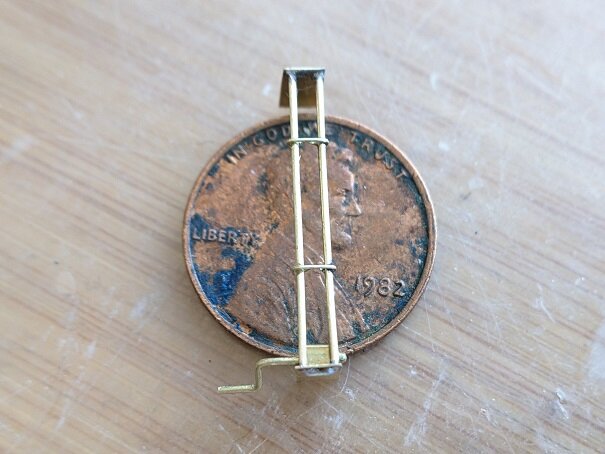
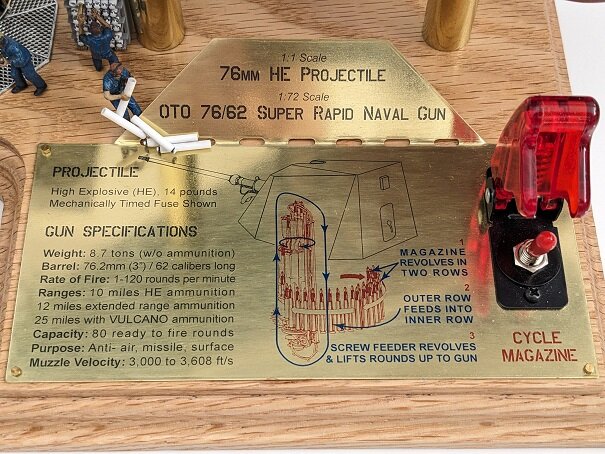
@wm cheng Thank you, I am VERY honored! Sorry, this is just for me. Our local museum is an air museum, so no surface warfare stuff. It is 1/1 scale and 1/72 scale. I have two other fuses (from WWI) and they make GREAT paperweights for holding down parts that are drying too! The original and cast for this one are below. At least they are stamped what they are, vs a lot of other old fuses. @Thom Thank you very much! @Big s Thank you very much! Yeah, I only heard about water colored pencils through my modeling club. They are an AWESOME and cheap tool! @derex3592 Thank you very much! @pengbuzz WOW! I am sorry to hear about your Superman figure! That REALLY sucks! On the other hand, it looks like you're gonna make a princess out of that pumpkin! You TOTALLY have the skills to do it too! - MT
-
Hah! That looks cool! - MT
-
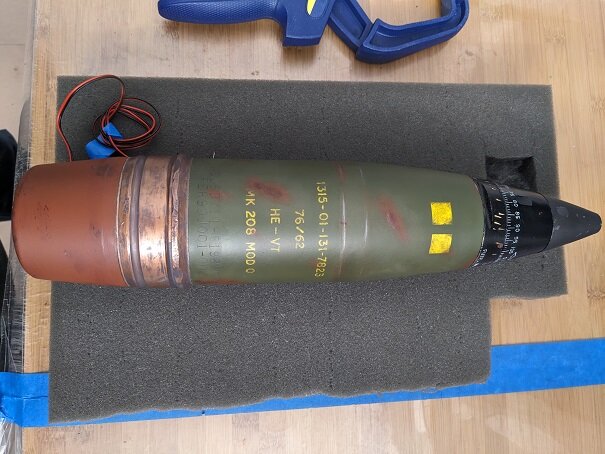
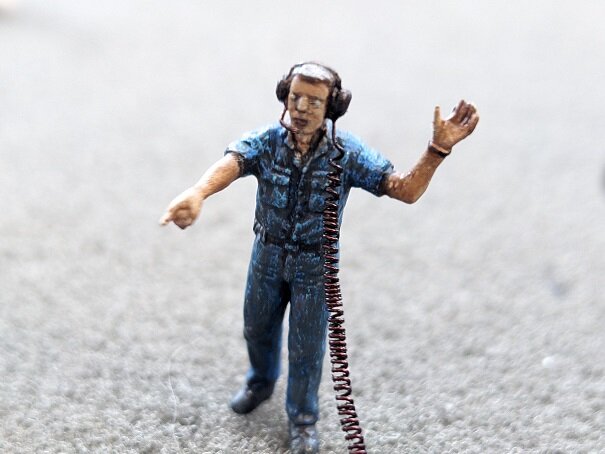
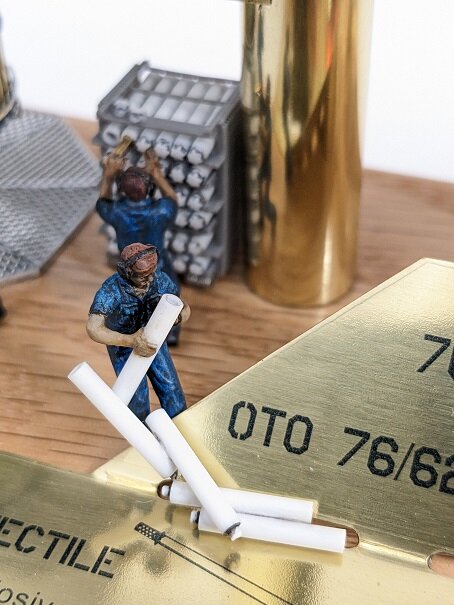
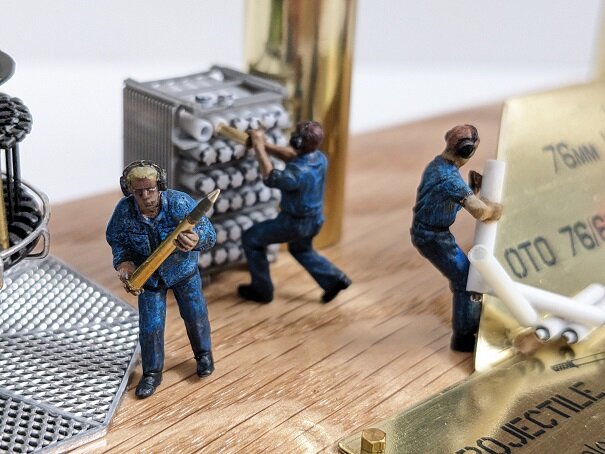
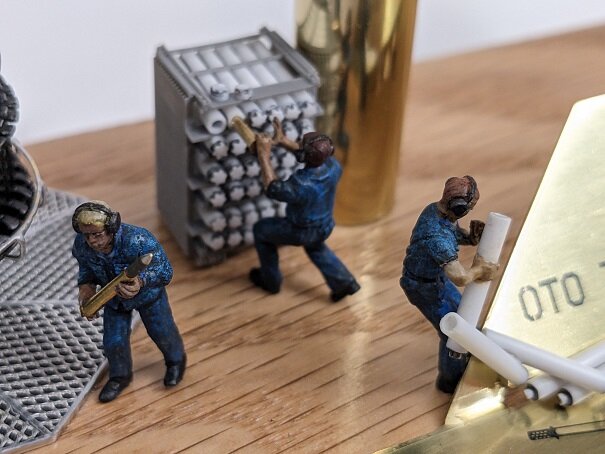
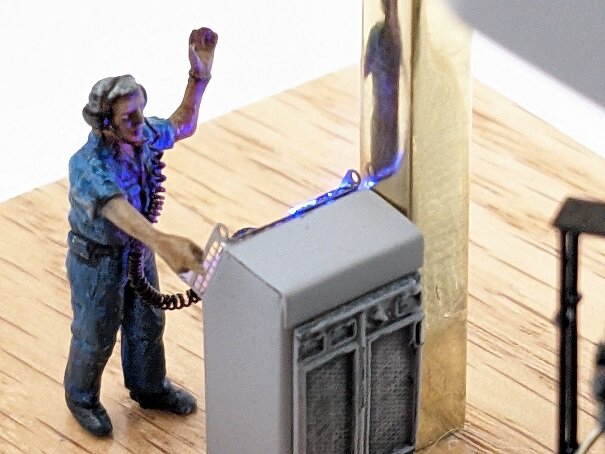
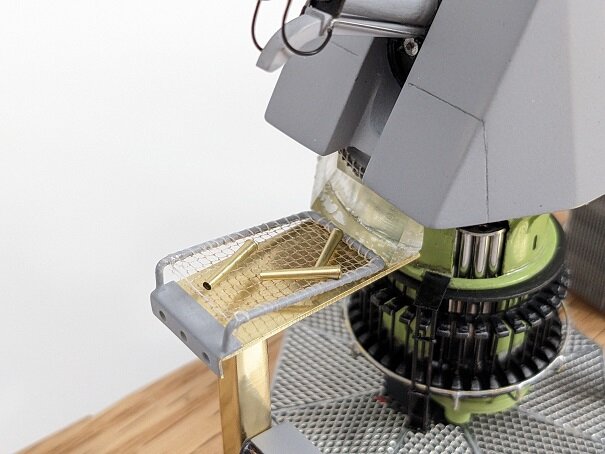
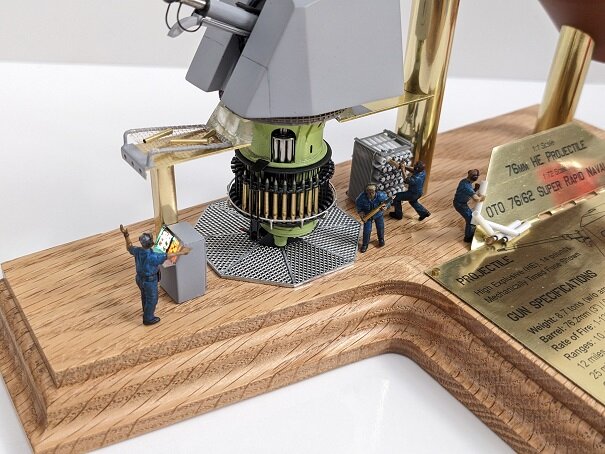
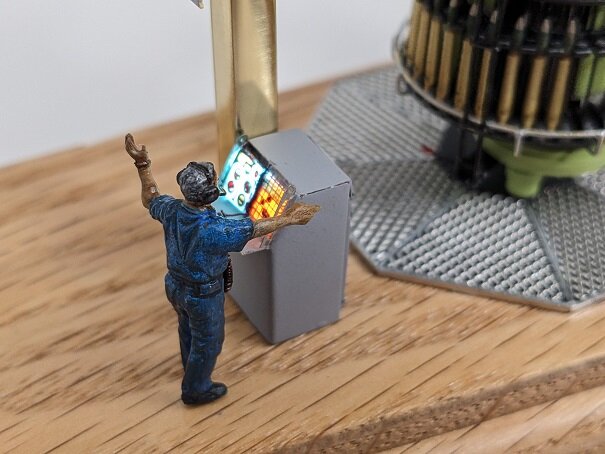
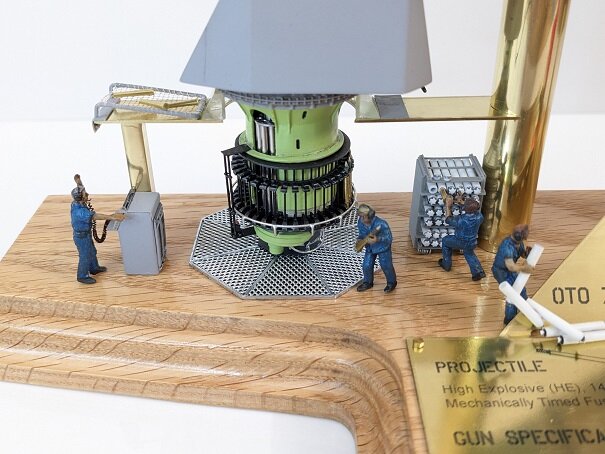
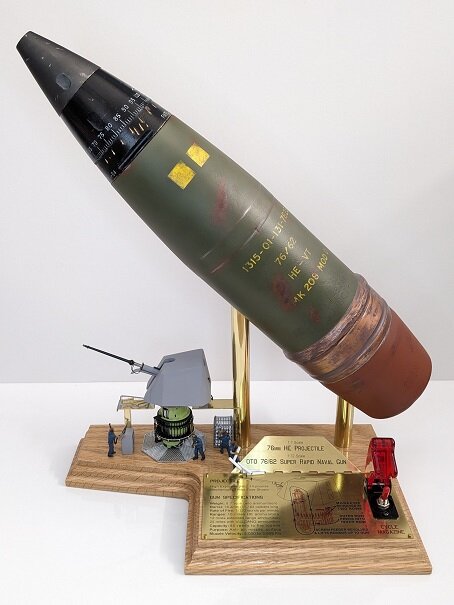
OK, FINALLY calling this thing DONE! Sorry for all the photos, but in case anyone wanted a better view, it's there now. I COMPLETELY redid this build from what you may have seen before. It was just the projectile and the gun. Now its the equipment and base to go with the gun plus the crew. Even the gun mount has parts that were redone. For those that get disappointed or frustrated with your builds, EVERYTHING on this build has been redone MULTIPLE times! So don't give up on what you're doing. SORRY, my camera made many of the photos (especially the figures) look like they were paint by numbers - it got TOO digital! The projectile completed and weathered. I stripped and repainted the driving band on it several times too - just in the past couple of weeks! Getting that metallic look was tough. I wish I could do better. The top number on the projectile is real. You can go and order it in the U.S. DoD supply system.😉 Last piece completed for the gun mount (it's the black part that sticks out on the lower left side now). The gun chief, or, "Little Orphan Annie" with those eyes🤣 and gun crew. Figure painting is NOT my strength! By the way, use WATER COLOR colored pencils! They're awesome and beat a tiny paintbrush any day of the week! Water can be used to blend or clean off what you did. They also smear/blend nicely too. And everything running. EVERYTHING runs off one "D" battery (1.5volts). The motor (to give it the right speed) and the LEDs run a a "joule thief" circuit to up the voltage. One LED is a color changer, the other is a tealight candle LED. Nothing fancy. Thanks for checking in guys! - MT

-
@Urashiman You get BONUS points for being a GOOD dad and also building models for/with your son!😁👍 @arbit Great sculpt! You even caught his constant looking angry looking face🤣 @Kurt That's a nicely detailed interior! - MT
-
@pengbuzz I'm sorry to hear that! Urashiman has a good idea, even though you hate A-wings. Make it crashed.😉 @Urashiman At least your airbrush is not pink like in that booklet 🤣 No way! I KNEW those A-wing lines looked familiar!!! Now I know why! thanks for posting that - I'll never get it out of my head! - MT
-
@Thom Ha ha! I was thinking, "Since when does an F-14 have throttle quadrants and a jumpseat for the pilot!?"😁 BEAUTIFUL interior though! @pengbuzz Sorry to hear about your Tomcat woes! I KNOW you can work it out - you can do it! - MT
-
@arbit Yeah, that's a great looking sculpt! @Rock Are you fixing surface flaws, or sculpt model? @Chas I NEVER thought I'd say that a plastic model looks good on 'roids, but there's a first time for everything!🤣 That is a REALLY COOL diorama! - MT
-
Thanks for sharing! The transport will be COOL in 1/35th! - MT
-
@505thAirborne That is a GREAT looking Widow! I like the decal scheme you chose for it too! Too bad that plane never made production. @pengbuzz Cool! Time to put the Top Gun soundtrack on build again😁 - MT
-
@electric indigo That cockpit looks cool. The pose of the pilots talking to each other makes it look more realistic. I know a retired pilot who has over a 1000 traps in the Intruder. He was smart and tape recorded his audio over the helmet headphones during the Vietnam war. There's a couple of missions where SAMs were fired at him. They got his recordings and made them available at the Naval Air Museum for visitors. You can hear the warning tone go off and then the crew take evasive action. It's cool to be able to hear what actually happened during those missions. @pengbuzz That's cool! So the question is, set to kill or set to stunning!?😁 - MT
-
It's cool to see a classic getting some love! Your paint scheme sounds cool too. This was one of those cool deals I got back in the 80's. We found an old comic book shop that had a TON of Macross and Mospeada kits up in there loft collecting dust. They marked them down to sell so I was a able to snag a couple of each mode. 👍 - MT
-
@wm cheng Thank you for posting that link regarding using acrylic inks! I actually bought a couple colors in green to try and color the tiny 1/72 scale projectiles. I had to settle with paint; but like you said, the ink pigments are finer and more scale looking. Even some of the best paints can still chunk up. The inks didn't work for me (they don't stick to metal😎), but in testing, I could tell right away they have potential for other effects. @nightmareB4macross That is going to be a Super Chunky Monkey (with less chunky - more SUPER)!👍 @Chas Thank you, I appreciate it! I never thought you'd hit the 'roids!🤣 Seriously though, that is going to be a COOL looking diorama! @Urashiman Thank you! They are Plastruct letters used to make a "shadow" or reverse stencil. Thankfully, they sell them all over the world: https://www.plastruct.com/search?q=letters @F18LEGIOSS2 It's great to see another old figure get some restoration! @arbit To keep the motor running at the correct speed, I had to use a 1.5v battery. The Joule Thief enables me to keep the same battery AND run the LEDs. I don't need a bunch of separate batteries. They have to be left out anyhow when not in use to prevent leaks ruining things, so the less the better. Isamu's bike (and babe) look awesome! You must be on a Macross Plus kick😁 AWESOME looking sculpt! - MT
-
Thanks guys! Right now it looks cool hanging up in the living room until my wife finds something more "decorative neutral"😁 I got it for my son's room. - MT
-
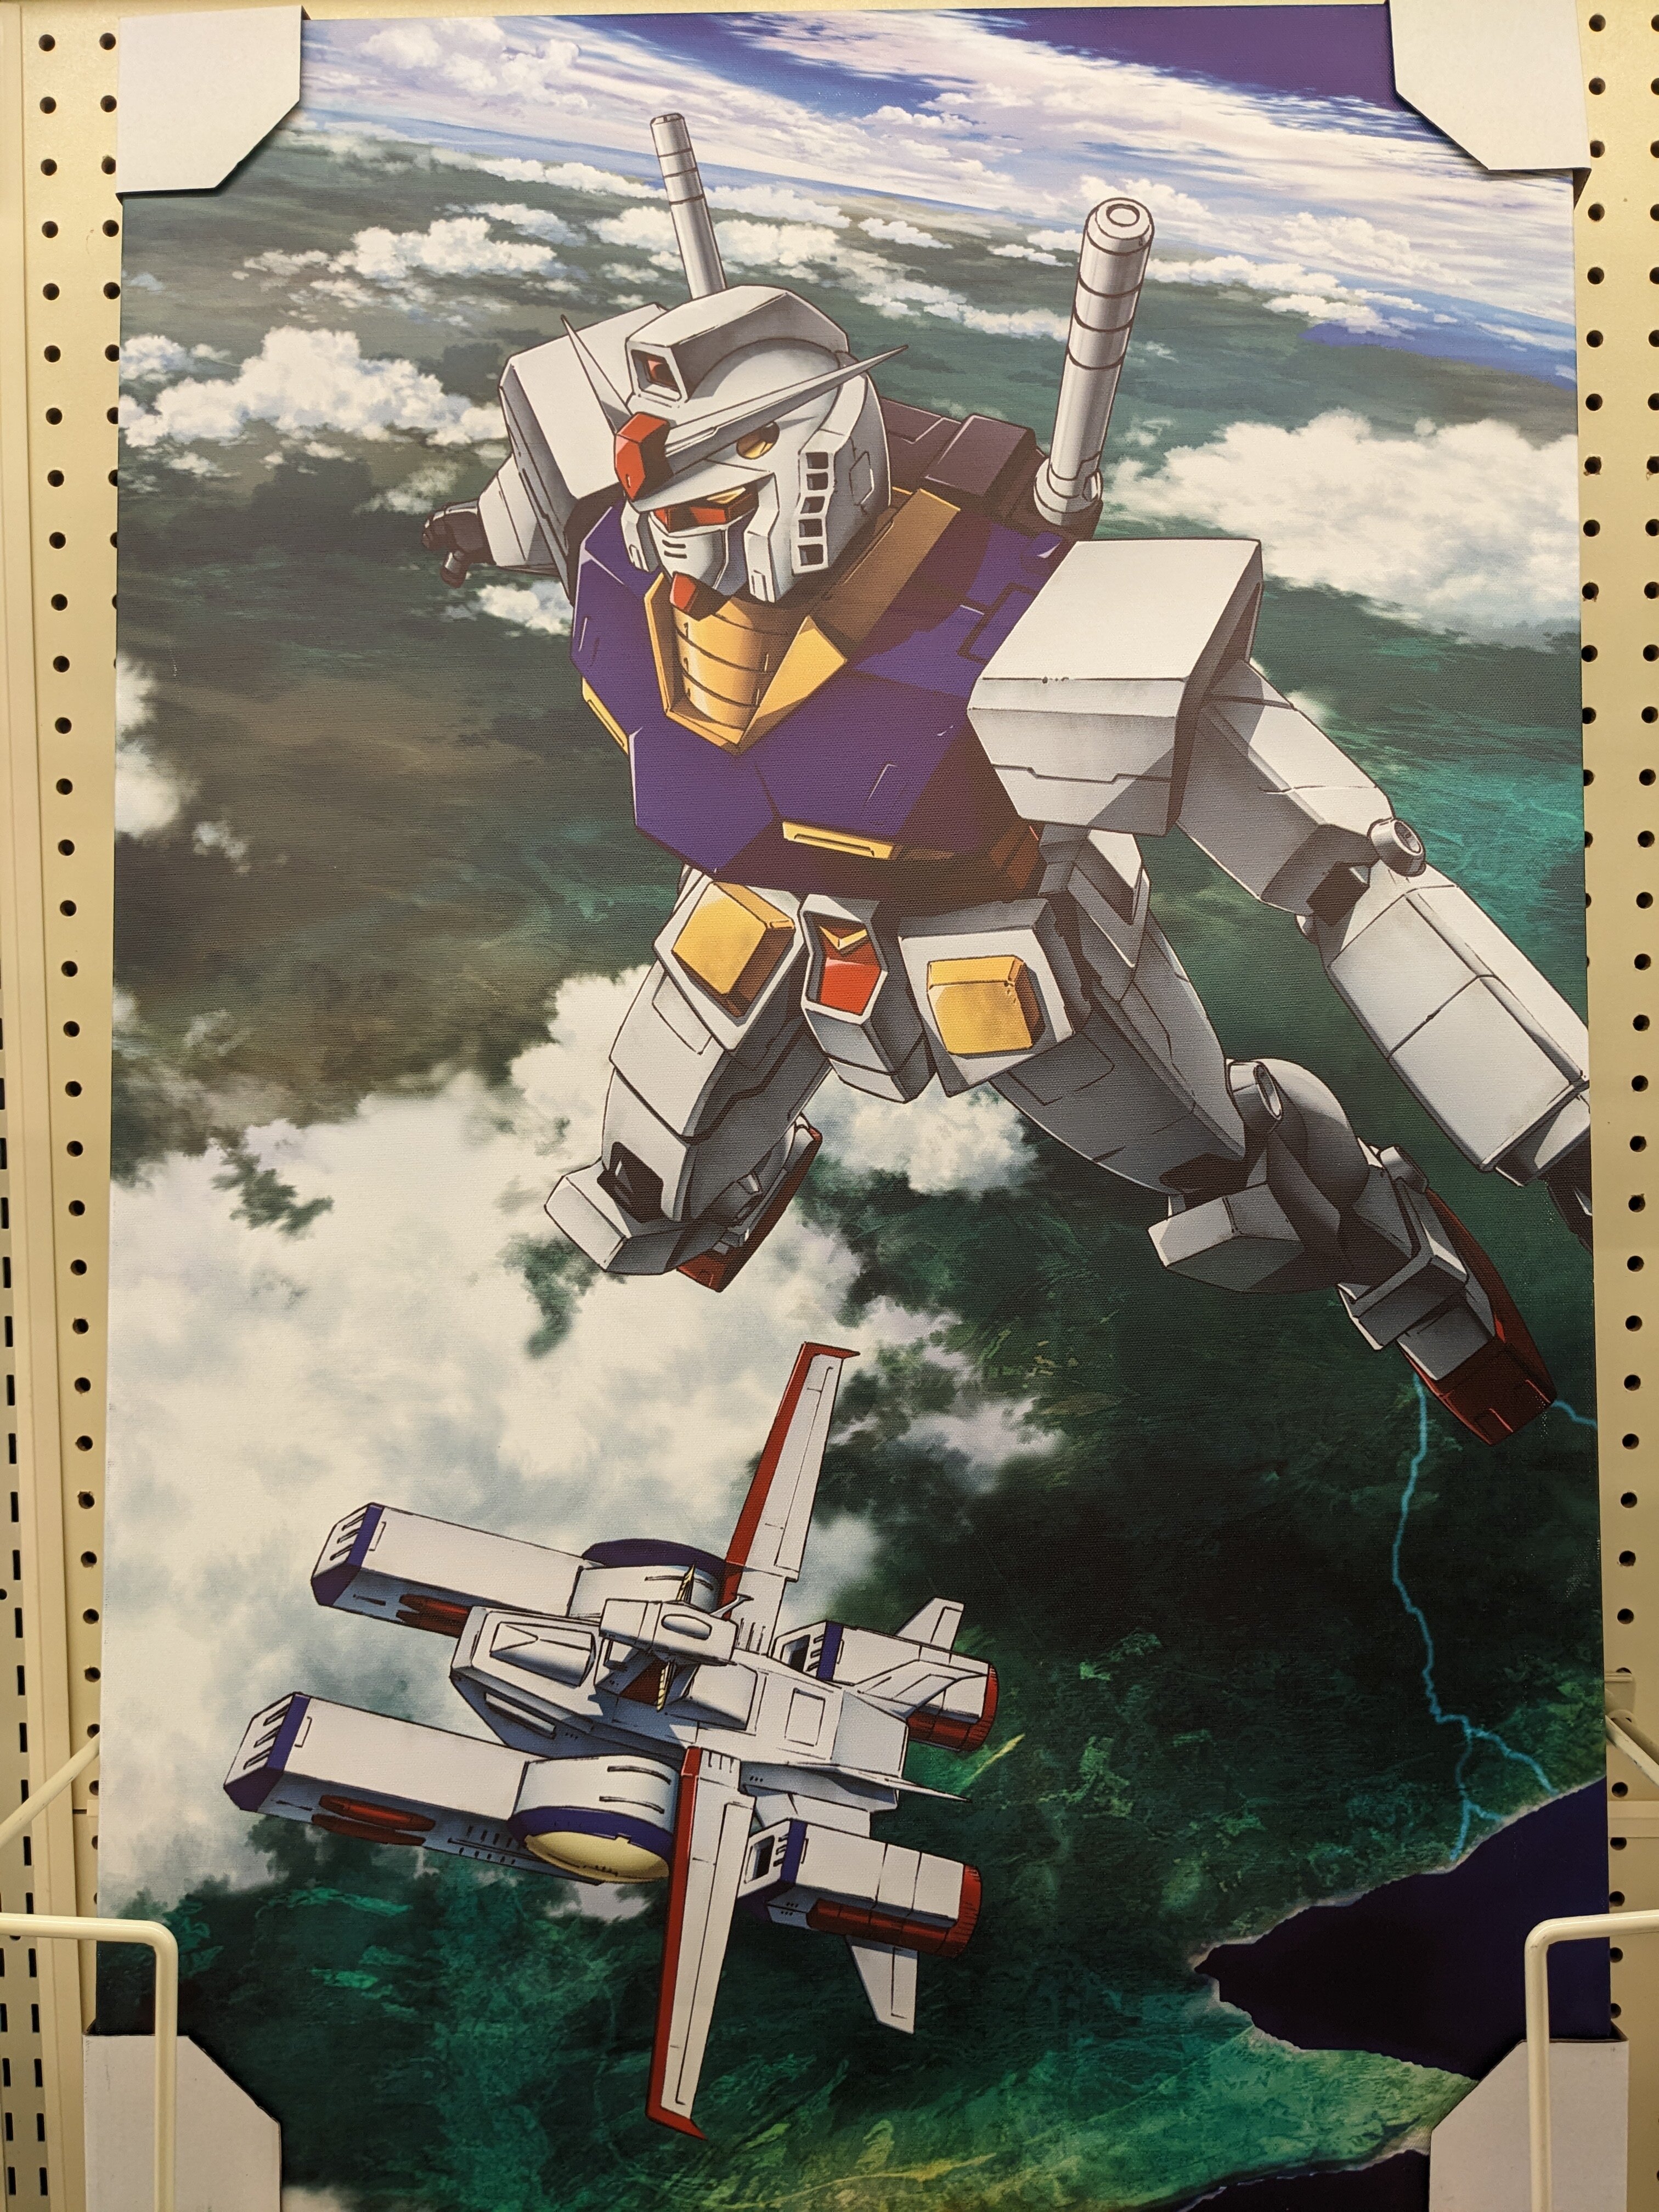
Sorry if I got this in the wrong thread, but Hobby Lobby has these canvas prints for about $25-30 (full size photo for detail). The print wraps around the edges. - MT
-
Thank you for the kind words everyone! "You begin to think you might just have some modicum of talent...then @MechTech posts an update....then you crawl back under your model table and begin to re-think your life....😂" Thank you @derex3592! You're toooo funny! You've also been putting out some great looking models too - like the Hornet! @pengbuzz NOBODY can beat your masking tape skills - NOBODY! Thank you and that is a COOL meme (and accurate) too! Thank you @Thom! Thank you @Urashiman! If I could make them that small, I would!😎 Sorry guys, for those that are interested, I forgot to tell you about this (full size so you can see detail): About $25-30 at Hobby Lobby! They've had other Gundam stuff there too occasionally. It is printed on canvas with overlapping edges. Ready to hang too! - MT

