
MechTech
-
Posts
4691 -
Joined
-
Last visited
Content Type
Profiles
Forums
Events
Gallery
Everything posted by MechTech
-
That's cool!!! - MT
-
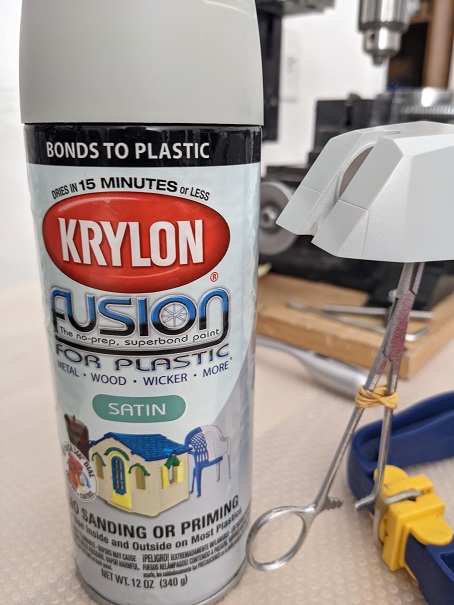
WOW! LOTS of cool builds going on! I've been too busy to post lately. Just to highlight: @arbitAWESOME sculpts and the painted bridge crew NEVER disappoints! The new sculpts look great to include the Capn's pipe in hand! @bzwacks Welcome aboard! AWESOME sculpt and rendering of the SDF-1! Are you doing that in ABS? If so, Acetone is an awesome and cheap cement for it - you're gonna need a lot! - MT
-
Cool! Thanks for the updates! - MT
-
Thank you guys! @BoltYour mecha collection and finishes are very diverse! Your diorama is getting there bit by bit too. @Gabe QThank you! I'm humbled and honored. Yes, I HATE masking. I always seem to have issues. @Thom Your mods are looking great! Nice details. Got some painting done this weekend, but I'll post photos when it's all finished. - MT
-
Hang in there @pengbuzz ! REAL ship building projects encounter the same issues too. I'm sure things will work out. - MT
-
WOW! I miss getting online for a few days and there's two pages of stuff to go through! I ran out of "likes" going through the photos! Just some quick comments, though everyone's work is looking great and is encouraging! @Urashiman Your models are looking great and so is all that paint work you're doing! @arbit Thank you for sharing all your work on the figures! They are looking awesome as always! Which Myria pose? I don't know! The one with her and the baby are very different from what you might normally see. @pengbuzz I'm sorry one of your Tomcats didn't make it back to the carrier! The rest of the work you did is superb and the details are awesome! I hope you come across that lost Tomcat soon! You need to launch a search another rescue mission! @Bolt Your modifications and revised paint schemes are cool and look great! @wm cheng Absolutely AWESOME photos of your models! I may have to try out your methods. Photographing models and even tiny parts is tough with such short focal lengths. @derex3592 Your aztec decals and paint are looking good. Those details help build its scale up and add realism. @SpacePirateNeko I remember building that Star Wars ship MANY years ago! It's a good platform for detailing and highlighting paint. Quick updates on the Oto Melara Cannon. The mantels and gun bases have been painted. The mantlets need some cleanup. This is NOT an easy masking job. Paint crackle looks cool on antiques, BAD on your models! The top paint coat reacted badly with the base. Used the "LA's Totally Awesome" cleaner to strip the paint down to the plastic and repaint it with only one color. The barrels and muzzle brakes were colored with acids to make them more durable vs using paint. That's it for now. Thanks for checking in guys! - MT
-
@Rock What country are you in? You may still be able to get your workbench with other options. - MT
-
Looks like they're pulling a Hasegawa! Milk the molds with another scheme - cool idea though! Thanks for sharing! - MT
-
@pengbuzz I'm sorry to hear about you losing parts. It's frustrating sometimes working in small scales just for that reason. One sneeze and bu-bye! @SpacePirateNeko I think your weathering is perfect. Considering the SDF-1's crew was always flying sorties and always being attacked, who's got time for the wash rack!? That's a great finish! @derex3592 The glass files are awesome! Also for doing clear parts. No more buffing out sprue marks in canopies. Those files do it for you! - MT
-
@pengbuzz That Victory is beautiful! I love the stand with the fancy paint and text too! @arbit Your pilots look fantastic! Thank you for making them available to everyone too! I'll have to download them some day to hopefully print some day! - MT
-
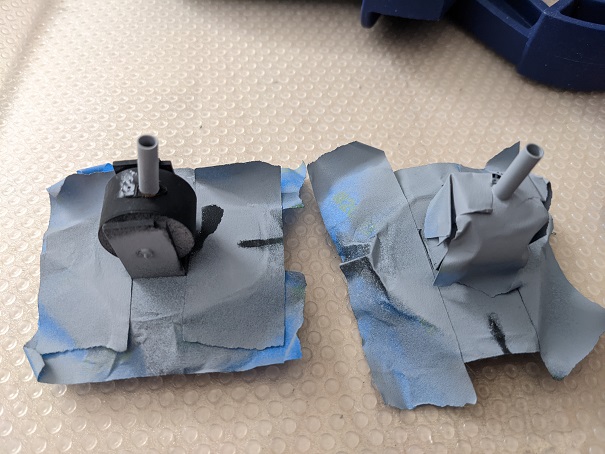
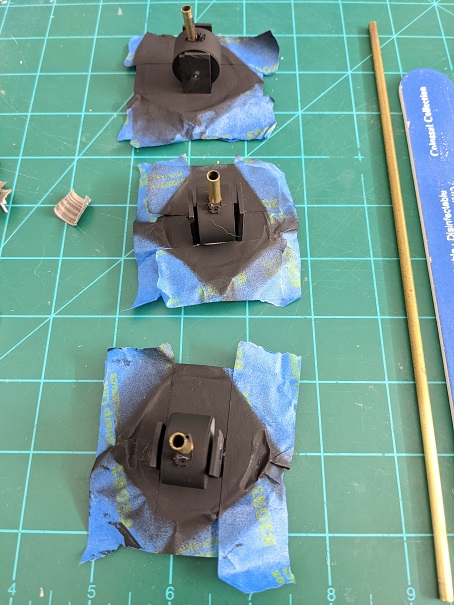
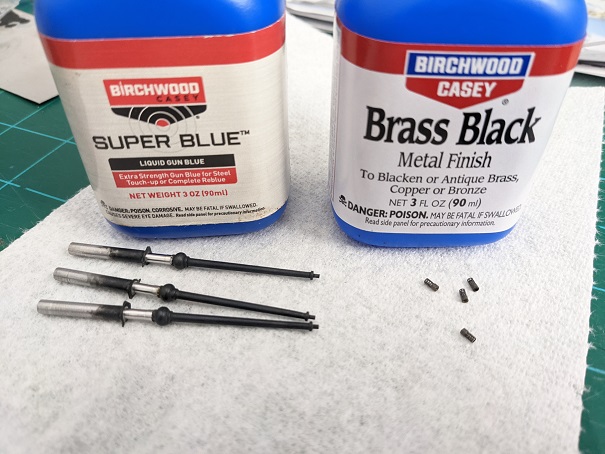
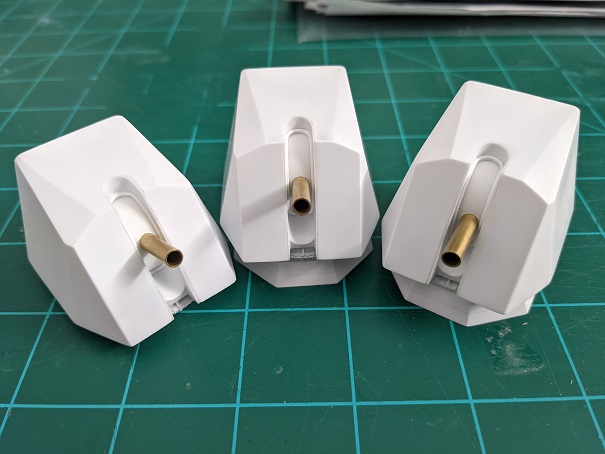
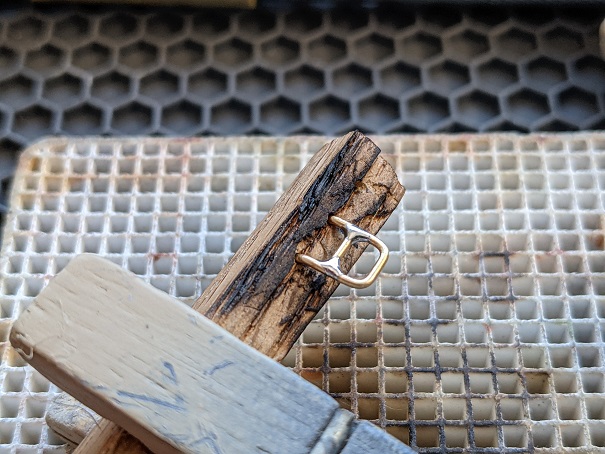
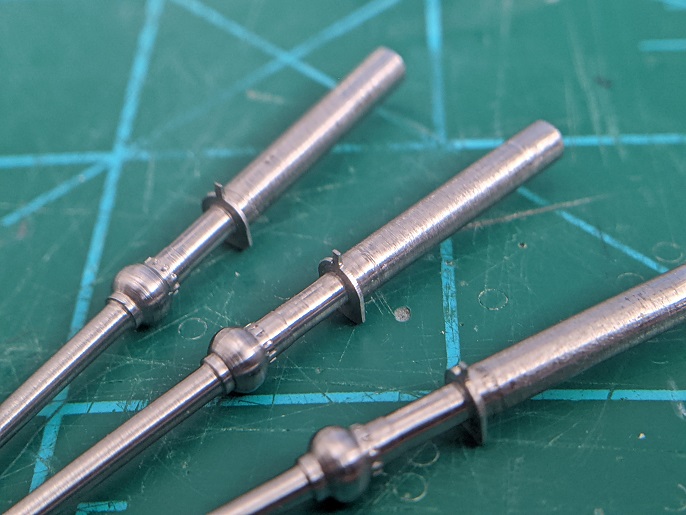
@Bolt Your detailing is looking great! Especially the cockpit painting. I'm glad you're above the flood plane. It was crazy in CA! @pengbuzz Your carrier looks AWESOME! About mid-way down the photos I can't help but seeing the swirling space-time rift as in the movie, "The Final Countdown"! Going with people on the deck will add that much more insane detail to your build! @arbit A great sculpt as always! I would say an arguing pose for any female involves both hands up in the air with a "What's the matter with you." 🤣 A short update on the 1/72 Oto Melara Cannon. It's nearly done!!! One of the last details is the ejection port and cover mechanism to keep water out, but allow shell casings to be ejected as it fires. There's few good photos with it in it, so I had to do some educated guessing. First, I machined some tiny "C" channel. I had to manually hold down the channel each pass because the tape wasn't strong enough. It's like playing dodge ball with a machete. Then the pieces were cut out with a razor blade. The ejector chute from the last post had a hole drilled in it because the real one has one for some reason. Then the parts were all glued together with other tiny tid-bits cut from rod and square rod. The actual port covers, which are usually metallic colored, were cut on the lathe. I believe its the recoil spring assembly that is over the barrel. It took me several tries to make one out of brass. Drilling the holes for it to fit into and tinier holes on either side of the barrels was lots-o-fun! And a quick cote of paint to check for scratches and other flaws. There's still more work and detailing to be done. Thank you for checking in everyone! - MT
-
@pengbuzz Putting it on wavy water AND having a Tomcat launch really ads a dynamic pose to your model. That steam looks very realistic! - MT
-
@neptunesurvey1 Glad to see you back and thank you! The Clam Ship and the Promethius are looking awesome! These would be awesome kits too. Looks like your Clam Ship has a SERIOUS case of crabs!🤣 There must be at least 100 in that bag. The details look great on them too for that scale especially. @derex3592 NOT painting over your pre-shading is tough! Looks like you're doing alright so far. @SpacePirateNeko Your painting details are looking great! Having the leg panel open adds depth to the build. - MT
-
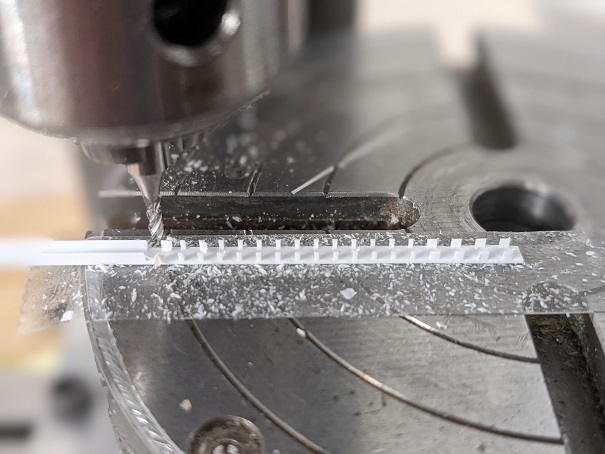
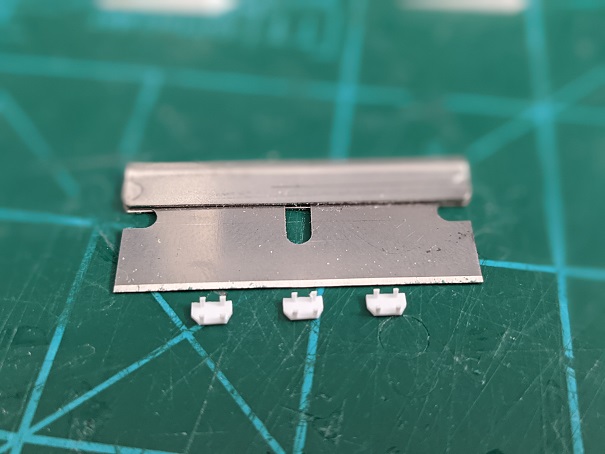
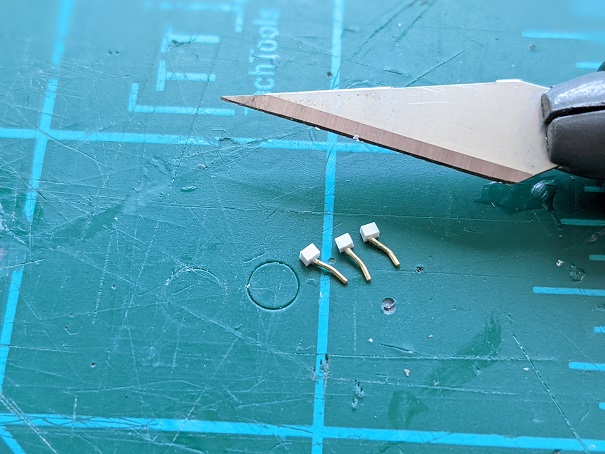
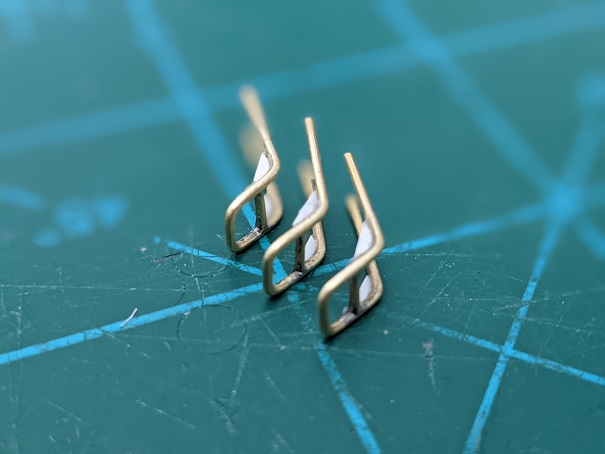
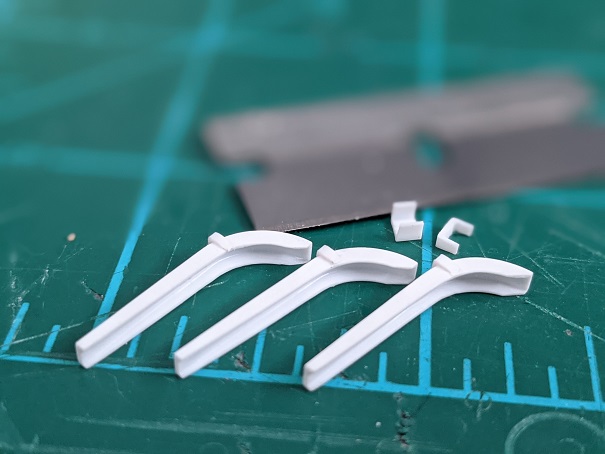
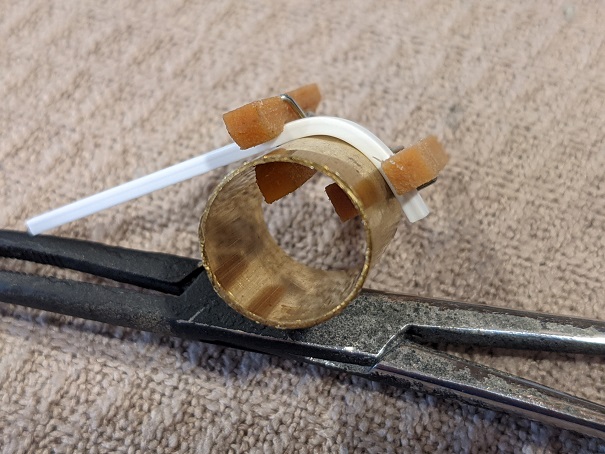
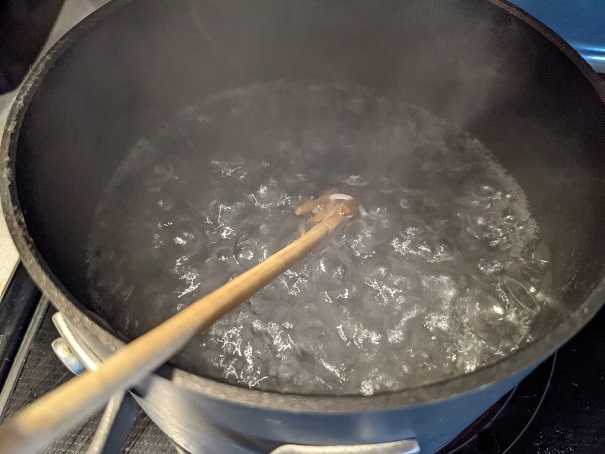
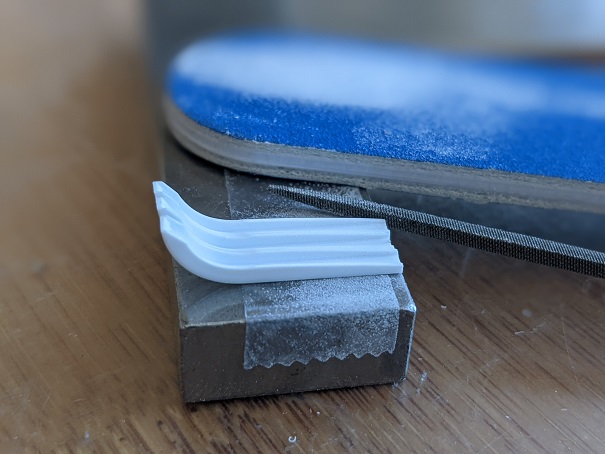
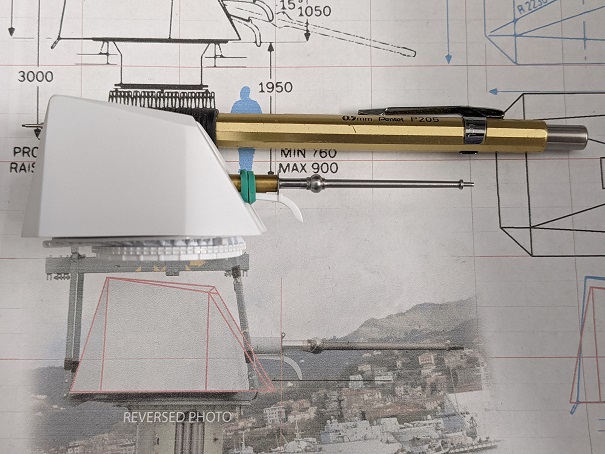
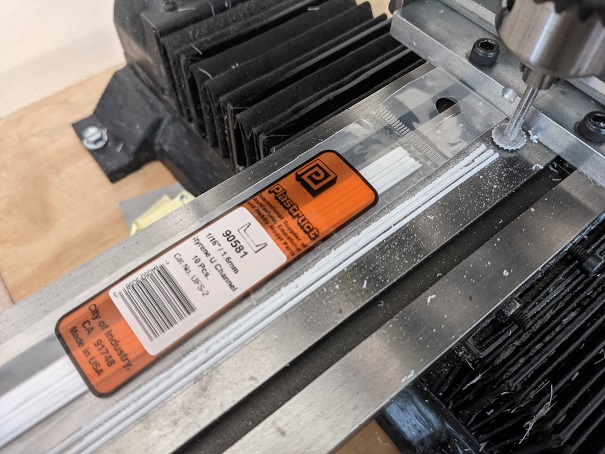
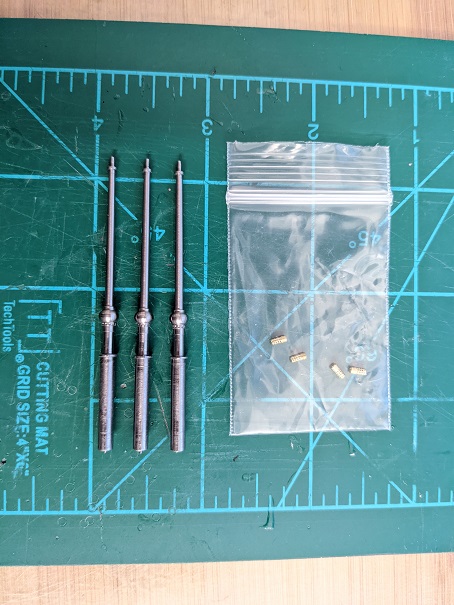
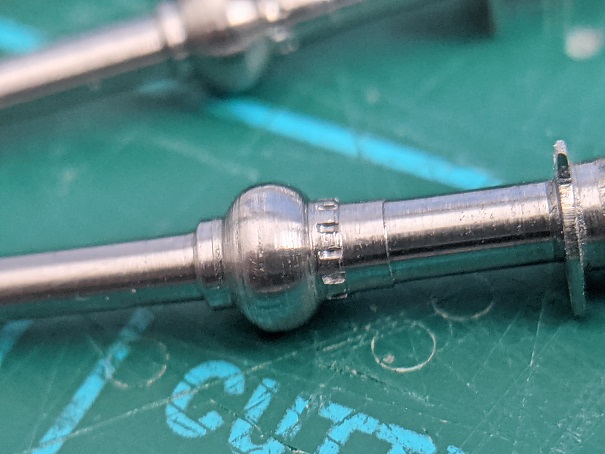
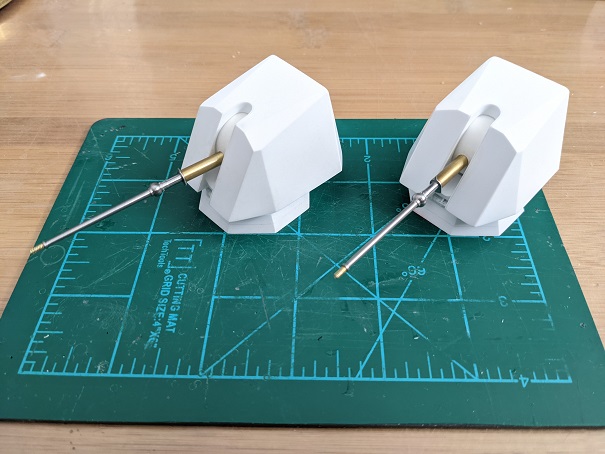
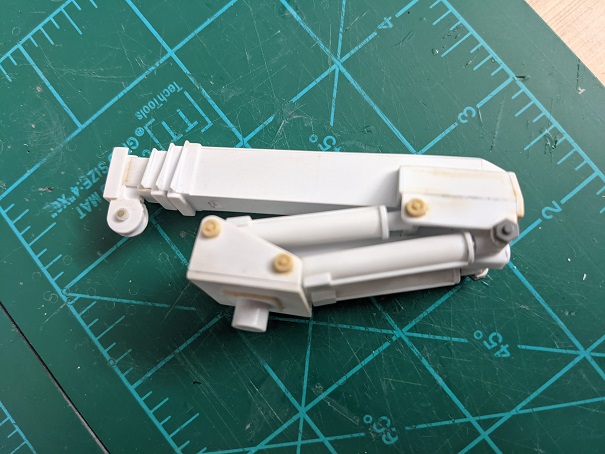
HAPPY NEW YEAR everyone! Let's hope this year improves over the last couple! @pengbuzz Your pilots and cockpits look great! Nice details on them. I hate painting 1/72 scale figures because of how tough they are. The physics of brush and paint at that size lead to less flow and coverage to be nicely thinned-out. Your 1/700 aircraft look FANTASTIC!!! I've seen lesser at shows. You should be proud (in a humble way)😁 @Thom That IS a beast! @Bolt The weathering is taking form on your VF-4! And Happy New Year to you too, nice graphic! @derex3592 Congrats and that is a great idea! I remember years ago reading about a guy in Florida doing that. I remember how bad the humidity got in Texas too. Even the metal gutters were dripping on the OUTSIDE as the humidity condensed on it. Sorry for all the photos on the Oto Melara 76mm / 62 cal gun. I haven't had time to download and update this thread with them. I wasted most of a day trying to machine brass (for durability) making handles to go on the doors. That failed, so I went with square styrene rod, a tiny drill and micro brass rod. Here's the handles... The steps needed to have a brace "welded" into them. I punched tiny styrene holes and cut the edges off the cut-offs to make these. And the back-sides of the turrets minus the ladders that will be painted in another color and added when finished. Note the vents at the top made from channel and a cap on one end. Then I wasted another day (and some brass) trying to machine the chutes for the front of the guns. The gun expels the shell casing so far, that a chute is used to direct them down onto the deck. Brass didn't work and neither did other ideas. So I got some styrene channel and bent it over a brass tube with micro clothes pins. Then they were dipped in boiling water for just a few seconds, and rapidly cooled with cold water. Too long and the channels collapsed. Ask me how I know... This keeps the shape of the styrene just like it was factory molded that way. Then the channels were shaped on double-sided tape together to keep them aligned for mass-production. Then tiny "brackets" were cut from channel and glued over the chutes. And a chute shown under the barrel. The gun and drawing are identical sizes, but the gun is higher making it look distordedly larger in this photo. The next step was to re-create the gaskets between the gun mantel and the gun casing. I wasted another day and plastic by: 1) Taking channel and cutting it long wise. 2) The cut pieces were all placed on the mill with double-sided tape and milled to make them the same height on one specific side. This created the "step" of the gasket and its base. 3) Gluing the pieces in place with regular cement, citrus based cement or superglue all made this stock split and break in areas of stress like the curves above or below the guns travel area. How frustrating! This was even after carefully pre-bending parts to fit in. It wasn't as detailed, but I went with square rod that was easier to work with. It still split in some areas, but not as bad - and that was with pre-bending it once again. Superglue was the messiest, but least stressful of the glues on attaching the styrene. What am I talking about? Doing this: And the turrets all gasketed-up! That's it for now. Thank you for checking in everyone. If there's a theme in my work so far - don't give up! Hang in there and find another way to do it. - MT


-
@Rock Your Tomcat is beautifully weathered and detailed! I like that they even have one of the TARPS recon pod cameras detailed (we have one at the local museum). Congrats on achieving your goals too. @pengbuzz It's too bad they wouldn't fit in with the legs. Who engineers these things? Gotta have leg space! @arbit ANOTHER great sculpt! Maybe 2023 we'll have a "family" printer for "teaching" the children new technology and techniques.😉😁 - MT
-
Welcome @ElliotGrimes ! You're in the right thread. Just about every build is here other than specific Macross models. Your Macross prints look great! - MT
-
Thank you guys! CONGRATULATIONS @derex3592! You got a win -win!!! You completed a model and made it look FANTASTIC! Great details AND all lit up too! AND you made the in-laws happy - VERY important! That's like a multi-level win-win too! I'm glad you guys had a great Christmas as well. - MT
-
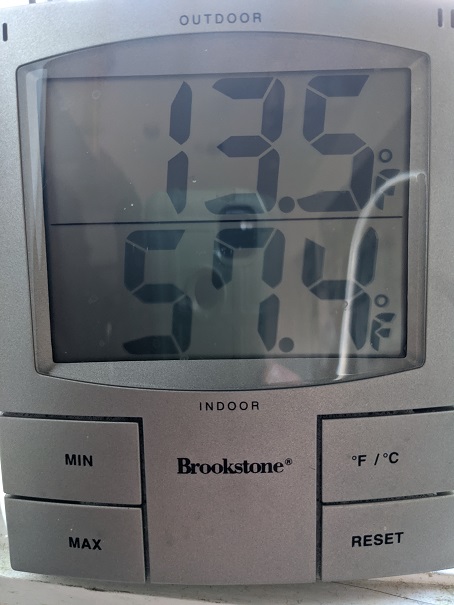
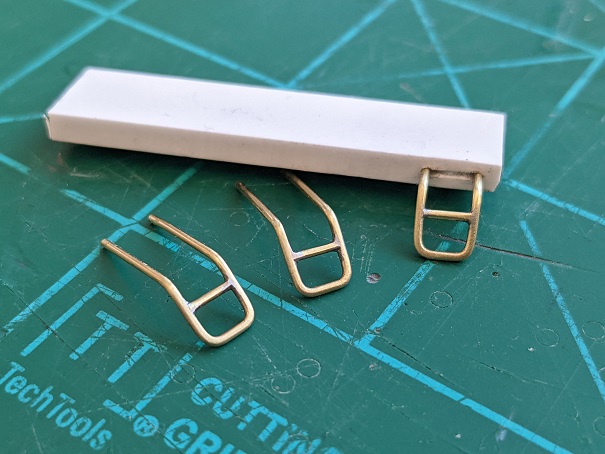
MERRY CHRISTMAS EVERYONE! It's not snow, but this is how cold it was yesterday (and only that cold next to the window indoors): @Urashiman Your valk is looking great! Yeah, Milliput is the best! Even the guys in my club have been discovering it for gap filling. And now for something different. Every year our modelling club has a gift exchange. Someone brings in a model and then we can steel other peoples models. Each model gets only three steels. Seven years ago someone brought in a rickshaw model and nobody wants it. In fact, it's now a club metaphor for the model nobody wants! My son was at last years meeting and said he'd take the rickshaw and build it. In fact, he "threatened" to soup it up a bit. Along with the weapons set he got as his gift, this is how he put them together (with my help): Micro-cord was used to simulate fuses, Everybody had a great laugh at it! Now an old Arii 1/32 sweet potato cart is the new "rickshaw!" All of yesterday and all I got was three ladders made for the 1/72 Oto Melara Turrets. I made them out of brass for durability. They hang down and can get snagged on stuff, so they need to be strong. They were made with K&S #8160 .081mm brass rod. Then soldered, again for durability. Then cleaned up and buffed a bit. The real ladder is at the bottom of the rear of the turret below: After several "freehand" failures, I got jiggy with it and made a jig so all three would be the same. That's it for today. Thanks for checking in everyone! I hope you have a great rest of the day and hopefully an extended weekend! - MT
.jpg.784f2e5a69302e8c044d569a2c8c256c.jpg)
.jpg.81558f0181fb28bc71bfb036161198ba.jpg)
.jpg.347bfd15bc80907ea11ebf972fbf47e0.jpg)

-
@Urashiman Your Valk is looking good and so is your painting! That does look like a nice kit, not too many issues. Sorry about your mat! Glue just tears those things up! @Bolt Have fun with that design! When I was a kid, I had a plastic store near my house and got styrene sheets cheap. I lined my shelves with plastic to make scenes and hangars. I never finished one, but had fun designing and making the stuff for them. @derex3592 Almost - to - the - finish - line! @arbit Wow! A little racy co-pilot!😁 She looks good! - MT
-
I'm late to the party, but I TOTALLY have to agree with @Duymon 's comment on the boxart. It just needs the Airfix log to be an Airfix box!
-
That's a COOL idea! I look forward to seeing your progress! - MT
-
@derex3592 I hear you man! Scrapped hundreds of hours worth of work. I'm sorry to hear about your difficulties AND lost sleep! It WILL be worth it when you hand over the keys to that baby though! It should get you extra street cred with your family too😉 @pengbuzz The Enterprise is looking good! Sorry about the spilled soda, at least it wasn't milk! @Bolt Thank you, I appreciate it! @Urashiman Thank you for the review updates. That's good to know. "I wonder - will that ship eventually float and be RC controlled?" NO, NOT a mean question. I've been asking myself that question! I want this thing to be done!😁 - MT
-
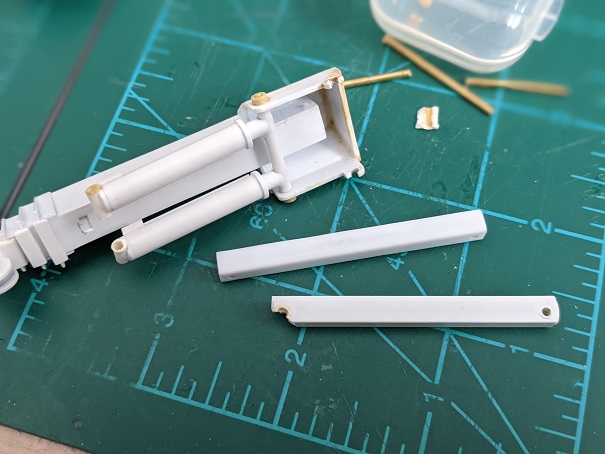
Quick update on the 76mm Oto Melara barrels and other stuff. I FINALLY completed the machining on the barrels. Here they are and some back-story. (No magnifying glass used here) There is what looks like a giant nut that goes around the barrel by the fume extractor. Because there has been so much effort put into this build so far, I thought it should include this detail too. Every detail makes it that much more realistic. So here's the cuts into the barrel to give that effect. The rounded fume extractors got some more sculpting too. This detail is hard to see with the naked eye, but you see it here with a magnifying glass over the lense. The barrels also have a lug eye at the base (for turret removal) and a holder for the ejection chute and water cooling hose (the actual barrels are water cooled. At up to 120 RPM, they'll bake!). So the barrels went back into the mill multiple times to make all those cuts. The lug eye goes on the little tab on top. The chute attaches to the bottom. The barrels test-fit into the turrets. Part of the problem, taking so long to build something so big is that stuff you already made gets broken. The crane did that. Something froze-up and this bar was broken. And the new bar with it. The bar (originally a square tube) was replaced with the same sized tube and a solid square insert. This made it a solid piece. MUCH harder to break now! And the frozen pieces were fixed too. A "bolt" was used to cover the damage and re-enforce the joint. And the crane is "working" again. That's it for this time. Thanks for checking in! - MT
-
@wm cheng That prop looks AWESOME! Great job refinishing it and recoloring it. Some "professional" advice on military weapons: They are kept in good shape. Minor scratches are OK, but when they get bad, they get replaced or re-blued. Oxidation is your enemy and makes parts jam. Most current and futuristic arms have a lot of plastic - which doesn't oxidize like that. So I think you're good to go. The green should be scratch free - looks "plastic". Maybe minor wear (dry brushing) on the barrel. Minor scuffs (similar color) on the green. Congrats on a AWESOME modification! @Rock That's a GREAT looking paint job. I like your weathering and shades. - MT
-
That would be cool! I'll have to see what I have. - MT
