
MechTech
-
Posts
4679 -
Joined
-
Last visited
Content Type
Profiles
Forums
Events
Gallery
Everything posted by MechTech
-
@pengbuzz Man, I haven't heard that song since the 80's on the Dr. Dimento show! That is good news about the apartment. At least it will be freshly painted. Hang in there! - MT
-
@pengbuzz I'm SO SORRY to hear that happened! Law is not my specialty, but I believe Sanity is Optional is correct. It's usually your lawyers going after theirs. Another issue may be valuing things. Models are hard to do that with. Other items are easier. I pray this works out for you! - MT
-
@arbit That is a SHINY boat! I would NEVER actually put that in the water - to afraid to jack it up on some rocks! I agree with Pengbuzz. In fact, some wood glues are waterproof when set. Nothing likes to stick to that chrome. If you're feeling lucky, you actually can use A LITTLE superglue, but you have to thoroughly clean the area of oils / fingerprints. Also mask the surrounding areas to be careful. At the factory they use something like contact cements, but lots o luck getting that precisely applied. @HWR MKII You're still alive! Good to see you on the boards. - MT
-
@Thom "Then the Amaterasu is your thing!" That's what I'm talkin' 'bout! @pengbuzz Using the tape to your advantage! Your improvements make that kit look MUCH better! @electric indigo It looks like Zveda is getting better with their molds. The last kit I built from them (A LONG time ago) was ROUGH. - MT
-
More turrets! More turrets! More turrets!😁 - MT
-
@Thom Yeah, that's the version I love! You can never have enough turrets or missiles - in my humble opinion! - MT
-
Thank you guys! I was glad to FINALLY get that done. I think I'm breaking my personal record for models built AND finished in a year. @505thAirborne You need a business card that says "Valk Doctor" on it😁 @Urashiman Your improvements look good and accurate! @electric indigo Great looking finish on the -25. The panel accents give it a nice feel. @derex3592 The work on the Titanic is looking great! The windows look real with the lighting. I don't know what it is, but ammo works great for holding parts while gluing. Its too bad about your cutters. The God Hand cutters are the best from what I've seen. I guess they say cut the parts off with some of the sprue, then clean it off with those. I've found the cleanest cuts are actually SLOWLY cutting the parts, not nipping them quickly. That's the weird part. @pengbuzz Sorry about your hand. You are making some 'UGE changes to that kit! They are vast improvements and looking great! Go crazy, add another gun turret! That stand also adds a richness to it. Classy! - MT
-
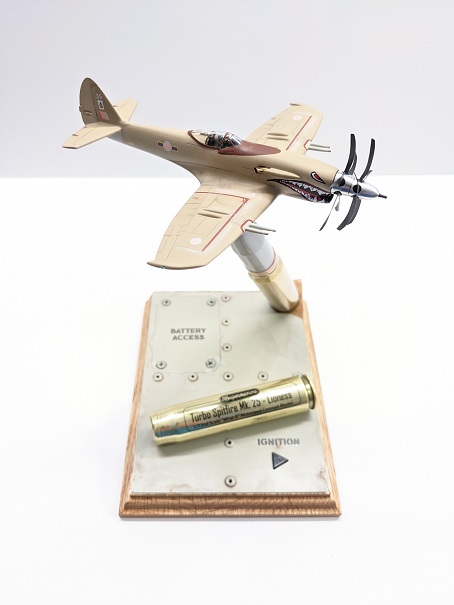
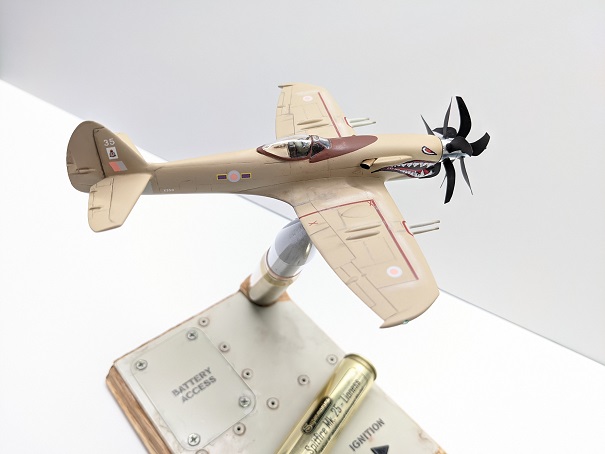
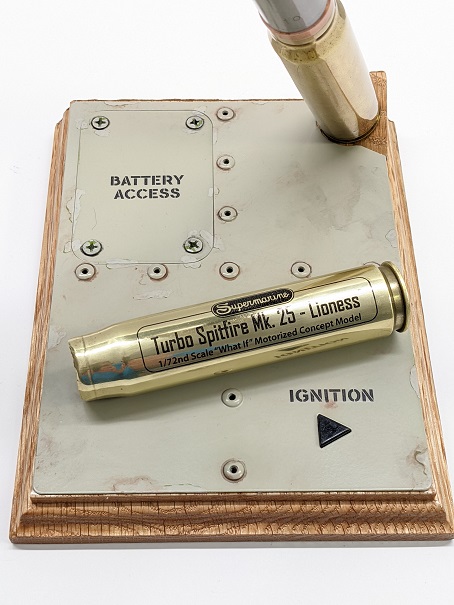
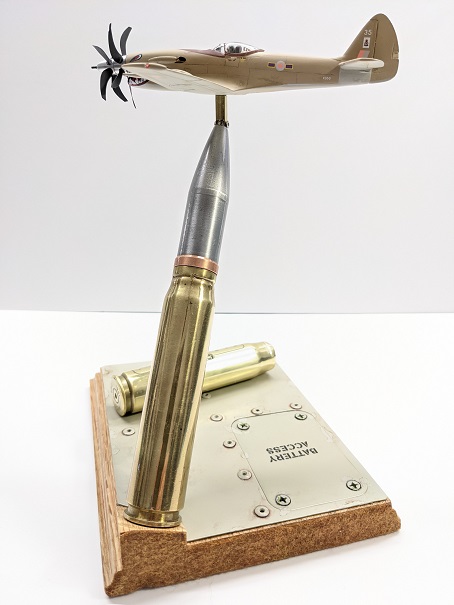
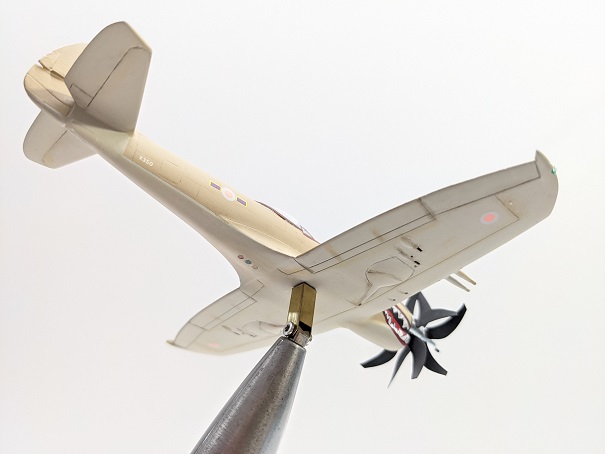
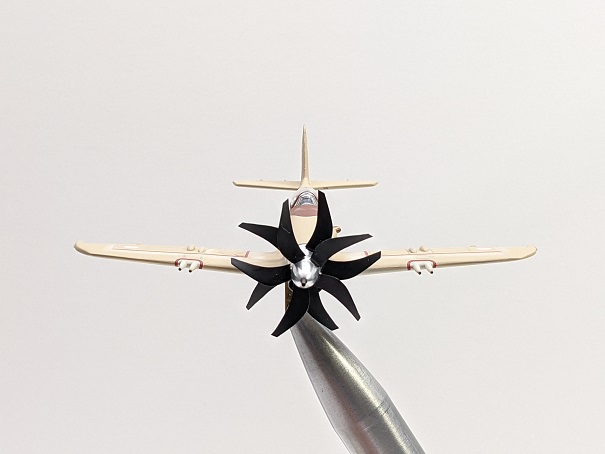
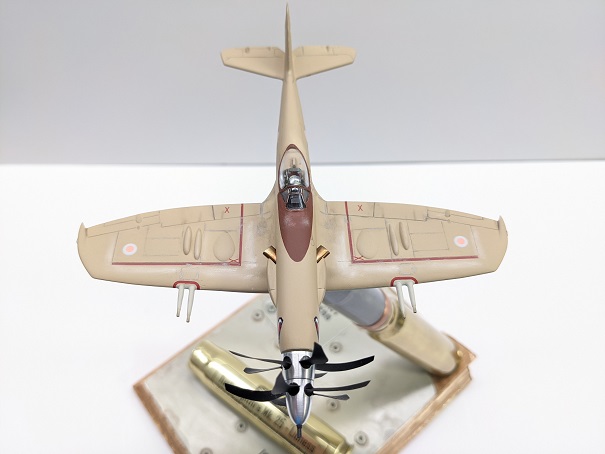
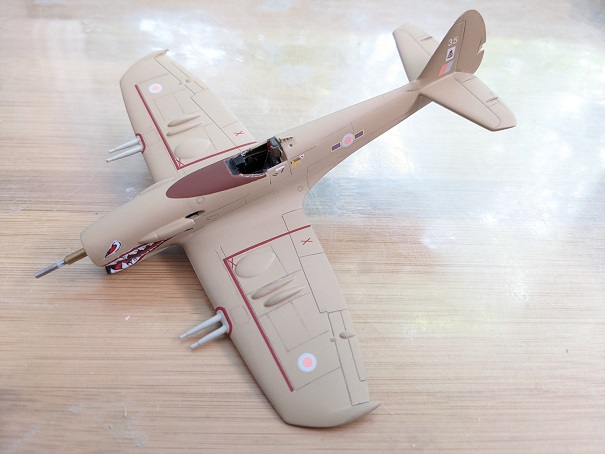
@pengbuzz Ahhh, the good ole' days! My son was complaining about a lot of the anime being on paid platforms so not a lot to see. I gave him the ole speech (grandpa voice), "back in my day we didn't have much anime and we liked it!" @arbit Now you're just showing off putting them together😁 @505thAirborne It looks like you have your work cut out with all the yellowed spots - even on the gray plastic! @Urashiman You're model is looking good. I think EI may be right about the windshield angle. At LONG last, a "simple" model that was supposed to be built for a January contest is finally DONE! It's also not so simple anymore either.😉 To encourage you guys not give up on what you're building (or life), here's a breakdown and a tally of how many times I had to redo stuff: The propeller blades were attempted as solid metal for strength and simplicity. That failed so I had to redo them in steel. Then solder them on to brass discs to fit into the hubs. My plan to blue them with acid failed as the steel had some tin it. So they had to be coated with a Sharpie marker and painted flat to seal them. The propeller hubs were machined several times for several reasons - of course - why not. The canopy had to be redone twice. The first one got bad crazes in it due to bad plastic. In fact, this one has some, but they're staying now! The canopy fit horribly from stock so it took several fillings and sanding to get it relatively smooth. Use the natural rubber masking compounds, they're great and get into all the tiny corners. The bottom shell casing "name plate" had to be decalled and coated four times for various reasons. At least its smooth now. Then four times to glue it to the base cleanly with silicone rubber. Somebody said the hole in the spinner would look cool with a cannon in it. I agreed. One Saturday, two drill bits later and several wasted pieces, the tiny 3/16" long part was done! I'll spare you all the details of the two gear boxes. That's tooooo long of a story... So, having a problem with a project? - DON'T GIVE UP! And now, here she is, the Mk 25 Turbo Spitfire Lioness - completed. Thanks for checking in guys! - MT
-
@electric indigo As usual, nice n clean with great surface detail! @arbit Your figures are very realistic, even with anime hair! If I need figures for a project, I know WHO I'm going too.. @Thom The shipyard is looking busy these days. Your stingray is really coming along great. @Chas It's great seeing a Phoenix here. I love your model. I LOVED that show growing up too. I actually built a very big and rough version out of wood scraps when I was a kid. I'm sure it was VERY rough looking too! Imagine a kid trying to "fly" around about 30lbs of wood model. All my "missions" were short and on the ground.🤣 - MT
-
Dude! I can see my house from here!😁 That city looks awesome in there! This is turning into a museum piece! - MT
-
Those mods an additional updates look REALLY cool! - MT
-

Upgrading a classic: yet another custom Bandai/Matchbox 1/3000 SDF-1
MechTech replied to tekering's topic in The Workshop!
GREAT mechanical modifications! That's also a nice-n-clean paint job too! She looks ready to start an intergalactic war all over again! - MT -
@pengbuzz I'm glad to hear you're healing up! It's frustrating when your hands are out of commission! That also sucks about your local hobby shop too! We had one here once until he closed too! @Thom Your mods are looking really good and clean. @derex3592 You'll be busting a scale bottle of champagne on that hull soon! She's looking good! - MT
-
I'm sorry about the clogged can! Even more sorry about your hands! I empathize with you. Sometimes its good to just rest up. I hope you feel better REALLY soon! - MT
-
The cockpit canopy looks cool on that version! - MT
-
@pengbuzz That stinks; I hate it when that happens. You can try soaking the nozzle and the can opening with thinner /lacquer thinner. Maybe another can's nozzle? If that doesn't work, then definitely try soaking the can opening in thinner or solvent of some kind. I hope that helps. - MT
-
Hey Derex, rattle can. It comes out perfect every time! It's never gotten a rough finish and always lays down smooth. I also shake it for THREE minutes to ensure a good mix. - MT
-
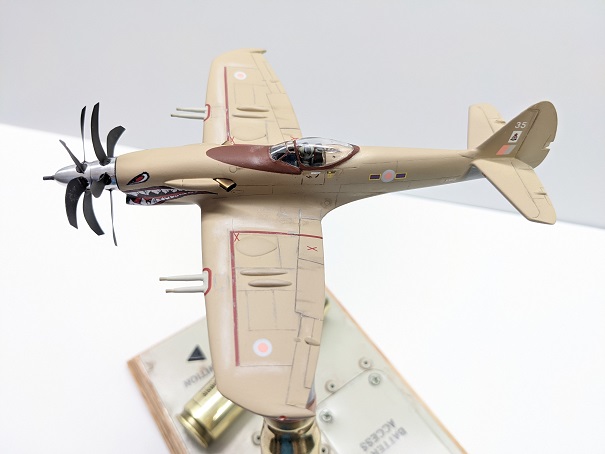
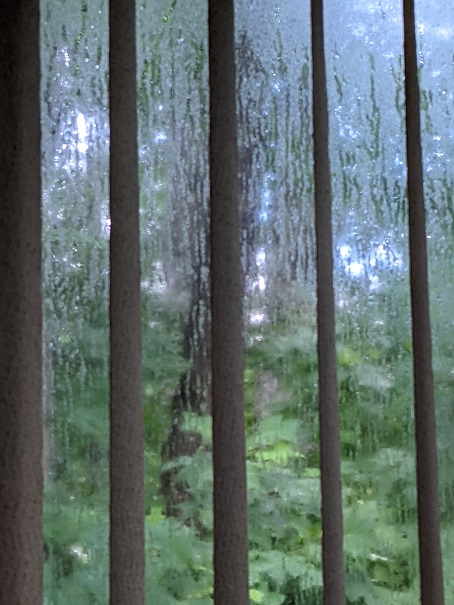
@electric indigo Great looking paint and colors! Nice color panel variation too! @derex3592 Those details are REALLY making it pop! By the grace of God, I somehow got the strength to re-shingle a 24 foot length of strip on our roof. It was done wrong by the original contractor. It was made with a "valley" that was collecting water which made its way through the roof. I was exhausted and almost heat stroked afterward! After chilling, I went outside and noticed the humidity was low. My glasses didn't fog up. Thank God the humidity was low in the afternoon. I've been waiting weeks to put a clear coat on my Turbo-spitfire with humidity like this on our windows: This was my chance! So I mustered up the strength and put a clear coat of Mr. Super Clear Matt on it. I think it is the best clear coat I have EVER used! Now on to the canopy and paint details. Thanks for checking in guys! - MT
-
After three decades or so, we finally get a transport model! Thanks for posting! - MT
-
@electric indigo Thanks for posting that! I'll have to try it. I'm used to poking holes to release air in stickers, but not to allow the setting solution to suck a decal downward on a model. - MT
-
That looks COOOL! - MT
-
@pengbuzz That totally SUCKS about your injuries! I empathise with you after having BOTH carpal tunnels worked on. I pray you feel better soon! @derex3592 Nice chain work! Getting into the stretch now... @electric indigo Great looking paint as always! - MT
-
That's a nice looking model! Thanks for sharing. - MT
-
The 'Hey look at this really cool model build I saw' post
MechTech replied to Shawn's topic in Model kits
@nightmareB4macross That's interesting! Looks like someone 3D printed the parts. @electric indigo Dress so shiny!!! 😎 - MT -
@Urashiman You sir are dedicated!!! @Big s It is from the MAILeS BYAKUCHI kit(?). Never seen the anime, but Bandai has been pushing these kits like crack on the market. It looked cool at the local comic book store, so I thought I'd help their business out. @pengbuzz I think you need to start with a chainsaw and work your way down from there!😁 You will be like the cartoons, whittling down a tree to make toothpicks. Don't get carpal tunnel from that beauty! - MT
