-
Posts
4678 -
Joined
-
Last visited
Content Type
Profiles
Forums
Events
Gallery
Everything posted by MechTech
-
Hey wait a minute, you can't be mixin' Gundam up with Mospeada weapons! That's just not right (in a styrene kinda way). With the weapons on the back opened up it looks a lot less like a nutcracker now! Cool model! - MT
-
I've seen less milking being done on a dairy farm! I love Hasegawa and all, but I think it's time to pick the needle up off the record and move on...on...on...on And yes, the "1/200th guy" owns SEVERAL of their kits - just in case... - MT
-
They both look awesome guys! The only thing I don't like about the design is that it's not "canon." I love the design and looks personally. - MT
-
Oh yeah, that's the stuff you heat up in hot water isn't it? I think you'll have issues with gluing and paint adhesion. It's good for making molds and prototypes I hear, not finished products. I'm curious about how good it is too! - MT
-
OK, I can't vouch for the booze, but an awesome Dremel unit is the 800. It's cordless, lasts a long time on the battery, and most important, has the lowest stock speed of any unit I've used. It has a lithium ion cell so no memory problems with charging and I've charged it and used it on and off for months before needing to charge it again! As a bonus, buy the keyless chuck ($10) and the light unit. It runs off the speed of the dremel and helps you see intricate work. The light is awesome, but you can drop the keyless chuck if you're always using 1/8" bits (their standard size). I've had my unit for two years and ou of all the rotary tools I've owned (5), it's my favorite! Oh yeah, and it comes with loads of bits in a case already! - MT
-
Thanks for sharing! That looks like an awesome set up. Man I got an ichin' to get some more styrene and resin work done. All the carbon fiber stuff is messy and just doesn't have the same satisfaction; no matter how high tech it is! - MT
-
OK, even I know a nutcracker when I see one! Actually I don't get into Gundam much except to but the kits for parts . I like some of the designs though. WM Cheng, the booster looks absolutely awesome! Great metal effects on the boosters. I just saw the episode with those yesterday and was thinking of you guys building that kit here. Neptuensurvey, the destroid looks great! I always did like that design. It's a good cross between giant and practical. - MT
-
The dimensions look good to me too. My children and I have been watching Macross and we just saw one of the episodes after the big battle that has one of these nosed into the ground with the pilot (skeleton in armor) holding a MinMei doll. There's a bonus item - MinMei doll in book case . The sculpt looks awesome as always! The pilot is a nice touch too! - MT
-
I think you got it on the button the second time around! MUCH better! - MT
-
Great job! I love the flying surfaces and other details on the VF-1. - MT
-
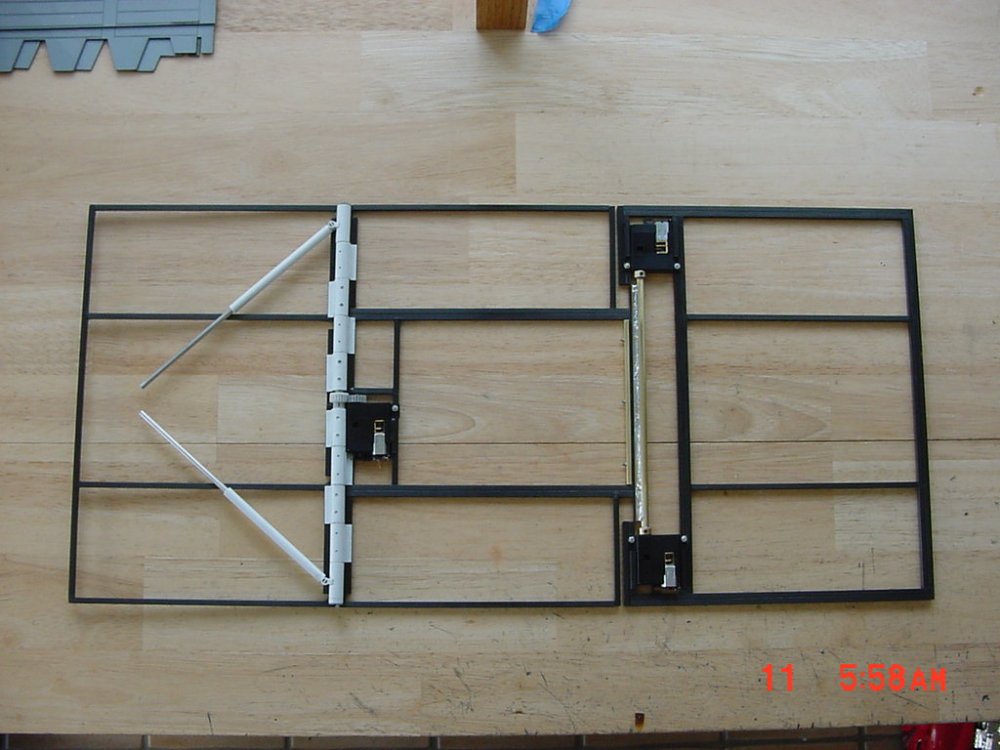
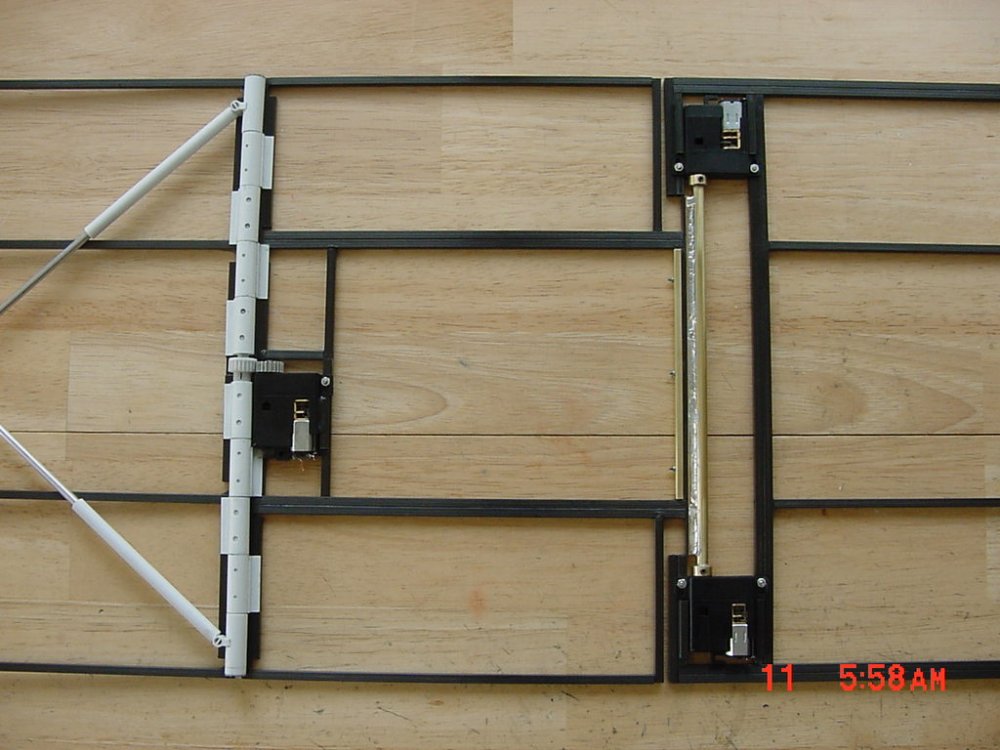
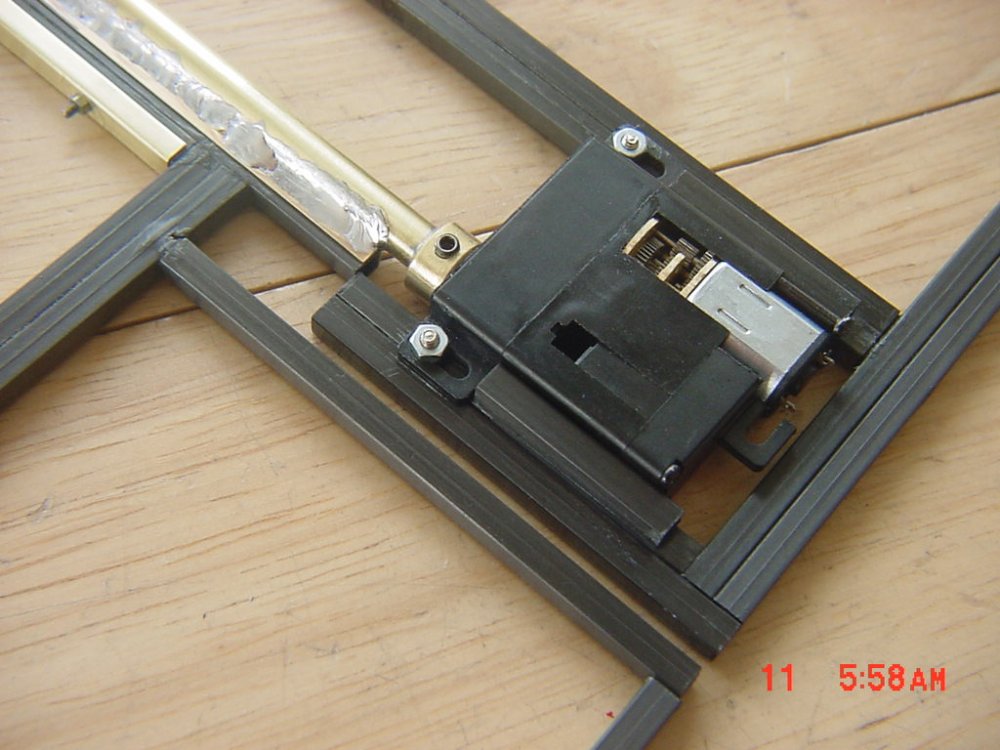
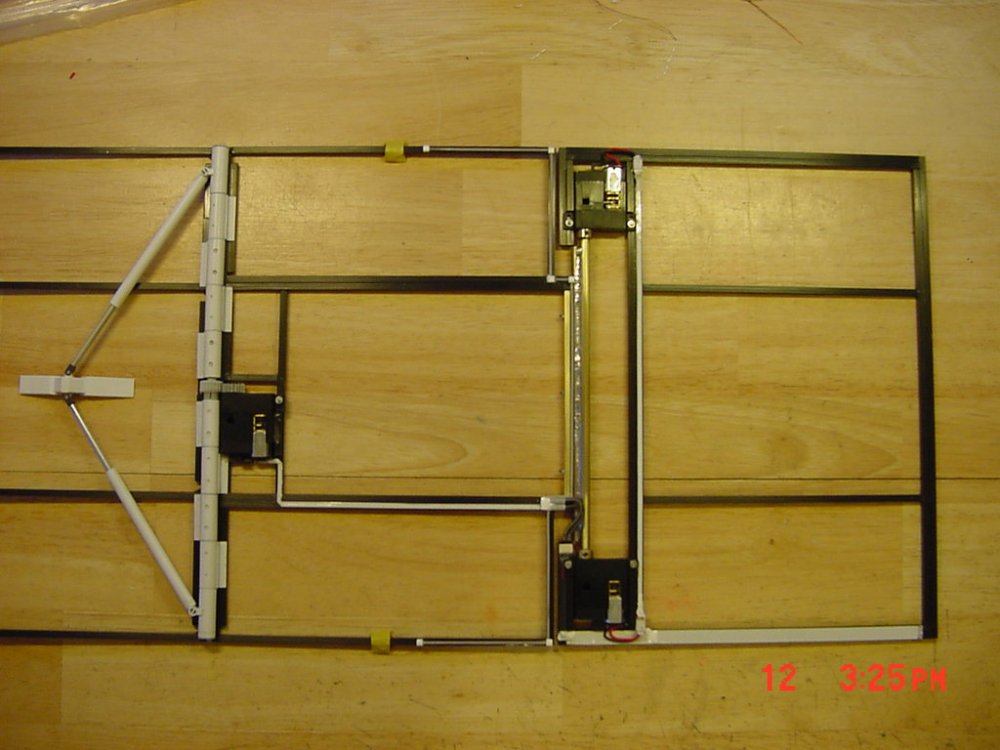
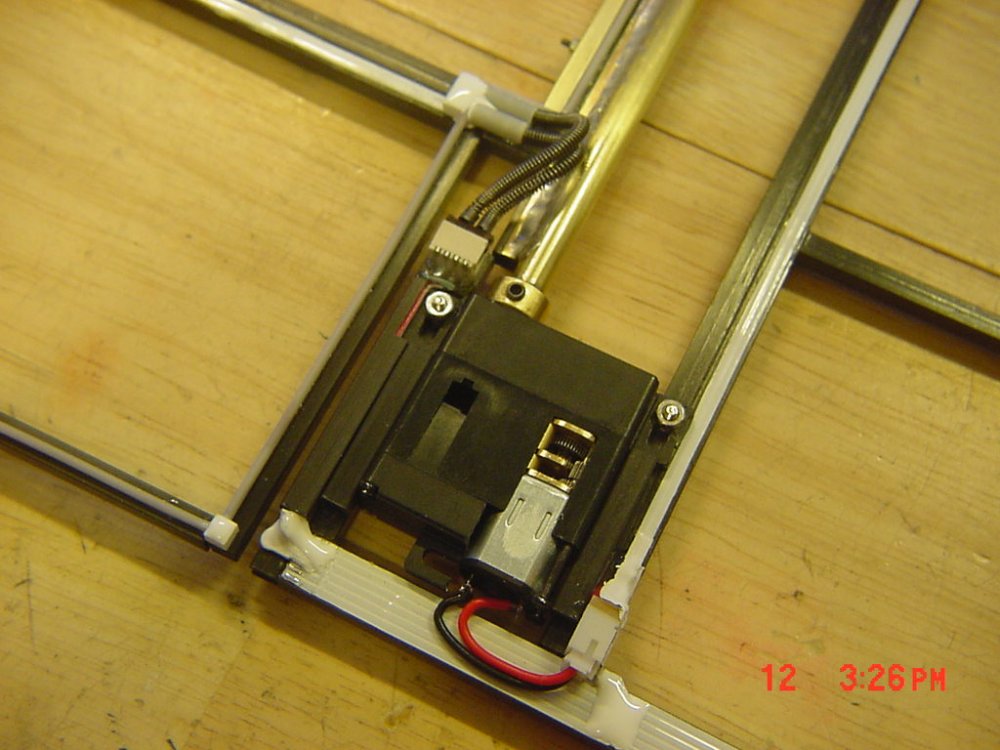
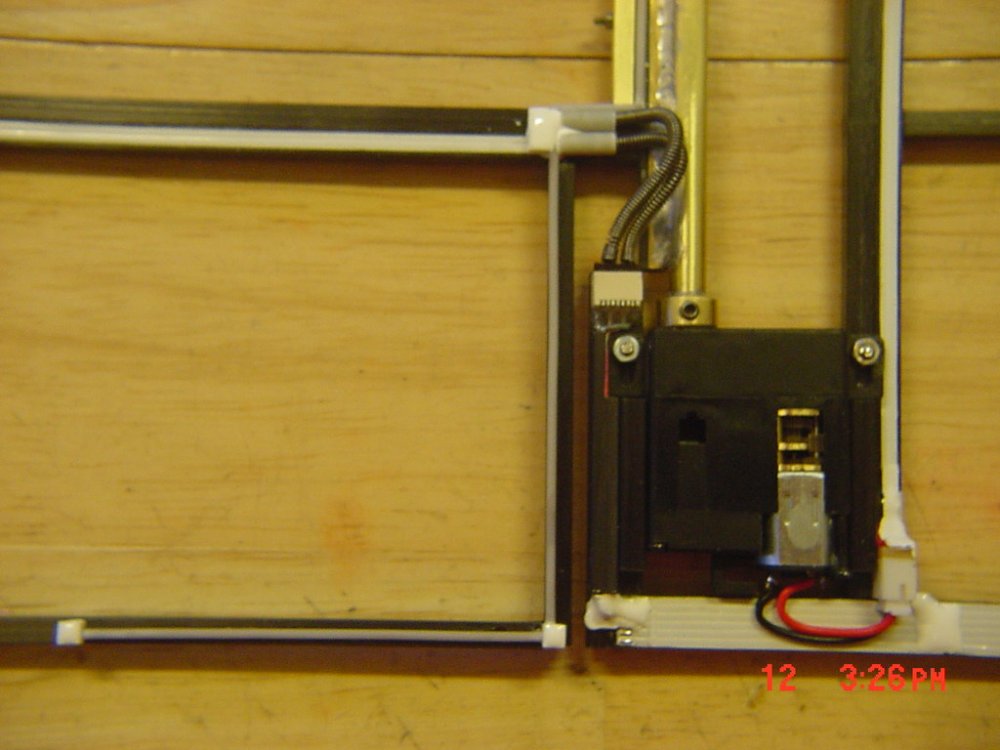
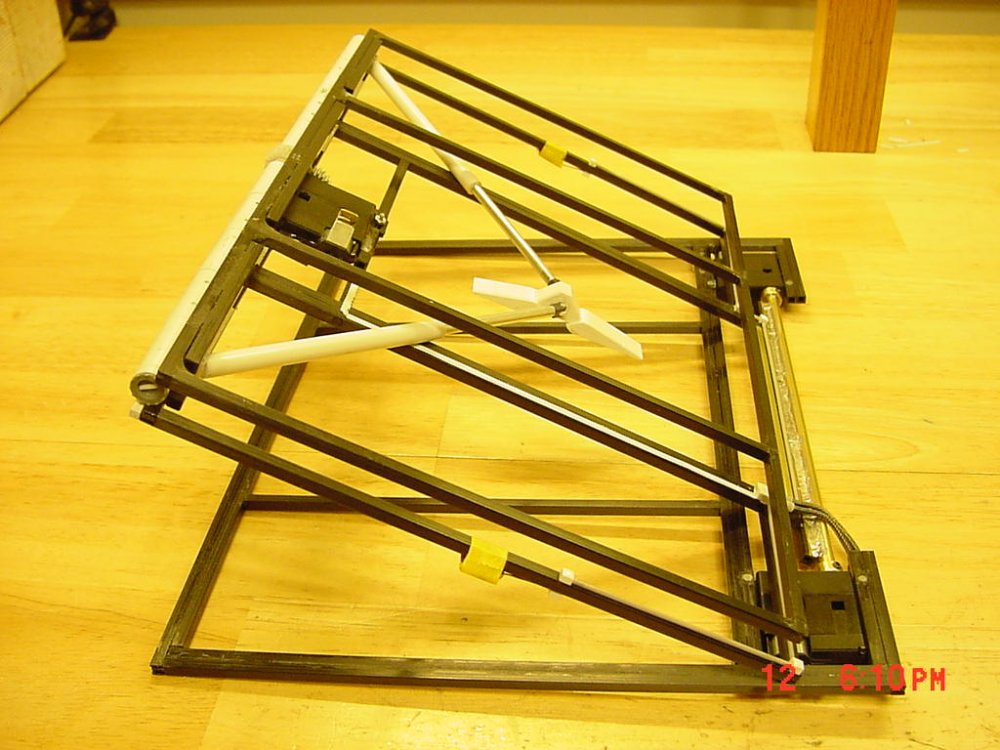
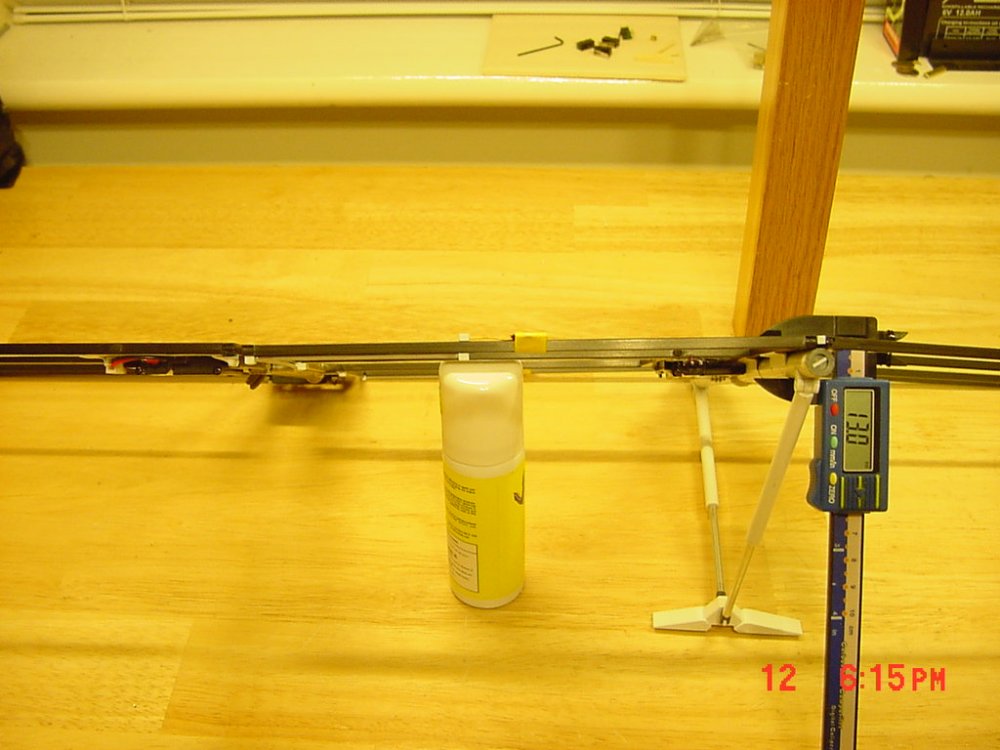
I used to be an assistant manager in a hobby shop, sell the stuff all day, blow half my paycheck there, and go home and build the same stuff! I can't believe how fast stuff is changing! Brushless motors, LiPo batteries - we used to dream about having that kind of stuff! The servos aren't really that small. There's much smaller around! The thinness and metal gears are what I needed...case in point: UPDATE 13 APRIL 08 ALL of the folding mechanisms are done! It works great! I'm not posting video until I skin the ramp and finish the end folding part - just in case . Here's some photos. I had to redo the frame to strengthen it. The servos are directly driving the ramp - I didn't want to do it this way. There's no room for a mechanical safety device, but I'll put some micro switches in to stop the ramp at the start and stop points. If it hangs up, there's no mechanical protection like on the end segment. But it works great! The servos are dual bearing so no sweat off there bushinged backs. Everything come apart including the servos from the assembly - just in case. The connectors on the servos will be covered over so no one will see them. Next came the wiring. It has to look real where exposed and be durable. The answer; use conduit (2mm micro styrene tube), cable armor springs and paper thin wires. All the light colored runs are wired electrical items.The lighting cables are wound up and masking taped to the frame until skinning the surface begins. Flex springs from an old Gundam kit, now really carrying electrical cables! One got over stretched . You can see the thin wire ribbon, armored springs and conduit. Yes, the best way to lay out the lighting wires was to use micro styrene tube and make my own "junction boxes" out of styrene squares (hole drilled in the middle and filled with colored 5 min epoxy). Folded up and in the stowed position (it will do this under power now) And the big deal with keeping it thin? Making the anime magic come to life! At the thickest point, it's 13mm thick. A real colossal giant like this would probably be very different! That's it for this time. Next comes the serrated end. I have to make it fold 180 degrees! After that, it's time to skin, wire it up and finish it off! - MT P.S. Sorry about the photo color, my camera hates flourescent lighting.
-
Awesome finish man! The colors are mesh together great! - MT
-
The net was swamped and I only saw the first frames, but I get the idea. That's cool! Pinvise - I use it almost as much as my X-Acto knife! I'm doing the same thing with my 1/200 Destroids. Great idea to share. - MT
-
Planning is great idea. I gave up on that though - it's called two children . I was blessed this weekend though to actually get some Daedalus build time in so I sympathize with you! Magnets are a great way to go! If you line them up right under a thinned area of plastic, you won't need ugly tabs to align your parts every time. I would recommend gloss paint in those area you use them though. Flat paint will show wear marks. Someone here recommended this place: http://www.kjmagnetics.com/ . I've used neodymium magnets for lots of stuff, I just bought mine a long time ago in store elsewhere. Several people have recommended putting them in the Daedalus so I'm doing that to hold mecha down to the deck. WM Cheng put them into his launch arm diorama build up too! Check it out in his builds. Have fun with your project! - MT
-
The Spartans look awesome guys! Great work! - MT
-
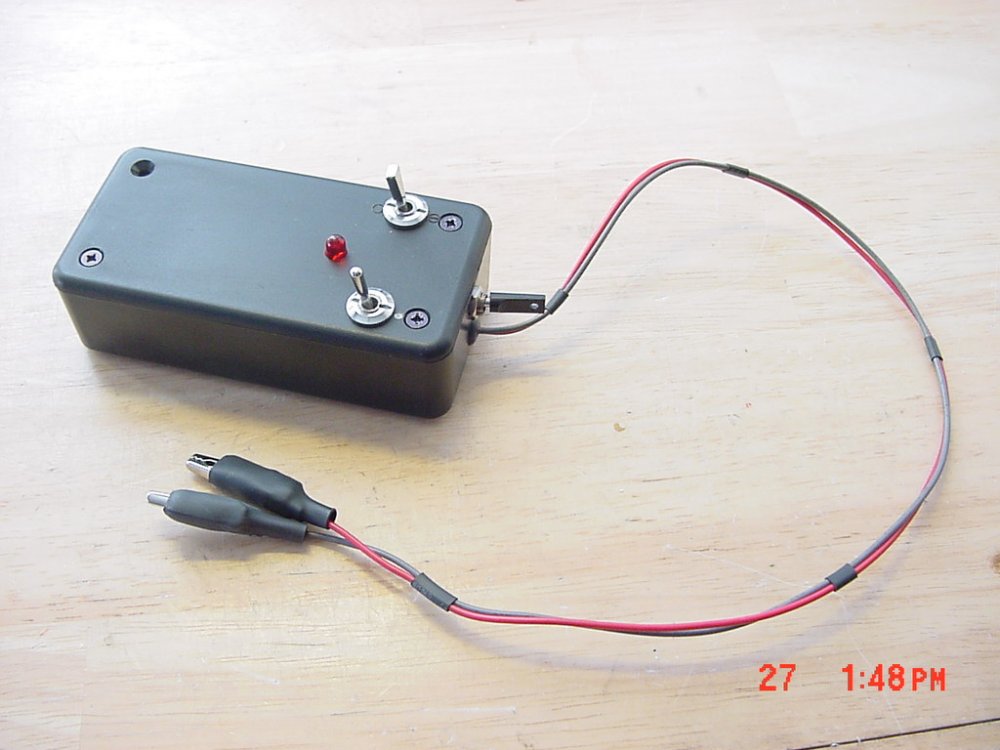
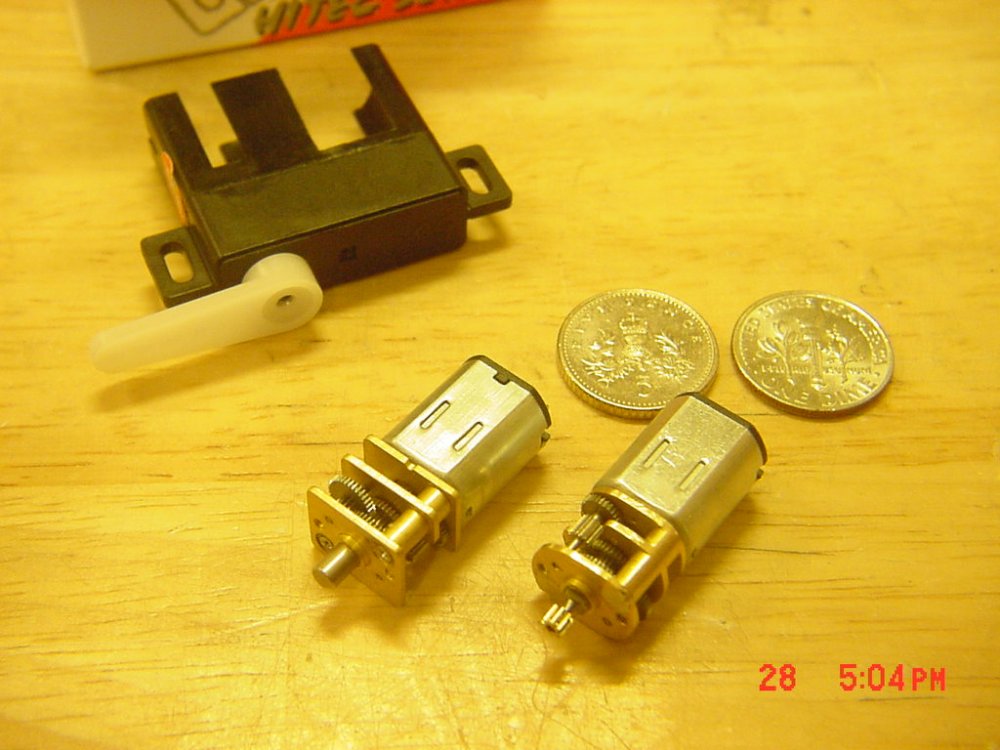
UPDATE 6 APRIL 08 Alright, first some updates, second an apology for my camera battery dying! I got two good shots. The first one is a motor controller (about two hours to build one night). I keep taking the leads from a battery pack and holding them up to completed assemblies and motors for testing. The problem is the wires keep breaking or I run out of hands to hold the whole thing together! One switch turns it on (LE blinking LED reminds me to turn it off, one switch temporarily engages power, and the one on the end switches polarity (forward/reverse). No more broken wires and I can observe the working of the whole thing better. Next I rebuilt two more servos like these: http://macrossworld.com/mwf/index.php?show...8403&st=500 (middle of page, 11 Nov update). It is a small gearcase with an N-20 motor (coins for comparison) stuck in place of the motor (also N-20 size) into the servo. This slows it down and increases the torque significantly. Here's a picture for comparison. The stock unit has a 2.5mm output shaft on it. The modified unit has a machined down 1mm shaft for the gear popped of the servo motor to fit into. The gearcase corners are also filed to contour the motor so it fits snug into the servo. Tops are soldered back together. I finished the servos, the new ramp sections (yes, new) and the brass parts that will make it all go. The cool part is that I now have three identical servos driving the ramp - all segments will fold up at the same rate. Hopefully my next post will have video! - MT
-
Great job! I love that mech too. Too bad it's not "canon." I think it looks like the next logical step in Valk "evolution." I like the way the model cockpit retracts too! If only the legs didn't have to come off. - MT
-
Yeah, 007 is right. Mine is a two gallon and it could probably wake the dead (never tried it yet ). Seriously, mine is loud as are a lot of these types. If you can put it outside your closed window and run the airhose in that may not be too bad. Your neighbors will then probably hate your guts! If you're only doing a little non serious work these are alright. Most lower end units of the piston style are loud. Make sure it has a good pressure regulator on it and a moisture trap (or purchase one seperately). These are both musts. Quick disconnects for the hose make life a lot easier too. Have fun shopping! - MT
-
I got over the "non-canoness" when I saw how cool the visor DOES look! Awesome cooperative job dudes! - MT
-
Thanks for posting the How To's. We can never have enough of them! By the way, I love the custom decal work on the Tomahawk. I never saw your build up of it earlier. - MT
-
The painting looks great and adds some size to them. You're right, I've got the 1/5000th and my little Nichimo has better detail! One suggestion if you don't mind, draw panel lines (light colored) around some of the light painted areas. It will clean up where the masking tape bled. I also agree about the weathering; more is less in this case. No paint chips visible on something this big! Keep up the good work! - MT
-
Nice job! The urban neighborhood really throws it off in the photos . - MT
-
They are great for pure black (clean anime style) lines. Just don't use them over some flat paints or clear coats, especially dull. I found out the hard way after going through two of them that the tips get permanently clogged and won't flow. Nope, solvents won't clear it out; it gets in the material. Use them before the clearcoat, but test to make sure it won't run (found that out the hard way too! - MT
-
I'm still at work. I just got the servos in last week and I'm reworking the ramp. Both servos have been heavily modified like he first. I'll post pictures soon! - MT
-
TTHE PROJECT IS DONE - 3 YEARS IN THE MAKING - PRO BUILD
MechTech replied to deadghost's topic in Model kits
Good things come to those who wait! Still over two years working on the Daedalus! Looks like you got your money's worth (hopefully). - MT

