Rockhound
-
Posts
103 -
Joined
-
Last visited
Rockhound's Achievements
")
Destroid Armour Waxer (3/15)
0
Reputation
-
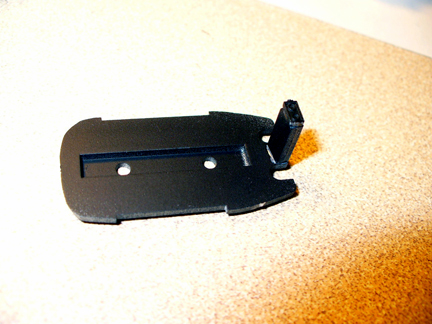
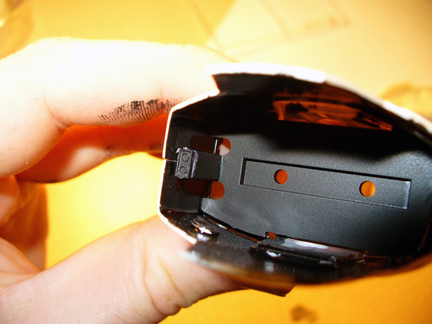
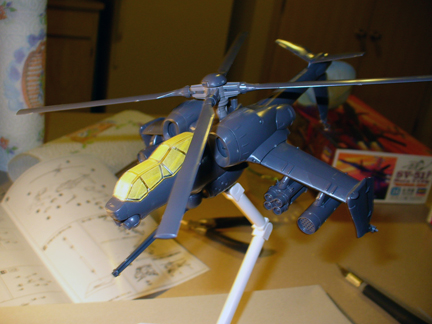
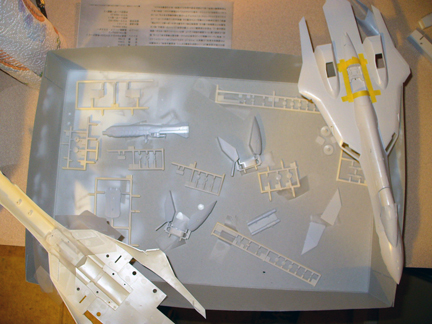
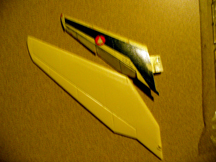
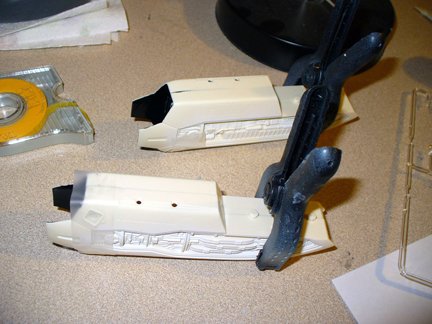
Update: engine rest parts The parts that you attach the feet/engines to come in three pieces: Big slot rest and two very small pieces. Be very careful when assembling them. They fit into the legs/nacelles a certain way, as mentioned in the instructions. Shown in the pictures are the parts and how they fit into the legs. And of course the legs are finally assembled! I used some grips and scotch tape to hold everything together overnight to insure a good contact seal. Well, that's it for the build-up thus far! Gonna sand down the legs tomorrow, as well as do some (massive) touch ups to the white-painted areas. Also, since I couldn't do any spraypainting, I decided to work on another model, just do some glue and sand work, as well as masking the canopy. Enjoy! It's the attack helicopter form Pat Labor 2. It's loosely assembled right now for the photo, but the major components are easily removed. The company that makes it uses alot of slots and tabs making for stronger attachment.


-
Update: base coat for metallics Here are the parts that require a black base coat before applying the metallics. Consists of the gun, feet/engines, verner nozzles, wheel hubs (mentioned in earlier post), head rest on top fuselage, intake "thingys" on bottom fuselage, pieces for front sensors, intake covers, etc. Forgot to take an after photo, sorry.

-
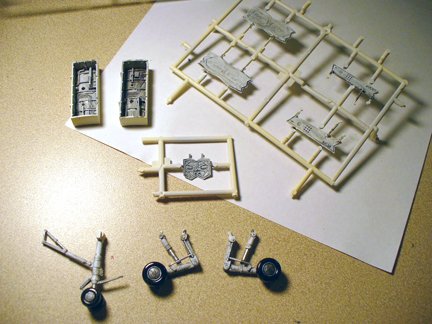
Update: Yay! Sorry for taking so long, that cold has been kicking my arse for forever. But now I'm back to it! Here's your updates! I separated the parts that require different base coats, mainly black and white. Here are the white coats: Landing gear, bay doors (interior), wheel wells. First I airbrushed the necessary parts white, let them dry. Then I used some black ink and smothered everything to let it all sink into the little notches and such. Once that dried, I drybrushed flat white paint over them. Needless to say, not very well, but they're white. I'm sure the paint gurus/masters are cringing at me right now, I've just never really did landing gear stuff before. Sorry! It really was a rush job. I might tighten everything up tomorrow when I'm not so tired. The landing gear is easy enough to paint, as there are alot of wide surfaces. But the silver needed on the hydralics (sp?) blends too well into the white so I need to fix that. Plus the gloss black I used on the tires kinda sticks out. Yeah, I'll definately work on that tomorrow, might even spend the whole night on it. Paint little details and such. WM Cheng: "A little note, it looks like the rear hydraulic arm thing to the front nose gear is in backwards in one of your photos - you might want to do a dry fit into the front wheel well to make sure." The pieces that assemble into the front landing gear actually come like that, just the way it was molded. Nothing I can do about it. The rear wheels/tires come in 4 separate pieces: tire halves and hub halves. The gear comes in three: halves and the little piston that attaches to them. The front wheels/tires come in 6 pieces, tires (whole) and hub halves. The good thing about this is you can paint the mubs OFF the tires making for a much neater paint job.


-
Thanks for the heads-up David. When I was looking for actual photos of the 188 F-16s, it showed the box art was indeed wrong. I'll be keeping the light/dark gray deleniation (sp?) in mind when it comes time to paint. Mainly all I wanted to do was build this with a paint scheme that screamed "Arkansas Razorbacks", wasn't really looking for accuracy. I will, however, be using your advice on alot with this scheme, especially the intake alignment tip. I never really paid attention to where it actually happened. Thanks!
-
Thanks for all the replies! It helps me stay motivated! The project is on hold for a bit, got really sick a couple days ago and I don't wanna have to worry about paint fumes and spray with a fouled up throat. Until I can get back to it, this is the scheme I've been talking about (in case anyone was wondering. LOL) My main concerns are the light gray to dark gray at the canopy. The F-16 has a wide enough surface to make the color shift more noticable than the the YF-19 surface area. I might play with that for a bit. Also, the decals for the read stab (the big red part) will have to be modified to match the YF-19. I plan to make all 4 rear stabs on the YF-19 red, and will have to work with the decals like that. But not to worry, it'll look good. I also have a WAY different plan when it comes to panel lining this bird.... you'll see (and probably cring.) Till next time! Rockhound

-
UPDATE: almost ready for main color paints I split the project into 3 masses: One for the top (upper fuselage, top of wing surfaces), one for bottom (lower fuselage, bottom of wing surfaces, wheel well doors, intake/legs, etc) and one for misc color (white for wheel bays/landing gear, gloss black tires, metal/steel for feet and other movable pieces) The legs have not been assembled yet since I need to paint the wheel wells and insides first. Once I do that, then the legs will be getting the two-tone treatment. Like I mentioned in the first post, I will not be painting this in the anime canon color of Radome Tan, instead opting for the F-16 two-tone gray style with red read stabs. (ala 188 FW out of Fort Smith, AR.) More to come!


-
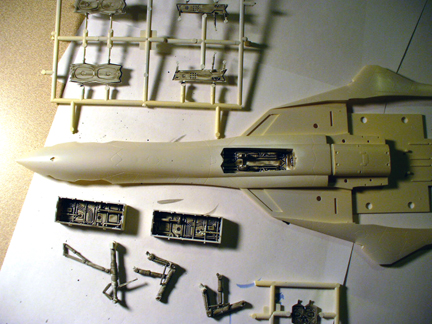
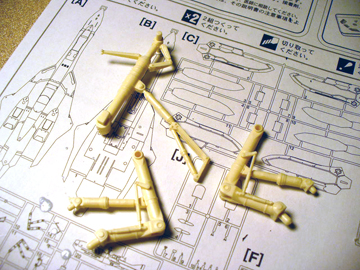
UPDATE: landing gear The landing gear is beefy and can easily hold up the aircraft. The front comes in 4 parts (3 plastic, 1 clear) not including the wheels. The read comes in 3 parts not including wheels. The rear gear has an extra hydrolic part to it not on the 1:72 scale. The whole thing is, as usual, awesome.

-
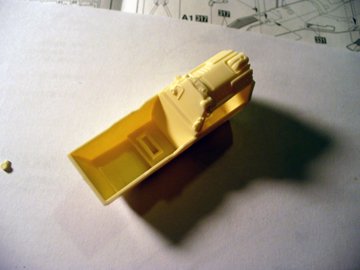
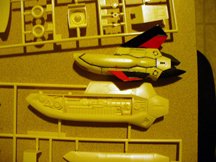
UPDATE: head The model comes with a faceplate. Dunno why, but it does. The problem: it looks friggin awesome and you can't use it. But here's a picture of it if you wanted to know. If you wanted to use it, you'd have to dig out the plastic on the fuselage.

-
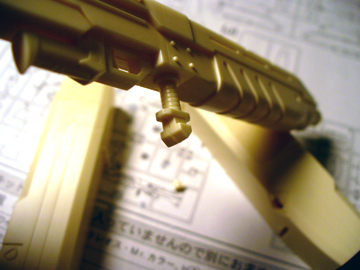
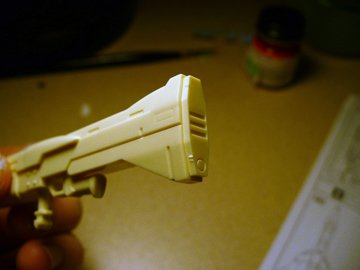
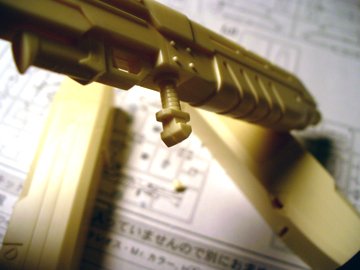
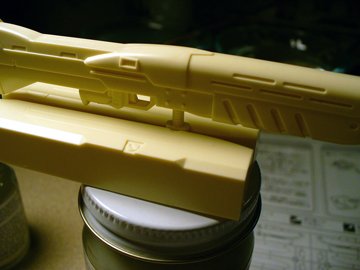
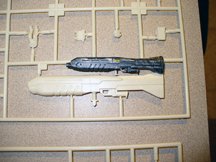
UPDATE: misc stuff The rifle: It's awesome. It comes in 5 pieces (4 plastic, 1 clear piece). The butt of the rifle and the nozzles are their won seperate pieces, so you don't have to worry about sanding off any detail in the front or back. The way it attaches itself to the arms is nice also. It's got tabs to help secure it so it doesn't go flopping around. Even without glue, it stays in place. With that said, it is recommended to NOT glue the arms in place until everything is painted and decalled. You CANNOT put the rifle on the arms after you place the arms on the fuselage. paint, decal, and cote the arms, and then paint/decal/cote the rifle. When it's time to due the final assembly, glue one arm on, then place the rifle in the slot, then glue the other arm on.
-
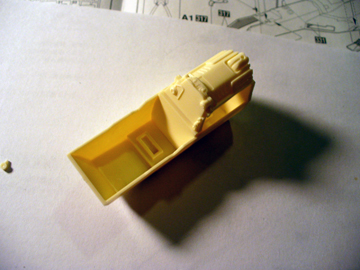
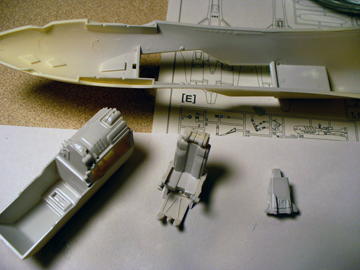
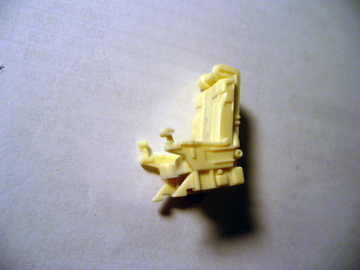
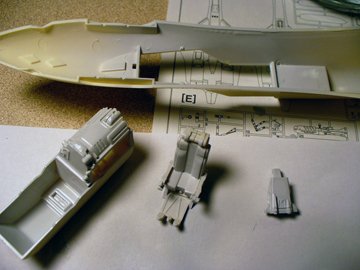
UPDATE: Some subassemblies, tips for building. The assembly is pretty much the same for the 1:48 scale model as it is for the 1:72. Today was a pretty light day, just looking everything over and some building. Assembled the cockpit and painted it. You can notice the extra detail in the cockpit area:the chair is looking more authentic and the rear area looks less "thrown together." Something to notice. In the back of the cockpit, the part that appears to be floating, does NOT rest on the back of the bottom piece. It's very, very lightly touching, so don't try move it around. I first primed the parts, then airbrushed dark gray over everything. After that I used a black ink form Games Workshop and washed everything with it. The chair was done the same way, with Guard Red painted onto the cushions.


-
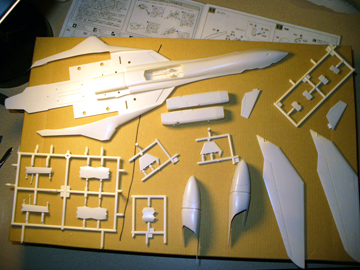
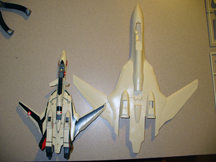
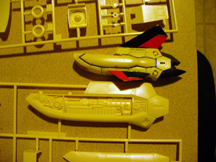
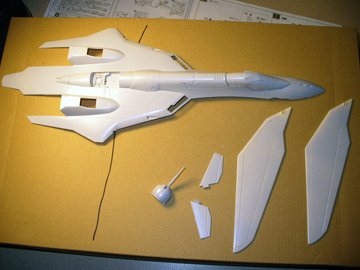
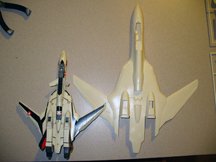
Good afternoon MW! Earlier I posted about finding a WIP thread for this model, but alas no luck. I got my models in today and will begin the thread! WHAT TO EXPECT WHEN BUILDING THE 1:48 YF-19 by HASEGAWA, aka Step-by-step to building the 1:48 YF-19 for those of us who are modelling challenged... First off, what to expect: It's big, but that goes without saying. This is how big it is... Some seperate piece comparisions: I apologize for the bad quality of photos, was using my Flip camera and taking stills from that video. But I'll be going back to digital camera I used when I made my other WIP threads. Some awesome things about this kit: 1. It's big! The detail is not simply an enlargement of the 1:72 scale. The details are evident in the wings, leg nacelles (sp), fuselage, everywhere! It's a completely new model from the ground up. 2. You know how we usually have to get rid of that unsightly crease line down the middle of the canopies? Not this one! Just go straight to the Future wax and you're done! Nothing to sand down. 3. Decals. They're big, big enough that you don't have to worry about masking and using your paints unnecessarily (if inclined to). 4. The wings can be switched to different positions without needing glue or special parts. But honestly, who sweeps them back anyways? LOL Anyways, keep watching this tread for the actual build-up. I'm starting the cockpit now. I will NOT be using the PE parts that will be available for the 1:48 YF-19. Simply because I'm too impatient to wait for them. Also, I will NOT be painting this in the anime canon paint scheme. My friend is really into this aricraft, but is also extremely proud of his college, so I'll be painting this in the scheme of the AF Air National Guard 188 FW F-16 (red-tailed Razorback scheme). I'll be using both the YF-19 decals, as well as the Tamiya 1:48 F-16 decals. Thanks for browsing!

-
Good afternoon MW! I'm glad to see MW is as active as ever. It's been a while since I built my last Macross model and was looking for a 1:48 YF-19 build-up thread if one existed. I ran a search for one, but nothing turned up. Just curious if I used the wrong keywords or something. Some might remember the build-up threads I did for the SV-51, VF-0D, and VF-0S reactive battroid. If a thread does not exist, I will make one once my models arrive (via 1999.com). If this is in the inappropiate forum, I apologize and please delete is necessary. I appreciate any help you can give. And if not, the 1:48 YF-19 build-up will commence once my model arrives! Thanks! Rockhound
-
Here's the best way to get rid of your backlog.... do them all at once. During my first stint at modelling, I built a whole Skull Squadron diorama. Roy, Hikaru, Max, Ben (forgot the true name. don't kill me).I built all the major assemblies for each kit, painted them, then assembled them. Took about as much time as once kit. This works best if you're painting roughly the same colors on different kits, which is why my Skull Squadron was finished as fast as it was. What keeps alot of modelers from cruising through the kits is down time. The best thing to do is simply build the subassemblies of the kits of all the kits you want, then prime all the pieces, then paint similar colors (doesn't work if you're doing a YF-21 and a SV-51 Nora though but you get my meaning). Simply eliminating downtime between processes will crush your backlog. Also Excillion, since you're getting that Alclad II Steel, you could do all your exhaust ports/engine nacelle/feet/gunpods/etc all at once! It's when you get to the decals you gotta bite the bullet and push through. Work enough decals and your fingers become raisins.
-
Hey guys, sorry again for the late posts. I've had to shelve the project for a bit. Combination of college, not enough time, and money. I'll resurrect the thread once I get going again. Till then!
-
Sorry, I haven't updated in a while. Summer courses for college are 5 days a week, 3 hours a day for 5 weeks. Pretty hectic. I'm still on the sanding stage. Hopefully I'll have something productive to post in the next few days. Edit: Another problem, I keep coming up with ideas for projects. Like Max's funky rear stab missiles aircraft (weird episode), a Razorback red custom VF-0S Battroid, VF-0D battroid custom, etc.