MechTech
-
Posts
4702 -
Joined
-
Last visited
Content Type
Profiles
Forums
Events
Gallery
Everything posted by MechTech
-
BUILD IT! Build it! You know you want to ! I think you should give it a shot. Some of these guys are talking about filling seems and stuff. Toys have seems and you're cool with that. Every skill is on a learning curve anyhow. build it...build it...build it... - MT
-

1:1 VOTOMS Brutishdog in Sheet Steel - For Real!
MechTech replied to MechTech's topic in The Workshop!
I searched and didn't find anything so I thought it was new. I didn't want to make a post like that wooden SDF-1 for the umteenth time . - MT -
Big F, I don't wanna know how you guys tested that out - MT
-
Like everyone said, it's an older kit. It is a great kit to learn on and you can even repose/transform it when it's completed (noses have to be swapped out). I love it though. Before Hasegawa made their kits, this was one of the most accurate VF kits around - in styrene. If your brand new to building, this may be a little difficult. If not, this is a great kit to learn improved techniques. This was the first robot/Macross kit I built and I've been hooked since!!! - MT
-
This is as custom and crazy a build you will find! I thought this was the perfect place to post. All in sheet metal! It makes our plastic stuff look like, well, plastic! - MT http://ironwork.jp/monkey_farm/botoms/2nd.html Now where's my GAT-22... - MT
-
CA IS strong stuff. With ventilation and occasional use, you should fine. Too much of anything bad and your body will start calling the shots! The funny part is CA was invented during 'Nam to rapidly seal and temporarily stitch up wounds. That's why it bonds skin so well! - MT
-
There is a lot of gluing and painting (it's not a Bandai kit), but I think it's worth it! Something happened to the first one I built and I even bought a second one. I just think it's a cool design and idea. - MT
-
I was shopping around at HLJ and saw that others were buying it. I checked out the link and could only think, "what scale is that, it looks like a little toy!" I was disappointed to say the least. That HUGE connecting bar is...HUGE. And it should be white from what I recall from the anime. It looks like they fixed some sculpts, but at that price...phew! I'll have to wait IF IT DOES look better... - MT
-
Heh heh, the "poop ship" keeps popping up like something that won't flush down the toilet. Everyone says how expensive it is, but a lot of hard work went into it. I remember the build up thread. - MT
-
Paragon, welcome to MW. Here's what drawing I still have (and it's not complete. Something happened to my older ones. I hope this helps. - MT
-
Nice collection and work! I hope to be able to get a display case someday myself! - MT
-
The Sundowner's scheme DOES look great on there! Nice choice! - MT
-
The cool part about Miriya's armor is that there is a little room on the inside for detailing. - MT
-
Do you visit MW forums at work?
MechTech replied to miriya's topic in MW Site News & Member Feedback
The network nazi's have this site blocked. Can you imagine that? I get a lunch ya know!? - MT -
Lego's anyone? Someone try this please!!!!!
MechTech replied to Excillon's topic in The Workshop!
That's cool! Thanks for sharing. I need to be a celebrity and be on those shows! They get to see some cool stuff! - MT -
Planning customising/weathering 1/48 VF-1J and GBP
MechTech replied to winterdyne's topic in The Workshop!
That looks great and the lighting engineering looks great too! - MT -
The armor is looking great and the hairspray idea sounds good. HMmmm, wonder what brand my wife uses... . - MT
-
Nice custom and an original idea! - MT
-
Great job with the club! Plan "B" for when ammo runs out . - MT
-
I bet you could find someone to do it here or at Starship Modeler! Looks great and I think a loss to Yamato! They could have done the VT and VE versions with the cockpit molds. They're all about milkin' the molds for all they're worth (don't blame 'em). - MT
-
The Pine Sol should be like a mild turpentine - same source for the base - pine sap. I had no idea about the power of Pine Sol. I soaked some old aircraft parts in it for restoration and it got the gunk and paint off !!! - MT
-
The sad part about the "lost" molds are that they are of the coolest kits! I'd love a 1/5000 SDF - again. I lost the bridge and a couple of other parts in a move on mine. The VF-2SS coming back is cool. Even though it's not canon, I still like it! - MT
-
That design looks like it would suck to fly; "I can't see, the guns are too big and the muzzle flash is blinding." Then again, it's hard to miss your target with that big a shell. I always thought it was a drone too. - MT
-
Thanks! I forgot mention I have to add the sensor and a coupler to the thermal jacket (convienant way to hide the seem). I can't wait for the Scopedog. I never got into Votoms much or bought the series, but they are a more probable design. - MT
-
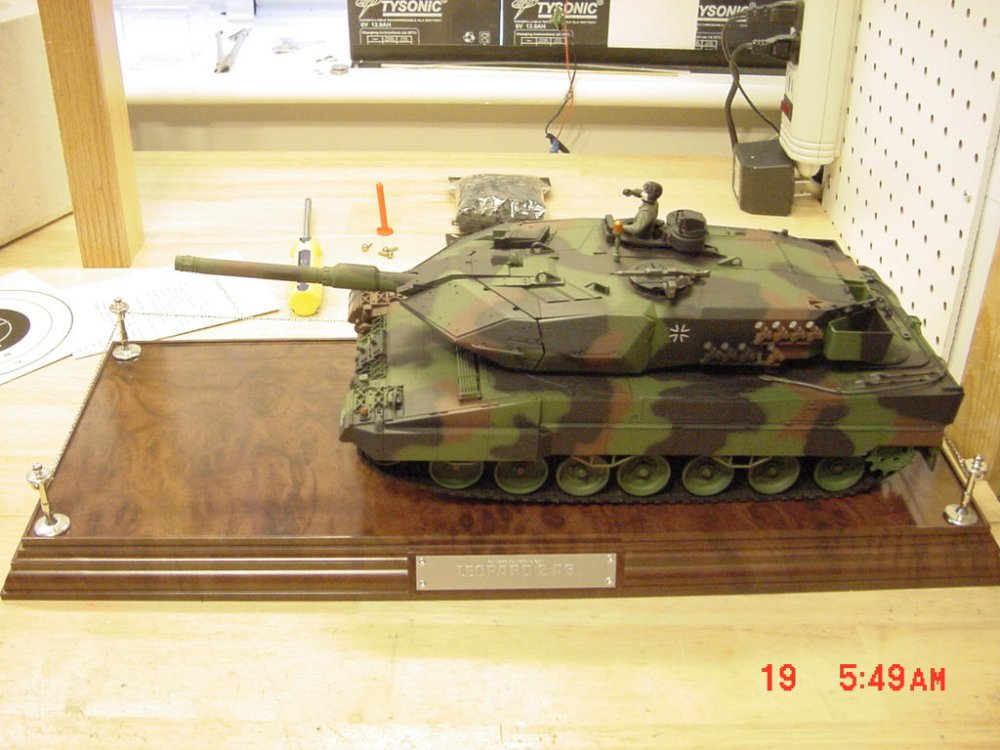
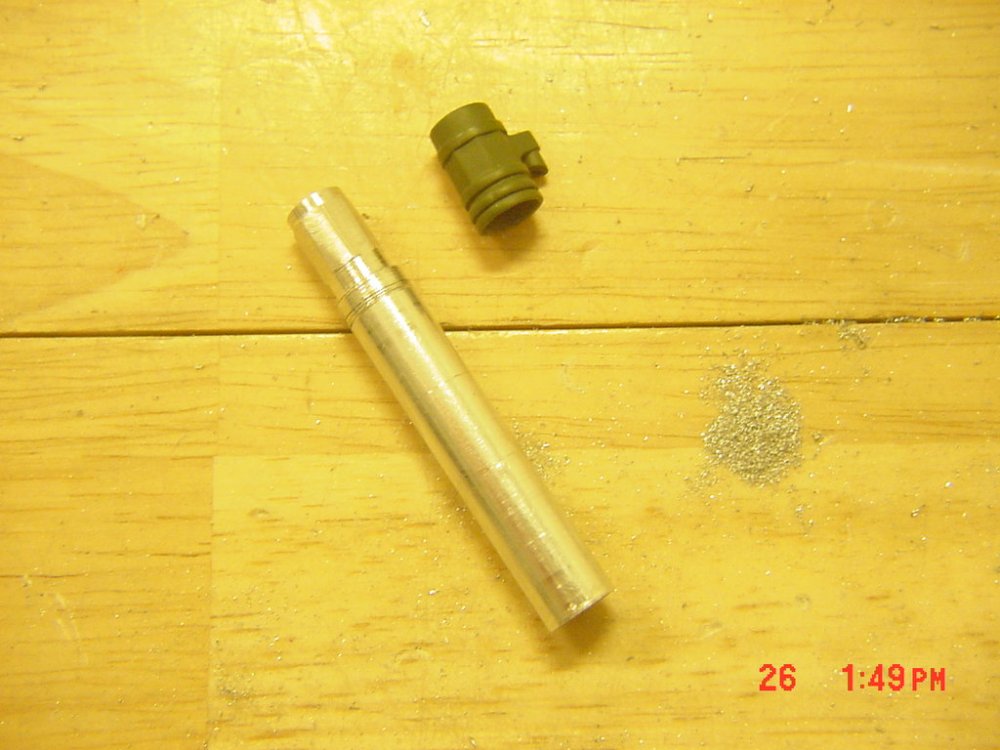
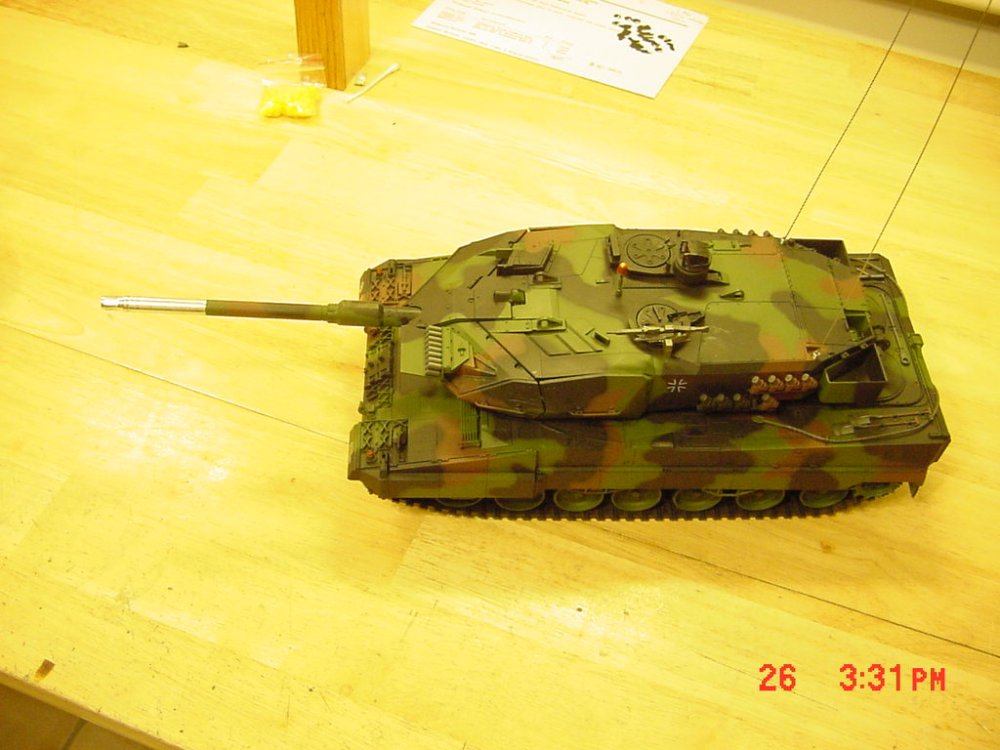
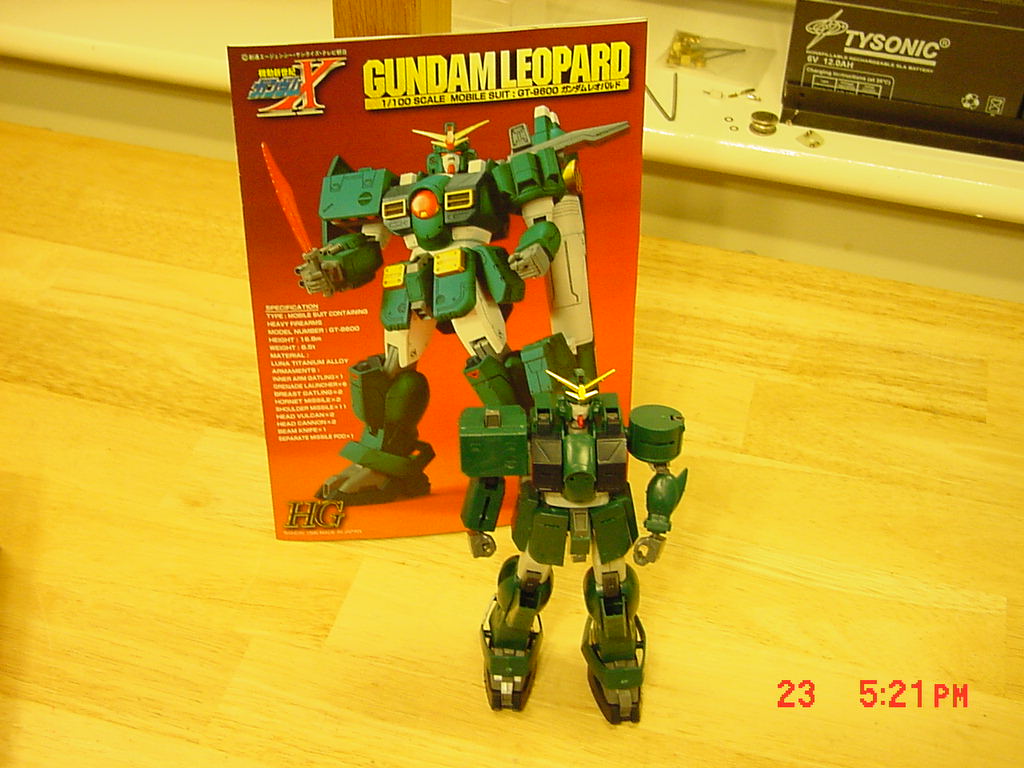
Lookin' great everyone! I took a break from the Daedalus (for sanity reasons ) and I'm working on something fun and easy. I'm working on two Leopards - sorta. Here's the VS Tanks Leopard 2 A5. I wanted the A6, but was told it's not currently available, so... A little aluminum work from an old Airsoft barrel. The children and I had fun putting holes in paper "testing it out." The individual track links are great; too slippery on tiles though . Paint's next. The children and I are working on just snapping together a Gundam Leopard. Count the tabs and seams, because we're not cleaning them up! They're having fun building it though, and more importantly, I have family members to help "enable me" in my habit, err a hobby. I'm waiting on a 1/20 Scope Dog Red Shoulder mod from HLJ. That will be my next fun project. - MT