MechTech
-
Posts
4701 -
Joined
-
Last visited
Content Type
Profiles
Forums
Events
Gallery
Everything posted by MechTech
-
I was wondering if you were still alive? That looks AWESOME! The pictures are fuzzy, but the weathering on the sides and markings look great! Are you going to weather the deck area too? I think the F-14 is too big though - MT
-
You didn't say airbrushing so I'm guessing spray can? If so, put it in warm (not hot) water and bring the cans up to a slightly warner temp. It helps the paint flow ,settle and cure smoothly. Keep the parts warm too, just not in the water . - MT
-
Looks great! Also looks like a big chunk of resin. - MT
-
Looks absolutely awesome man! - MT
-
Thanks. There shouldn't be any problems weight wise. The whole bow section and ramp assembly so far weighs 720 grams or 1 lb 9 3/4 ounce according to my scale. It's the heaviest part too! The back half won't have all the mechanics on it. The lower hull weighs about 30 lbs and is broad/flat bottomed. I'm only worried about control issues into the wind actually. The hanger deck is a giant sail. We'll soon see! the 24th marks two years under construction! - MT
-
He he, great minds think alike. I've had a Talgeese shield on hold for the same thing; but for a VF-1. It's coming along great. - MT
-
Welcome to the boards Nausica (I never thought I'd say that). That looks really good for a three day build and your choice of materials. I believe if you planned out and used more care, you could really make a professional looking model! I could never build anything scratch in that short of time. The texture on the one you made looks rough; that can detract from all the work you obviously put into it. You have skills. Try styrene sheet and shapes too. Great stuff! - MT
-
Dah! Why didn't I think of graphite? Good idea! Thanks guys and Isamu for the compliment! - MT
-
Welcome! Also check out Big F's stuff. He's working on a Jetfire right now last I heard. - MT
-

Anyone know how much in the way of turnaround time we can expect....
MechTech replied to SebastianP's topic in Model kits
Hasegawa sticks to reality with the exception of the Macross series. Watching the MF episode I was trying to figure out how the models would look. They're buglike, but very mechanical. Alex - I'll take companies called Bandai for $200 please... - MT -
I remember those. I never bought one. I thought it was like breeding an apple with an orange and trying to get someone to eat it. I thought it was another Macross wanna be. - MT
-
Wow, for a while there I thought the next pain I would see while scrolling was a member's blood dripping down. Oh, and the transport looks good HWR. The dog is a nice touch. I got the stand and accessories pack for my Leo A5. Now I'm just waiting on the tank and individual tracks. - MT
-
She looks great. I'm thinking closed mouth too. - MT
-
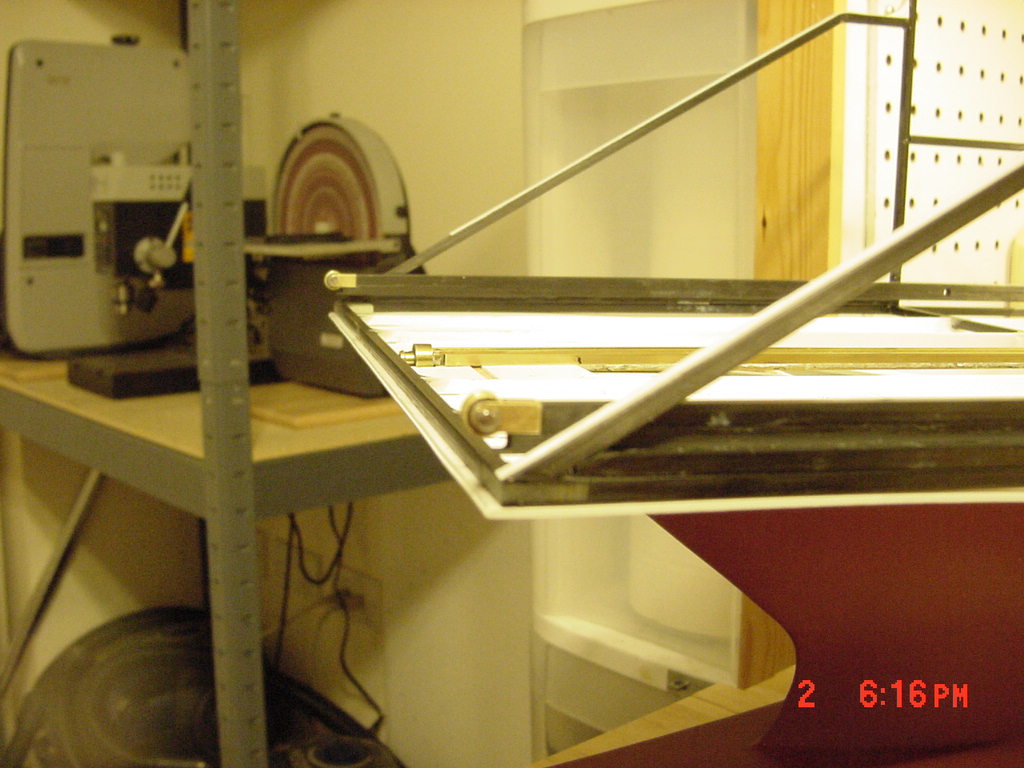
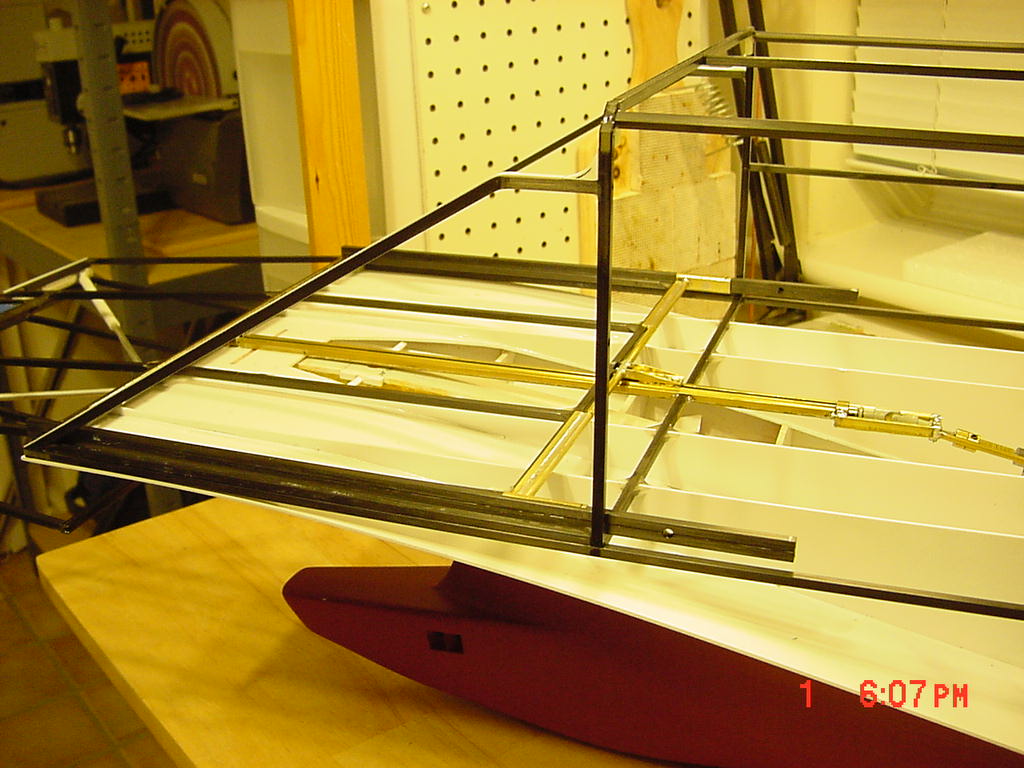
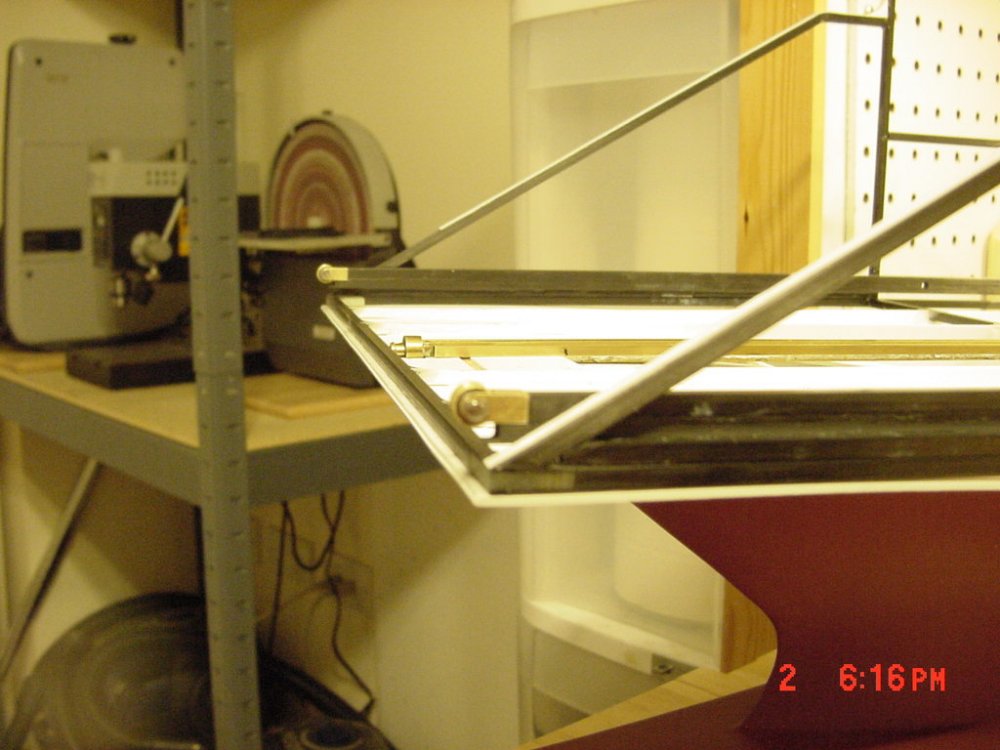
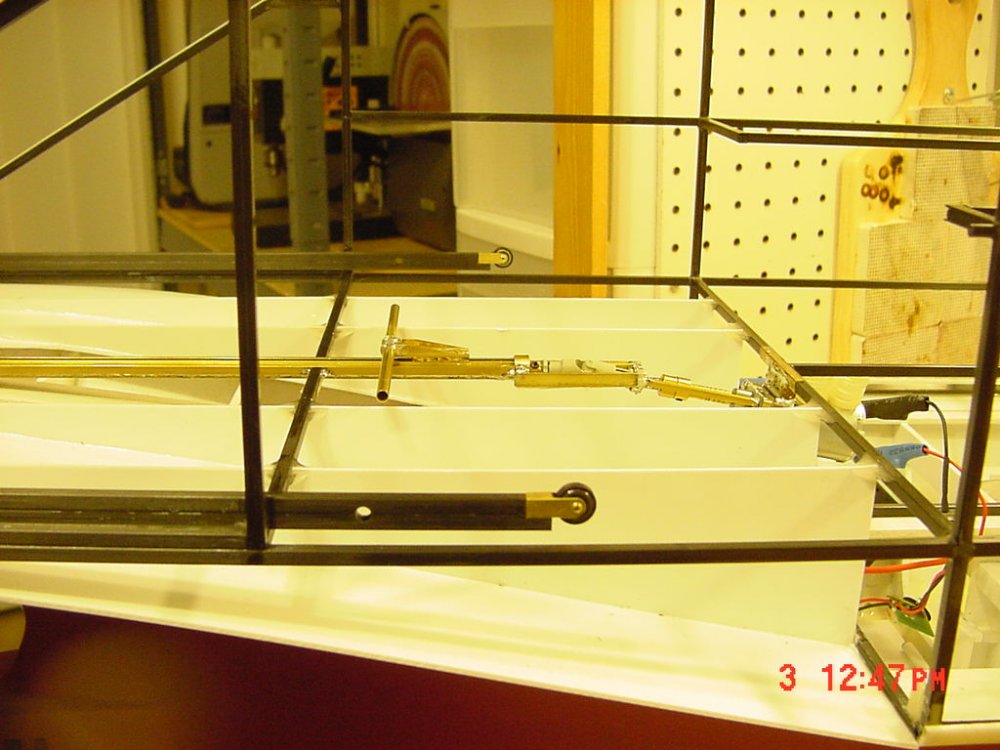
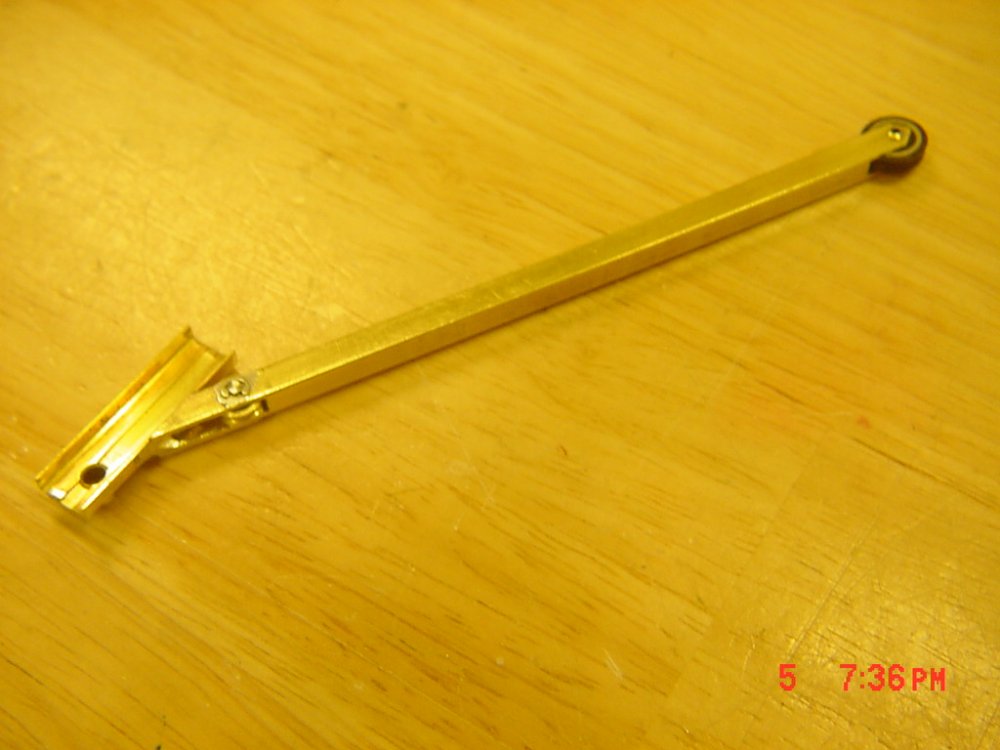
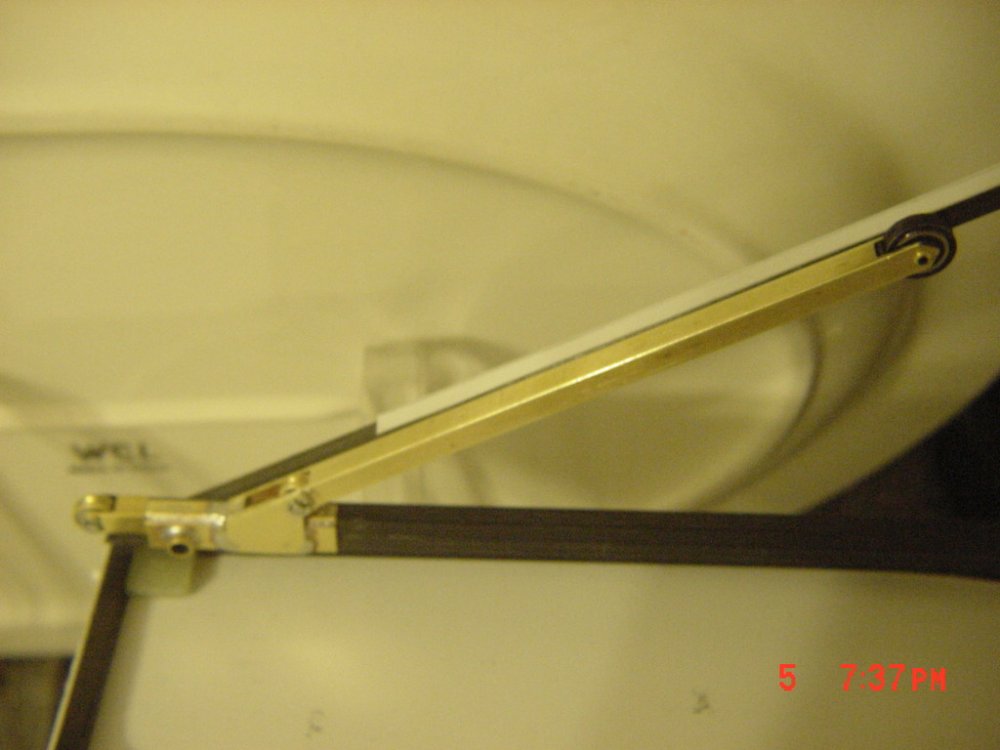
Hiriyu, thank you,I'm actually not using lube right now to keep dust from clotting on it. Plus the channel will be open so I may never lube it to keep it clean. UPDATE 6 JAN 08 Here are some photos from this weeks buildup. To save weight, time and a lot of things, the motion of the ramp retracting will also fold the middle and (already folded up tip section) using cables. There was no easier or realistic way to do it. Not all of the components are completed yet. Front Ramp pulleys will be replaced with the end of the cable. The rear pulleys will be going into the towers. Long story short, the original idea was flawed in that the cable and the ramp both moved equally. Round two worked and that involved making towers to move the cable backward. The cable has to be elevated to offset the fulcrum of folding the ramp. The gearcase works really hard now, but it's till just one gearcase! [at achment=48714:Guide_To...in_Place.JPG] The guide tower in place. The angle of the tower is so that it matches the angle of the main hatch opening, but still elevates the cable enough. When the ramp retracts, it pulls these right along with it. The cable will be anchored to the front of the rails and up into the towers and out back to the ramp canter section. The trials worked! Now I'm waiting on my VS Tank and accessories to come in. I wanted something completed I could have some fun with, so I bought a VS Tank Pro Leopard 2 A5 with Airsoft gun. I could'nt find the A6 anywhere so I'll just lengthen the barrel and update the details. I also got the liked tracks for detailing. - MT


-
Thanks TSP! I researched them a lot and found some bad news on the Hen Long stuff. The vstank.com site slammed them with all sorts of photo and verbal comparisons. The dealer I almost ordered them from I looked for reviews on too. Banana Hobby got slammed everywhere I looked. Supposedly the FBI is investigating them. Thanks again for posting that link up of Macross Frontiers in the valk voting thread. I saw the translated version and it was great. Now we're going to have to buy VF-25s!!! More money! HWR - That's cool man with the old '77 Leopard. Tamiya's older stuff is really great and paved the way for many modern R/C vehicles. Some of the old spares I had found their way into the Daedalus in one form or another. - MT
-
Thanks TSP for posting the links to Macross Frontier. I hadn't seen it yet! (I gotta get out more-virtually speaking). - MT
-
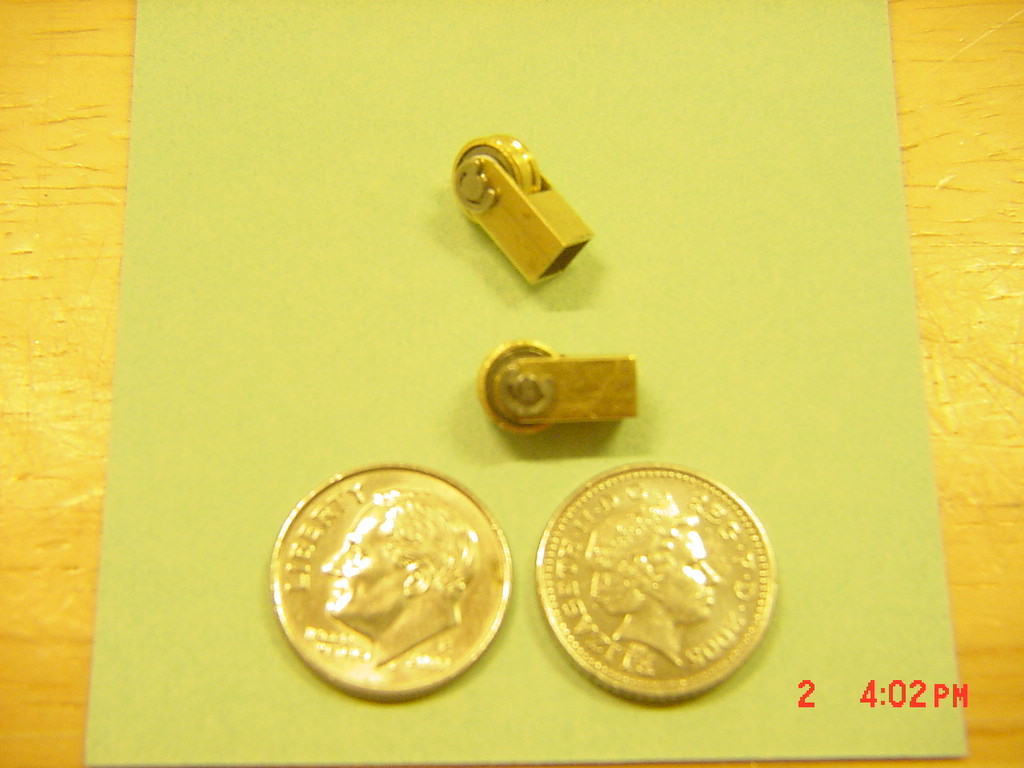
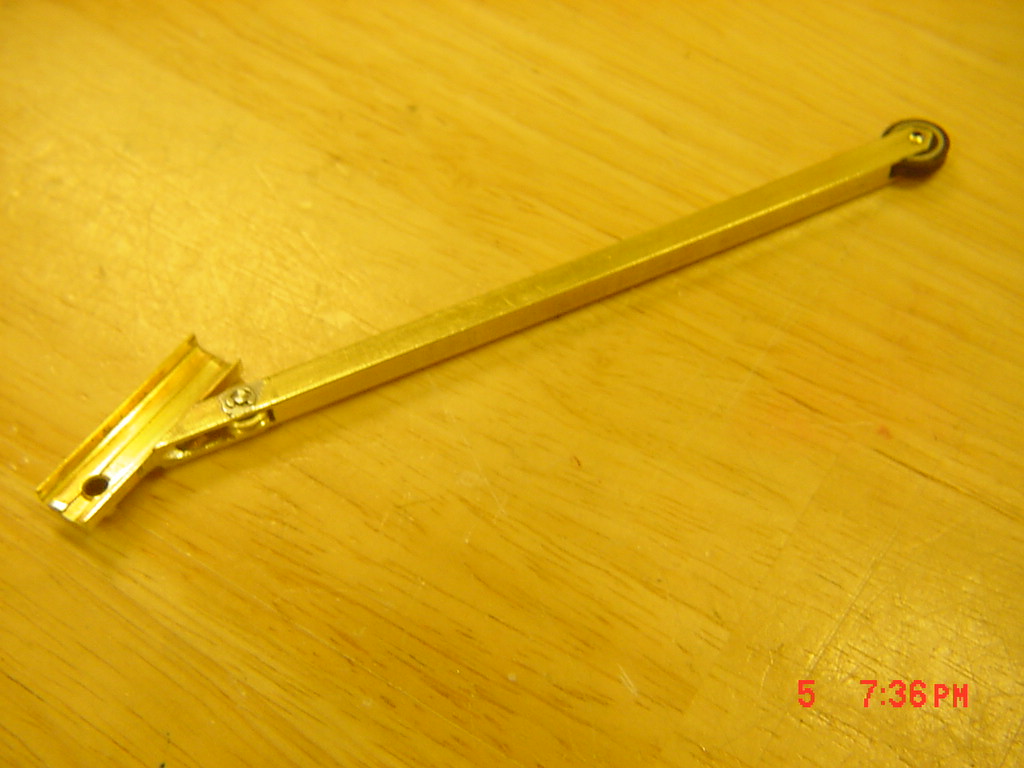
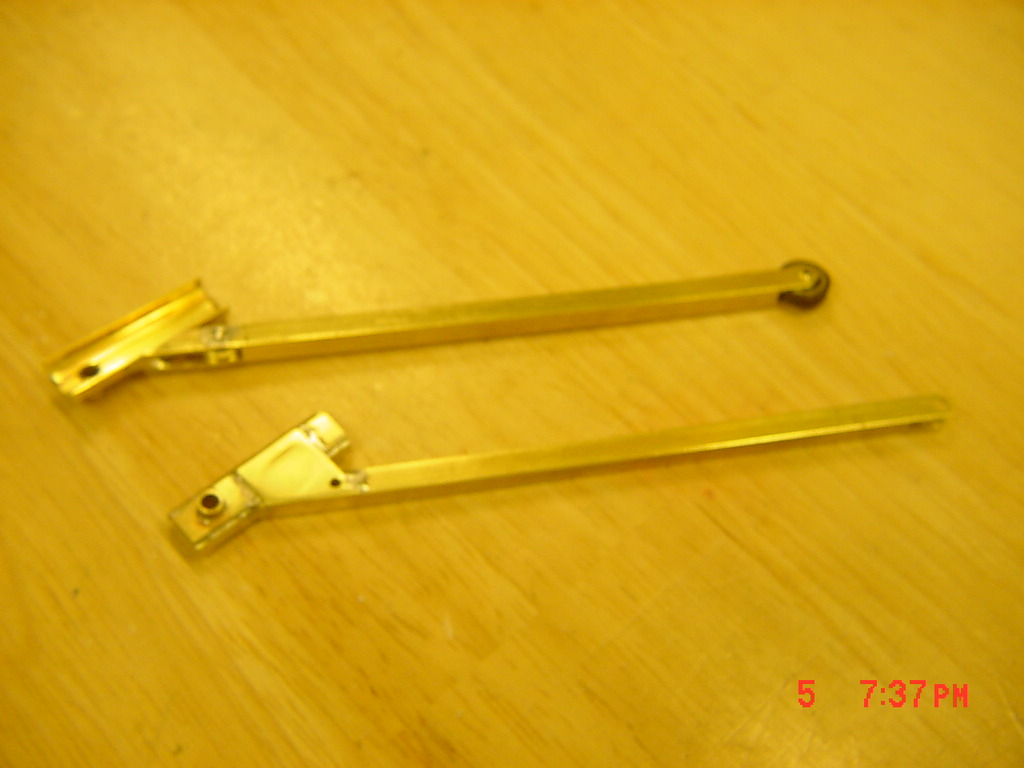
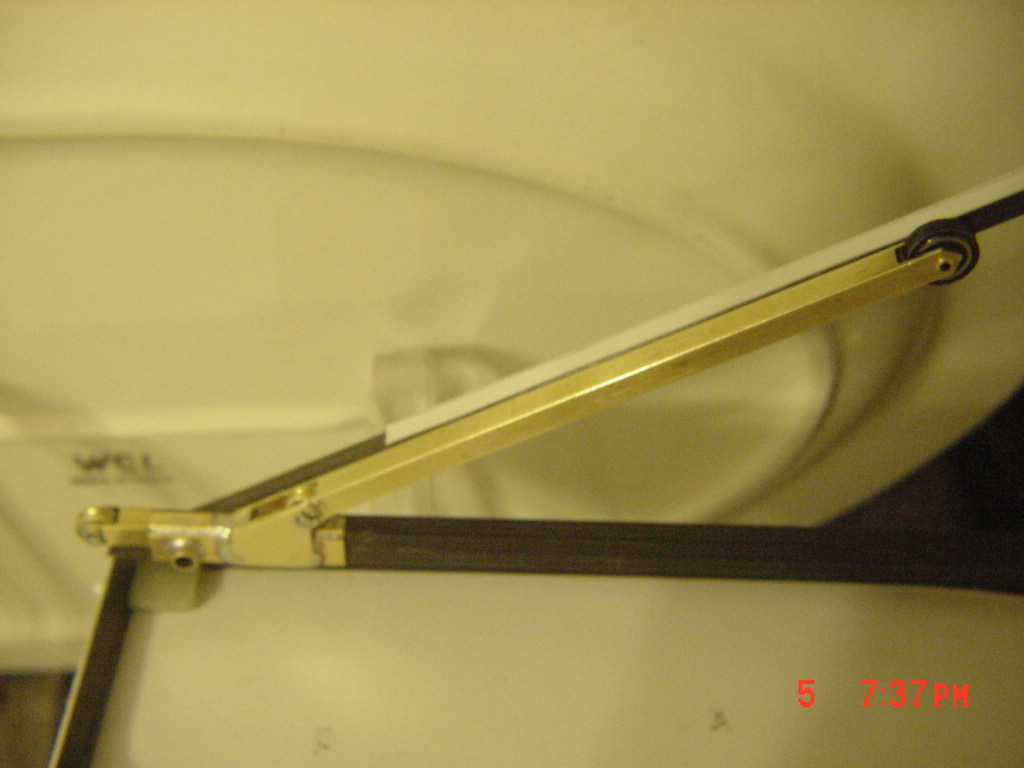
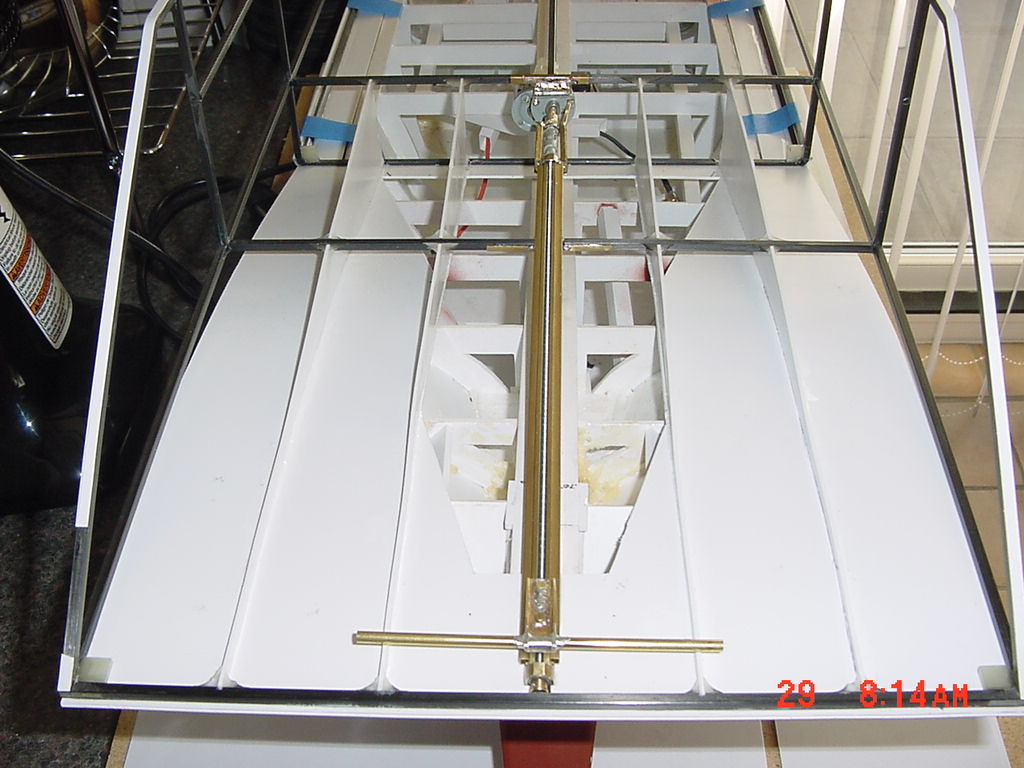
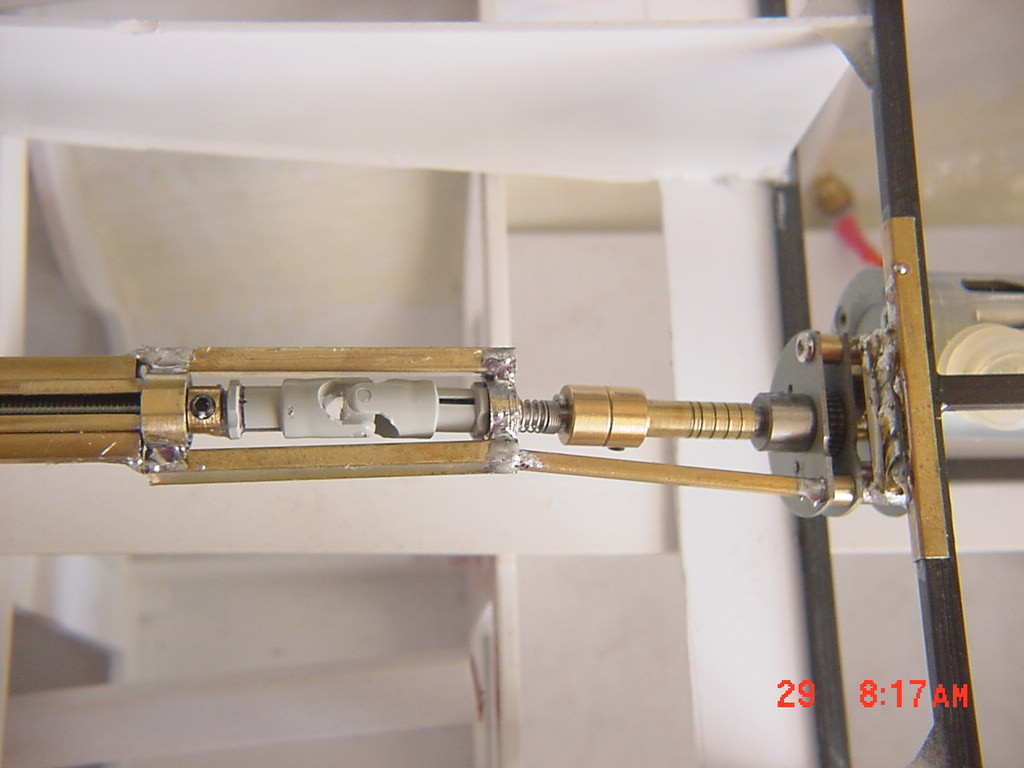
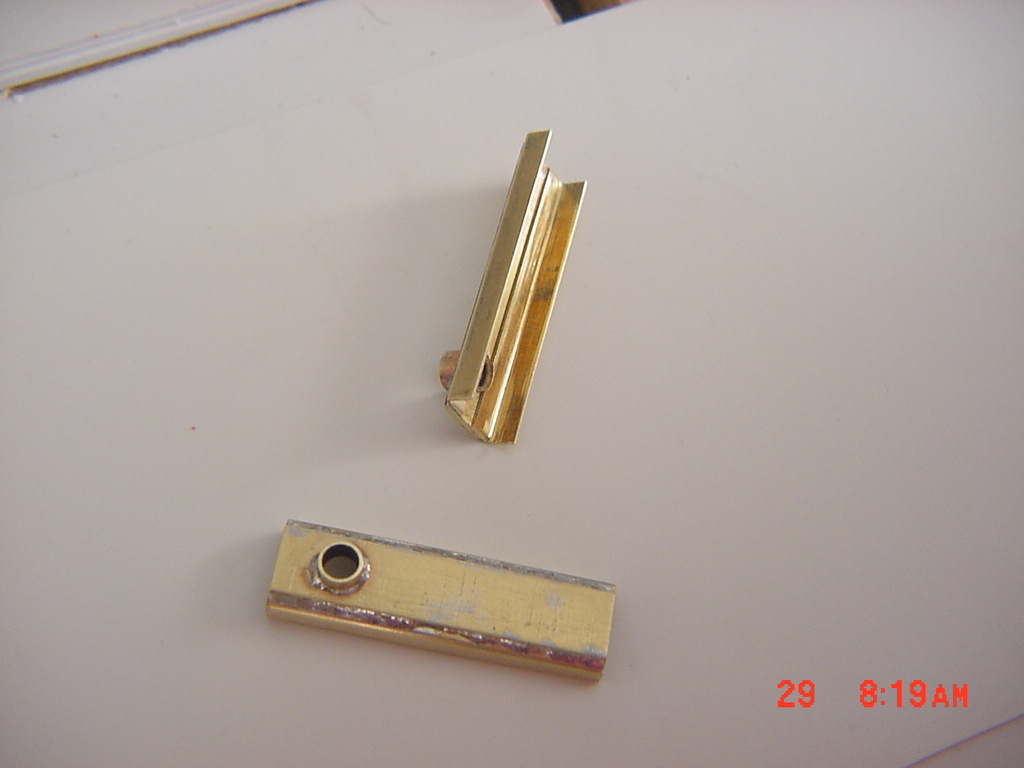
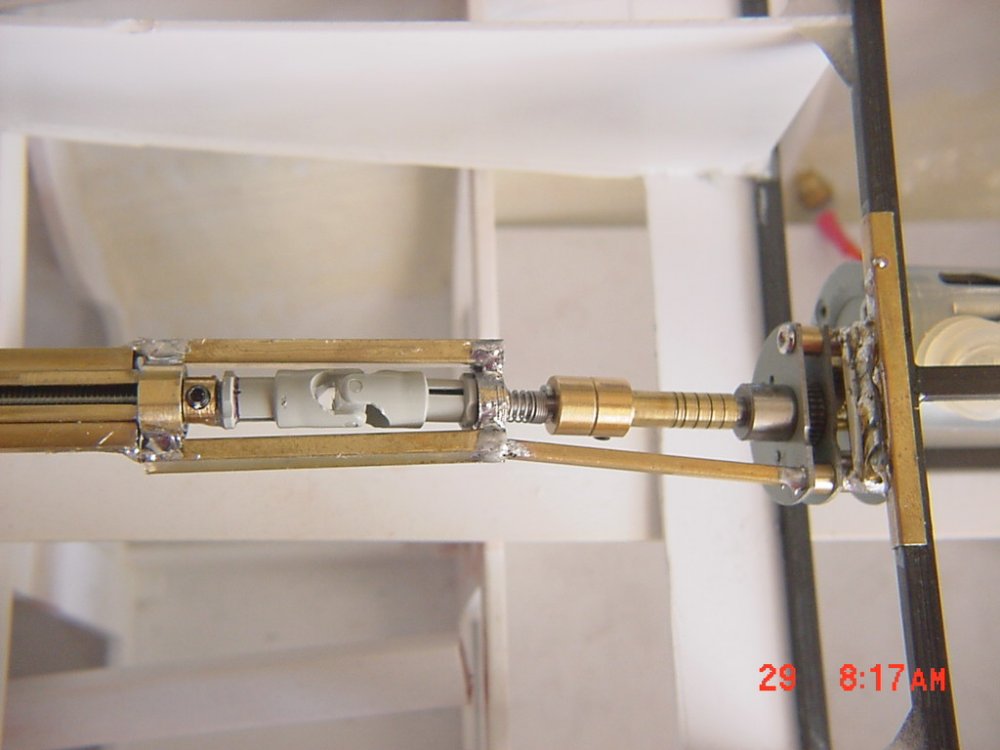
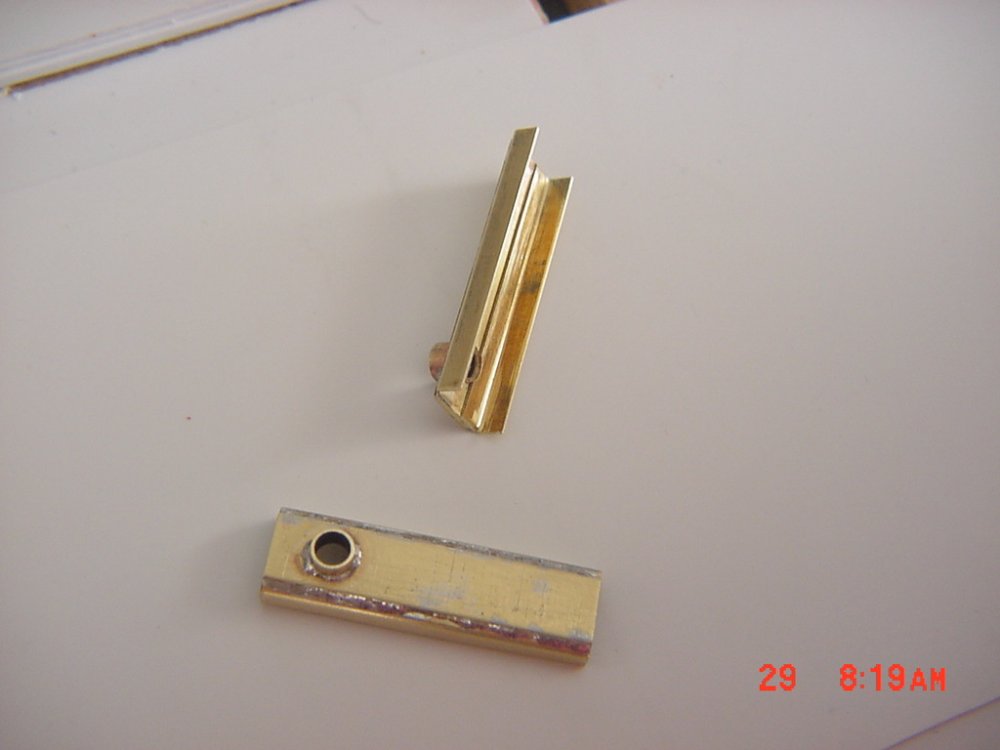
Neptunesurvey, the crane works great. I think the video for it is back someway a bit. HAPPY NEW YEAR! UPDATE 1 Jan 08 The linear drive is now centered, hooked up and running smooth. Here's some photos: The completed drive installed dead center. The universal joint and gearcase. Some of you are saying, those are Lego parts! You're right! I needed a strong and low profile UV joint, this was perfect and needed only a little work (ans some epoxy) to fit right over the ends. The gearcase is an MFA gearcase with 280 motor. Quality unit by the way. The gear case is quiet with other motors, but I rebuilt the 280 from other Mabuchi 280 motors, added 2mm ball bearings to both ends and dropped several windings to increase speed. Still has plenty of torque, weighs 1/4th of the Mabuchi 555 I thought of using (which is ultra quiet at 3volts but weighs 1/4 kilo). The carbon brushes add noise as does the strain on the gear case during part of the cycling. I'll put up with the noise to save that much weight! The soldering looks sloppy, but I had to get everything aligned while making it work. No one will ever see it anyhow (except you guys). Next I made up the rail guides. These support an 1/8" shaft that goes through all of the ramp hinges to hold them together. The rails are simply doubled up 4mm CF square tubes. This was the simplest, most robust and lightest design that worked (yes there were others). The hole in the back of the rails is to align the ramp, guides and rails up for installing or removing the ramp. And a little video clip to give you an idea of speed. Ramp_Retract.MPG Next step is getting the ramp to fold up near the back section. Hopefully this will be the year it ALL comes together! - MT


-
Yeah, everyone's been busy! Nice work! HWR, what original chassis are you using for the Leopard? I'm seriously looking at getting a Marui/VS Tank Leopard 2 A6 with Airsoft cannon. Just something to have fun with that I don't have to build (or have time to build). The other issue is trying to find someone who sells it stateside. Specifically the VS Tank (I like the controller layout better). Banana Hobby sells it, but I've seen them slammed online. I'll probably get the accessories and stand to spruce it up. I love the Tamiya A6, but too much money, time and space for me right now. I'm mad at work engineering the Daedalus ramp mechanisms now. - MT
-
Nice paint jobs! - MT
-
This isn't sounding too good already . A Mickey D's scheme would be funny, french fried missiles on the wings. In all seriousness, warm up the spray paint in a tub of water first so it lays out smoother. You should even be able to make custom decals from a Testors kit they sell too. The Macross roundrel with a giant "W" in the middle. - MT
-
Upgrading the kit TSP? BigF, that Jedi cockpit looks awesome man! Is that the 1/48th scale one? I got one for my son about a month ago (he's three). I just went heavy on the glue after he broke some parts and he still loves it! Pre-painted it's great as a toy. The R-2 unit halves just didn't want to match up. By the way, did anyone out there see the Fine Scale Modeler January issue. They finally posted the Wonder Fest pictures in it. I was really disappointed! NO MECHA whatsoever! I'm thinking of going with Hobby Japan now with a subscription (even though I can't read Japanese). FSM just doesn't do mecha anymore (except the adds in the back). They did have a great article on working with real metal foils though. Maybe a a valk in the "buff." - MT
-
They are actaully 1/200 scale. The Preiser ones are spot on, the Herpa ones are a bit too small, but not unles you get your calipers out and start measuring. Preieser makes most of their people in all those scales, 1/200, 1/160, 1/144 and 1/100 (plus someother other scales too)! - MT
-
Looks great Capn'! - MT
-
That's awesome! I love small scale stuff and that's just too cool! Thanks for sharing! - MT
-
To update everyone, I bought the Herpa Military Ground Support Equipment set and the and the Air Force Personnel set. The AGE set has great detail and high quality printing on it. Most of it will go great with Macross stuff. It even come with 4 AMRAAMS and a drop tank! OK the ordinance isn't Macross, but most everything except for the tractor and weapons loader could pass off. The AF set comes with two each of: ladders (look Macross correct), pulling dudes, standing pilots with helmets in arms, arms up/down waving guys, legged tractor operators, kneeling maintainers, female kneeling maintainers (yes you can tell at that small), ladder climbers, legg less equipment operators, and six pilots with helmets sitting (partial legs). That's 24 people and two ladders for $13.60: http://store.houseofhobbies.com/he1acairfope.html. The AGE equipment was $23.20: http://store.houseofhobbies.com/he1acgrsueq.html . By the way, the Gulliver 200 line has awesome detail. Get a magnifying glass and you can read all the warning notices like "no step" signs on the airframe! http://store.houseofhobbies.com/gu200mije.html Burbank's also has more great 1/200 ground stuff to include the Preiser Mechanics(if you can get them in orange, they're canon): http://store.houseofhobbies.com/1acfi.html Aviation Retail Direct (UK) has more of the line and the Jolly Rogers F-14 available on pre-order. ALL the ordinance is loaded too. I'm getting the F-14 from Burbank's for now. It says F-14A, but there's an LGB on it. Gotta get the Jolly Rogers soon though! http://www.aviationretaildirect.co.uk/skel...1&grpid=112 More cool stuff to keep your 1/200 and Nichimo kits from being lonely at night! - MT