MechTech
-
Posts
4691 -
Joined
-
Last visited
Content Type
Profiles
Forums
Events
Gallery
Everything posted by MechTech
-
Looks great neptunesurvey! I can hardly wait to build all the small craft to go with the Daedalus. On second thought, yes I can. And yeah the ignorance of people with the series is a bummer. Somebody said I had to see the Transformers movie because I built those kits growing up. I almost replied back - how dare you ! HWR, the conversion looks great. It fits it well too. - MT
-
Looks great man! Don't worry about the details and such. How many people can say they have one of those or even have one built up that good. Do you get my point? - MT
-
I know you don't want to hear this but...airbrush. That's why I went to one; smoothness. I've heard of chemicals you can add to acrylics to slow their cure speed down. Check out your local art store. More and more artists go for acrylics due to less hazards and smells. The old schoolers had the same problem, drying / working speed. - MT
-
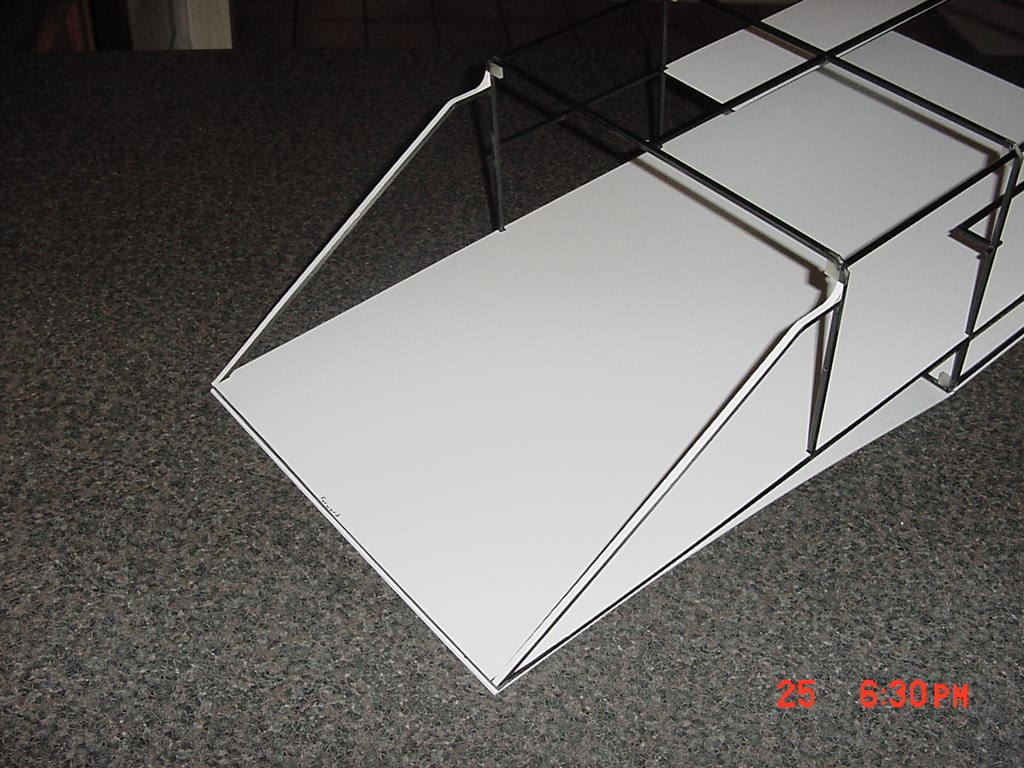
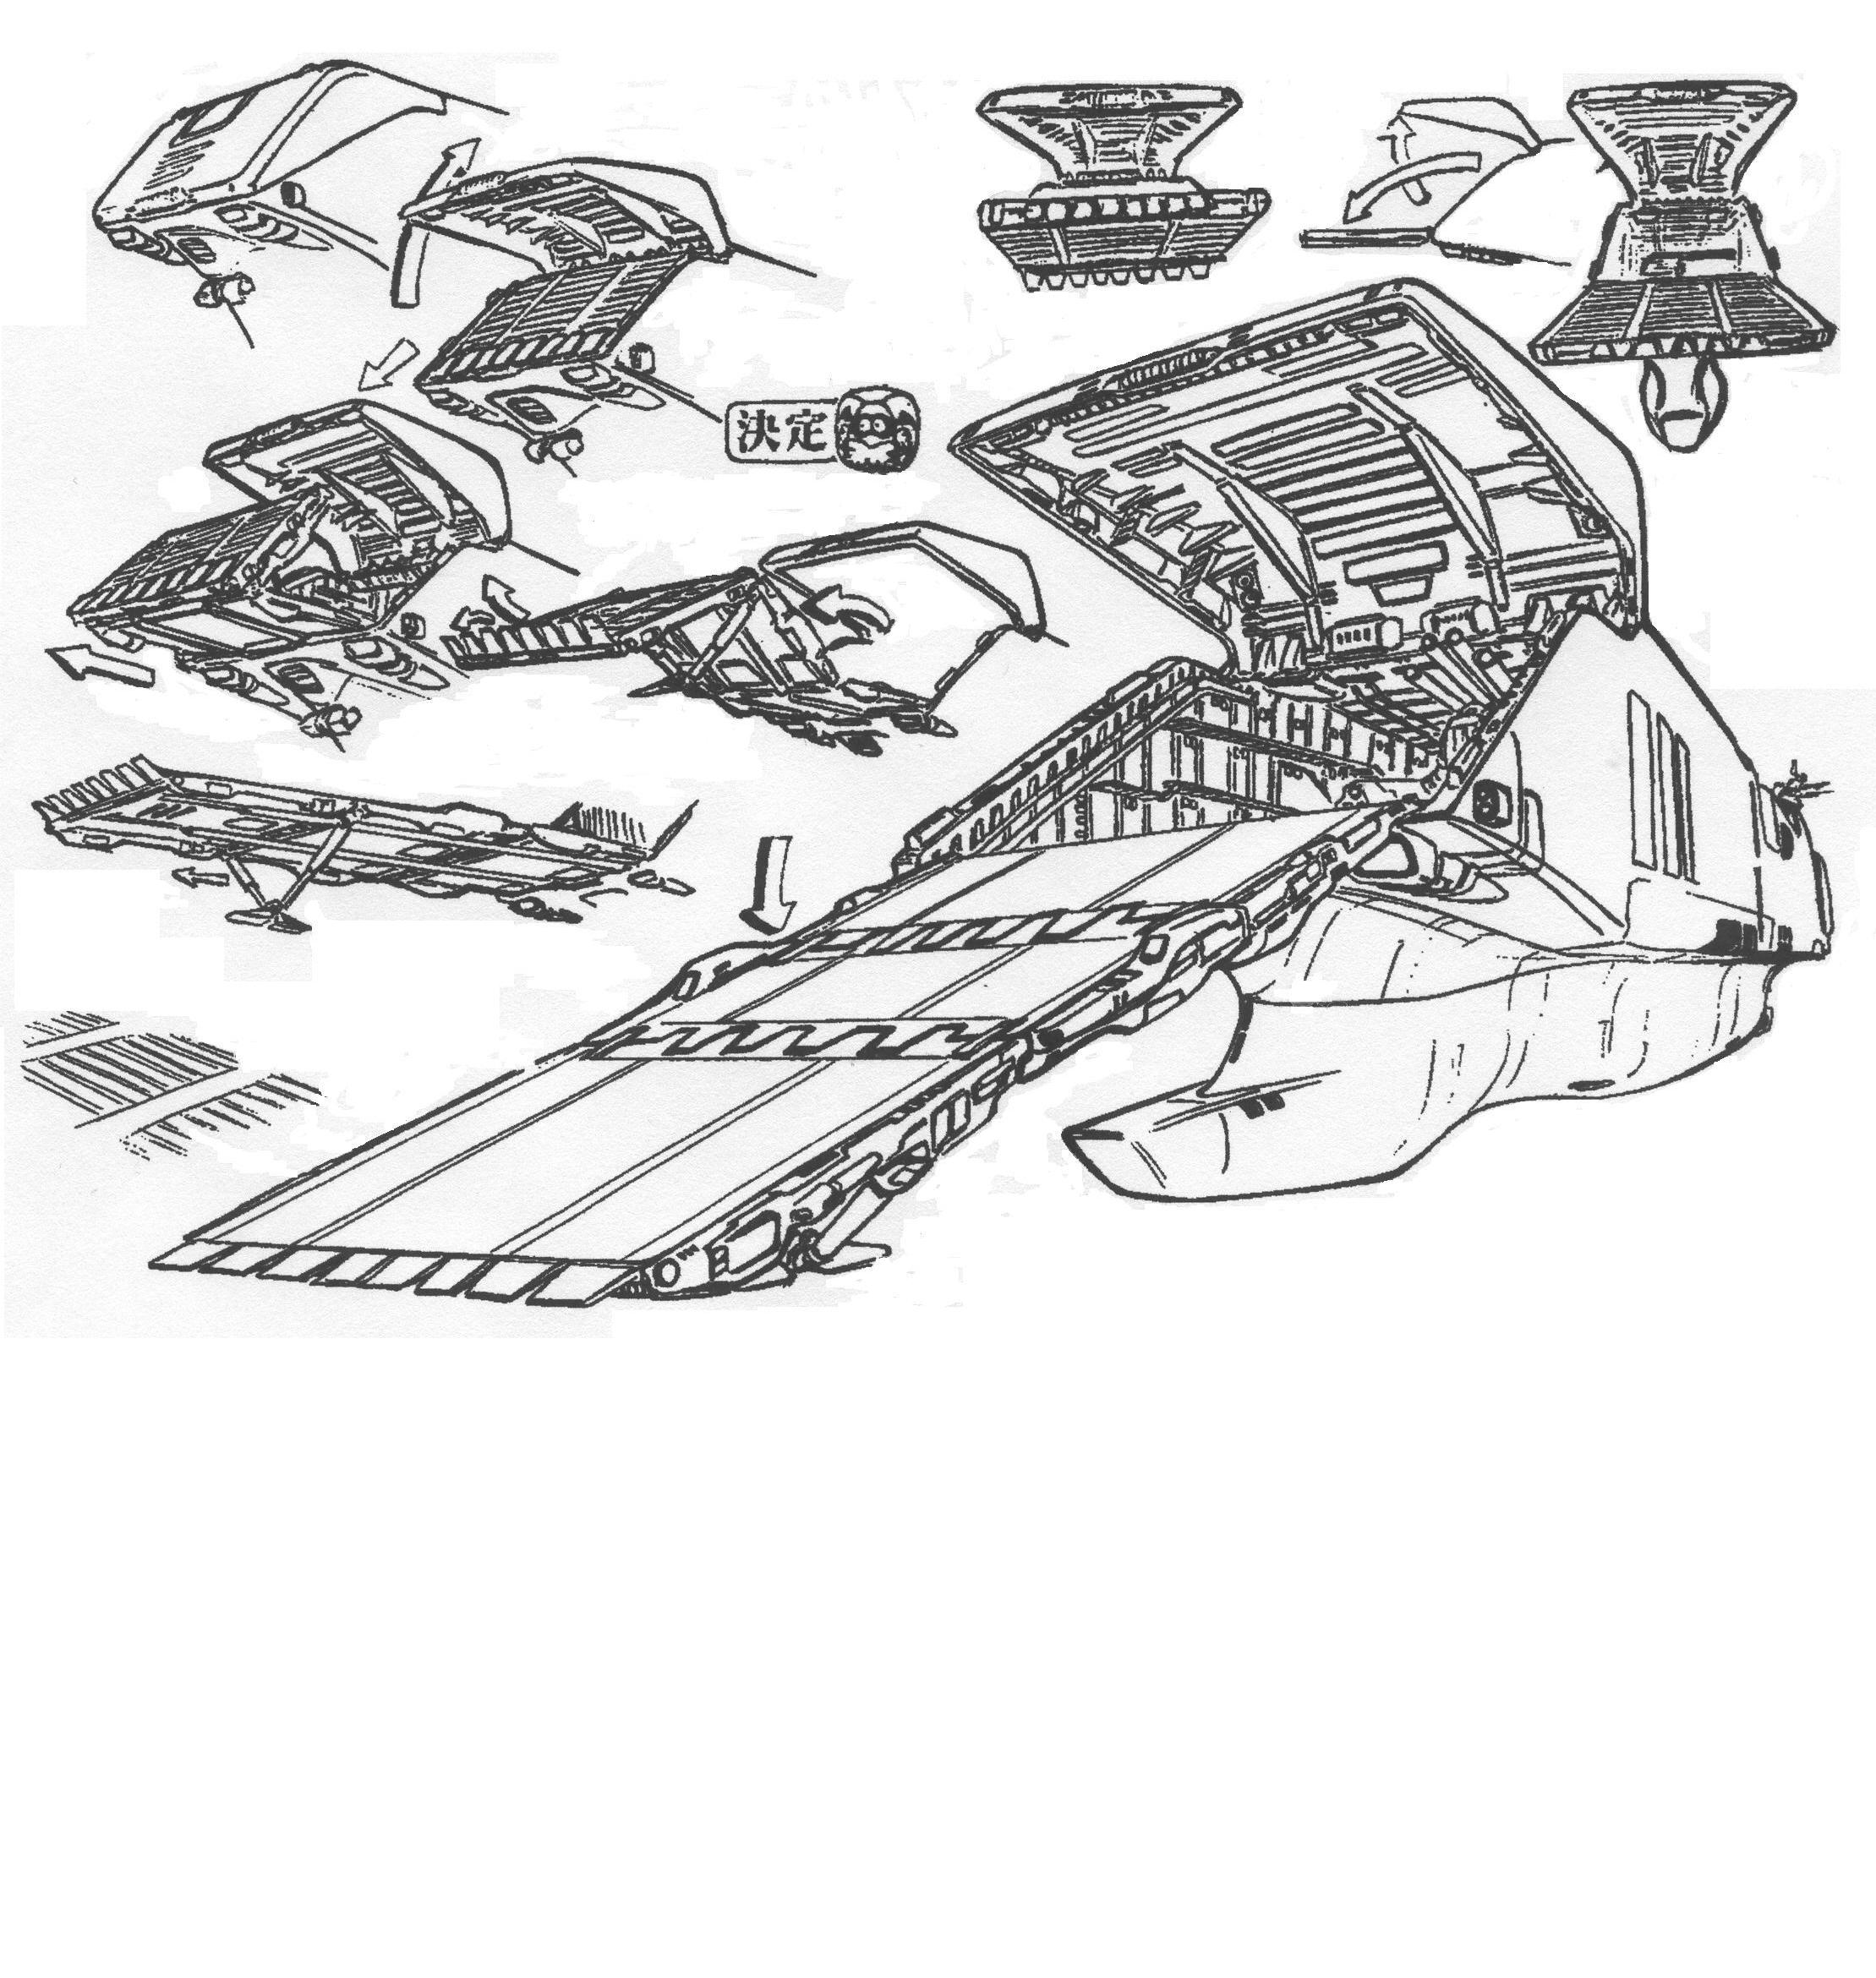
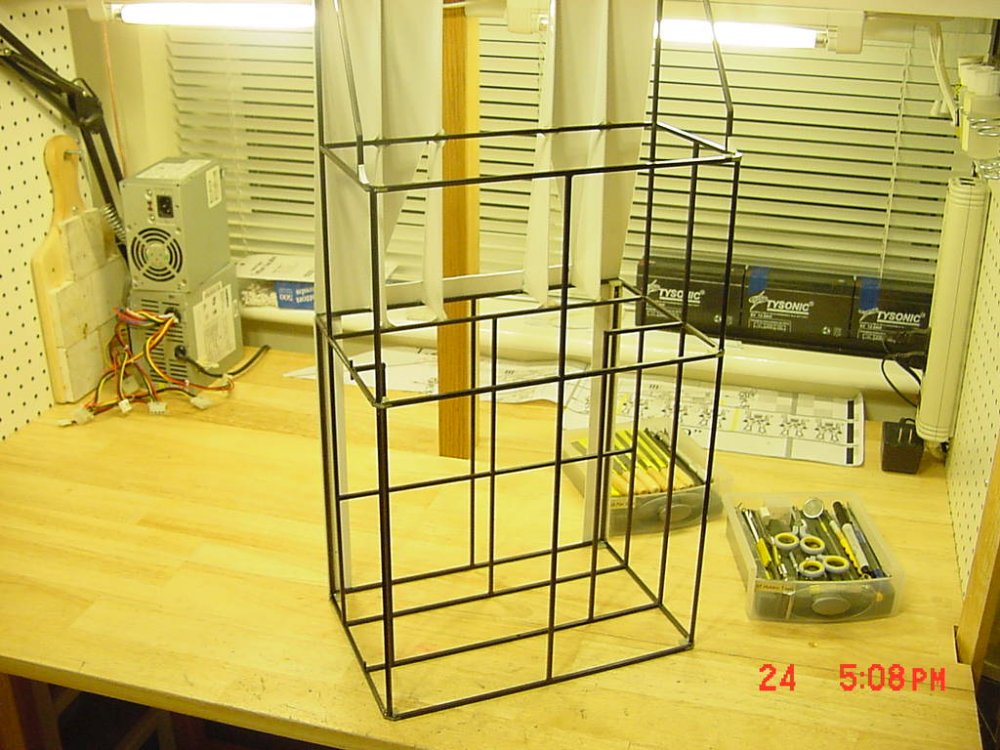
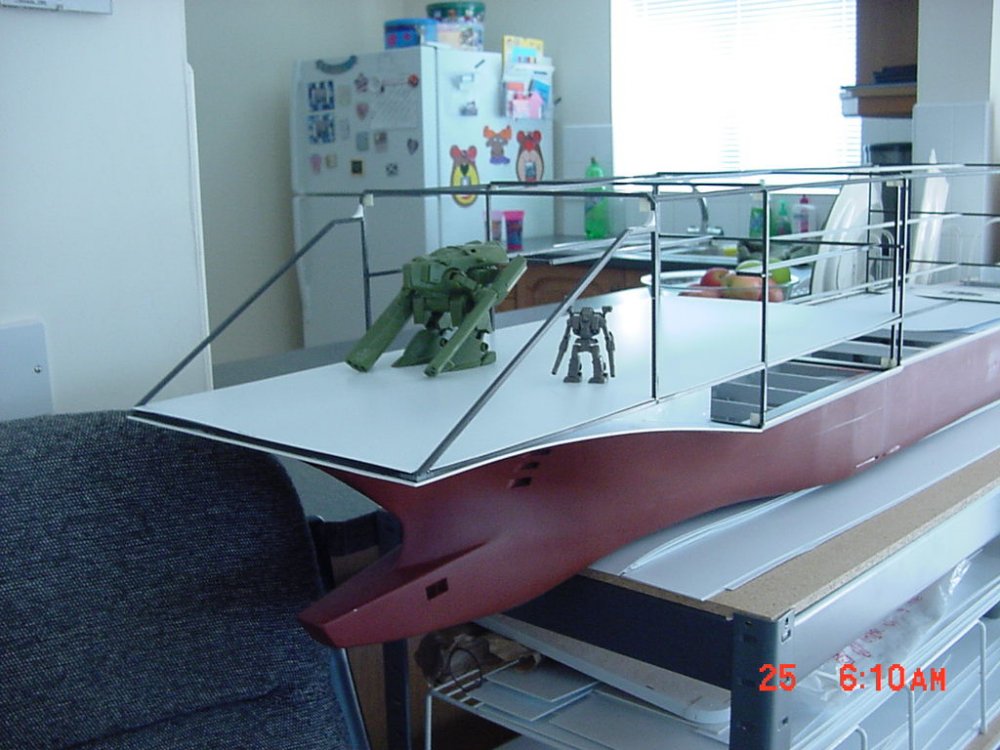
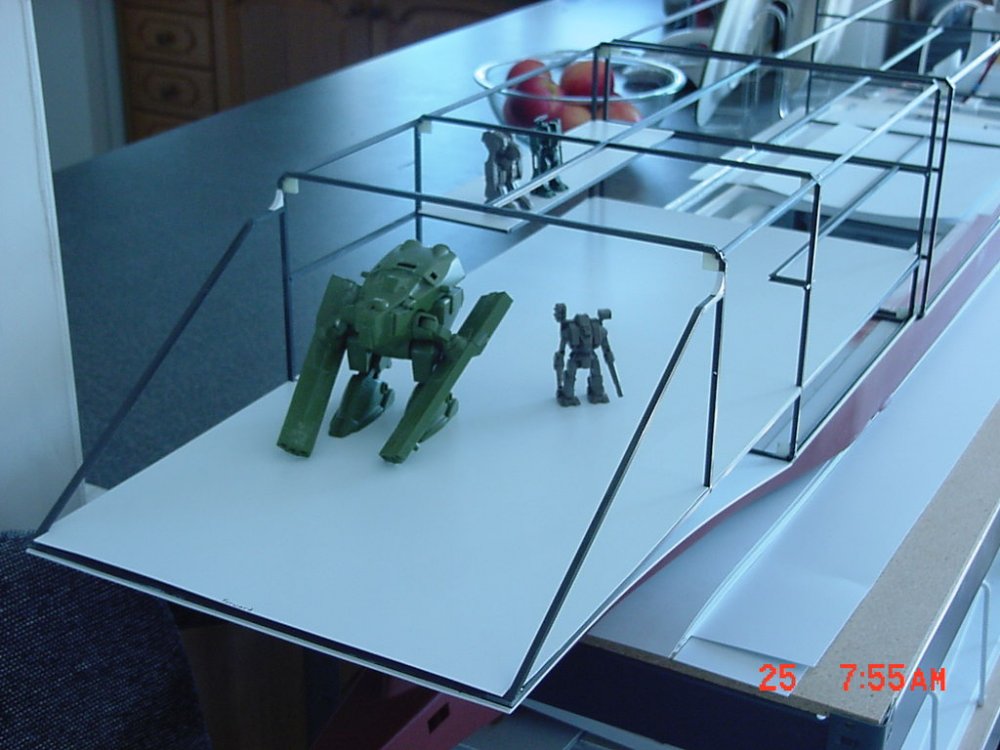
Hey guys, the chickens worked! We got pinned!!! Special thanks to that special mod out there - whoever you are! UPDATE 29 AUG 07 Here's what I've done this week so far. Got the starboard side ribs glued and trimmed to fit precisely around the carbon fiber frames. Here's a blurred view sneak peak at the side outline (my camera has it's good and bad days). A sneak peak at the interior with unfinished models for comparison. Panel lines etched for whatever the heck they are for. Thanks for the encouragement everyone. This is a great board to learn stuff and find vendors. I've gotten a lot of both here and just trying to return the favor. My workbench JUST butts up against the kitchen counter. If I push my ship over a little too far when needing extra room, I find it moves back "all by itself" mysteriously. The ship will be lit up in the interior. If you imagine a mail slot 12" deep and only 3" high with no light coming in around it, that's what the interior decks will look like. Plus lighting just adds to the realism; especially when put into fixtures. The main hatch will have Daedalus Attack capability. The door will open and the ramp come down - or the door opens and the ramp extends outward. Engineering that has been really fun. Somebody make a paper mache Zentraedi cruiser! If someone comes up with a metric ton of silicon rubber, we can recast it! I'm not paying for shipping though! Talk to you all later. - MT
-
Heh, heh, no favoritism; I didn't know. If that's the case, Jigabachi is a good name. You can tell which series I haven't really kept up with . - MT
-
I saw this up on the boards and popped in. Mari Iijima would either be honored or insulted. In private she would laugh - A LOT; like I did! Those dudes got some intestinal fortitude! I thought I was a hard core fan, but you can guess where I draw the line . All battlepods in the house make some noise!!! The location of the microphone for the monster was funny too! Those are probablt the same guys building models that we see links to and say, "that's awesome man!" The ALL synthesized video was probably a good college project for someone. - MT
-
You know, I think the Jigabachi looks ugly, even with all that armament. BUT I've ALWAYS loved the Patlabor Gunship. Even though the gatling is a bit out of scale. A Comanche would be just TOO awesome. I've been tempted to build one. One of these days I will if they don't. Let's ALL e-mail them and say PLEASE. - MT
-
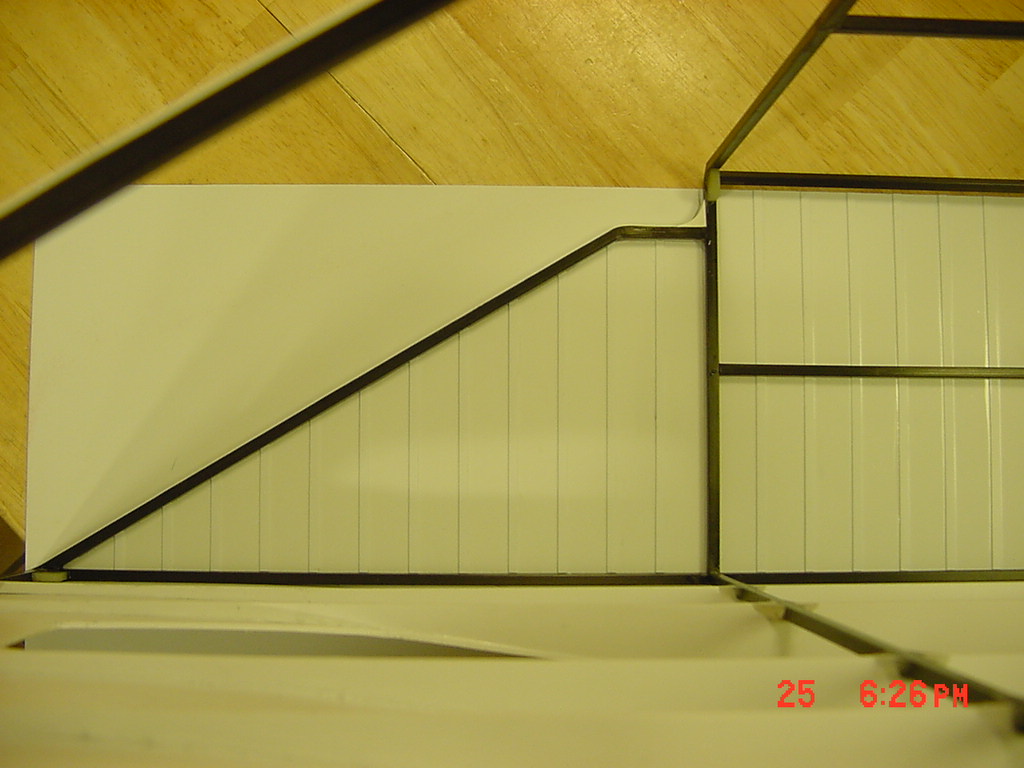
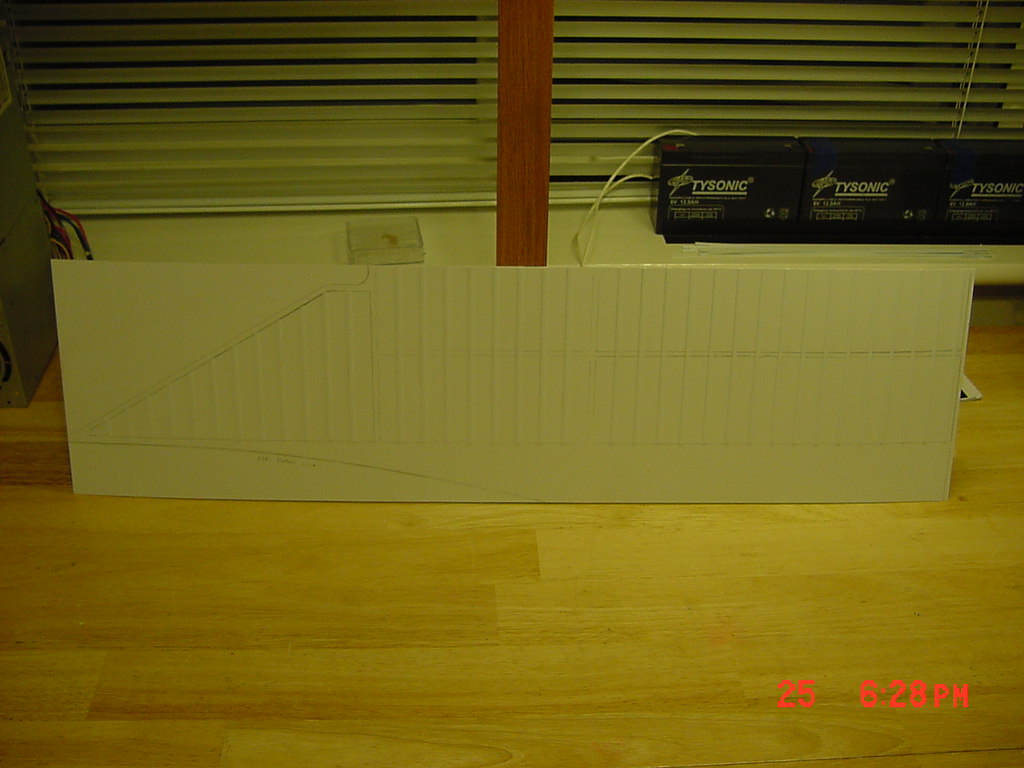
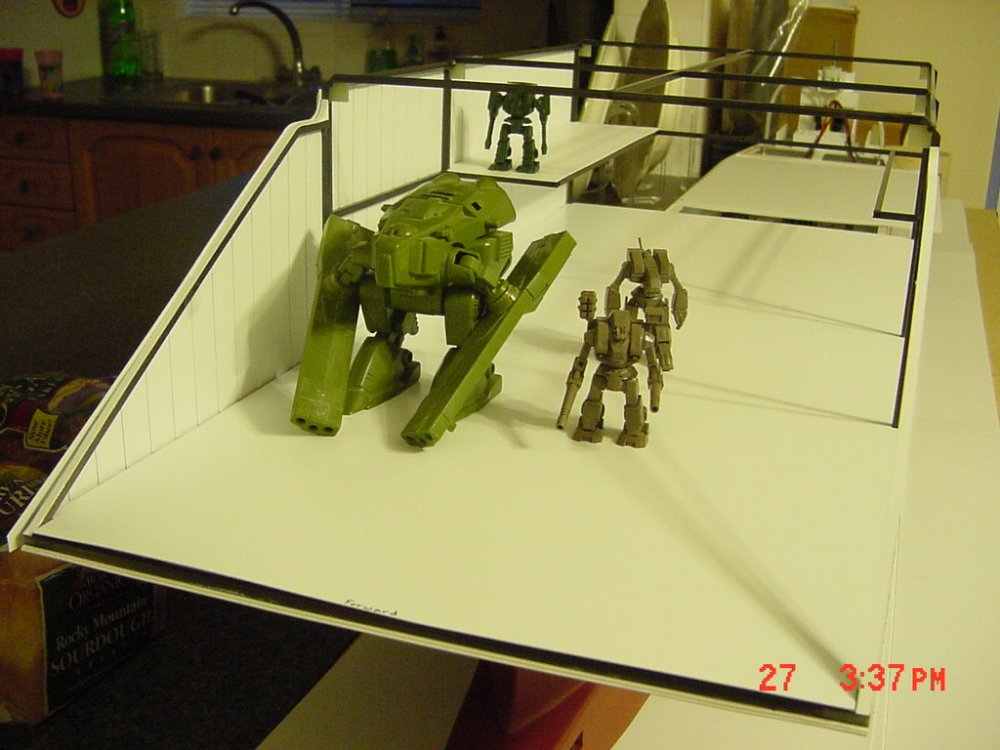
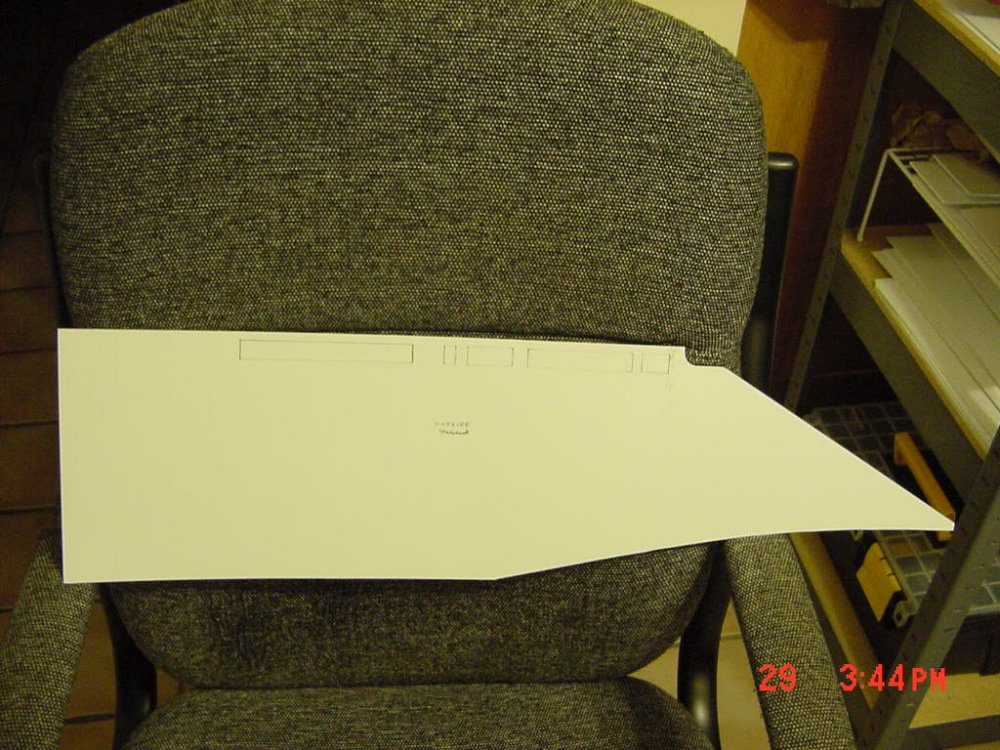
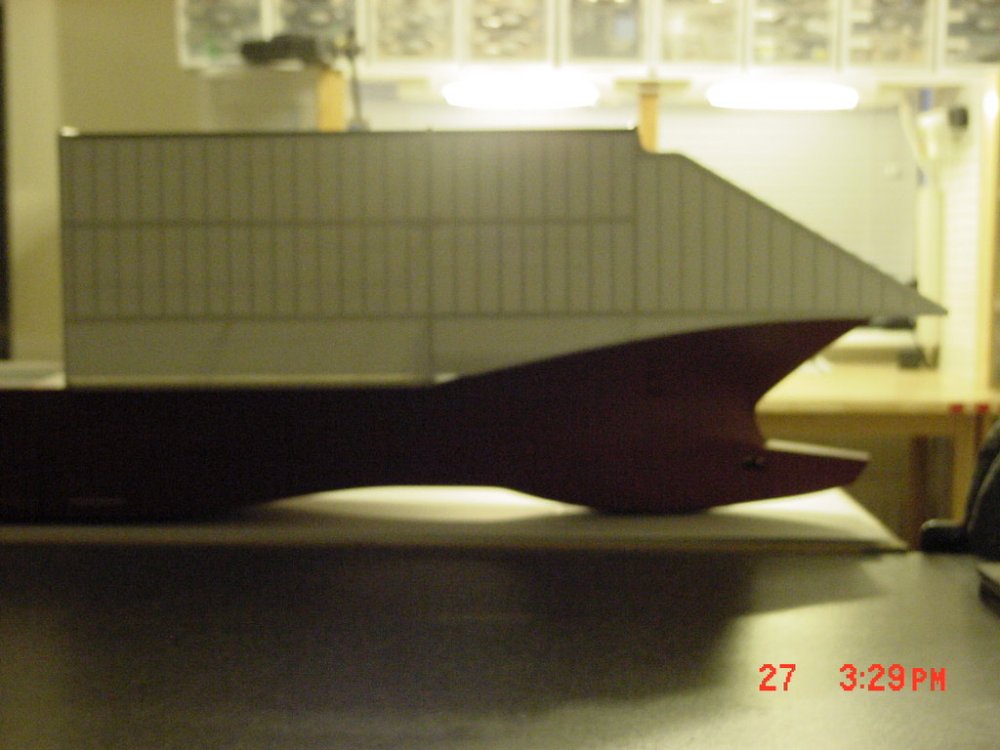
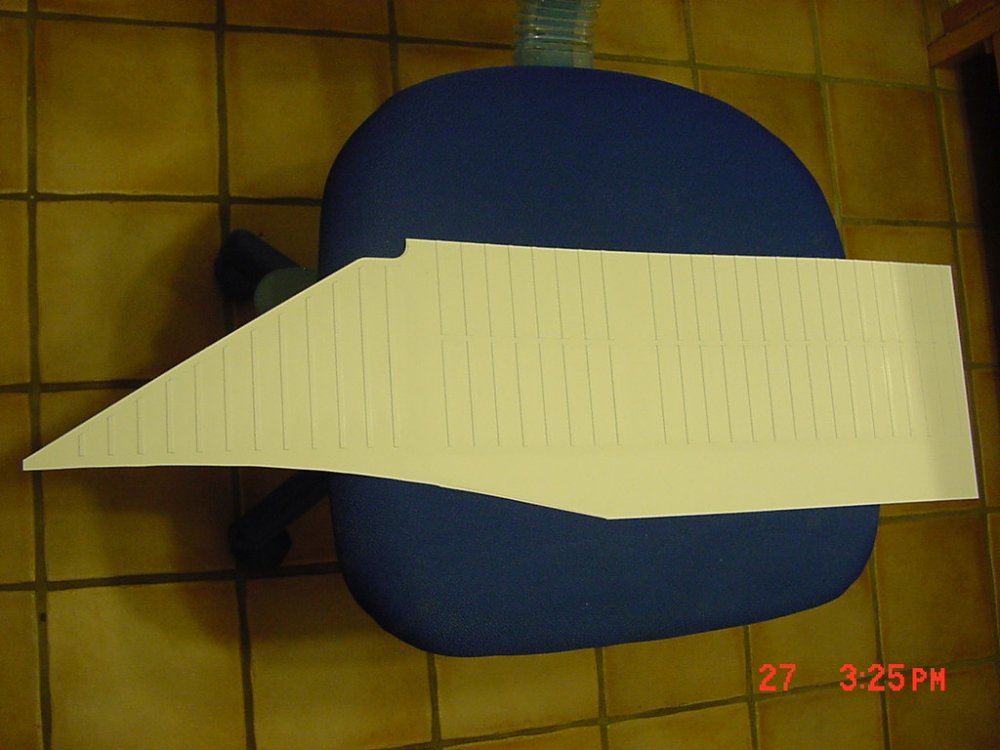
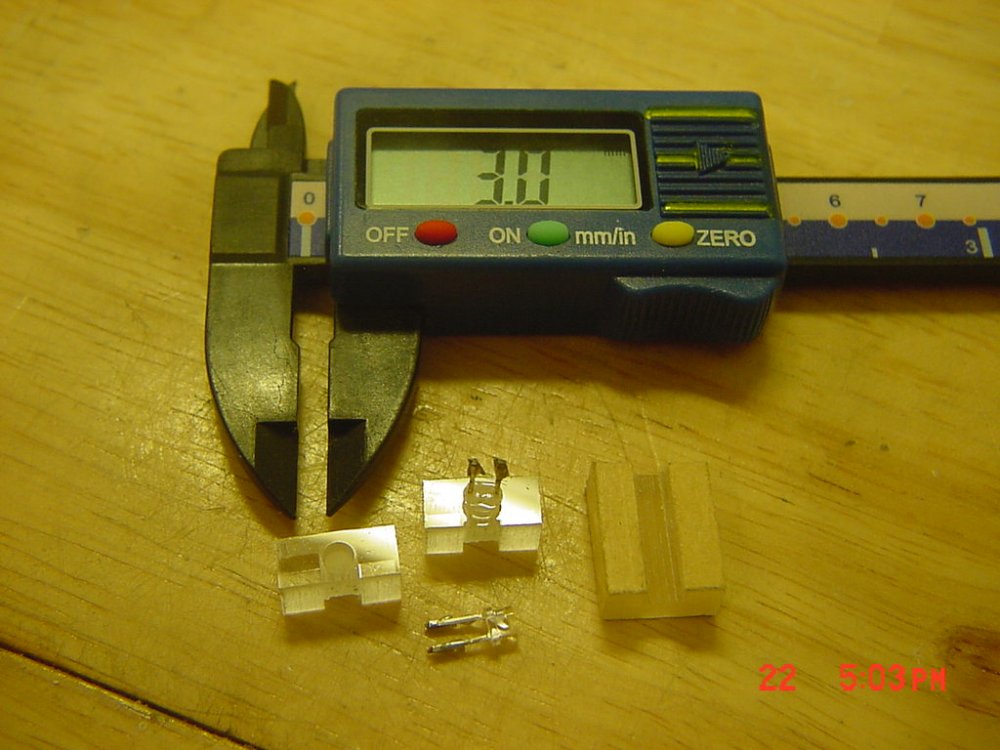
Welcome to the soft porn and poultry section of Macross World (thanks Dante ) UPDATE 26 AUG 07 Here's some updated photos... I took 132, 3mm white LEDs and sanded all the tips down (with a jig) Talk about boring... Then I took acrylic stock and shaped strips with it on my table saw and cross cut the individual lights on the band saw. Using a jig I drilled out a 3mm hole for the LEDs to glue into. These will line the starboard side of the hanger decks. Added A LOT more rod to strengthen up the deck areas and add on the second deck (giant cat walk). With flooring added (rough fit, not glued). Both decks test fit. Ribbed starboard side fitted and from a distance. The last picture is darker to bring out the ribs. Brighter "burned them out" in the photo. The main entrance sheeted with styrene (note rounded corners in upper area). The flash brought out the white better. Note in this drawing the starboard side interior. Now you know why and where the lighting and ribs are supposed to go. That's it for now. Next step is to scribe the outer details to the starboard and port sides and THEN cut them to fit onto the frame. Talk to you all later. - MT


-
007-vf1, .080" is THICK stuff. I rarely use it except for structural areas that need the strength like load bearing areas on the Daedalus. Otherwise I've always gone with .040" or .060". Big F's idea of foam board is good too. You can glue styrene to styrene, just keep the solvents away from the foam of coarse. You can prime the foam itself with simple white glue and the solvents will leave it alone. I've done that a few times before. You won't be able to scribe detail in it though unless it's thick enough. The good part about your cardboard is that when you cut out all those doorways on the ARMD into the styrene panels, the cardboard will be behind it. Just paint it flat black and it should give you a nice depth effect with the plastic on top. ZAP O is supposed to be good with foam ZAP link . I bet it will work on laminating plastic to cardboard. Even regular CA should work too come to think of it. The slow setting stuff should give you time to set up. - MT
-
By all means start a petition. That'd be great! Yes I did spend a while on line, but at least my stuff works better now!!! - MT
-
AAaah, look at that avatar! Yeah, I have two children and I'll vouch for the time you NEED to spend with them. Even though mine can feed themselves now, you still have to spend quality time with them. That's one reason it takes a long time to do any hobby related stuff. It's worth it though!!! - MT
-
Thanks man. That's cool! If I had the cash, I'd be getting my own prototyping equipment! - MT
-
That's cool. I'm not sure what you can use to get the styrene to stick to it. I've used contact cement for paper to styrene (pattern cut outs). The glue just has to be dry or it'll attack the styrene. UHU makes styrene compatible craft glue. Good ole white glue doesn't stick well to styrene either. Once the panels are glued together it won't really matter though. Have fun! - MT
-
Thank you! I'm starting to wonder if I ticked off a mod somewhere and I'm just getting the cold shoulder!? - MT
-
That looks great so far. I empathize with your scratch building efforts. You still can do it really cheap in styrene if your interested. Buy a sheet of 40" x 72" for $11.48 (link). It's easy to work with and the painted surface will be smooth, and not so "corrugated." You could also plate what you've done in thin styrene too. Just some helpful, humble advice. - MT
-
Justiciar, I meant to post earlier on this but was having browser issues. That looks great! If you don't mind my asking, how much are they charging you to prototype the drawing? I've seriously considered doing this myself. Keep it up, looks great! - MT
-
Those look great. You know, I always thought the designers were at an American Indian museum looking at arrow heads when they got an idea what the baddies warships should look like - MT
-
Found this one too (completed). It should float; it's all hollow! - MT

-
I was just catching up and saw this thread. The paint is very uneven - and you can't ride with it on!!! - MT
-
I just love how they molded four materials, PVC, ABS, HIPS and rubber together to make the EVA kits. You cut it off the sprue and it matches the rest of the kit's plastic, but has ratcheted joints! You know, they've been doin' multi-color stuff like that about as long as Macross has been around. I never saw Gundam in the beginning, but the cool kit designs and colored plastics "called out to me" from the shelf. I couldn't be rude and say no! - MT
-

VF-1S Strike Battroid Valkyrie step-by-step
MechTech replied to DrunkenMaster2's topic in The Workshop!
Looks great so far! I missed out on a lot when my phone line was down! - MT -
No more fumes! BIG Apology mods - this should have gone into the scratch build/customs section. Little sleep for a few days does that to ya. - MT
-
I so know what I want to do when I grow up (maybe someday). Even their toilet is awesome! I just need a bazillion dollars/pounds to buy that laser engraver! - MT
-
Thanks guys! I'm really humbled - really! I'm also excited because I've got a 1/2" stack of .030" styrene on my workbench in custom cut sheets so I can handle it better (the full size sheet BARELY fits on my floor! I've gotta give props to U.S. Plastics (link). They came through again quickly and with what I ordered. They even e-mailed me to verify my order because of the additional charge for the custom cutting. GREAT prices and selection! Until our mods can restore most of the old pictures, most of them are here Model Boat Mayhem thanks to the proprietor, Martin who was following the thread too unknown to me. He e-mailed and asked what happened to our website here - small world! I'll be updating them there too now I guess. The weather has turned from R/C flying back to building weather again, I think. Good timing! Oh yeah, I DID buy a PicooZ R/C helo. Awesome with a little mods for forward flight. It just needs a Sea Sergeant or Comanche body - but that's another project. My apologies too for any delays in response. Our telecom cable pair went bad and they had to wire us up to a new one ( a week later) No names, but those in the UK can guess who they are. Maybe my speeds will be improve? "Talk" to you all later. - MT
-
IAD and HWR, that's awesome guys! I've been roughing it out in the field to come back to this. Very NIIiiiiiice! You will definitely have to post some video!!! - MT