MechTech
-
Posts
4679 -
Joined
-
Last visited
Content Type
Profiles
Forums
Events
Gallery
Everything posted by MechTech
-
Looking greater than ever! Yeah, make ONE that you really like and cast it for uniformity. It WILL save you time and improve the professional appearance. Plus you'll learn more about the hobby; even if you've casted before. Keep up the good work! - MT
-
I guess the question is have you built many models before? I saw it's your first Macross kit, but I don't want to assume you're first kit period. The Hasagawas are the most accurate in detail, but I have to agree too that the Bandai transformable kit is the bomb! I've built a few and modified a few. The only kit I've thought was better is the 1/200th IJN Yamato kit by Nichimo; 52 inches of beautiful ABS battleship!!! - MT
-
Awesome work as always cap'n! That kicks butt over any other sculpt of any regault I've seen yet! - MT
-
Looks great. I still think its an unorthadox design. - MT
-
Sorry, I've been off line for a while. I will be using carbon fiber for the rails the ramp retract on and the rest of the upper hull structure. I just hinged the first segment and have to do the other half. I've been working on the mechanics of the retract and folding mechanisms. I've got to keep it ultralight, but very robust, Tough combo! - MT
-
Looking good! - MT
-
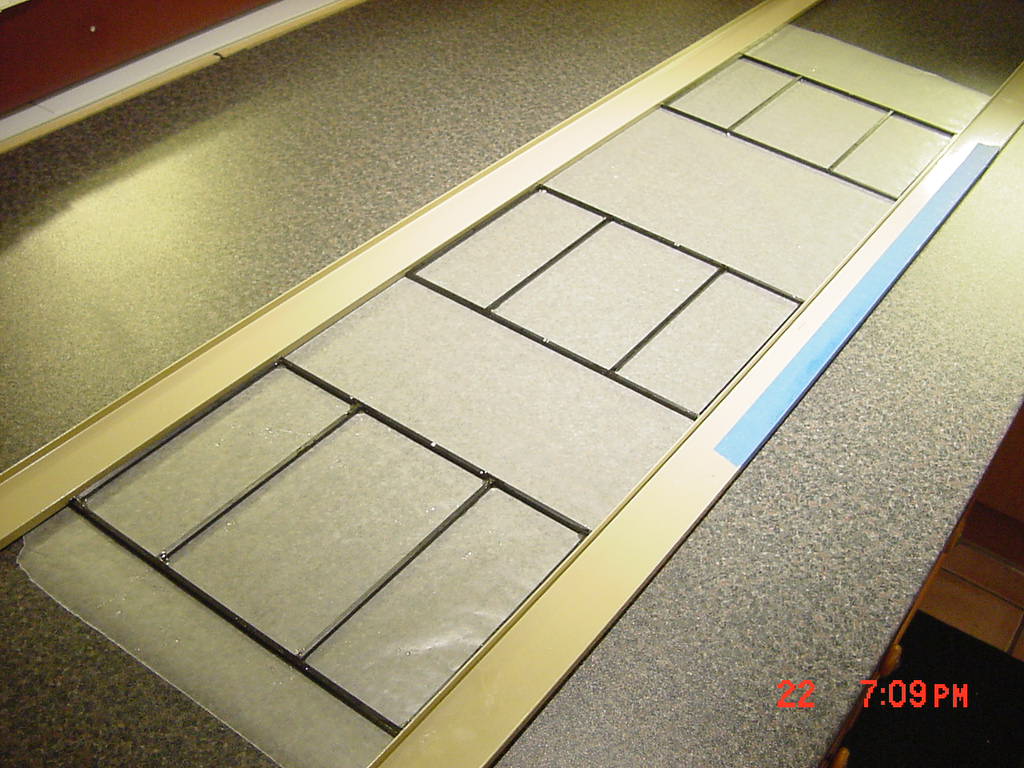
UPDATE 23 Sept 07 I thought which parts I need to be working on first and I figured I better get the ramp and all it's mechanisms in first. That way I don't have to worry about working around walls or destroying details. Plus this is the toughest engineering part of the whole ship for me. It's not exciting, but here's 42 pieces of precision cut and machined carbon fiber being epoxied together. The two metal parts are keeping all the parts squared off while the epoxy cures (Devcon 2-Ton). These three frame make up the panels for the bow ramp. The sides and tops will be thin styrene to keep the weight down. I don't know whether I'm building a ship or plane some days in trying to keep the weight down. These three panels will then be hinged together and have three actuators to fold and expand/retract the ramp into the bow. That's where I'm really having to do the thinking! Talk to you later. - MT

-

Scratch built transforming valkyrie, in the works!
MechTech replied to zanderwitaz's topic in The Workshop!
somebody has been doing a lot of thinkin'. It looks good so far. The only dead giveaway is the head and different looking windscreen. - MT -
Shoo fly, shooo! That thing is tiny in comparison! That looks great man, I'm inspired! I personally appreciate the hard work of sculpting and painting that. I'm sure people are still asking for castings of your valk! - MT
-
Awesome craftsmanship and nice touch with the sensor eye lens/detail! I gotta ask, what parts are you lathing? Awesome as always!!! - MT
-
REALLY COOL Cool8er!!! I could only hope mine looks that great if I ever get to it! Awesome mix of kit and resin too! I always wondered what those two would look like together. Nice clean paint too! - MT
-
That's coming along awesome! Keep it up! - MT
-
Alright, alright, take you're time; unless of course you don't want too... Are you happy now DND ? - MT
-
Looks great Cap'n as always!!! If only I was building that size scale - MT
-
I thought your project was becoming a victim of the Zentraedi or something? Keep it coming (when real life doesn't get in the way ). - MT
-
Awesome work once again!!! - MT
-
Sebastian, sorry, I didn't see your post earlier. Thank you for the compliments and my wife and I were just talking today about submitting the ship to a magazine or two. In all honesty I'm working on the ramp and main hatch areas now. The engineering is taking a little while to keep the weight down. Part of the plan was to put flashing lights and "safety" paint/markings for realism. Well, at least I won't get written up by OSHA for that. Does any one have the OSHA regs for intergalactic semi-submersible ship safety? - MT
-
Great job on a not so great model! - MT
-
I've got all the kits personally just because "I had to." They're like the old video game cartridges. The box art looks cool like two tanks dueling it out. Then you play the game and it's like two blips firing cursors at each other. I think the Capital ship is the most disappointing personally. Personally, I just bought them for my collection (and the tiny SDF-1 inside). - MT
-
Some HEAVY seems, but not too bad. Thanks for sharin.' - MT
-
I much rather see that than the plain ole' stupid error messages! - MT
-
Welcome too JeffQ! Some one posted this here a while ago. We all thought it was great work! I love your engineering and use of wire. Great model overall!!! There is A LOT of great stuff over at HKML!!! - MT
-
Nice job!!! - MT
-
As I said in another thread here with the same model, that's where the guys sits who has REALLY BAD GAS! It's the "auxillary tank" cockpit ! Actually I think it's awesome work! - MT
-
That conversion is awesome! Now I know where the backseater goes when he has really BAD gas ! Make your own details! Get some clear and coat it on the back with chrome/silver and green on the front for the monitors. Drill out gauges and fill in with white, or cover with old decals, made up decals on your PC. Keep us posted whatever you do! - MT