tekering
-
Posts
4140 -
Joined
-
Last visited
Content Type
Profiles
Forums
Events
Gallery
Everything posted by tekering
-
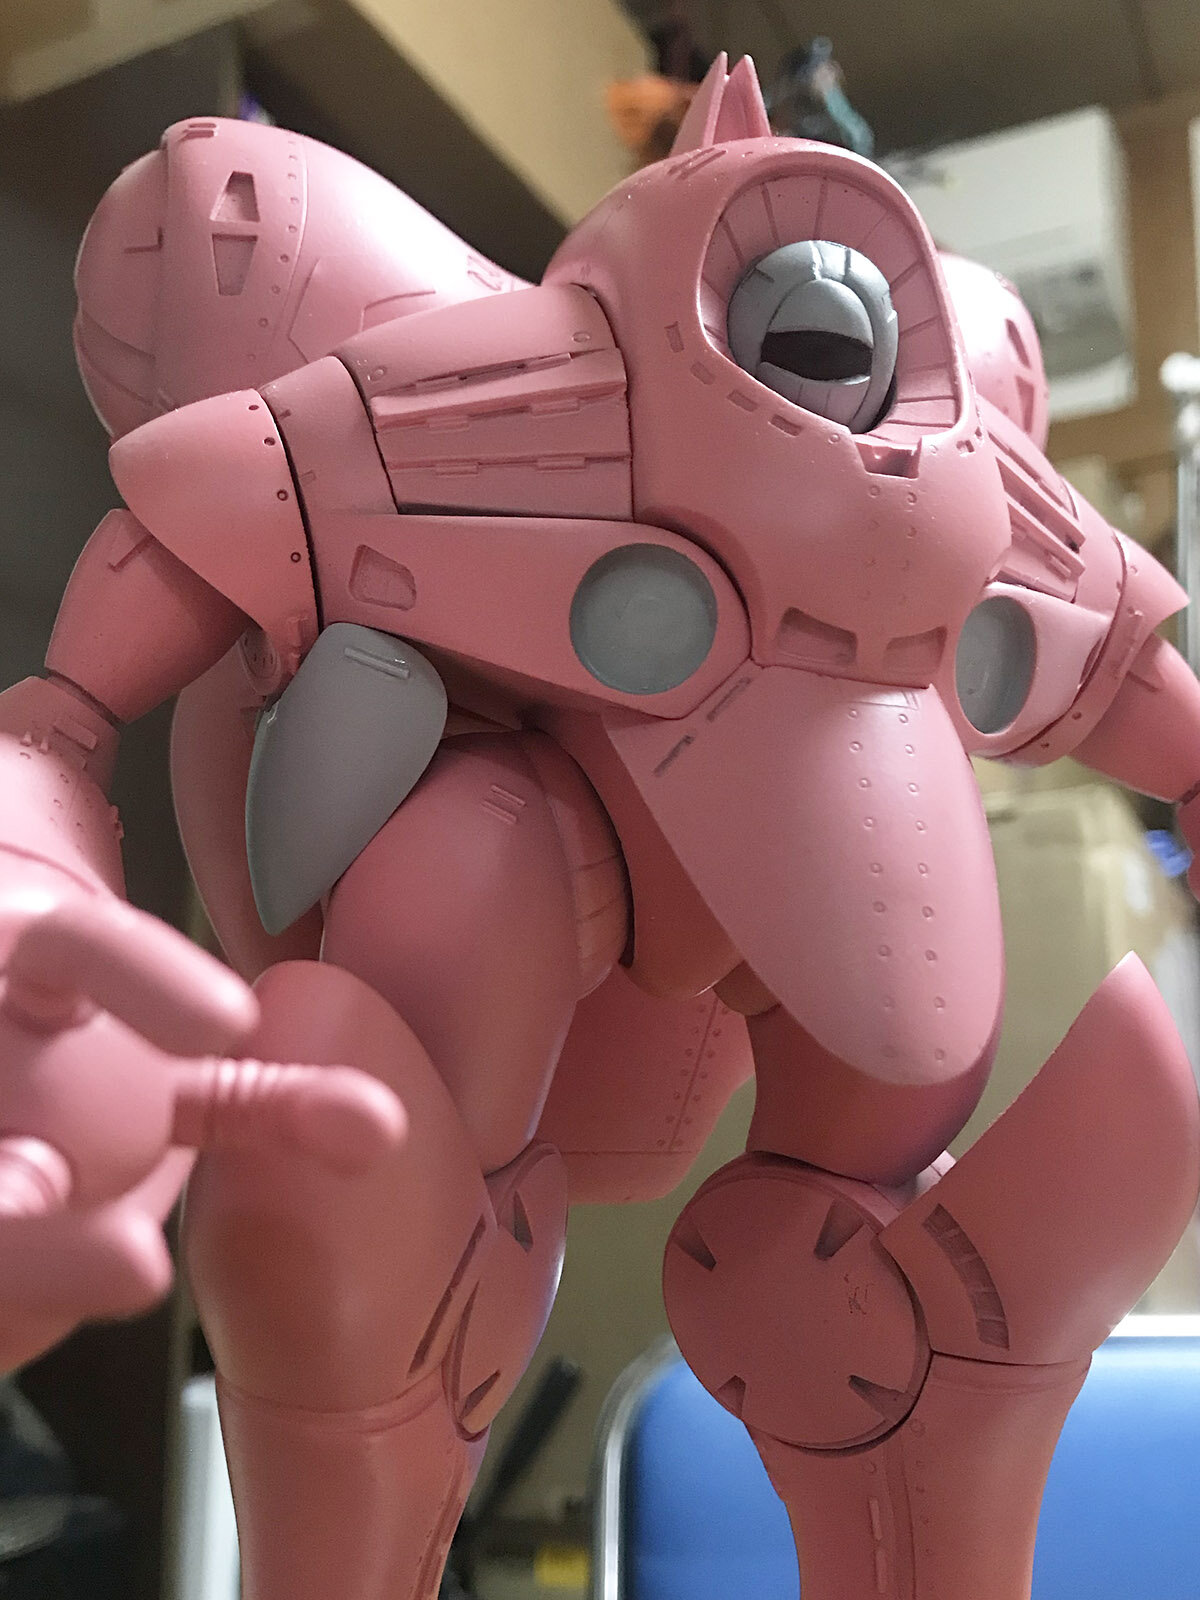
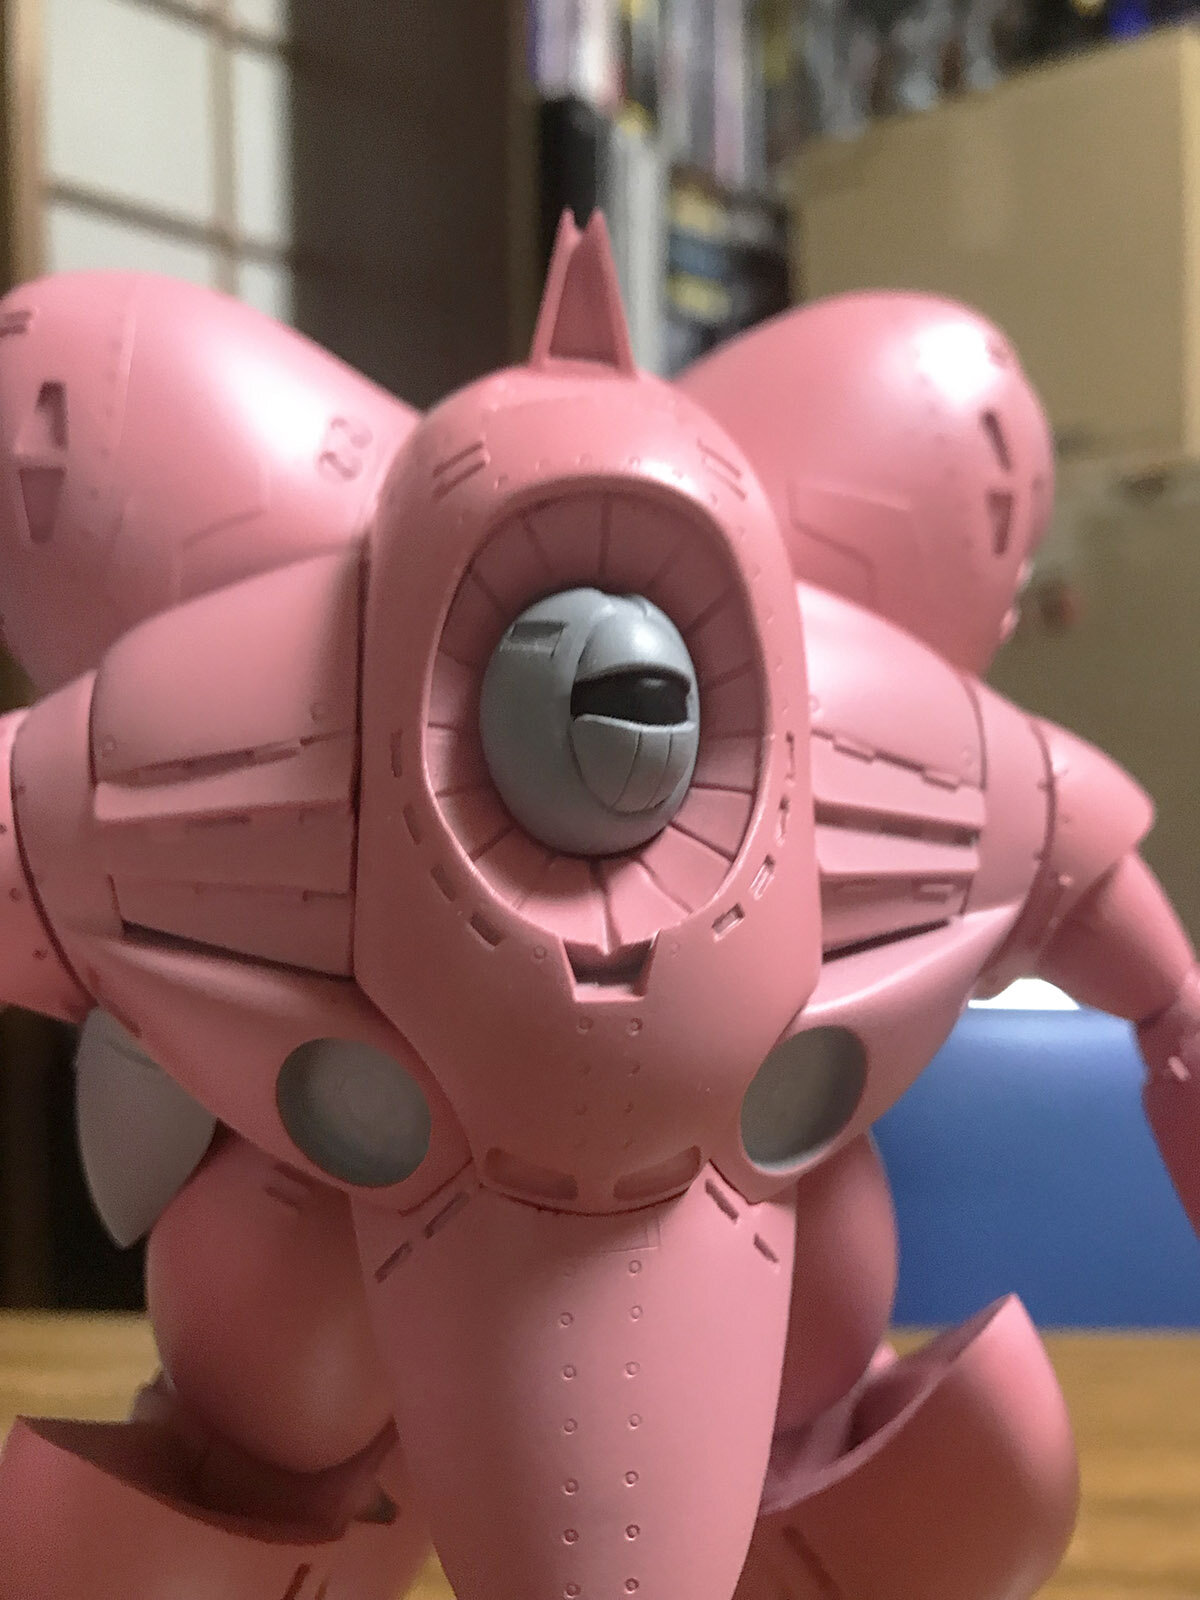
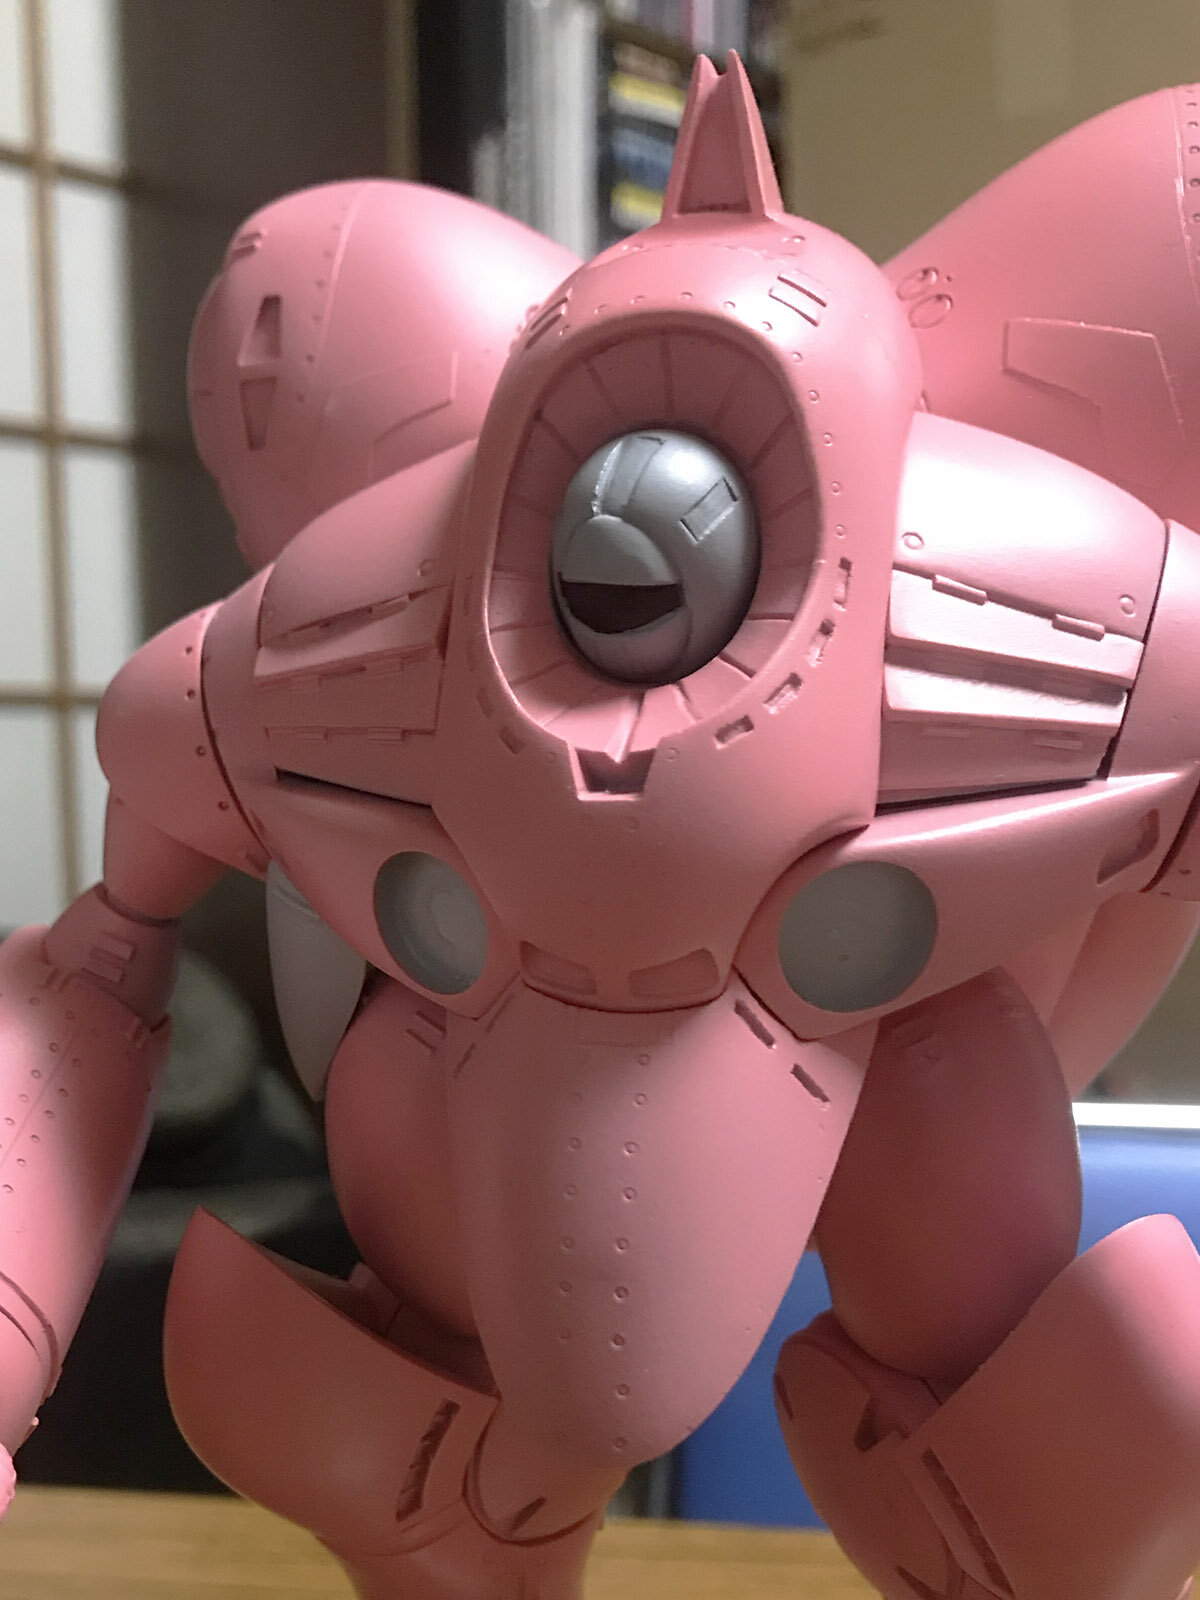
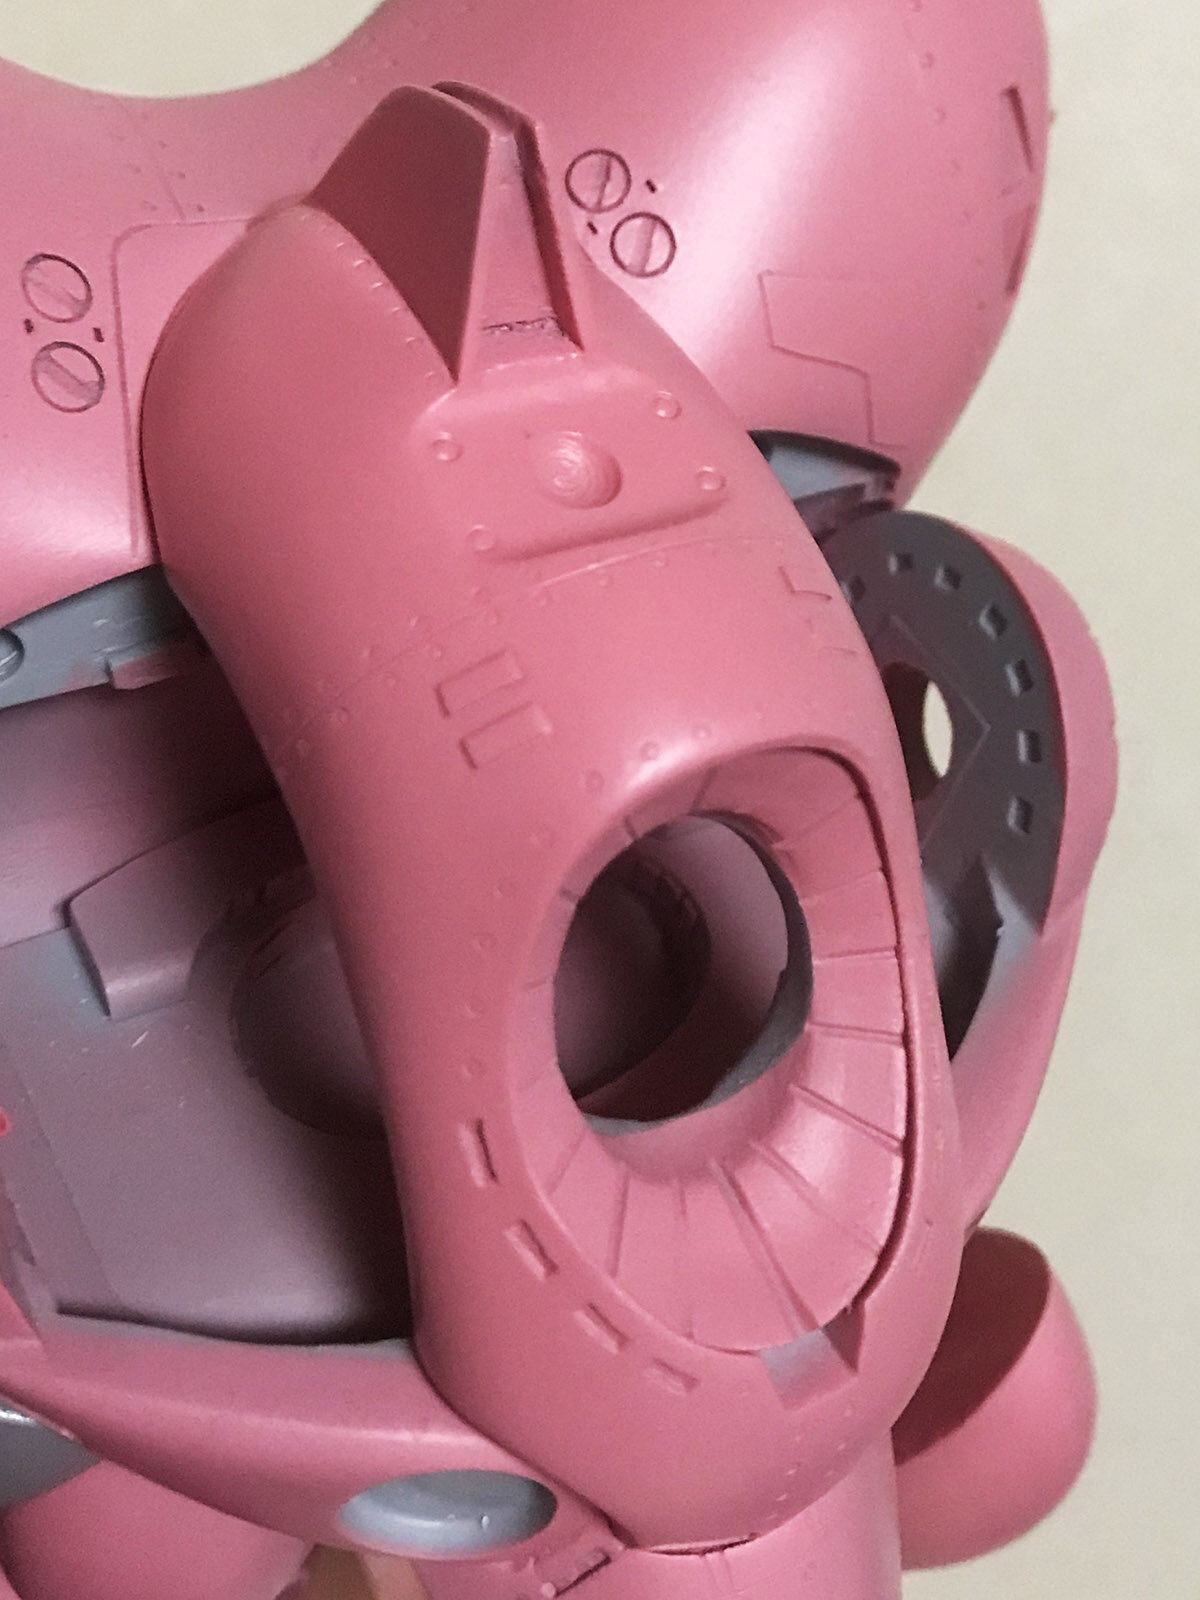
Thanks, but I'm not so sure myself... 🤔 As usual, I've been carefully analyzing the anime to confirm the color scheme, and some of the animators interpreted the model sheet line art quite differently from how Moscato did; the "face," in particular. I don't see an oblong sphere protruding from the carapace, but rather an oval mask inset into it. Also, the conical section on top isn't (usually) depicted as a closed triangle, but an open vertical channel that runs all the way down to the antennae... Thus, I carved a similar channel into the "triangle" on top, and hollowed out enough space to mount the face inside the carapace. This also allows a fair degree of articulation, allowing the eye to move up and down, and side-to-side. Finally, the hands are usually depicted bent into a fist, rather than the open hands Moscato provided. Even the iconic line art pose (and all derivative Imai and Bandai packaging art) show the left hand curled into a fist... ...so I went to the hardware store to acquire some springs of the appropriate diameter. It looked a little better once I coated the springs in cemedine. With these modifications made, the Quincy Rowe is starting to look more familiar.


-
Sorry, my image of Sonoda's work is about 30 years out-of-date... I realize what you have represents the work of the same artist, but... I'm shocked and dismayed by the change. 🤕
-
Kenichi Sonoda...? 😧 What the hell happened? Did he suffer a stroke or something? 😳
-
Would have been nice to see an MG Gaplant of any kind, rather than another little HG variant. 😐
-

MOSPEADA Inbit Revival Part III: Gamo doppleganger?
tekering replied to captain america's topic in Anime or Science Fiction
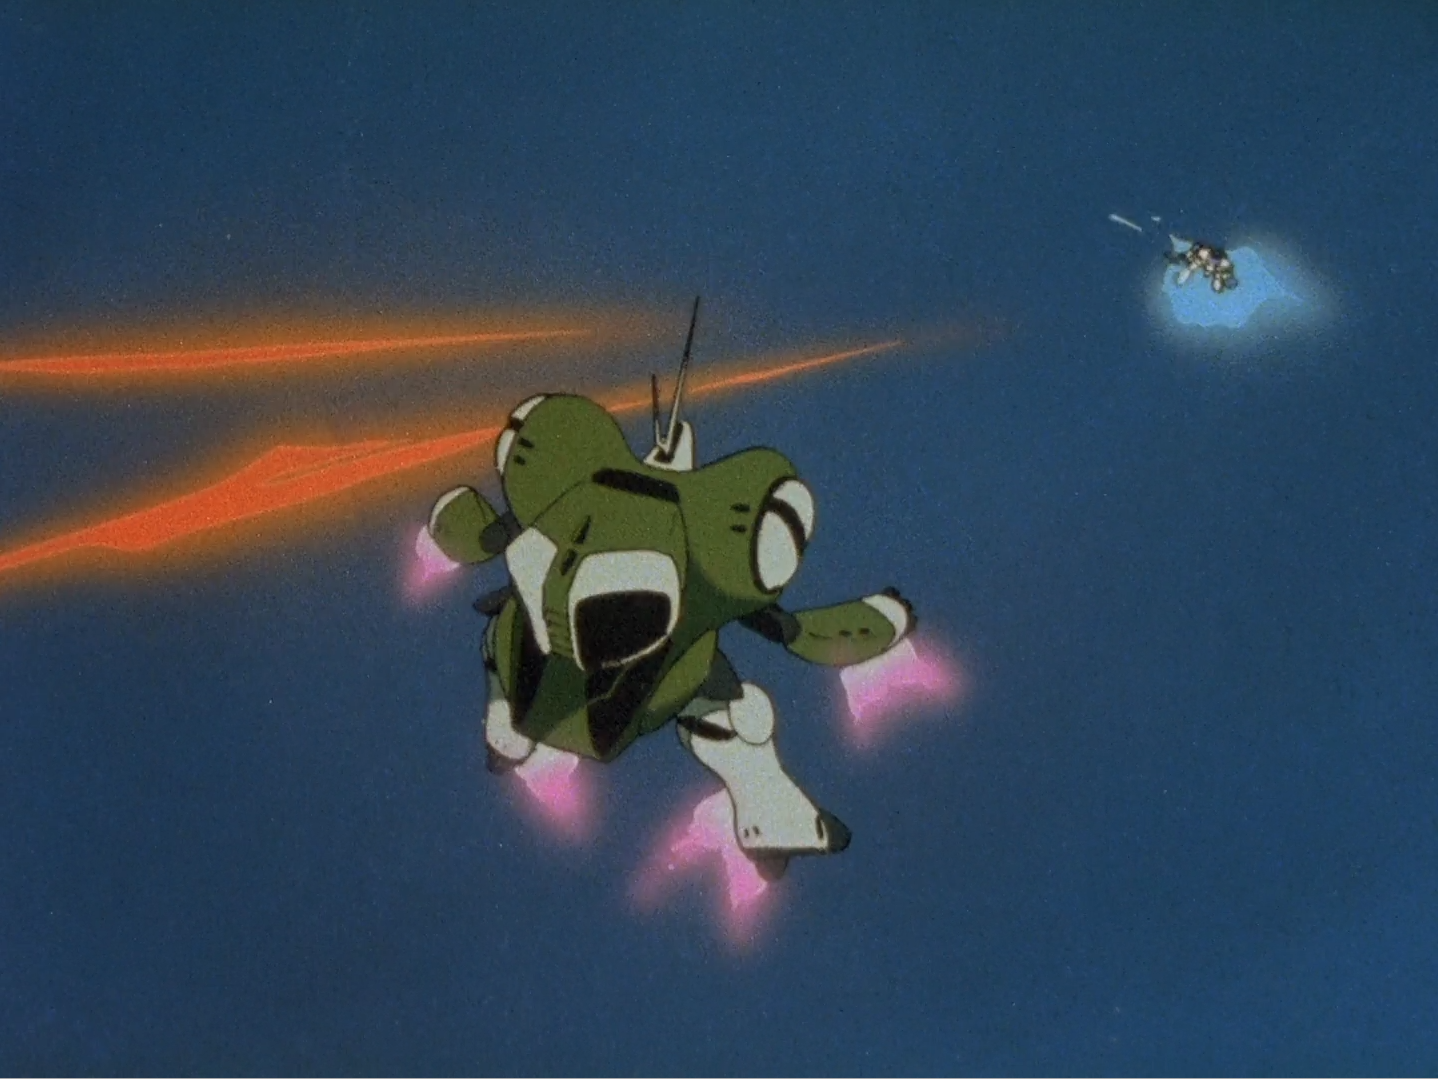
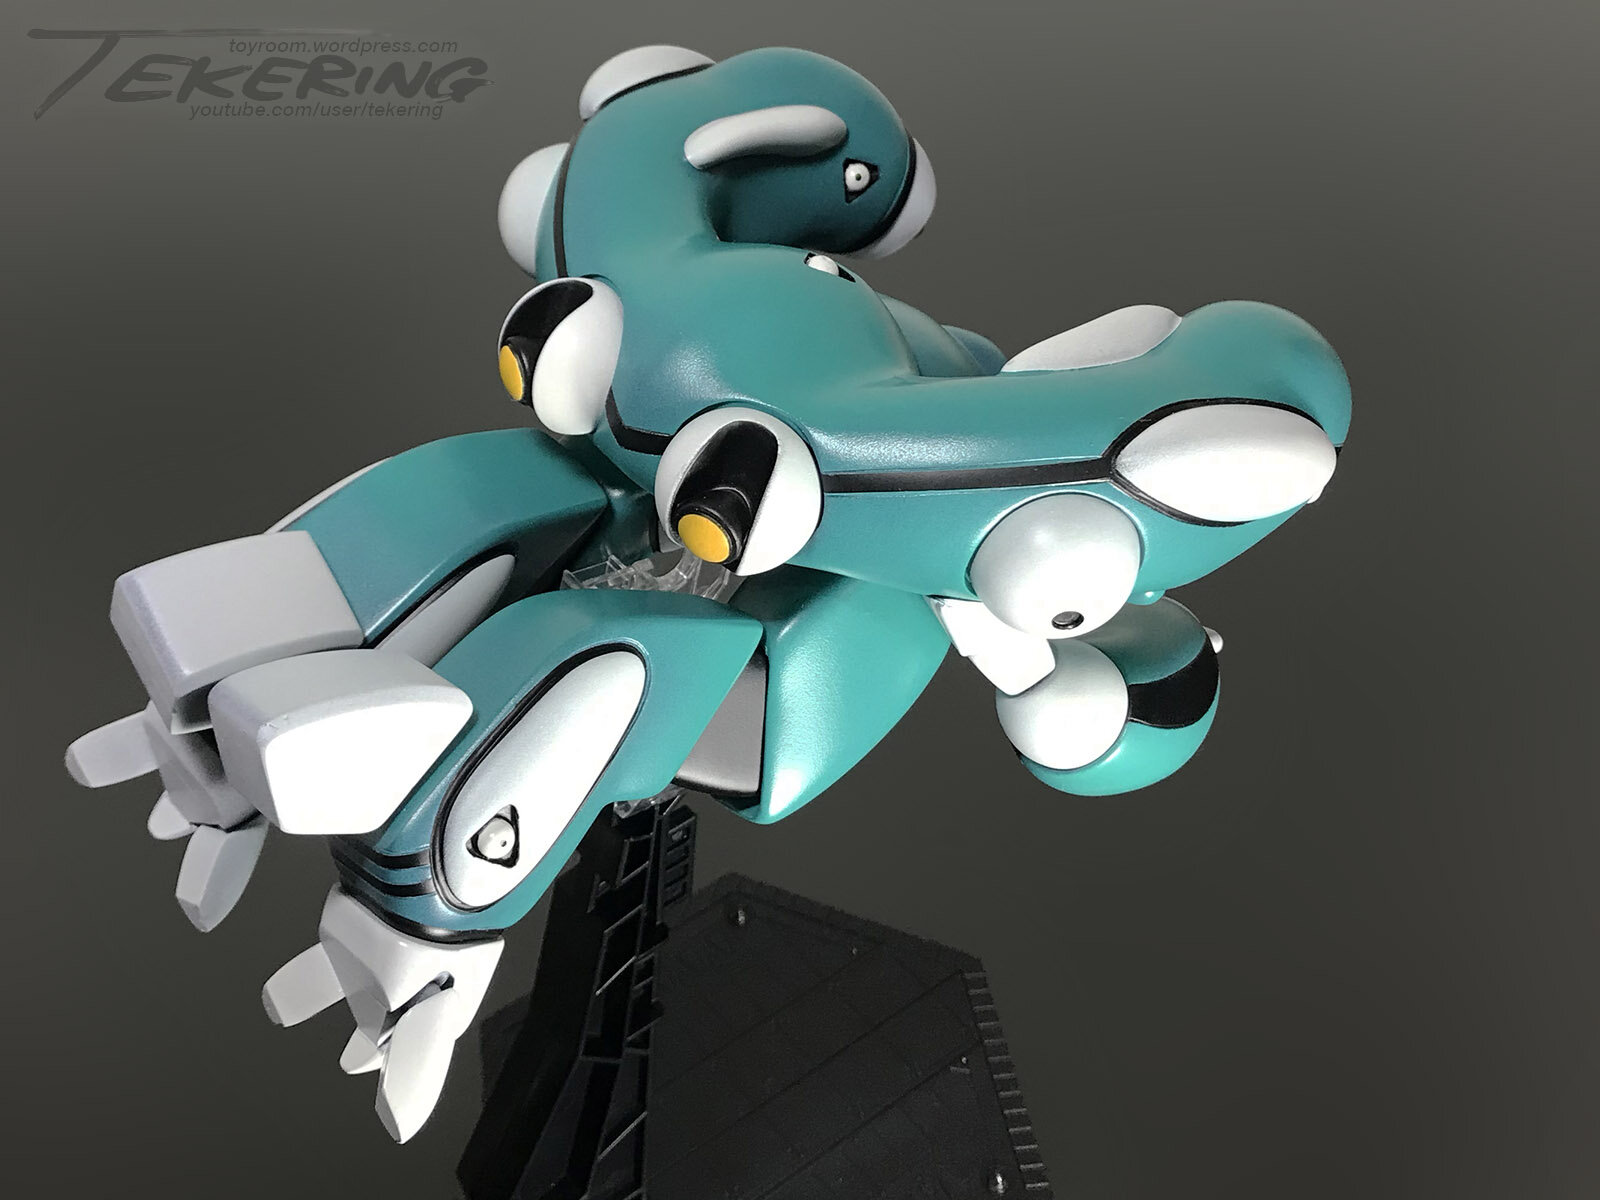
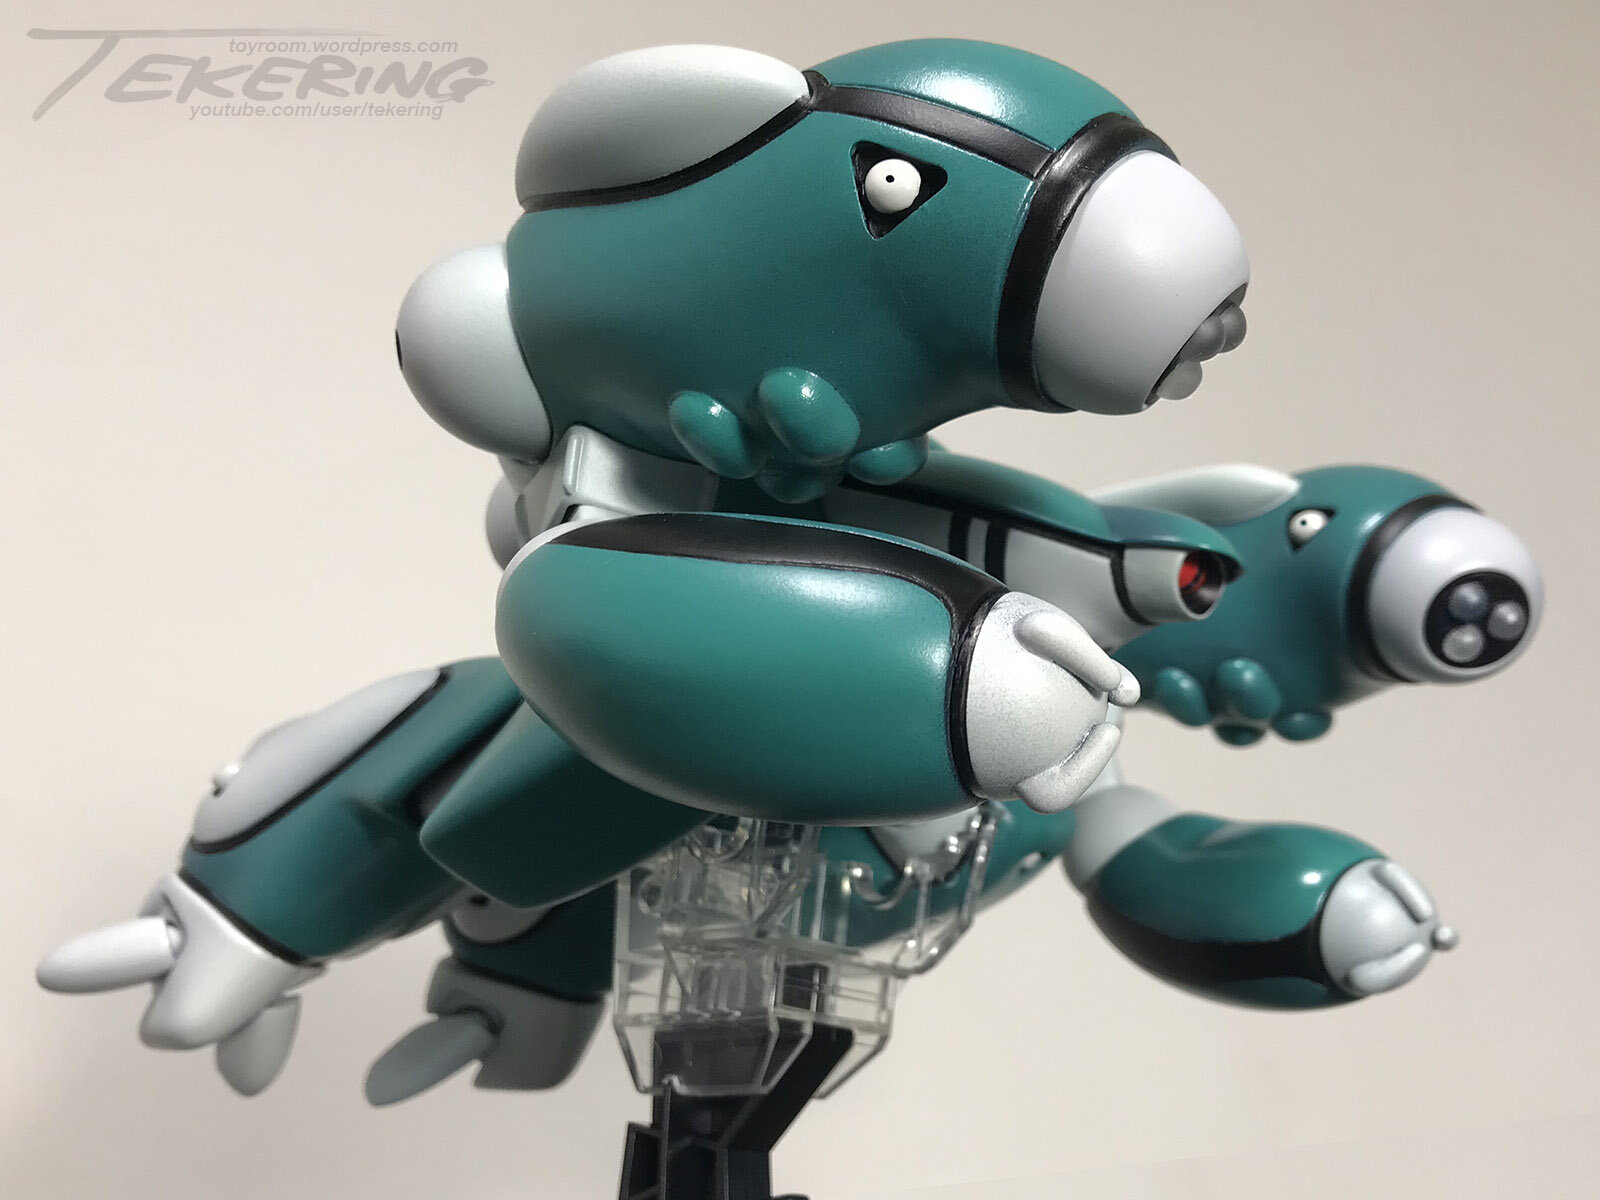
I'm pleased you're all so pleased. 😄 Nothing so complicated as that... A brass rod connects the lower half to the upper half. This is its default position: For flight posing, however, it plugs into a completely different hole, at a 40º angle: The knee articulation does the rest. ☺️ I use Tamiya lacquers almost exclusively. The pale grey is a single coat of AS-5 Light Blue over black surfacer, with a light dusting of AS-20 Insignia White for highlights... The turquoise is a solid coat of AS-8 Navy Blue, with a thin layer of TS-102 Cobalt Green sprayed over it.
-
MOSPEADA Inbit Revival Part III: Gamo doppleganger?
tekering replied to captain america's topic in Anime or Science Fiction
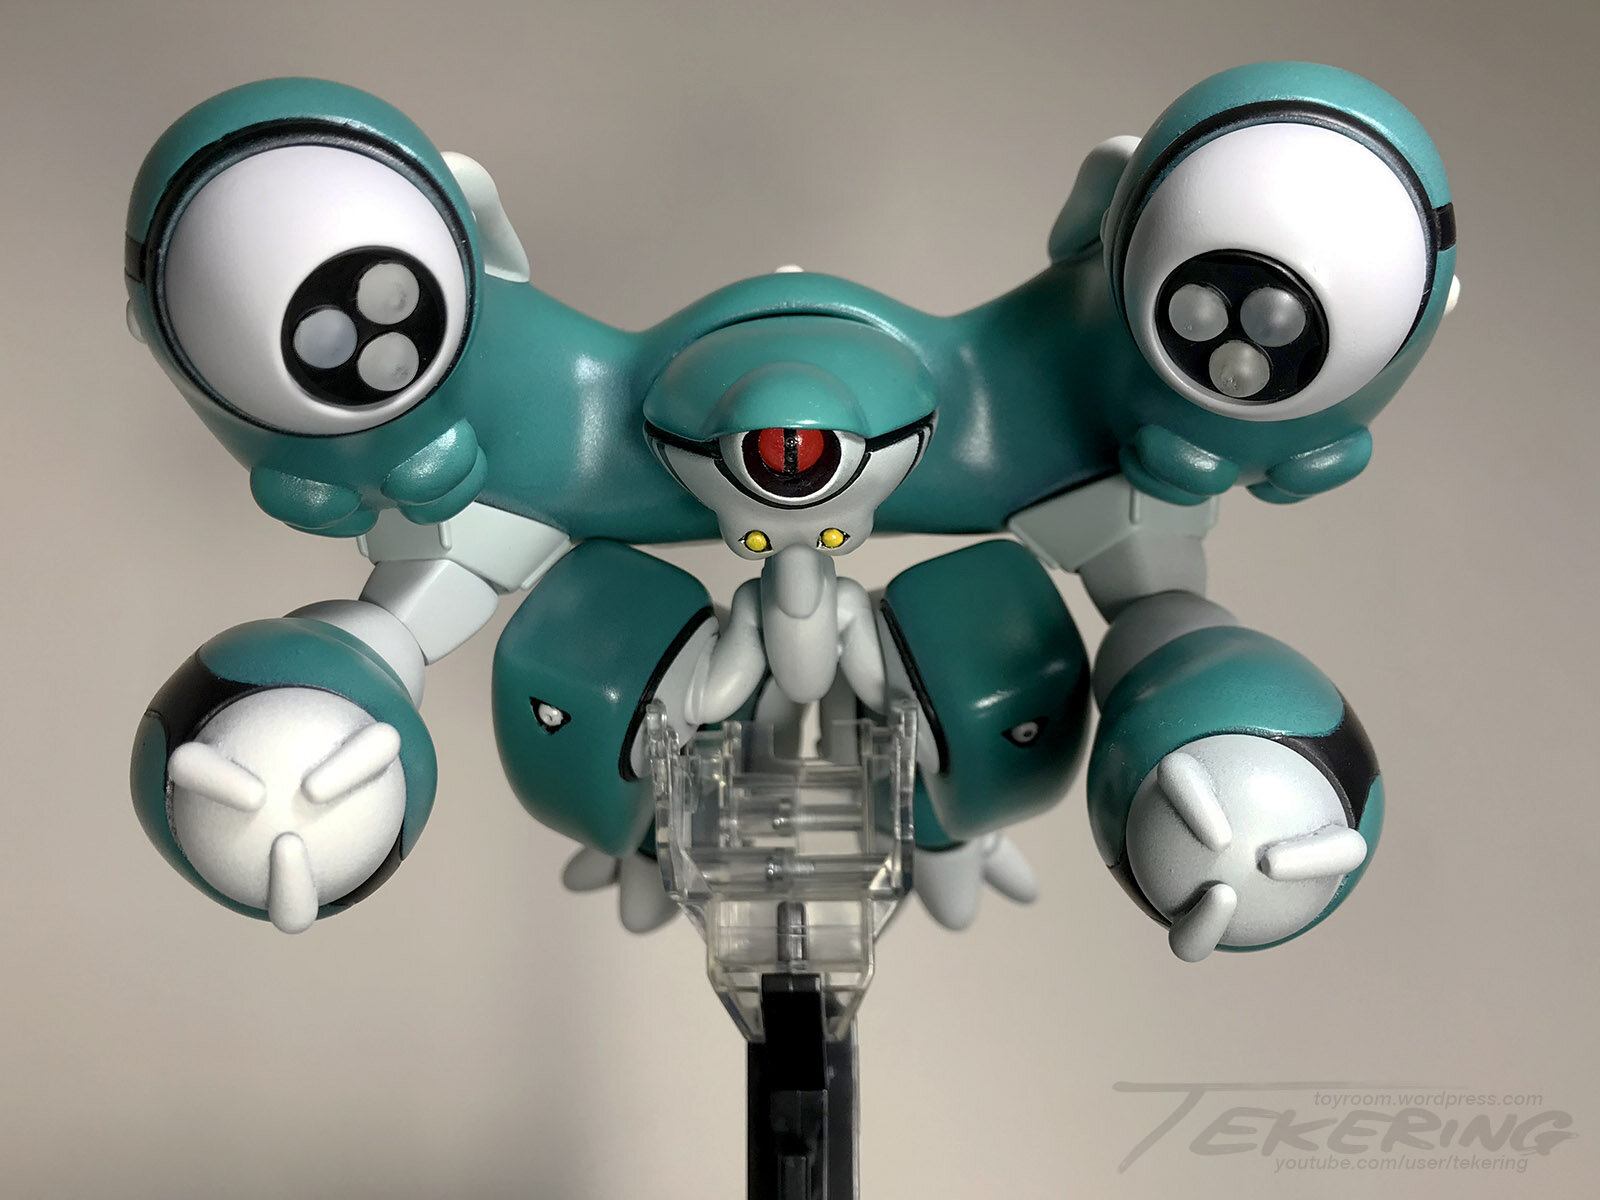
Cool find! ☝️ Poorly lit, though. 😐 Properly lit and photographed, it looks like this (about nine minutes into episode 24): And I think I managed to match the Blu-ray colors pretty close: And with beam emitters lit: Flight pose! Scale reference: I'm very pleased with how this one turned out. 😎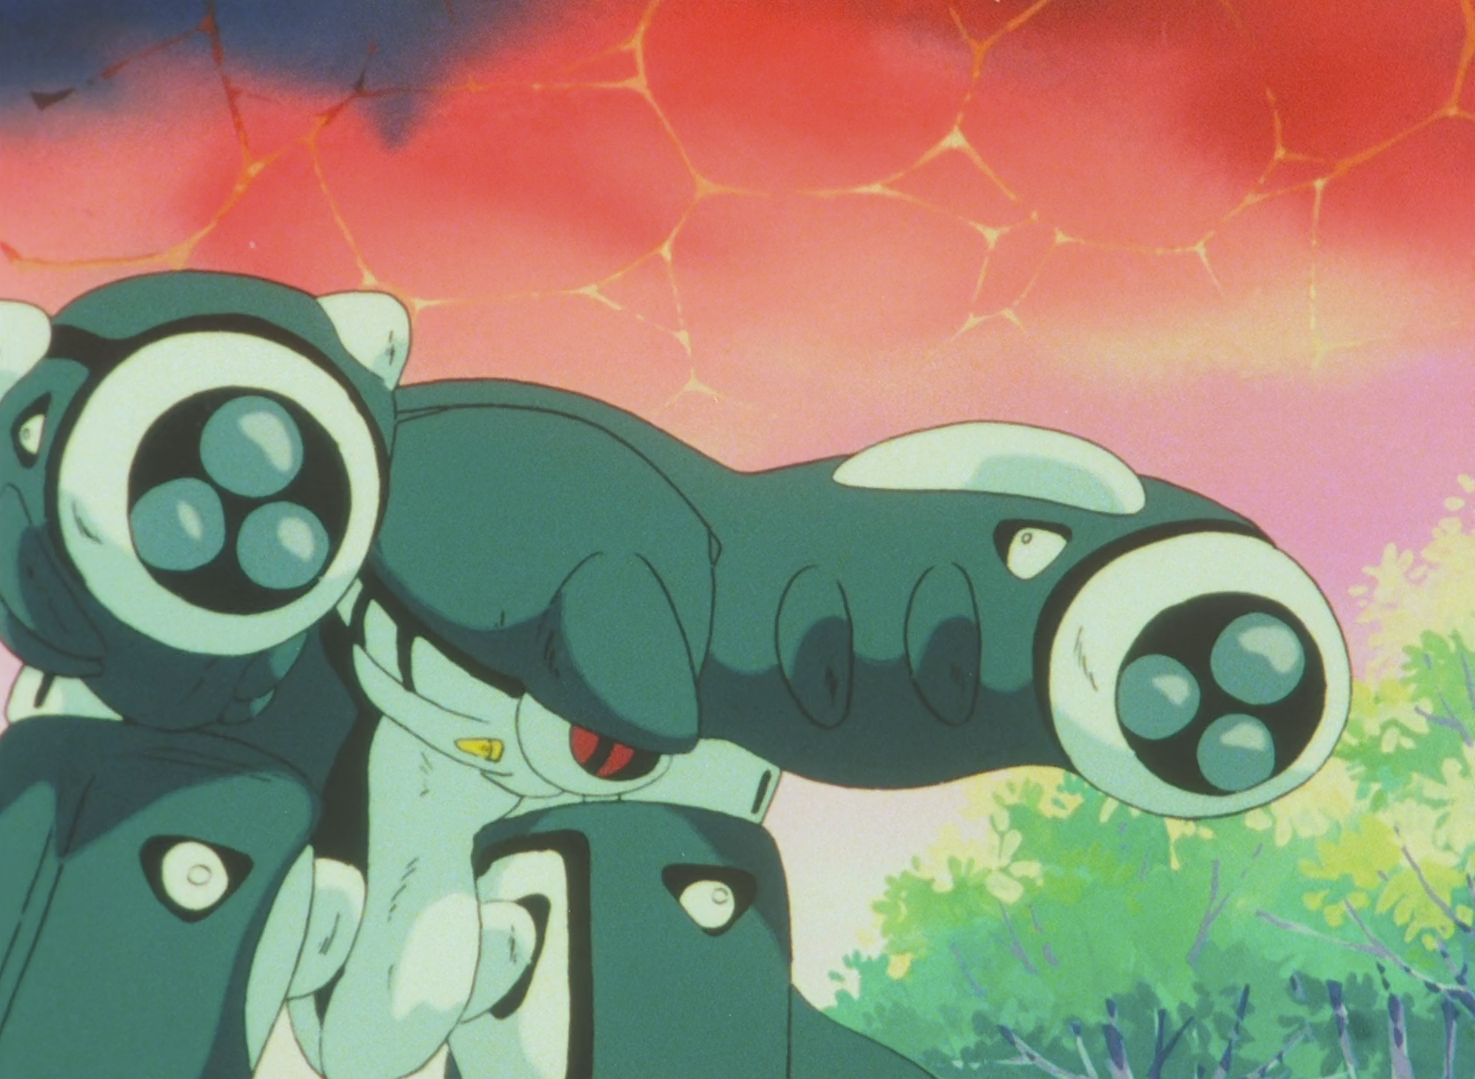
-
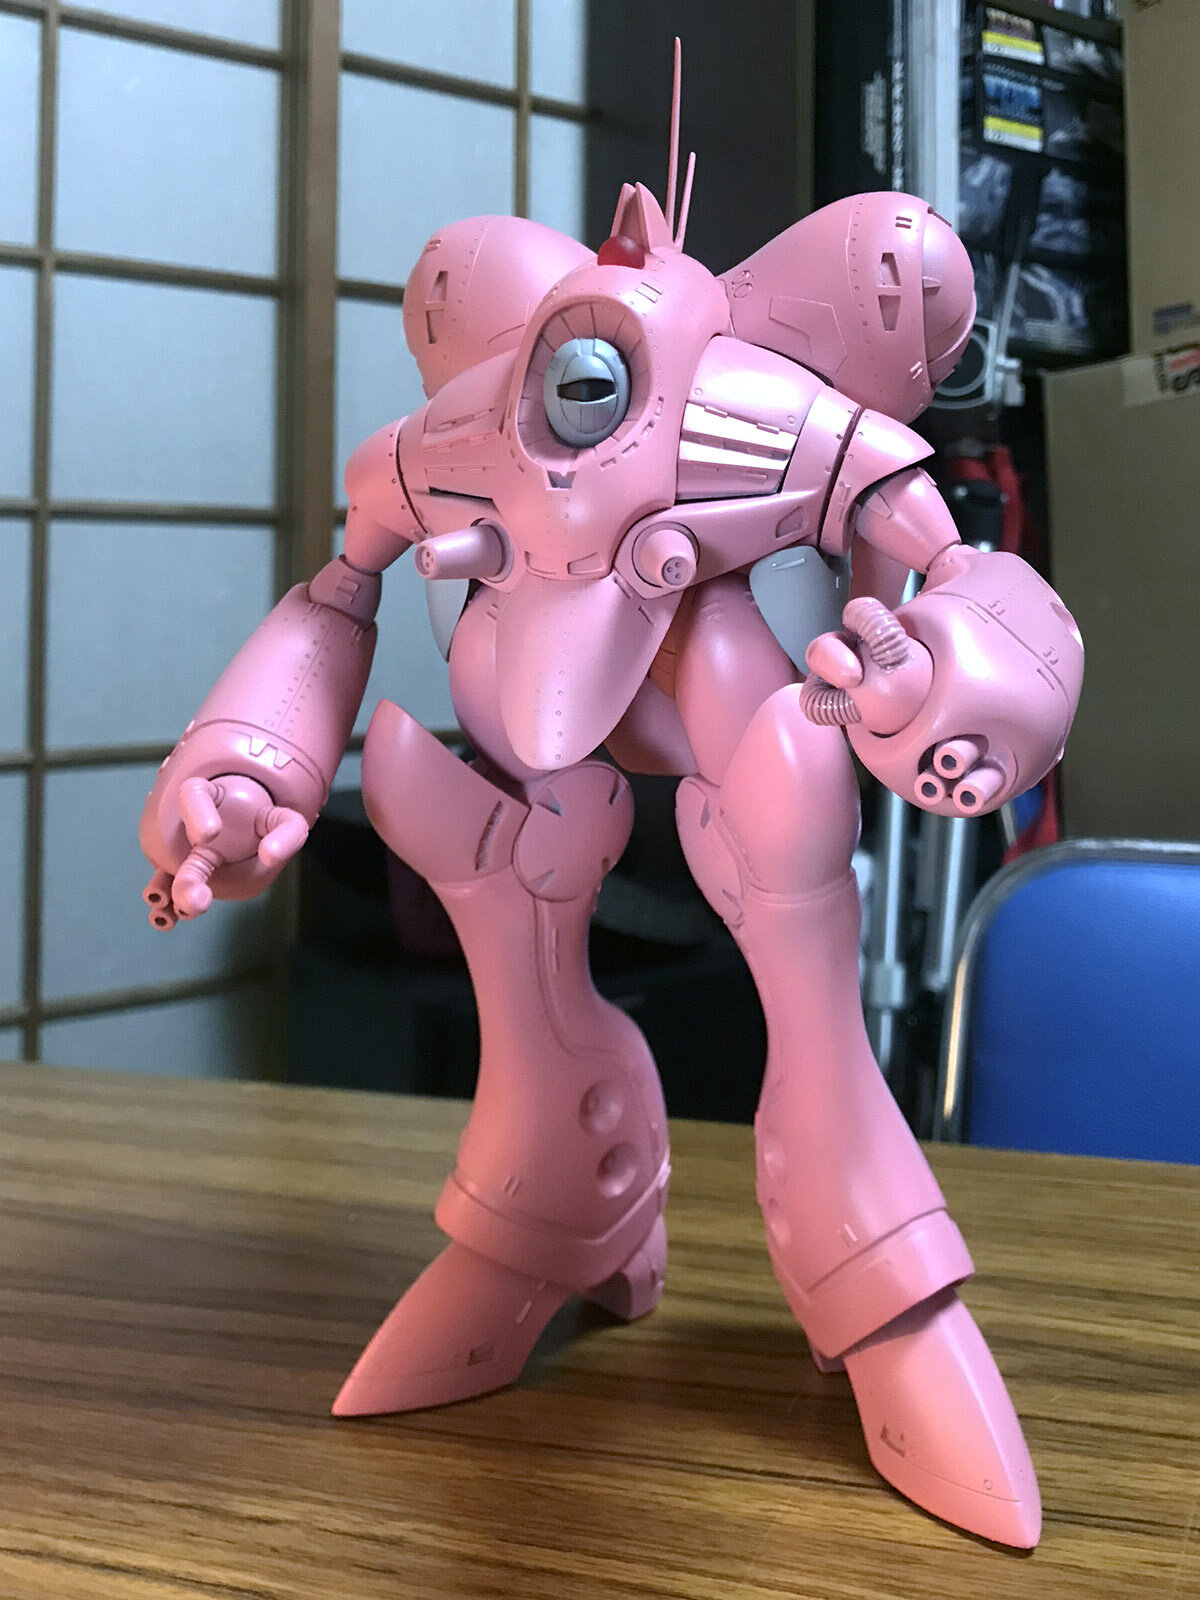
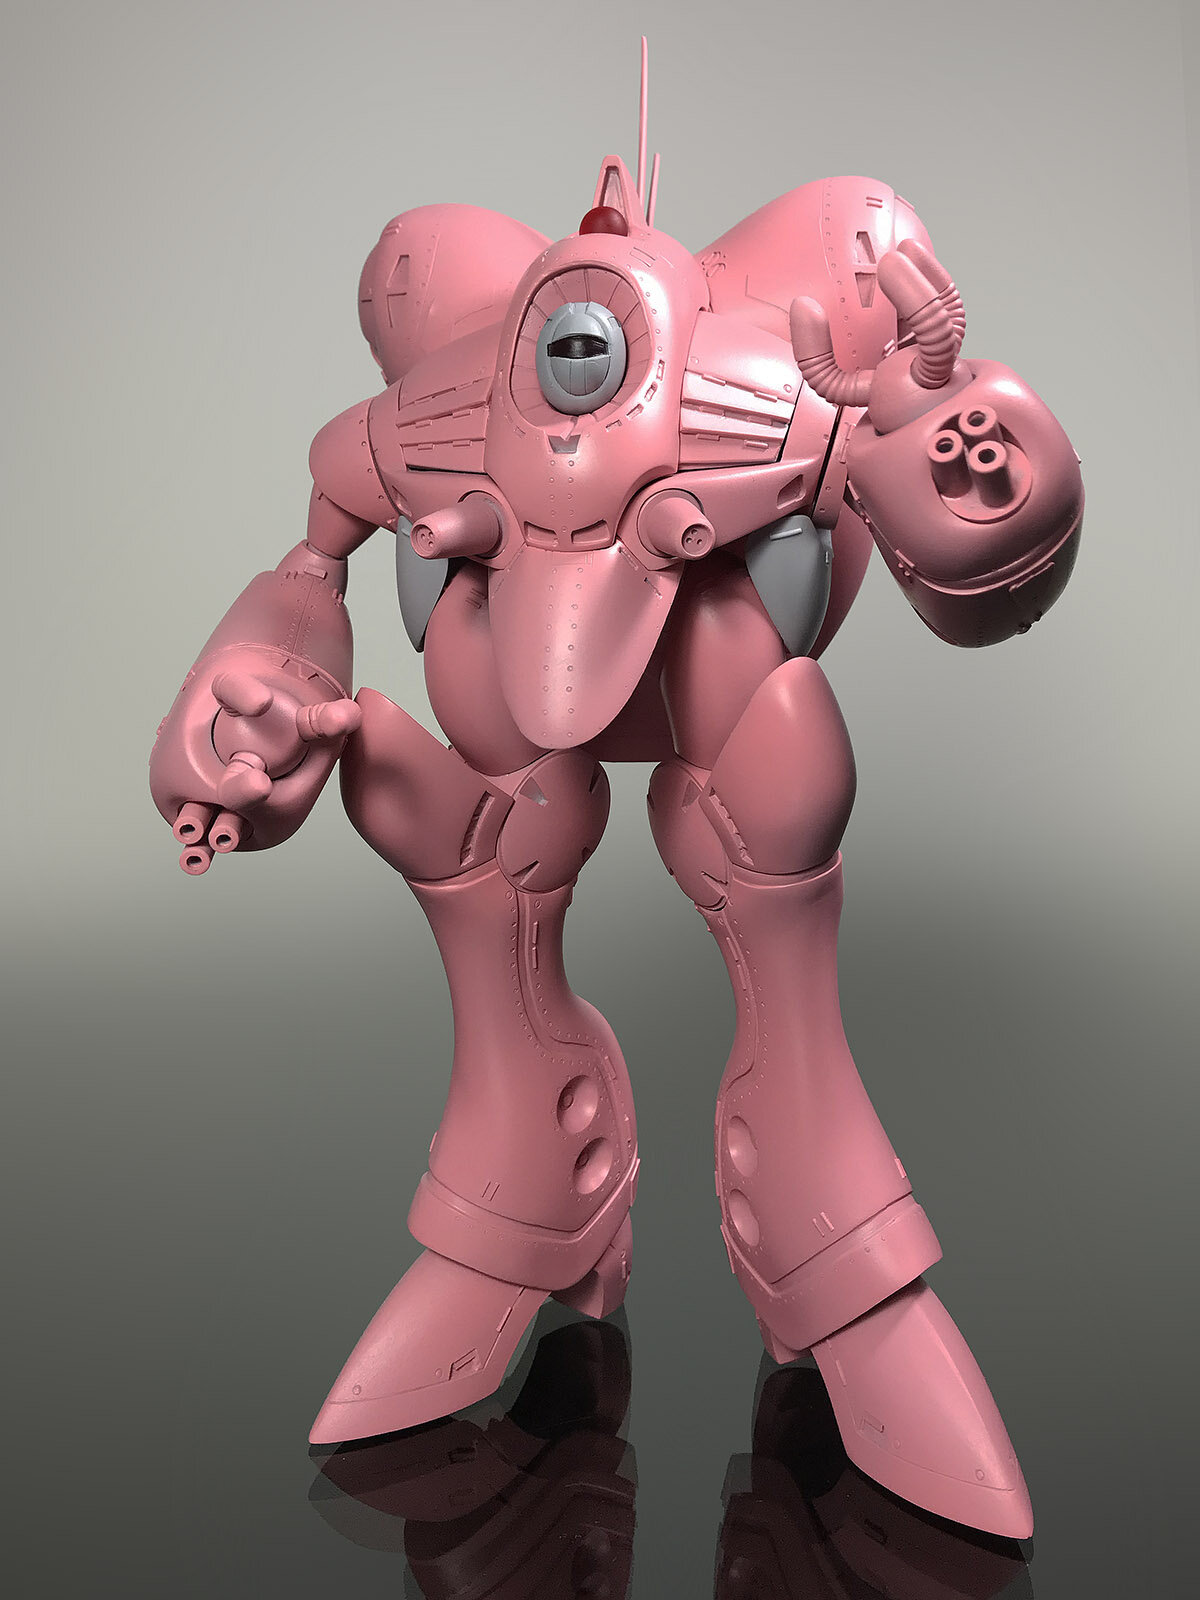
My unprecedented burst of productivity is now focused on the Quincy Rowe, where I'm compelled to use pink primer. 😋 Not being sexist or anything... Grey primer just isn't practical on grey resin. 😉
-
Probably a good time to repost the destructions, then! ☺️
-
MOSPEADA Inbit Revival Part III: Gamo doppleganger?
tekering replied to captain america's topic in Anime or Science Fiction
Appreciate the feedback, gentlemen. Yeah, I've come to the same conclusion. Now, let's see how closely I can match it... 🤔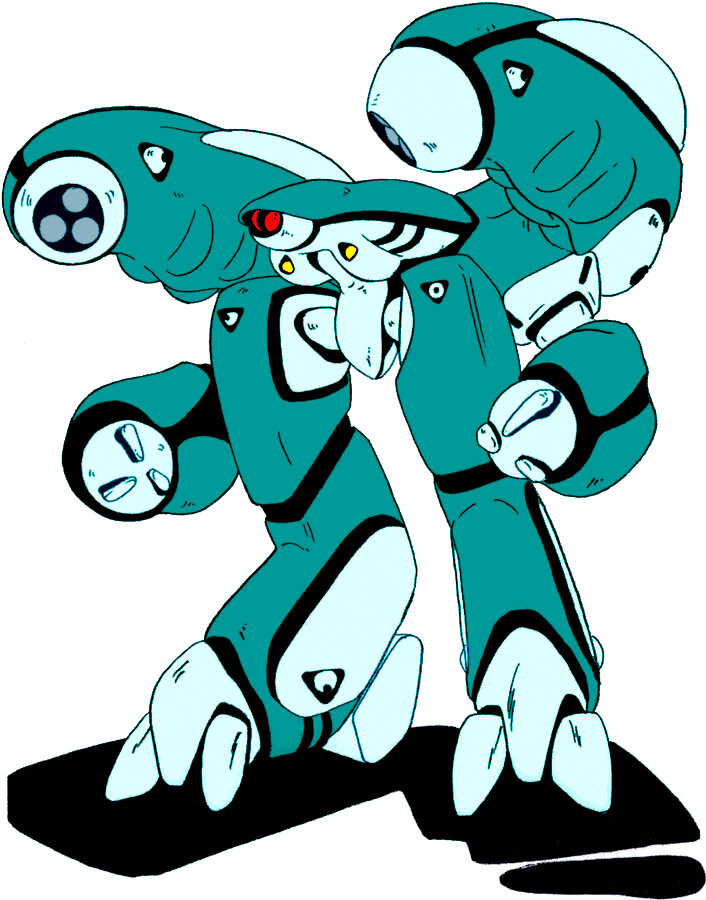
-
MOSPEADA Inbit Revival Part III: Gamo doppleganger?
tekering replied to captain america's topic in Anime or Science Fiction
Since the Star Spangled-Man was thoughtful enough to cast the beam emitters in clear resin, I've decided to mount red LEDs in there. See, that's precisely why I take the time to acquire the best reference material, do the research, and make my own color guides to work from. Secondary sources, fan art, and even our own memories are notoriously unreliable. 😒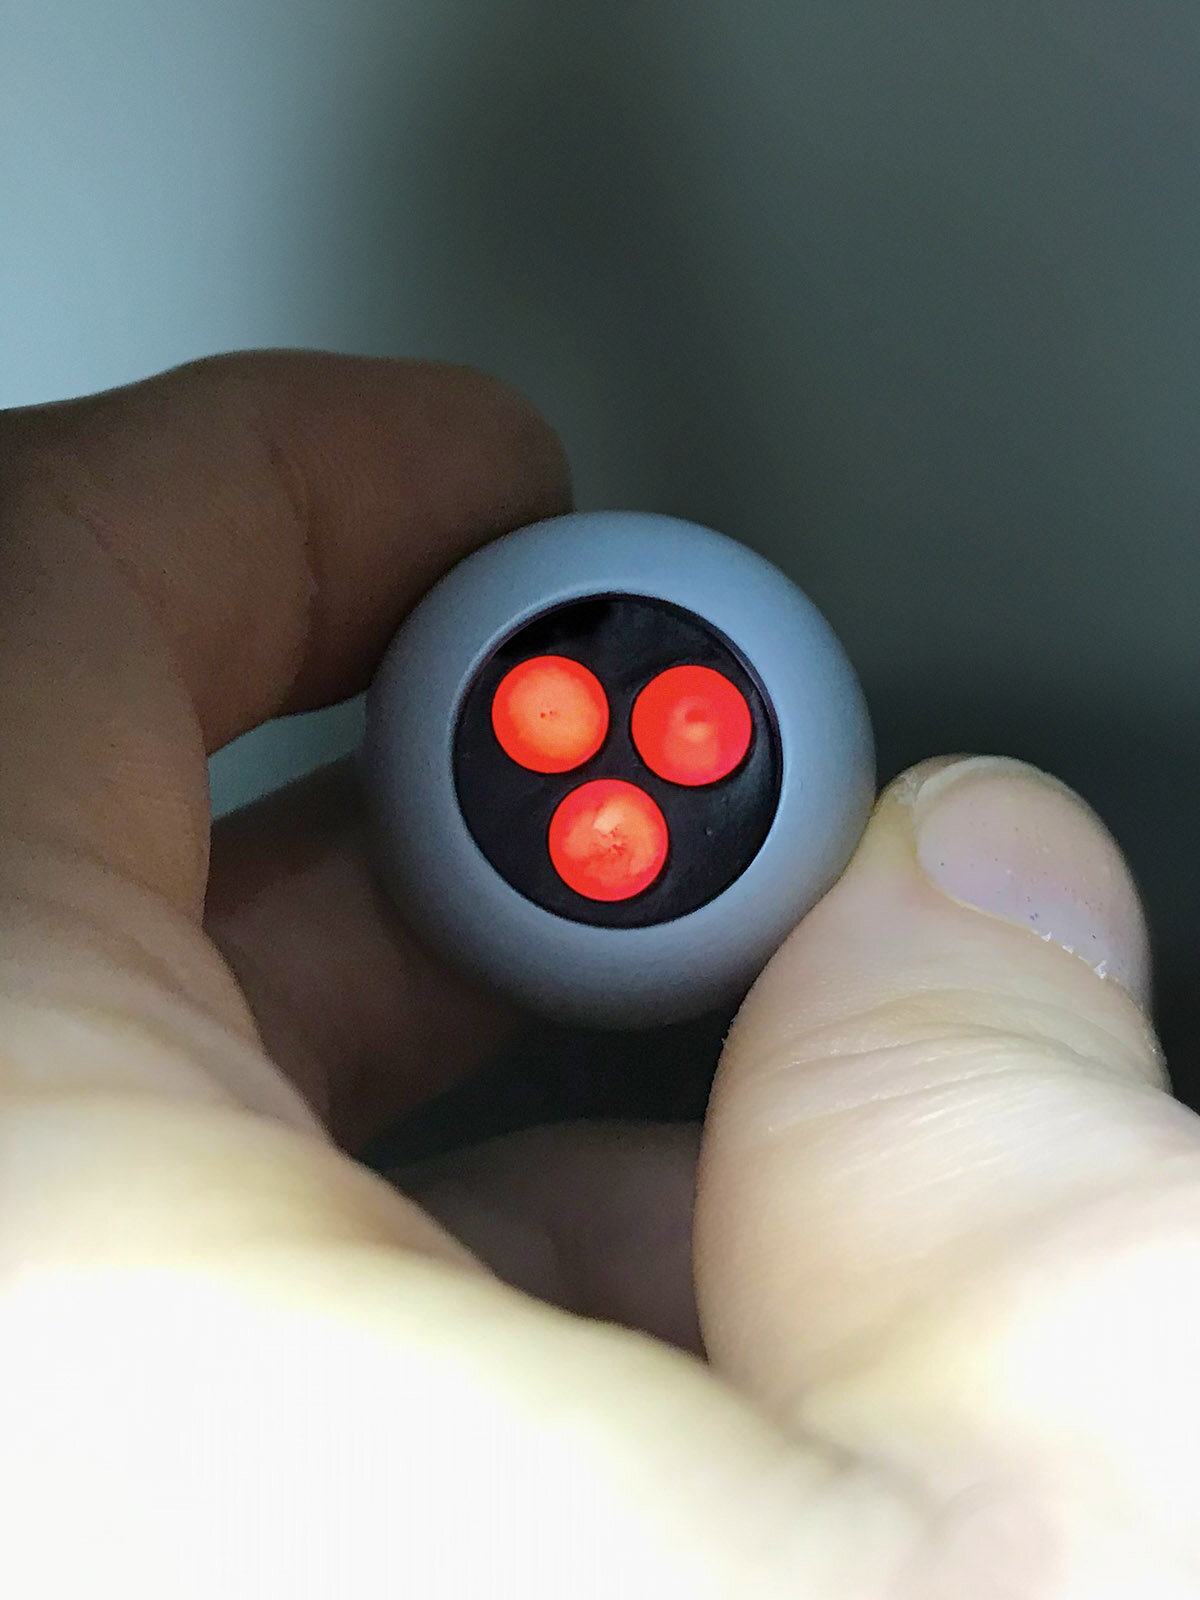
-
The Mandalorian - Star Wars webseries from Jon Favreau
tekering replied to SMS007's topic in Anime or Science Fiction
Not dumped, just repurposed... ...twice, even. 🙄 -
MOSPEADA Inbit Revival Part III: Gamo doppleganger?
tekering replied to captain america's topic in Anime or Science Fiction
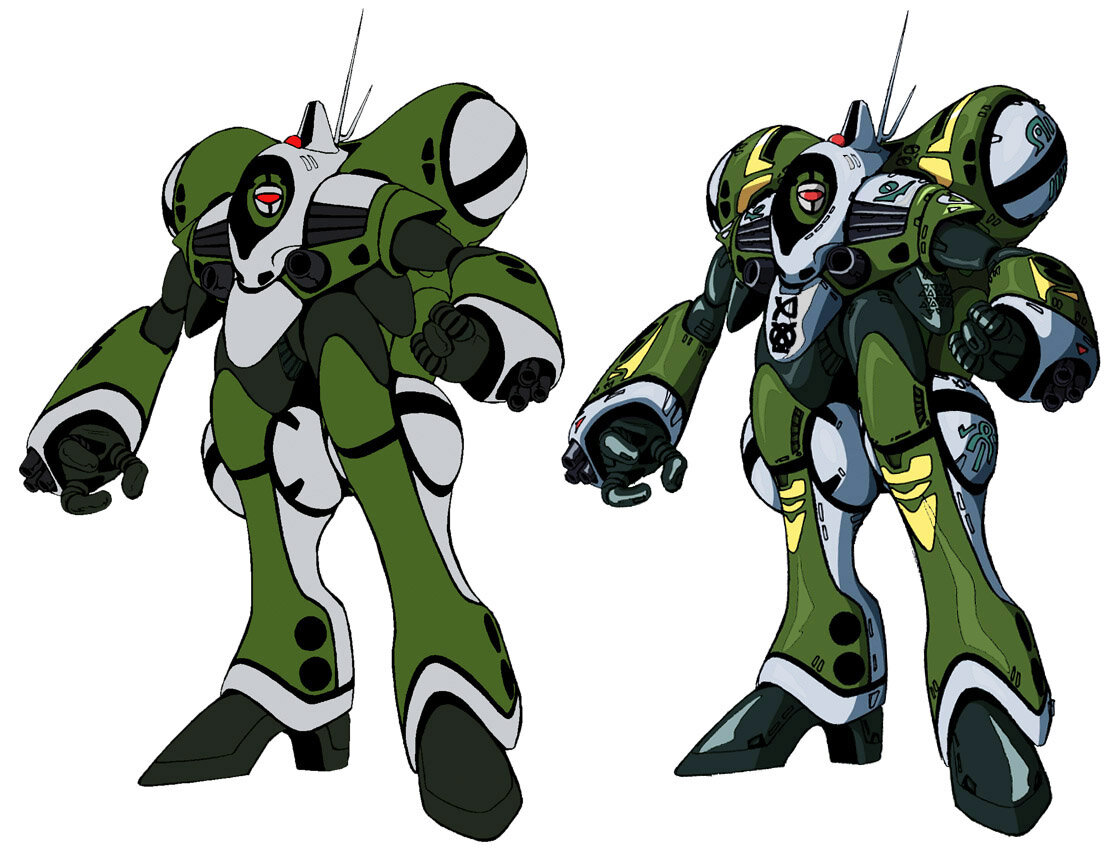
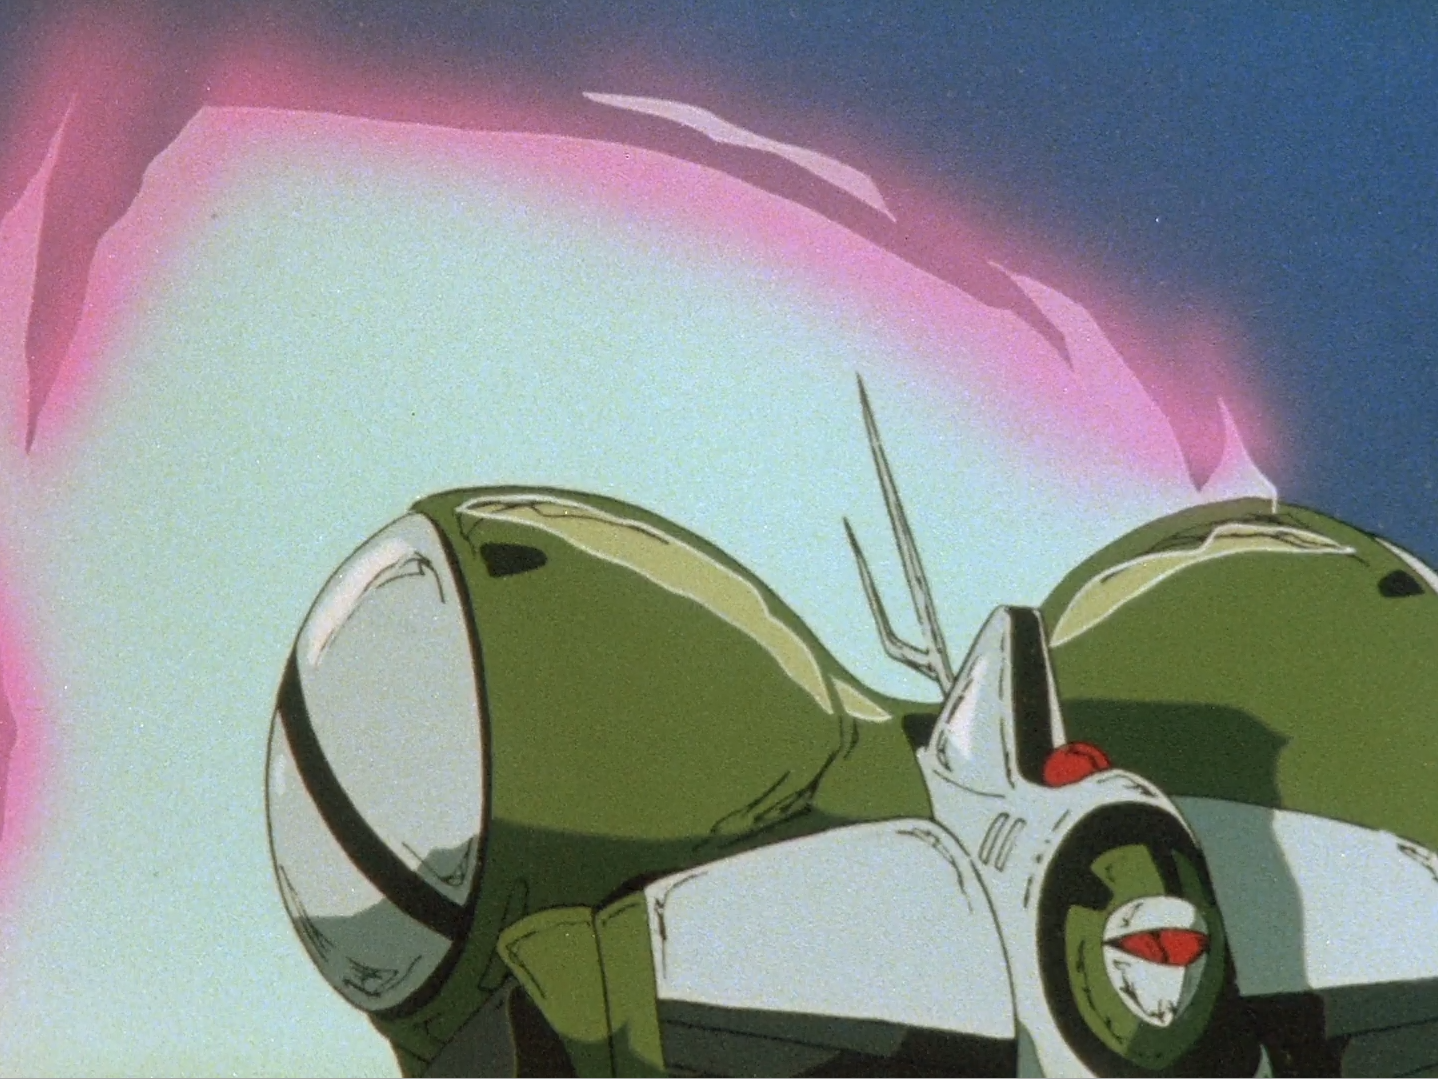
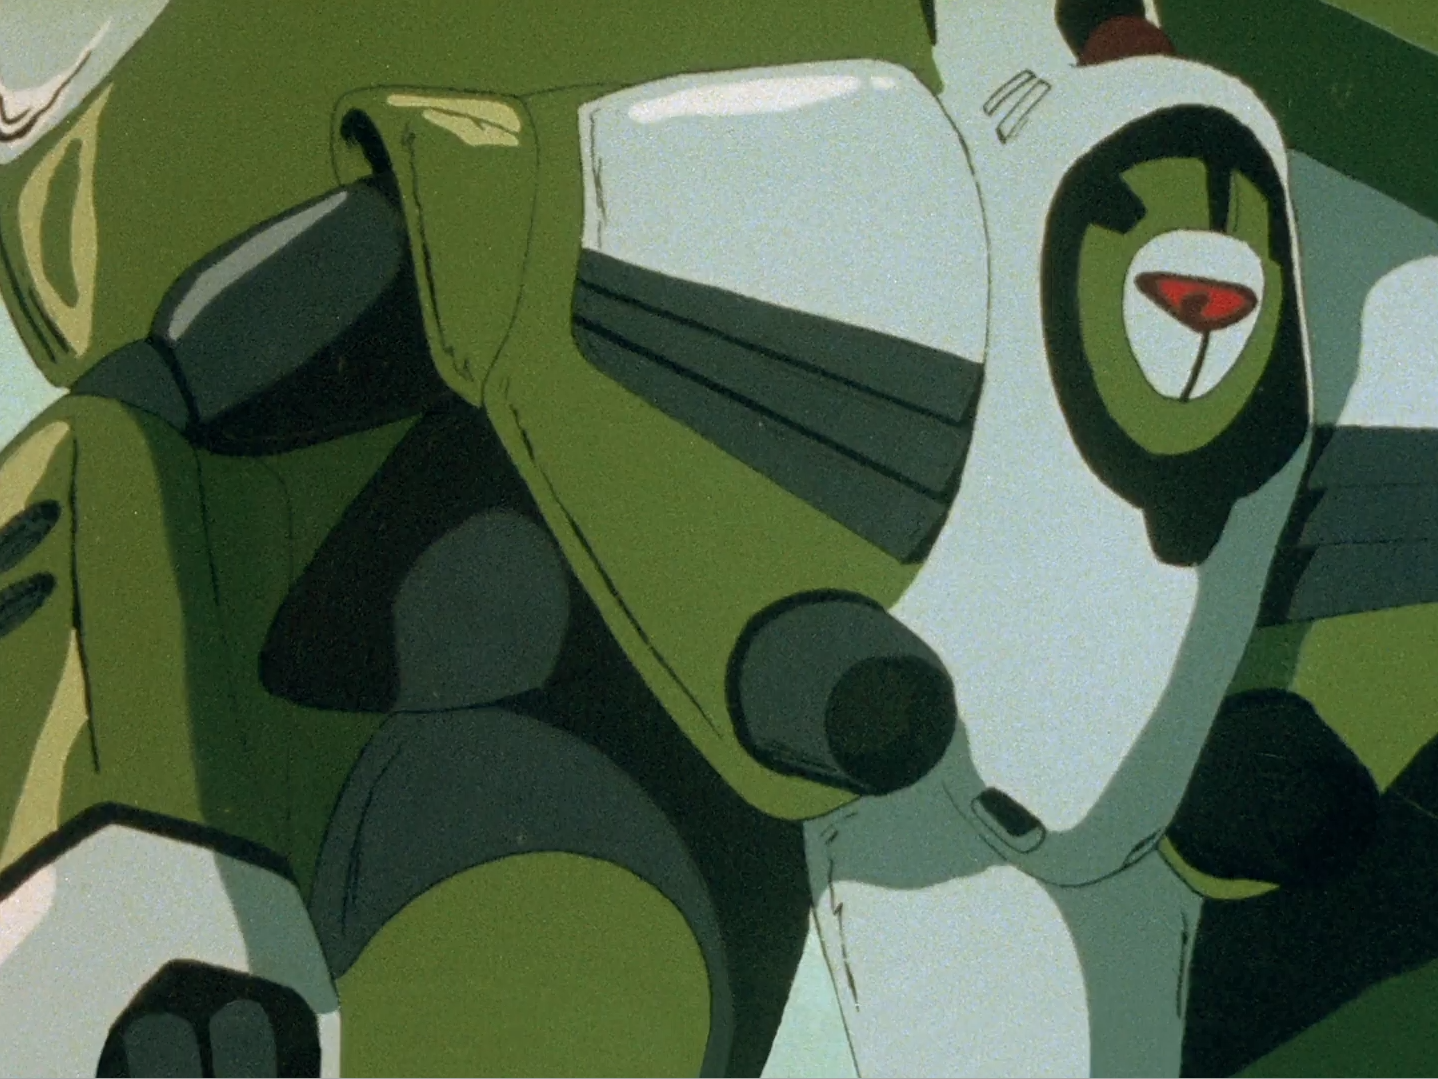
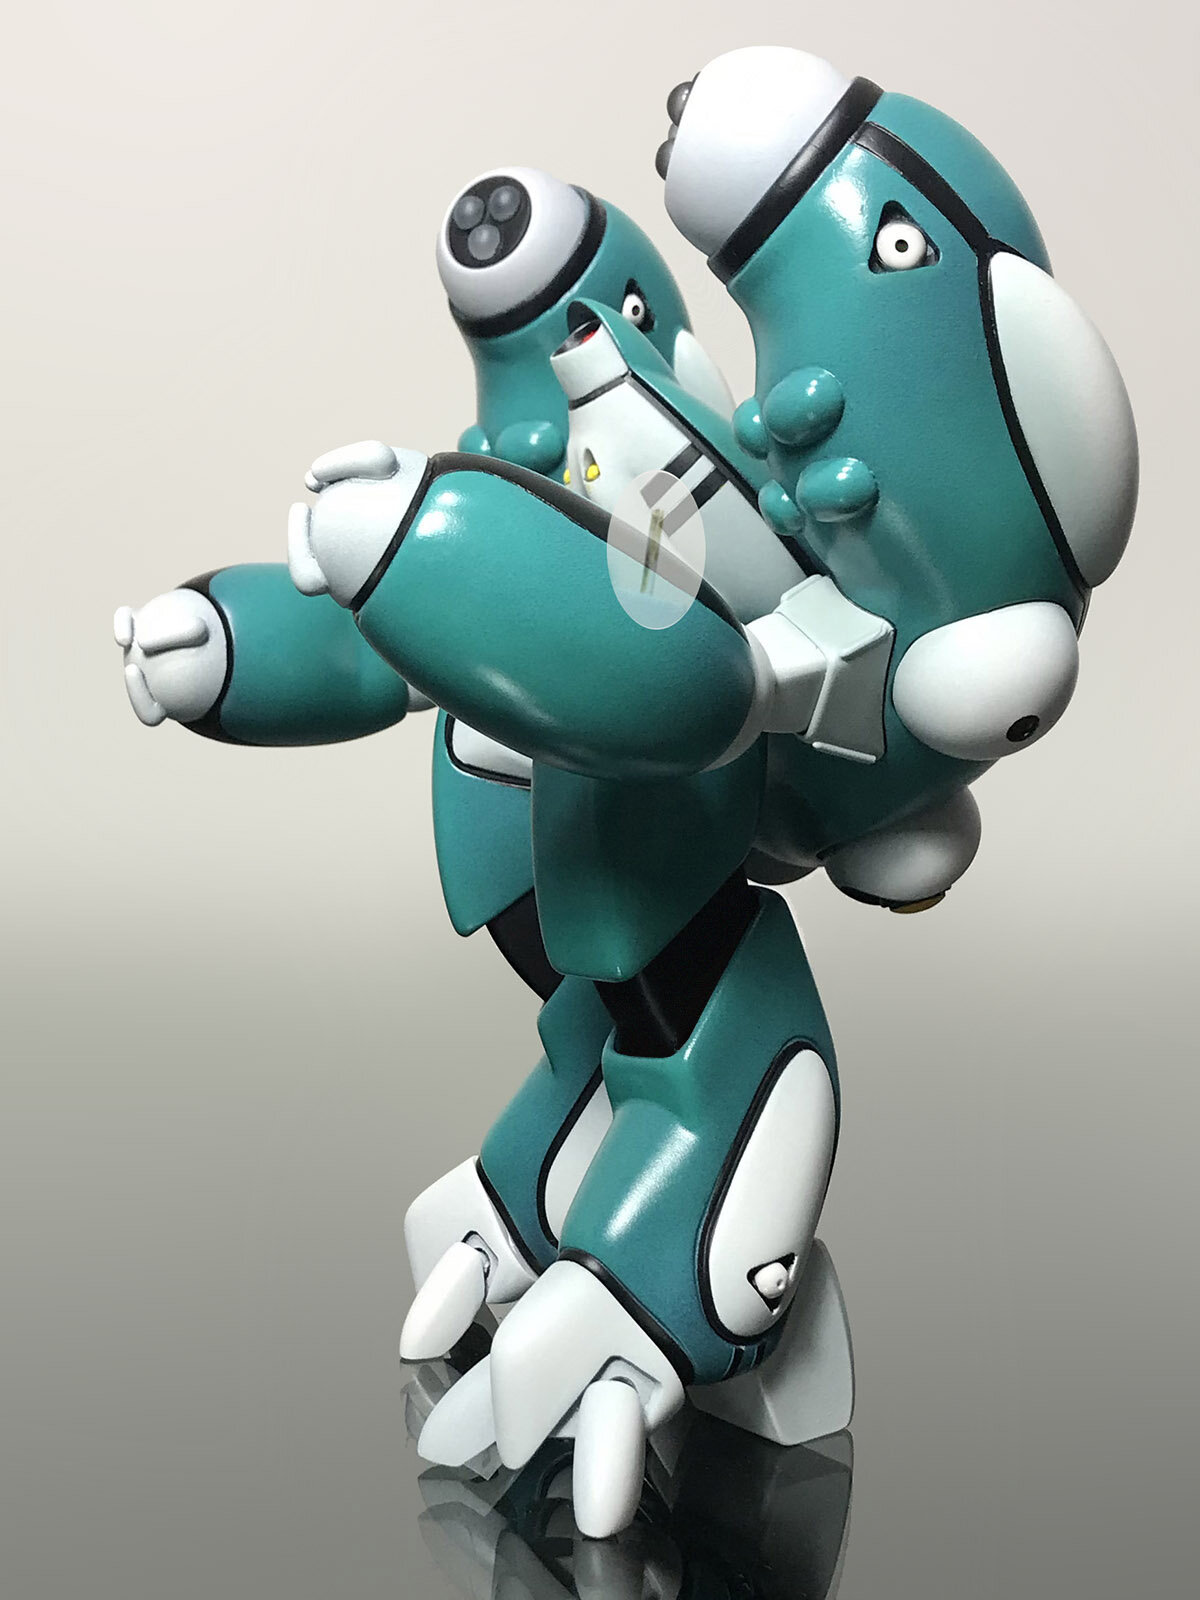
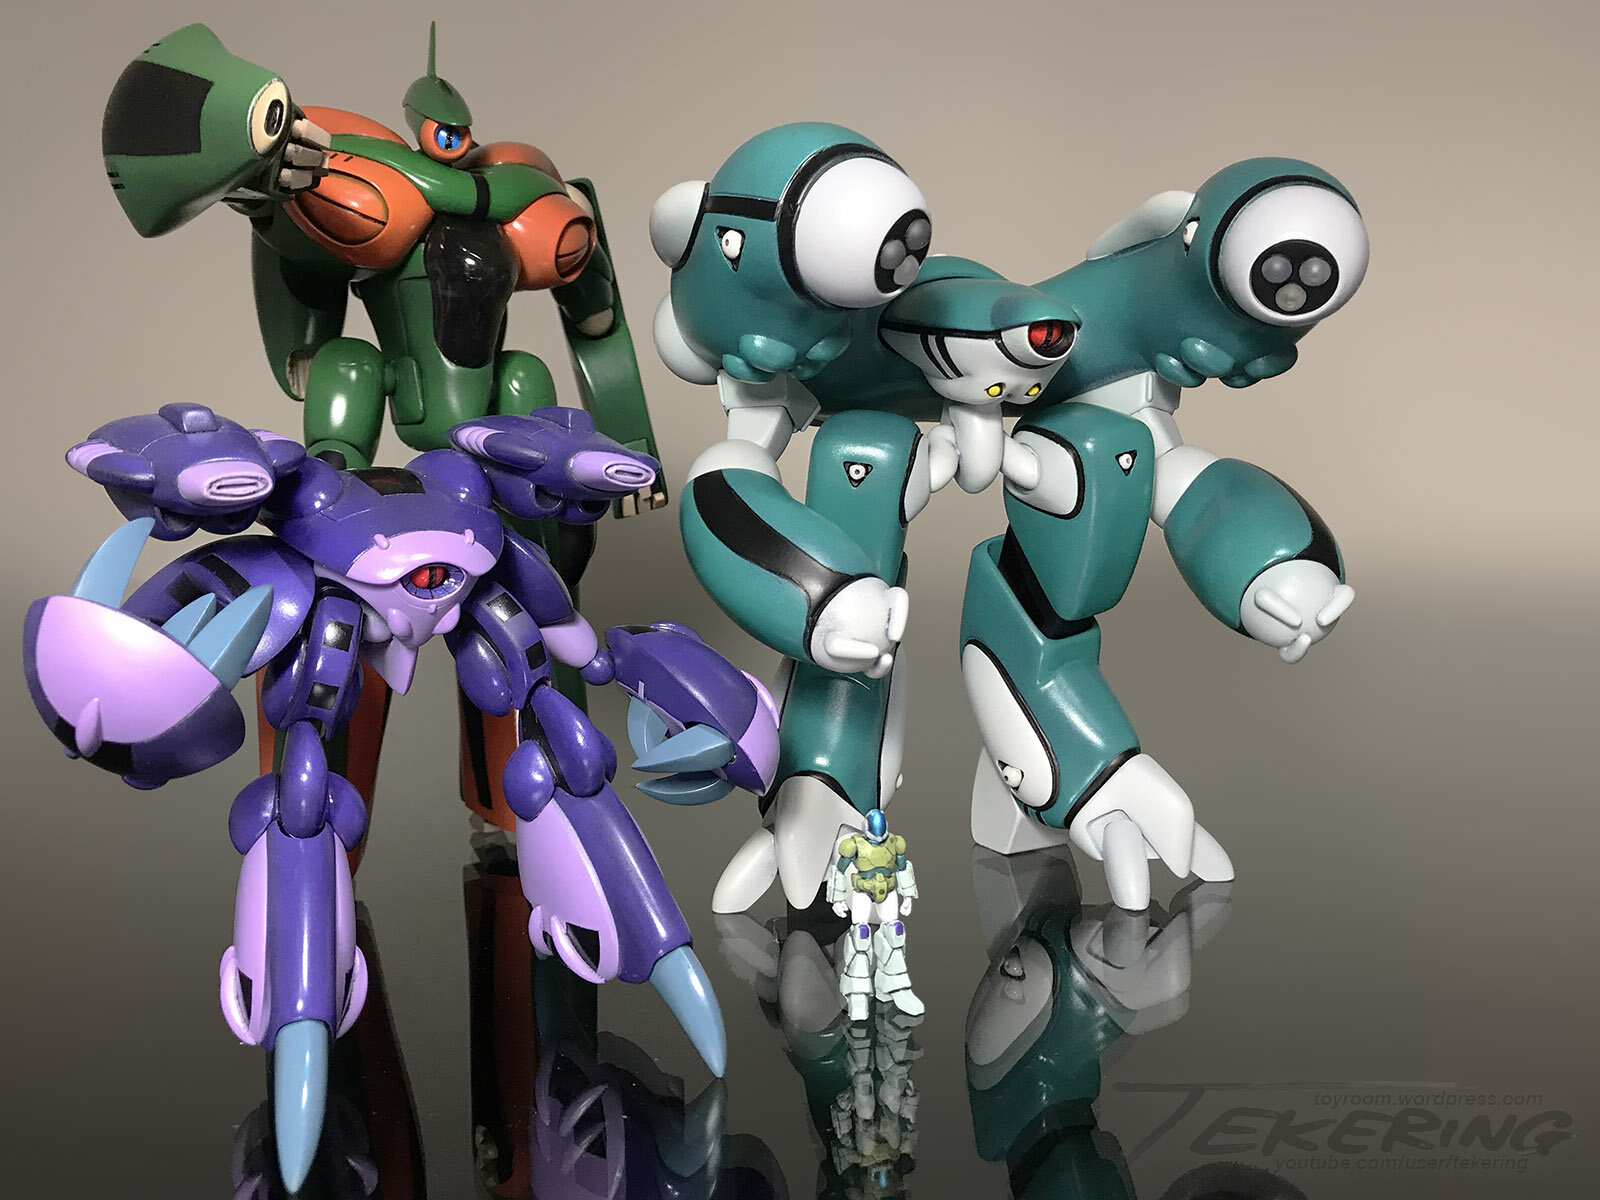
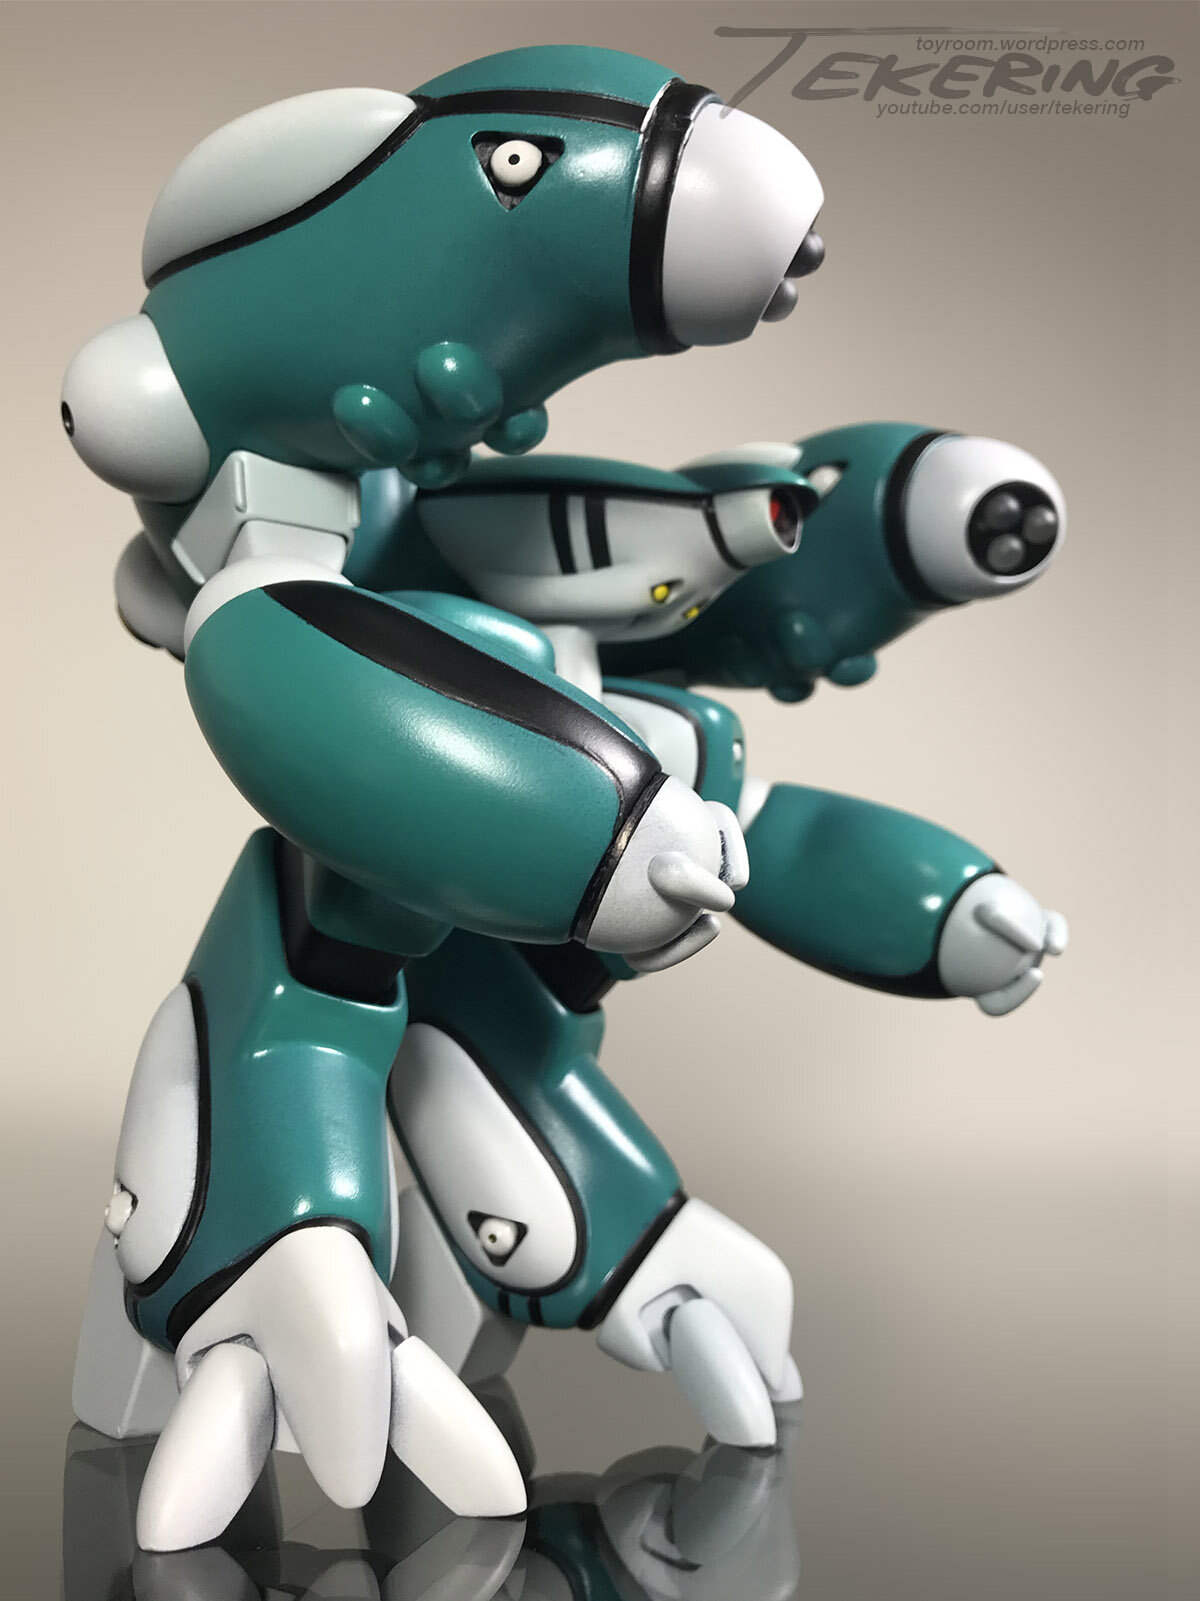
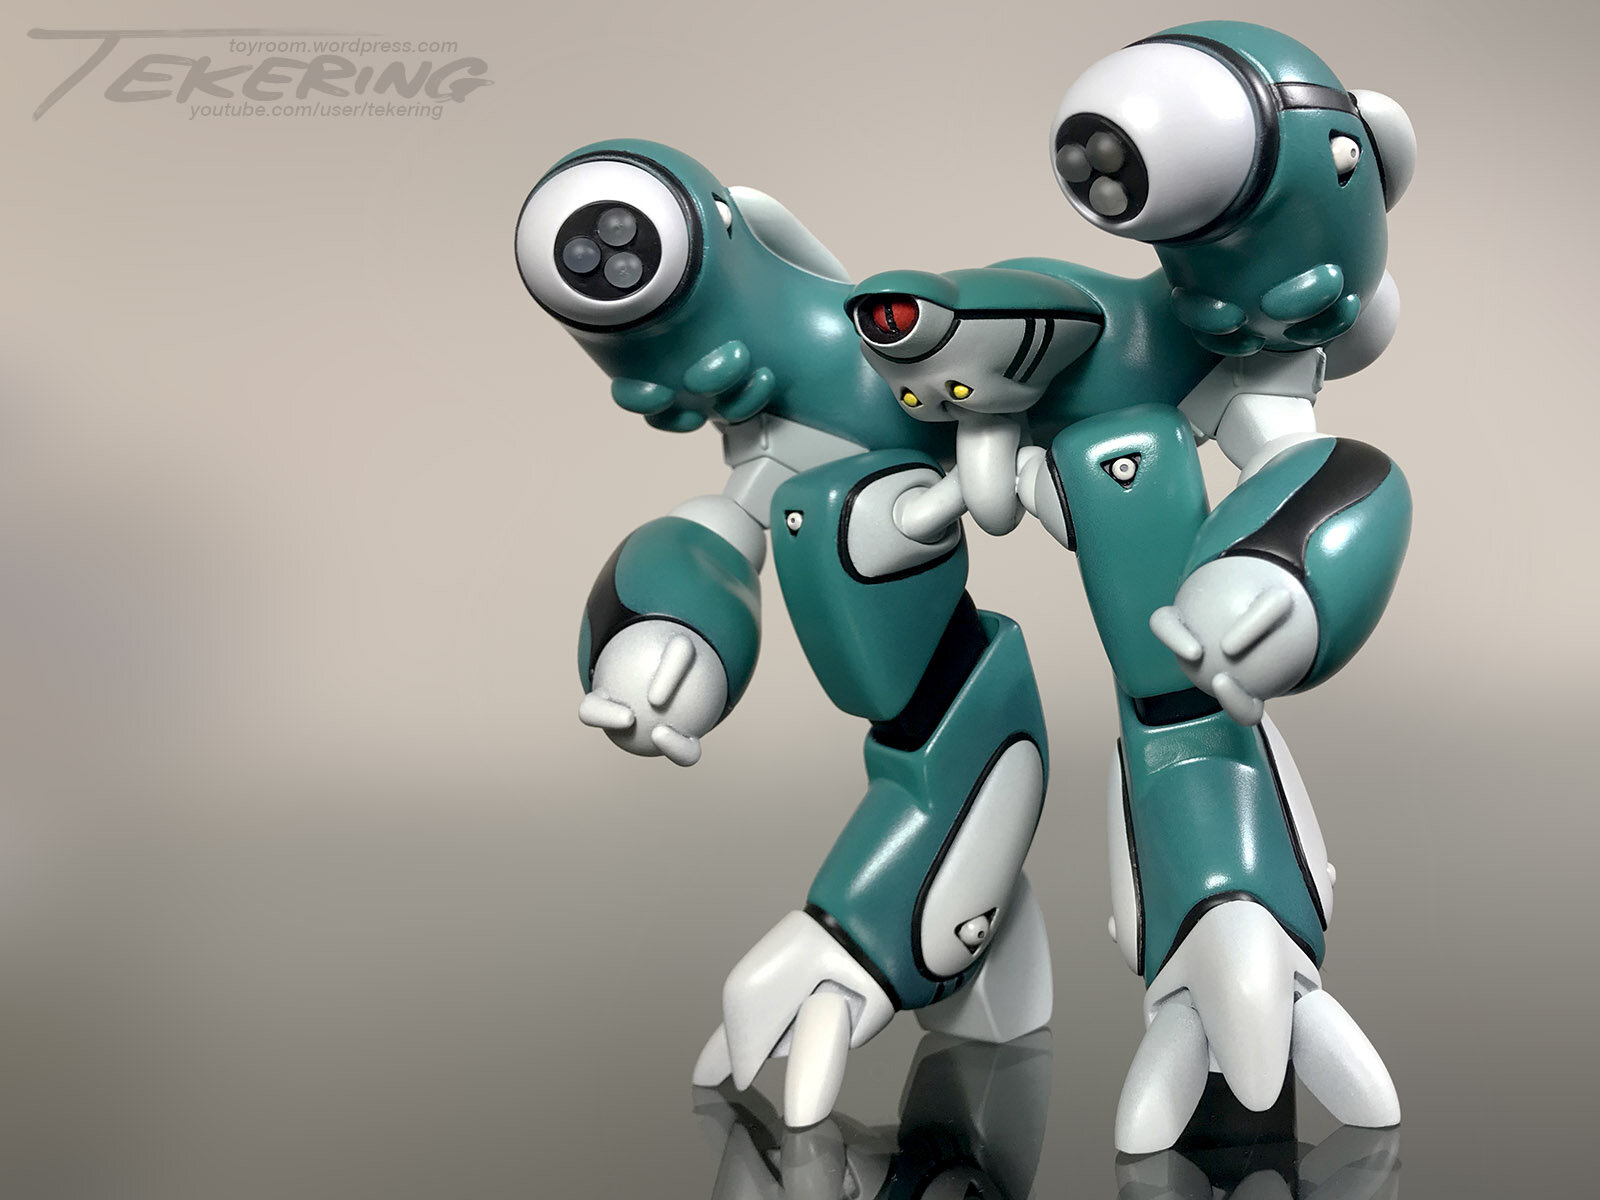
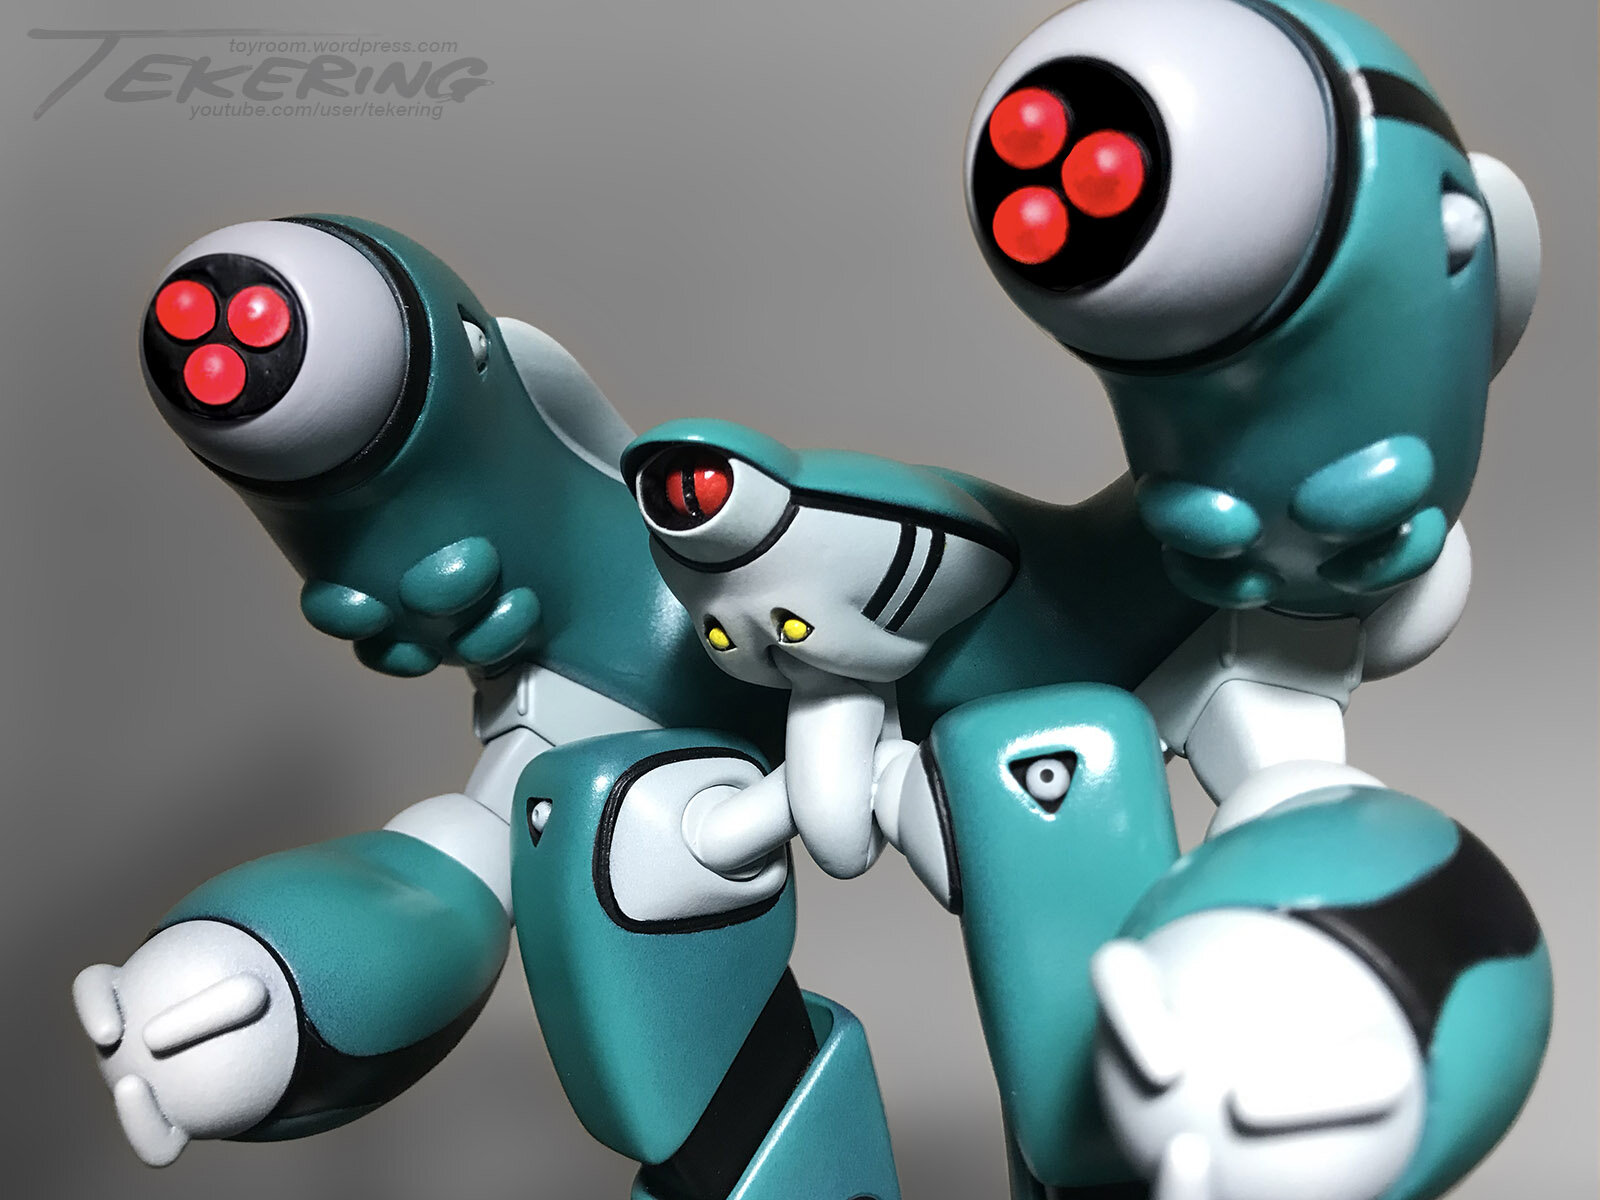
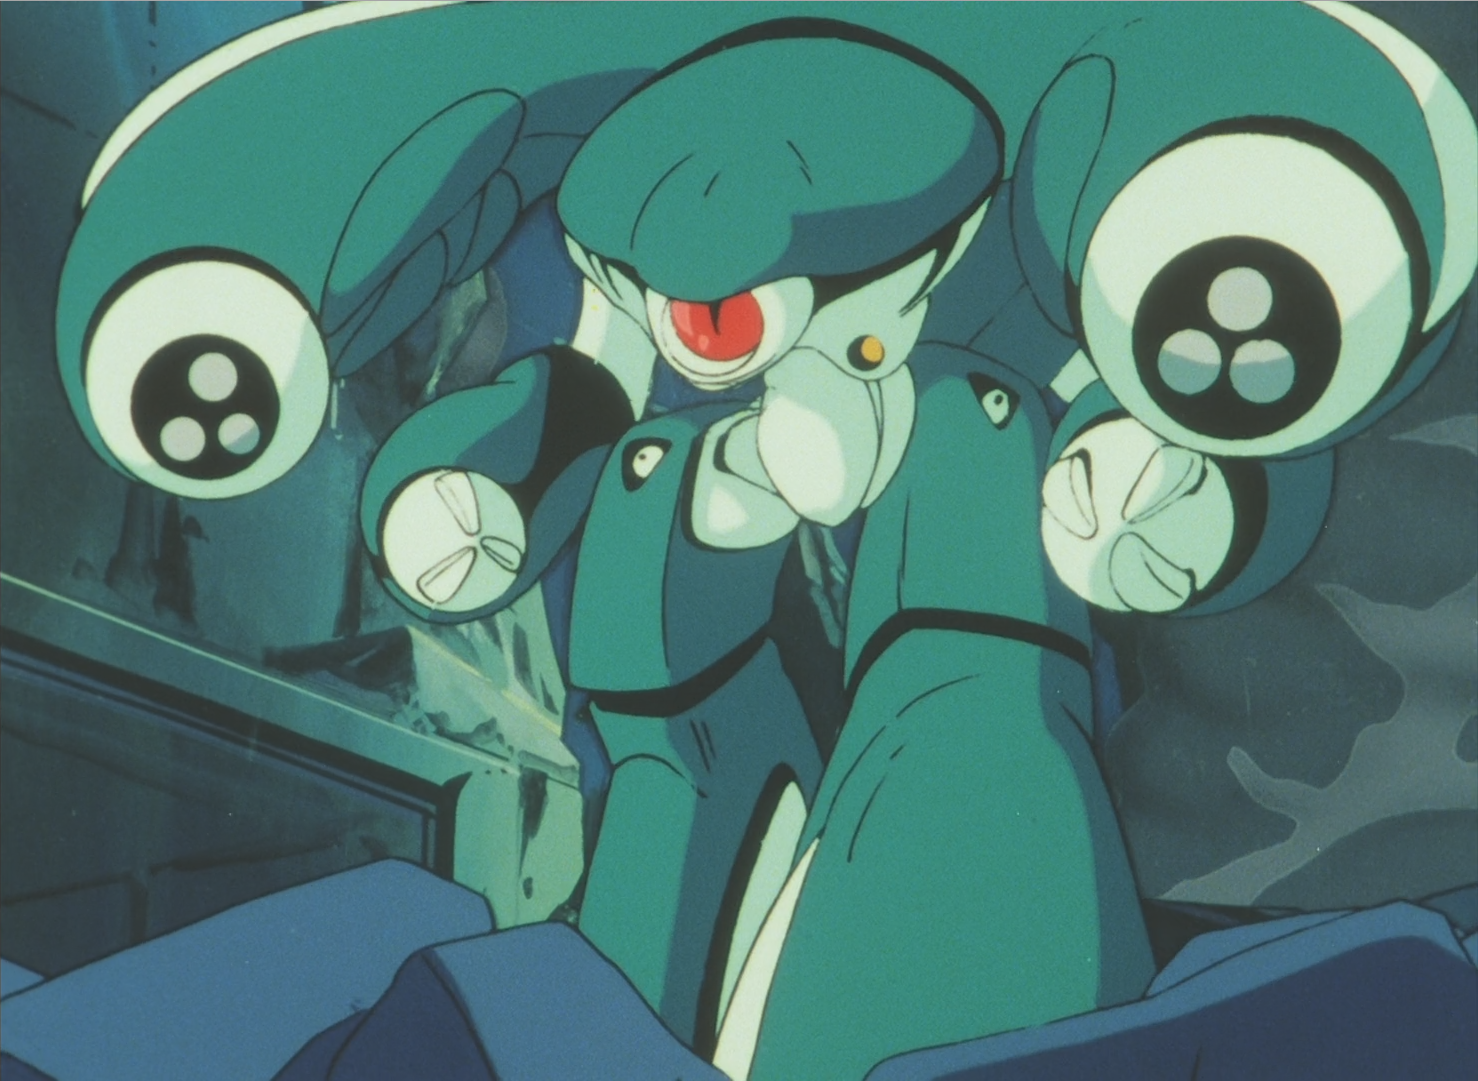
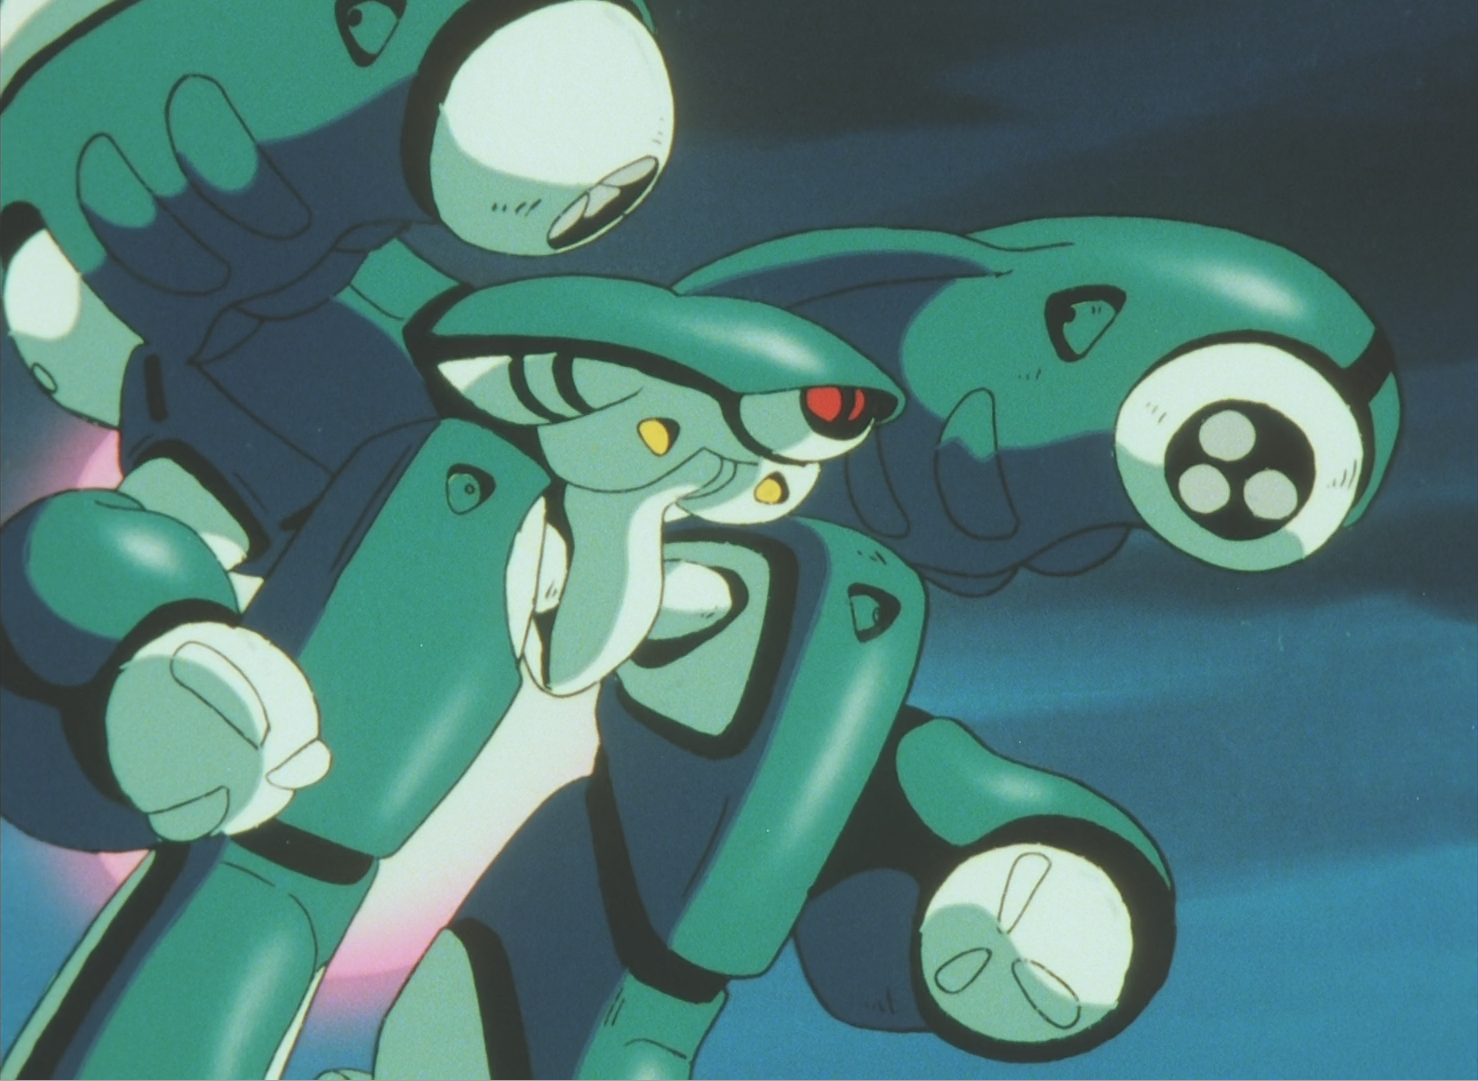
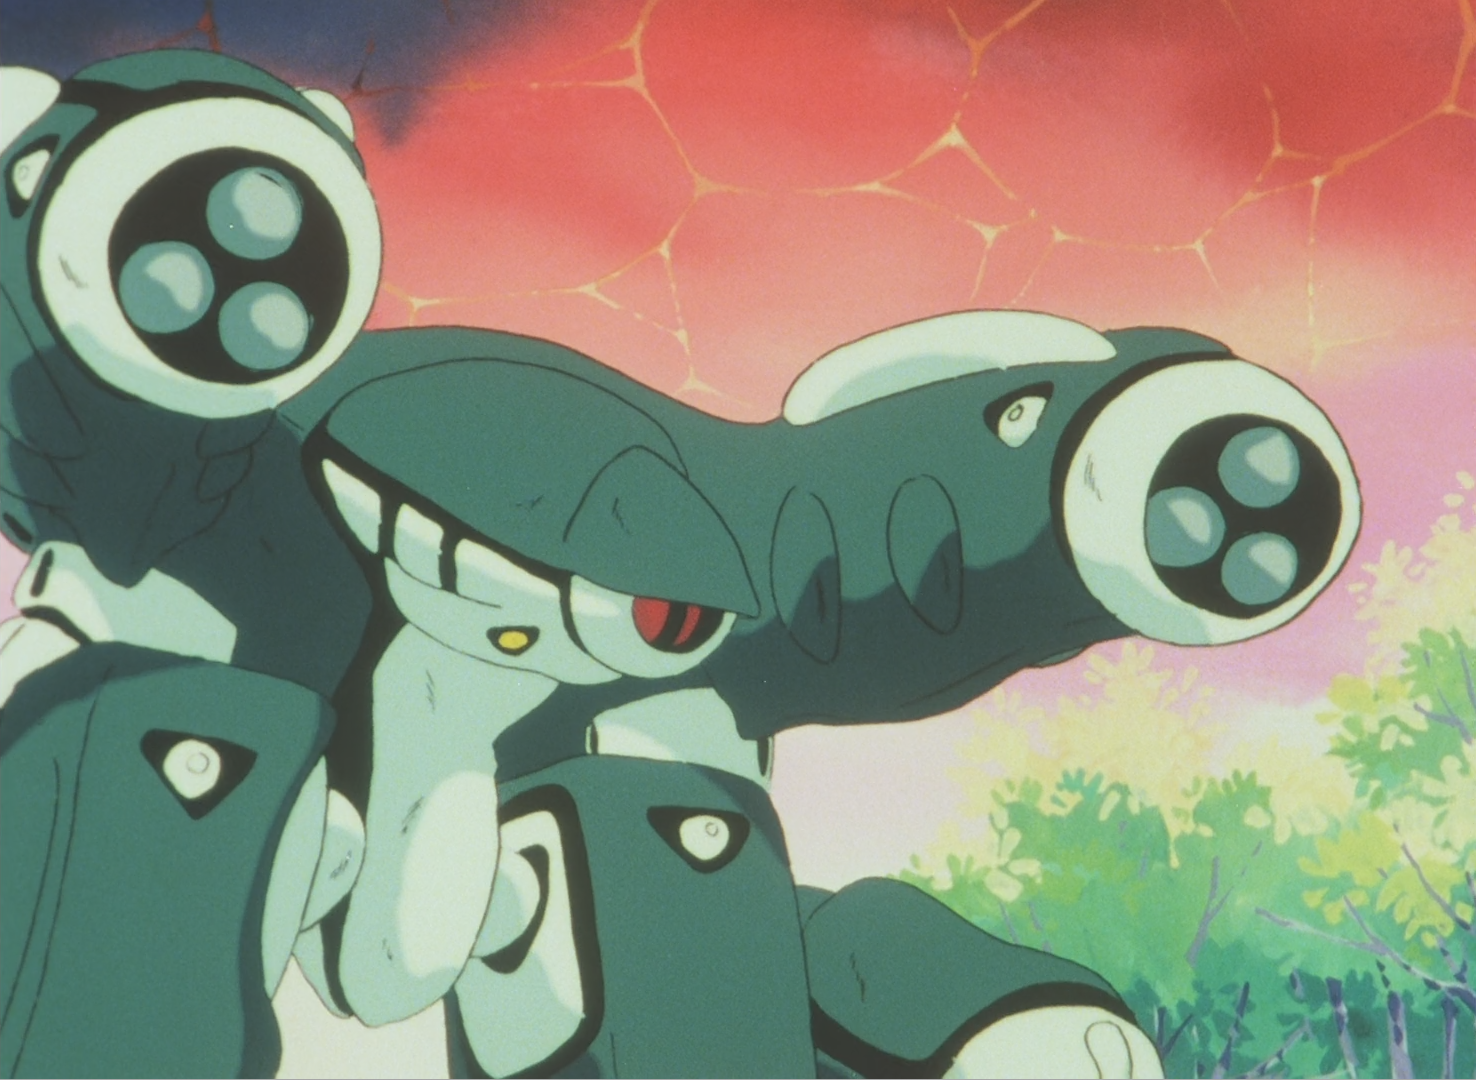
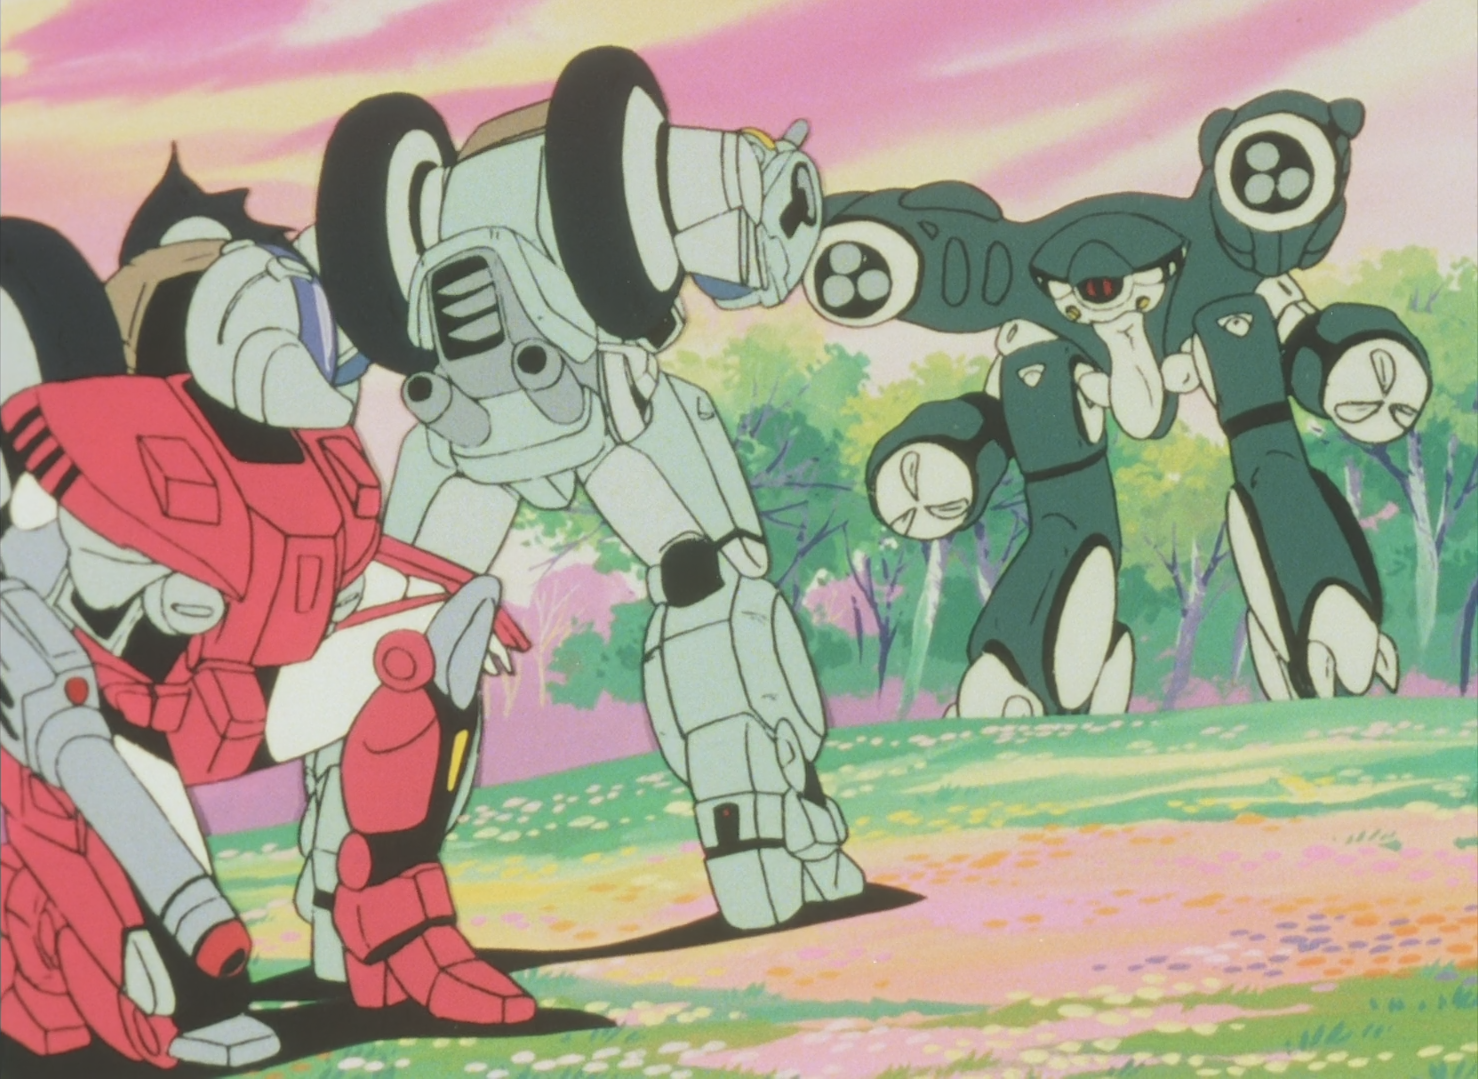
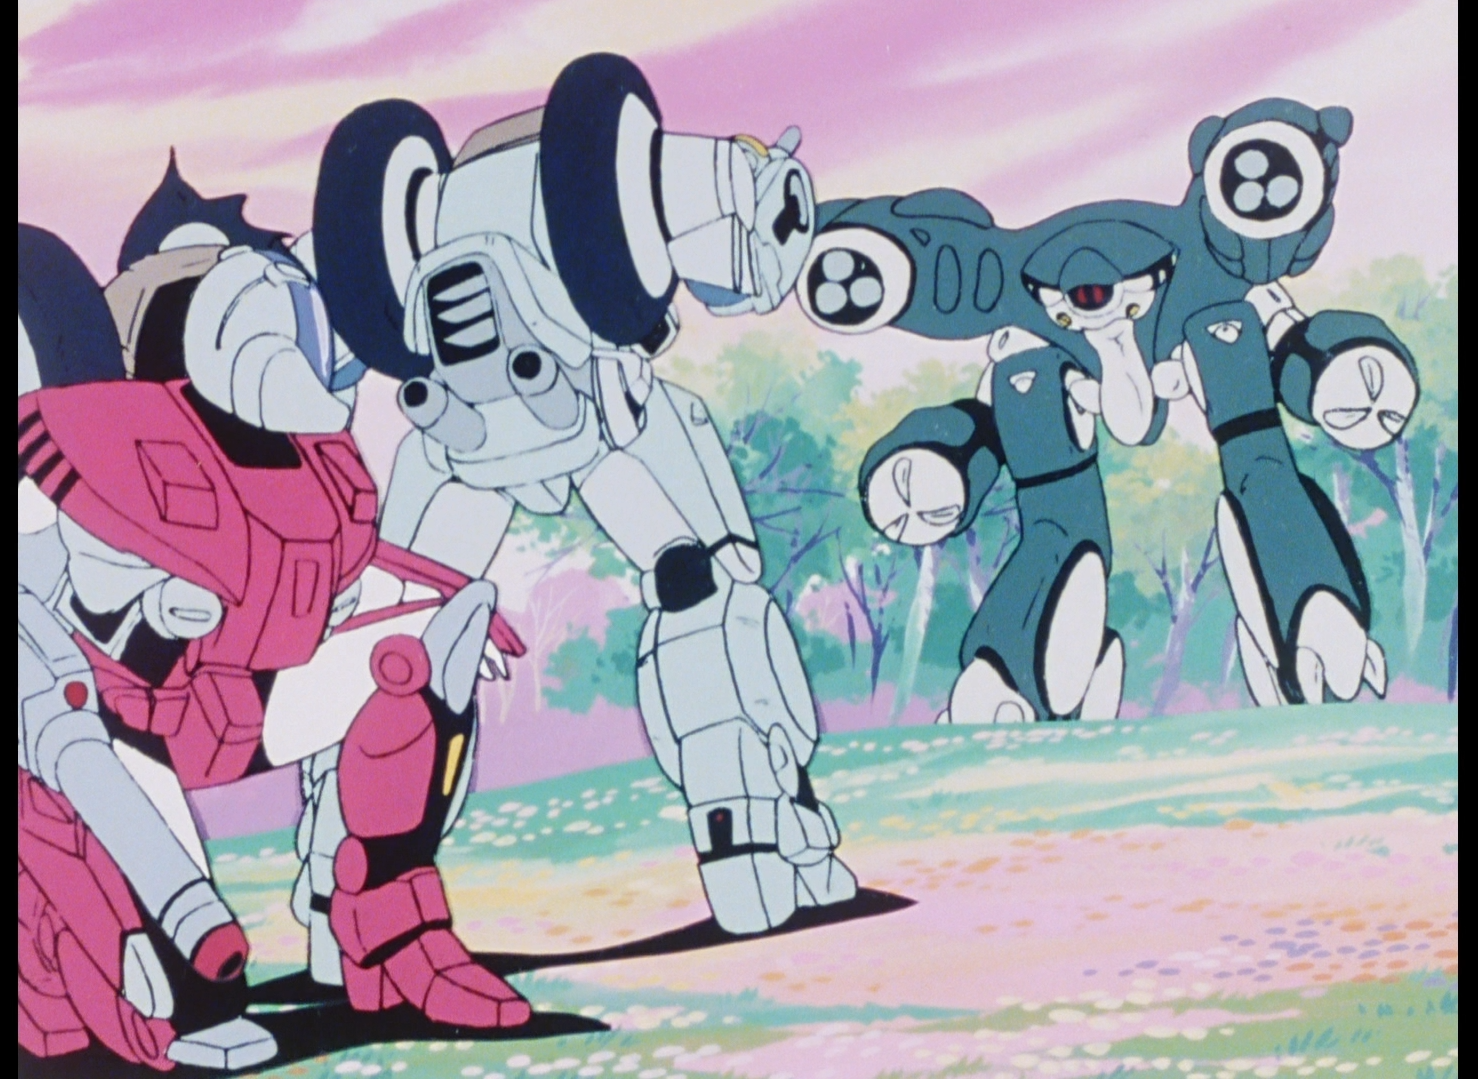
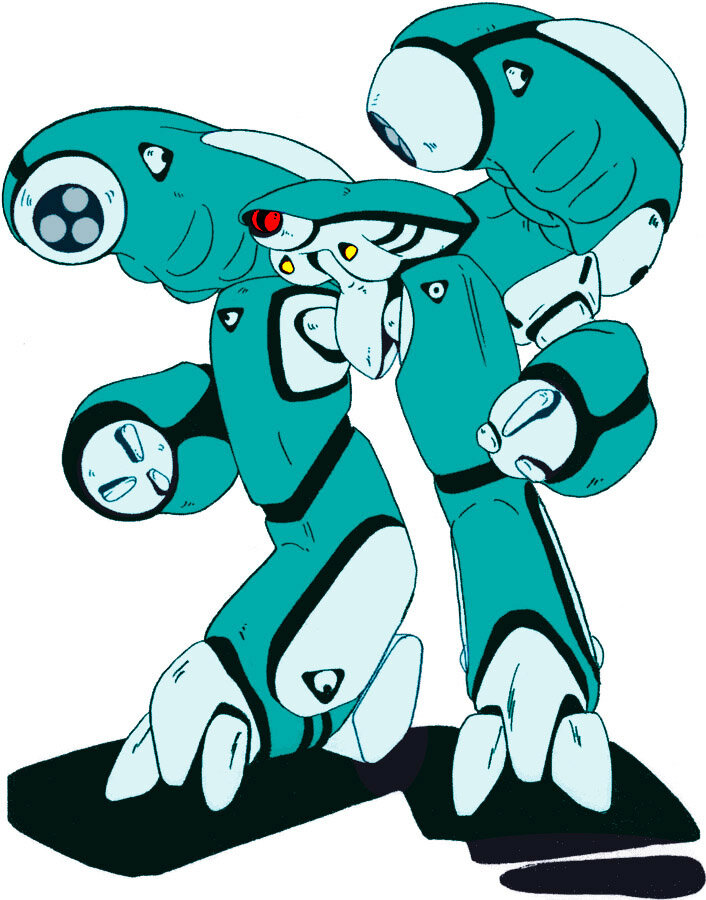
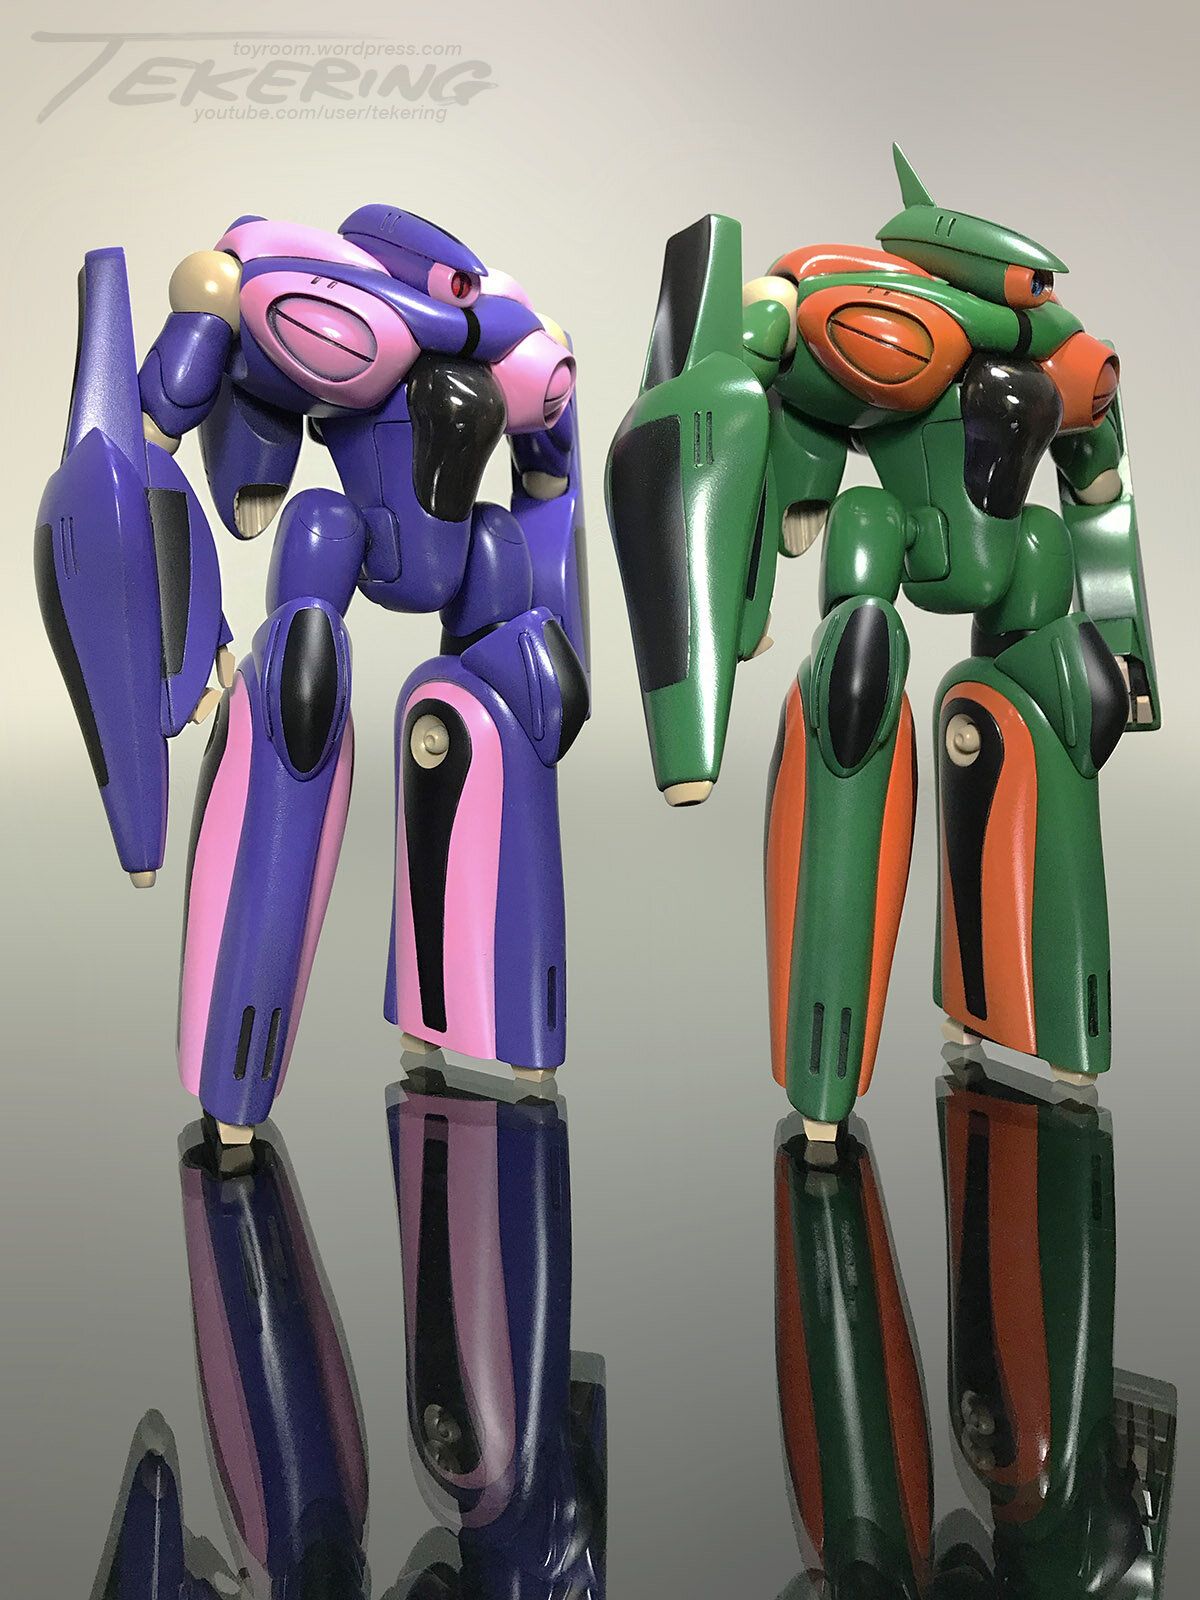
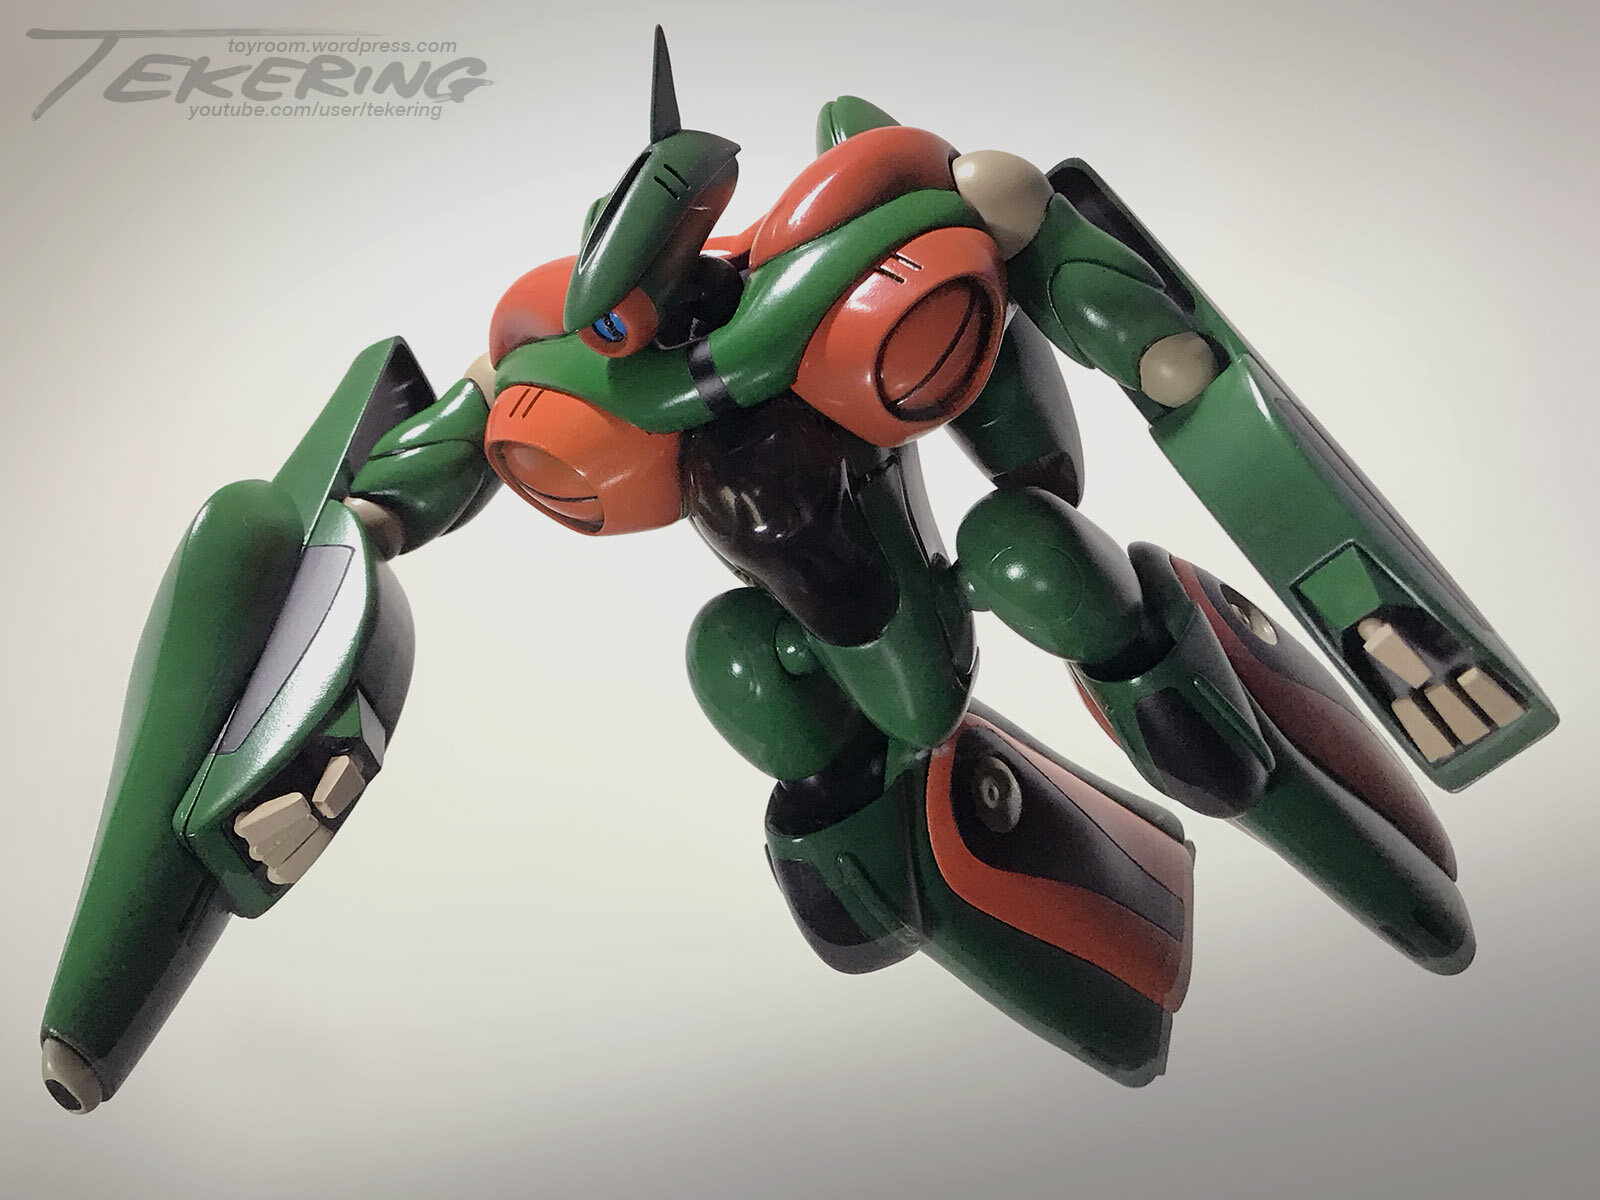
A massive offensive launched from the dark side of the moon manages to inflict devastating losses to the Invid, thanks to the effectiveness of the "Dark Legioss." With only the most rudimentary understanding of human technology, the Invid Regis simply counterattacks with Garmo painted in the same "midnight blue" paint scheme... ...and the human resistance is swiftly and completely wiped out as a result. 😜 The Garmo is actually a tricky color scheme to pin down... Not only are the details painted inconsistently, but the base turquoise itself varies slightly from episode to episode. Just to be thorough, I even consulted the inferior Robotech Blu-rays: As a result, I think this is the ideal color scheme. Any objections?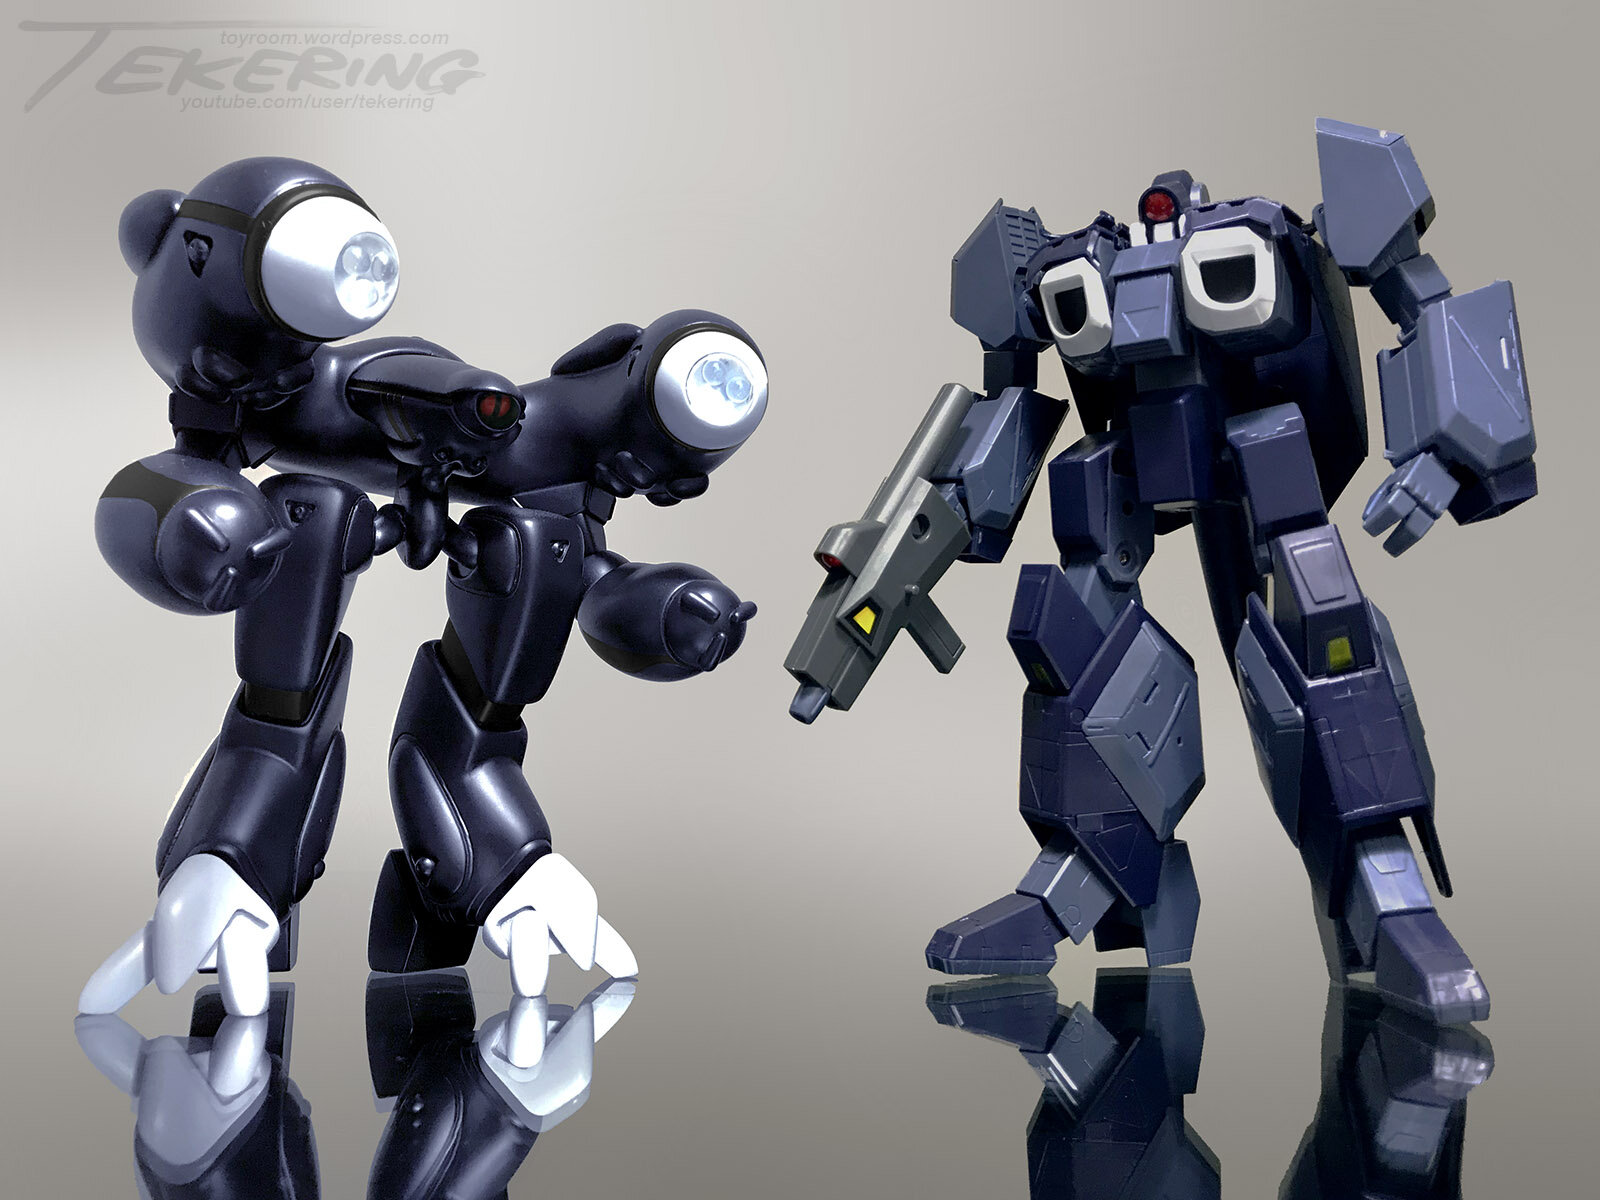
-
MOSPEADA Inbit Revival Part II: Gosu?
tekering replied to captain america's topic in Anime or Science Fiction
And then, there were two.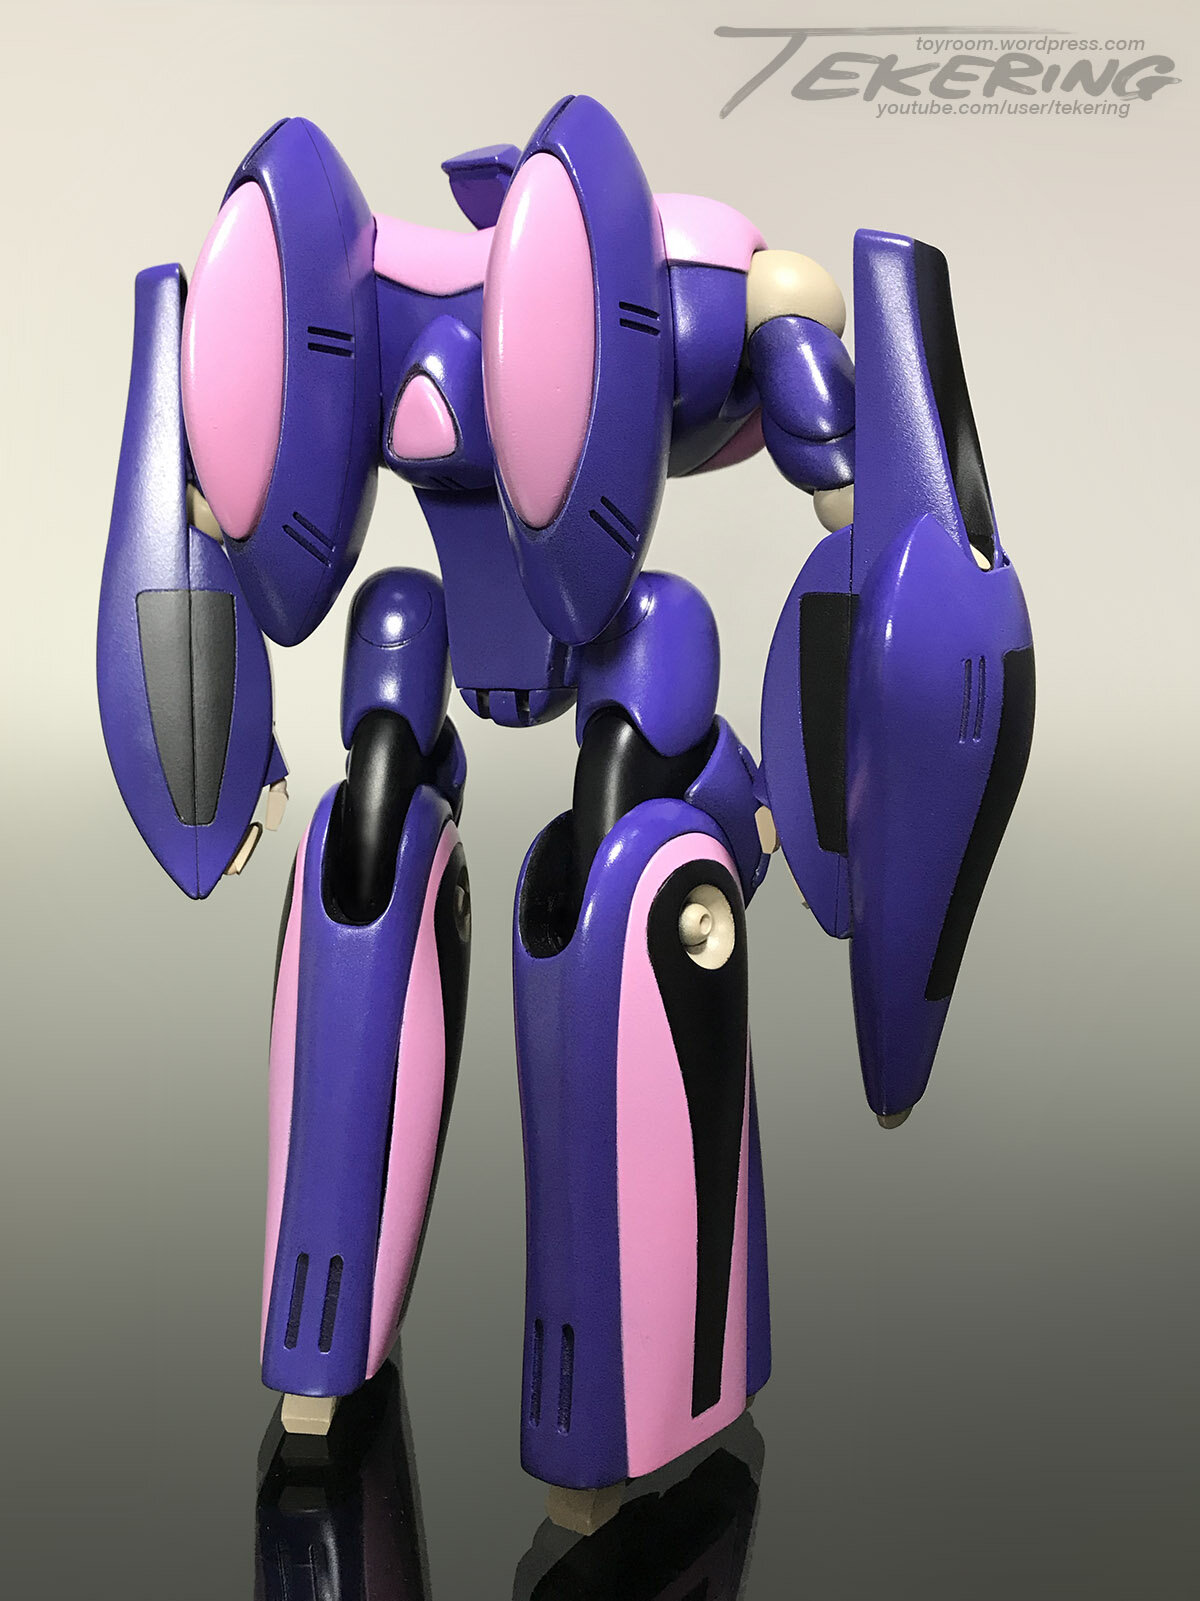

-
STAR WARS Merchandise Episode - 2
tekering replied to Black Valkyrie's topic in Anime or Science Fiction
Is that Baylan Skoll? It looks a lot more like Ray Stevenson than Christopher Lee... 🤨 -
MOSPEADA Inbit Revival Part II: Gosu?
tekering replied to captain america's topic in Anime or Science Fiction
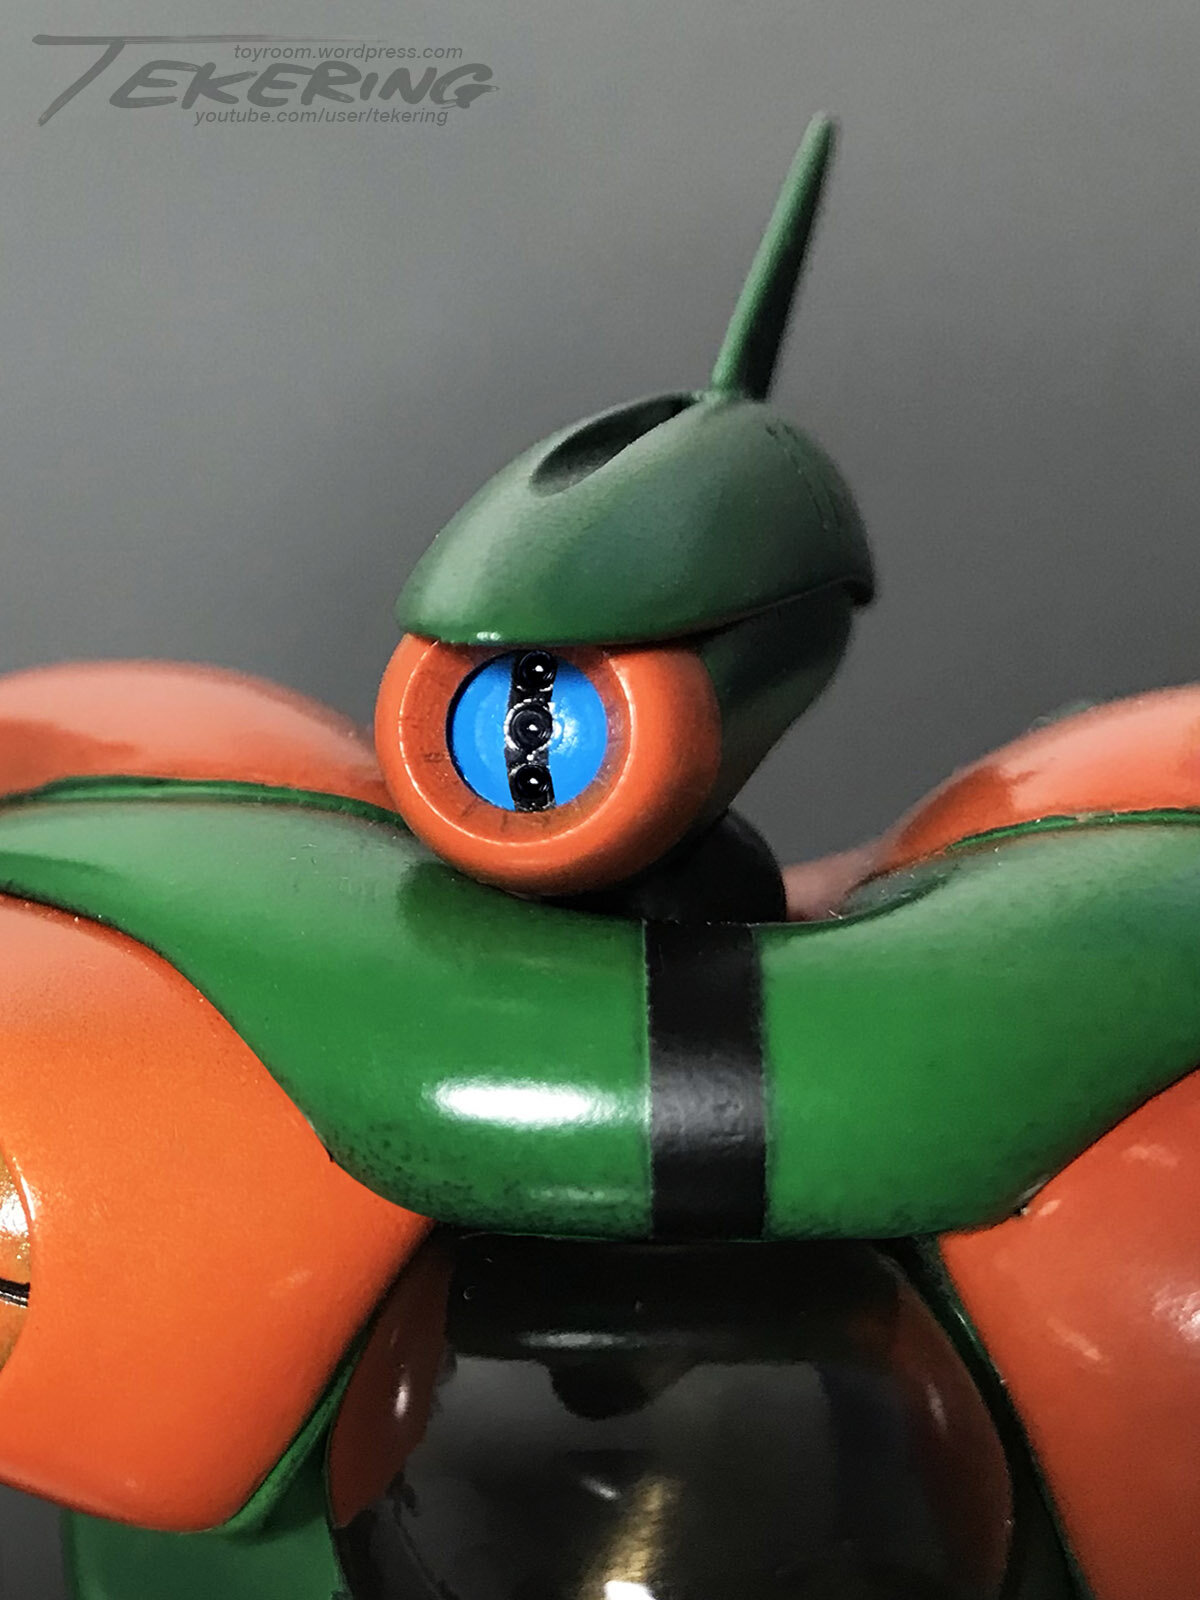
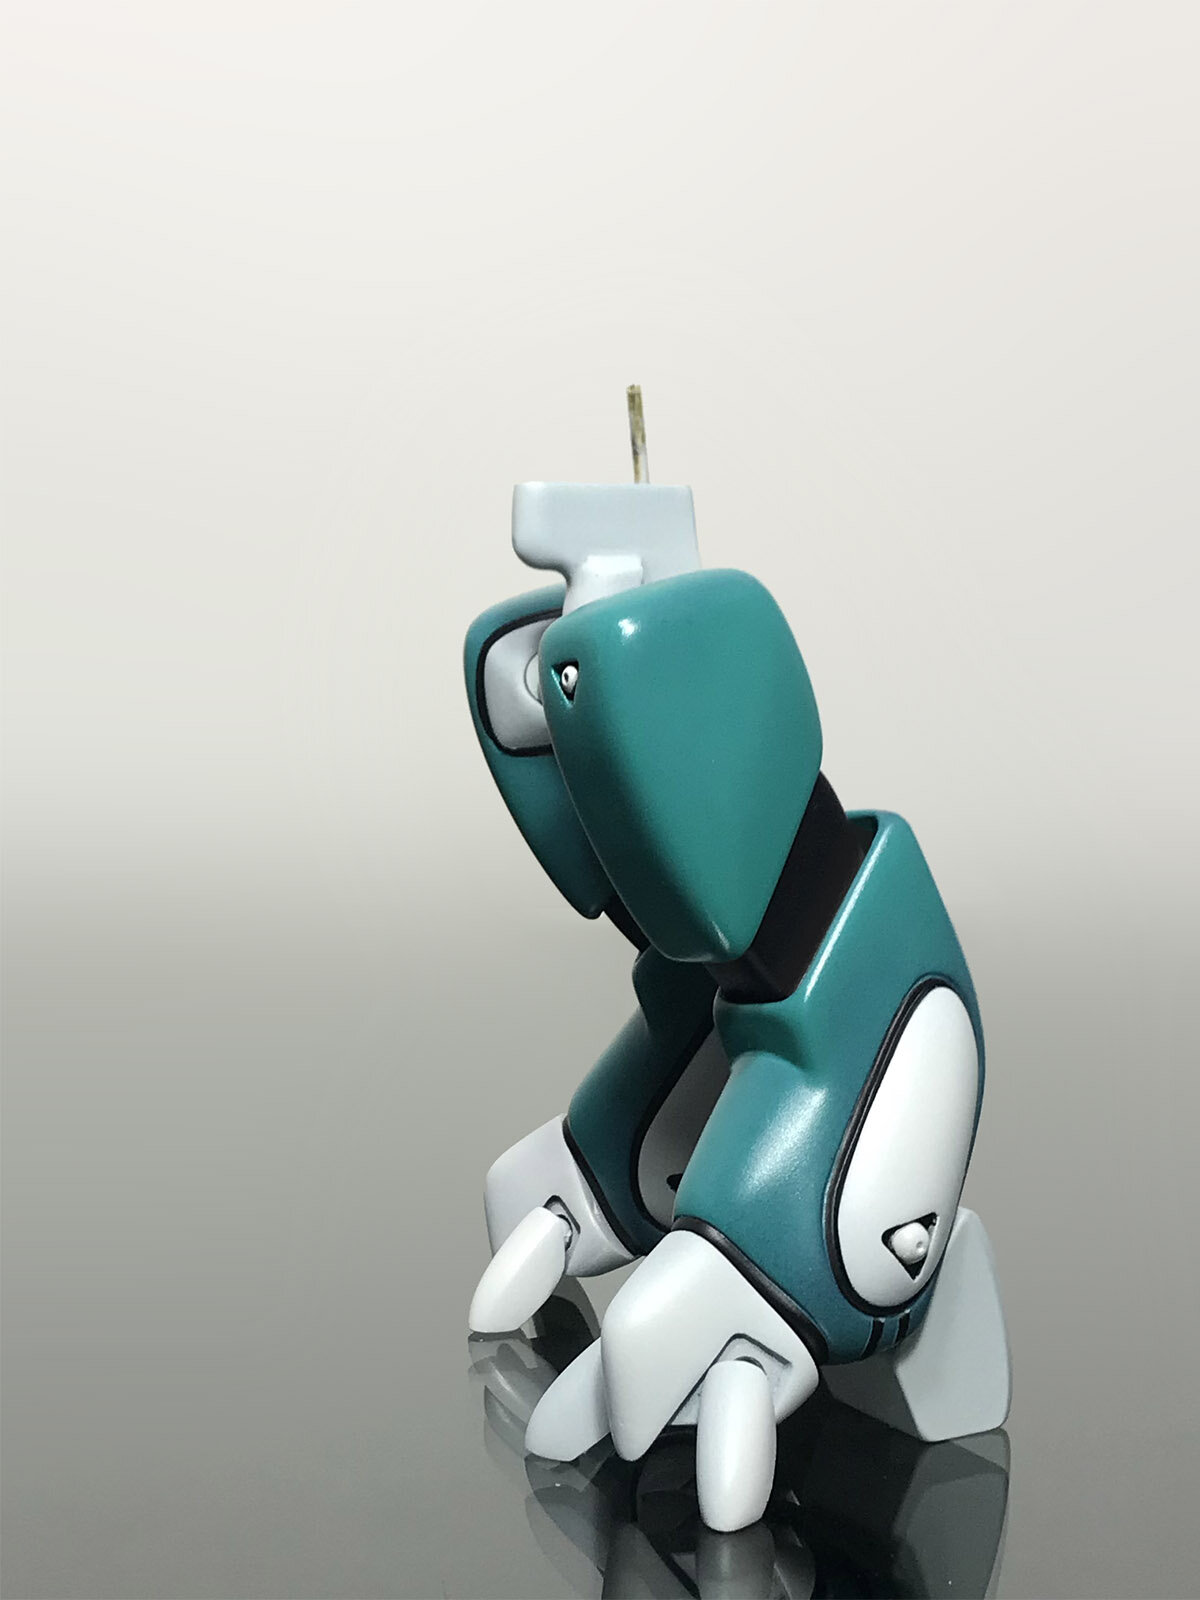
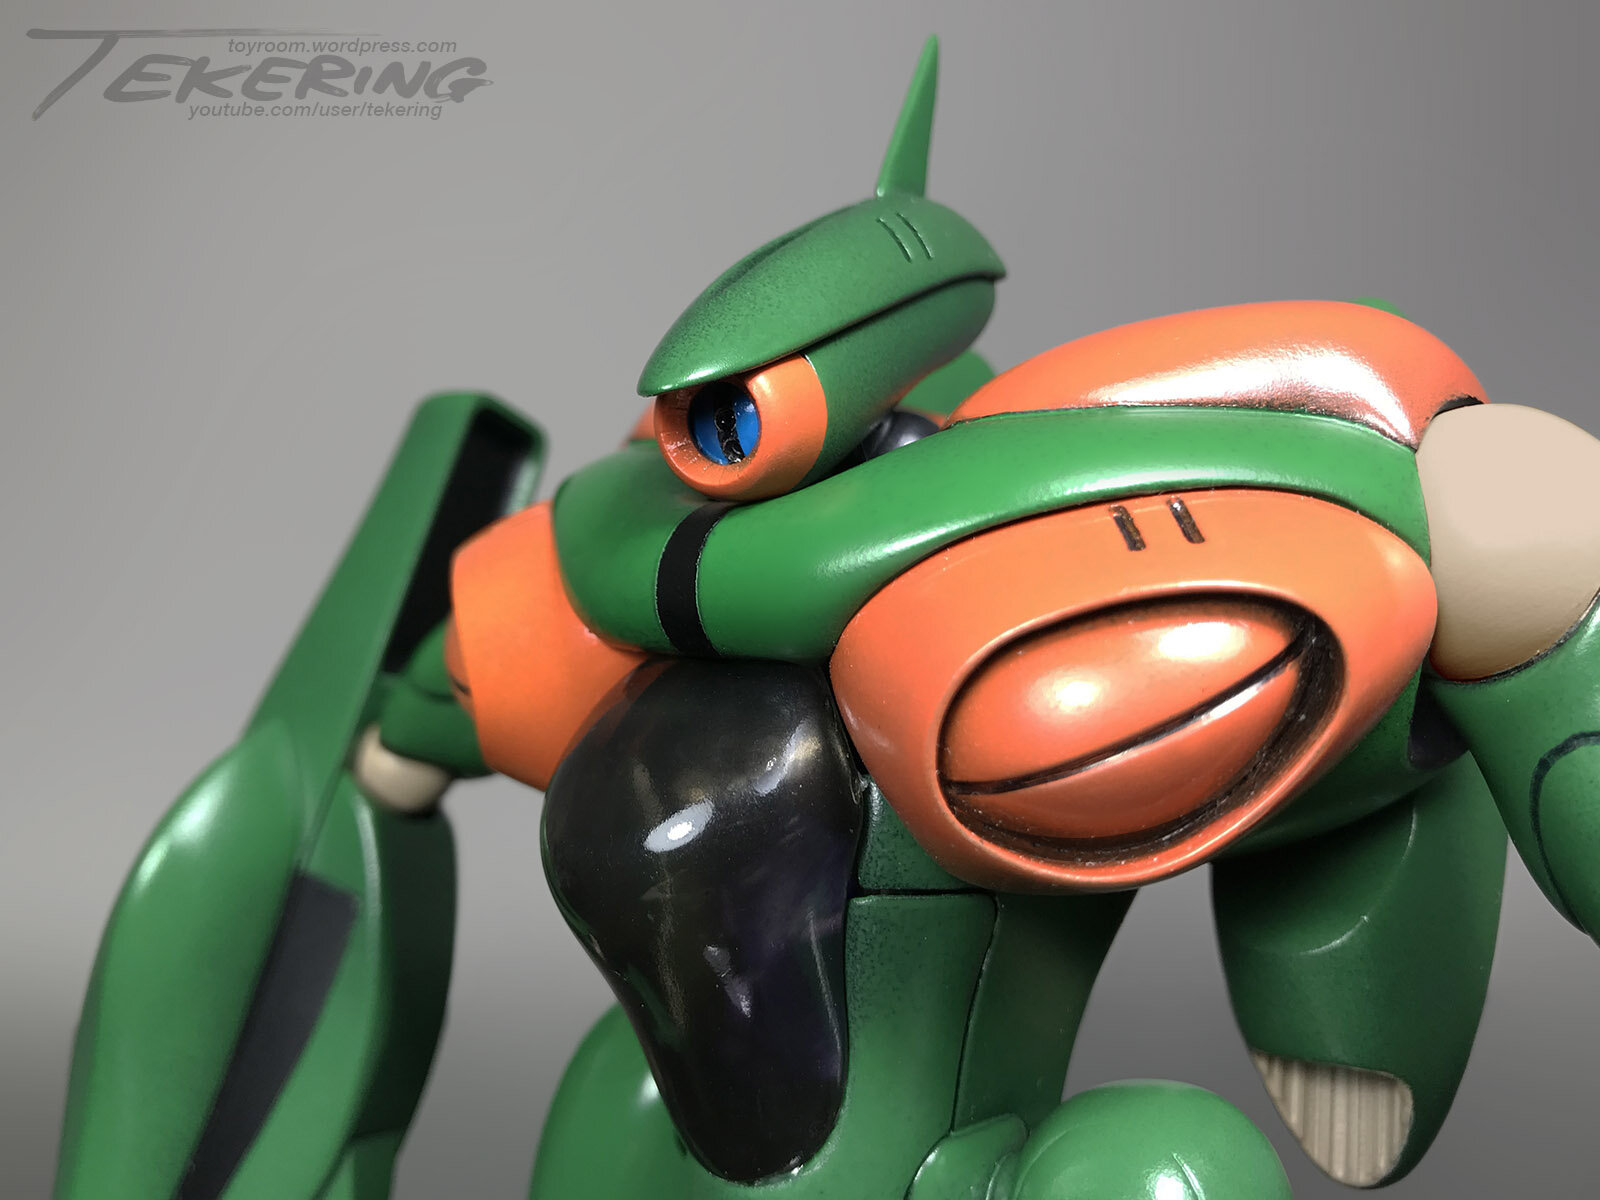
The Eye of Sorji. The aperature's a little thinner on this one. I wanted to give her a more inquisitive stare, rather than the threatening glare of her brother's eye. "Intergenerational scaling of mecha," eh? Sorji will be ready by Halloween; the Garmo will follow in November.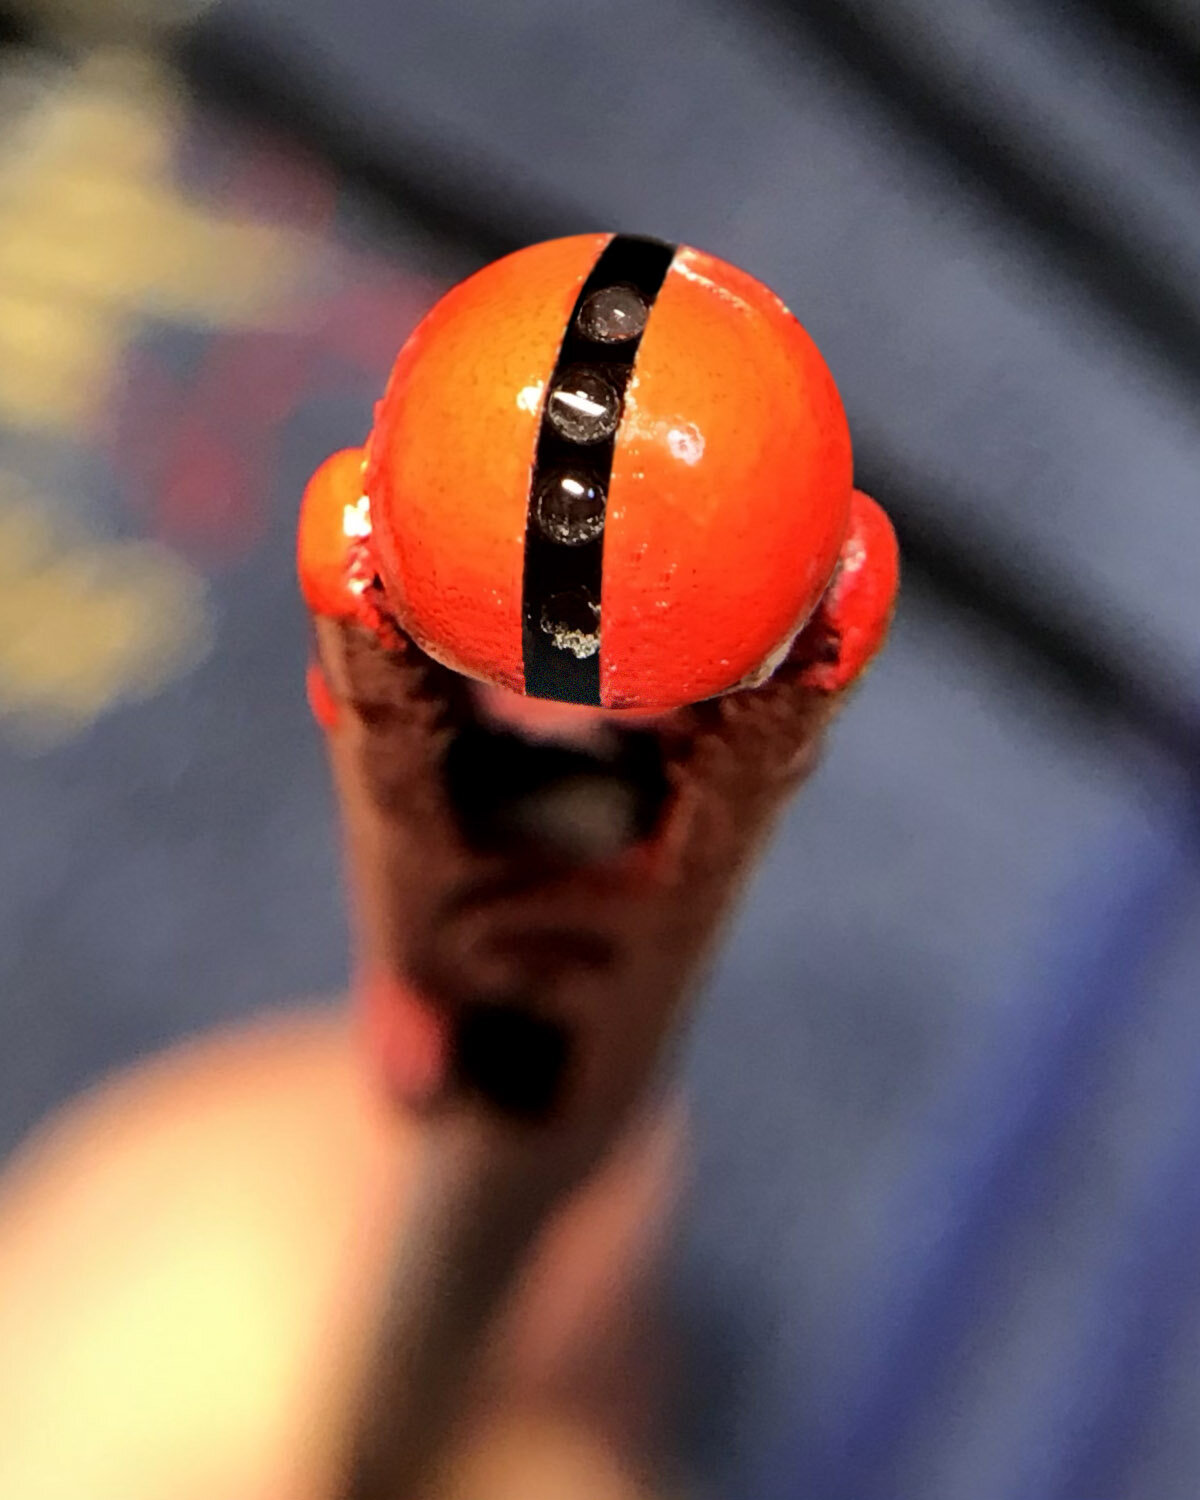
-
The Unlicensed Third Party Transformers Thread
tekering replied to slaginpit's topic in Anime or Science Fiction
I see it, but I don't believe it. -
Looks like a Monstrously large set of arms... 😲
-
Actually, he was 55. 😉
-
The Mandalorian - Star Wars webseries from Jon Favreau
tekering replied to SMS007's topic in Anime or Science Fiction
As opposed to episode four, "Seven Samurai and an AT-ST?" 🙄 That desiccated corpse of a storyline stunk up my living room so badly I had to have the house fumigated. -
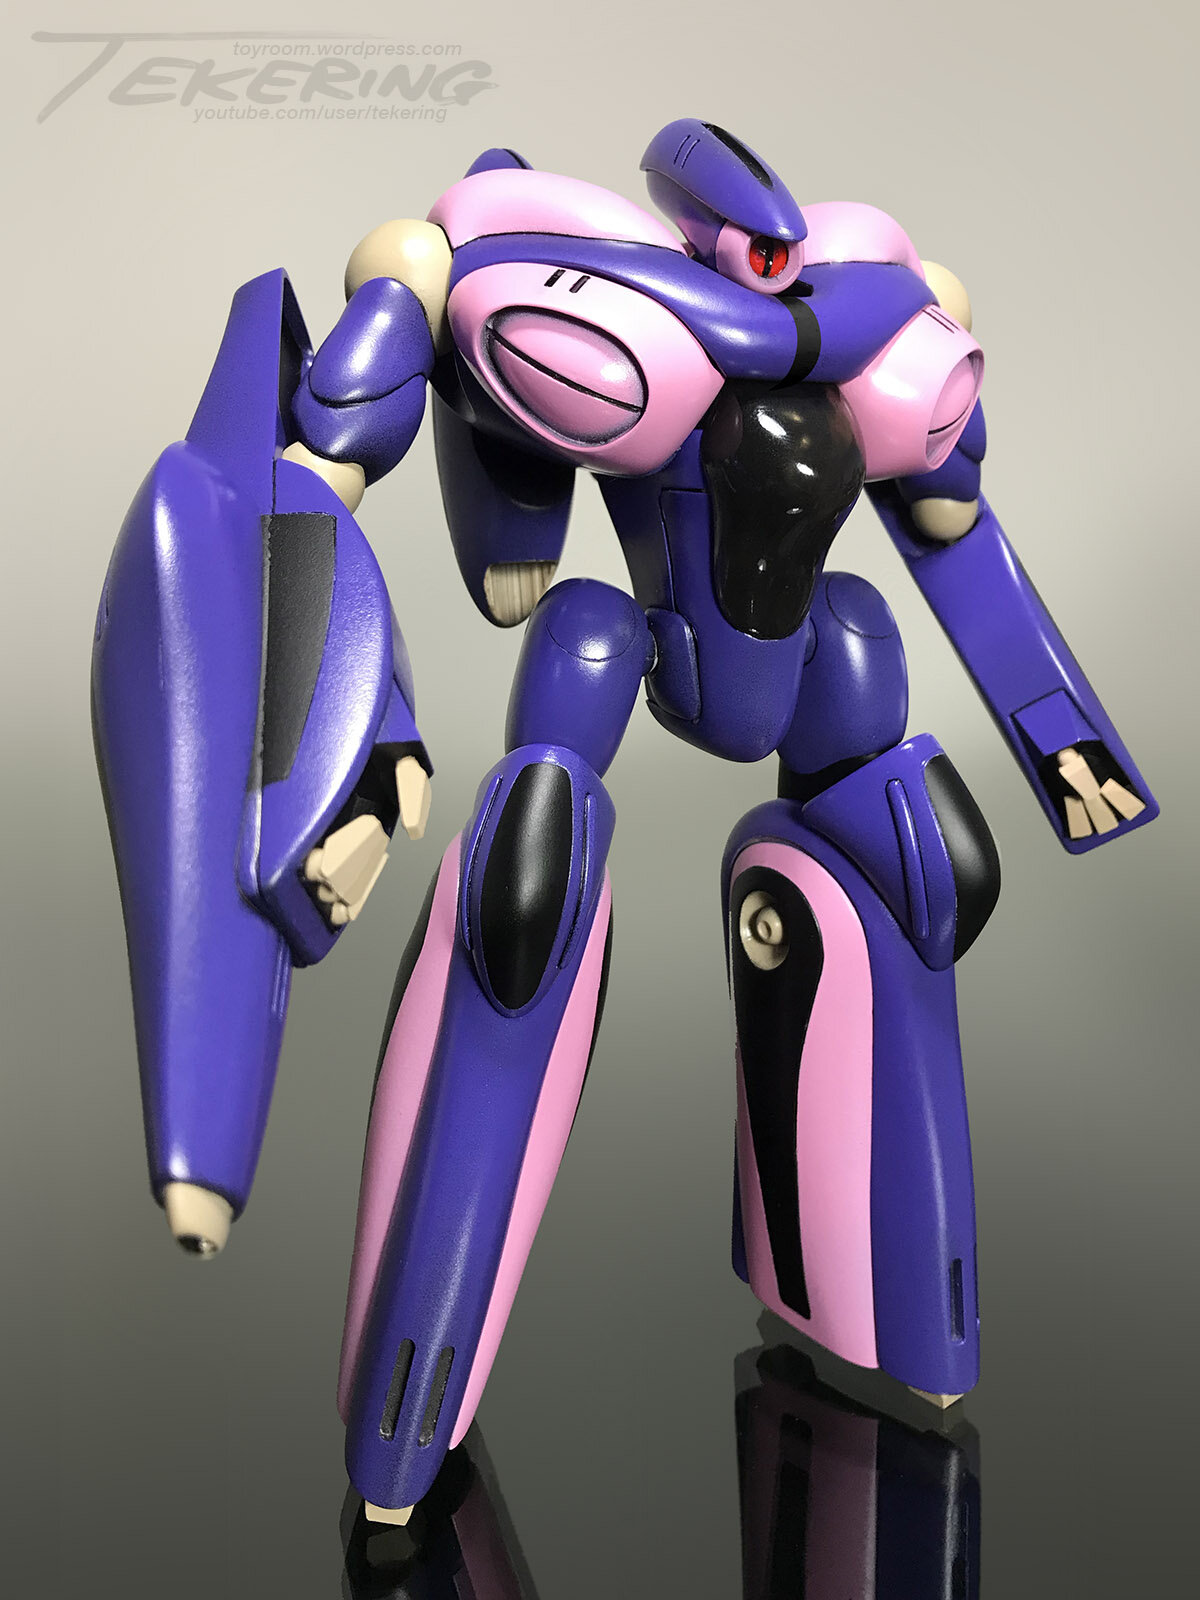
MOSPEADA Inbit Revival Part II: Gosu?
tekering replied to captain america's topic in Anime or Science Fiction
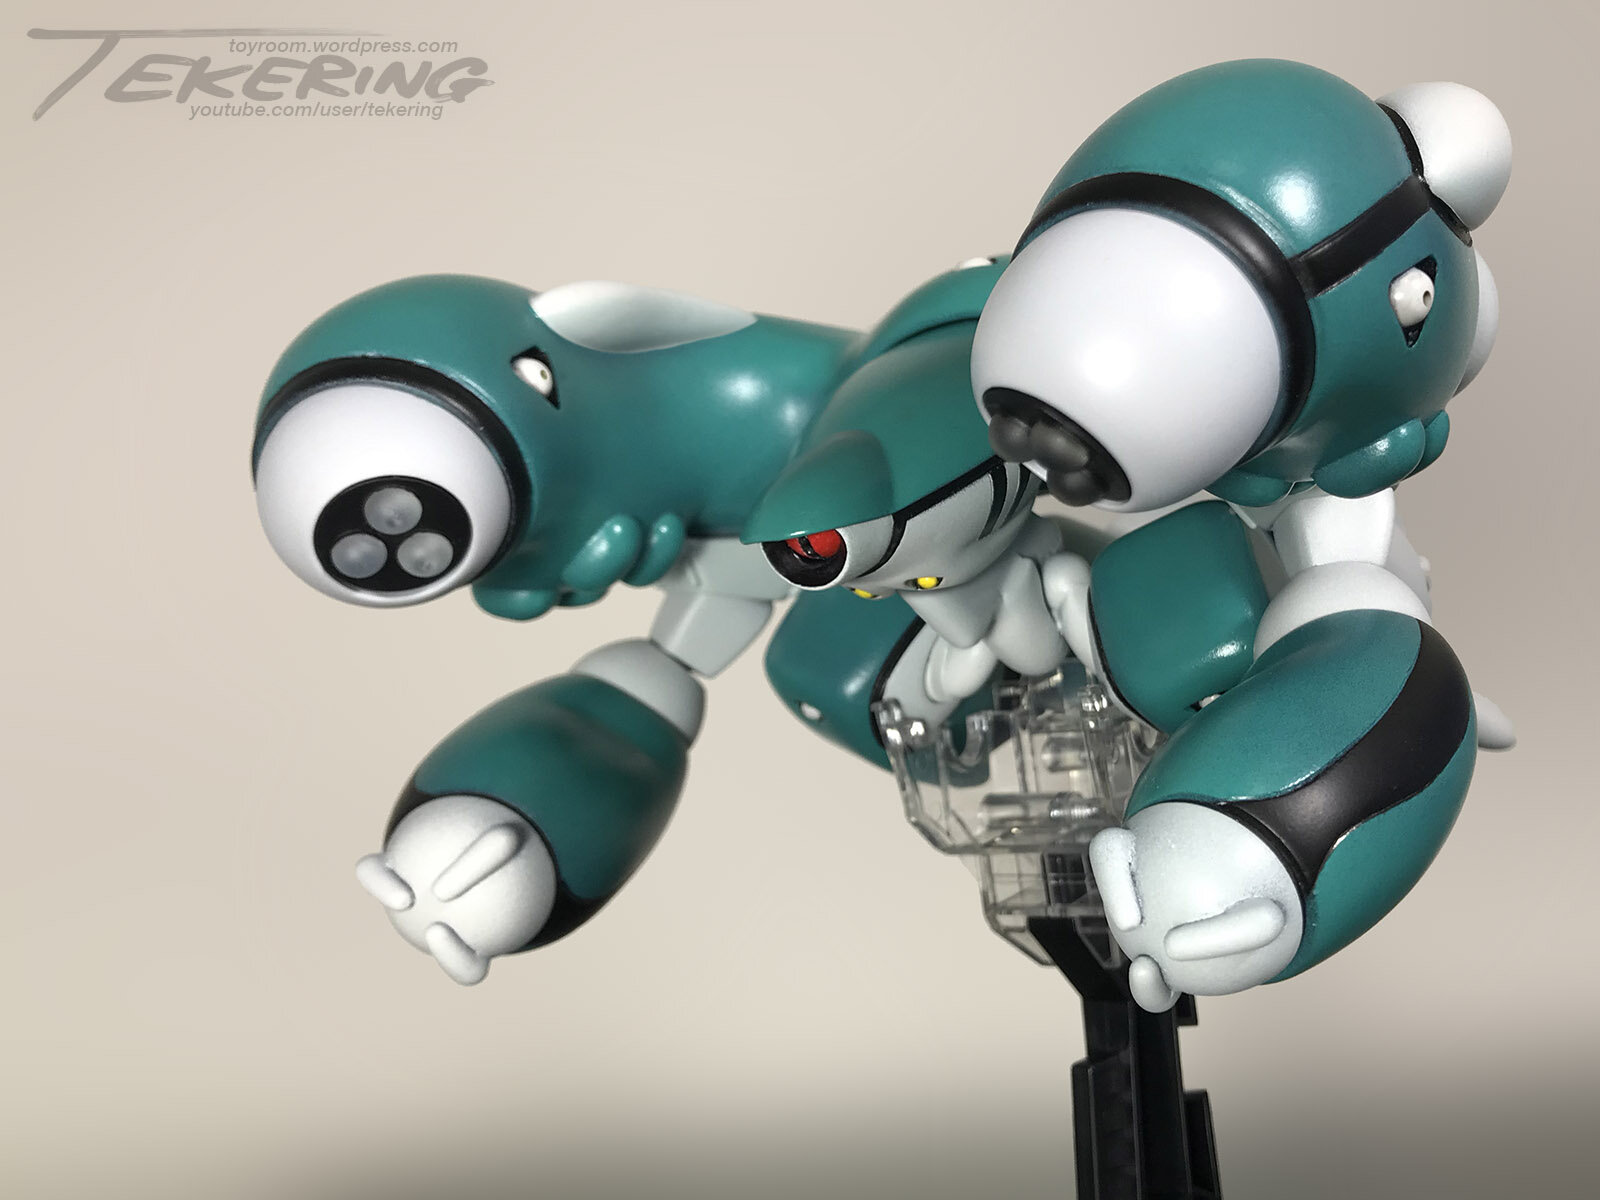
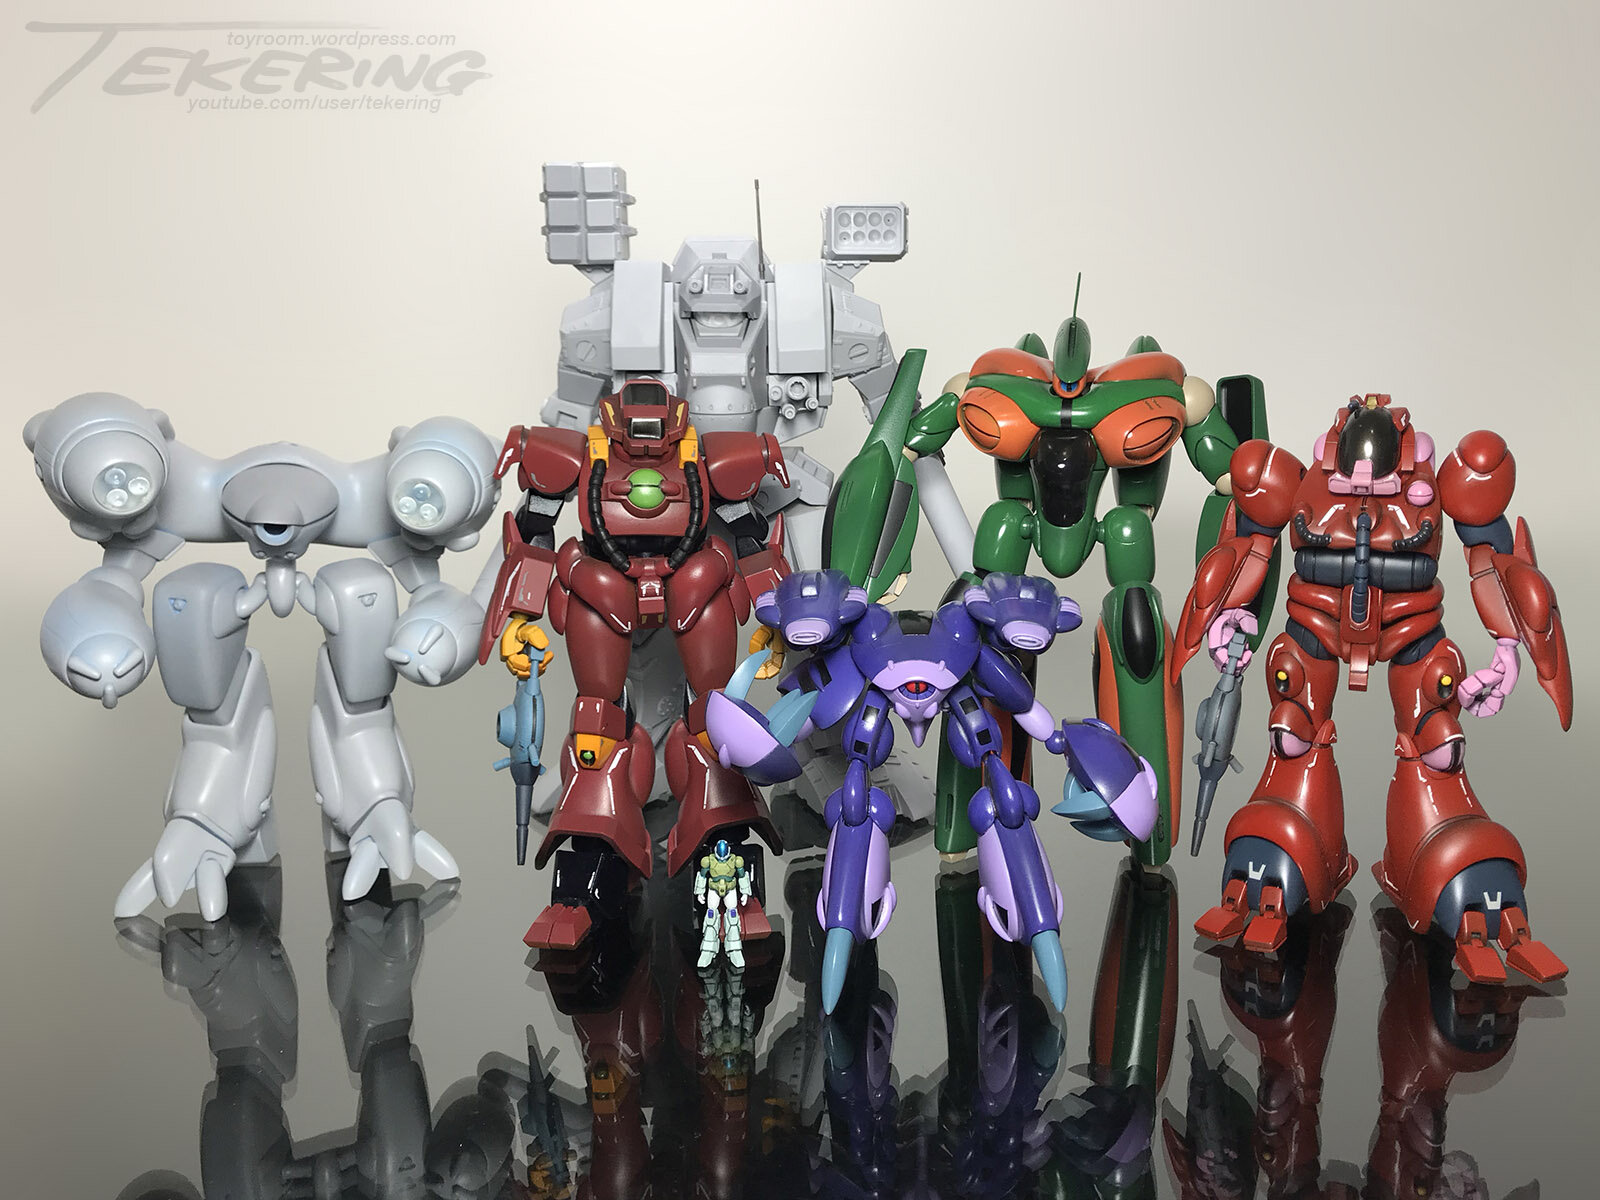
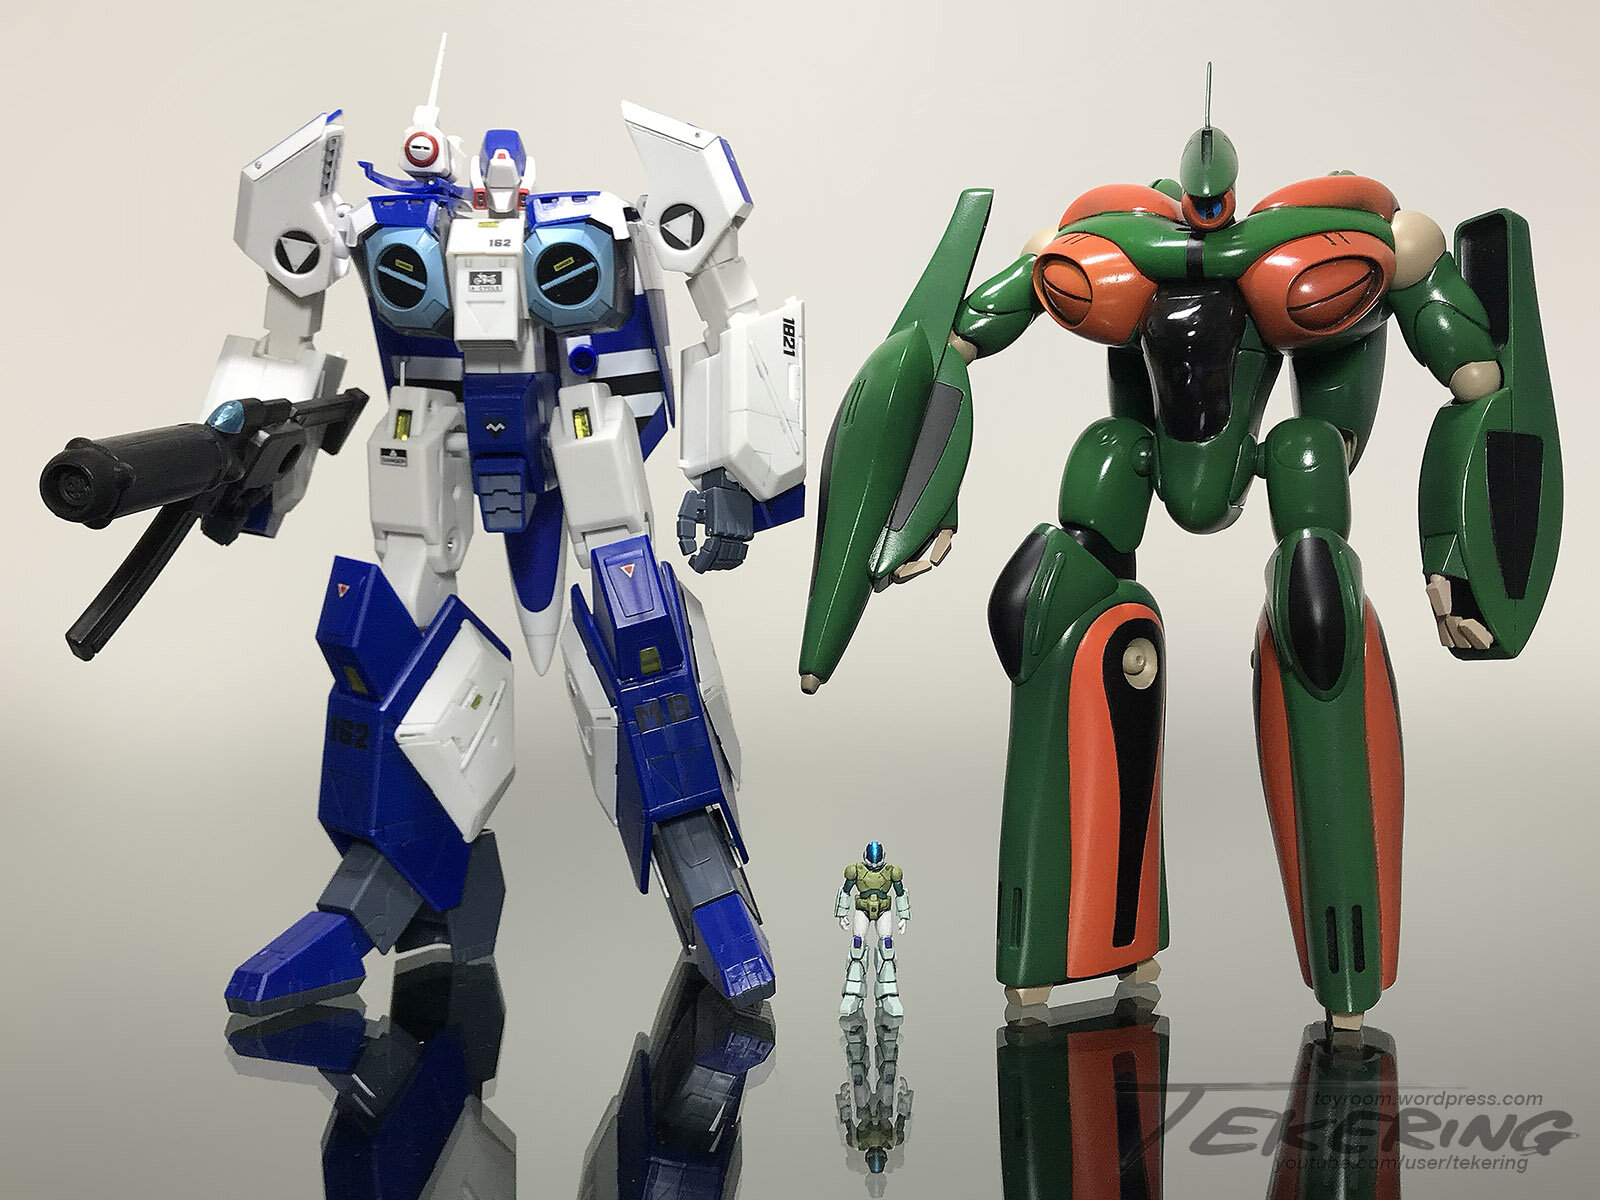
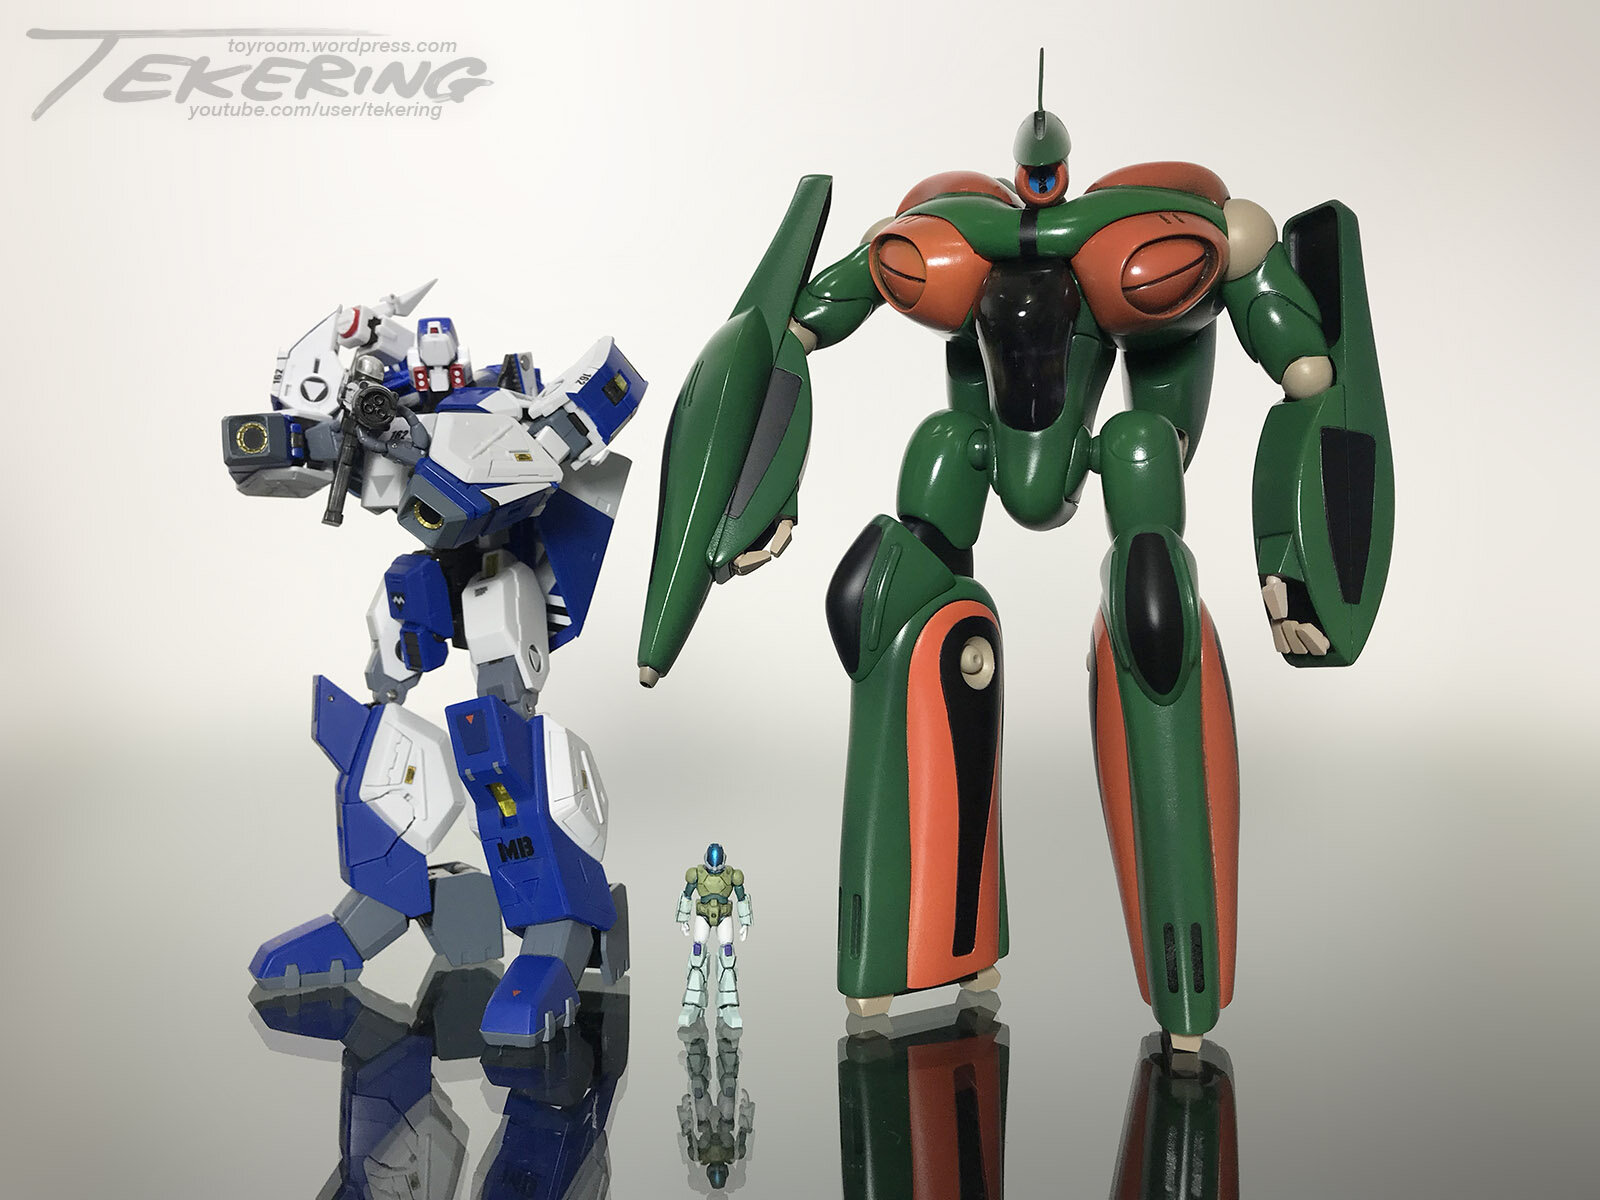
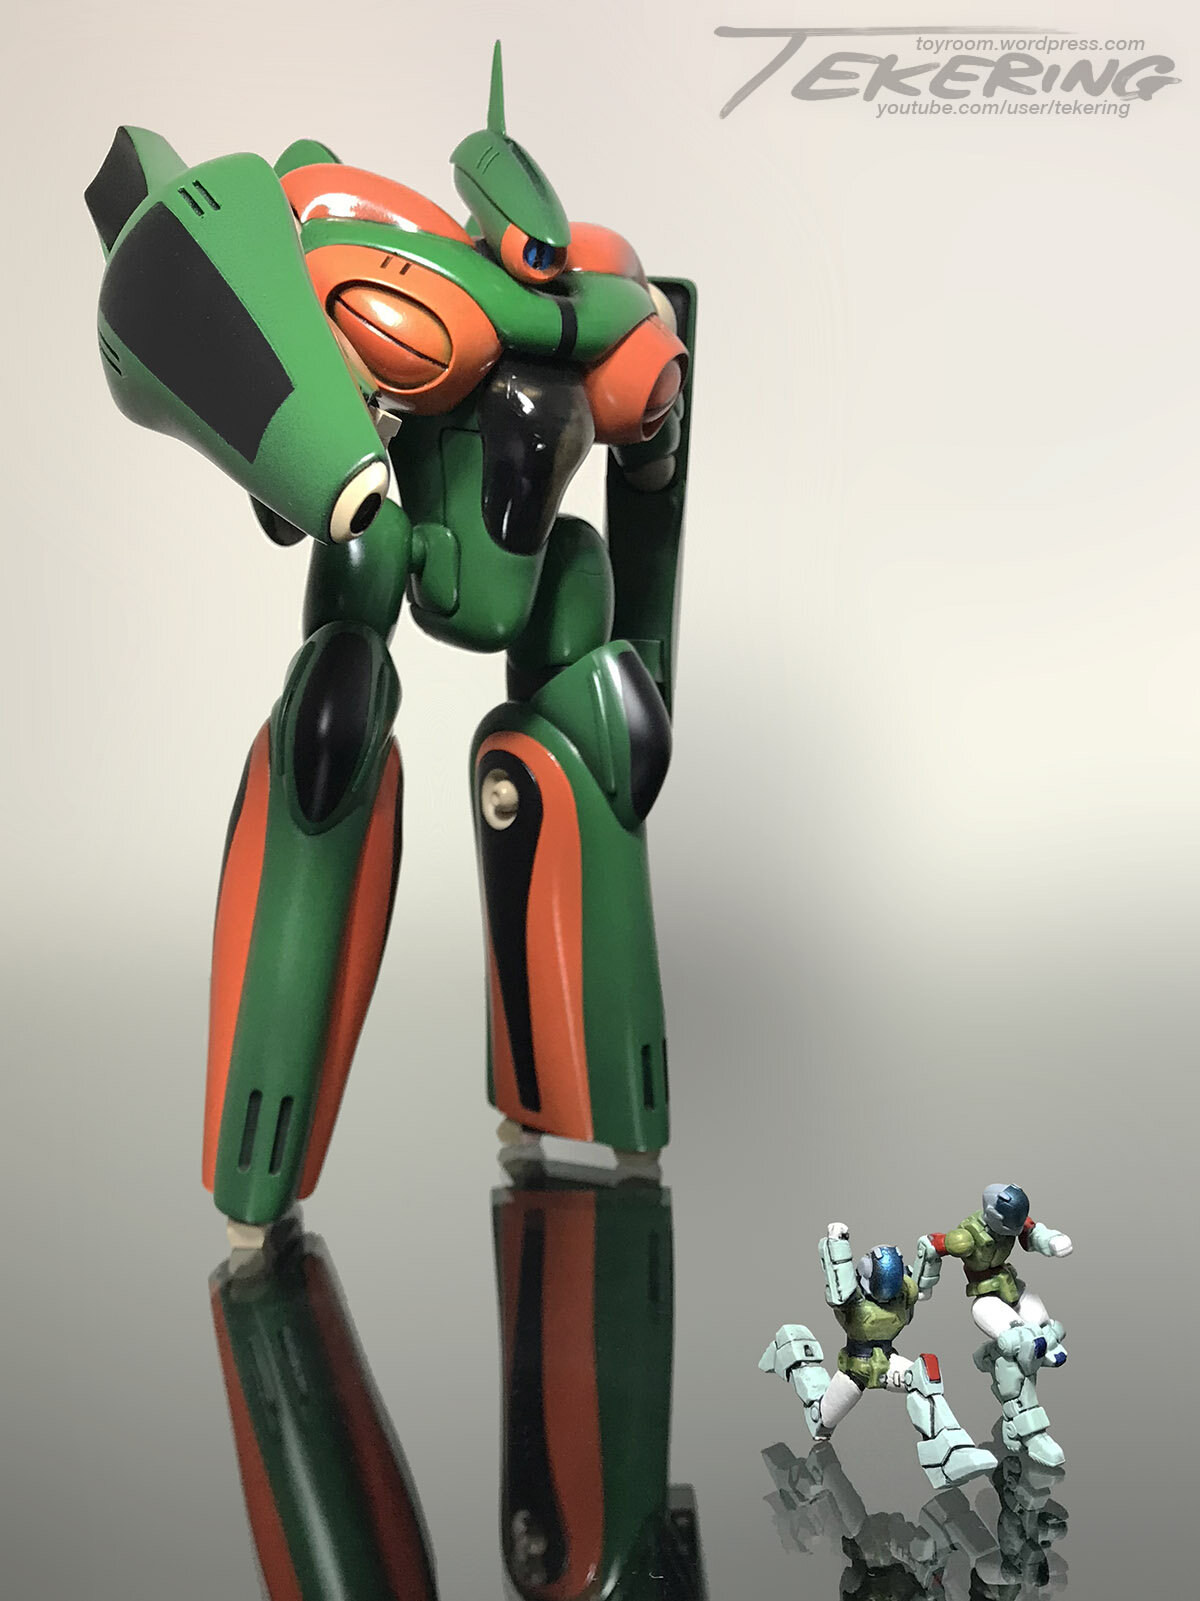
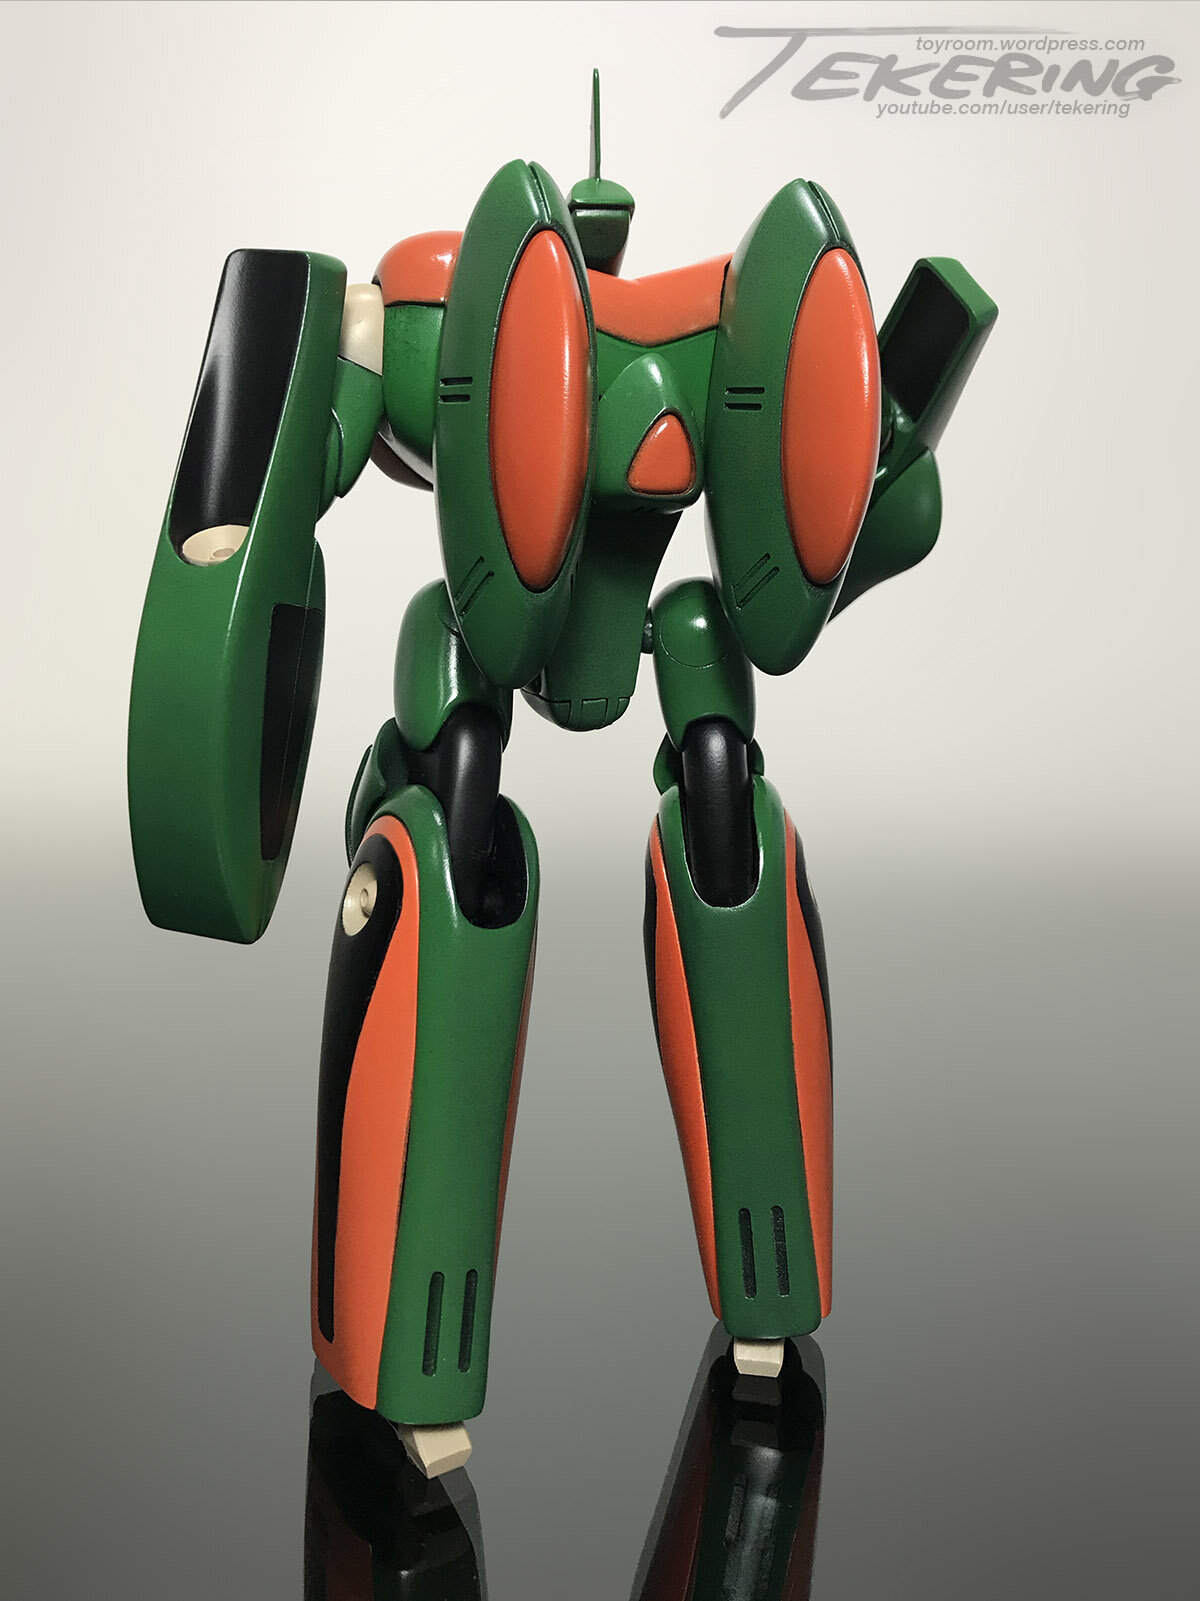
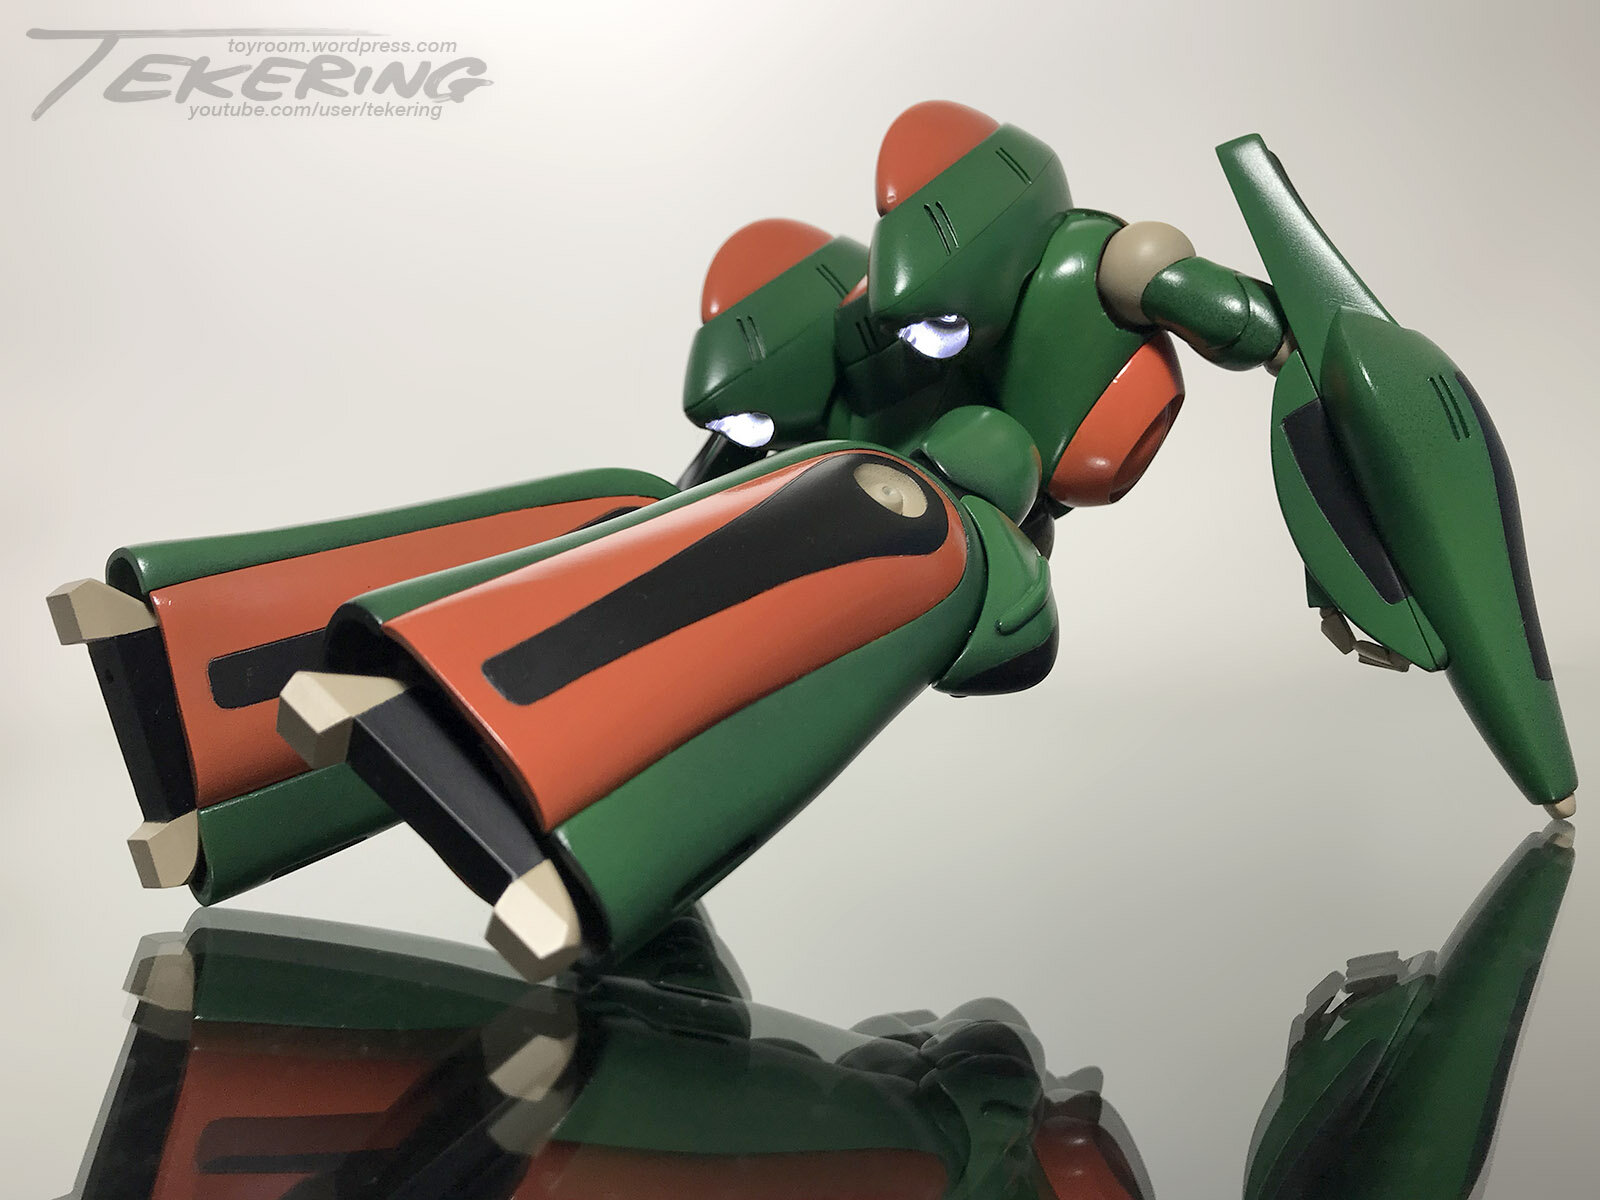
One down, one to Gosu. 😉 Ready for the pic dump? 😅 Articulation is somewhat limited, but I wanted a little playability: ...and while he can assume a flight pose, I haven't come up with a stand to support him. I did install LEDs in the flight pack, however. And, since scale is important: Our beloved Sentinels are undersized, of course, but Moscato's 1:48 kits scale great with Evolution Toys.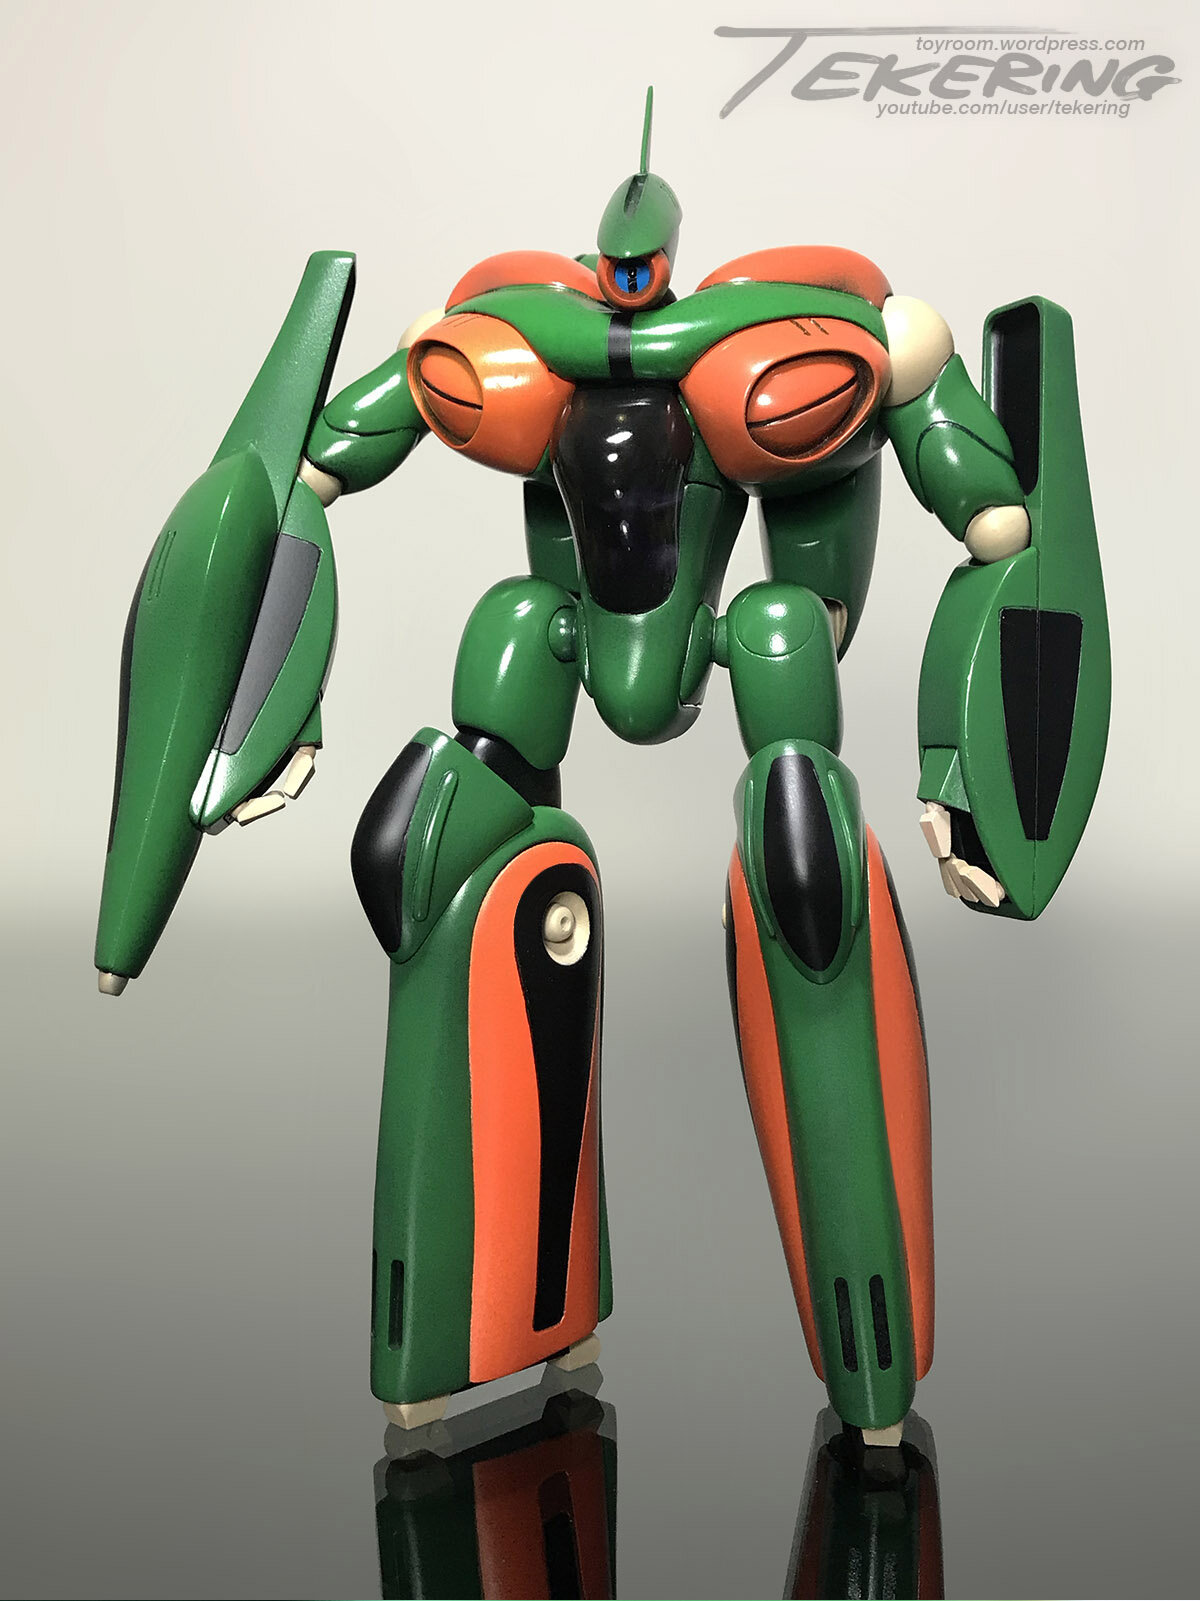


-
I don't think "gay shipping" is appropriate for this forum. 😅
-
Cultural impact is impossible to analyze objectively, of course, but the Internet can provide some useful statistics; Google search results, for example. A search for "Robotech" results in about 8.8 million hits, roughly half of the number of results for "Macross." A search for "ThunderCats" results in about 15.3 million hits, slightly less than for "Macross." A search for "Ulysses 31" results in about 16.8 million hits, slightly more than for "Macross." A search for "Exosquad" results in about 416,000 hits. A search for "Jayce and the Wheeled Warriors" results in less than 120,000 hits (but still more than "Thunderbirds 2086"). ☺️ These are all "statistically insignificant," of course, next to something like Ghostbusters (74 million hits), TMNT (107 million hits), or Transformers (a whopping 700 million hits)! It is, as Seto says, a fundamental difference in scale.
-
And yet Temuera Morrison, bald and fat in his sixties, was cast to portray Boba Fett at 41... 🤕
-
MOSPEADA Inbit Revival Part II: Gosu?
tekering replied to captain america's topic in Anime or Science Fiction
That's a technique I picked up making little Moderoid Obsolete exoframes. Drill 1mm holes, and fill them in with little drops of super-glossy topcoat. ☺️ I fully intend to kitbash one...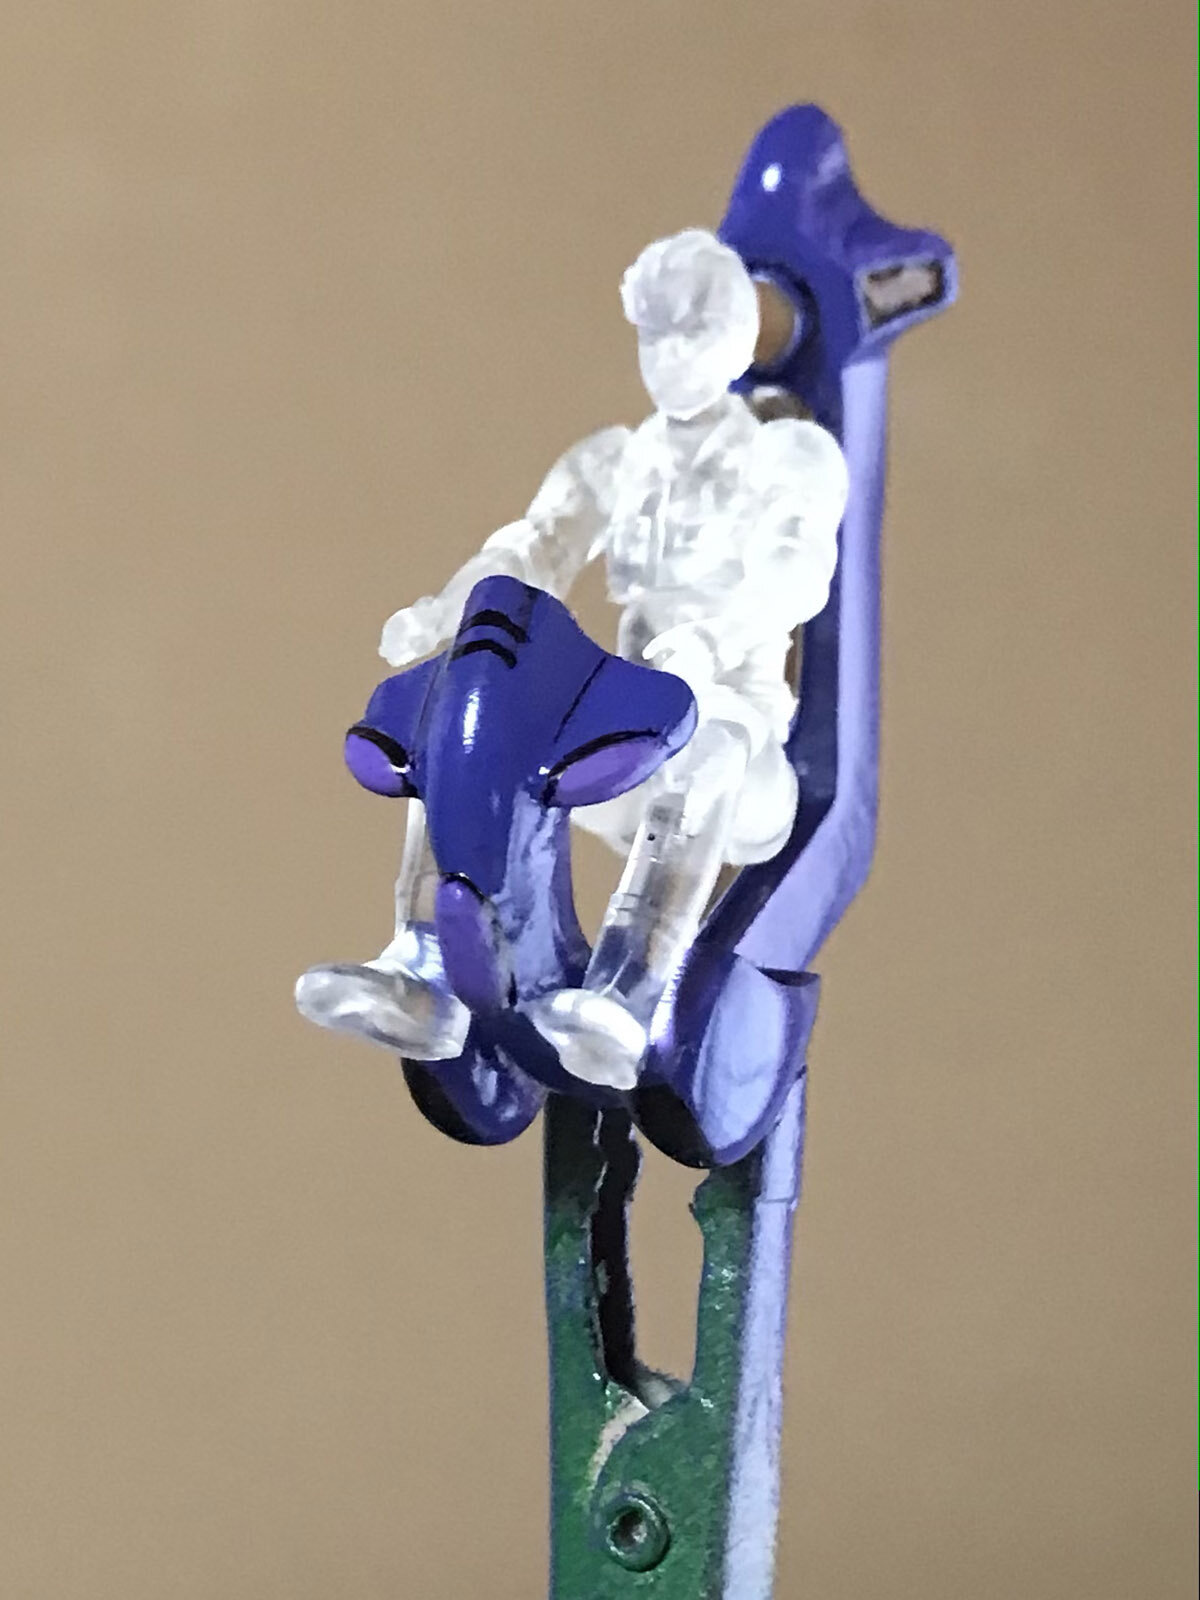
-
MOSPEADA Inbit Revival Part II: Gosu?
tekering replied to captain america's topic in Anime or Science Fiction
Having finally found the motivation to complete my Ghosu, painting is almost finished...