MacrossJunkie
-
Posts
3239 -
Joined
-
Last visited
Content Type
Profiles
Forums
Events
Gallery
Everything posted by MacrossJunkie
-
LOL yeah... pretty much. The gist of what I got out of the translation is that Step 1, they decided to make a 1/2000 macross prototype because the 1/2000 scale let them have a better sense of scale and detail. On Feb 22, 2009 they announce plans to sell it. say they still want a macross now, so they decide to make a limited release of the 1/2000 scale model. The planned to make 5- Step 2, They find that it was impractical to sell it in 1/2000 scale with all the features, quality and size, but people10 sets out of HDP, each individually inspected and sell them for 210,000 yen. Each time, the release a batch, it sells out and it seems to have made it worth their effort. Step 3, they shrink it down and make it viable for mass production. It is going to be longer than the sv-51 (400mm vs 320mm). Some redesign was needed due to the size shrink.
-
The item has been available for pre-order for some time now and almost all of them are cheaper than the suggested retail price listed there. As for the translation, it's hard to understand what Chrome is showing me, but you can get the general gist of it (taken from the actual page on Yamato's site): Step 01 "Macross ship" during the development of the scale of the problem is listed in the configuration first. To balance and sense of volume and location of hand when, a first / trial made a 1/2000 appearance on a scale setting. This trial in detail before making Komu and shape of each part gimmick, held on February 22, 2009, "Binary Space Los macro expression" at the show after it was announced along with the commercialization of their production in plants was used for study. Step 02 While promoting gimmick, and form design, a result of review and negotiation at the plant, size of finished goods to the conclusion that this is also impractical in terms of price and quality standards. The charm of this exceptional size, however, is driven by a voice I want to get a little faster, a replica of the prototype model, an industry first in the specification / implementation model 1/2000. The company has asked a prototype system to deliver special-order parts inspected one by one to adjust the craftsman's premier products that range from 5 to 10 sets per month. Fabricated using a special material for the industry, "HDP Kit" This model is billed as 210,000 yen (tax included) but that price, a book filled with minutes already delivered in April 2009, at 12 months great response. Macross "completely transformed" Ukagae expectations for the fans, "Yamato" was an event feel tremendous self-confidence and responsibility. Monthly production still accepting orders, has been sold out and reward each time. Fabricated using a special material for the industry, "HDP Kit" This model is billed as 210,000 yen (tax included) but that price, a book filled with minutes already delivered in April 2009, at 12 months great response. Macross "completely transformed" Ukagae expectations for the fans, "Yamato" was an event feel tremendous self-confidence and responsibility. Monthly production still accepting orders, has been sold out and reward each time. Step 03 The final size of the finished product is a result of various studies / decision in 1/3000. Yamato Macross is still on, was the best ever, " 1 / 60 Perfect Transformation SV-51Γ "of more than 340mm, Length 400mm! The maximum size of the finished product updates. No one is 1/2000 design, only 1 / shrink even as the molded hold since 1/3000, according to the size of course redesign is necessary. Here, "Yamato" is gone, "redesign of the mechanism," not just "one more / shape and appearance appropriate to 3000, painted as a value" could be reviewed again. The left image, WF 2010 held in July 2010 [summer] what was posted on. 1 / 2000 has been achieved, "the leg of residential areas" adding gimmicks and adopted in full as it is for holding the magnet and the outer shape of the minor changes as well as considering the scale effect, a gimmick to add Takashi Seki has incorporated. Yamato Macross far, several mock-up design and fabrication, and Repurikakitto and "Macross" created by the incorporated feedback from fans who love, 1 / 3000 Macross finished product, by all means your collection a!
-
The only thing they're really meant to be mounted on is the VF-0.
-
I'm always impressed all over again each time I see your maintenance bay diorama. That thing is awesome.
-
I wish HLJ had some more of those mighty block stands for sale. After buying some items from this sale, I need some more stands and I'm liking the flexistands less as of late because I found the clear rubber(?) tips eat right through both the acrylic and lacquer clearcoats I've tried using and turn the contact points into a sticky goo. I can at least get around the mighty block shortcomings by gluing the swivel points in place.
-
Anyone that has the 1/2000 version also getting this one as well? Before someone asks why anyone would get the 1/3000 when they already have the 1/2000 version, perhaps they didn't want to spend another 200,000 yen for a second one and wants to display the macross in the other mode as well.
-
I sticker pretty much everything also, but I don't just peel the stickers and apply them. I trim them right to the edge or as close as I can get using a hobby modeling knife. I also panel line everything I get and lately have been weathering every new item I get as well. Resale value is of no concern to me. I prefer the customized look of the stuff in my collection that differentiates it from others and I enjoy doing the extra work. It's part of the fun of collecting new valks for me.
-
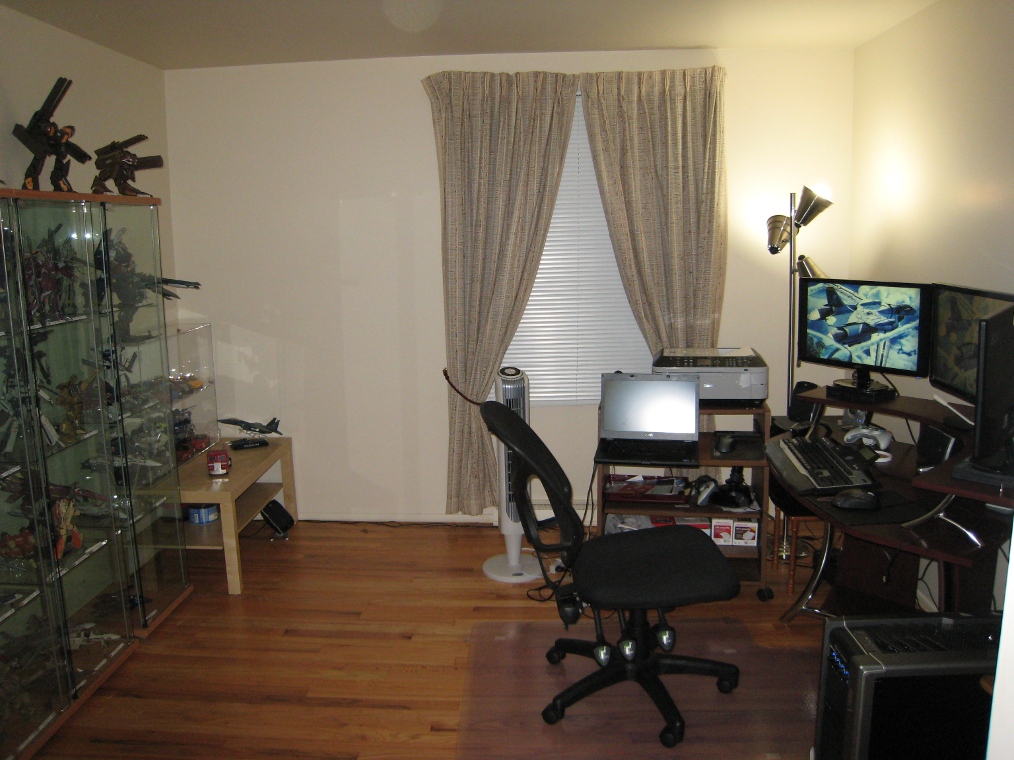
Ha! Now that's an idea. I could dye the drapes red, tie up the bottom of the drapes together to form the bottom half of the kite and draw a big circle around the whole thing. Actually I was thinking of getting rid of the drapes altogether. I installed the blinds when I bought the house but left the drapes on thinking they might help block out sunlight better, but they don't do much so I'm gonna take them off when I get the inclination to.
-
Does it seem very fragile due how thin some parts are?
-
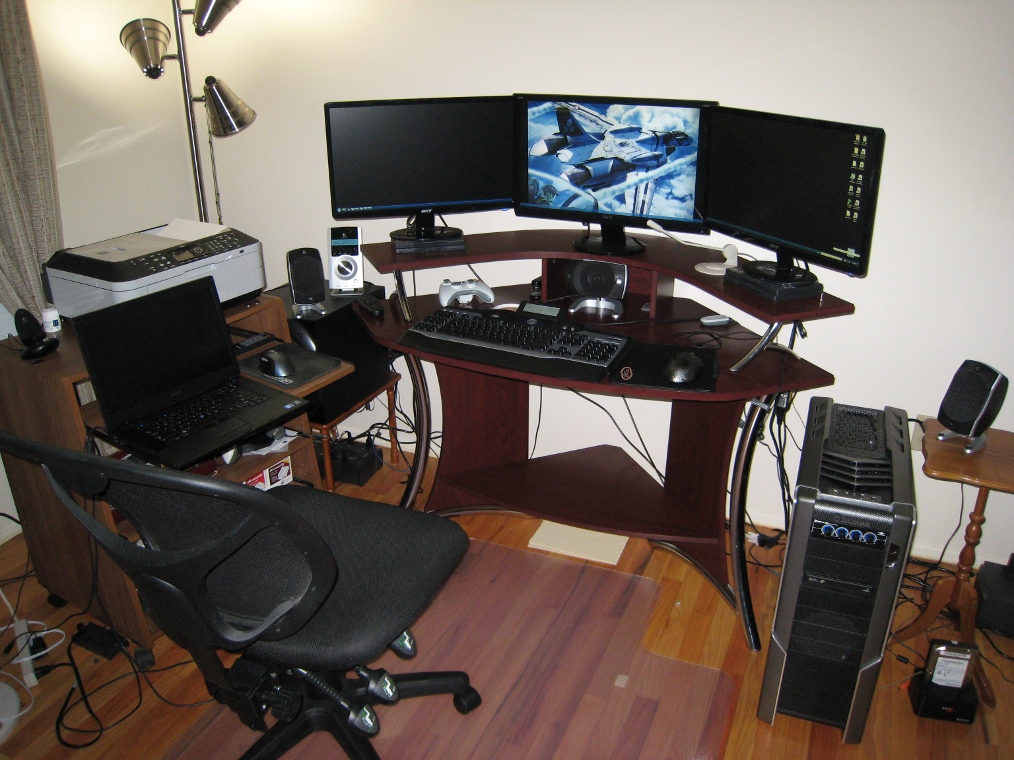
That's basically what I did with my home office. One side of the room is computer stuff and the other side I have some select items on display. It's still a work in progress as I need to buy better furniture. Some of the stuff is just junk I've had since college. Tell you what though, playing games in 5760x1080 resolution is awesome. The panoramic view fills your peripheral vision and feels much more immersive. Also, just having 3 screens worth of desktop space is nice. Man, I really need to get a 4th detolf so I can add more things and re-organize my displays.


-
Thanks very much! This store seems to have a lot of useful stuff.
-
Where did you buy those acrylic stands for your labels? Are there shorter versions as well? I did something similar where I label the items in my display and show the respective faction logo for which the toy is affiliated (UNS kite, NUNS logo, Anti-UN cross, SMS logo, Zentradi insignia). I basically folded them with a mountain fold to stand them up and are just about 3/4 inch or so high.
-
I stand corrected. It is the only non-web/magazine-exclusive release that includes Roy in his TV style flight suit.
-
Well the way you worded the sentence, made it sound like a blanket label for the majority of people who post in these threads regarding Bandai's DX releases in general. But I see now your train of thought. In many video game forums for example, particularly for MMOs, I'll see plenty of people who will post complaints about different aspects of a game, but fewer people who post praises to the devs about good stuff. In that, your line of thought is valid. People who are happy with the game are spending their time playing the game while the people who aren't happy will spend more time posting problems they want fixed. I think however that circumstances are a bit different in the MW forums. Many of the same people frequent this forum regardless of their opinions regarding a particular toy or line because we love the subject matter, Macross, in general. The same people often will often click through the most recently updated threads and read recent posts and sometimes even browse through older forgotten threads and reply if they have something to add (or in some cases even if they don't have anything to add). In many of the "Should I buy X?" type threads, depending on the toy, you can get majority positive or negative responses. If only the grumblers stuck around to post, this wouldn't be the case. Also given that new releases for a particular line are frequently coming out, like the 1/60 VF-1s and 1/60 scale DXs, that also helps to get people coming back even if the first item in the line may be a year or so old. Finally, I agree with your advice to buy a used item cheap to try it out and form your own opinion if unsure.
-
I haven't heard of any QC issues with this release. The TV release sans FAST packs is the only release in the 1/60 v2 line that includes Roy in his TV style flight suit. It has the newer style crotch lock. It's whiter than the DYRL? versions. Comes with the bubble styled fixed pose hands rather than the more mechanical DYRL? styled fixed pose hands. Arrows on the head are black instead of yellow just like the TV series. There aren't any real advantages, imo, just depends on your preferences.
-
Define "best"? What are you looking for in a toy that you would describe it as such?
-
It's a D"stance model kit, not actually a toy. You can see more pics of it here. Edit: removed a misplaced word.
-
 Where did you see the description? The ones in the pics are too small and blurry to read. It seems to me to be one of many robotech items licensed out by harmony gold either under the robotech brand or rebranded as something else. Just as they did with the Matchbox and Playmates toys. Playmake calling this cardboard construction a "toy" seems a bit of a stretch... then again it does fit the definition of a toy in that it is something meant to be played with.
 -
I hope you're not implying that people are hating on the DXs irrationally. Actually, of the complaints and dislike going towards the DXs, they are really mainly directed towards the DX VF-25's. I think quite a few people are happy with the DX VF-27, myself included. Not to mention the VB-6 konig monster and Macross Quarter releases have generally been well received here by those who purchased them. So calling people DX haters just because they find a lot of faults with the DX 25 seems misleading. There are many valid complaints about the DX VF-25. I think part of the reason the DX 25 line has sold well is because MF is/was new and many people scrambled to get the toy versions of the latest featured VF and even if the design of the toy was average at best, it was good enough and was also the only game in town if you wanted something in scale with all the Yamato valks out. And consider also that some people don't really place much emphasis on the looks and would rather have a toy they can play with more vigorously, which could be another reason it sold well. It was easily transformable and had a lot of diecast in many stress bearing areas which made them feel more secure for play, flaws in screws and such notwithstanding (even if people found out a few months down the road that the joints would turn floppy on them).
-
I don't know honestly. This was the info in his post: You could try PM'ing him for details.
-
I think you'd be better off buying some orange paint that looks close to the orange of the heat shield. As for gundam markers, if you're talking about the ink kind, I don't think they'd blend well. For the paint markers you could theoretically mix the paints, but I don't think it would be a good idea and it probably wouldn't turn out well. If you want to attempt it with gundam paint markers, you'll want to pre-mix the paint so you get the right shade before you actually apply it and to do that, you'll have to pull out the tip of the marker and dab some paint from the other end of the plastic insert of the paint marker on some plastic wrap or foil and mix them with a brush. Getting the right shade will likely be difficult to attain. You will likely need to throw in some white as well. Edit: I just remembered that there was a person in this thread, Negotiator, that had the orange stripes on the leg missing and painted it himself. He mentions Cadmium orange and the result looked very close. You may want to just buy the paint and save yourself the trouble of having to mix gundam marker paints.
-
No, the nub is not covered and I don't see any way to cover it with the top part. I think you'll just have to go with painting it.
-
Bandai DX Chogokin YF-29 Durandal Valkyrie
MacrossJunkie replied to UN Spacy's topic in Hall Of The Super Topics
On first impression... ick. On second impression... still ick. The battroid should look pretty similar to the VF-25, but the fighter looks like a bad photochop. That's going to take me a long while to warm up to. Perhaps it wouldn't look so bad if thety got rid of those wing boosters that look like randomly tacked on objects. And what's the deal with having a 29 already? The 25 hasn't even seen anything other a trial run with SMS much less actual full production for NUNS and someone goes and develops the 29. They've got upgrade-itis worse than your average iPhone/android user. -
You mean the flexistands? Go to http://www.flightpose.com/.
-
I was going back and forth between a TV Roy VF-1S or Milia's VF-22S. Ended up going with Roy since it was cheaper than the 22S, I don't have any regular 1/60 VF-1s, and it goes well with the VF-1D. Still went with SAL shipping since I'm in no particular rush to get it and would rather save as much money as possible. Comes out to be a little over $90 with shipping calculated in. Not bad at all.