MacrossJunkie
-
Posts
3254 -
Joined
-
Last visited
Content Type
Profiles
Forums
Events
Gallery
Everything posted by MacrossJunkie
-

1/48+fp's, 1/60, And 1/72 Picture Gallery Pt 4
MacrossJunkie replied to VF-18S Hornet's topic in Hall Of The Super Topics
Try Target or Walmart. It's sold now as Pledge with Future Shine floor finish. Somewhere in the cleaning products section I think. If you still can't find it, then just order it from a store online. Don't use a cotton swab. They can leave a lot of lint which you don't want on the canopy. Try using a small flat paint brush (ideally, use an airbrush if you have one). -
1/48+fp's, 1/60, And 1/72 Picture Gallery Pt 4
MacrossJunkie replied to VF-18S Hornet's topic in Hall Of The Super Topics
Coat it with Future. It will make it nice and shiny. -
Mine hasn't worsened, unlike the VF-25G and RVF-25 I have. The shoulder joints were not very tight to begin with but the legs are as tight as ever and hold poses very well. The joints for my armored 25S haven't worsened either.
-
It would provide very... interesting...err weathering effects also.
-
Yamato 1/60 VF-19 Fire Valkyrie
MacrossJunkie replied to UN Spacy's topic in Hall Of The Super Topics
The face is probably fine where it is. The chest just needs to be angled down a bit like in the line art instead of being posed completely level. Once it's angled down, it shouldn't be blocking the face. It might still be blocking the chin, but that's just because the hump is just so high (much more so than the YF-19 toy). -
About time! I've been needing some new stands. It's been a while since I've gotten some. I still have the old style ones with the black rubber tips and some with circular bases.
-
Yamato 1/60 VF-19 Fire Valkyrie
MacrossJunkie replied to UN Spacy's topic in Hall Of The Super Topics
Oh ok, cool. Sorry, I can't read the Japanese. -
Yes, definitely. If they can make it as good as the new VF-19 seemingly is, we'd finally have a fairly definitive and truly awesome version of Isamu's baby. Out of all the versions of the 19, the YF-19 (and by proxy the VF-19A) is my favorite.
-
Yamato 1/60 VF-19 Fire Valkyrie
MacrossJunkie replied to UN Spacy's topic in Hall Of The Super Topics
Interesting. I just noticed in that particular CAD pic, it looks like the pilot seat is positioned vertically in battroid mode and also managed to have the front console out of the way so that the pilot has a clear path through the top hatch. I wonder how they accomplished that if they did in fact manage to do it. -
Yamato 1/60 VF-19 Fire Valkyrie
MacrossJunkie replied to UN Spacy's topic in Hall Of The Super Topics
I already figured the fighter mode would look good, but it's nice to see some visual confirmation so soon. The only thing I can see there that I hope they improve is how the shoulder is a little blocky at the end that attaches to the joint and doesn't fit the rounded shoulder pivot part. I hope the new transformation method is sturdier. The hinge where the neck of the plane bends and gave so many people trouble with cracks, breaks and stress marks was troublesome. Edit - misremembered how the YF-19 toy transformed. -
That's the price for the 1/2000 unless that what you were already referring to.
-
Official Bandai DX Chogokin VB-6 König Monster Thread
MacrossJunkie replied to Funkenstein's topic in Toys
Was it colored like that in the movie? I thought that it was like that because it was a test shot colored like that to show the different pieces. -
That looks good even at a smaller scale. I hope they don't end up making this a web exclusive too.
-
Official Bandai DX Chogokin VB-6 König Monster Thread
MacrossJunkie replied to Funkenstein's topic in Toys
Those are some... interesting colors. Looks like Mylene upgraded to a Konig. -
Yamato 1/60 VF-19 Fire Valkyrie
MacrossJunkie replied to UN Spacy's topic in Hall Of The Super Topics
Wow. That sculpt is incredible and so detailed. It makes me want to get one and repaint it with other colors so it doesn't look so clownish when it gets released in its red, white and yellow colors. Then again, maybe the production version will surprise me also and I may take a liking to it. We'll see. Ironically, despite it going to have the clown look, it doesn't have the "tiny clown hands" that the YF release had. The hands look fairly proportionate to the rest of the valk. I'm even more excited about the prospect of a 19F and S variant now (maybe even a P?). I think they will still be able to pull off a good fighter mode. I don't see anything there that stands out that would prevent a good fighter mode. If anything, it might end up better than their earlier YF-19 considering how much more they've improved since the time they released it. -
But the energy converting armor doesn't engage until the VF is in battroid mode Besides, aren't the No Step markings there for safety reasons rather than for preventing damage to the aircraft? The "No Step" markings are placed near the edges of the wings and on flaps. If someone were to stand on those areas, they would be risking personal injury should they slip or one of the flaps move.
-
If all you're looking for is doing panel lines, I'd say to try some Promodellers weathering wash. The results look great. I've tried different things like enamel or acrylic paint diluted with thinner, gundam markers, and the Promodellers, and I have to say I like using the Promodellers weather wash the most as far as results and ease of cleaning up mistakes go. Thinned enamel paint looks good, but the smells can be a bit much and can be hard to remove once dry and can sometimes leave stains even when not dried yet. Gundam markers are easy to apply, but sometimes sink into the plastic or paint immediately. It's especially hard to get off those painted surfaces. I've had a few times where I screwed up and tried to wipe it off immediately but wouldn't come off completely, even with the use of rubbing alcohol. It also looks too artificial, imo. I still use gundam markers, but only very sparingly in certain situations and rarely for panel lining now. For the promodellers wash, I just add a few drops of dishwashing soap into the bottle to break up the tension and it's ready for use. Brush over a surface or just apply directly to a panel line. It flows into the lines and the lines are very fine like the results of thinned enamel paint. The color comes from clay and is easy to just wipe up with a paper towel dampened with water or saliva. There are no harmful vapors to worry about unlike paint thinner and is non-toxic. Also, you can be lazy and leave it on a brush and let it dry, it's easy to clean off by rubbing it under some warm water.
-
I think he might be referring to this in the customizing forums. VF-22S Canopy Cover Project
-
Ah ok. No there isn't any way to bend the nosecone outwards. Right from the area where the fuselage separates to reveal the head, the piece underneath is basically a solid piece from the joint to the tip of the nose. There wouldn't be any way to angle out the nose cone. I think it might just be a trick of the camera angle combined with the cockpit moved down to give that impression. Like in this pic, I can see how it might look like it's angled out slightly, but it really isn't. It's just the cockpit section slid down to make the nose shorter, but the side effect is that the cockpit is angled in a little bit.
-
I think you forgot to slide the cockpit down. I think not sliding it down might stress some parts actually. One time I forgot to slide it down and I had a hell of a time trying to get it corrected. What do you mean by angled?
-
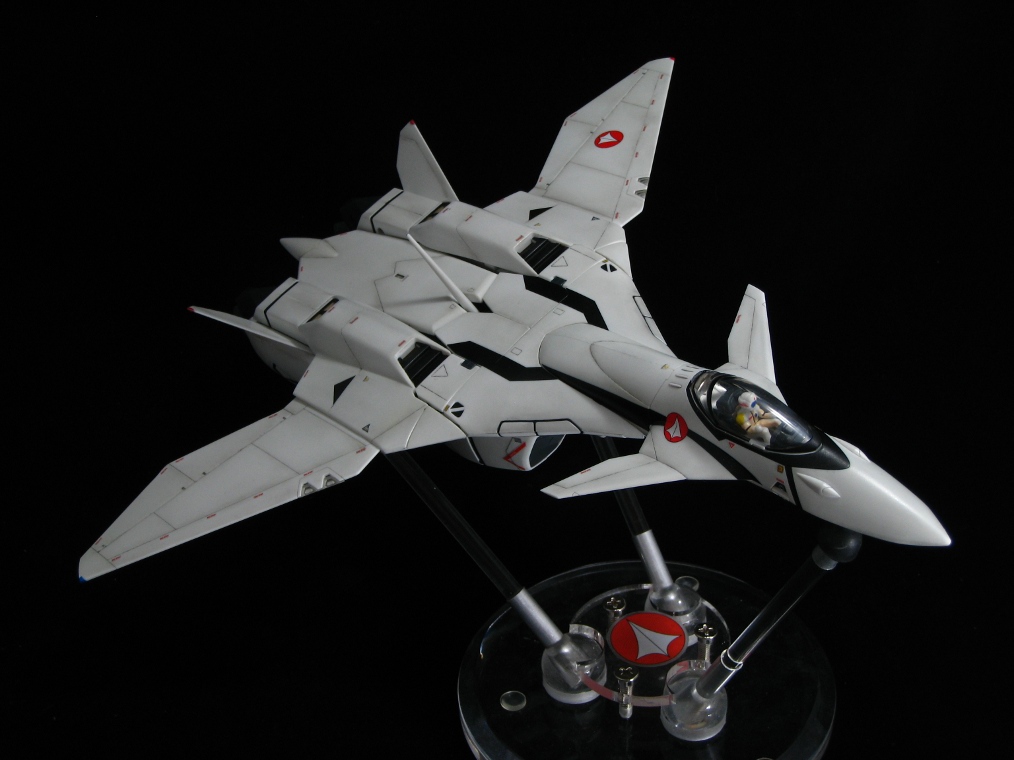
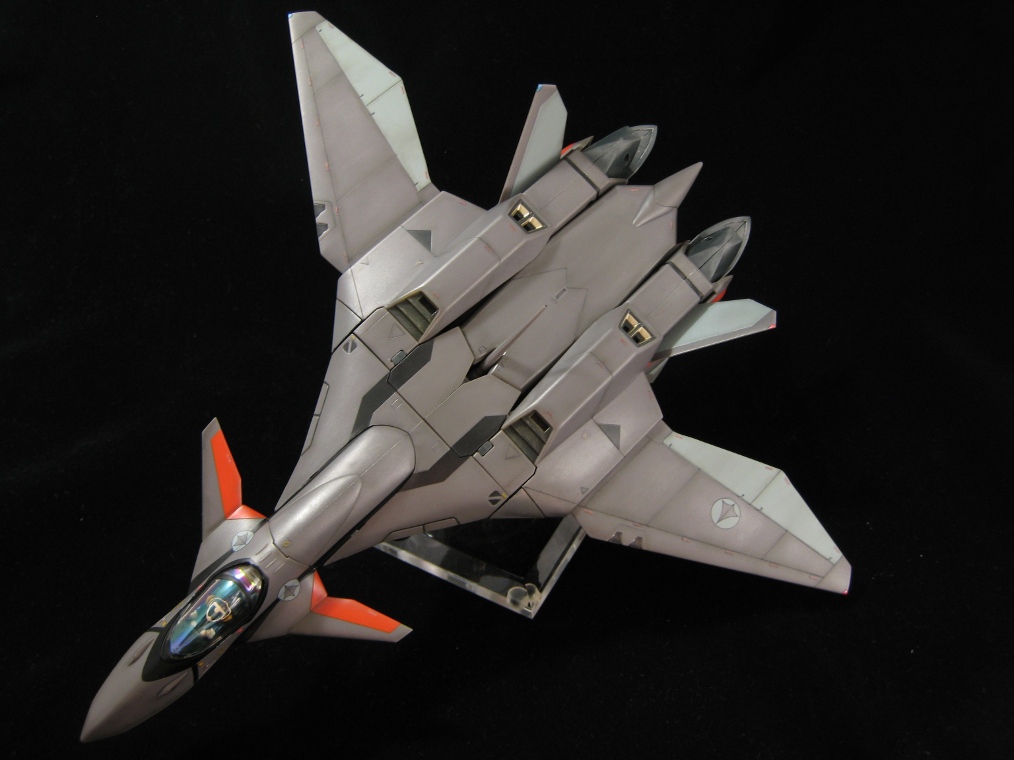
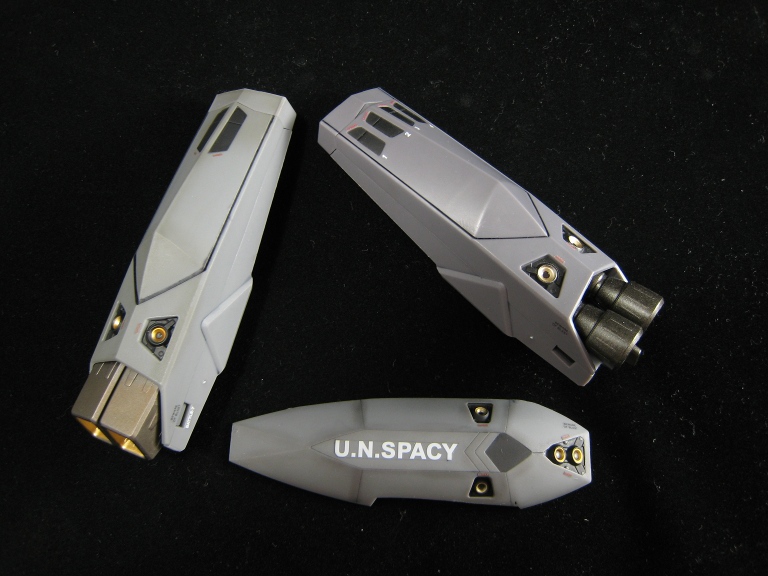
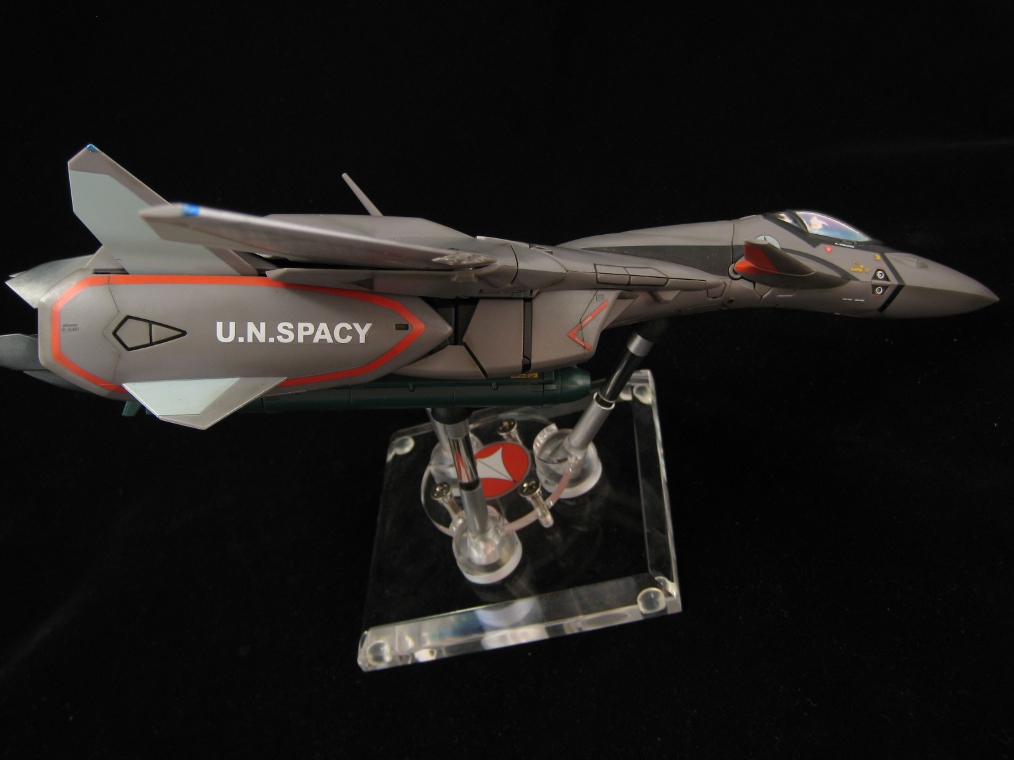
I'm one of those that applies the stickers, but I try to trim them right to the edge to minimize the sticker look. Since there were no Hasegawa models for the VF-11, I just went by marking conventions used by the YF-19 and VF-1. For the fighter itself, I have "No Step" markings on the wings and canards as shown in the pics, "Danger" above the secondary intakes and overflow outlets and above and below the maneuvering thrusters below the cockpit. "No Step" on the edge of the air brakes, the trailing edge of the shield. I've included a pic of the 11C which I've marked identically (except for the "Rescue" marking which I opted not to apply on the 11C), but should be easier to see against the white. You can see where I've put the other stickers as well. For the FAST packs, I went to the VF-1's for some inspiration. Edit: Added side view to show stickers not visible from the top.

-
I haven't heard anything about limiting the M&Ms to a small number made. The 1,000 for Gamlin's version must have been regarding just the initial batch because I see on AmiAmi that they are doing a pre-order for another batch of Gamlin types to be released in August.
-
Nice. That seems sufficiently bright to me. I've got 3 items per shelf for my 1/60 scale VF cabinets and 2 per shelf for my 1/48s. I may have to play around with the positioning of the lights a bit when I get them. That's true, it is expensive if you compare it to normal lights. But compared to the LED lightbulbs I was looking at before, these are a steal. It seems a decent LED bulb would cost between $30-70 per bulb. These Dioder strips come in a set of 4 so you could kind of look at it like each strip costing a little over $12. I'm a little paranoid with discoloring plastics, especially with the whiter VFs. Fluorescent lights use a low amount of energy and less heat than incandescents, but emit a good amount of UV light which would likely facilitate discoloration. Incandescents emit low UV, but produce a ton of heat which can also discolor plastic, probably more so than UV light from a flourescent bulb could achieve in the same amount of time. LED lights seem to be the best of both worlds. They produce very little UV like incandescent lights and produce even less heat and use less energy than a fluorescent. Given that, I'm willing to invest in some of these Dioders so that my display will look nicer with some lighting and still give me some peace of mind that I'm not hastening the yellowing process by having them on.
-
It's too bad shipping costs so much. I got mine when they had the 70% off shipping and the total came out to be 15,808 yen. At least they have FedEx as an option now. A bit cheaper than EMS and much faster. What would have taken EMS about 4-5 days from shipping date took only 3 days with FedEx.
-
Awesome! That is exactly what I was looking for. I was looking for some lighting solutions but I didn't want to risk yellowing the plastics with fluorescent lights or adding extra heat from incandescent ones. I had been thinking of getting LED light bulbs to put in my cases but I couldn't find any that would work well or were extremely expensive. At $50 for a pack of 4, that is a much better solution. Thanks for bringing this up. Btw, just how far does the light go? Do the toys at the bottom get any usable illumination from the LED strips? Edit: Oops. fixed the price. looked up the Dioder multipurpose light instead of the light strip version, but that looks good too.