Aztek Posted September 12, 2004 Author Share Posted September 12, 2004 Been tweaking some textures and object parent/child hierarchy to get better xform functionality ... Did a quick pose, here's what I wanted ... Link to comment Share on other sites More sharing options...
Aztek Posted September 12, 2004 Author Share Posted September 12, 2004 (edited) Here's what I got ... I know the gun looks a lil weird, but the render caught part of the vernier recess on the cannons booster. The grip is actually seated in the pocket of the hand and I have the finger off the trigger since he's not ready to cap anyone just yet ... Edited September 12, 2004 by Aztek Link to comment Share on other sites More sharing options...
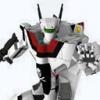
The_WOZ Posted September 12, 2004 Share Posted September 12, 2004 Kornholio, agentex, great work! and fast! First thing I did this week, the amm-1 Link to comment Share on other sites More sharing options...
The_WOZ Posted September 12, 2004 Share Posted September 12, 2004 Astek: WOW! Well, next is the gunpod: Link to comment Share on other sites More sharing options...
The_WOZ Posted September 12, 2004 Share Posted September 12, 2004 more Link to comment Share on other sites More sharing options...
The_WOZ Posted September 12, 2004 Share Posted September 12, 2004 Closer views Link to comment Share on other sites More sharing options...
Aztek Posted September 12, 2004 Author Share Posted September 12, 2004 Thanks Woz, I gotta texture up that fold out chest filler panel thingy it looks like a boxy insert instead of a functional piece of valk machinery. Link to comment Share on other sites More sharing options...
agentex Posted September 13, 2004 Share Posted September 13, 2004 Aztek, that is one intense pose! Its awesome to see that you have pushed your rig that far. Looks like its going to be ready for some awesome animation. Can't wait to see what else your valk is going to have under the hood. Woz, wow man, your progress is insane! Love the wip posts but the detail you add in at the end is sick! Here's the latest progress on my valk. I'm modelling it so that it can transform bvut have switched to the VF-1j fighter refs for proportions, the Strike Valk was waaay off. I'm having some problems figuring out whats underneath the chest piece (the red arrow), it seems to curve inwards but I'm not sure where to go from there, this is tough with no model ref. Any crits on the cockpit? I'm having trouble with the shape and the smooth. Plus the cockpit needs to get modelled in. More progress midweek, hopefully I can finalize the model and start texturing it. Link to comment Share on other sites More sharing options...
Aztek Posted September 13, 2004 Author Share Posted September 13, 2004 Thanks agent, your valk is pimp the way it is right now if you're going low poly. I like the proportions you are using, it seems your going more anime than straight aviation. Which is a welcome change since most here are following realism. In the end, your proportions may be more true to the story than ours. But I don't think you'll be happy till you crank up the polys and start inserting some detail. My model is not efficient by any means. That pose is about 220k polys. That's minus the gear and cockpit detail which I deleted to speed up render and modeling. Add another 100k for a complete valk. Keep your updates coming. Can't wait to see you skin it. Link to comment Share on other sites More sharing options...
kornholio73 Posted September 13, 2004 Share Posted September 13, 2004 been crazy with work and a friend getting married, didn't have time to even fire up my computer til this morning, first thing i did was to check this forum. and as always, the work here is freaking awesome! agentex: i feel the same way about my valk on proportions, i've bulked up the shoulders a little bit, the head i'll leave it as it is for now, will see how it holds up further down the road, saw you updates, dude they kick serious ass! doktor: thx for your advice, i had the legs spaced out a bit more and it helped the overall proportion. aztek & the woz: great work! seeing your work makes me wanna up the quality of mine. able to work on it this morning for a few hours, didn't really do much, but managed to work on the arm and hand...here is an update on battroid and fighter, as you can see it's under heavy construction, having serious crashing issues on fighter mode underneath where the arms are, i used the same set of arms on battroid but they just don't fit on fighter without crashing into each other... Link to comment Share on other sites More sharing options...
kornholio73 Posted September 13, 2004 Share Posted September 13, 2004 fighter... Link to comment Share on other sites More sharing options...
agentex Posted September 13, 2004 Share Posted September 13, 2004 Aztek, your poly count is as insane as your riG!!! I totally admire the effort you've put into realism, it shows even without that sick rig! The flaws in my model are definately visible, I'm working to fix them thanks man. Kornholio, nice updates, the proportions on the battroid look good. Especially the legs, I really like the way you've modelled them especially the top part where the vents cover the air jets. My experience: if you're transforming or looking for proportions that go both ways, don't use the strike hasegawa scans :/ I did and ended up having to manipulate my entire model to fit decent ones. I'm using a fighter blueprint and am looking at the proportins on Aztek, Gonzos and Datter's valks as those are off the hook. Link to comment Share on other sites More sharing options...
DatterBoy Posted September 18, 2004 Share Posted September 18, 2004 Been awhile. Decided to redo the fast pack set, hopefully will get much better quality in modelling than I had before. Not looking forward to the leg armor. :Dat Link to comment Share on other sites More sharing options...
The_WOZ Posted September 19, 2004 Share Posted September 19, 2004 Well, I been working on a new leg all the week. Ihad to restart several times Still needs work, there is some smoothing problems About the Strike Valk blueprints, the proportions are wrong only on the side views, which are a little shorter than it should. You can fix that with a Photoshop or PSP, open the Strike Valk blueprint and the VF1J one, select the cockpit and copy as a new layer on the Strike Valk blueprint. Set that layer blending mode to multiply or something that let you see what's behind. Move the layer until is over the cockpit of the strike valk. If needed, resize proportionally the layer so the vf1-j cockpit mach the vertical size of the strike one. Then, resize horizontally the background layer 'till the two cockpits match. Link to comment Share on other sites More sharing options...
The_WOZ Posted September 19, 2004 Share Posted September 19, 2004 (edited) The other side BTW: the leg is about 5K polys Edited September 19, 2004 by The_WOZ Link to comment Share on other sites More sharing options...
DatterBoy Posted September 20, 2004 Share Posted September 20, 2004 Lookin Great WOZ. I can see you're modelling all the panel lines in, just like the DOK. Been working on my fast pack set. Test fit: leg armor Link to comment Share on other sites More sharing options...
DatterBoy Posted September 20, 2004 Share Posted September 20, 2004 Booster: Link to comment Share on other sites More sharing options...
Aztek Posted September 20, 2004 Author Share Posted September 20, 2004 (edited) Looks sweet Dat, From the second angle it looks like the side armor should be taller; to compensate for the "calf" armor. Then again it may just be the perspective. Also, did you notch the armor where the ventral fins jut out against it? Edited September 20, 2004 by Aztek Link to comment Share on other sites More sharing options...
pandaren Posted September 20, 2004 Share Posted September 20, 2004 Hey guys1! nice to met u all here!!! I'm newbie, n i'm also 1 of the fan of Macross!! I hv see all your work~~ that great!!! I'm planning to do a 3D Valk...but lack of reference n infomation, can i know where can i get such thing?? Thanx anyway!!~~ Link to comment Share on other sites More sharing options...
DatterBoy Posted September 20, 2004 Share Posted September 20, 2004 (edited) Hey AZ, how ya been. man! Took a look at your armor on your posed valk and decided it was time to get abetter set. Have not had a chance to do the little cut out for the leg flappy thing (I have a total lack of avition technical terms for airplanes) but realize I'll have to at some point soon. I can see the armor cutting through polys there and that just can't be acceptable. It may be a bit short in the rear for the back leg armor, but I think if an adjustment needs to be made, I'm only willing to scale for the adjustment now. The leg armor side is a real pain to mode. Such an odd shape that I have little to no flexibility with big adjustments. The difference between this set of armor and my older set is that this one is being built based on the Hasegawa plans, but since I used the same plans to remodel the lower leg of the valk, they seem to match up pretty good. Chances are I will simply model the rear leg armor to fit this side leg armor and that will be that. Next up: Strike Cannon. My old one was pretty decent so I may just stick with it. Depends on how well it fits with a booster that is modelled on HASEGAWA. PANDAREN, Welcome! Have fun! the answer to your question is: HASEGAWA. I'm sure you can find the prints somewhere. Let me know and I'll hook you up if you can't. :Dat Edited September 20, 2004 by DatterBoy Link to comment Share on other sites More sharing options...
Skypoet Posted September 21, 2004 Share Posted September 21, 2004 Hey WOZ and Datterboy, great work! Are you mechanical engineers or what? This all looks so professional!!! Are you doing this in MAX/Maya/Sequoia or an engineering CAD program (Catia/AutoCAD/TurboCAD/other) ? Great looking! Link to comment Share on other sites More sharing options...
DatterBoy Posted September 21, 2004 Share Posted September 21, 2004 MAYA... Another test fitting. :Dat Link to comment Share on other sites More sharing options...
Rodavan Posted September 21, 2004 Share Posted September 21, 2004 Great stuff guys Good 2 see the thread stillaround and going strong Link to comment Share on other sites More sharing options...
Doktor Gonzo Posted September 21, 2004 Share Posted September 21, 2004 (edited) Hey gang, Sorry to be essentially absent lately - been sidelined by real-life concerns. Ought to be able to pick things up soon. Meanwhile, here's a brief test clip to show I haven't been completely idle. It's not much by itself, but it's proof-of-concept for some more involved things I hope to get started on soon: Taxiing for Takeoff Edited September 21, 2004 by Doktor Gonzo Link to comment Share on other sites More sharing options...
chrono Posted September 21, 2004 Share Posted September 21, 2004 Well, I been working on a new leg all the week. Ihad to restart several timesStill needs work, there is some smoothing problems About the Strike Valk blueprints, the proportions are wrong only on the side views, which are a little shorter than it should. Damn! That detail is tight!!! How did you get such good looking surface detail? Because everytime I do surface detail the height always is 'wrong' somehow. Also what program are you using 3D wise? Link to comment Share on other sites More sharing options...
Knight26 Posted September 21, 2004 Share Posted September 21, 2004 Looking good Doc, and Skypoet the only modeler on MW that is nutty enough to use a CAD program is me, but then again I don't model macross stuff, just put nods to it in my designs. Link to comment Share on other sites More sharing options...
DatterBoy Posted September 21, 2004 Share Posted September 21, 2004 DOK, Said it before, will say it again.. sick. Can't wait to see the final product.. and remeber.. I get a cameo in your movie. I wanna see my model explode in the background.. CF style! :Dat Link to comment Share on other sites More sharing options...
Doktor Gonzo Posted September 22, 2004 Share Posted September 22, 2004 (edited) DOK,Said it before, will say it again.. sick. Can't wait to see the final product.. and remeber.. I get a cameo in your movie. I wanna see my model explode in the background.. CF style! :Dat Dat, Forget the cameo.... we'll get you a co-starring role! Remember, the poster we're slowly slouching towards on this thread is allegedly only a warm-up.... the final goal is a collaborative CG Macross short! Edited September 22, 2004 by Doktor Gonzo Link to comment Share on other sites More sharing options...
NERV Posted September 23, 2004 Share Posted September 23, 2004 Taxiing for Takeoff i see little random bit popping out of that, was it superimposed over an existing craft? Link to comment Share on other sites More sharing options...
Doktor Gonzo Posted September 23, 2004 Share Posted September 23, 2004 Taxiing for Takeoff i see little random bit popping out of that, was it superimposed over an existing craft? Good eye! Yeah, this was a clip of an F-18 taxiing, I garbage-matted it out before rendering my own craft in. Obviously, for a "real" shot rather than a quick test, I'll shoot my own plate, but for this I just grabbed and modified something I found on the internet - and unfortunately nobody bothers to shoot and put up pans across an empty tarmac! Link to comment Share on other sites More sharing options...
DatterBoy Posted September 23, 2004 Share Posted September 23, 2004 Taxiing for Takeoff i see little random bit popping out of that, was it superimposed over an existing craft? Good eye! Yeah, this was a clip of an F-18 taxiing, I garbage-matted it out before rendering my own craft in. Obviously, for a "real" shot rather than a quick test, I'll shoot my own plate, but for this I just grabbed and modified something I found on the internet - and unfortunately nobody bothers to shoot and put up pans across an empty tarmac! No way... I'd think that was all they'd do... :Dat Link to comment Share on other sites More sharing options...
Knight26 Posted September 23, 2004 Share Posted September 23, 2004 Hey Doc Gonzo, if you want them I have some videos I shot recently on the Nimitz showing hornets landing and taxiing. Link to comment Share on other sites More sharing options...
Doktor Gonzo Posted September 24, 2004 Share Posted September 24, 2004 Hey Doc Gonzo, if you want them I have some videos I shot recently on the Nimitz showing hornets landing and taxiing. Sure, I'd love to have a look, Knight! Link to comment Share on other sites More sharing options...
The_WOZ Posted September 26, 2004 Share Posted September 26, 2004 Well, I been working on a new leg all the week. Ihad to restart several timesStill needs work, there is some smoothing problems About the Strike Valk blueprints, the proportions are wrong only on the side views, which are a little shorter than it should. Damn! That detail is tight!!! How did you get such good looking surface detail? Because everytime I do surface detail the height always is 'wrong' somehow. Also what program are you using 3D wise? Well, my English isn't good enough to explain this the panel lines are "cuted" on the surface by using boolean operations. I create very thin cubes that match de panel lines, then I made a new copy of the leg for instance, resize it just a little, substract it to the cube and then substract the cube to the original leg. I'm usign Truespace 3.2 DatterBoy: That battroid look amazing!! Link to comment Share on other sites More sharing options...
chrono Posted September 26, 2004 Share Posted September 26, 2004 Whoa those were boolean operations!?! I avoid them like the black plague, even in TS 6.6! Crappy things they are. The Draw tool is our friend. A tip when working with non-planar faces is to change the phong shader to 'faceted'. This allows you to better see the poly's orientation. Also if your going to work with alot of curved surfaces use a Sub-D plugin for a better surface instead of time consuming hand modelling using splines. Oh and when using references in the TS size the object to the pixel size of the image. It won't be distorted then. Great work though! Link to comment Share on other sites More sharing options...
Recommended Posts