Jasonc
-
Posts
6319 -
Joined
-
Last visited
Content Type
Profiles
Forums
Events
Gallery
Everything posted by Jasonc
-
Getting around that time. Can't wait to see the results.
-
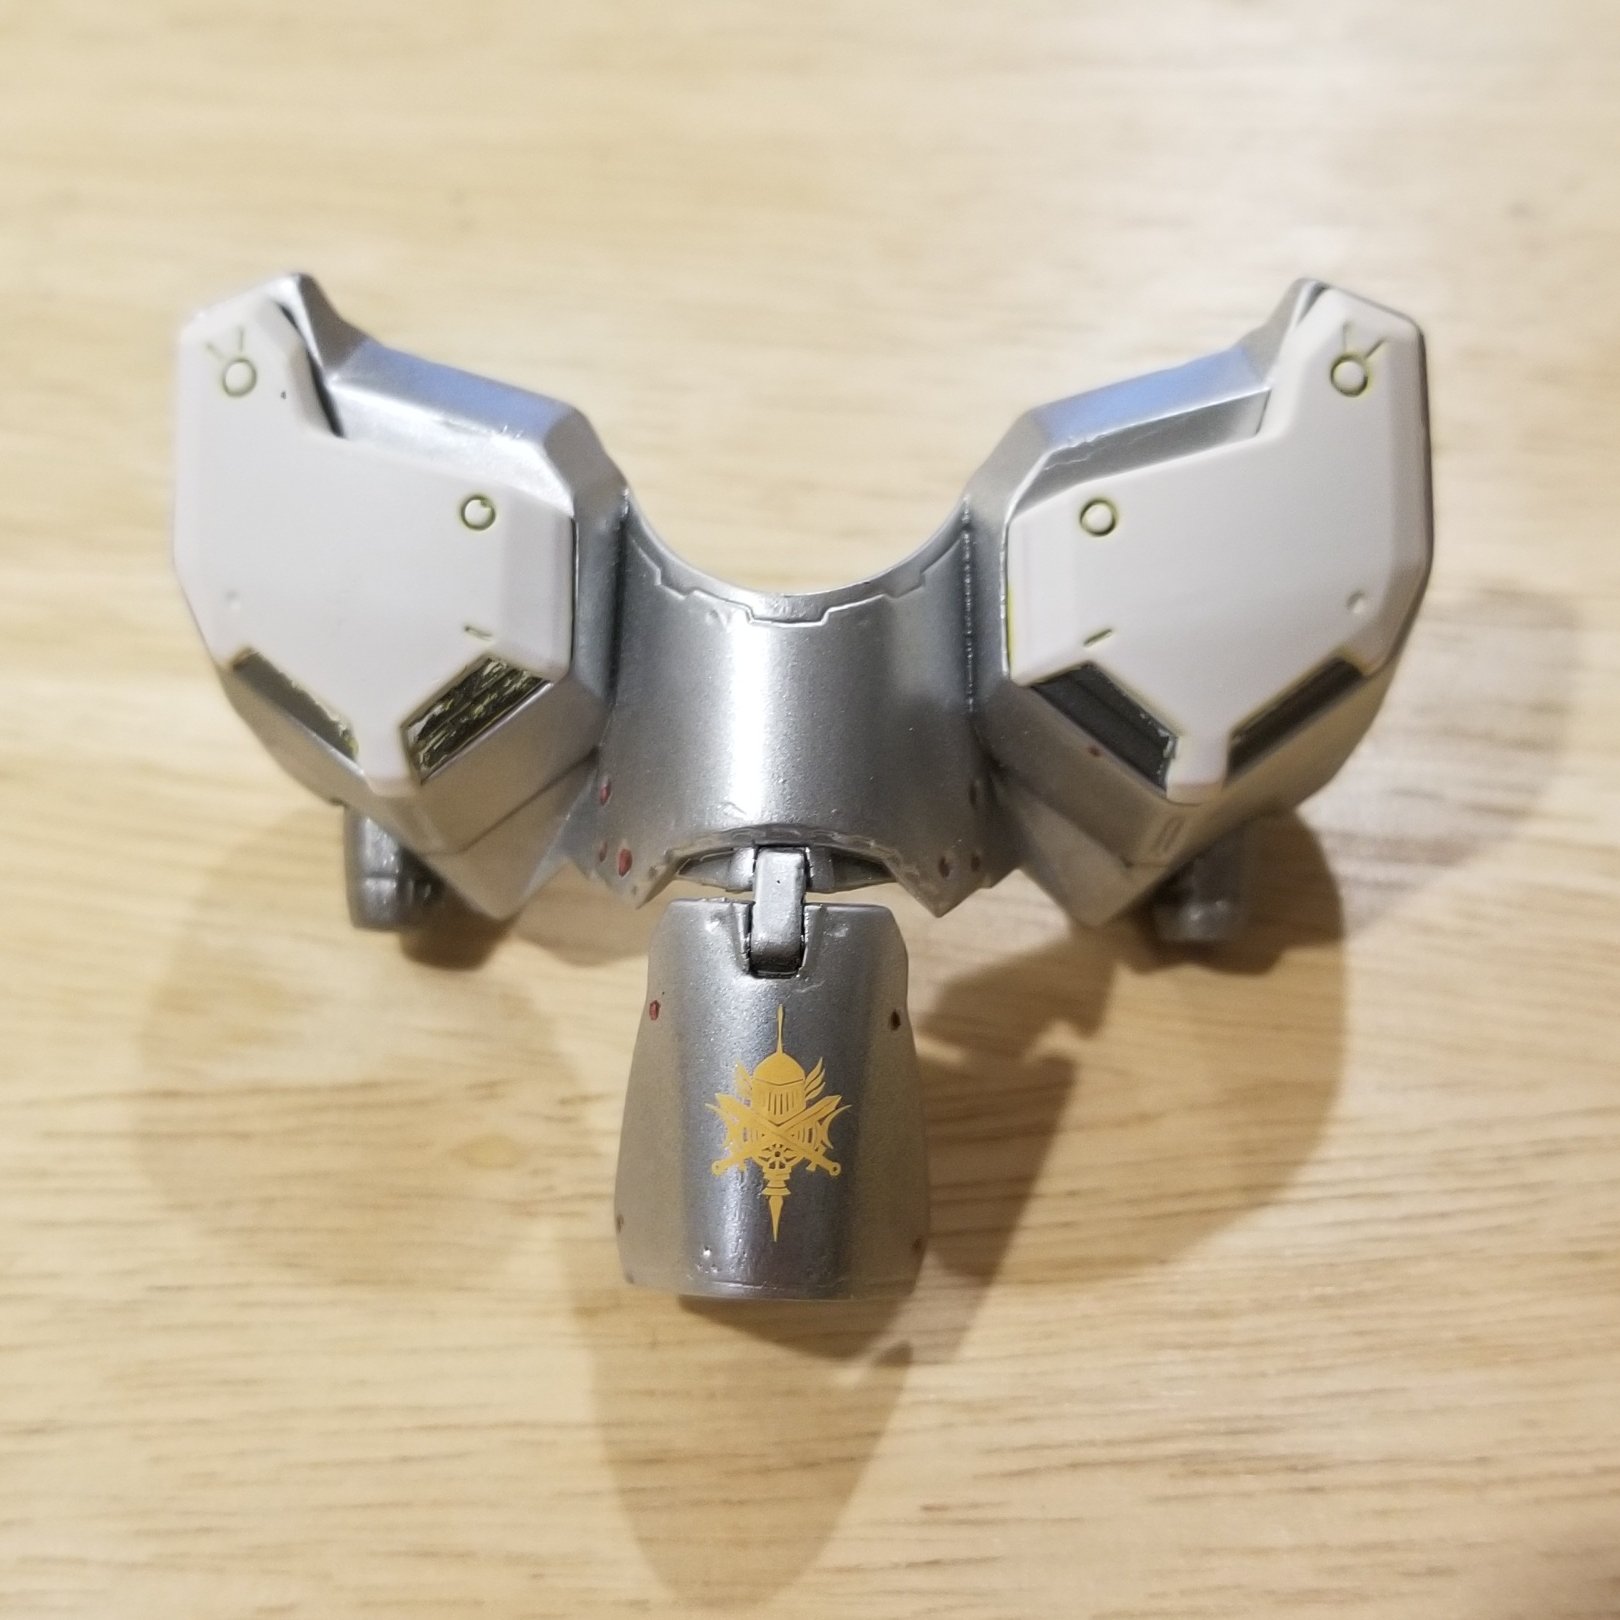
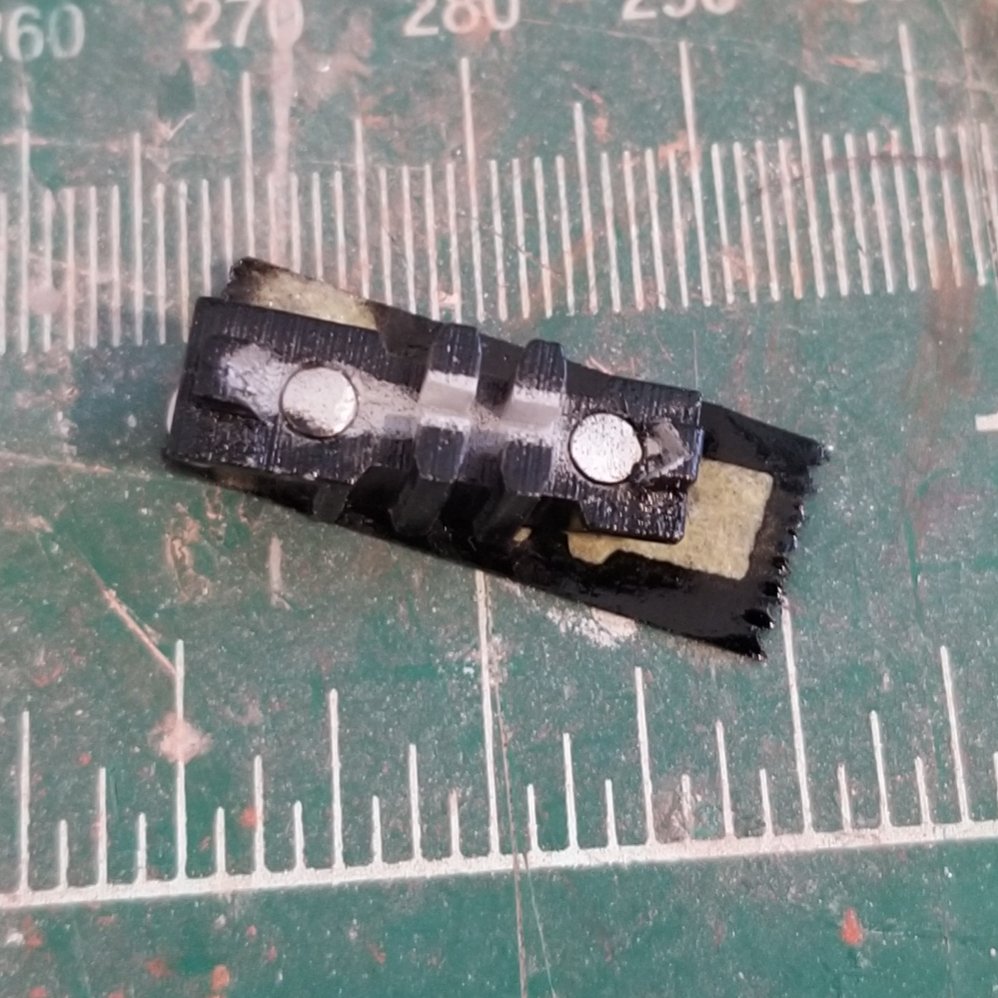
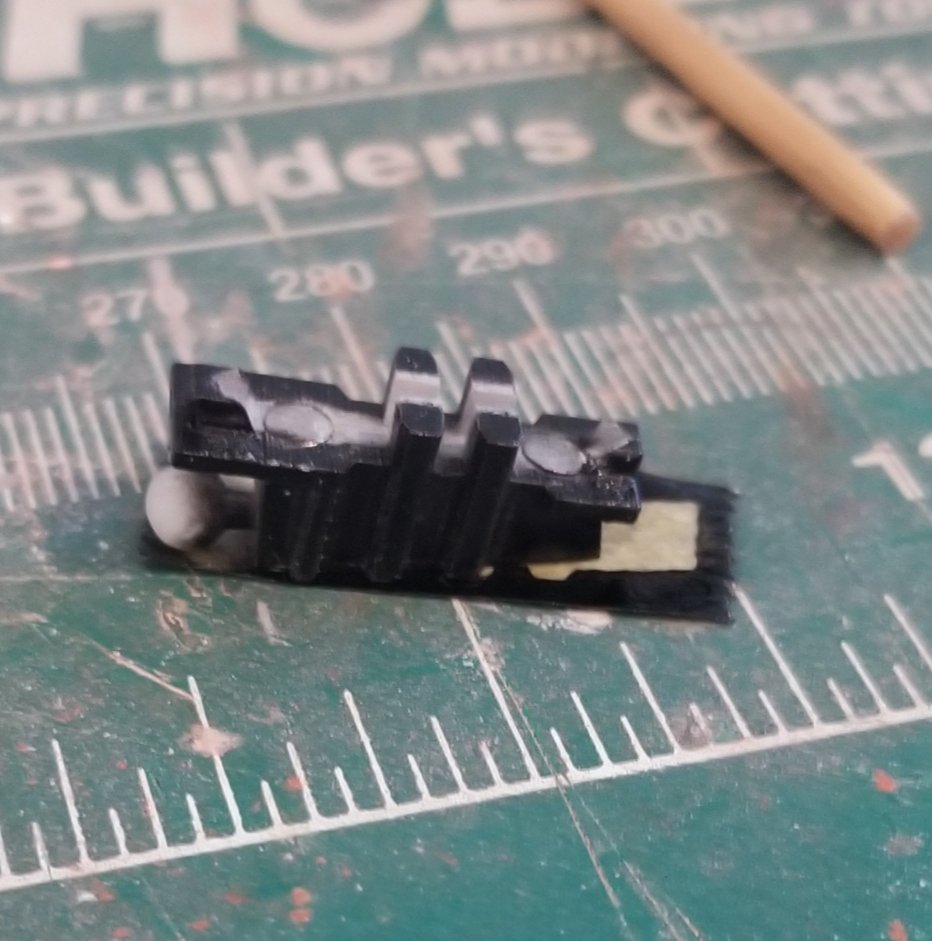
And this little piece is the backpack connector. The 2mmx1mm round magnets there are to help with securing the lance to it, but they are not strong enough to really do a suitable job. However, the design of the new piece, with the rail guides that protrude is. Between the two, it will hold upside down in fighter mode. For the 9f you who got this kit from me, you may want to make sure that when testing the lance connector (the top piece on the lance) that it is snug but something you don't have to peel off. My first attempt at this had it way too tight, and it took too much work to get it out. If you need to, use a 400 grit sand paper in between the columns where the lance connection will slide in, an lightly sand until a desired thickness is obtained. Also take 8nto account paint. These will be chromed and sealed on Tuesday. True test Wednesday.
-
One more of the top.
-
I used liquid buffer and 800 grit sandpaper. Wet sandpaper first, then the liquid buffer to make it shiny again. I still put my clear top coat over, but once totally painted, it will be satin finish top coat.
-
More work today.

-
It's better to buy them. You'll get full detail, and even in the parts the newer release had from Frameout, they weren't well detailed. You can find them fairly inexpensive on Mandarake last I checked.
-
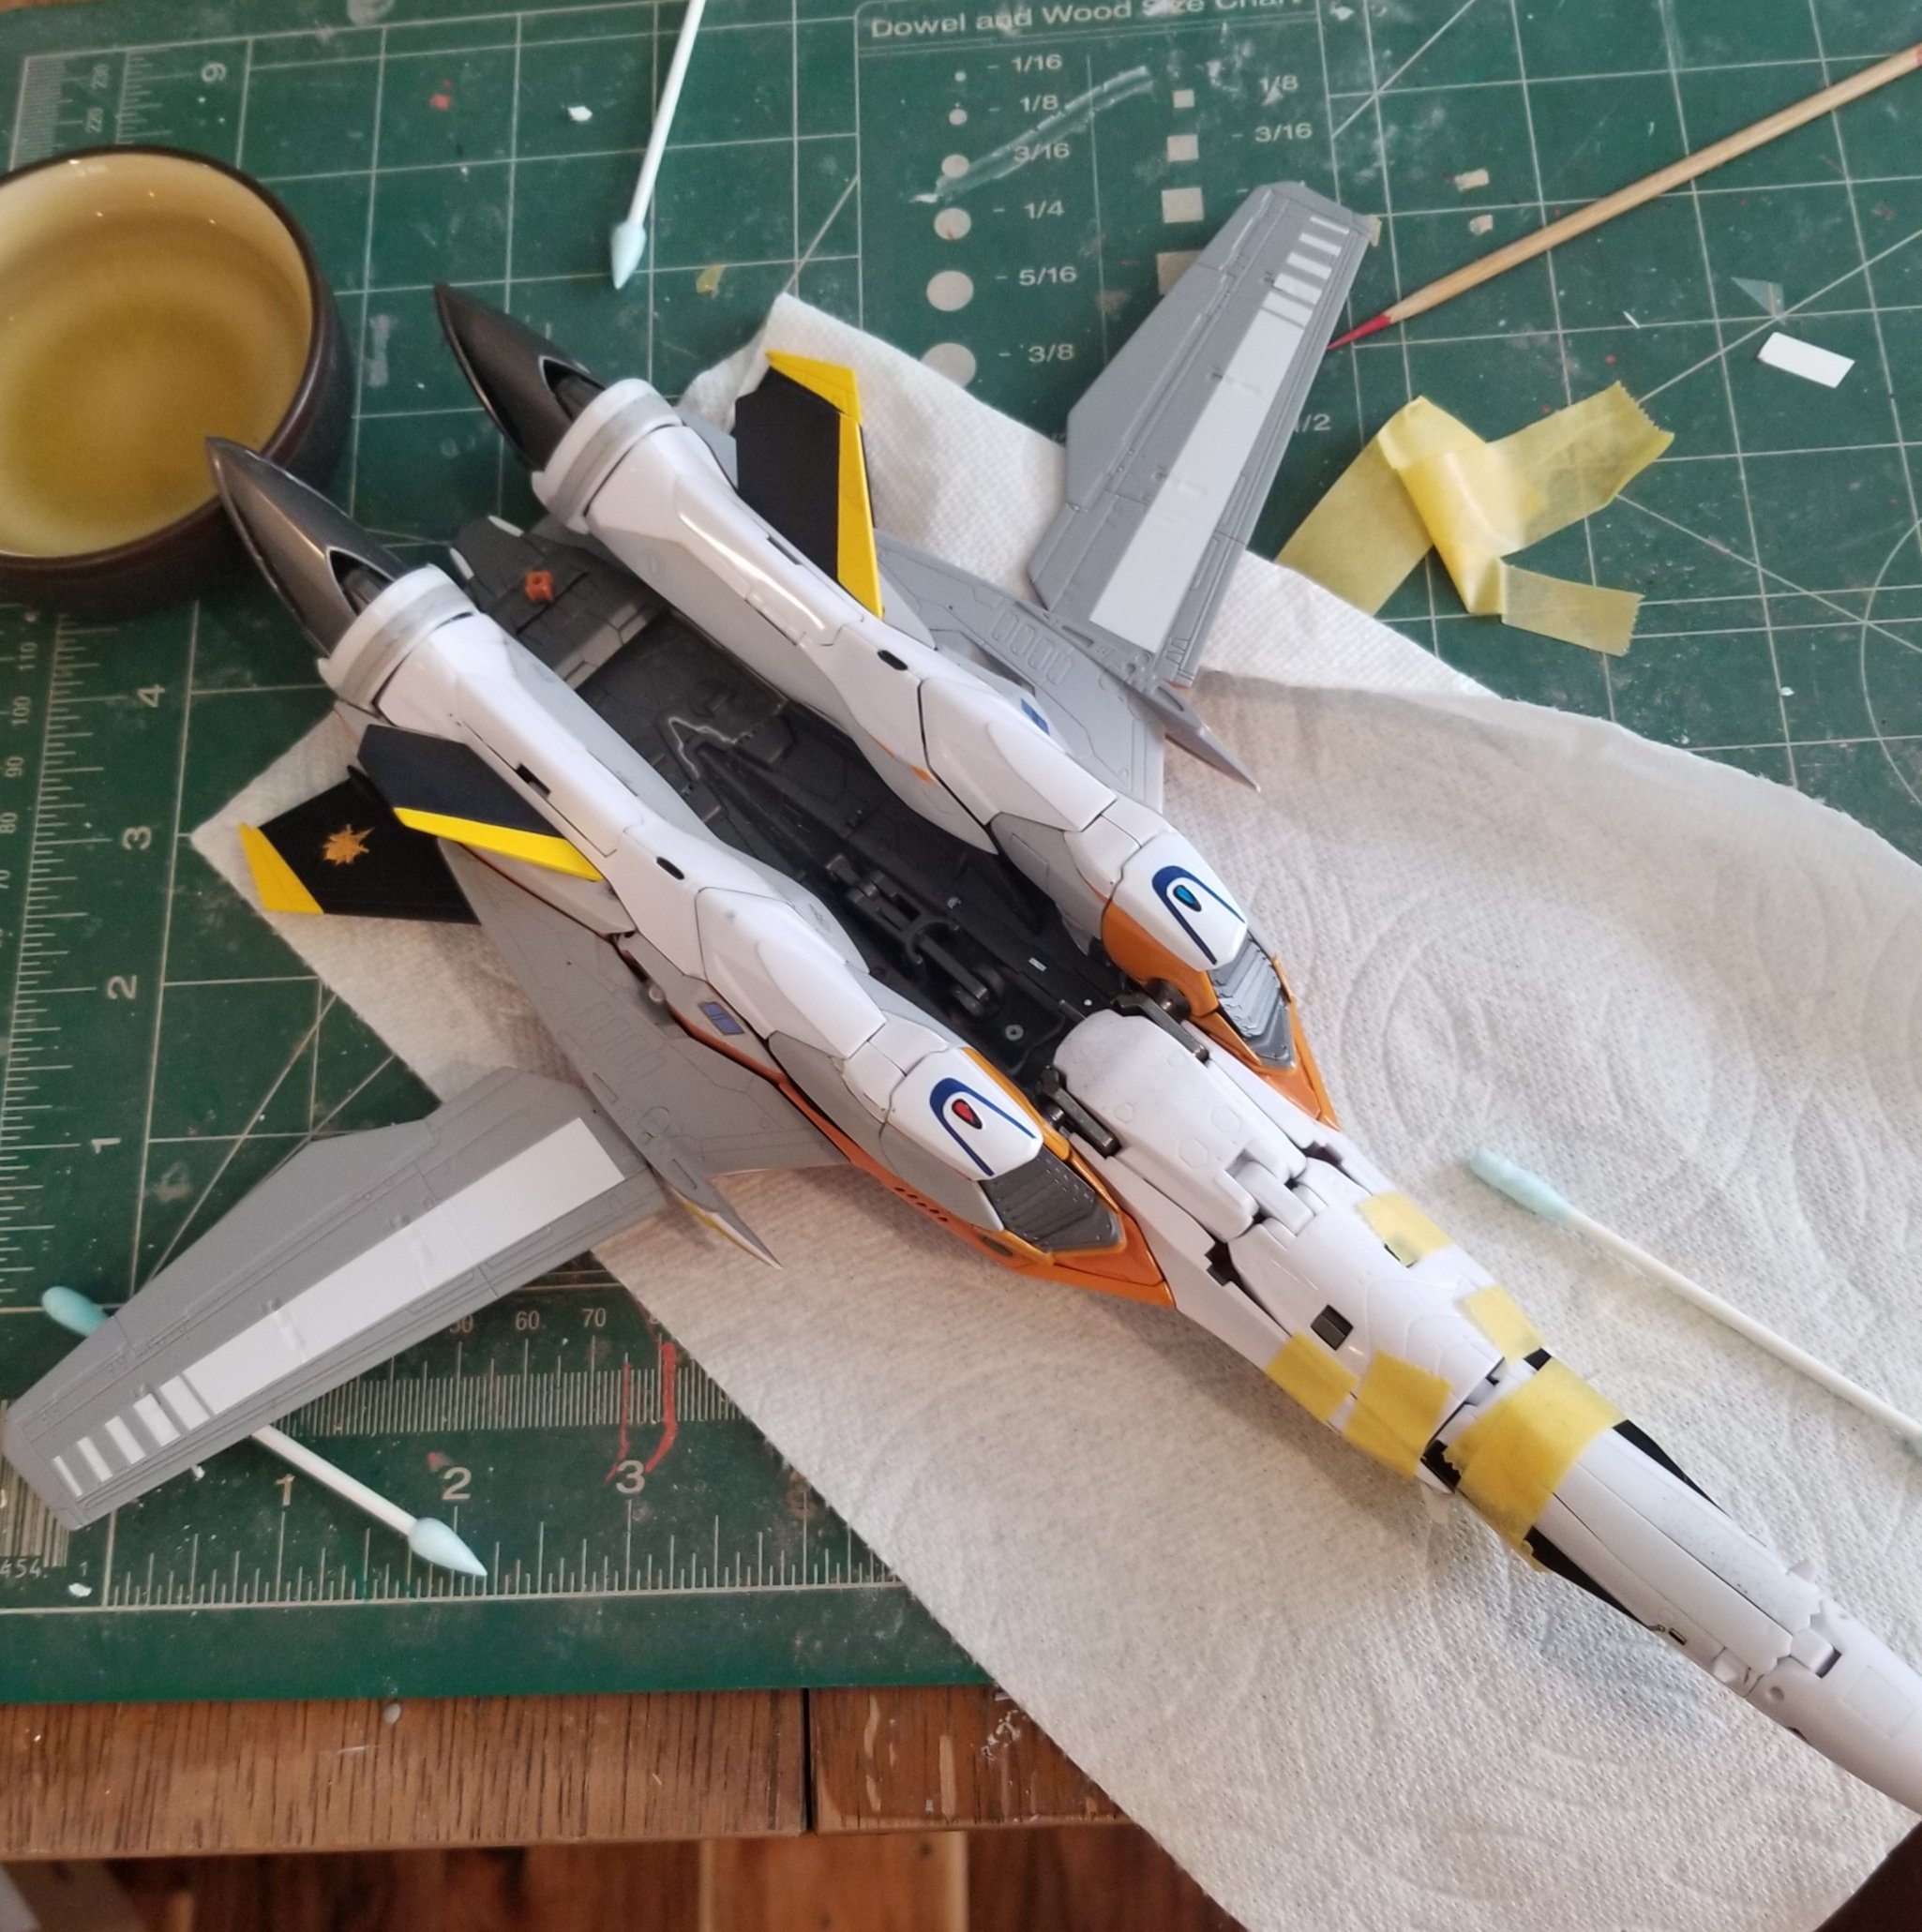
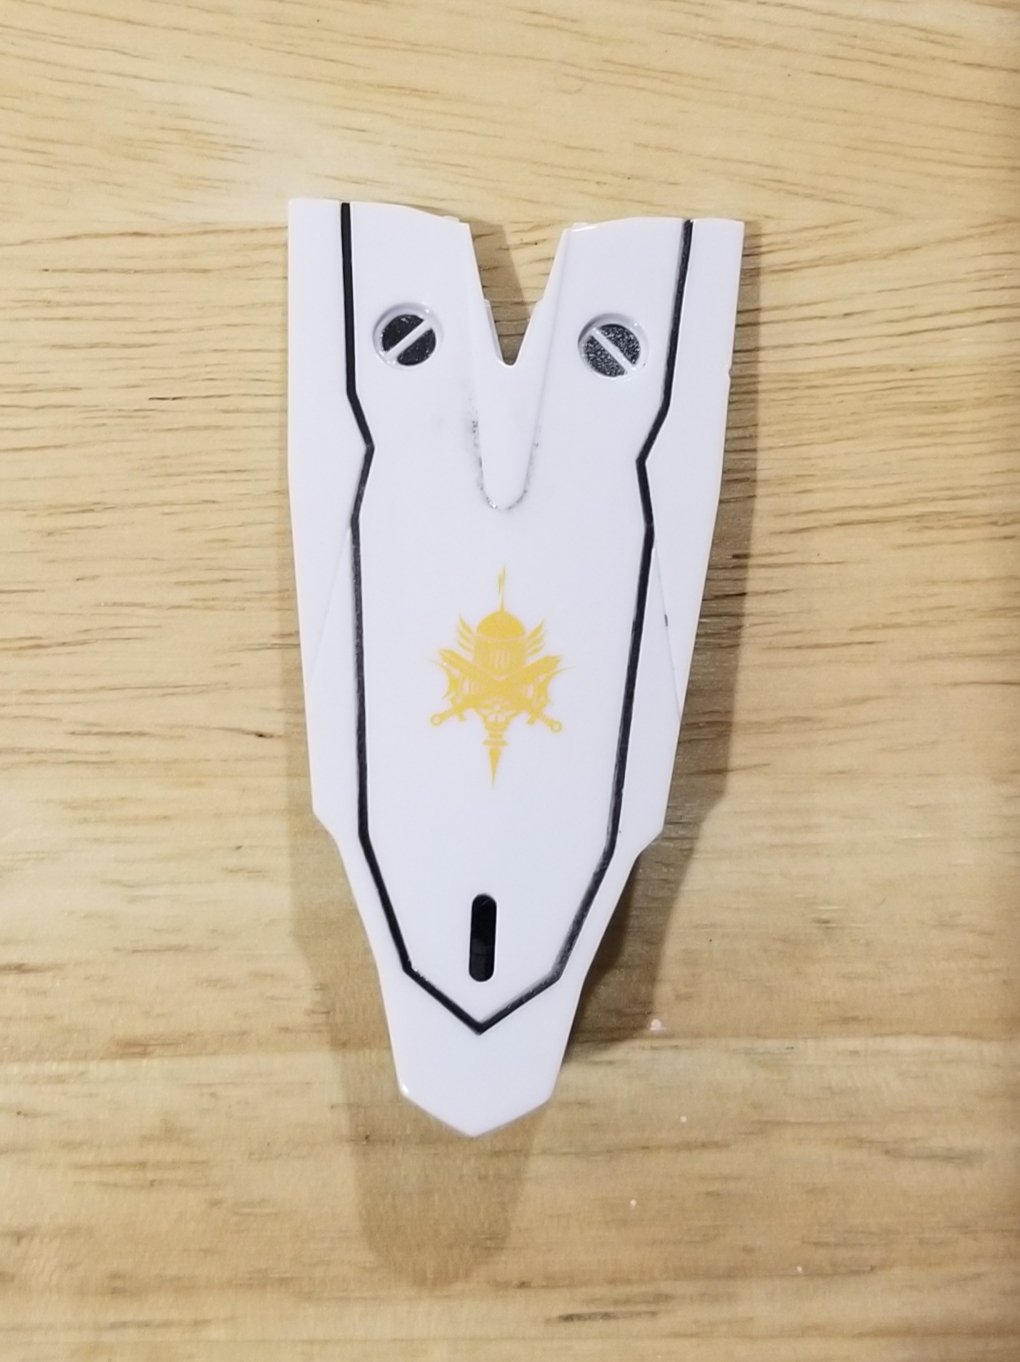
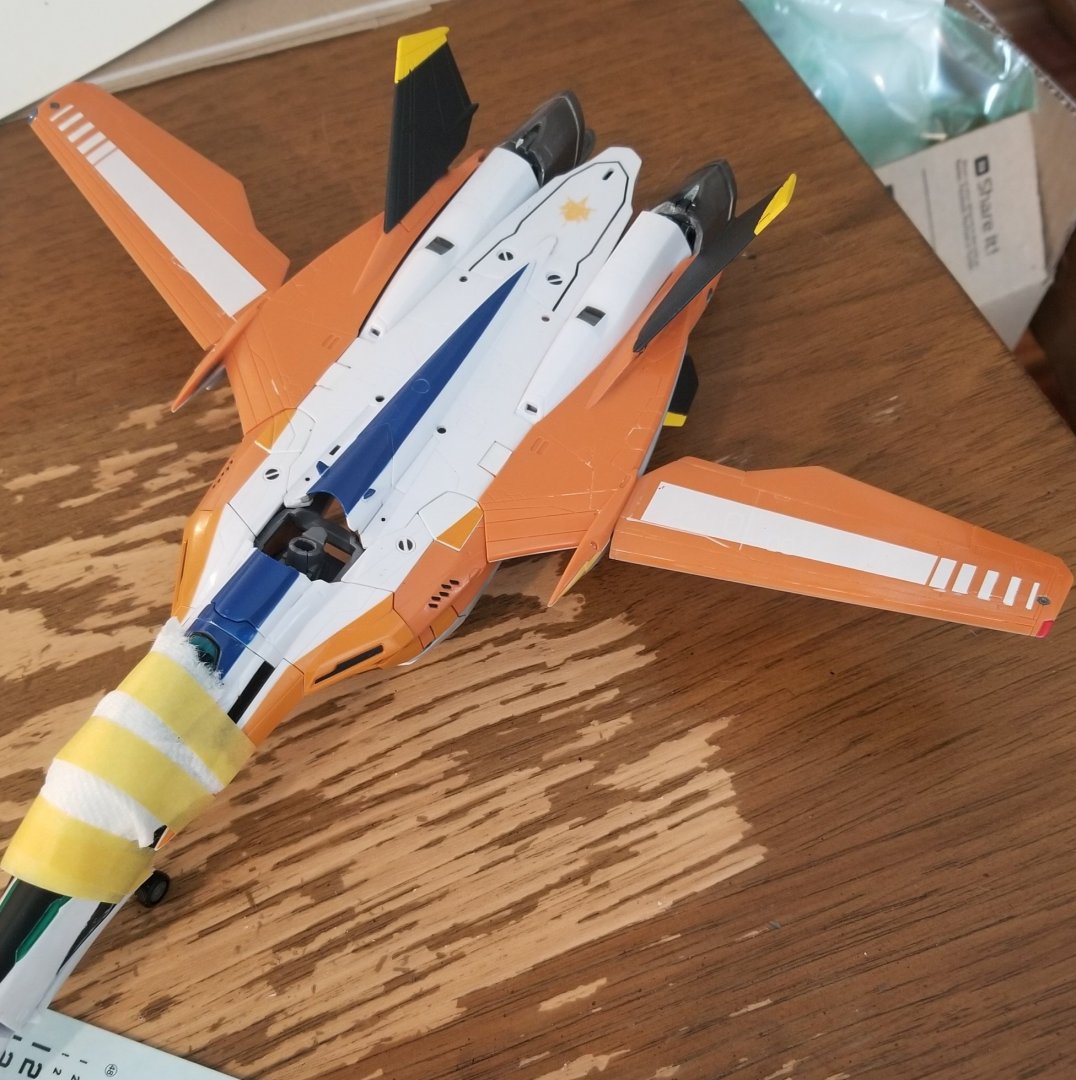
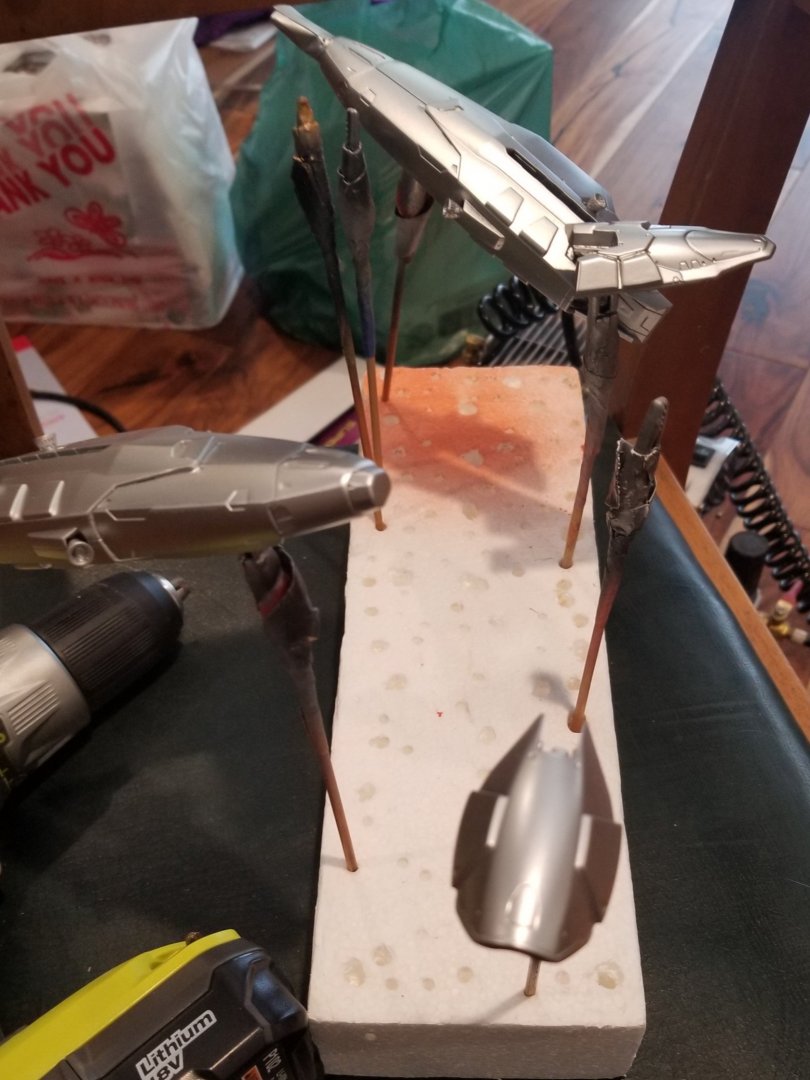
So, more updates, and it mostly has to do with painting and decal applications. I've pulled the YF-25 apart, and have painted grey parts grey, and buffed out tampons pieces that dont belong. The valk itself is about done, but I had a misstep with the right wing white trim. Theres no correcting it, so once the clear coat dries tomorrow, it's off to do it again. I will also do the under wing decals tomorrow, which are easy enough, but there are these. The pictures of the paladin logo are rub on transfer decals. They're great because they leave no residue, but you only get one chance to do them right. Anyways, I learned after trial that it's best to get a piece of tape over it once you lock it in position,and use a q--tip to rub on top of the tape, followed by a light scratching with your nail. These pieces are now done. She's getting there. Just hope before SDC.


-
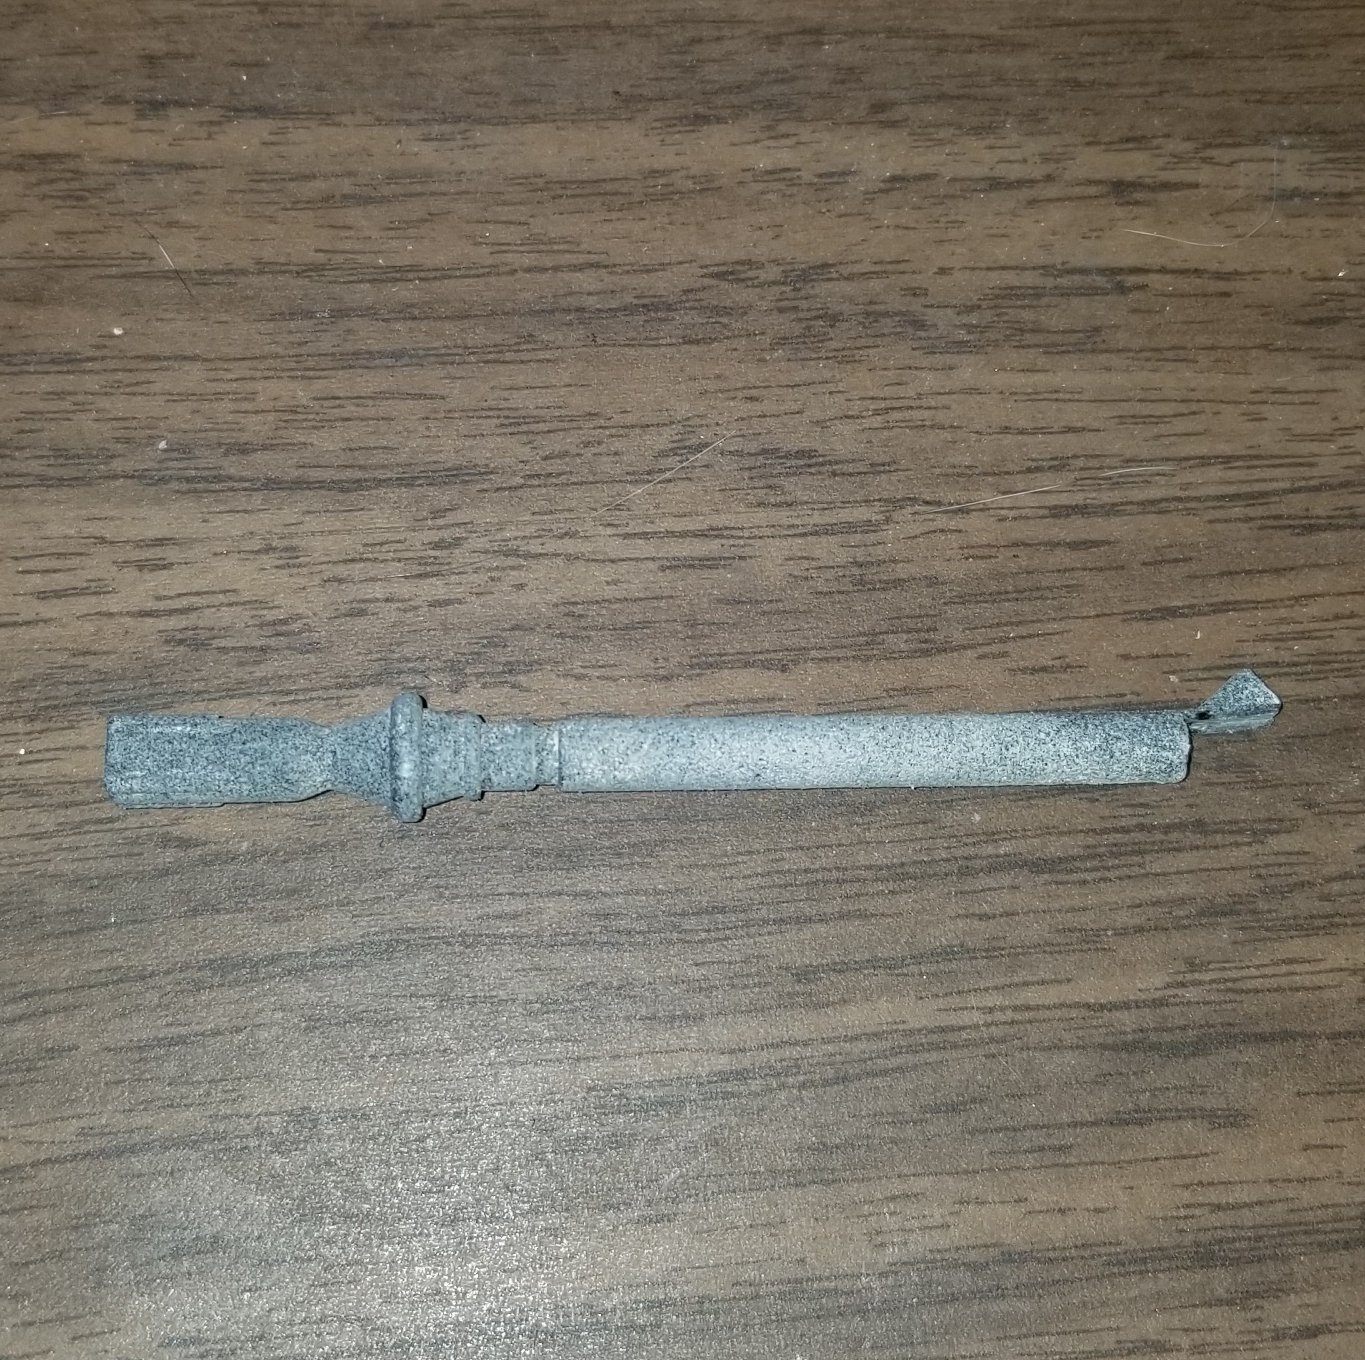
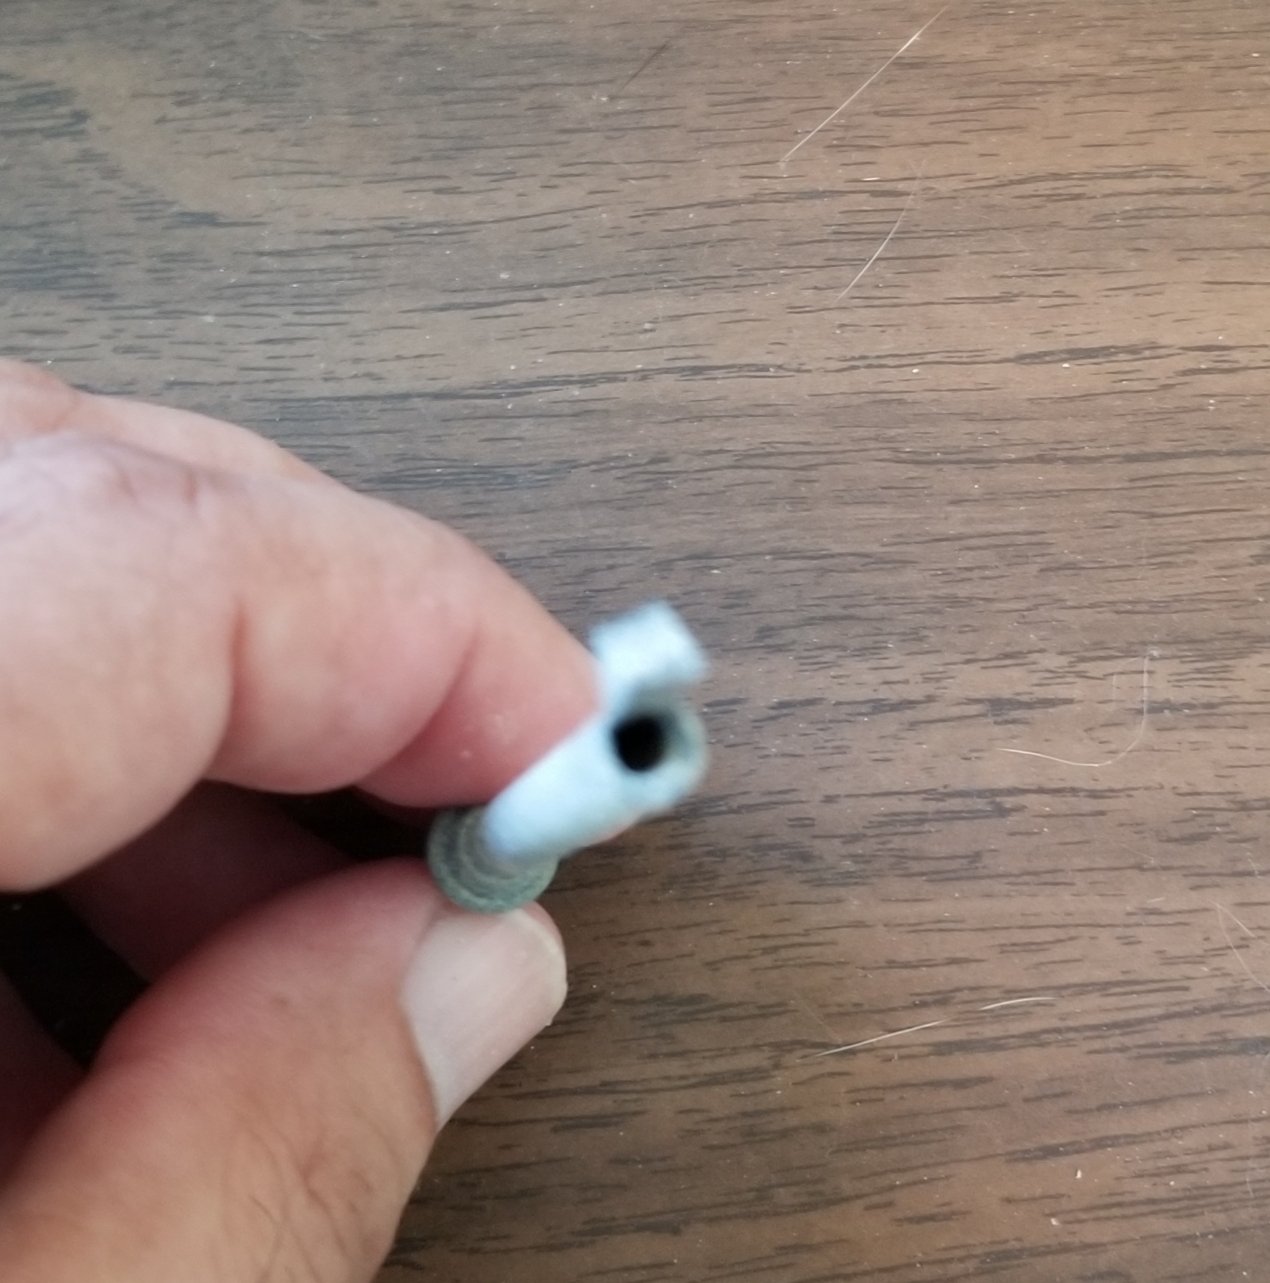
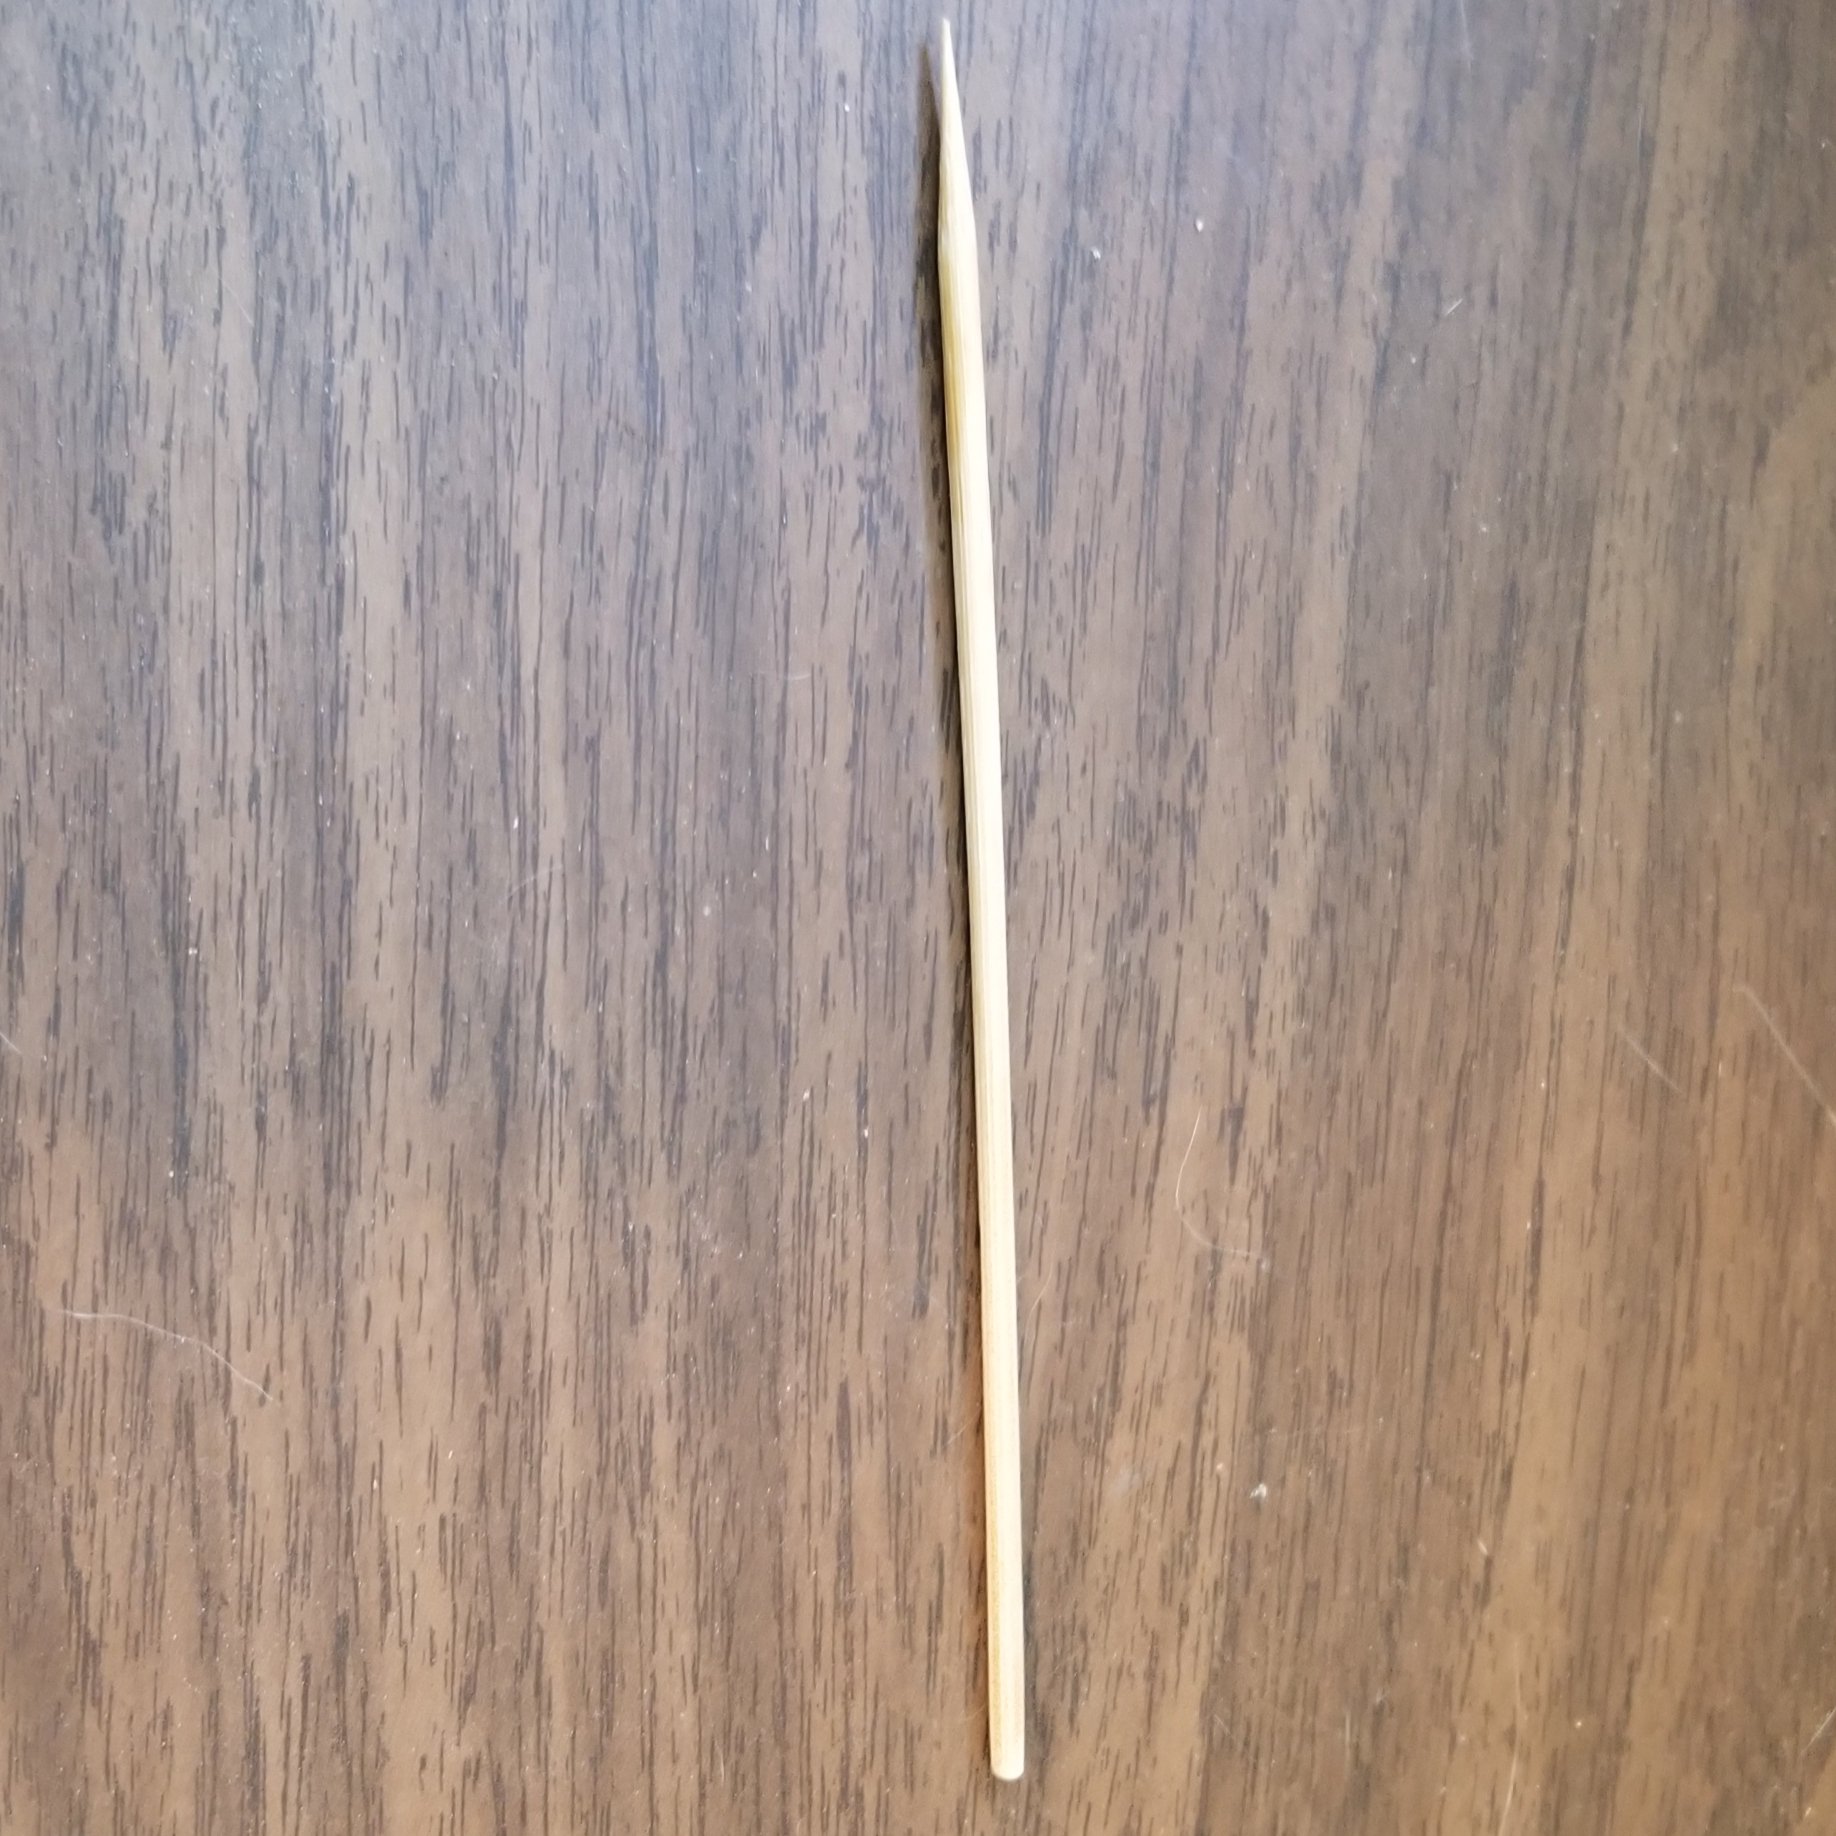
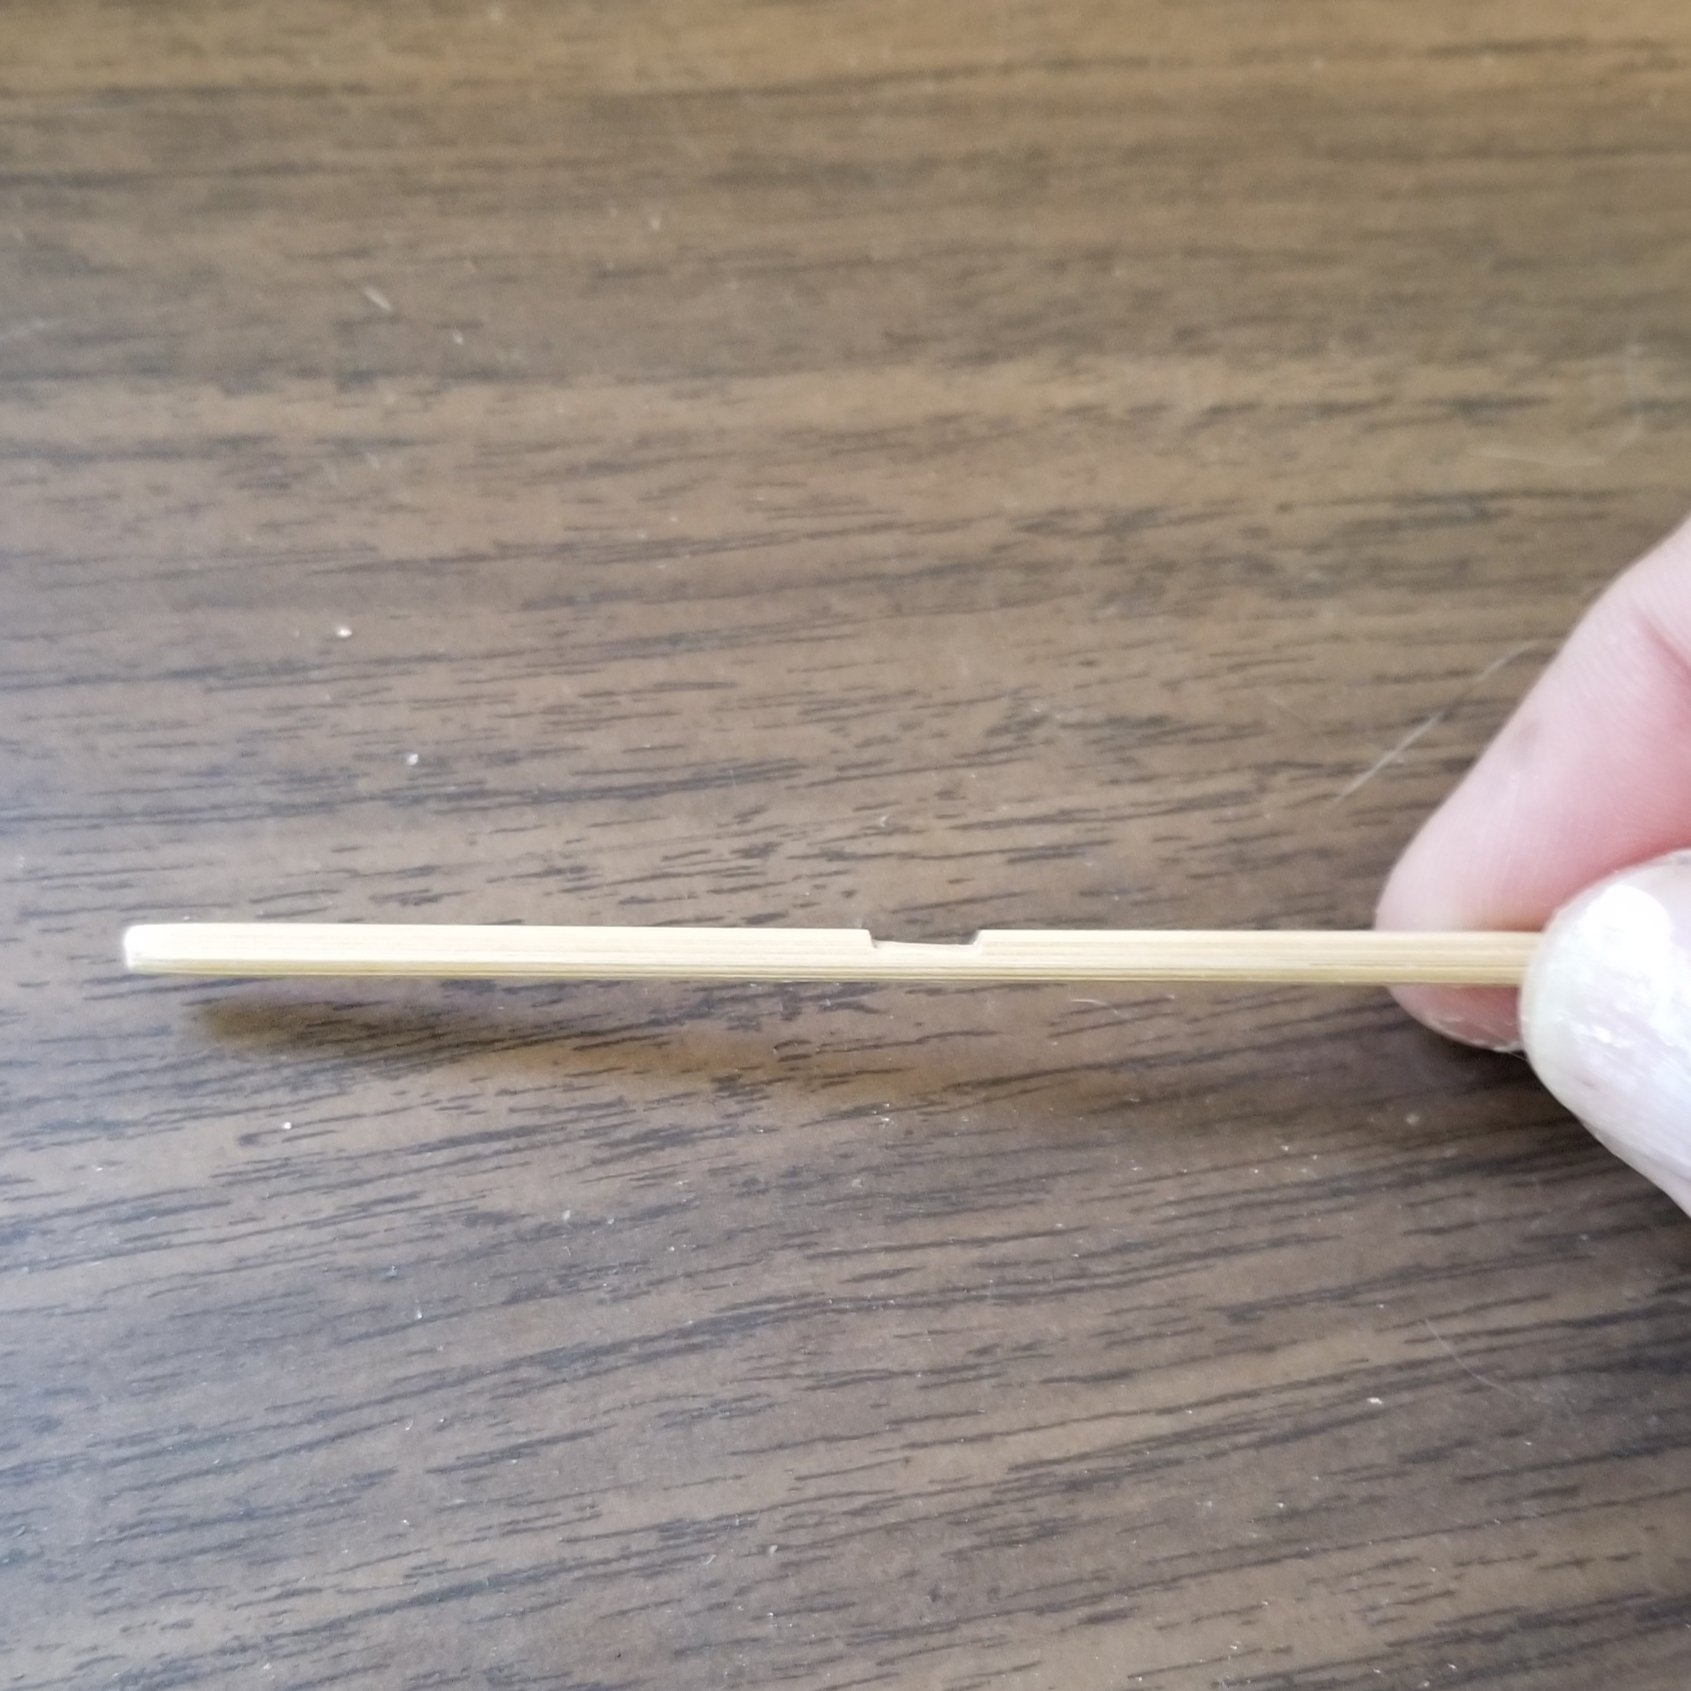
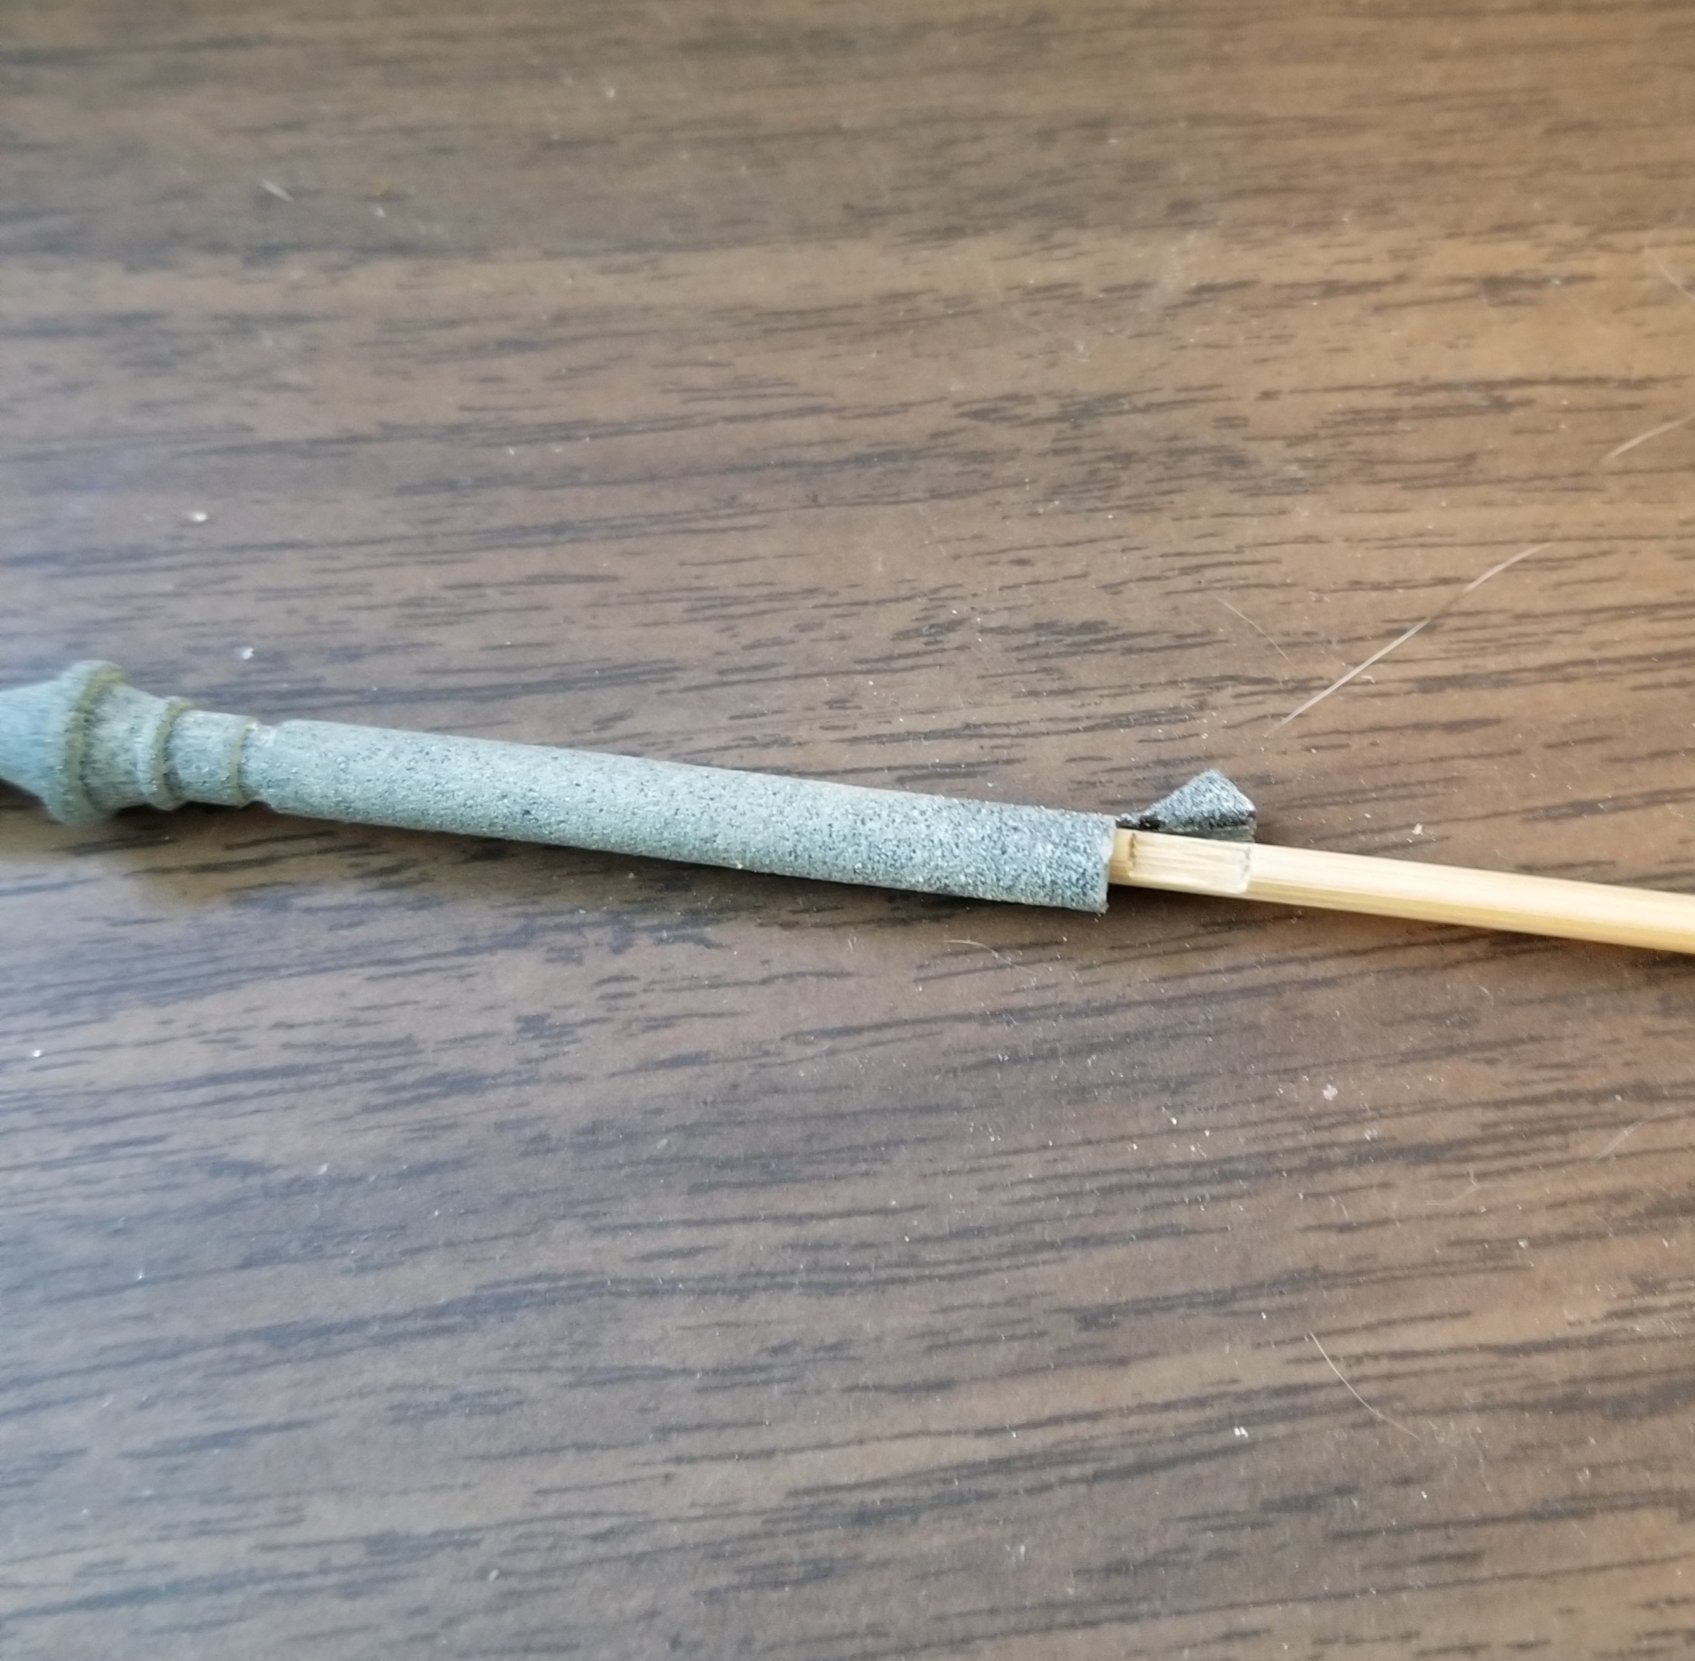
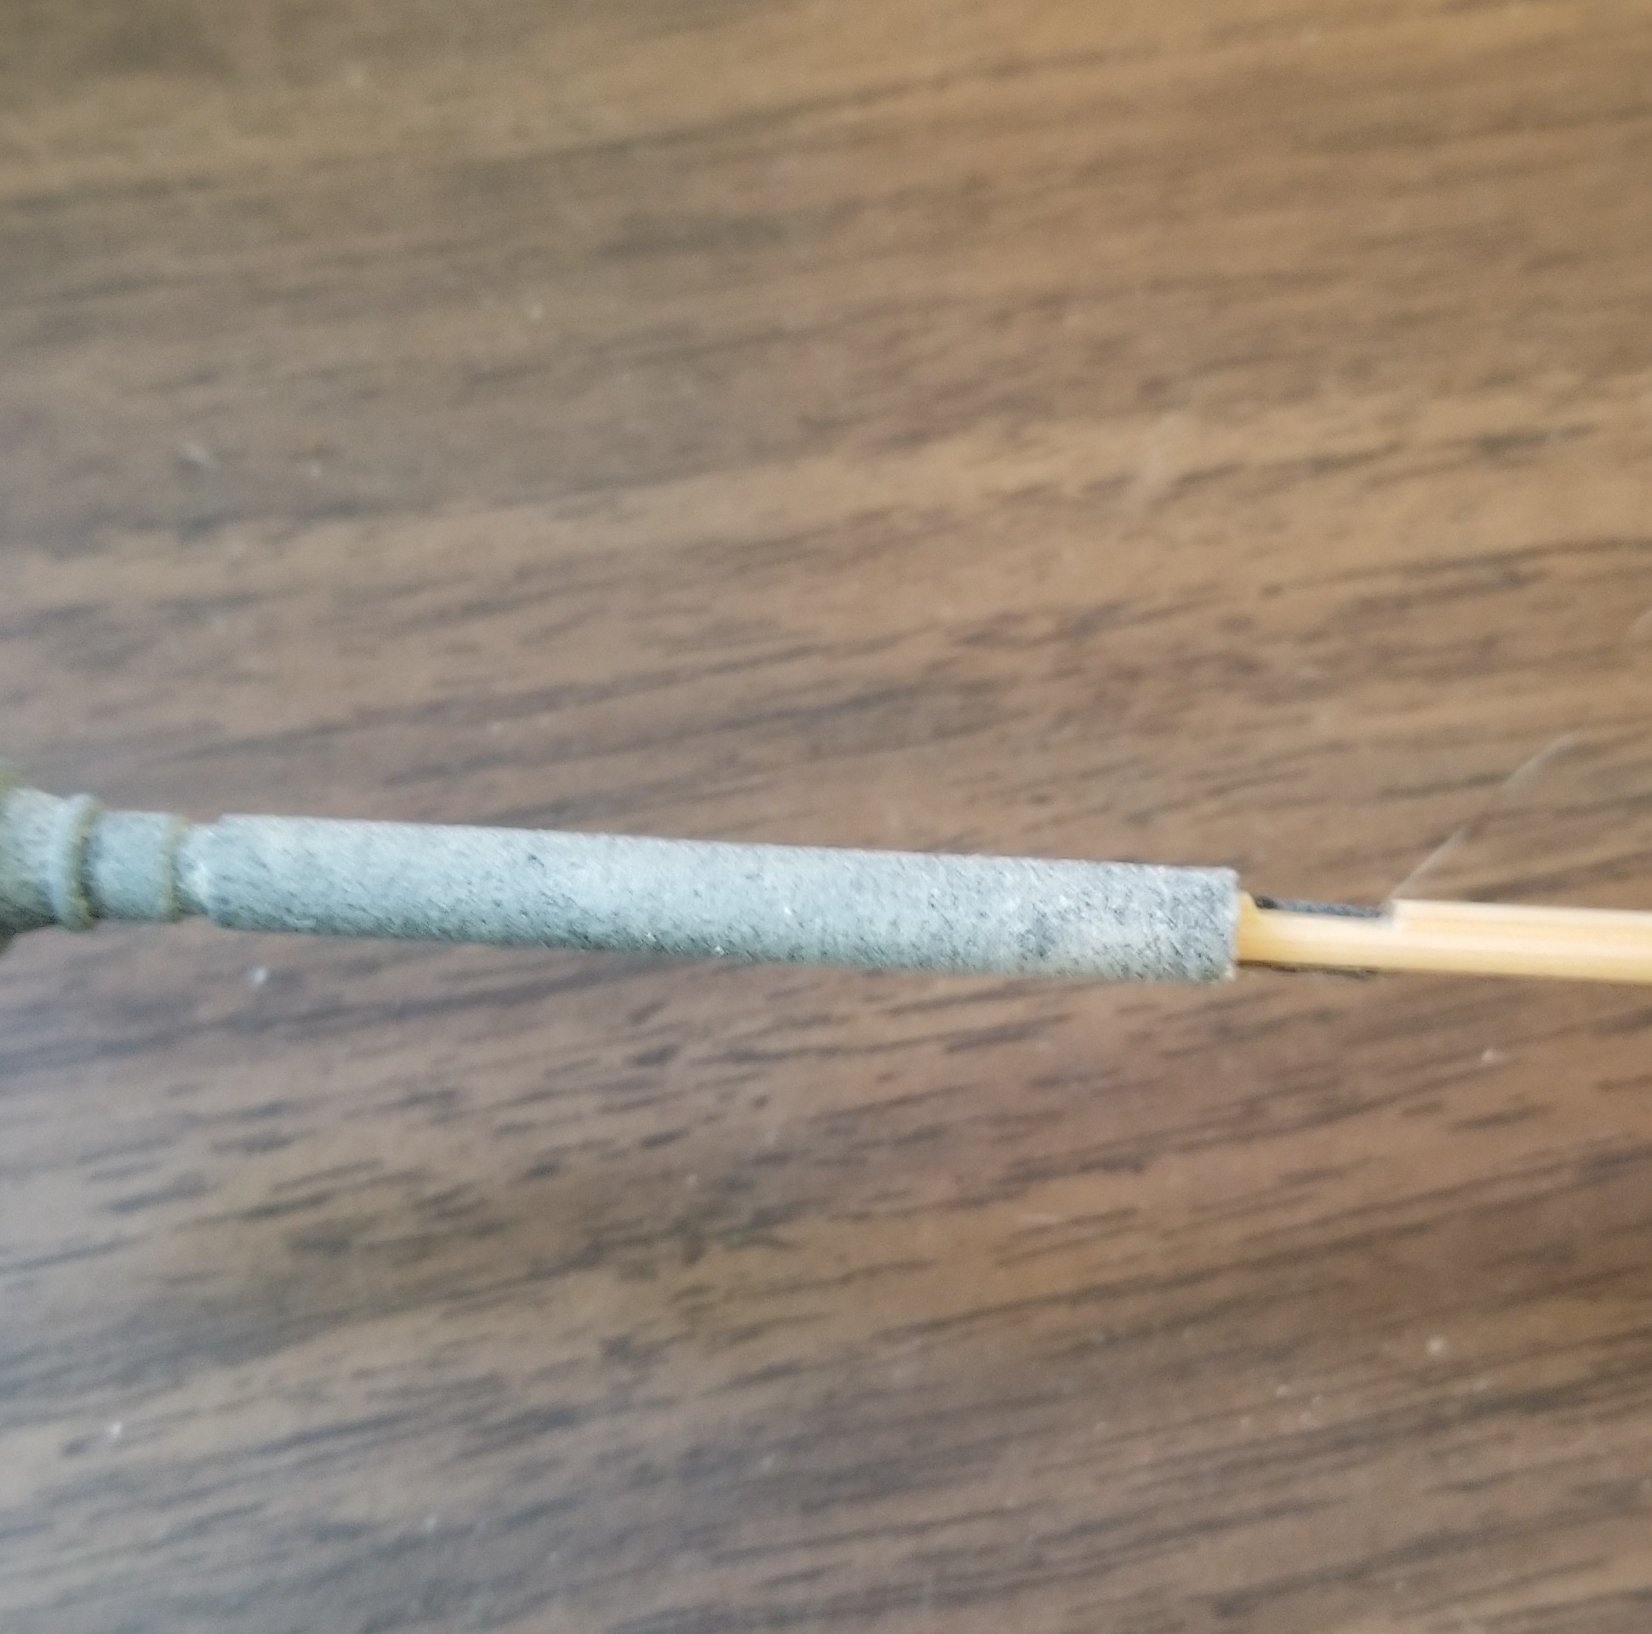
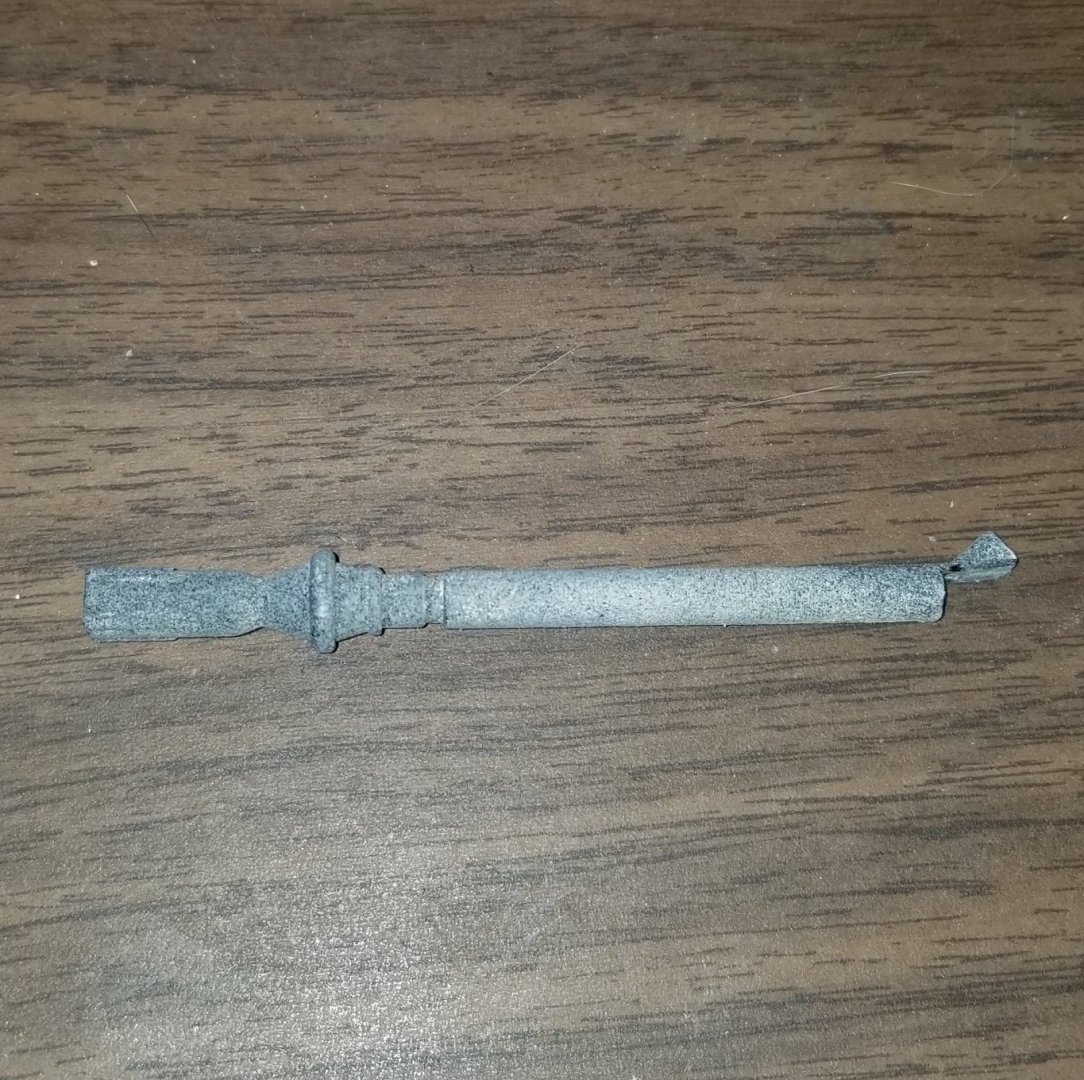
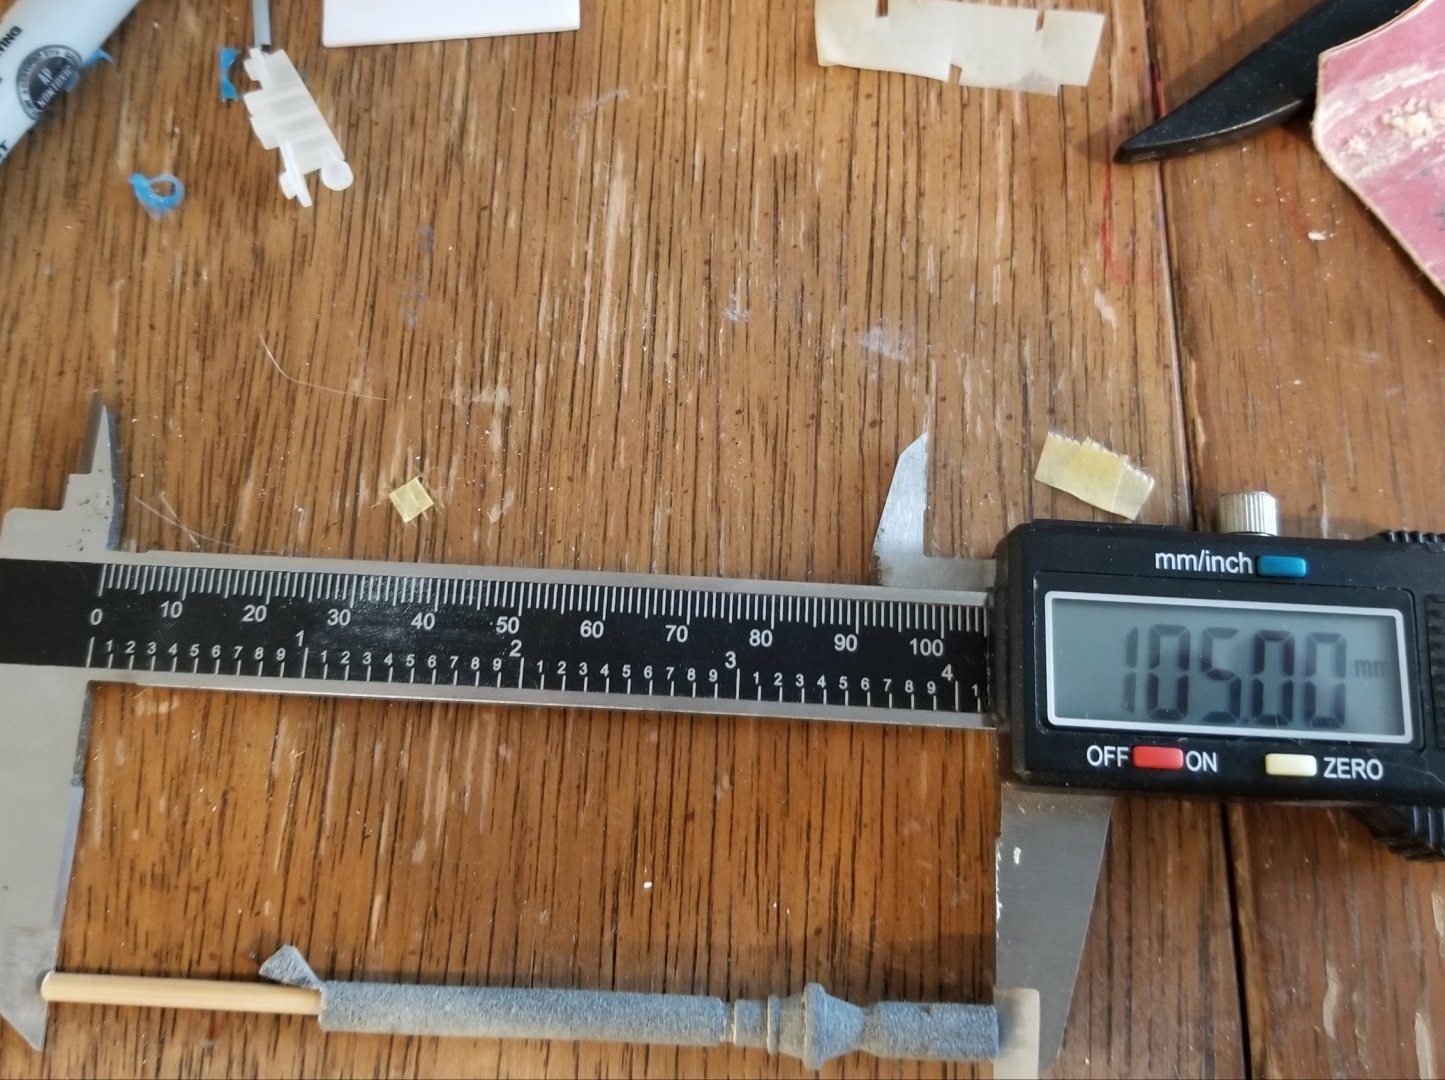
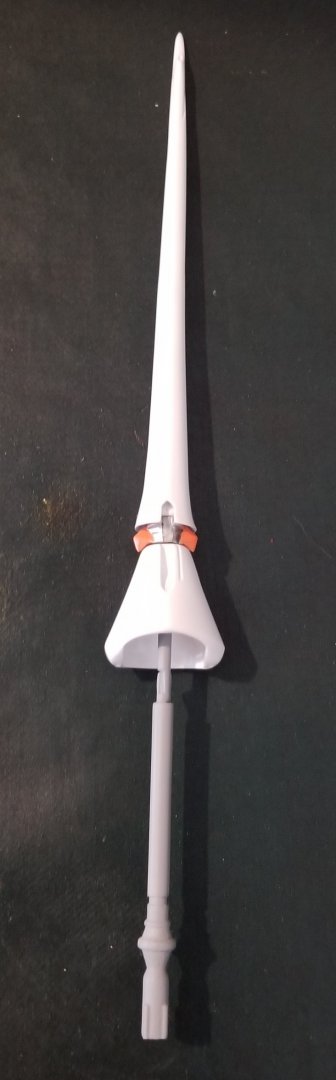
Ok, so this is a bit of a work through with an experimental piece that actually came out way better than I had planned. Because I have Lways been a little iffy on a plastic handle being attached to the lance, I thought, "how can I put a solid piece of material on its place, and be able to carve out the part for the hand?" Well, I did some mods to the lance base, and made a 3mm diameter hole down it. Here is what it looks like So, it looks very rough, and needs a lot of paint and sanding to fill in the sponge like material. But not now. In my search, I looked for 3mm pins, pipe, something that is strong, but would be straight and do what is required. That's when I found the wood pieces I put my painted parts on. They're a little wider, but they're rough so what better way to fix them, then to sand them down. Now, it needs to be borrowed out a bit where that triangular piece on the printed part is, and about halfway down. I used an exact, the a file that is the perfect width. So this wood is actually quite strong and durable. Once everything lined up and the wood was slim enough to slide all the way in, here you go. Now the full length of the lance handle happens to be 105mm, so I now not the tip about 106cm, and sand it til it's just right. I used crazy glue to put that little triangle piece down. Crazy glue is great on two porous materials such as this 3d material (which is also very sturdy and durable) and wood. From this point, I must've used this grey primer and sanded about 6 times before it became smooth. After that, I put it together with some fine touches, and here she is. Hope you guys like it.

-
If the dye method is used, the only drawback I'm seeing is that you can't really get that completely smooth look from that type of material. Because it has a sponge-like composition, it can never be fully sanded smooth. The only way to fix that, is by painting, or filling in. What you could try, and I haven't tried this yet, is to dye the part the color you want, then put a gloss clear coat on, and sand. You'll need to repeat it until the sponge makeup is filled with gloss clear coat. Then it should look a lot smoother I think.
-
So, all the new fixes from the second build have been made and uploaded? I may start buying the pieces for this kit now.
-
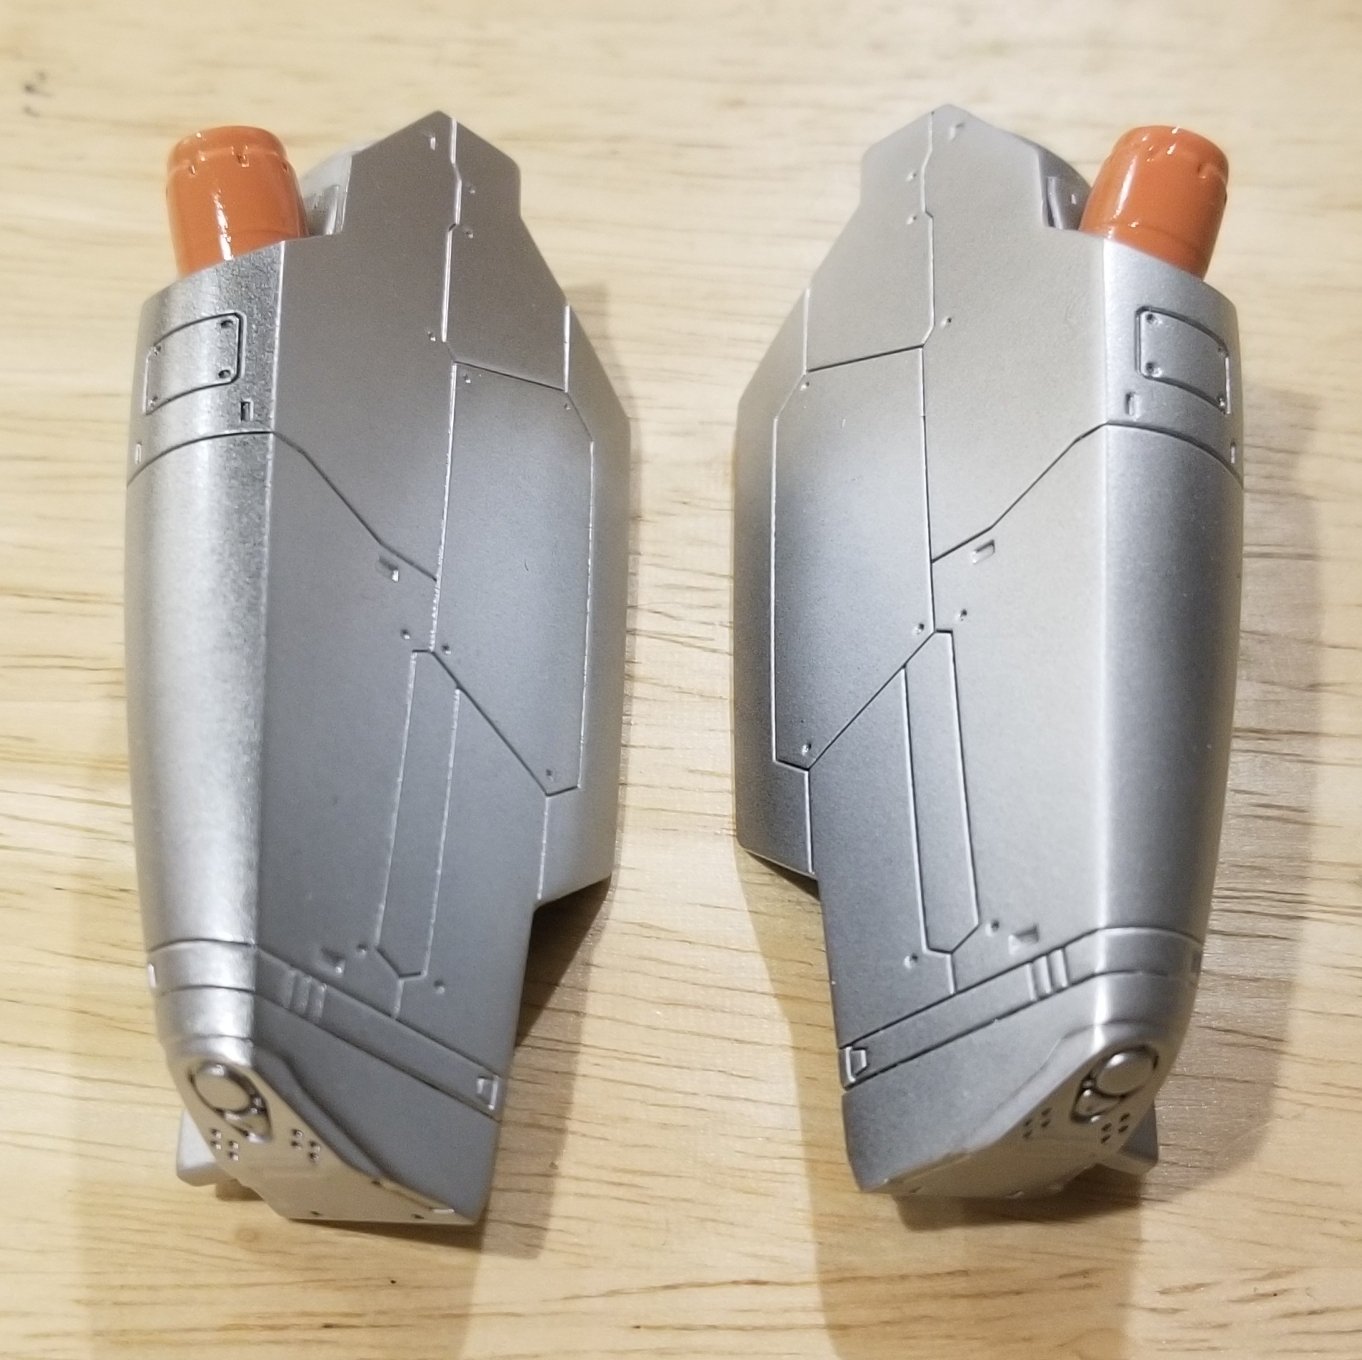
Thanks. That's a lot of light sanding, with primer, thinned out gloss black, and thinned out high metal chrome paint. I have one bottle of it left, and it's painfully hard to find locally. Nevertheless, I'm hoping to have more done tonight on the lance. I'm going to put some gold paint on some trim, and get the attachment piece on, if I can find my dremel for the steel prongs for magnets.
-
The head needs to have the current glass popped off. Mine luckily came off easily. It takes some work. I think the official instructions on the page may explain how to take it off.
-
These are really hard to make without making a recast of the part to replace it with. I have clear resin, but without an original working canopy that is aligned properly, your chances of fixing it aren't too great. Perhaps one of the 3D CAD guys here can make a copy of one for you, and you can order it on Shapeways. That's probably your best bet for a fix.
-
If you wire frame it, you could actually bondo it all to smooth it out, and then paint her up as she's supposed to be painted, and you'd have a pretty legit looking statue.
-
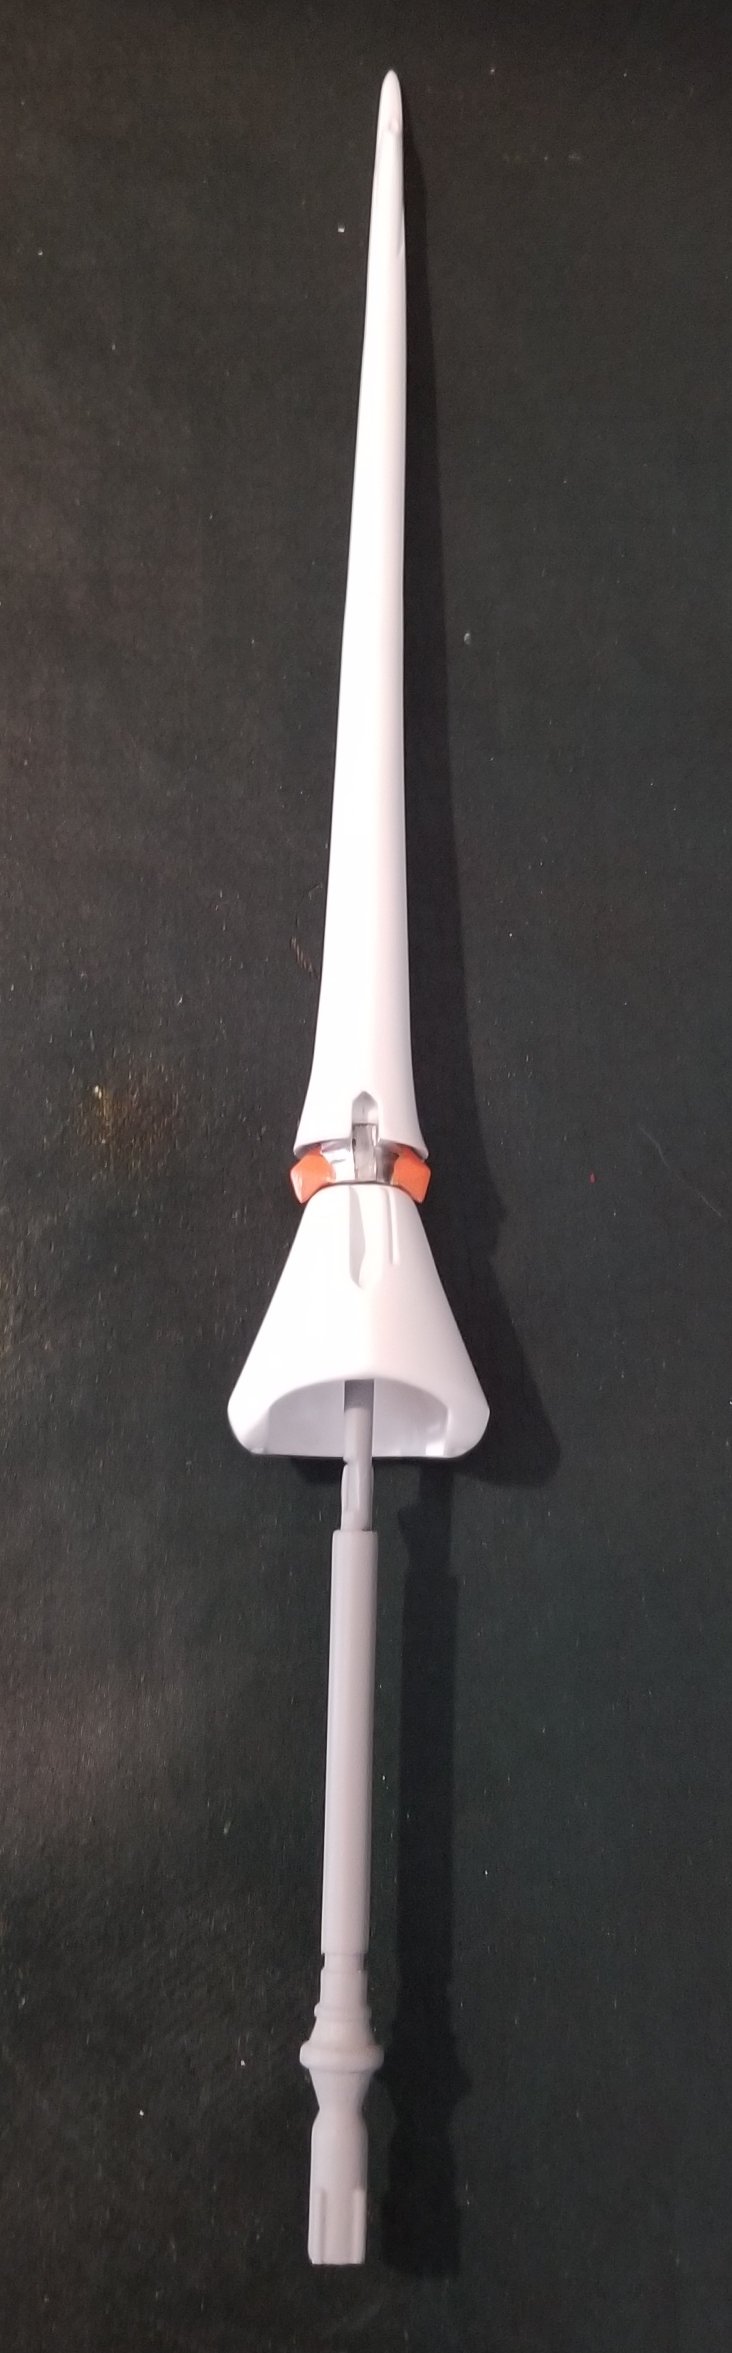
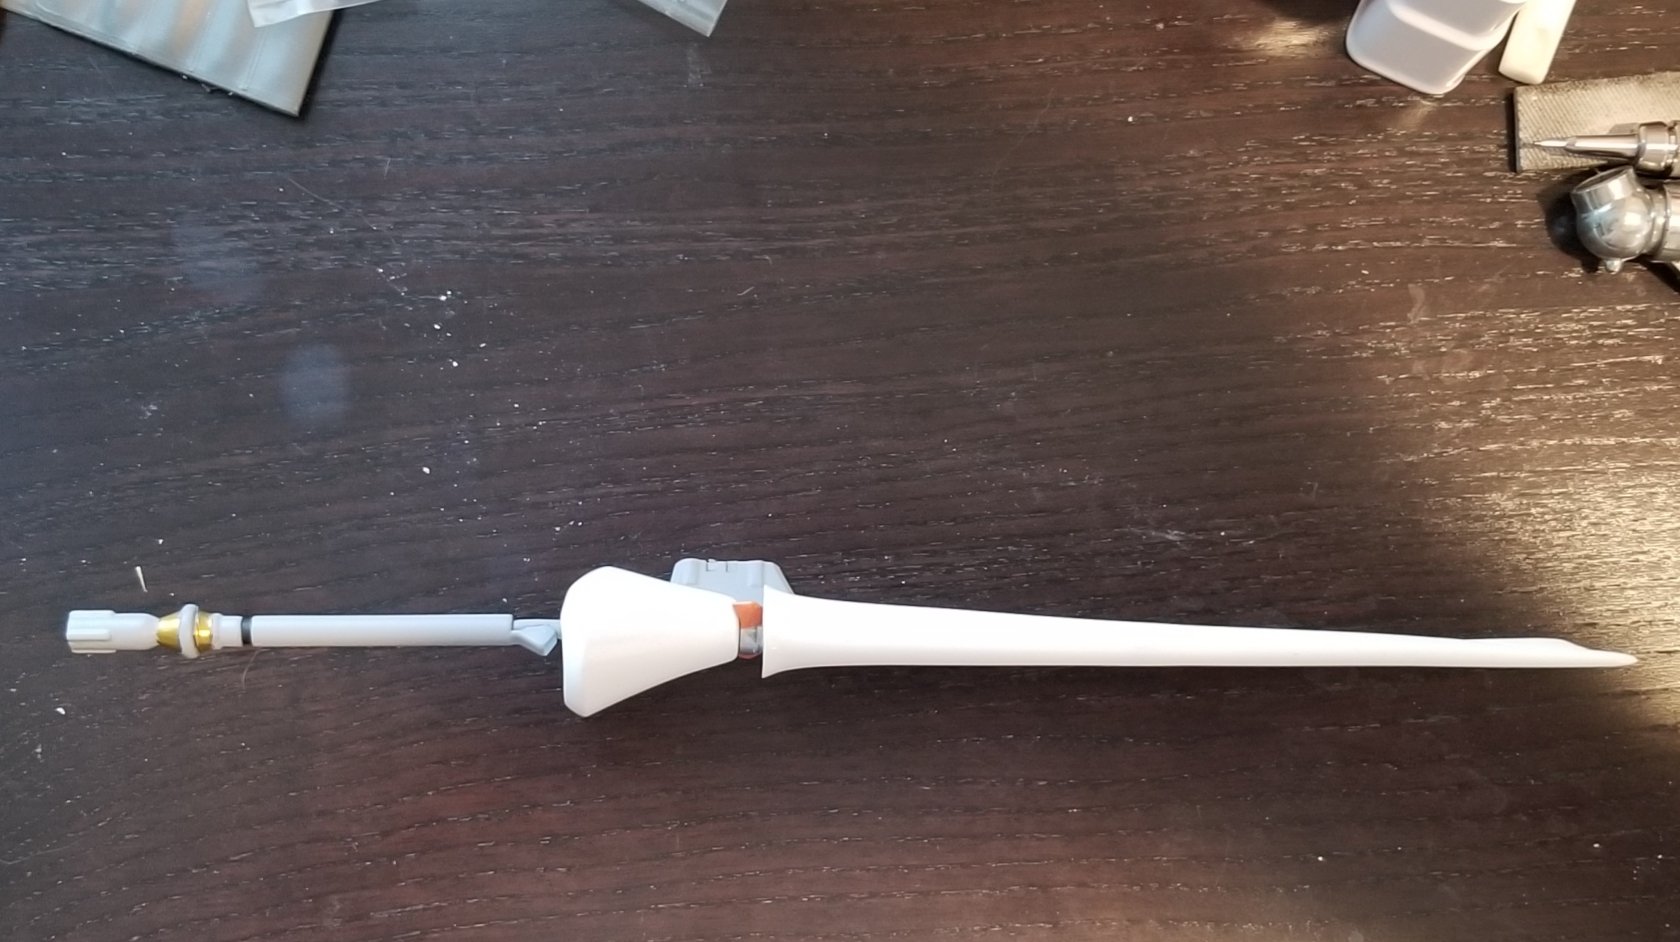
So, it has been awhile, but I started putting together the kit I designed, and while I've already put up pics of the head, the lance is now to a point where I can put up pics of the work. Enjoy. Sorry if it's a big pic. I'm doing this from my cell phone. I just need to put the armor connector piece, and paint in some details, and it's all done. I've also got a chrome tint on the parts that will be on the armor.
-
Now that's what I'm talking about. Being able to put them in some of their classic poses would make them really worth building. I need to learn about papercraft.
-
I can't wait to see the next results. I'm looking forward to building one of these.
-
Are they able to pose them in ways that actually have a bit more life like look and feel to them? If so, it sounds like a fun project that I'd like to take on. I'd probably work on a Sheryl, since I can't afford the roughly $18,000 price tag..
-
The wings look like they are extended out more. Is that the case?
-
Is this going to fully transform? If it is, are you going to 3D print the mechanical pieces in metal?
-
Geez, I want this terribly. If all goes well, it'll be an easy purchase when the new 2.0 version is examined.
-
None of this sounds good. Doesn't Paypal have a rule against businesses preordering so far in advance? Basically, by the time the thing was released, it was already against the wire.
-
Lately, almost every DX (yes, with some exceptions) have eventually gone up. Most Arcadia releases go up, except in case of a re-release. I remember selling an Alto YF-29 with armor for over $500, then literally without any notice, a second release was announced right after. Then I think there was a smaller 3rd, but I can't remember. your best bet is to always get in early if possible, which seems to be harder these days. Macross has made a bit of an increase in popularity for all series with every new series. Truly, a rising tide floats all boats. In regards to the news of a possible new stock of these coming in, I certainly hope so. I thought of backing out because I can use the money, but having one and being able to resell it later isn't a bad 2nd option if I get to that.
-
All very valid points to take into consideration. Even if this was the main hero valk, these things pop up well after they're gone, and at that point, just becomes a matter of simple searching. If that becomes a majority of all of our tasks for this thing, I'll gladly wait it out. There's way too many other things in the list of wants that I would like first.
-

Macross Δ (Delta) Movie Gekijō no Walkūre (Passionate Walkure)
Jasonc replied to no3Ljm's topic in Movies and TV Series
From what I'm gathering, no, it isn't common. The movie got extended due to theaters selling out, and for an anime in theaters, that's pretty big news. I believe there was even a 4D type of viewing at a cinema just recently, and that sold out. While the release of the BD is now confirmed for August, it's also noteworthy to include the fact that the Walkure 3rd Live will be released on BD roughly around the same time (well, autumn). The fact that the concert was performed the 3rd week of the movie release is significant, as a big part of the Macross franchise is the music. Having both coincide during the same time, along with the event at the Skytree, and several independent fan events will help push one another.