Jasonc
-
Posts
6319 -
Joined
-
Last visited
Content Type
Profiles
Forums
Events
Gallery
Everything posted by Jasonc
-
I would want one of these, but I'm not going to spend the money on it. I have one that's never been opened, so I'm good for now, and to be honest, the 0 Phoenix isn't my favorite Valkyrie. The SV-51 though, that to me, is a beast of a fighter.
-
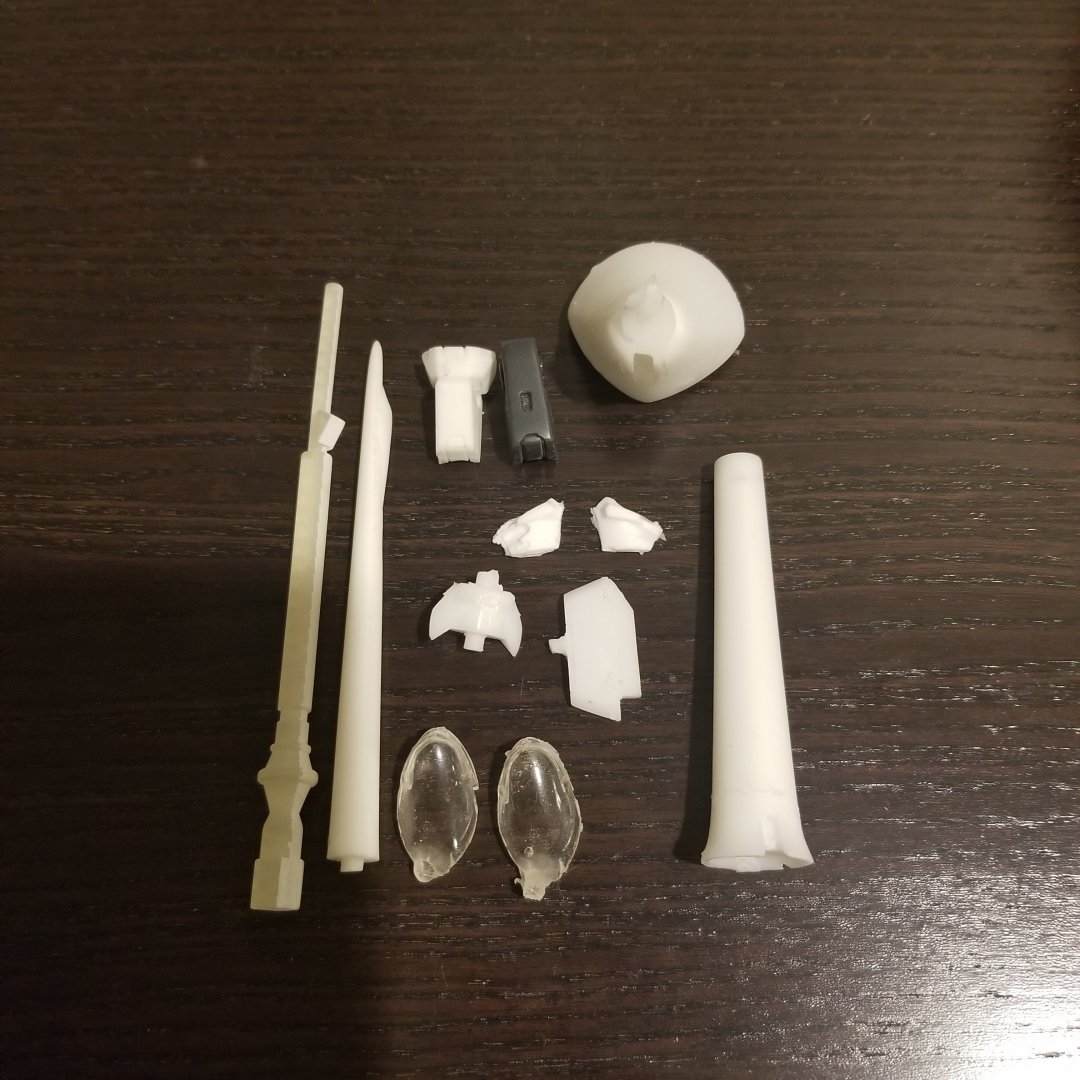
K guys, I have some updates for the set I created. It is finished and I have started recasting parts. If you are interested in a set, I am selling the set for $45. This will include all the parts specific tot he Paladin set. These are parts that I have designed, with small changes, but overall, can be interchangeable with the original set (if any of you have it). There is one part that I did not recast because I simply can't, but can be found on Shapeways. I did redesign another knee joint that looks like the original piece, so I can add that as well for the option. In any case, the set is done, and recasts of the original printed parts are being made now. If you want a set, send me a pm. Shipping should be very low, as the parts are light. I will also scan a copy of the instructions here, so that everyone can see how the parts are to be put together. I have enough for about 15 sets max, and after that, I'm not making anymore of them unless there's a large demand after, which I doubt.
-
This looks great. I can't wait to see the transformation results.
-
I'm going to keep it clear. The reasoning is that I don't mix enough clear resin to put any pigment in. Pigment messes with the integrity of the plastic, and because I use such a low amount each recast, I don't want to make it soft. Clear resin already is kinda flexible.
-
I preordered one. It looks great, and after seeing it on display in Japan, it's a definite buy.
-
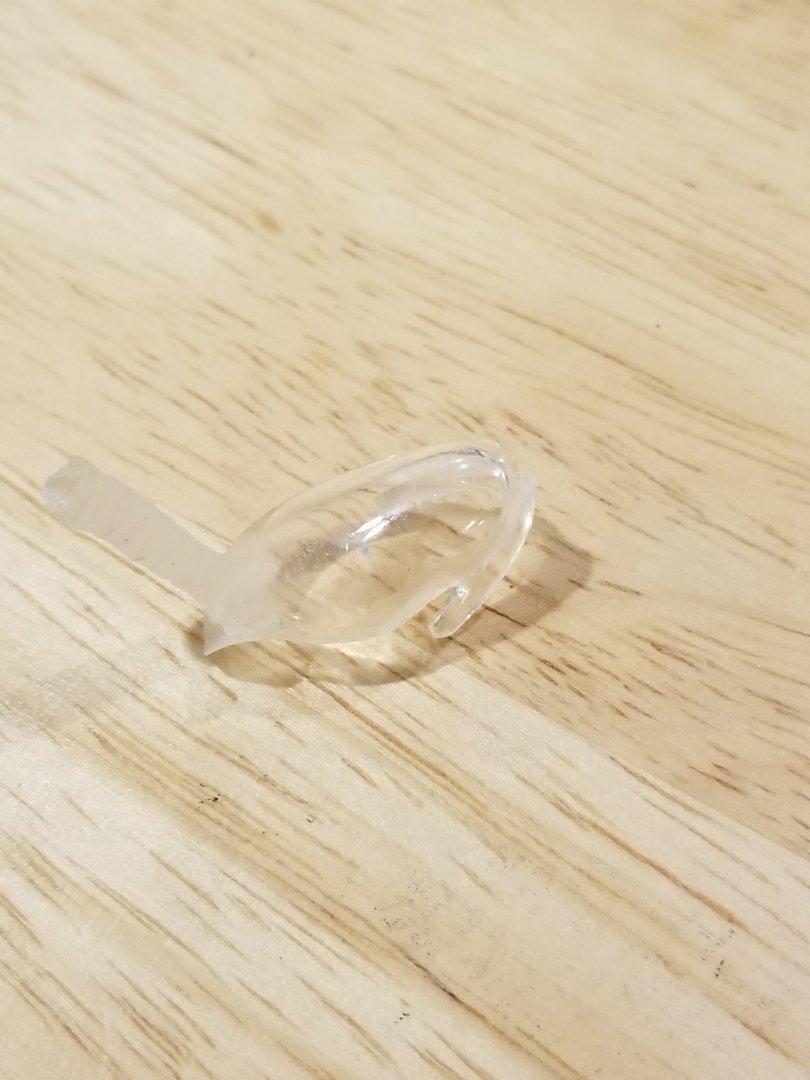
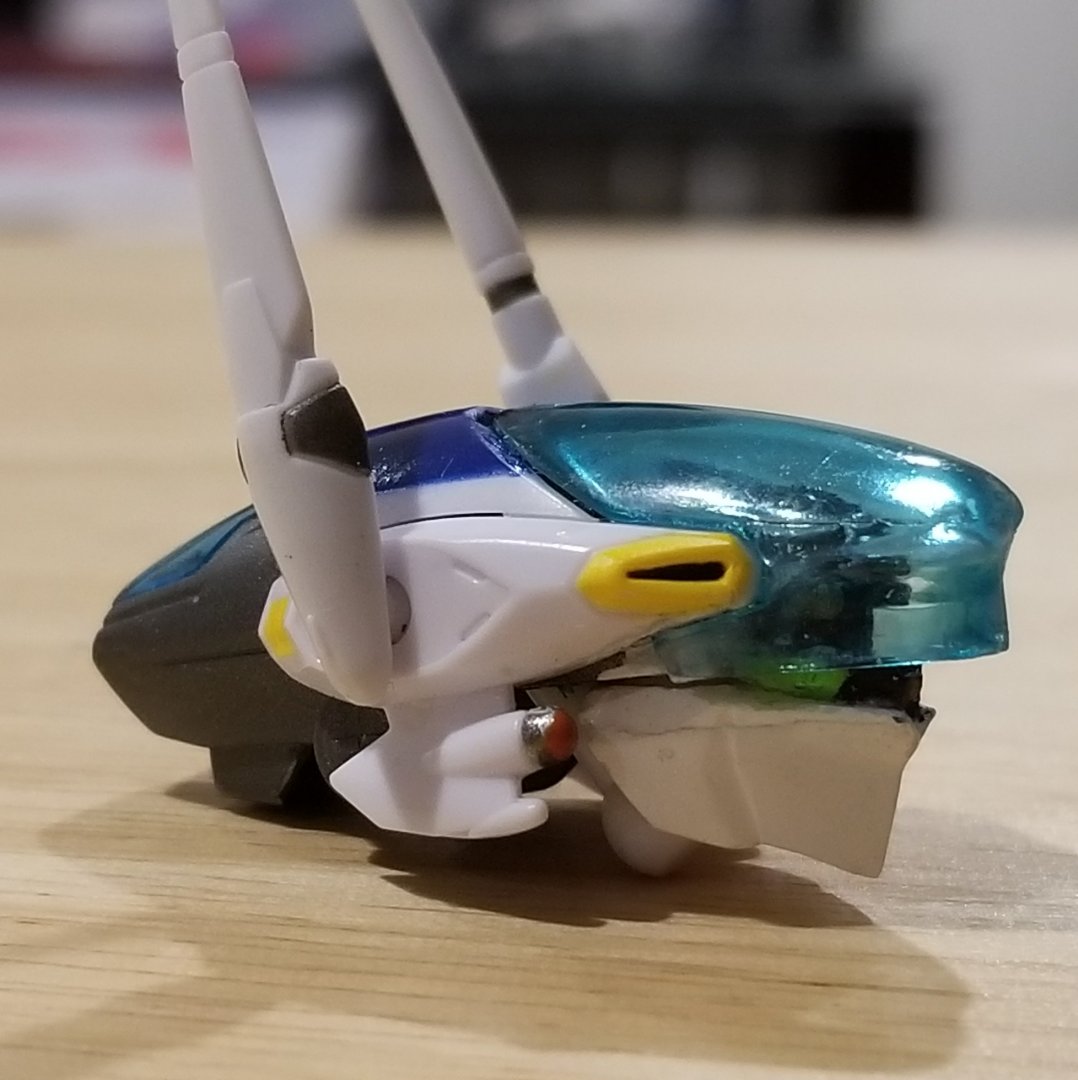
I will. I'll try to do it during the week. I've spent the better part of 4 months tweaking the angles and measurements of the front head glass just to get it where it is now. I'm quite happy to say that it now fits and works as it should. Dome may ask why I'm recasting it, instead of just putting it up on Shapeways. Well for one, you can never get this clarity in any shapeways print work. This allows me to continually recast them and not have to spend a fortune getting any sort of frosted xtreme detail parts made. Plus, FXD is extremely brittle. The idea is to have you guys not have to buy anything from shapeways, with the exception of 1 part that I simply cannot recast due to the complex design. In any case, this is an actual recast part, and you can see how clear it is. I'm very happy with this.
-
I will. I'll try to do it during the week.
-
I gotta see that. I used a little thinner on the shield, and bad mistake. Not the worst, but the best action is to just lightly sand it off, then used a liquid buffer, or a nail buffing pad. It worked out just fine that way. I will start this on the wings tomorrow.
-
For the lance to set on top in fighter mode, the original kit came with a piece that allows it to snap in that upper back part, but the way it is designed isn't to my liking. I am working on a way to make it slightly thicker so that I can either have it attach via magnets, or by some slim 1 - 1.5mm pins. With magnets, I can hide them, but I'll need to search and see what type of design I can use to optimize it for. If not, pins will be what is used. As for the fast packs, covering those parts is easy, and shouldn't bee too much trouble, but my biggest concern is taking off the tampo printed markings that are on it now. it's not the think one really wants to do, and they don't come off easy, but I haven't tried a good method yet. Maybe thinner? I have decals to replace them.
-
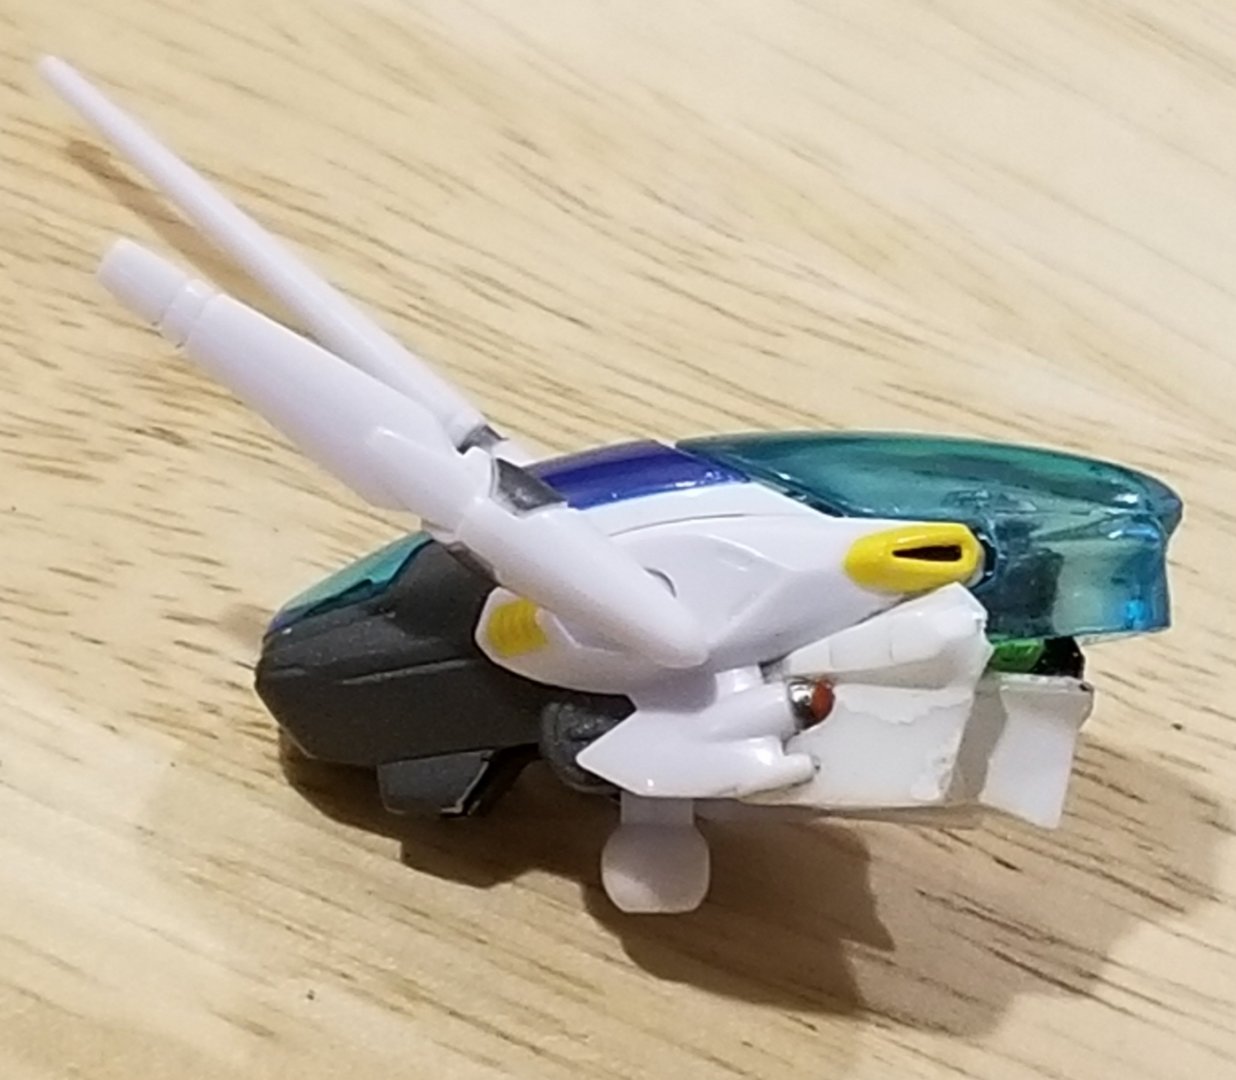
Well, the cheek guards I designed work perfectly. They do require some sanding and cleanup like all resin, but they fit smoothly (after two tries).
-
That's really cool. You're going to recast the parts you've made? For the head, I used Frameout's head. I can't wait to see the stuff you're working on in the near future. If you do work on anything new for this project, I hope you are able to do a wing replacement with the lead edge shield on the wing and the extended flap.
-
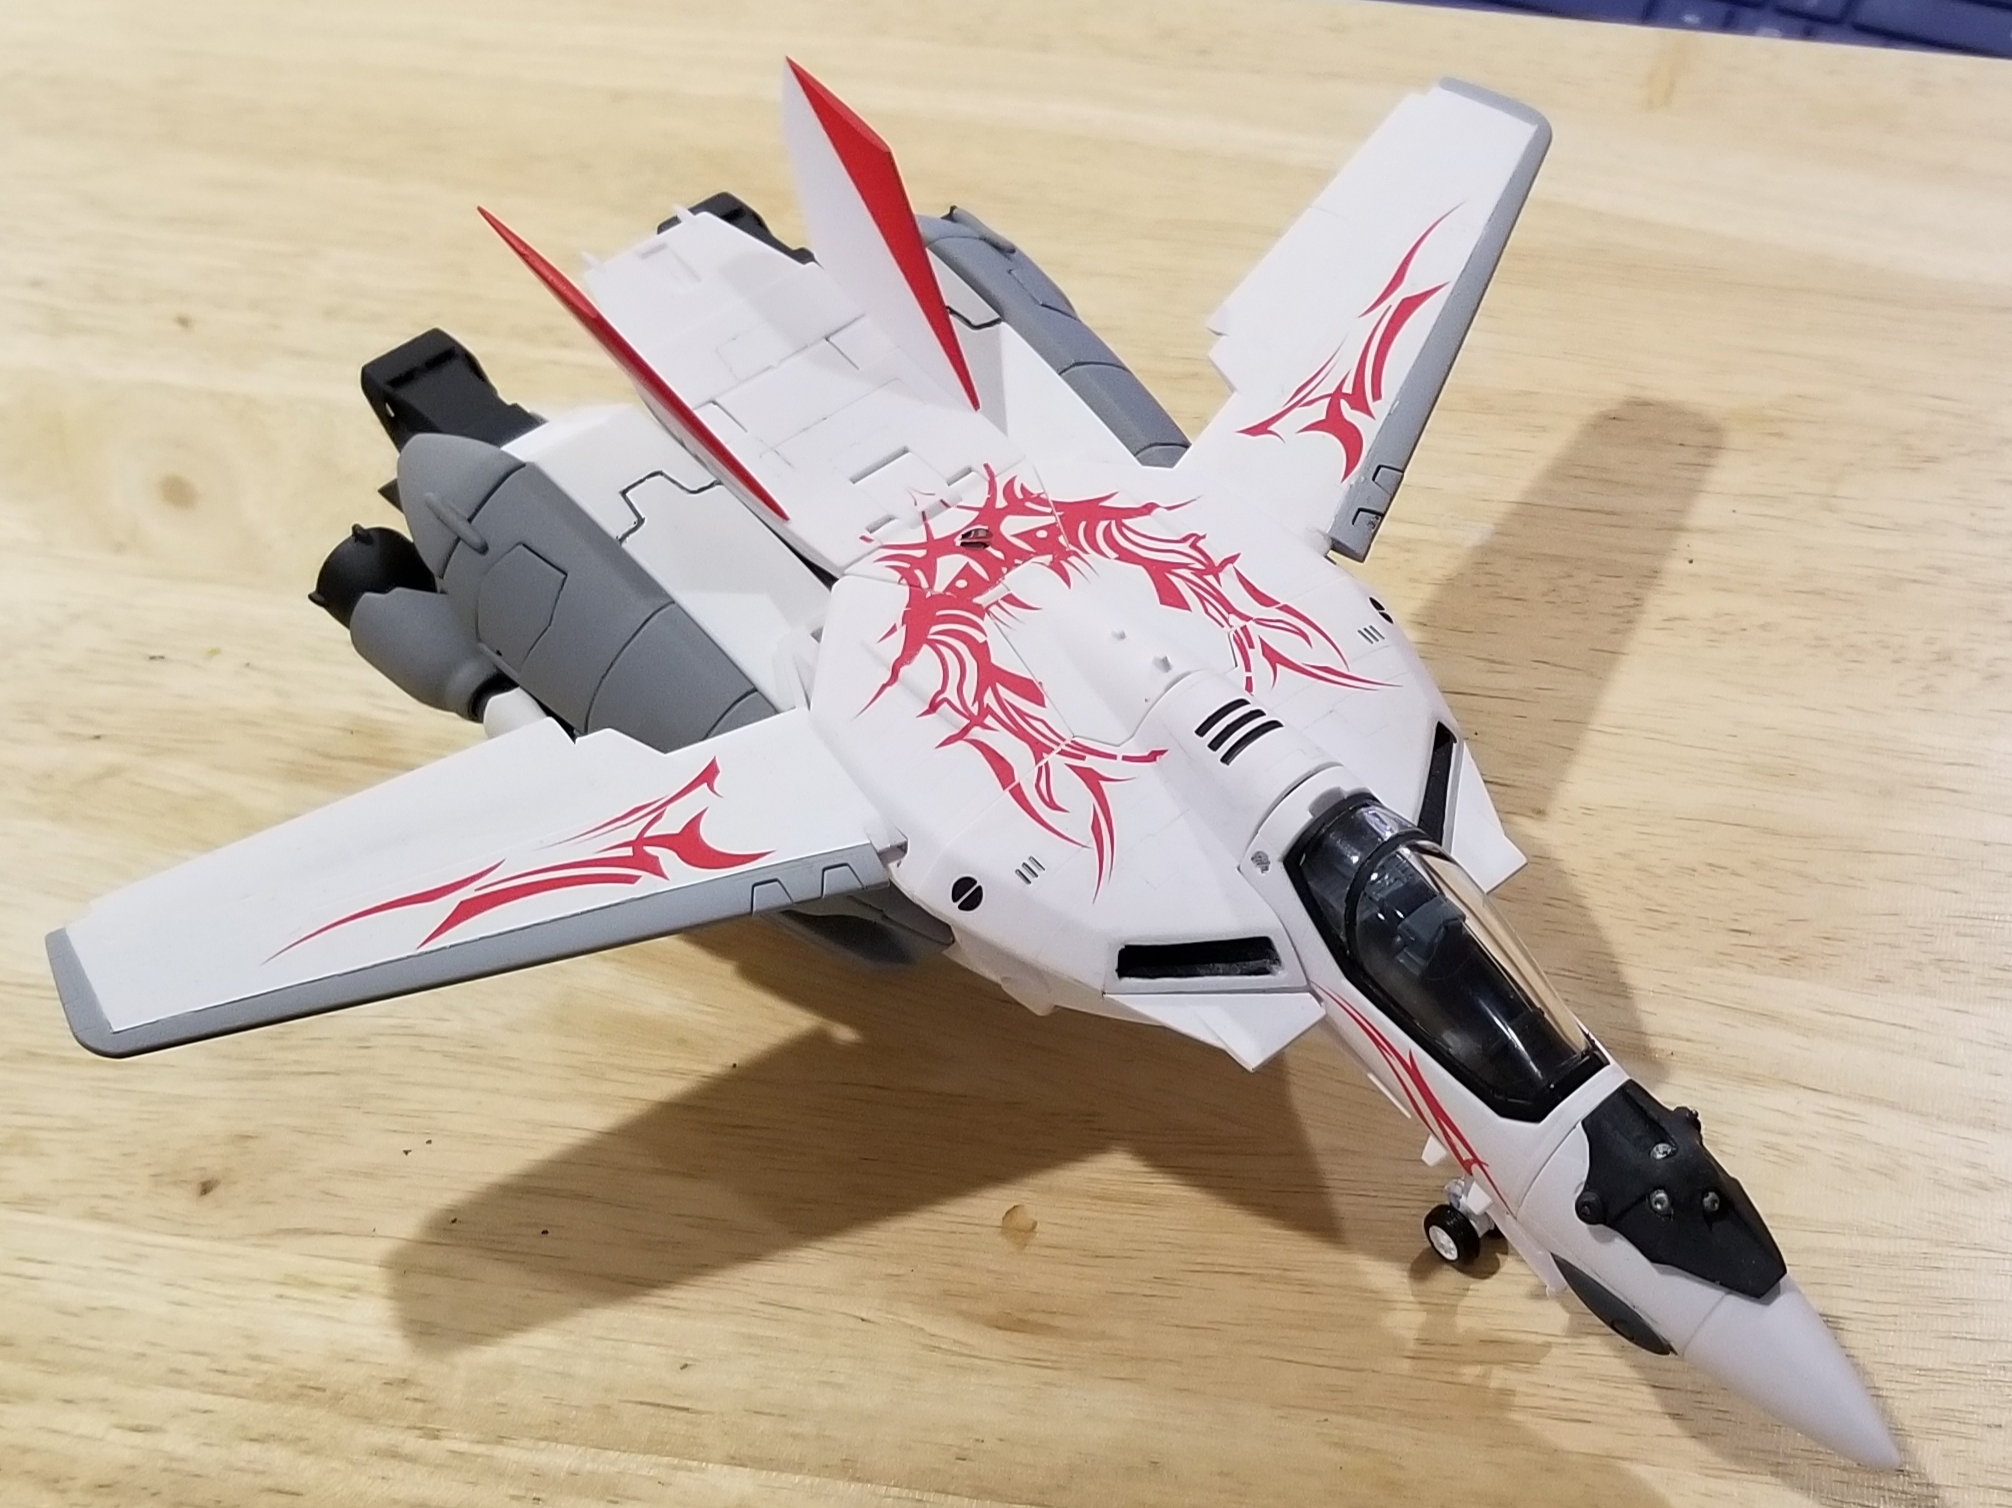
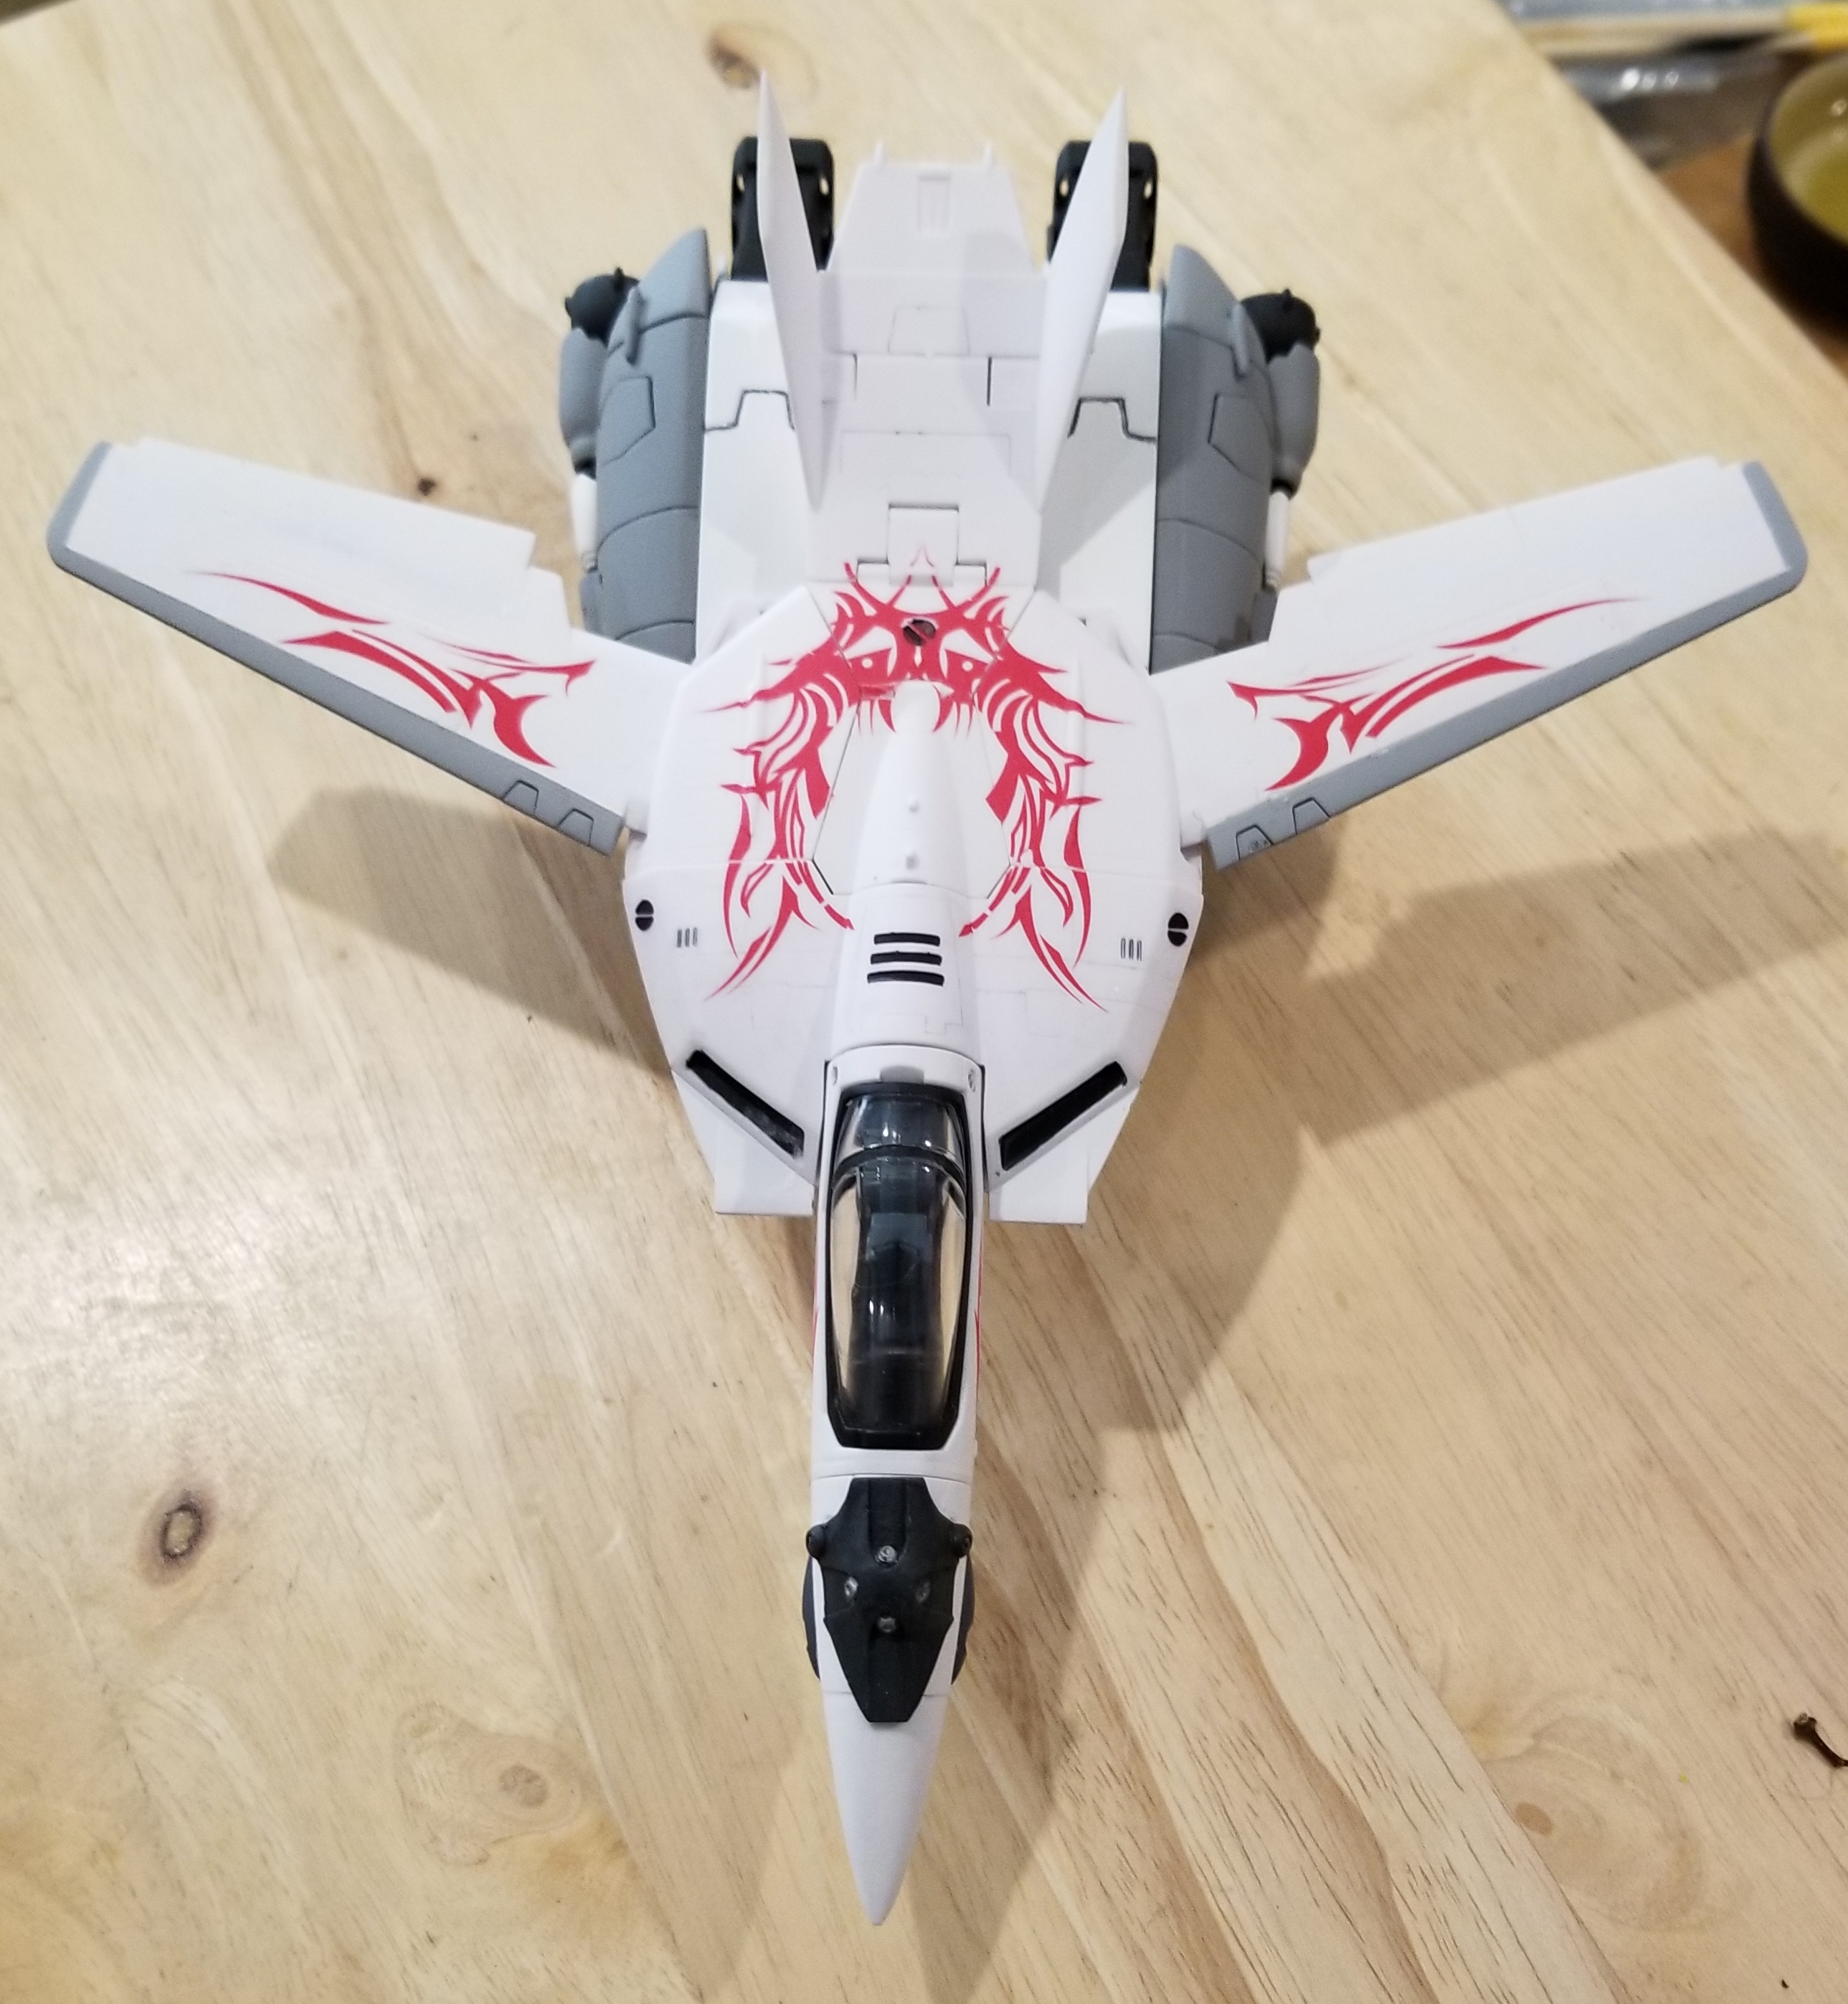
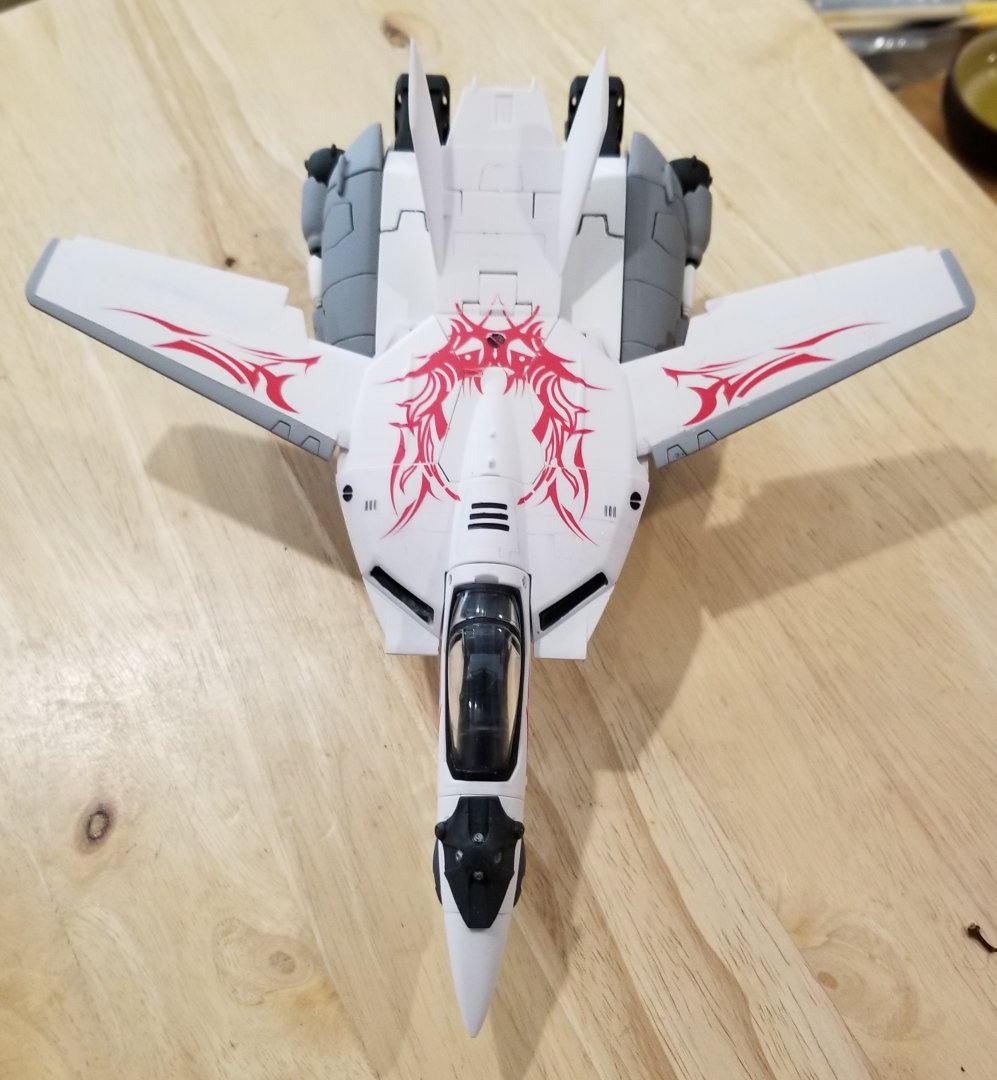
I finally managed to paint the tail fins and they came out great. I didn't need to mix any paint, but found a Mr Color that works very close to it. I haven't put on the body/wing base covers, as I'm trying to figure out If I want to redesign it to cover the inner part of the wing. I have the one you made, Xigfrid, so if I run out of patience designing it, I'll stick them on. So far, this is probably the happiest I've been with a custom project. Between the work Xigfrid did with the extras, and the parts that were from Frameout Models and the decal work, along with my own work that I'm proud of, I think it's come out quite well. I think my last piece will be customizing the pilot to look as he should.

-
Progress is going very slowly as of late. The reasoning is mostly due to recasting parts I've made and have tested out. After priming the parts and smoothing them out, a few pieces are now ready for recasting. there isn't much difference between the original parts and the redesigned parts, but what is redone works quite well. there is only knee connector for the left thigh guard that is a complete redesign, and it works great, but due to the way it is made, it will need to be ordered via Shapeways. Other than that, I'll be recasting a few sets of the redesign while working on my own stuff. I'll probably have a couple pics of the redesign parts soon.
-
Yeah, I have those redesigned as well. Those go on next.
-
I probably could, but it wasn't on my list of things to do with the the set. So far, I've managed to do all of the lance, and most of the face parts, save for the visor. Will do, and yes, I agree that we need more MtR stuff. I'm a huge fan of the custom work they did. I've got several of the pieces done, and once I'm finished, if I can get enough orders for it, I'll begin recasting the pieces. I'll need to figure out what I'm going to do with the clear visor, but once I get it all put together, I'll let you know.
-
Hey all. So, I was able to start on converting a Bandai DX YF-25 Prophecy into the Paladin version. I have the set from the WF kit that was done by Frameout a few years ago, and with me now being done on a project, have begun taking the super and armor parts of extra sets, and being able to use them for the kit. As I was not completely happy with the Frameout kit (not the best resin for a heavy lance), and parts that seemed to fit a little loose, I started 3D printing my own parts. They look similar to the original parts, but have differences in measurements and fits that IMO, make it slightly better. I've also used a sturdier resin that can hold up to the lance being the largest and heaviest part. So I hope I can make a version of this kit. It shouldn't be too difficult, and hopefully as I work on my build here, if anyone is interested in a set, send me a message. I may put up an interest thread later, but I can at least start to see if it's worth it. Anyways, without further ado, the project has begun.
-
the book isn't too hard to find. The thing that would be great to get would be the images, but I honestly haven't looked into getting it. I have a friend who will be translating it at some point, but I think his issue was that it references things in the Frontier novels. The Delta novels reference a couple things from Macross the Ride, so you can see how he wants to do it in order.
-
Interesting. Is that an image from the novel? Well, with that knowledge, I can re'clean thosse parts, and get them ready. I'll try color matching tomorrow.
-
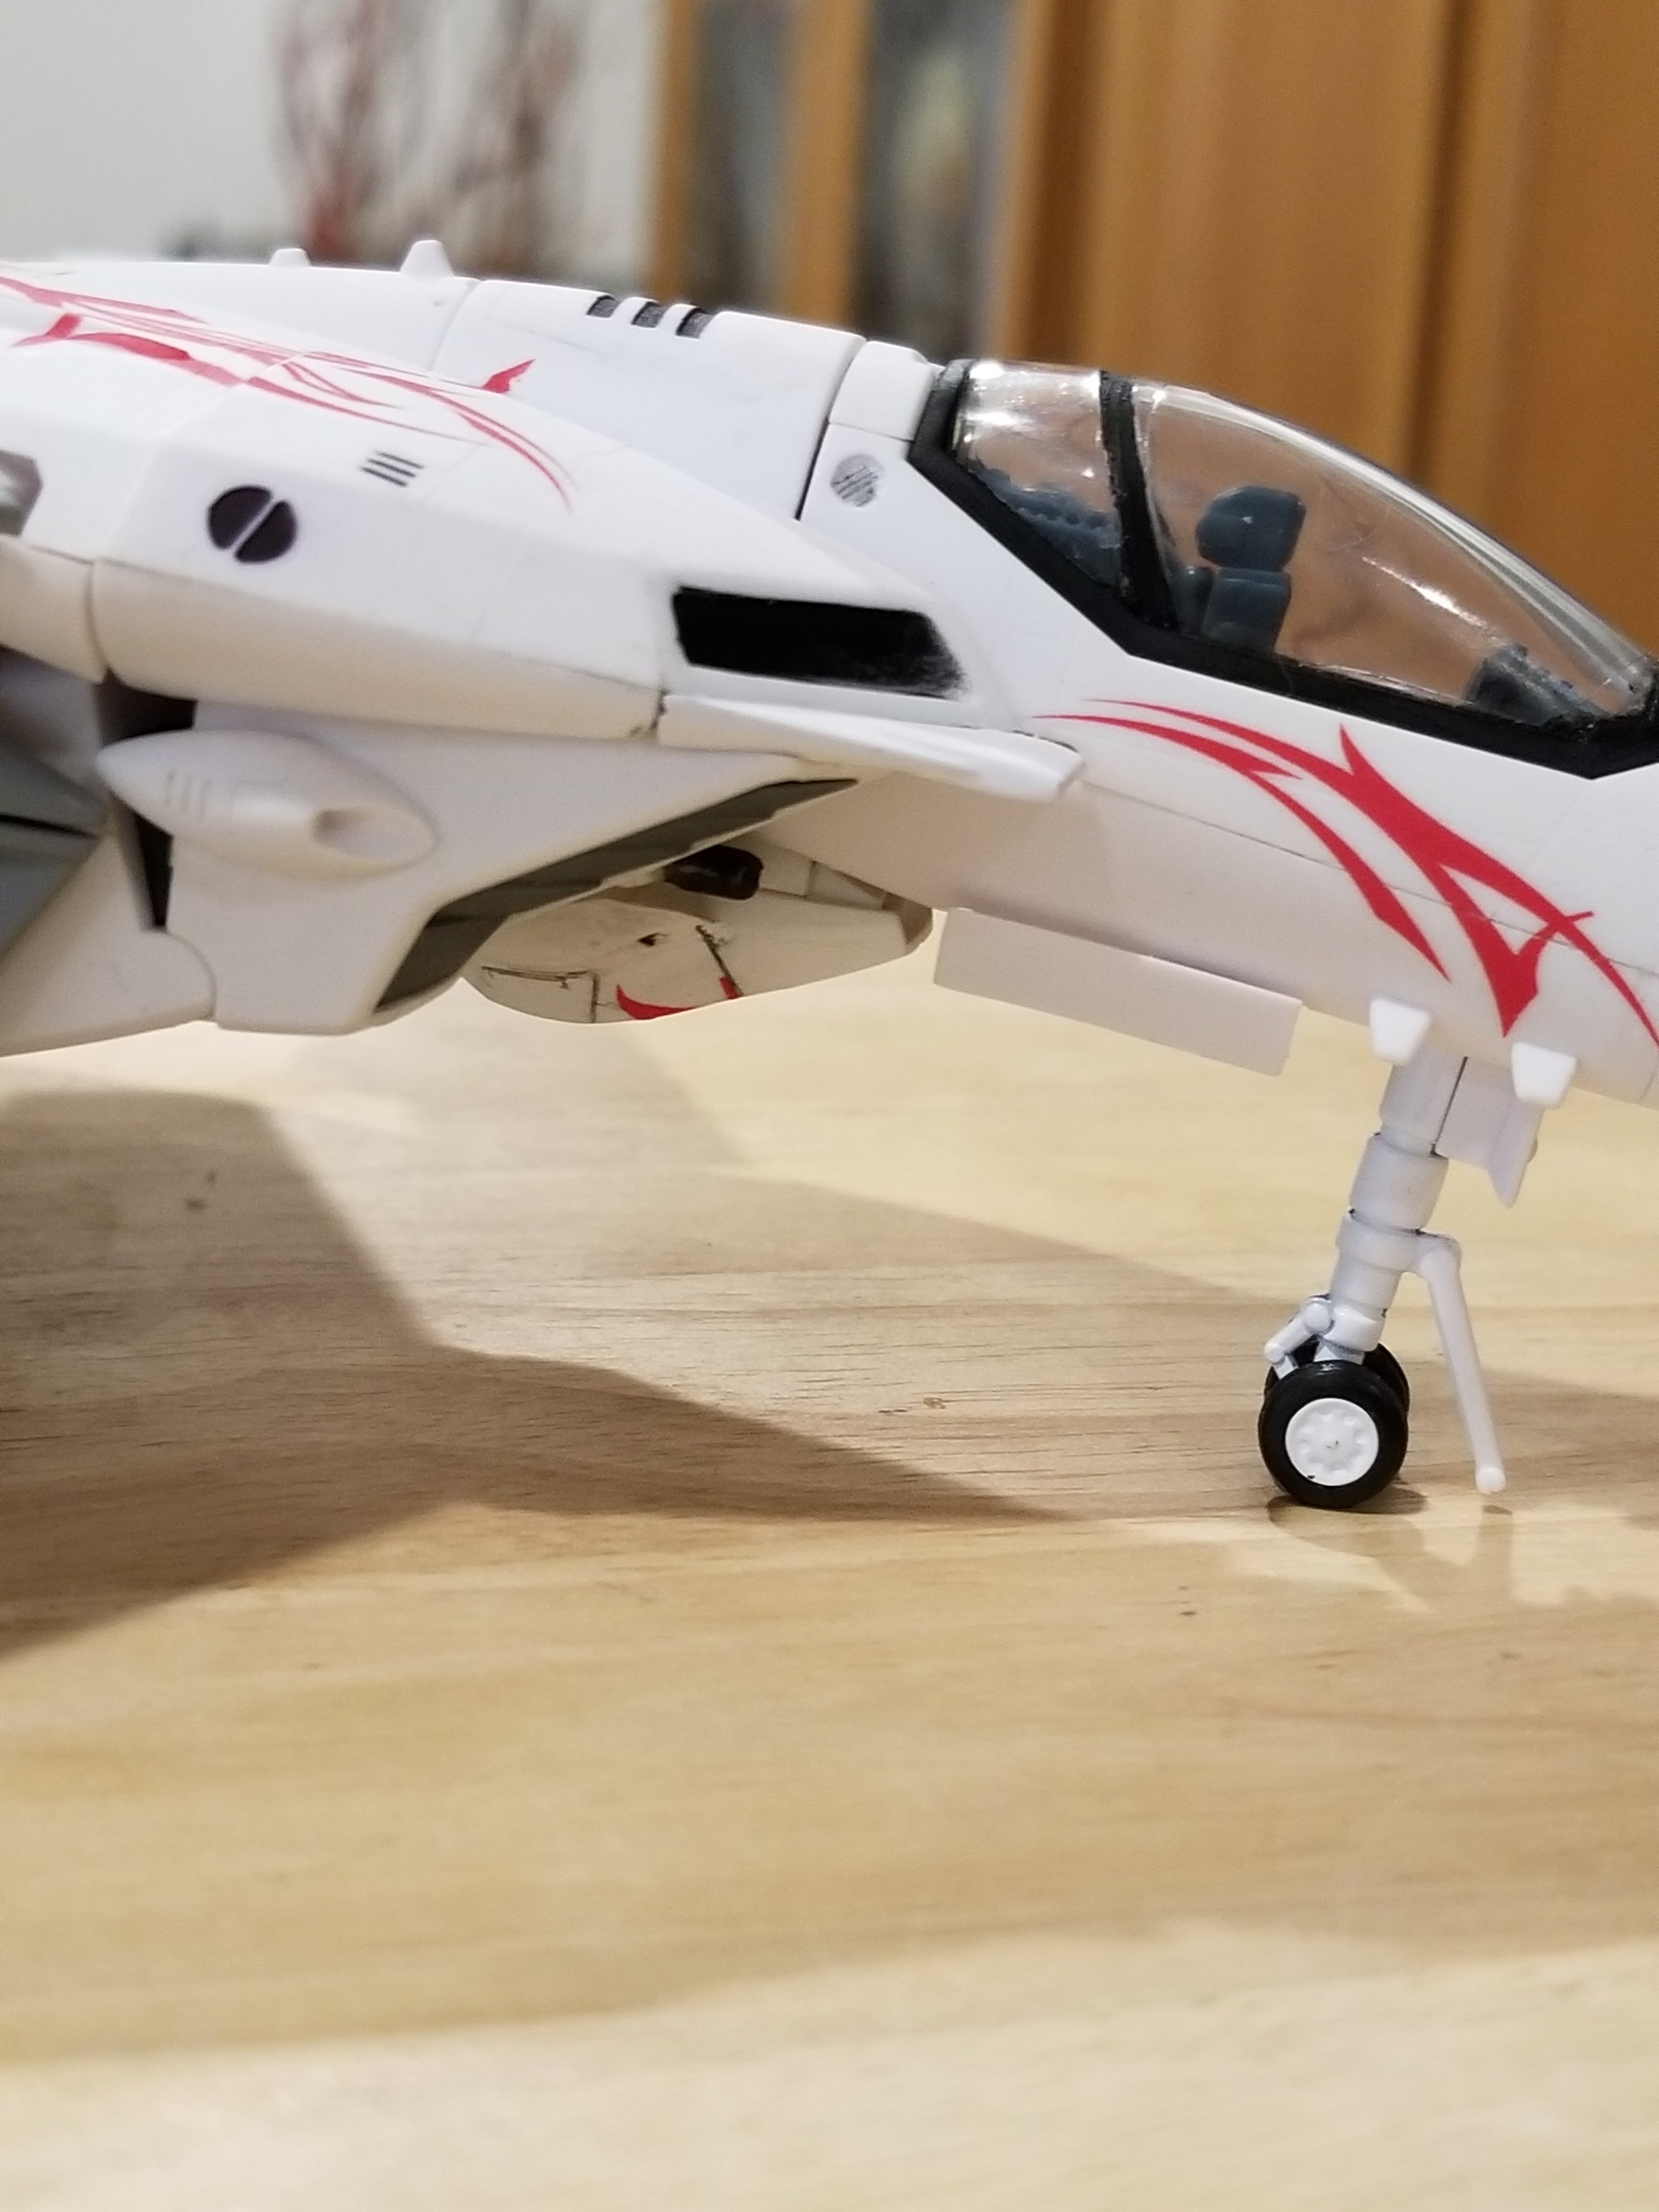
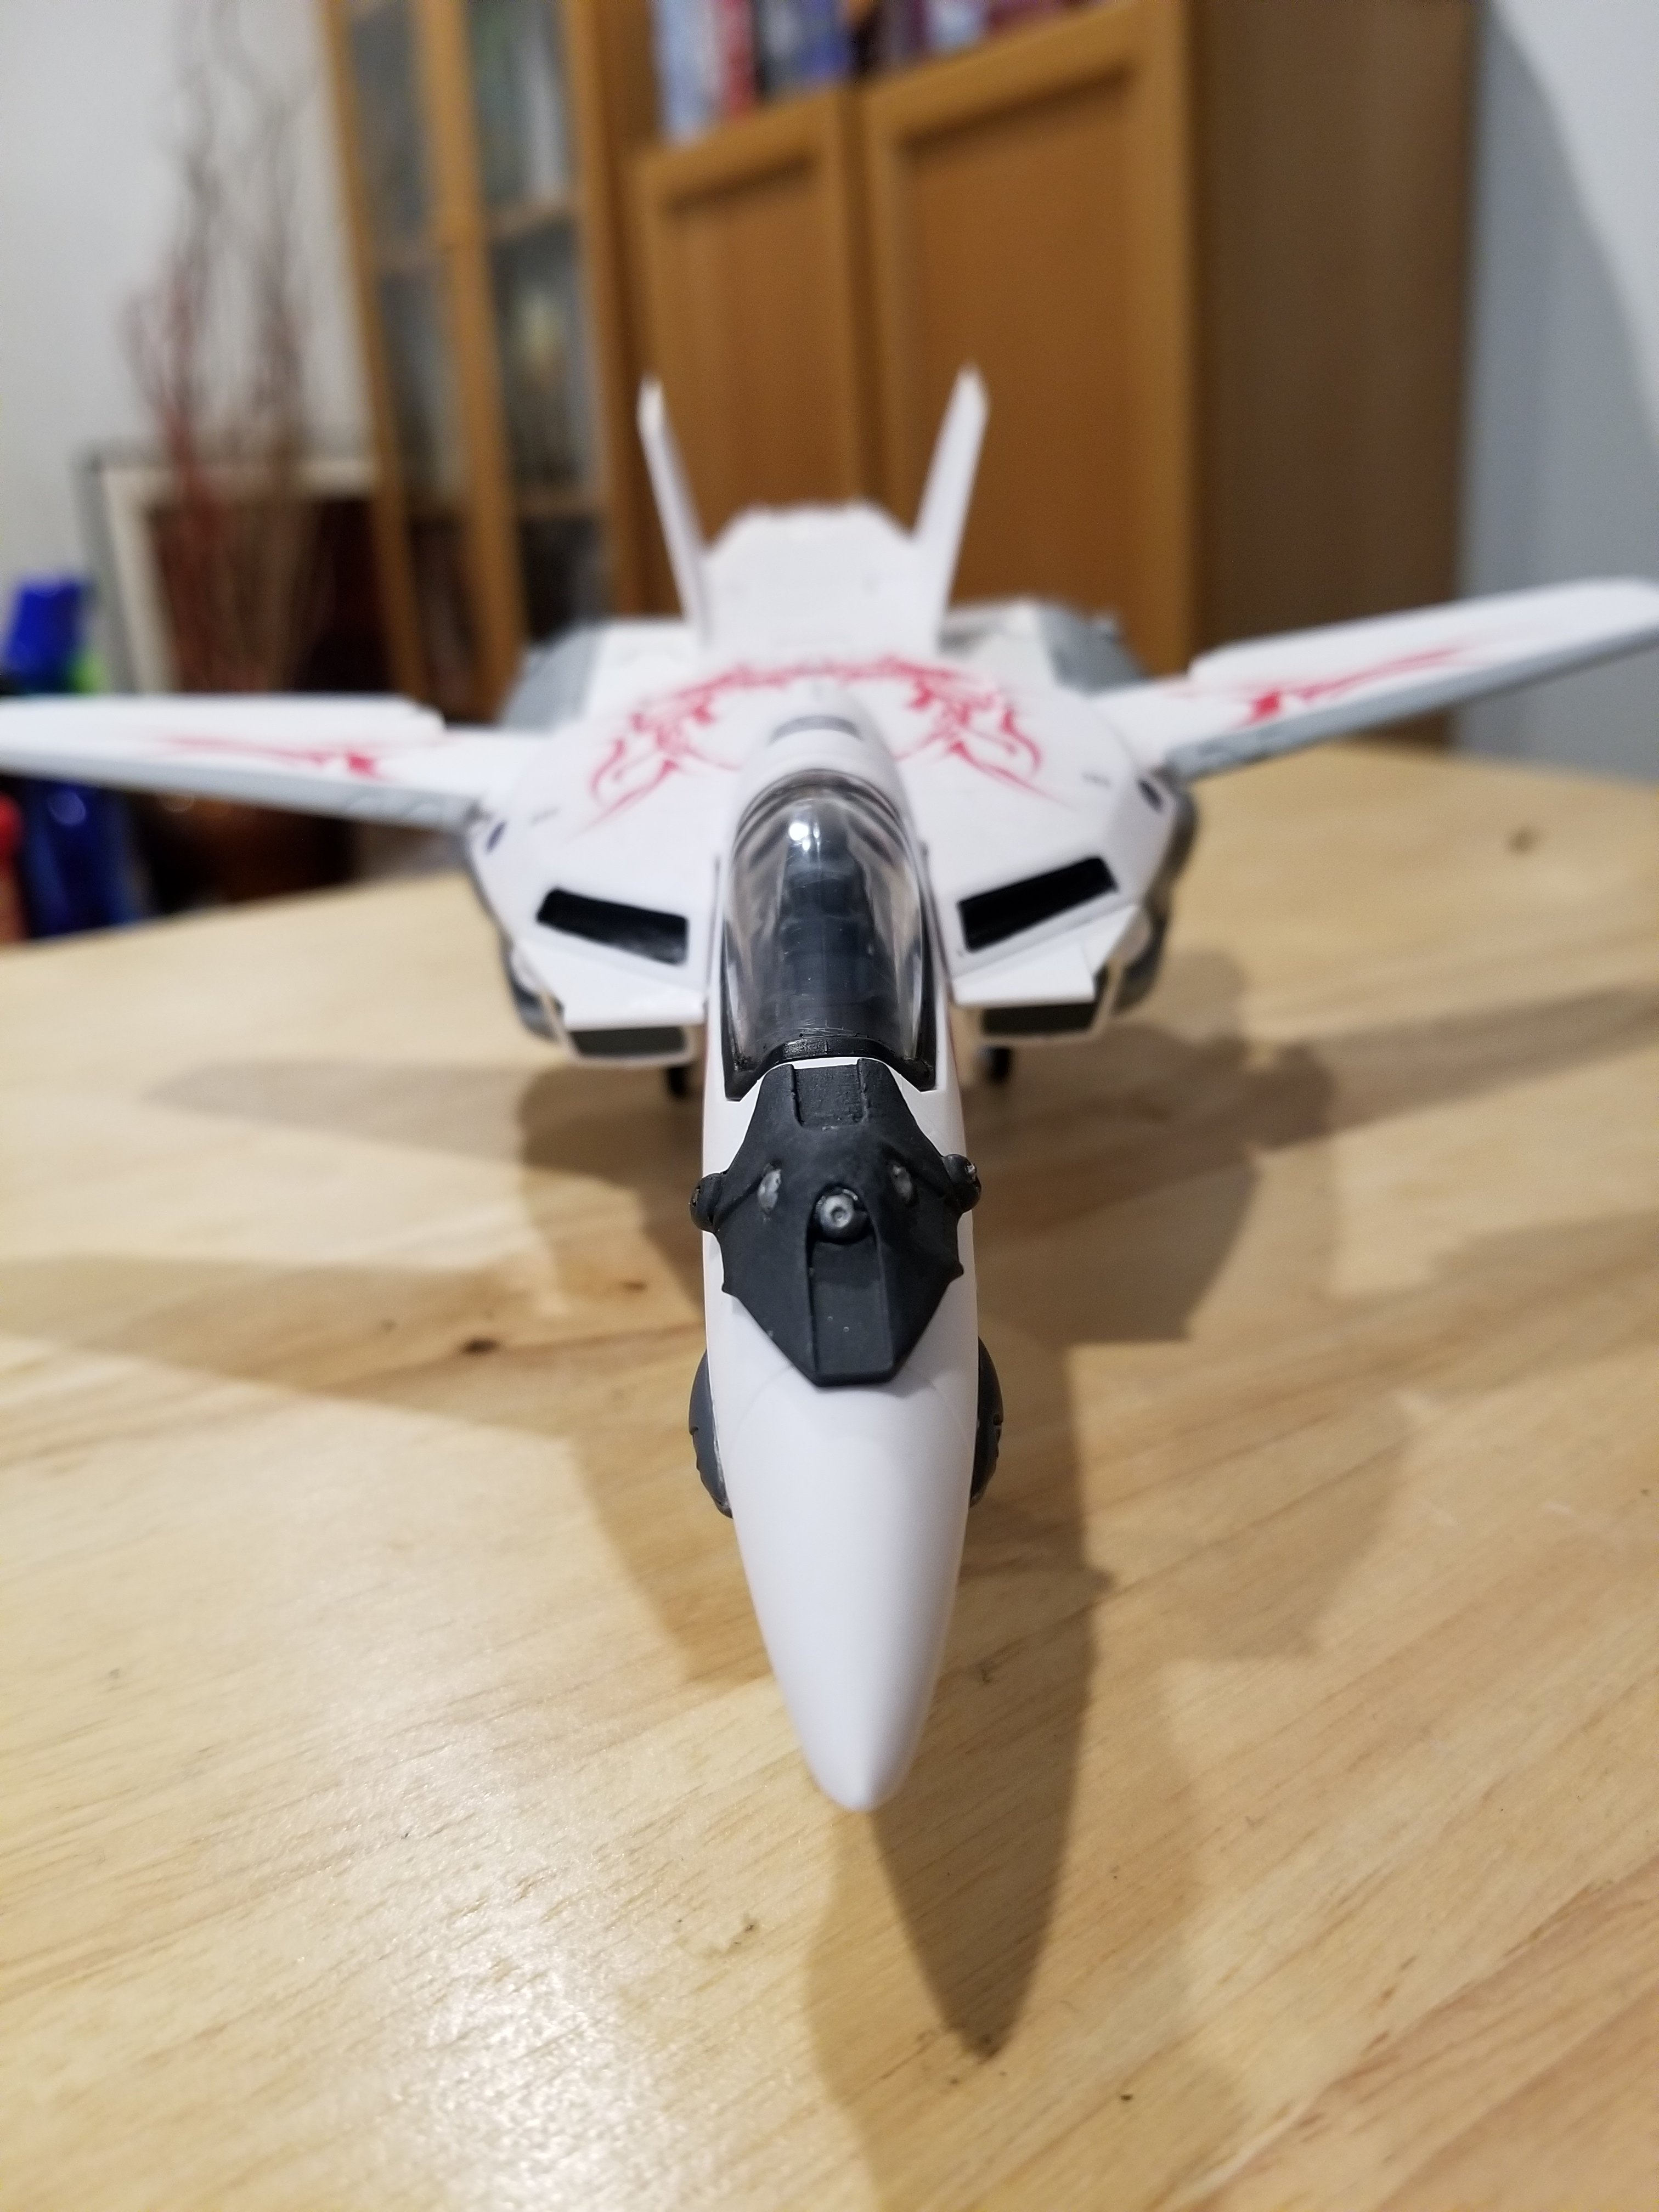
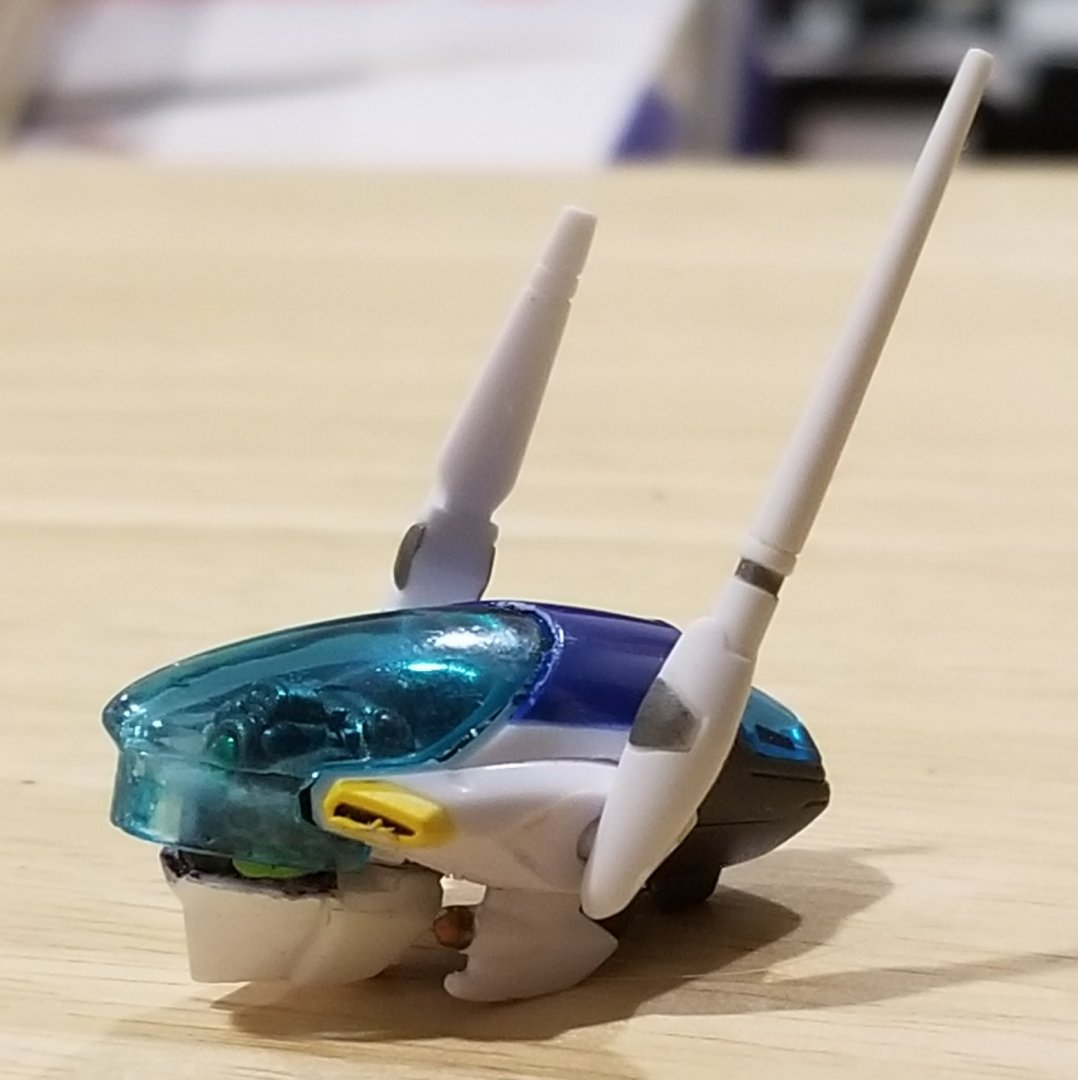
I'm going to trim it down on the inside so that it fits, or maybe make that part so that each piece is actually two pieces. I think they're meant to separate in transformation. I'm happy with how the color came out. Two drops of clear red, and about a dozen light grey in a 10ml bottle of white, with about 1/3-40% leveling thinner. All Mr Hobby. I just need to work on those, and colormatch the tail fins.


-
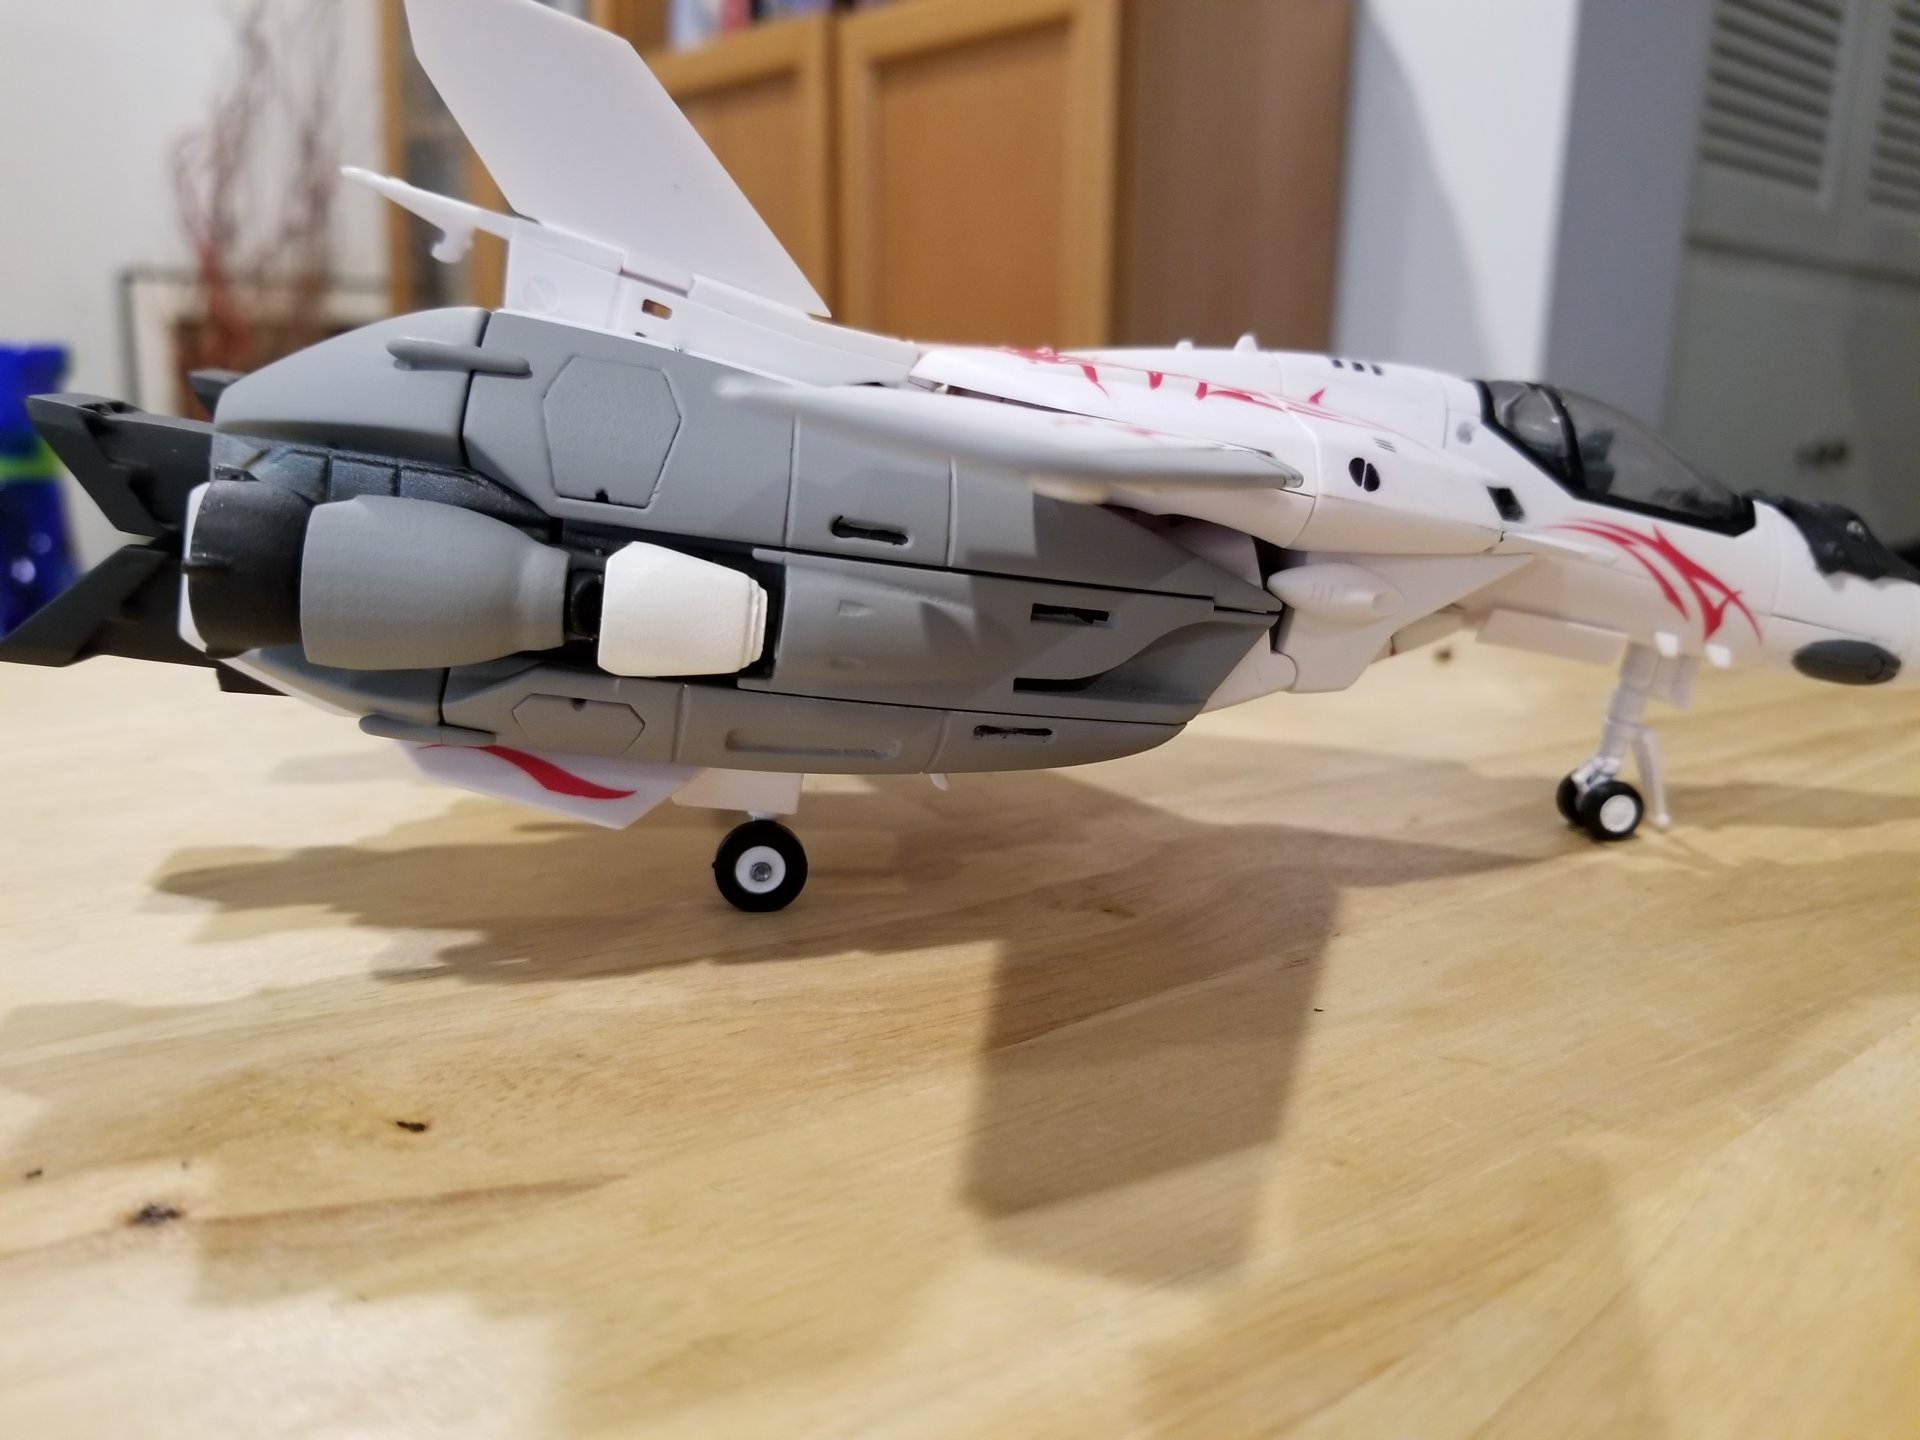
Here's the updated wings painted and some decals.

-
Picture of wings going up today, once I get home. they came out pretty good, so I'm happy with them, and while the color isn't perfect, it's really hard to tell the difference once the matt coat goes on it.
-
I'm making mine from the Yamato unassembled out. I bought a bunch back when they were initially released, and again when they re-released them. I believe they were maybe $100 or less at the time.
-
I used Mr. Hobby (Mr Color white, Mr Color light grey, and Mr Color clear red). Unfortunately, I don't have proportions, as I continuously kept adding in color until it seemed to blend to the inside of one of the leg pieces and the sprue. I tried to get the shade of white first, then tried to warm it with the right amount of clear red. I was hoping to put a layer of the color on today, but I had a bit of a family emergency, and I'm at work for some overtime, so it'll be tomorrow. I'll post pics tomorrow so you guys can judge it. I really need this to be right.
-
OK, not much of an update, but one nevertheless. I had a chance to buy more white paint, and work a lot more on color matching while waiting on another project to dry. This process is not for the light hearted. It's A LOT of work!!! I mean, I used clear read for a translucent pink hue to match Yamato's white, and more light grey than I needed before, but I think I got it. I did use the sprues the parts were on to test, and I'm at a point where just based on color, I can't tell where the paint is at first glance. It took roughly 2 1/2 hours to do this, while slowly mixing in the colors. there was one time where I put too much light grey in, but I had another bottle of white, so I just spent the last time lightening it. Ugh. In any case, that is finally done. I should sell this paint as Yamato white. In the last spray attempt, I also learned that 1/3 thinner in Mr. Color paint IS NOT enough. I need to almost half it to make is a smooth finish. I guess that's good because I'll get much more paint out of it, but this stuff dries so fast, it needs a lot of thinner, the consistency of milk. I'll be giving this a retry tonight (hopefully), and then waiting for it to dry to see how close I am on color matching. I really just need it for the wings, so it'd be strange if they're off. Once that's done, I'll be putting decals on the wings, and then of course, using a UV matt coat, which I've been putting on all the plastic of the unassembled Yamato kit. It does give it a nice feel and look, and should also help in the yellowing aspect even more than the science put into the hue and materials of the plastic itself. I did test fit the wings, and the flaps, while they extend out, don't collide being that I offset them just slightly. If anyone is interested in doing this for themselves, I measured the flaps out and made the replacement flaps that are in Shapeways. I can put them up for sale, but you may want to order them in Frosted Ultra detail or extreme. You can use WSF polished, but you might need to sand down too much and you'll lose some detail in it that it needs.
-
Looking great.