Jaustin89
-
Posts
170 -
Joined
-
Last visited
Content Type
Profiles
Forums
Events
Gallery
Everything posted by Jaustin89
-
So if I got an "order acnoledgment" e-mail from Ami Ami I'm good and don't need to stay up for NY right? Never managed to get an order in at Ami Ami before.
-
Uploaded a sprued kit; I left the individual pieces available for spares in case of any loss/breakage. Sprues are all attached to flat surfaces so it should be pretty easy to trim and sand down.
-
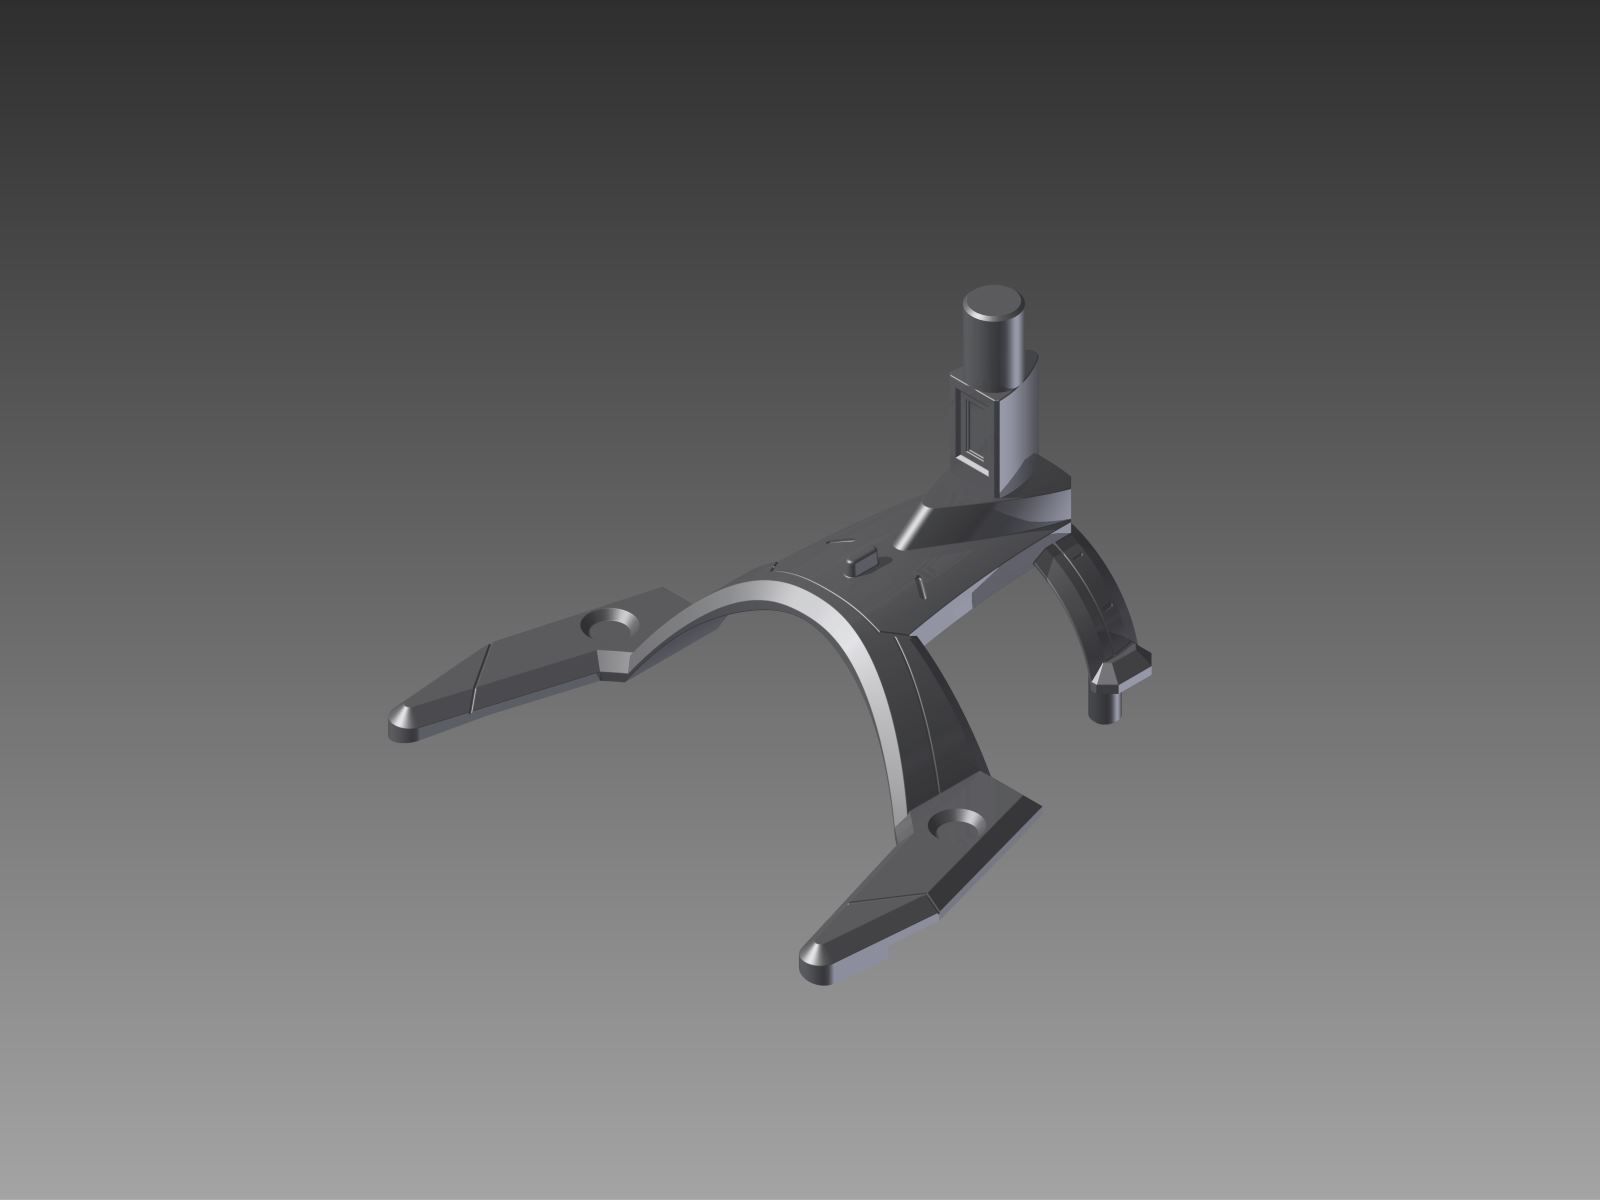
I'll see if I can get something workable; the reason I didn't try that before is that the plate thickness on these is thinner than Shapeways' minimum diameter for sprues so I have nowhere to mount the sprues horizontally. I'll try stacking the shoulder plates above the mounting flanges on the adapter; that should be workable and will likely reduce the price compared to going out horizontally since the print volume should be about the same as the current adapter.
-
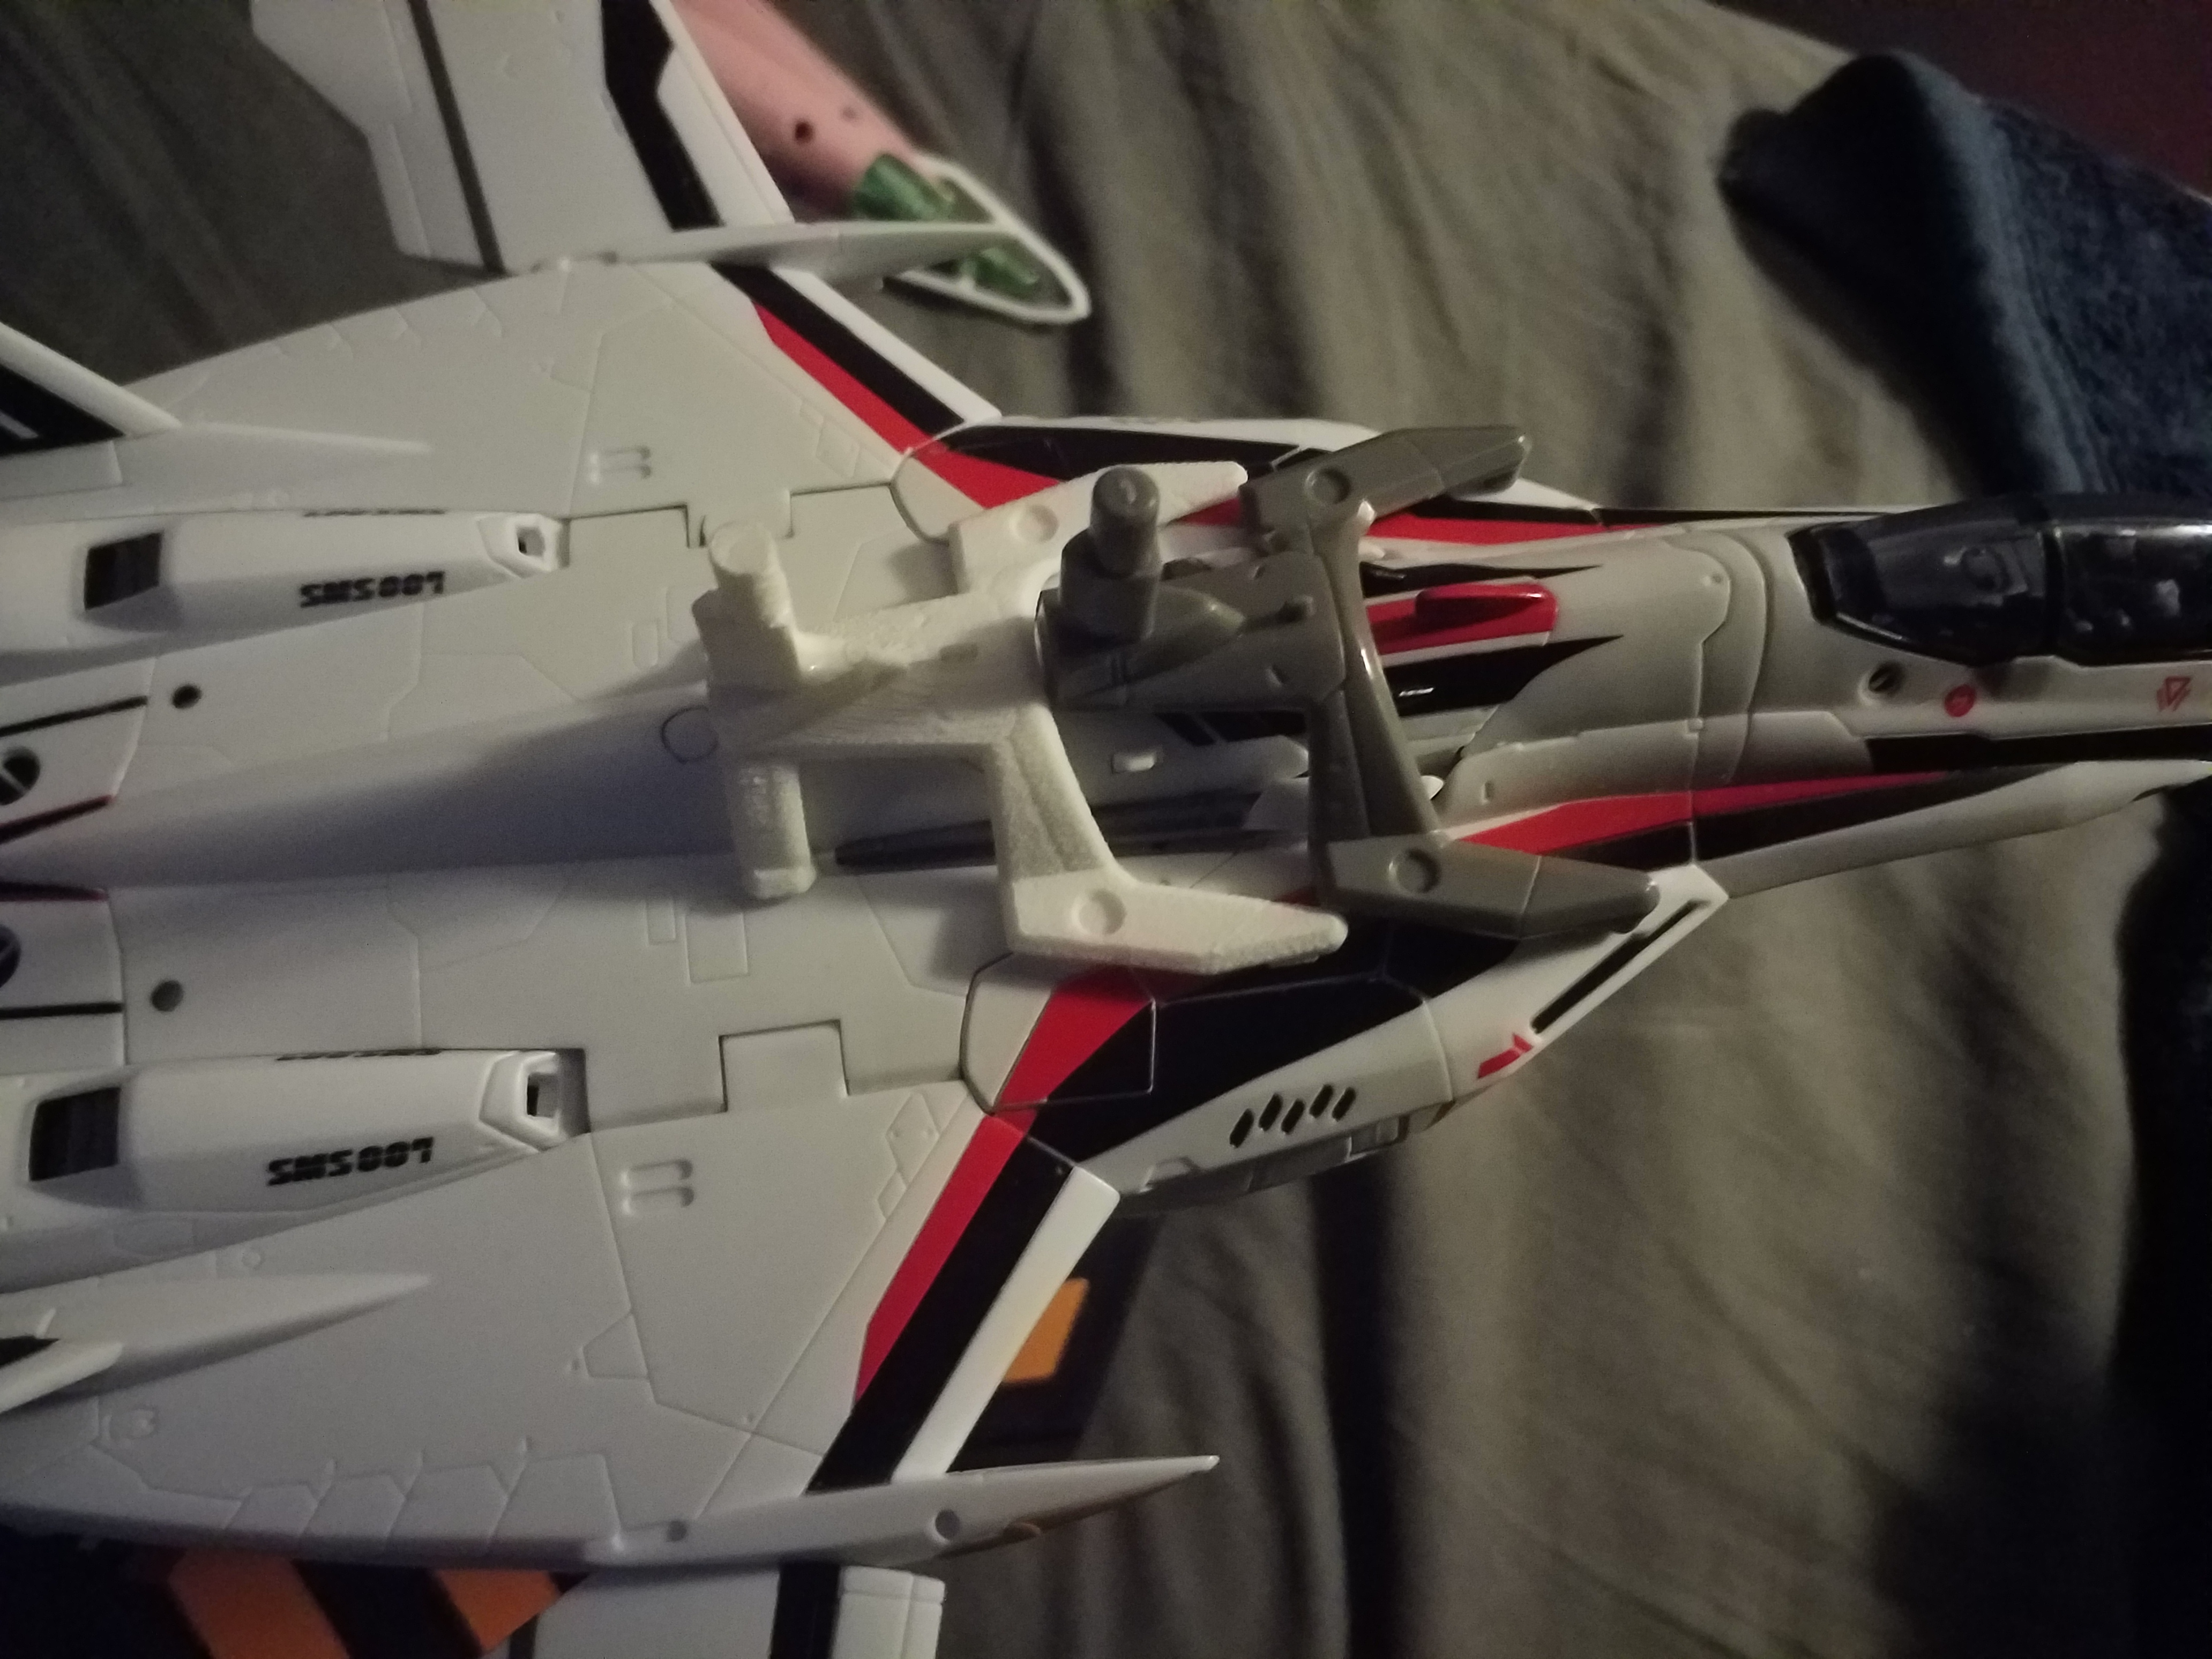
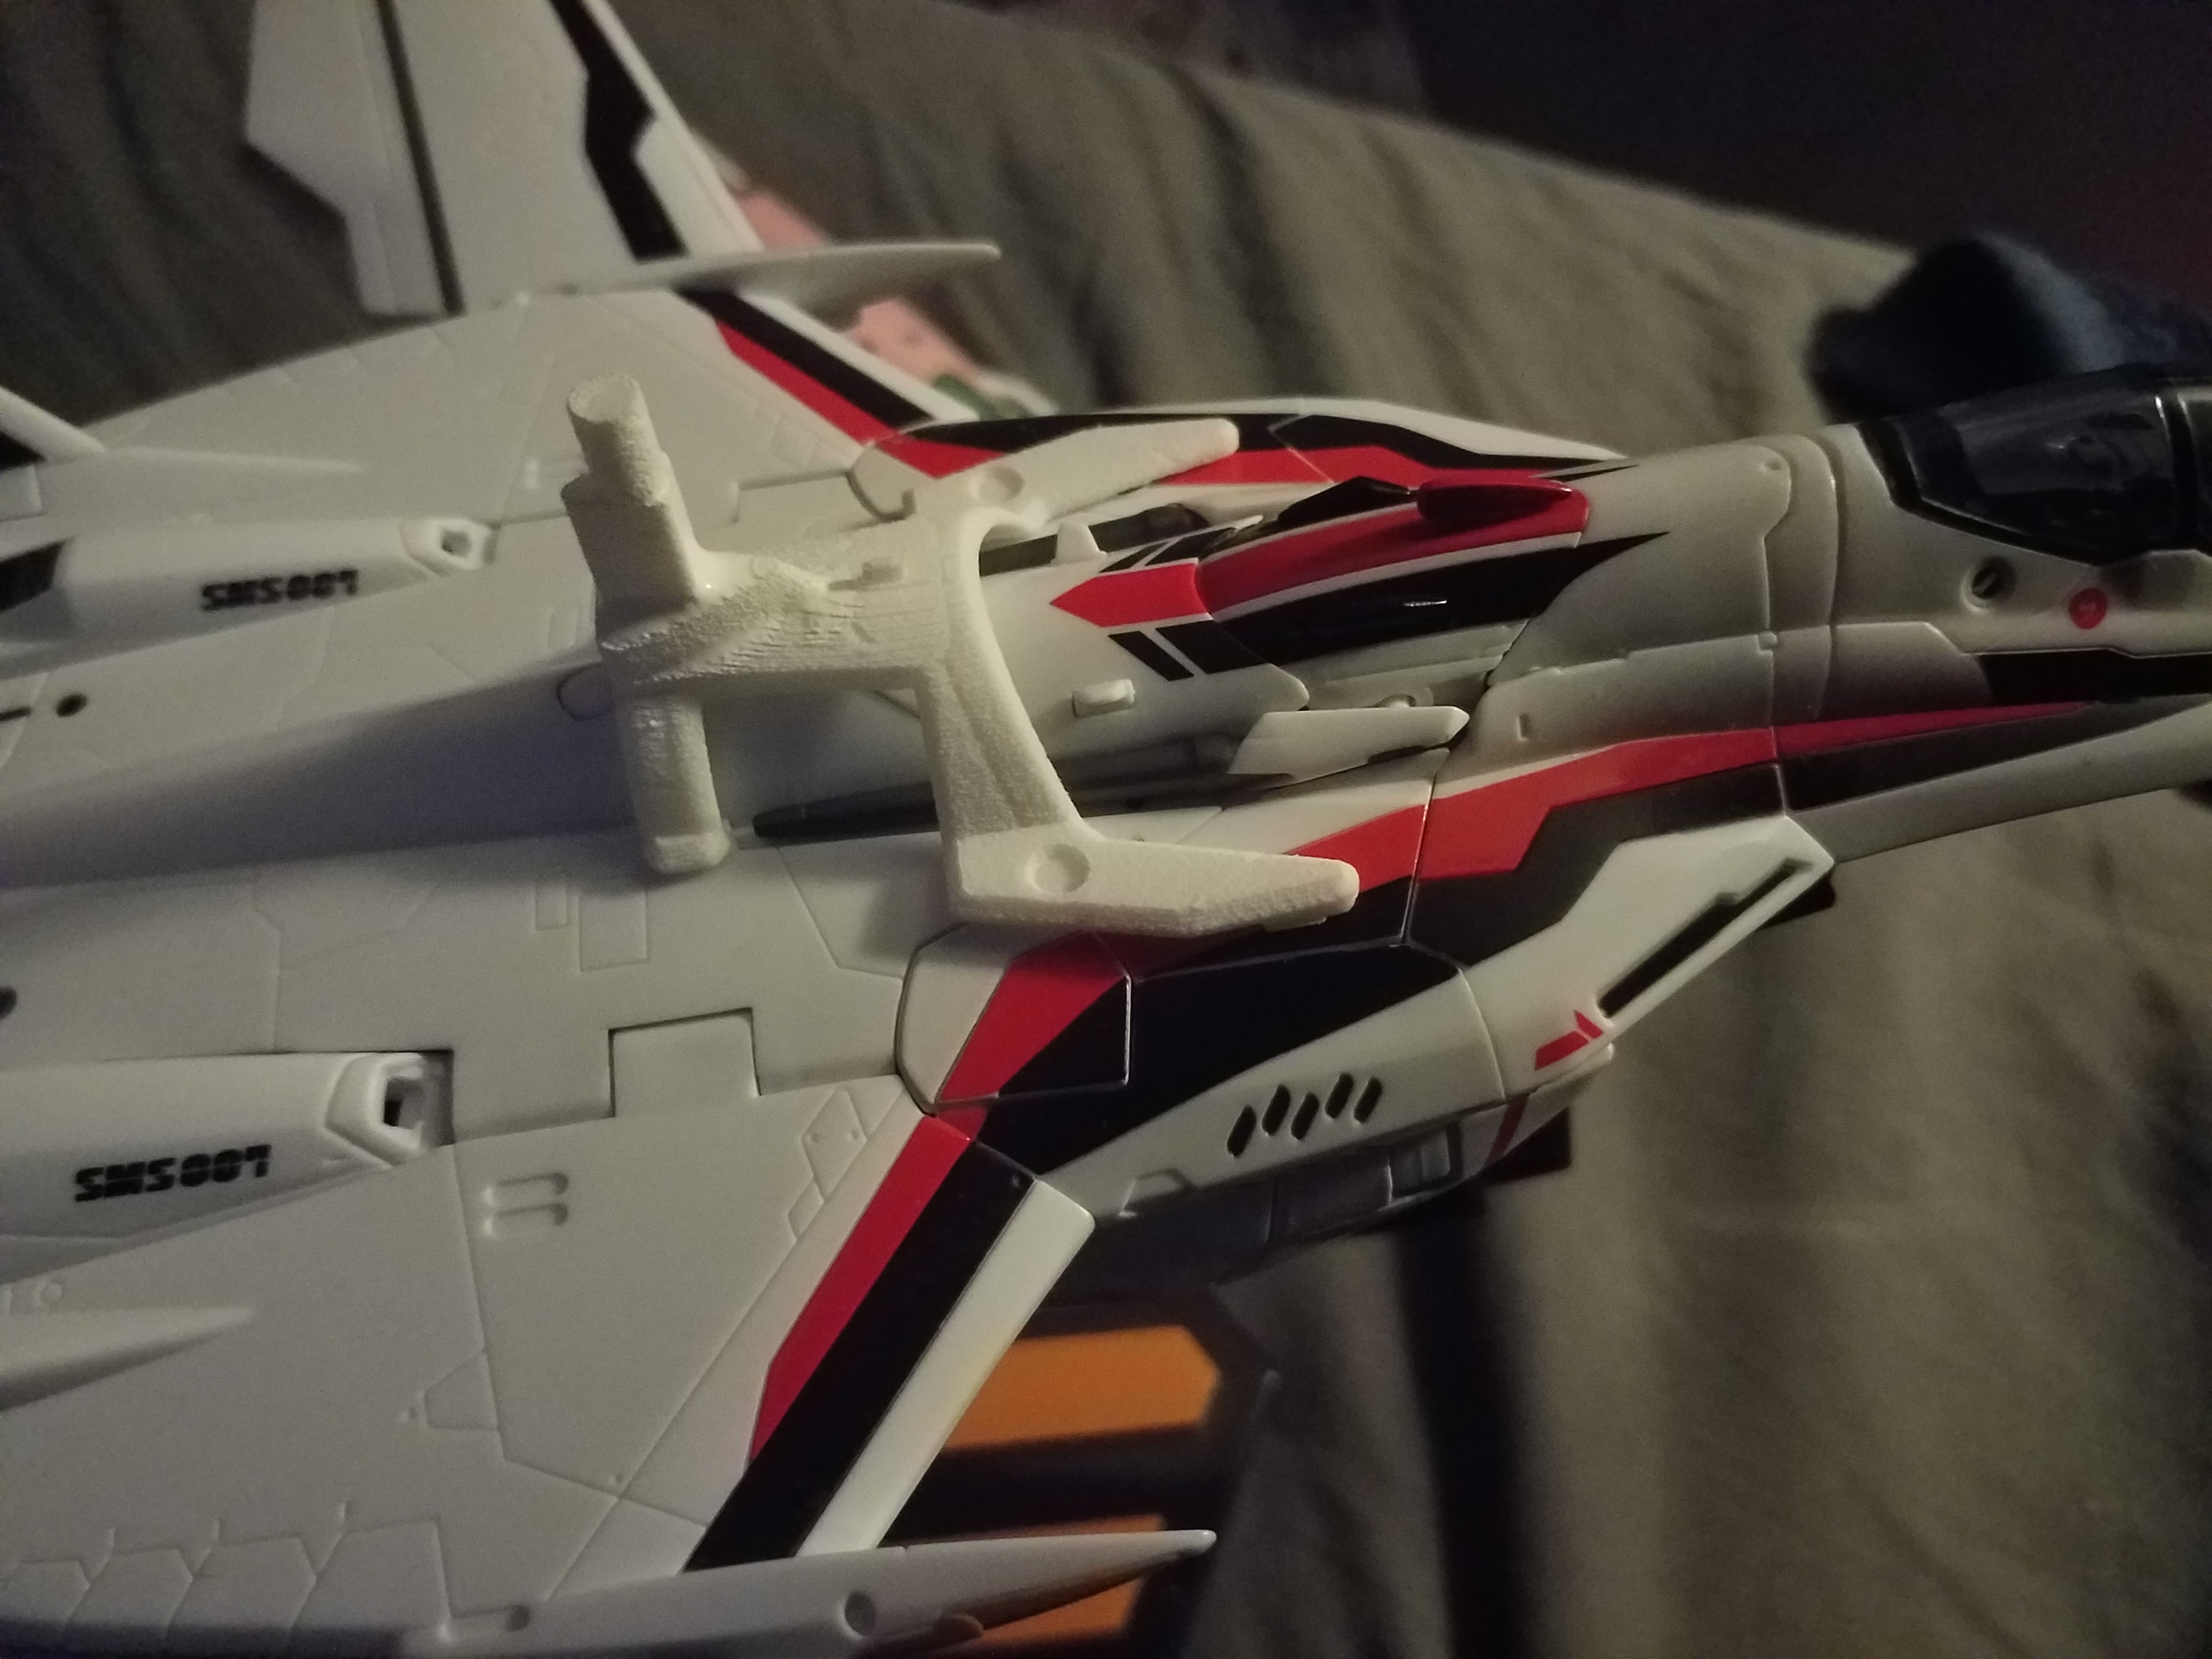
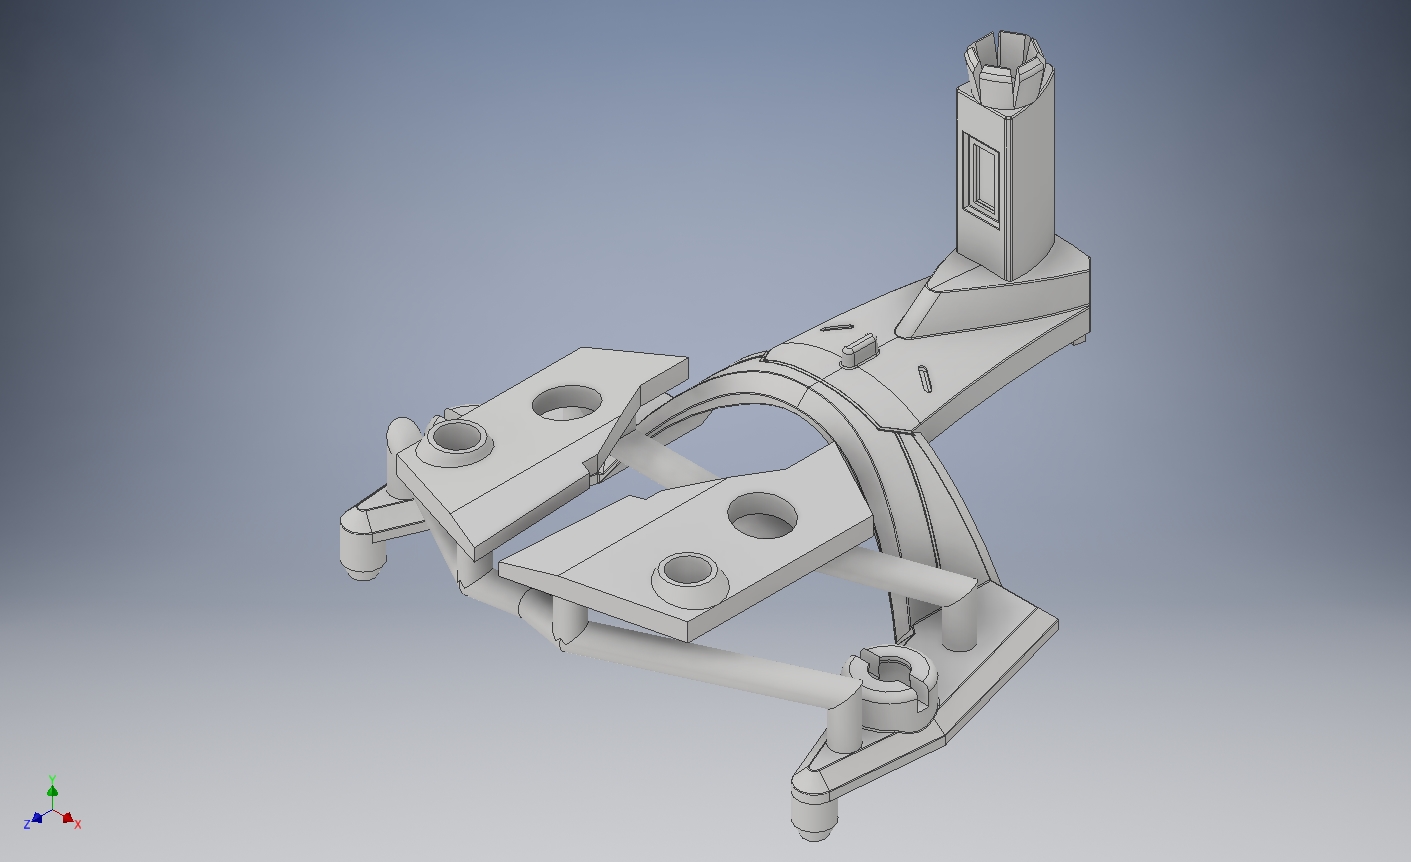
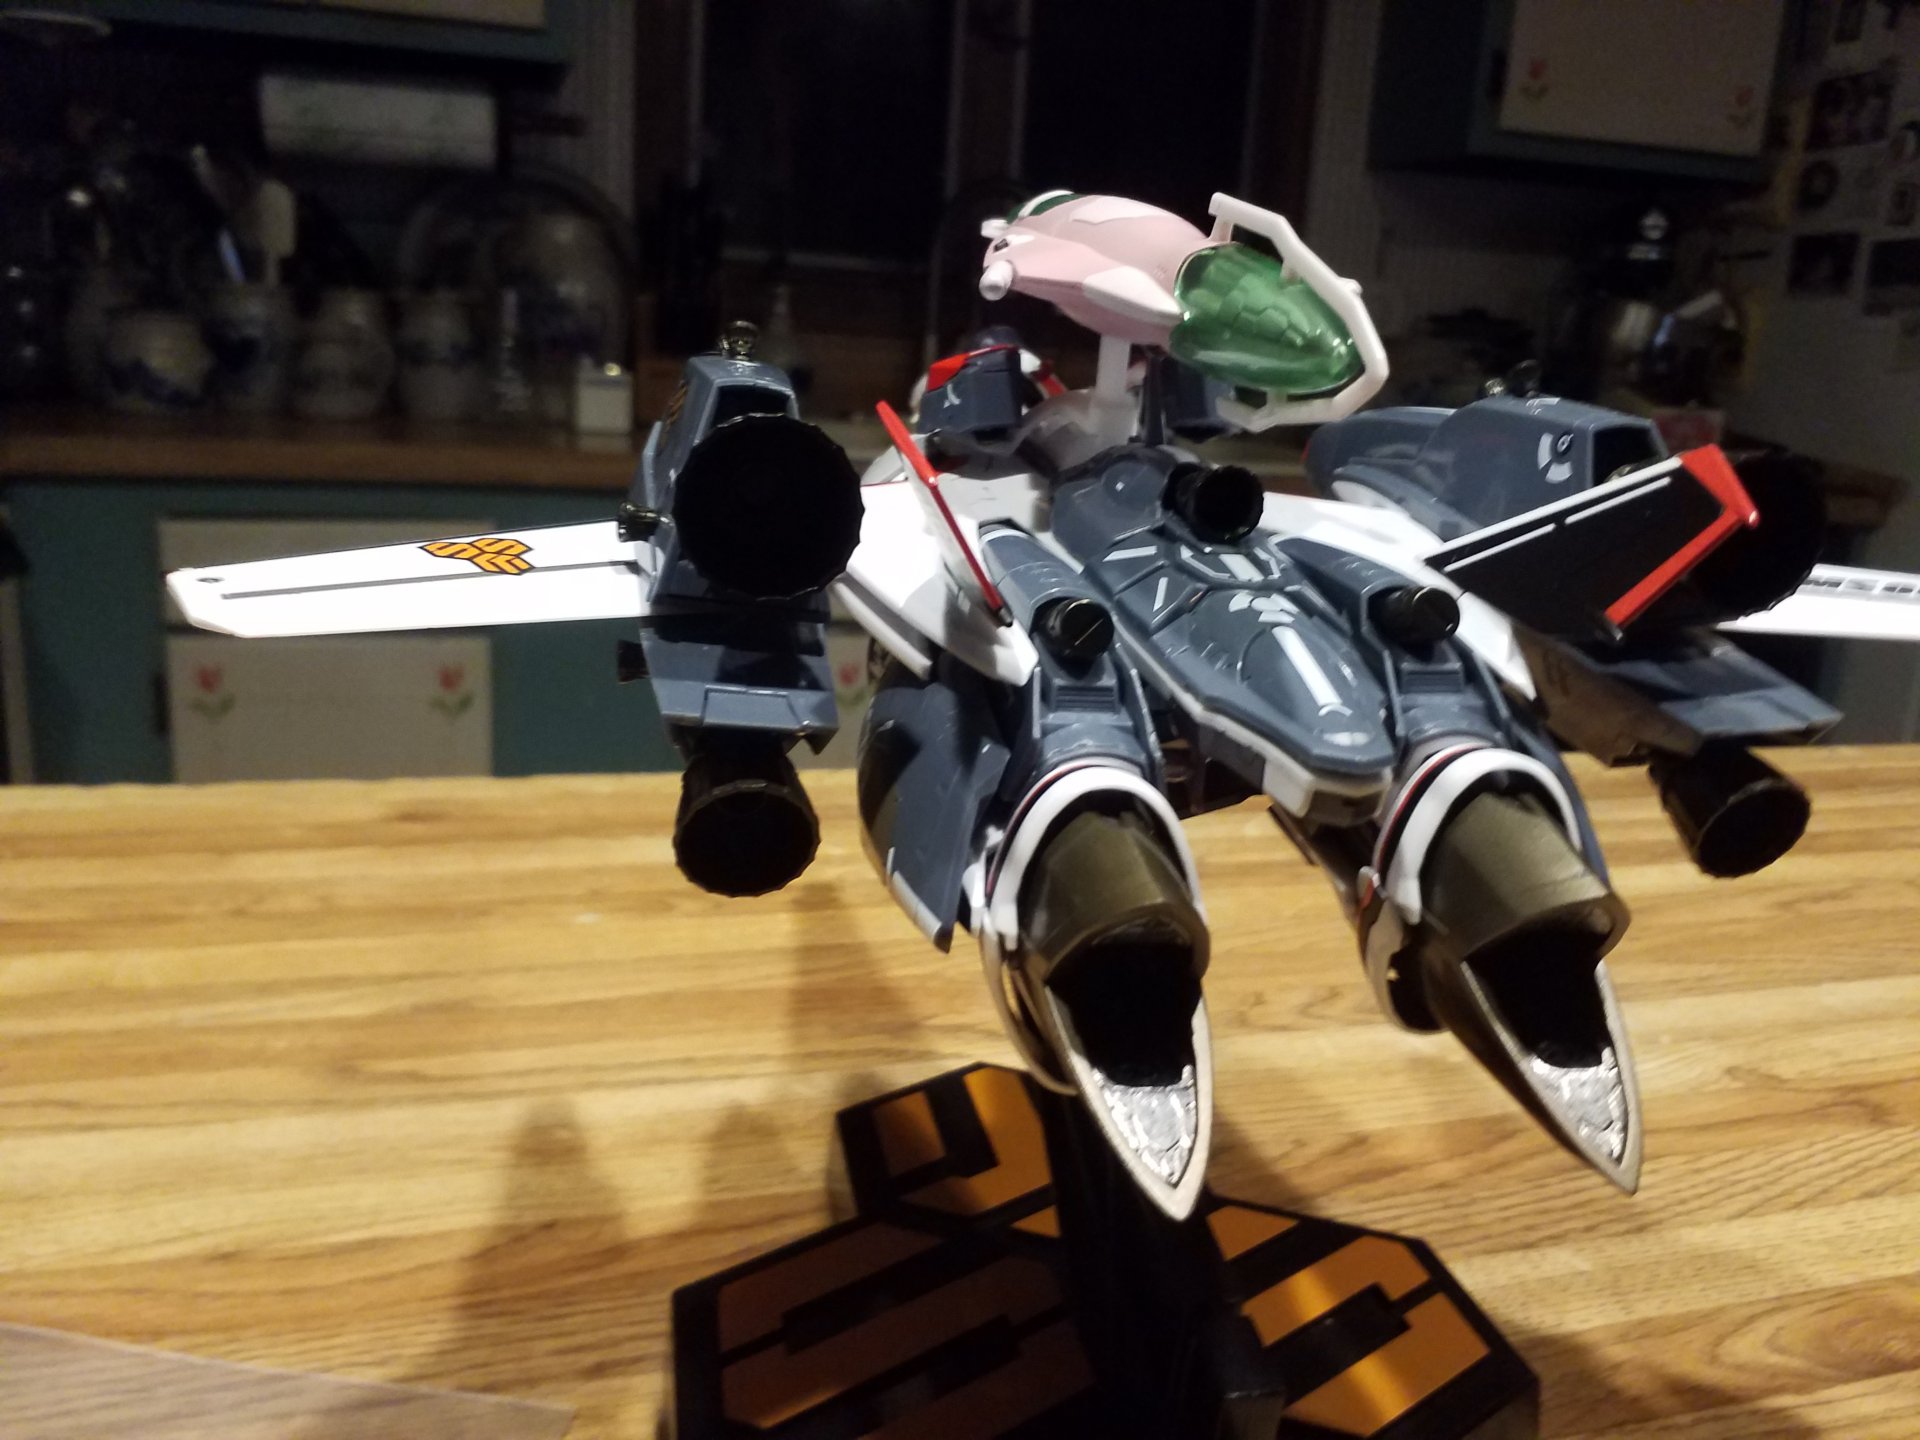
Got the updated adapters from Shapeways and they work perfectly. The new peg design is very solid, enough so that I could invert the adapter and the booster didn't even shift (Not sure I'd advise that with the full setup though as the interface between the shoulder plates and the underlying frame probably would't bear that much weight; it's fine for normal display even with a banking adapter, jut probably not much beyond 90 degrees bank.) All parts are now available on my Shapeways shop. If you're planning on using the fold booster without super packs I'd recommend using my non sp compatible adapter and the stock shoulder plates; you can use the shoulder plates and the stock adapter but the plates do leave some gaps with the surrounding panels that get covered by the missile pods when using the sp compatible adapter. The sp compatible adapter does require the shoulder plates in order to mount to the Valk. Photos:


-
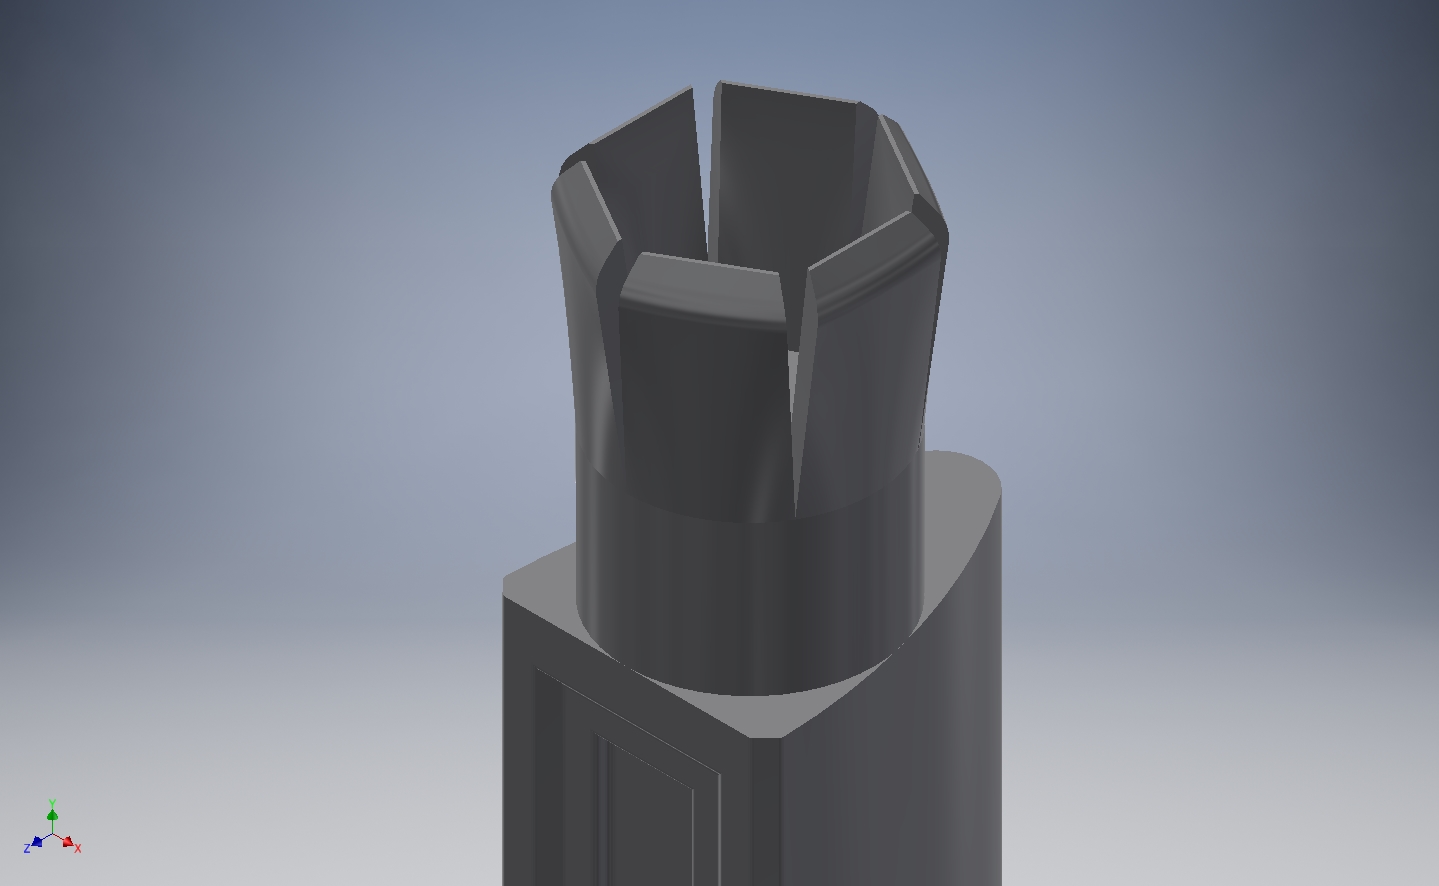
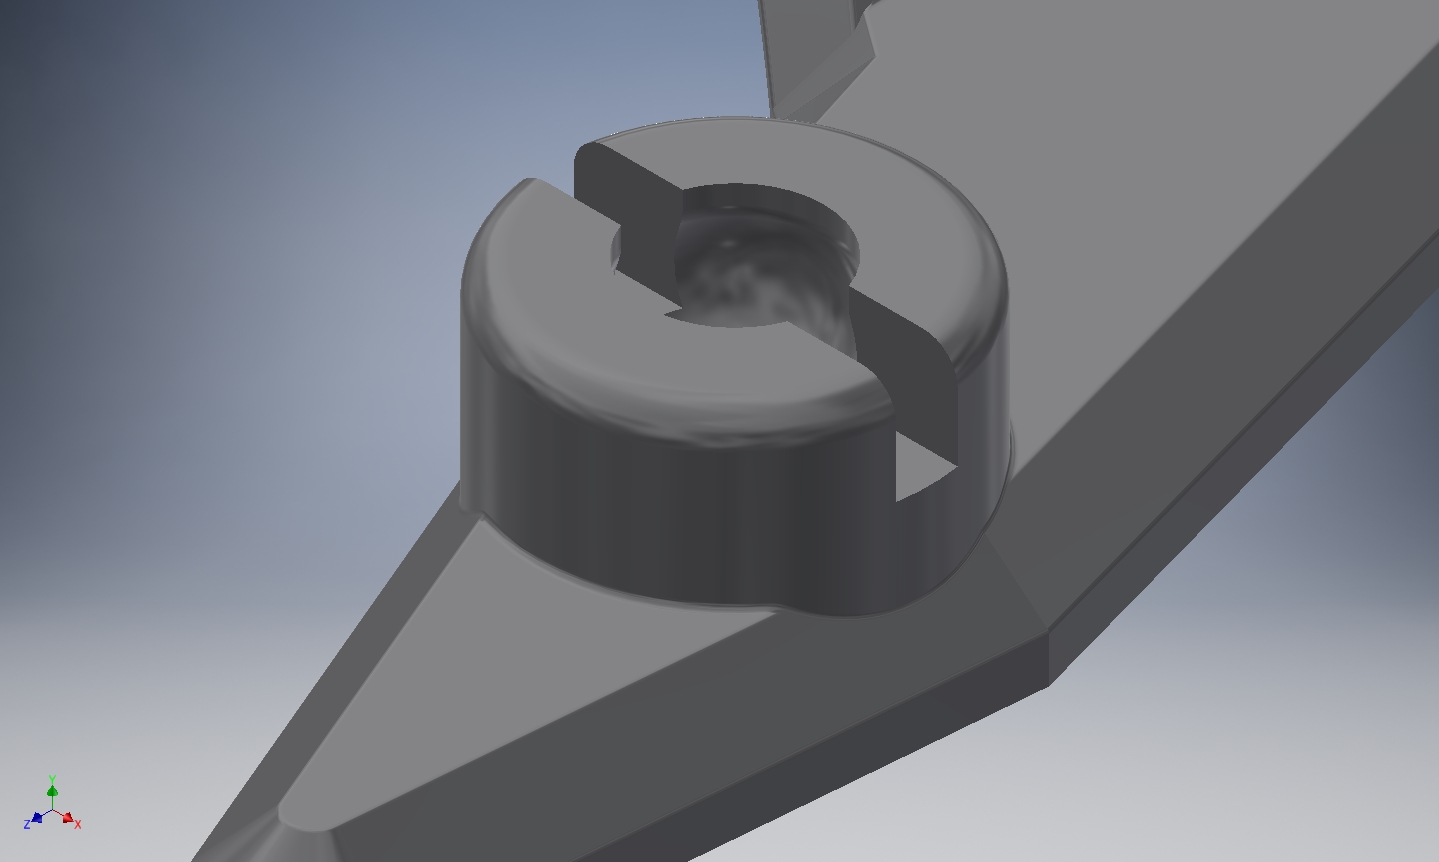
Updated the model with a hybrid of my idea and Sanity's suggetion to get the best result. I think the only potential problem with this design is if Shapeways refuses to print it because of the walls in the flare being slightly below their recommended thickness (.5 mm vs. .7 mm) and potentially flexible (ie: exactly how I want them). I also made a variant that should accept the ball joint on the missile pods for the super pack. Ordered a test print of each; if there's no issues when I get them I'll make them available. Edit: Shapeways won't print them as is; I'll have to adjust the models again tomorrow and re-upload. I just hope I don't loose too much flexibility.

-
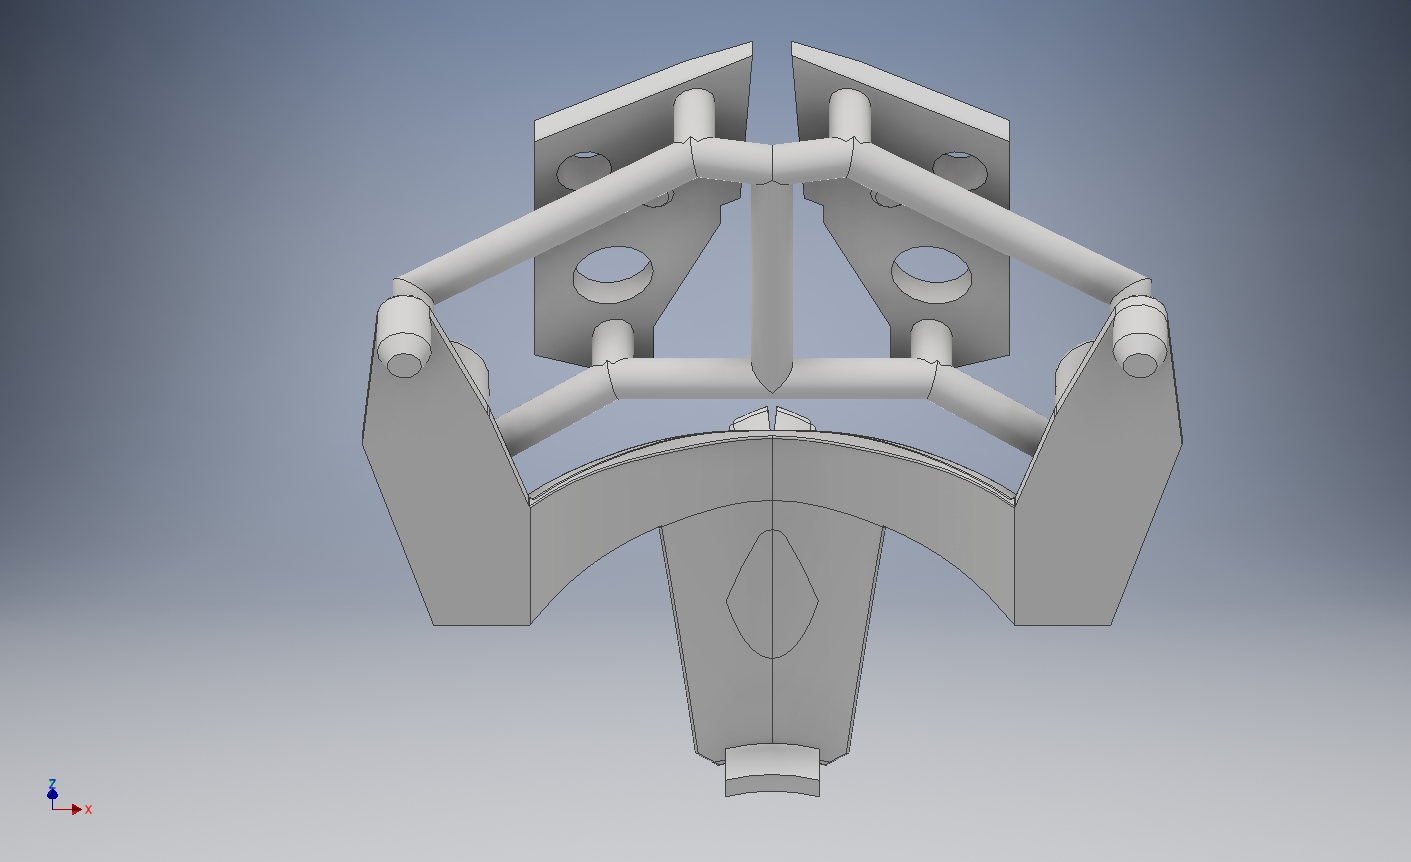
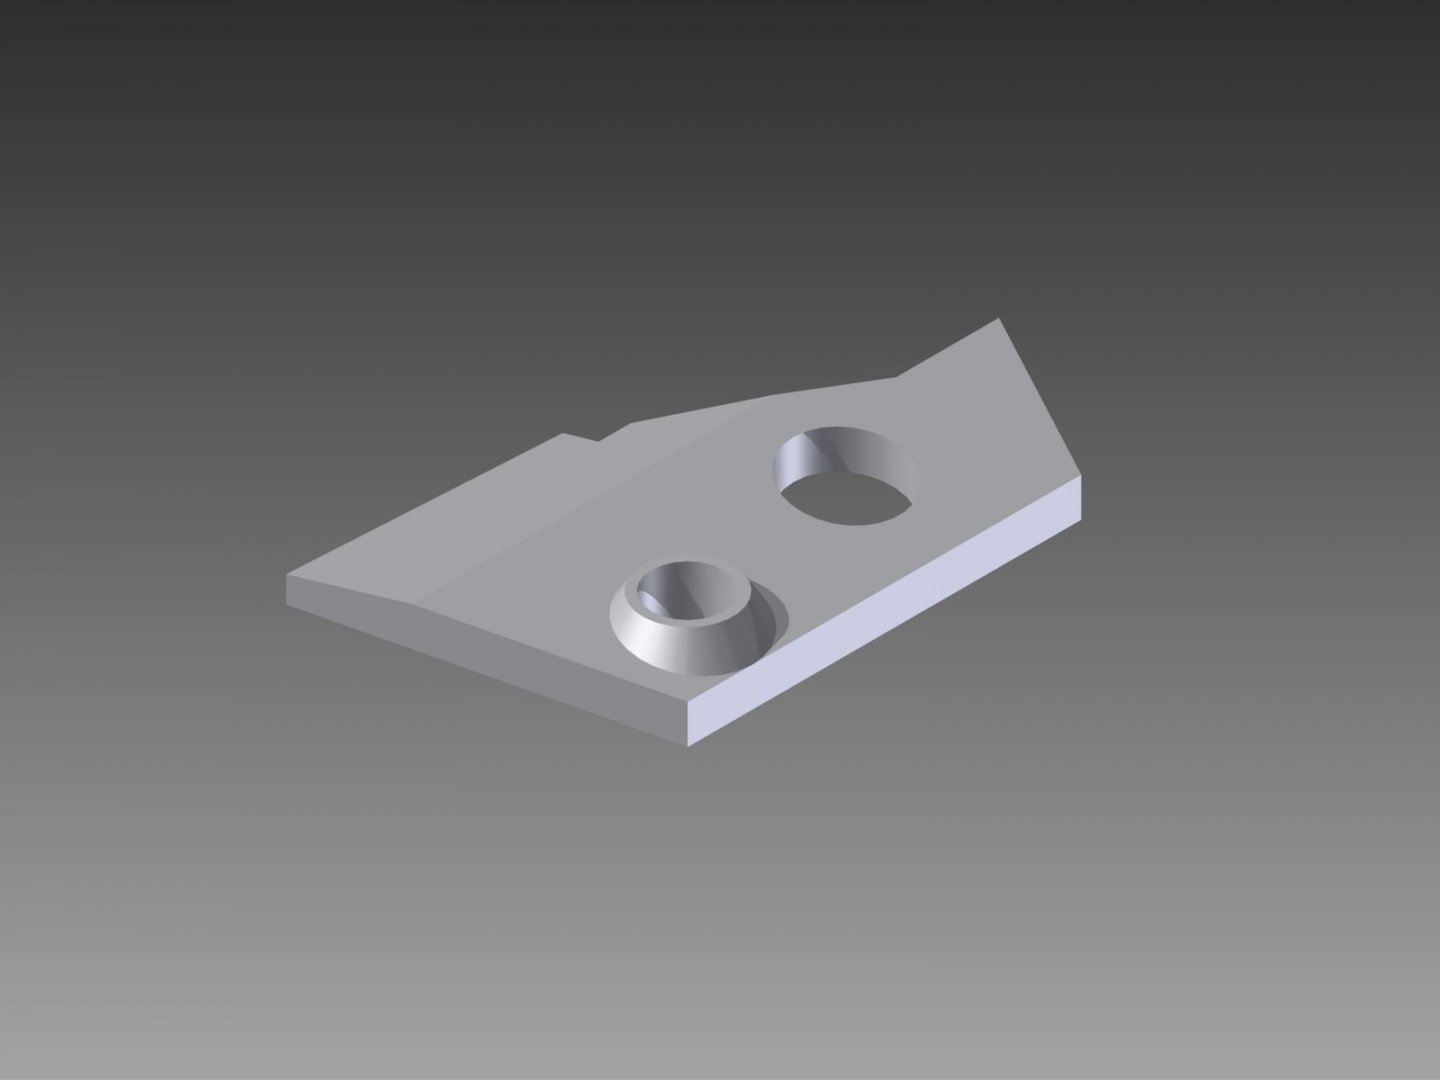
Adapter still doesn't work; I suspect the printing method Shapeways used just can' meet the kind of tolerance needed for this tight a fit. I'm going to try changing to a hexagonal peg to match the hole in the booster; that should prevent the booster from rotating without needing to meet a really tight tolerance like the force fit circular peg the stock adapter uses. The redesigned shoulder plates however work just about perfectly. Bandai apparently changed the missile pods for the v2 supers so those won't fit on the stock super parts adapter like I was assuming (I tried filing down the missile pod pegs on the stock adapter but even then the pegs are too close to the arch to attach) but everything else works. I'll try making a variant of the adapter that'll work with the missile pods but if they need the same kind of precision tolerances as the booster I'm not terrbly optimistic on the results. I'm making the shoulder plates available now for anyone that doesn't mind not using the missile pods and they'd be required anyway for any super part compatible adapter since there's nowhere else I could use to mount it. I didn't add a markup on these as it doesn't feel right to add a 50-100% markup and anything less than would be kinda pointless in the volumes these are likely to sell. Shoulder Plate, Right Shoulder Plate, Left

-
I'd say there's a 90%+ probability that the adapter I made available is good as is; still waiting on the test print I ordered to confirm (shapeways list it as in production so I should have it in hand within a week or so if you wish to wait till I can be certain it works.).
-
Pretty sure the booster is only shown attached in fighter mode and is left on orbit. As for the super packs; no that adapter won't work with either the shoulder missile pods or the back armor, that's why I was also working on shoulder plates that would accept the super pack adapter that's included with the booster I just have to get a design that works which requires a fair bit of guesswork with how diffcult getting good measurements on the original shoulder plates is. Renders of the updated models: (I didn't bother with much detail on the shoulder plates as they'll be covered by the missile pods.) I'll probably make the adapter available as soon as Shapeways clears it as the changes from the version I have in hand are minimal (OD of the booster peg increased from 3.8mm to 3.99mm) and shouldn't affect printability. The shoulder plates I'm going to continue doing test prints on till I'm certain I have something that works. Shapeways link: VF-25 Fold Booster Adapter I set it as available in all of the strong and flexible plastics and metalic plastic. For the pricing I just took the base price added $1 and rounded to the neaest whole number (average markup is somewhere around $1.15 or so); I figured that was reasonable.

-
Agreed, especially since I got to five layers of polish last night and the fits still not tight enough. I'll update the models today and see how they work.
-
Got the test parts I ordered from Shapeways; the shoulder plates to allow using the booster W/ super packs need to be redesigned (for those curious I have the peg ~1mm too far aft and apparently the underlying structure in the V1s was different allowing the peg from the adapters to protrude through the plate; I'll have to create a boss around the hole to get enough engagement.) The modified adapter however works almost perfectly, the booster is fairly loose on it but It's close enough that I think changing the model is more likely to cause problems than solve them and it's probably better to just use nail polish to add a bit more engagement. Any opinions on whether I should offer it as is with a note to use nail polish to tighten it up or see how it works with a larger peg? My calipers are at work but I'd estimate less than .1mm larger diameter or 2-3 coats of nail polish to get it as tight as the original adapter. Waiting on polish to fully dry, will add picture W/ booster attached later.


-
Finally gave up on getting my 3D printer running and shifted focus to this; I got the models done exported to .stl and will upload to shapeways. I apprently wasn't paying attention when I exported images though since I ended up with PDFs rather than Jpegs; no idea if these'll work but since the site let me upload them: Adapter_new.pdf ShoulderPlate_L1.pdf
-
Perfect, thanks. Looks like it goes just about where I was thinking though I probably had it 5-6mm too far aft. I should be able to work up mounting flanges to work with that. Unfortunately if I use those mounting holes it'll be incomparable with the super pack. I'll probably also make pair of shoulder plates to accept the existing adapter, that'll be more work painting to match the valks but there's nowhere else to mount to.
-
vf-31 siegfried WIP: Alternate Weapons Pods for VF-31
Jaustin89 replied to Sanity is Optional's topic in The Workshop!
I forgot to consider that the command I was thinking of would have been burried under help topics related to the assembly command. Here's the one I wss remembering: http://help.solidworks.com/2017/english/solidworks/sldworks/t_inserting_a_part_into_another_part.htm Though getting the parts oriented and positioned with constraints then creating your sprues and joining everything togethrr with the command you linked will probably be your best bet. -
I'm working on creating an adapter for the VF-25 renewal to mount Bandai's fold booster released for the older versions. I worked up a model replicating the adapter that comes with the booster but I'm not sure exactly where I need to add pegs as I don't have a 25v1 to compare mounting patterns. Does this look about right for positioning? If so I'll probably just add another arch directly under the peg for the booster to pick up the holes there, then just leave the forward portion of the adapter for stability/appearance but with no pegs. Also as this is the first part I'm designing for 3D printing there's a few things I'm not sure of that I was hoping one of the mombers more familiar with it could answer. The adapter has an arch ~24mm wide by ~10mm tall with a minimum thicknes of 1.5mm will this be self supporting during printing or do I need to add a support in the center? What's the detail resolution on an average 3D print? The adapter has panel lines molded into it that are ~.25mm wide and deep; I'm guessing I should just disable those features before exporting to .STL as they'll just get lost in printing or destroyed in sanding/painting. If anyone has the fold booster set and a v1 that it fits any closeup pictures of how the adapter mounts to the Valk would be helpful. Thanks
-
vf-31 siegfried WIP: Alternate Weapons Pods for VF-31
Jaustin89 replied to Sanity is Optional's topic in The Workshop!
Haven't worked with solid works in a while but I'm pretty sure there was an function that would allow you to do that. Try searching the help menu for "insert part"; I think that was the function name. I know in Inventor I can either insert a solid into an existing part or convert an assembly to a multibody part so solid works should have equivalent functions. -
Re frontier fold booster: You guys do realize Bandai already made it right? There's a pre renewal kit that comes with the booster the under-wing speaker pods and a Ranka figure. I got it a while ago but unfortunately the adapter only fits the pre renewal 25s, one of my priorities for the 3D printer I have coming tomorrow is to make a new adapter to fit the renewal valks. https://myfigurecollection.net/item/55720
-
Your most recent Macross or toy purchase! General thread.
Jaustin89 replied to Gakken85's topic in Hall Of The Super Topics
1:72 and $150; the place I got it from still has some in stock but its a limited edition of 800 pieces so I wouldn't count on that being the case for too long. http://www.flyingmule.com/products/CW-001623 I'd say that my only complaint is that the wheels are molded rather than functional, beyond that it's impressive in level of detail and build quality. -
Your most recent Macross or toy purchase! General thread.
Jaustin89 replied to Gakken85's topic in Hall Of The Super Topics
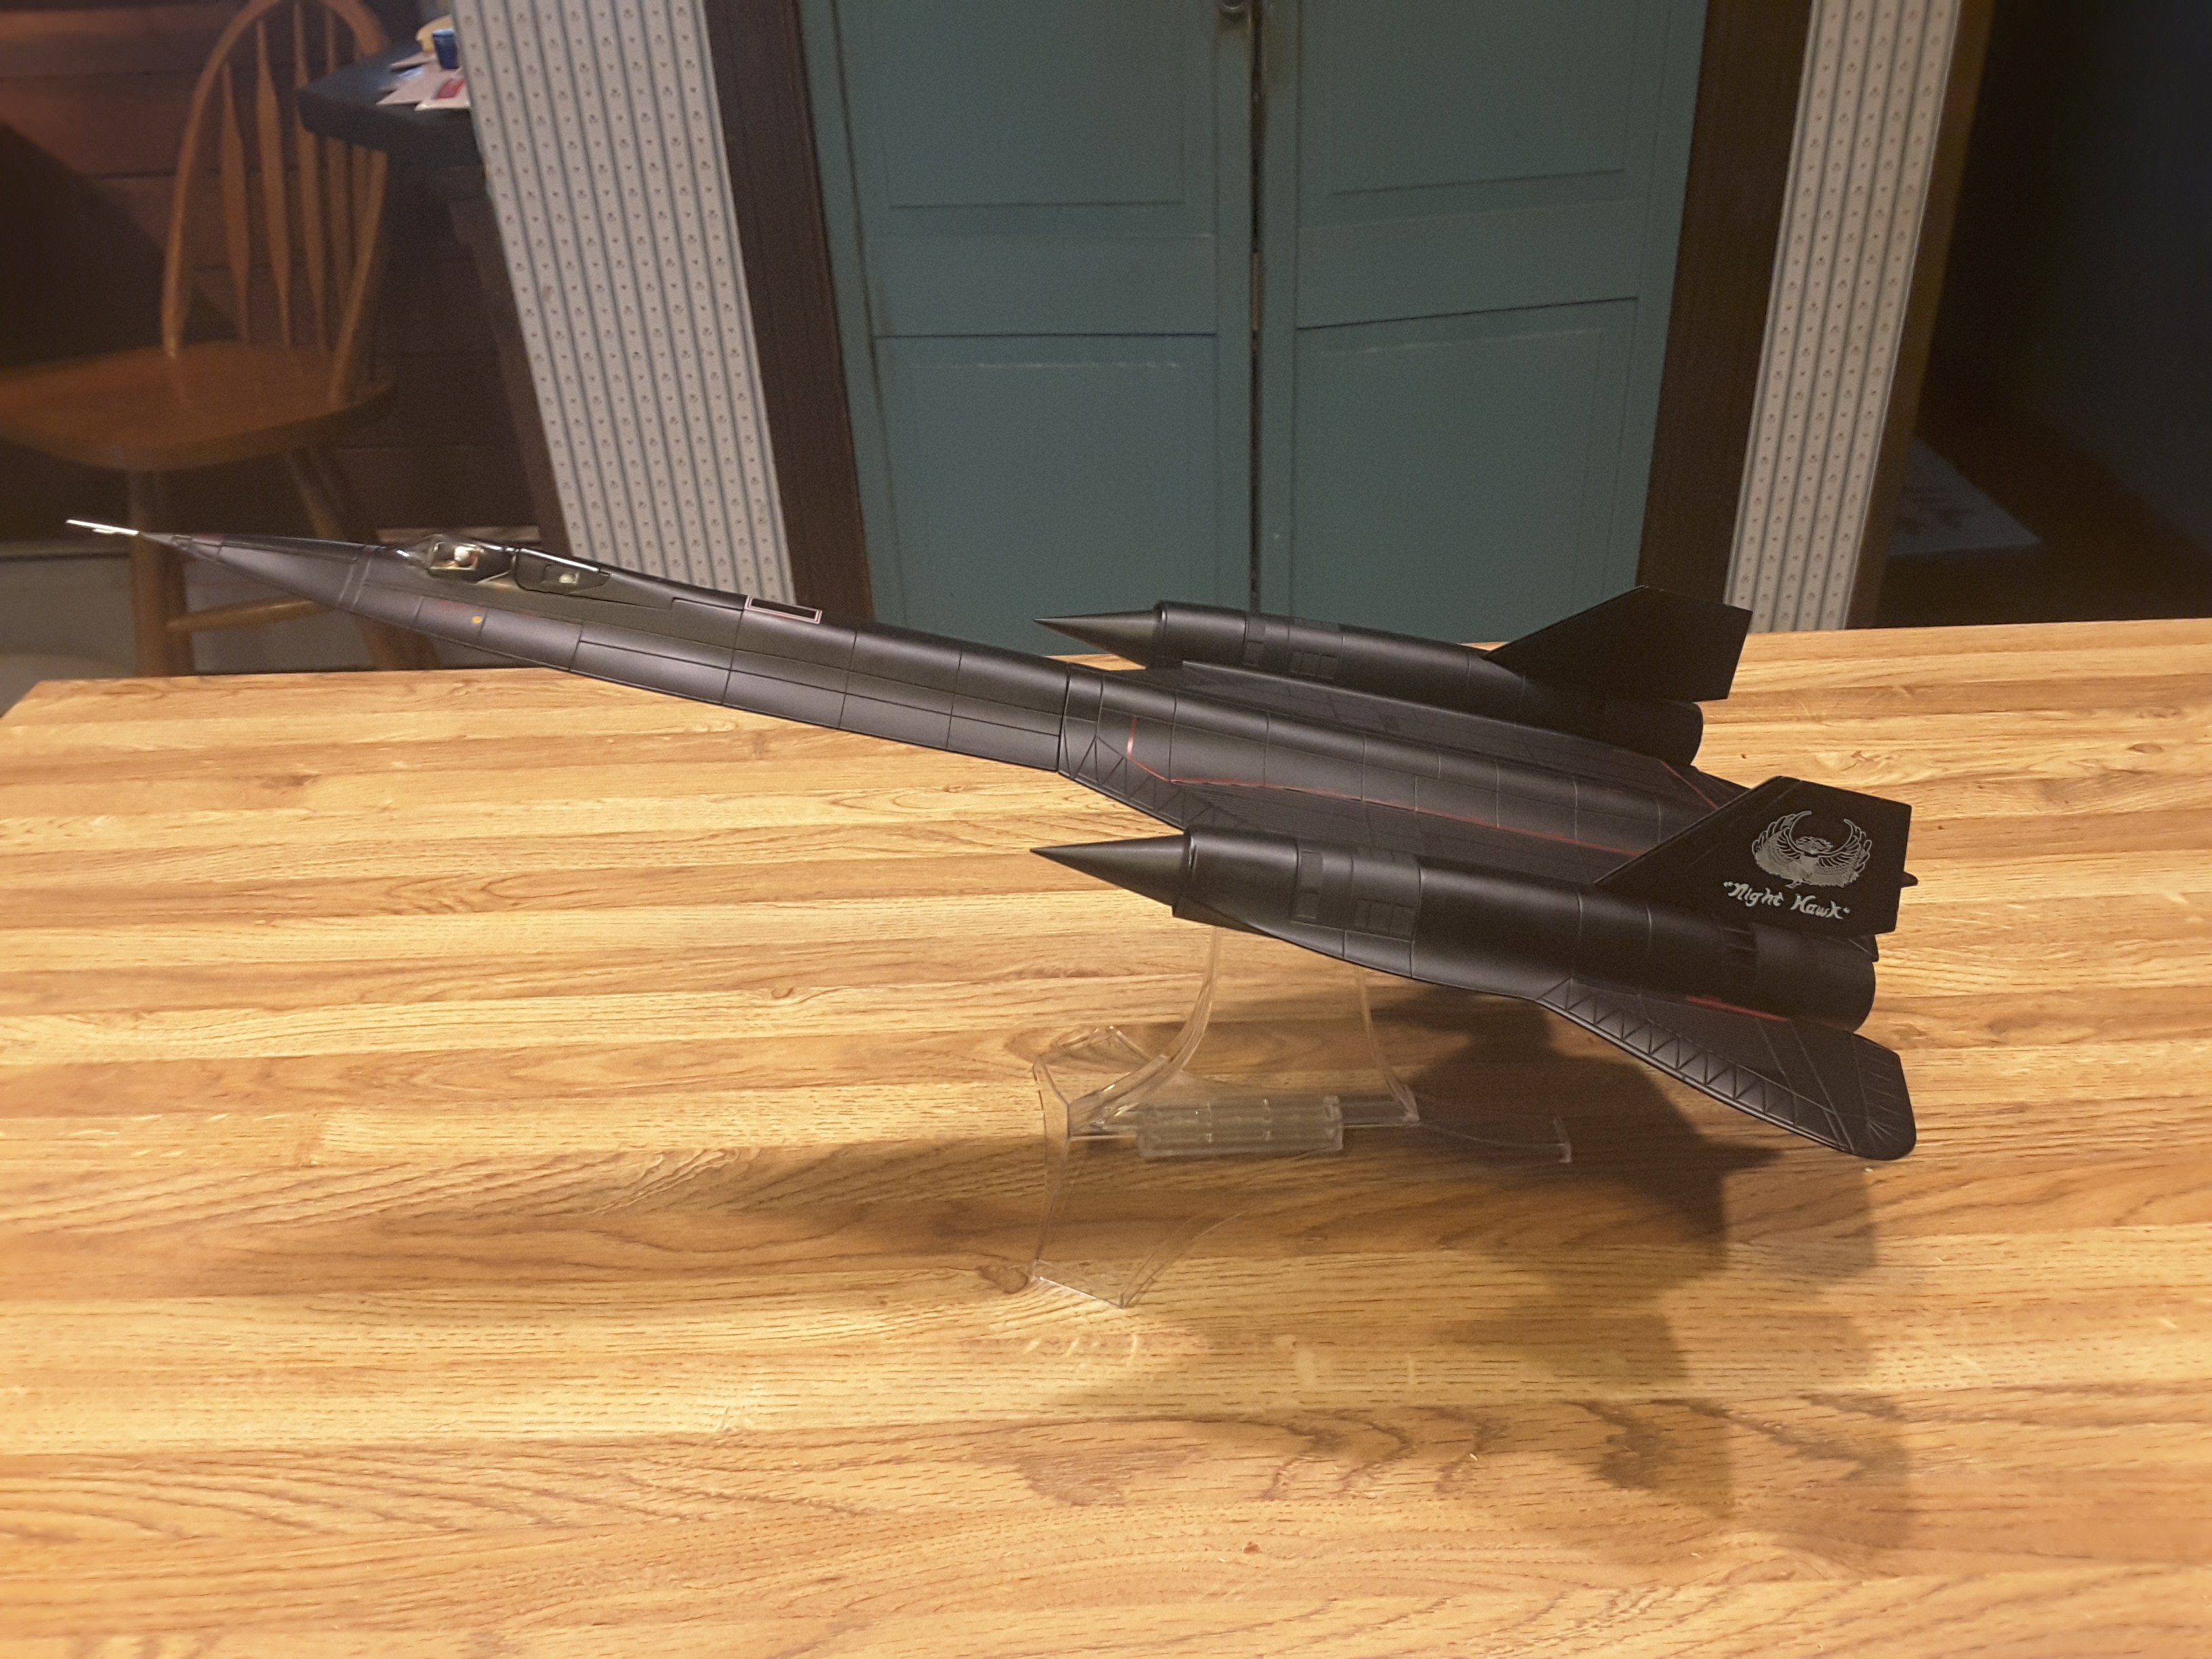
Finally got my die cast SR-71 pre-order that was supposed to have shipped in June; it was a long wait but worth it.
-
Your most recent Macross or toy purchase! General thread.
Jaustin89 replied to Gakken85's topic in Hall Of The Super Topics
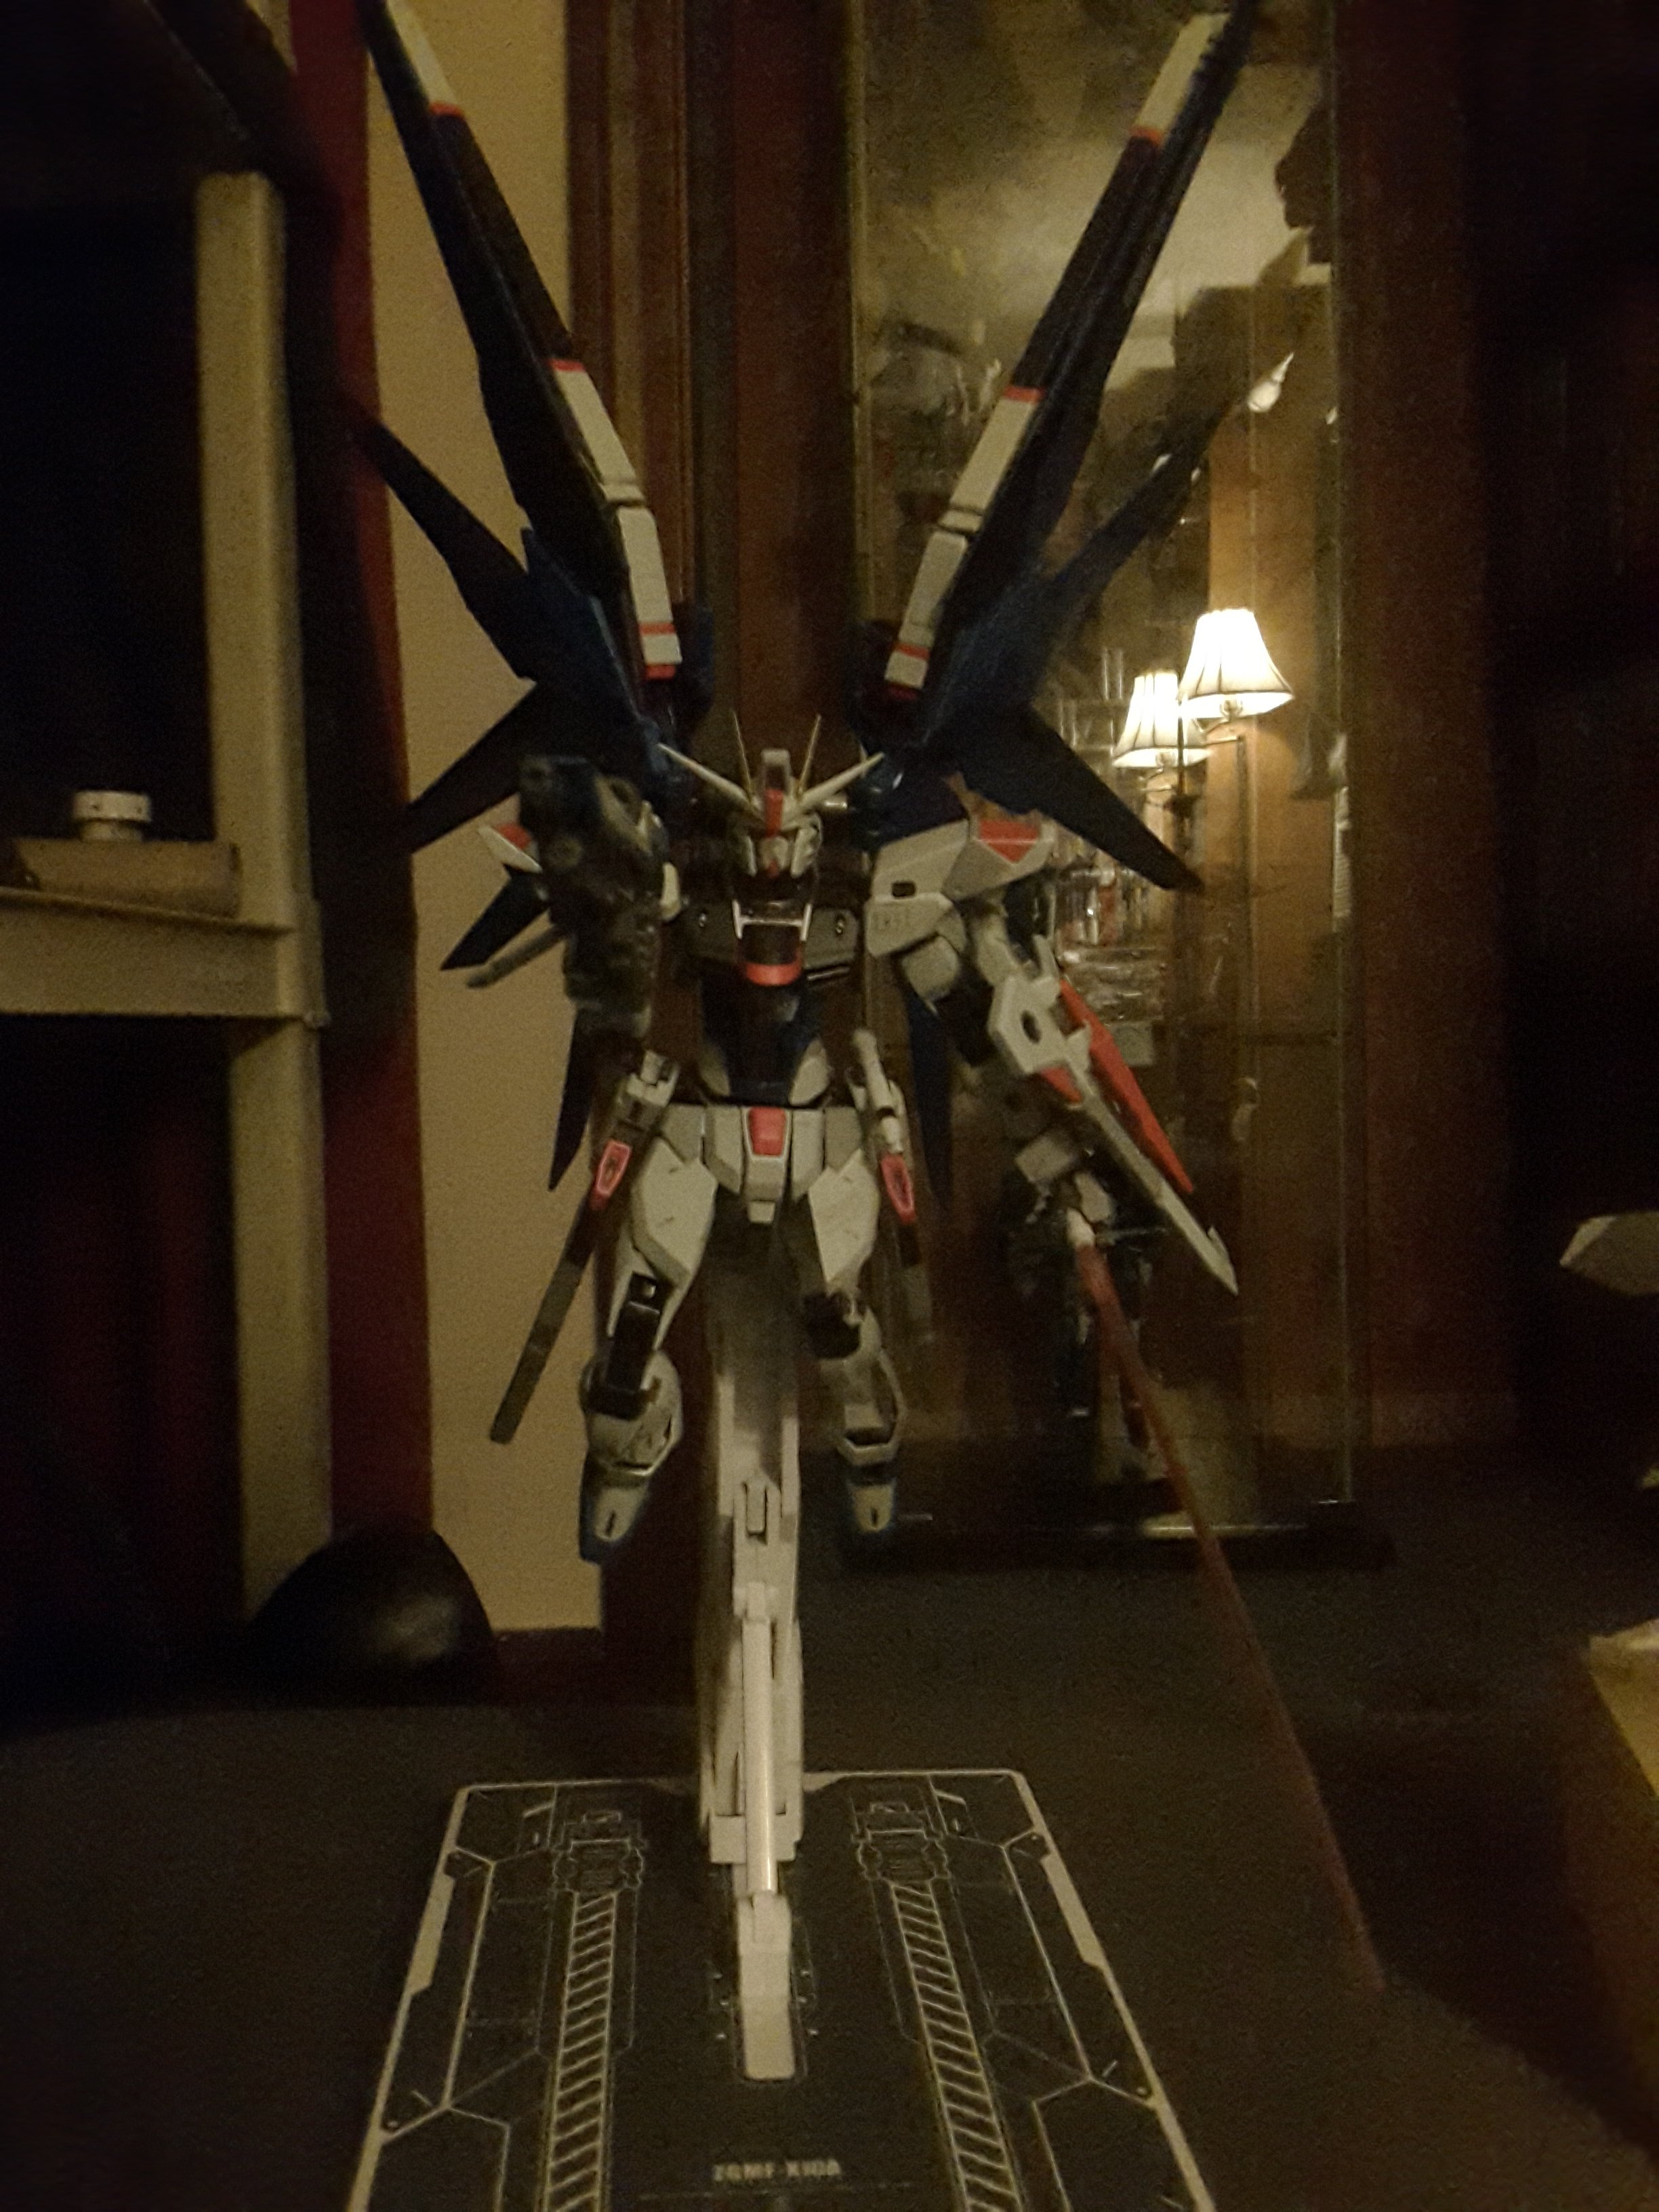
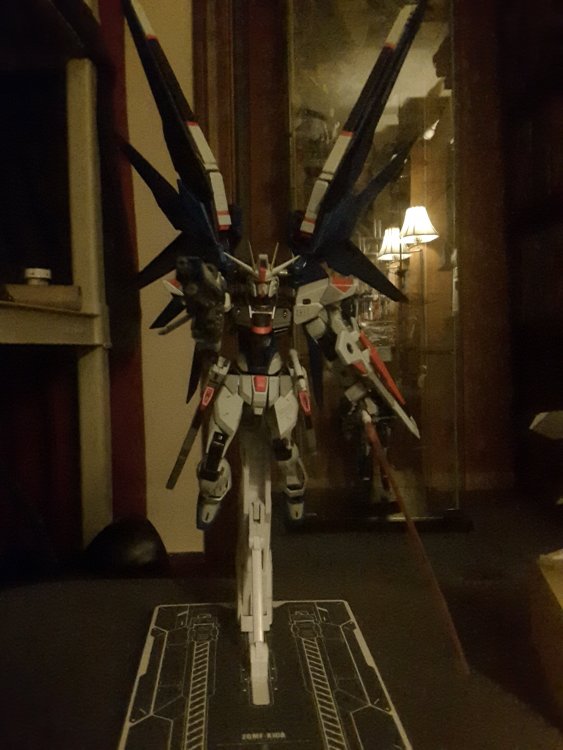
Picked up a Super Sylph and Metal Build Freedom Gundam on the sale forums so I've oficially branched out from just getting Macross DX's; I fear for my walet's saftey. Waiting on a backordered component to fix my camera so tablet camera quality will have to do for now.
-
CIG did a run of them a few years ago; I want to say they made a couple thousand of them. Given how poorly they sold I would be surprised if they ever did another run or any other models, if I remember correctly they ended up selling the last few hundred at cost just to get rid of them
-
Your most recent Macross or toy purchase! General thread.
Jaustin89 replied to Gakken85's topic in Hall Of The Super Topics
Ended up at ~$600 total including shipping (Valk was opened but never transformed so effectively mint, the supers were MISB, and the tornado pack is actually still in the factory cellophane) so I think I did fairly well. -
Your most recent Macross or toy purchase! General thread.
Jaustin89 replied to Gakken85's topic in Hall Of The Super Topics
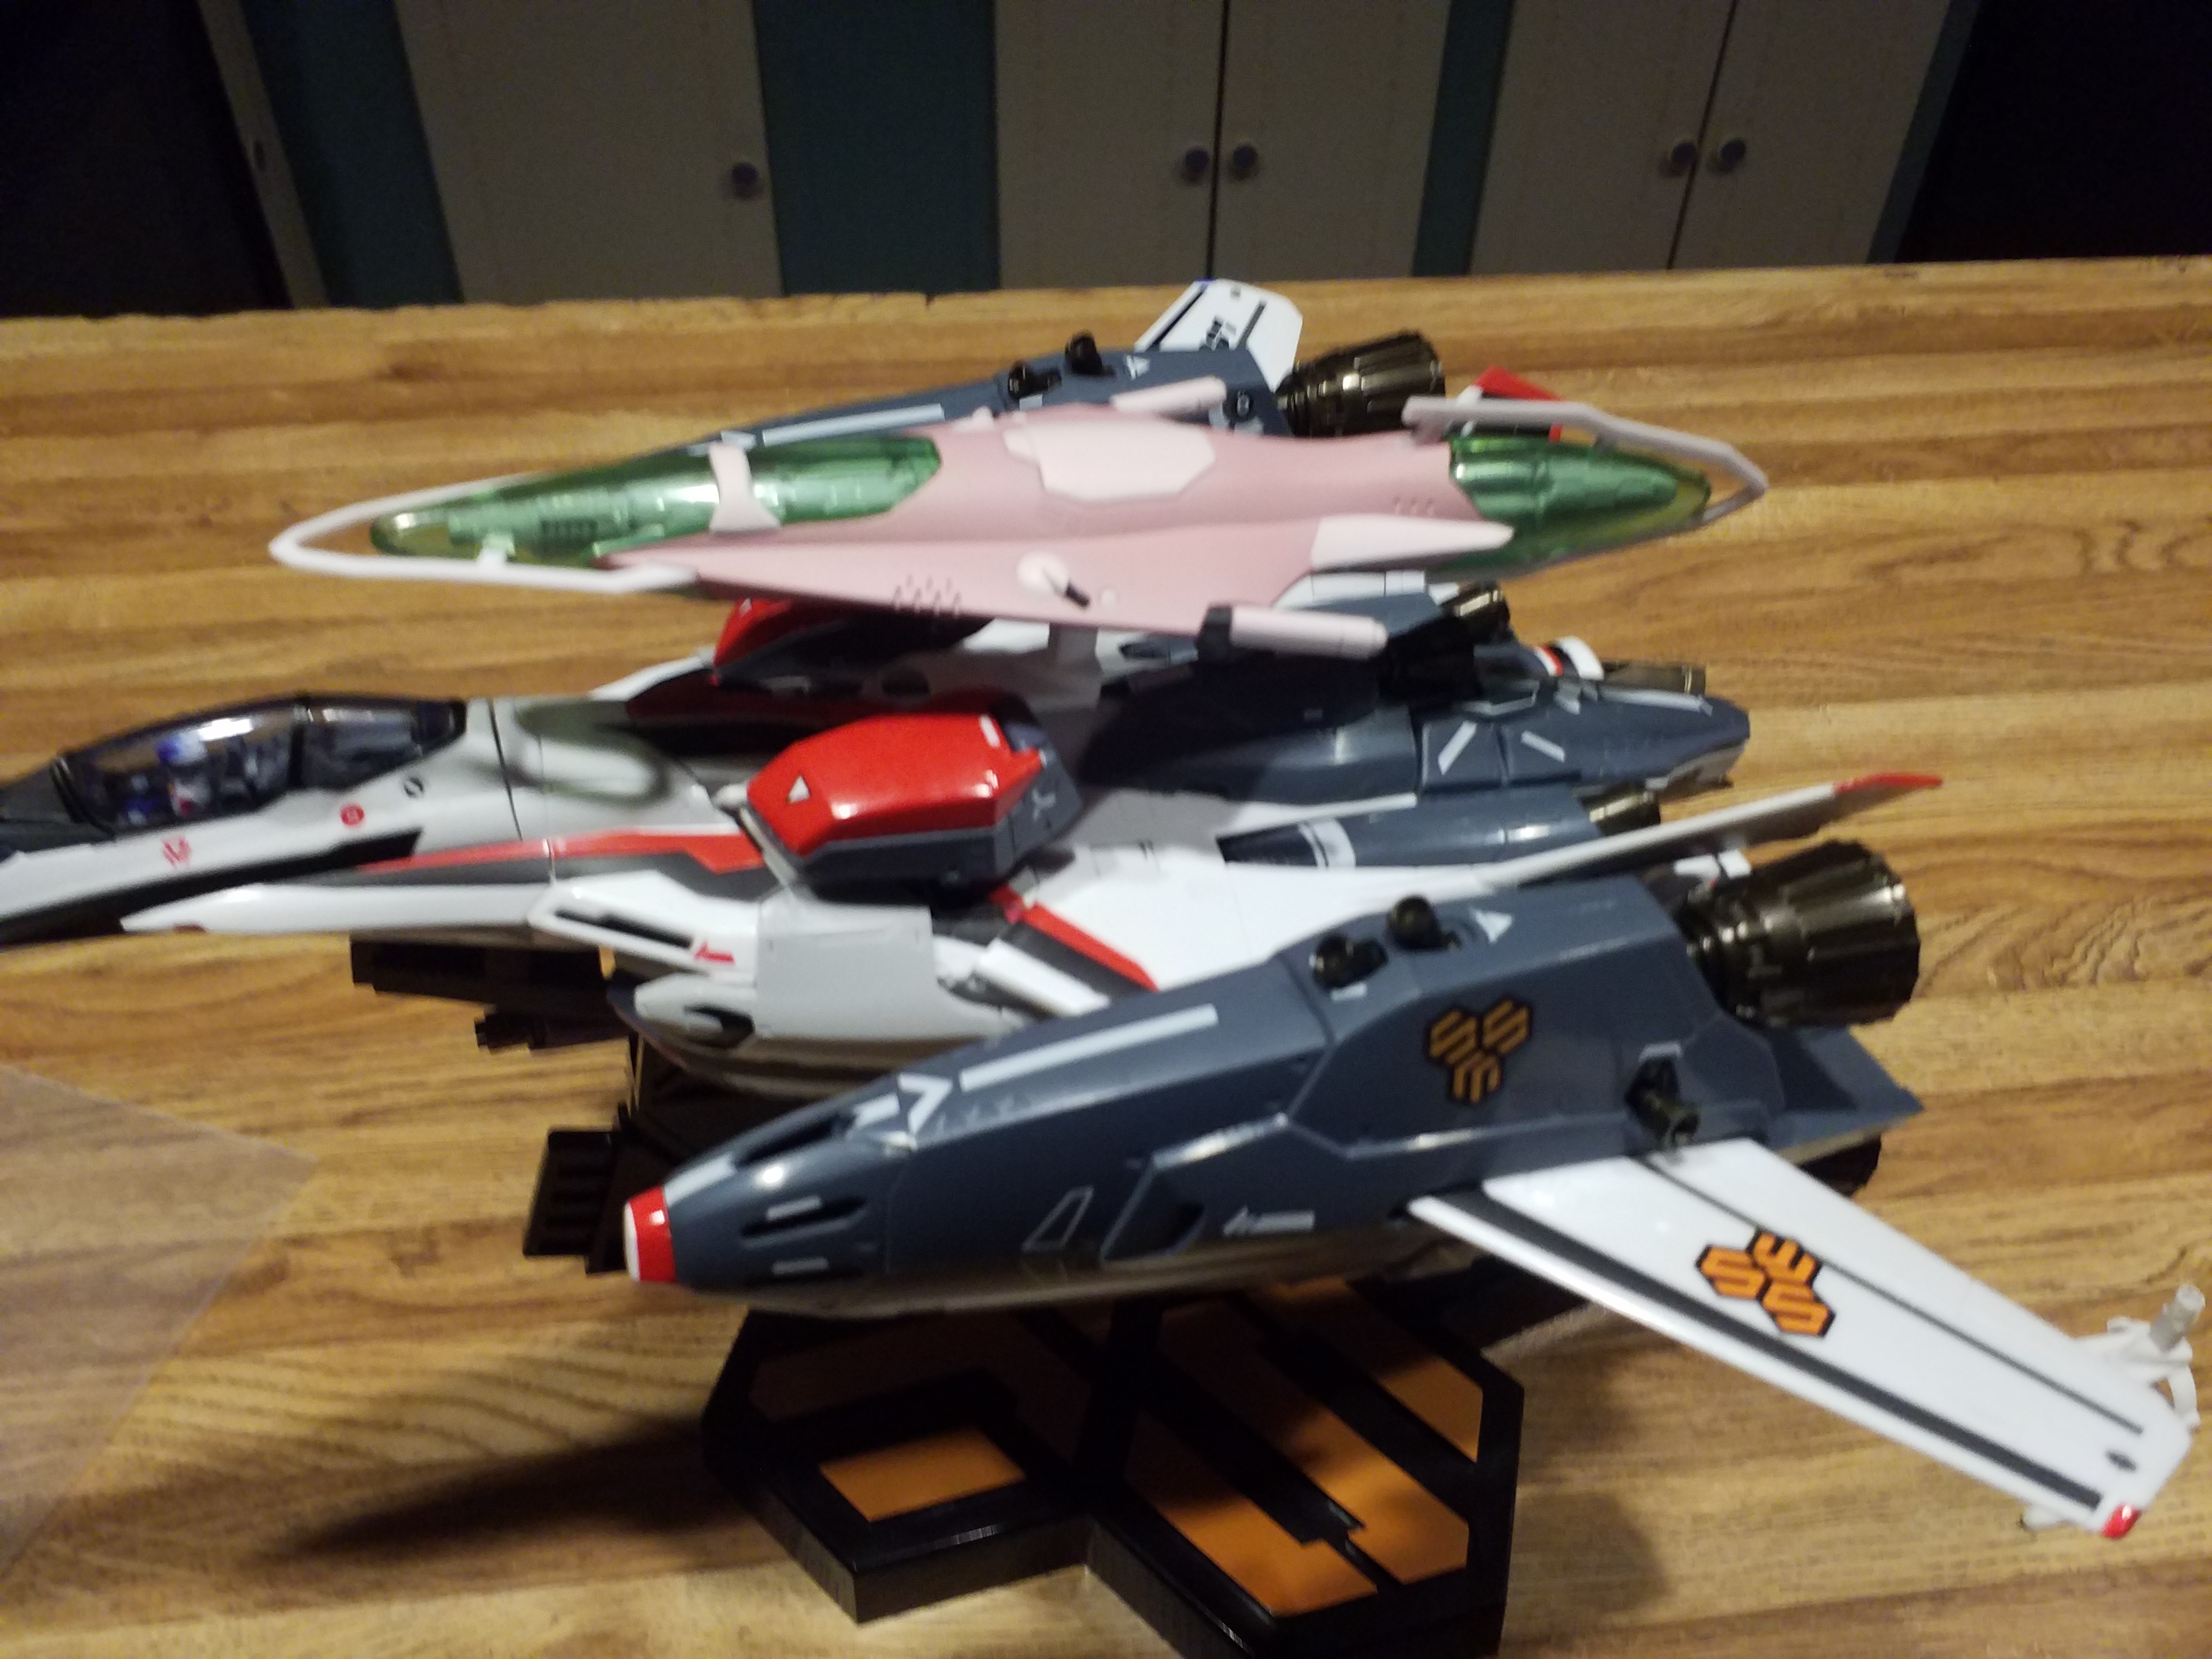
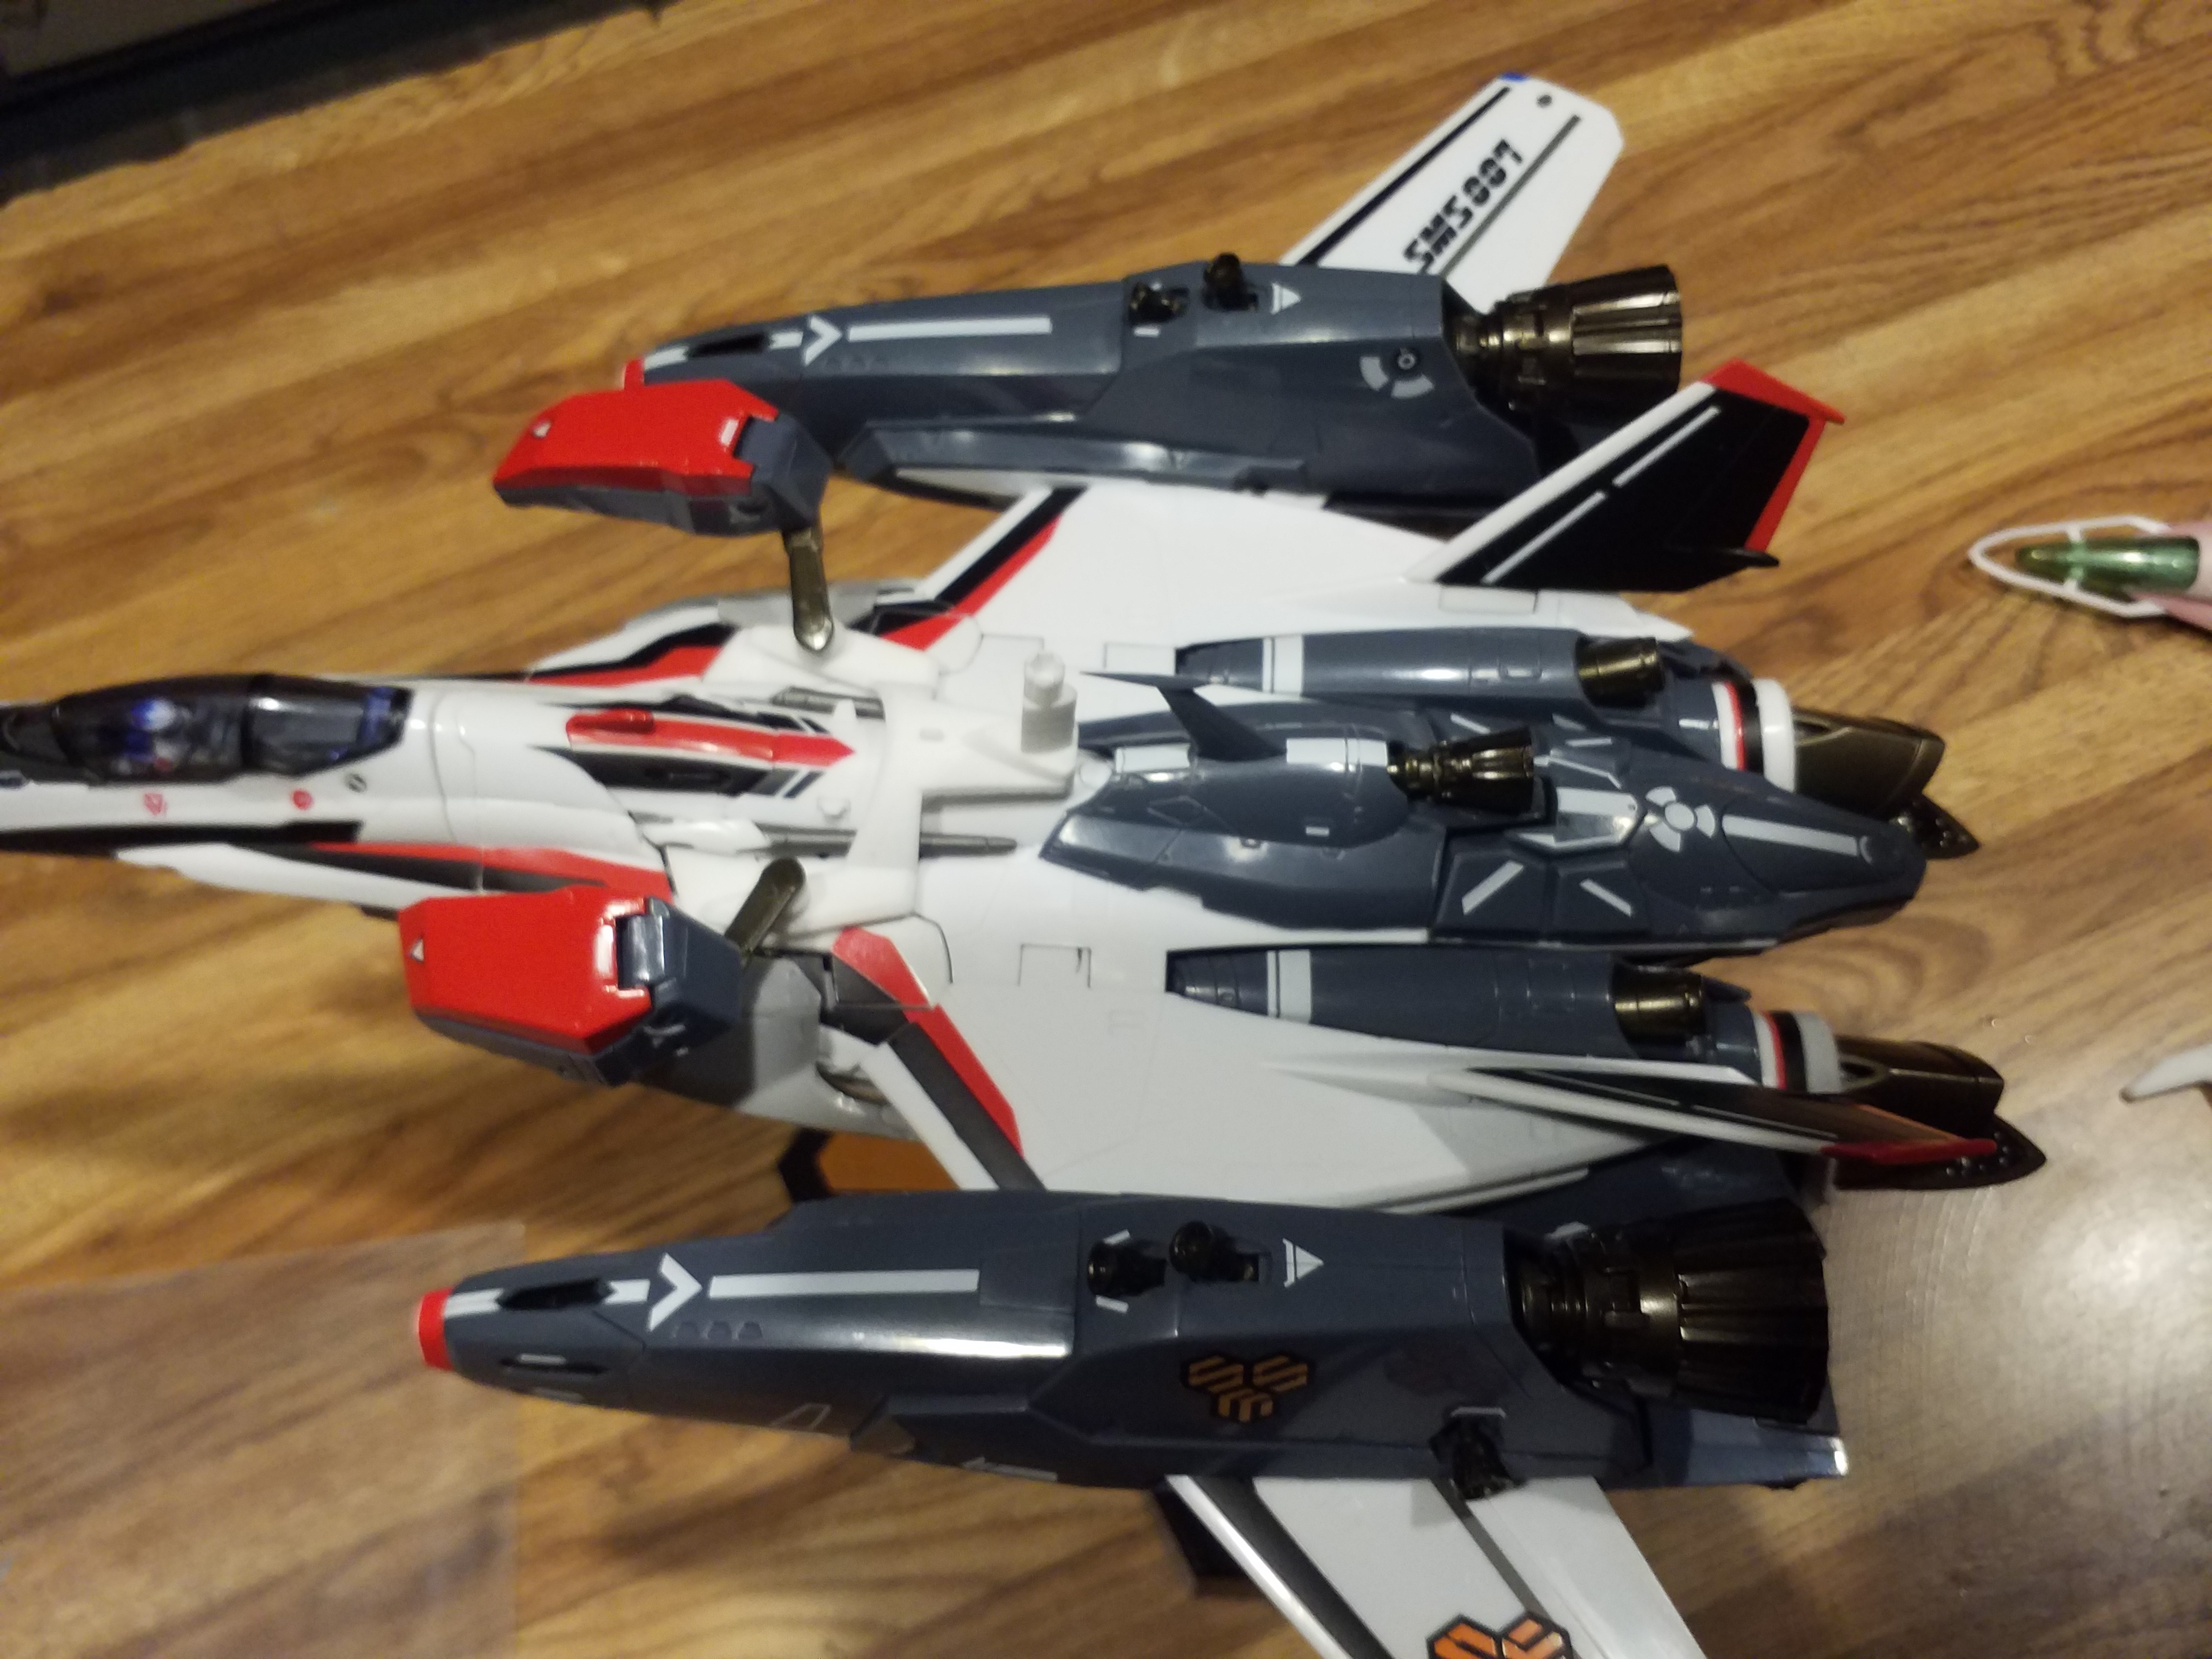
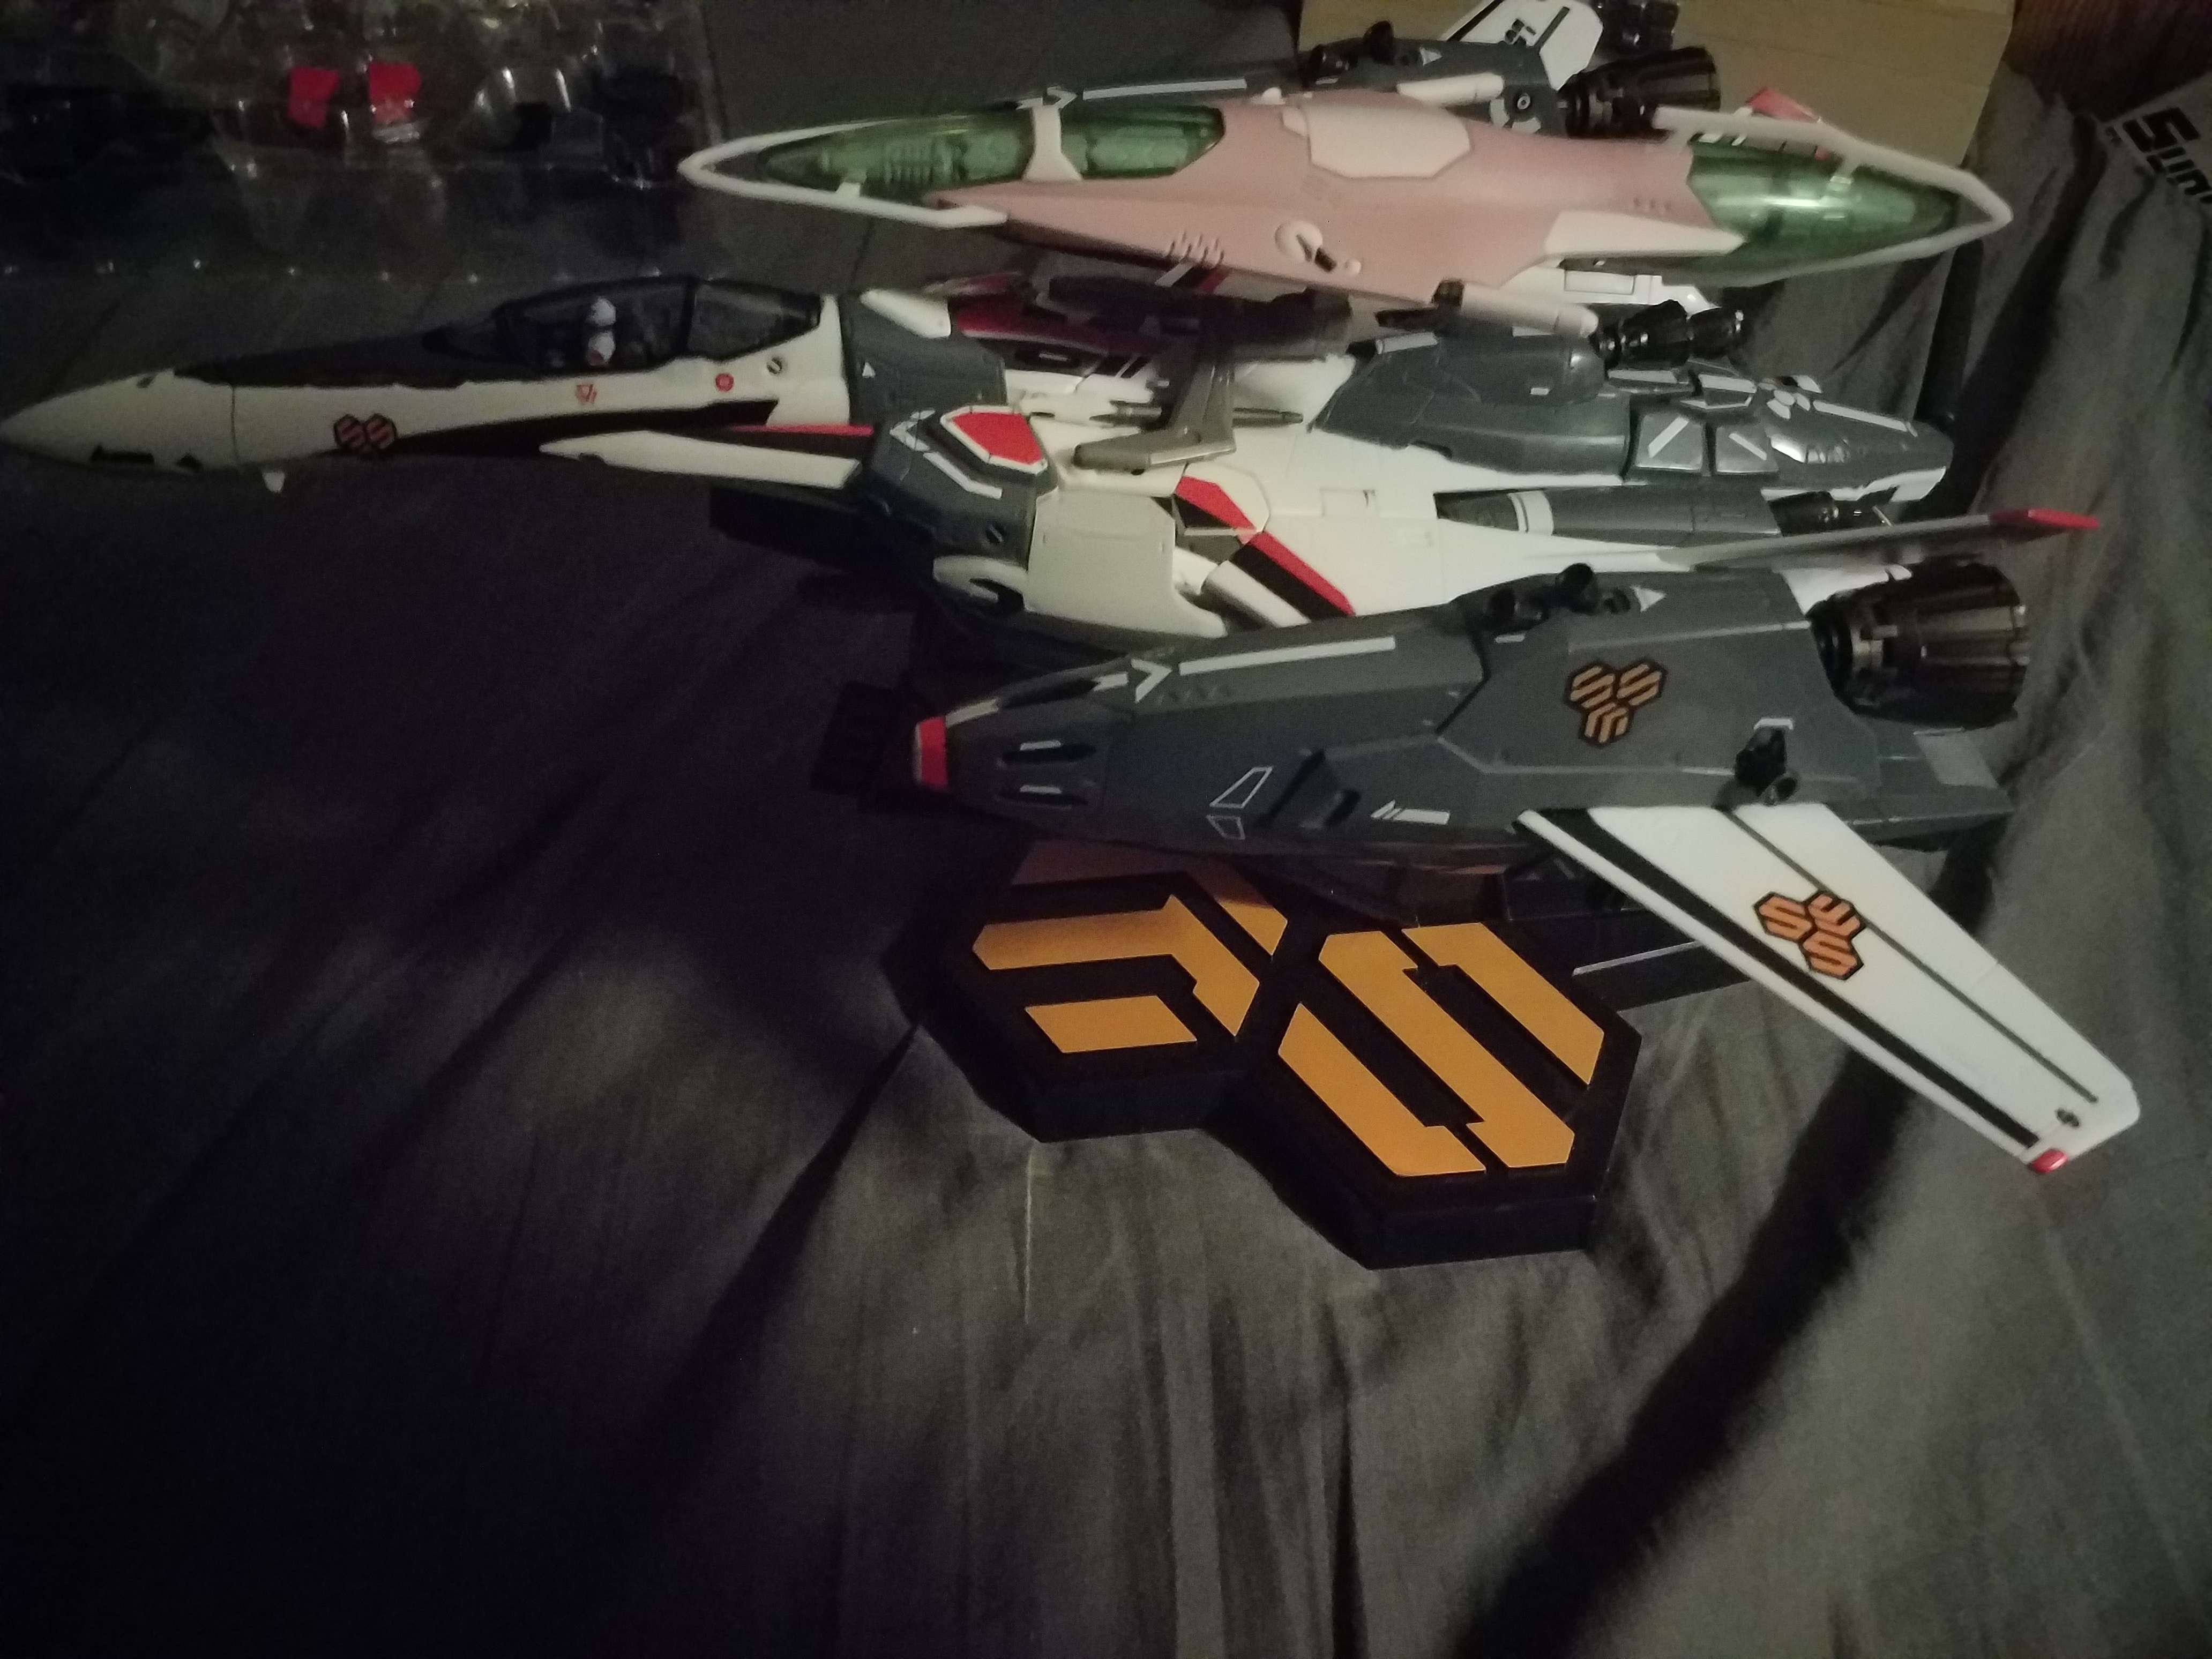
Just got the second of a pair of packages that completes the SMS Skull Squadron; ironically the one coming from Japan beat the one coming from California by 2 days despite living in the US.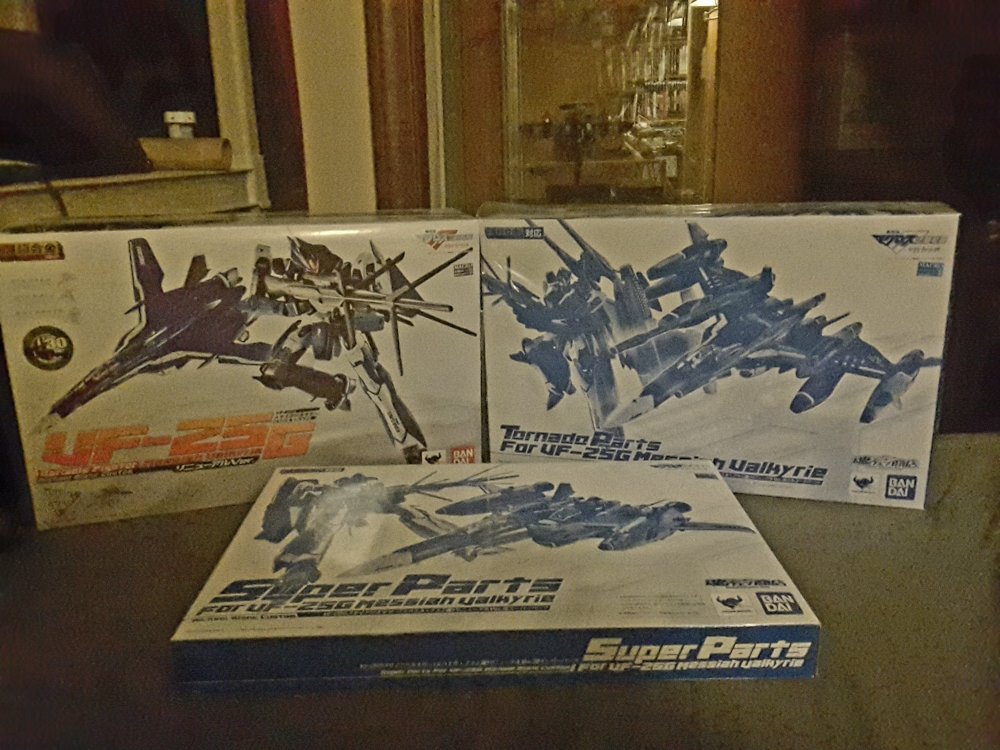
-
Your most recent Macross or toy purchase! General thread.
Jaustin89 replied to Gakken85's topic in Hall Of The Super Topics
Got a YF-19 aniversary edition curtosey of Spanner; had to relegate it to the top one of of my bookshelves for now as my display shelf is full. Probably going to head down to IKEA this weekend and pick up my first pair of detolfs to resolve the space issue.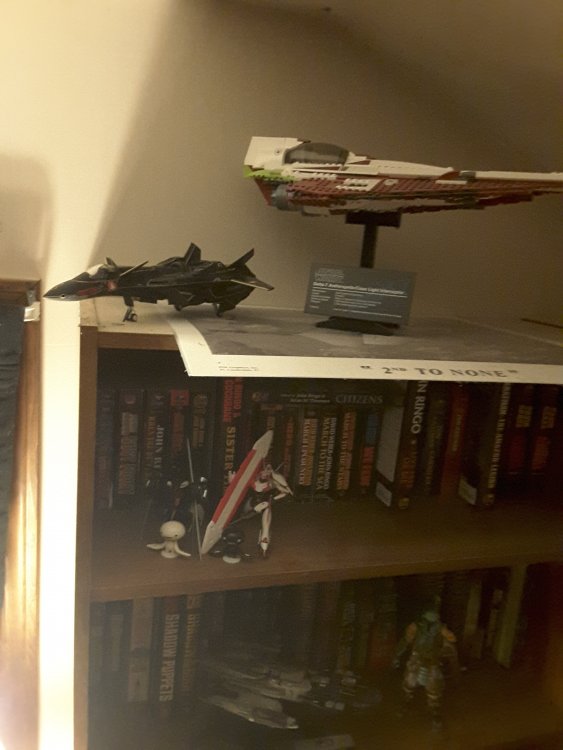
-
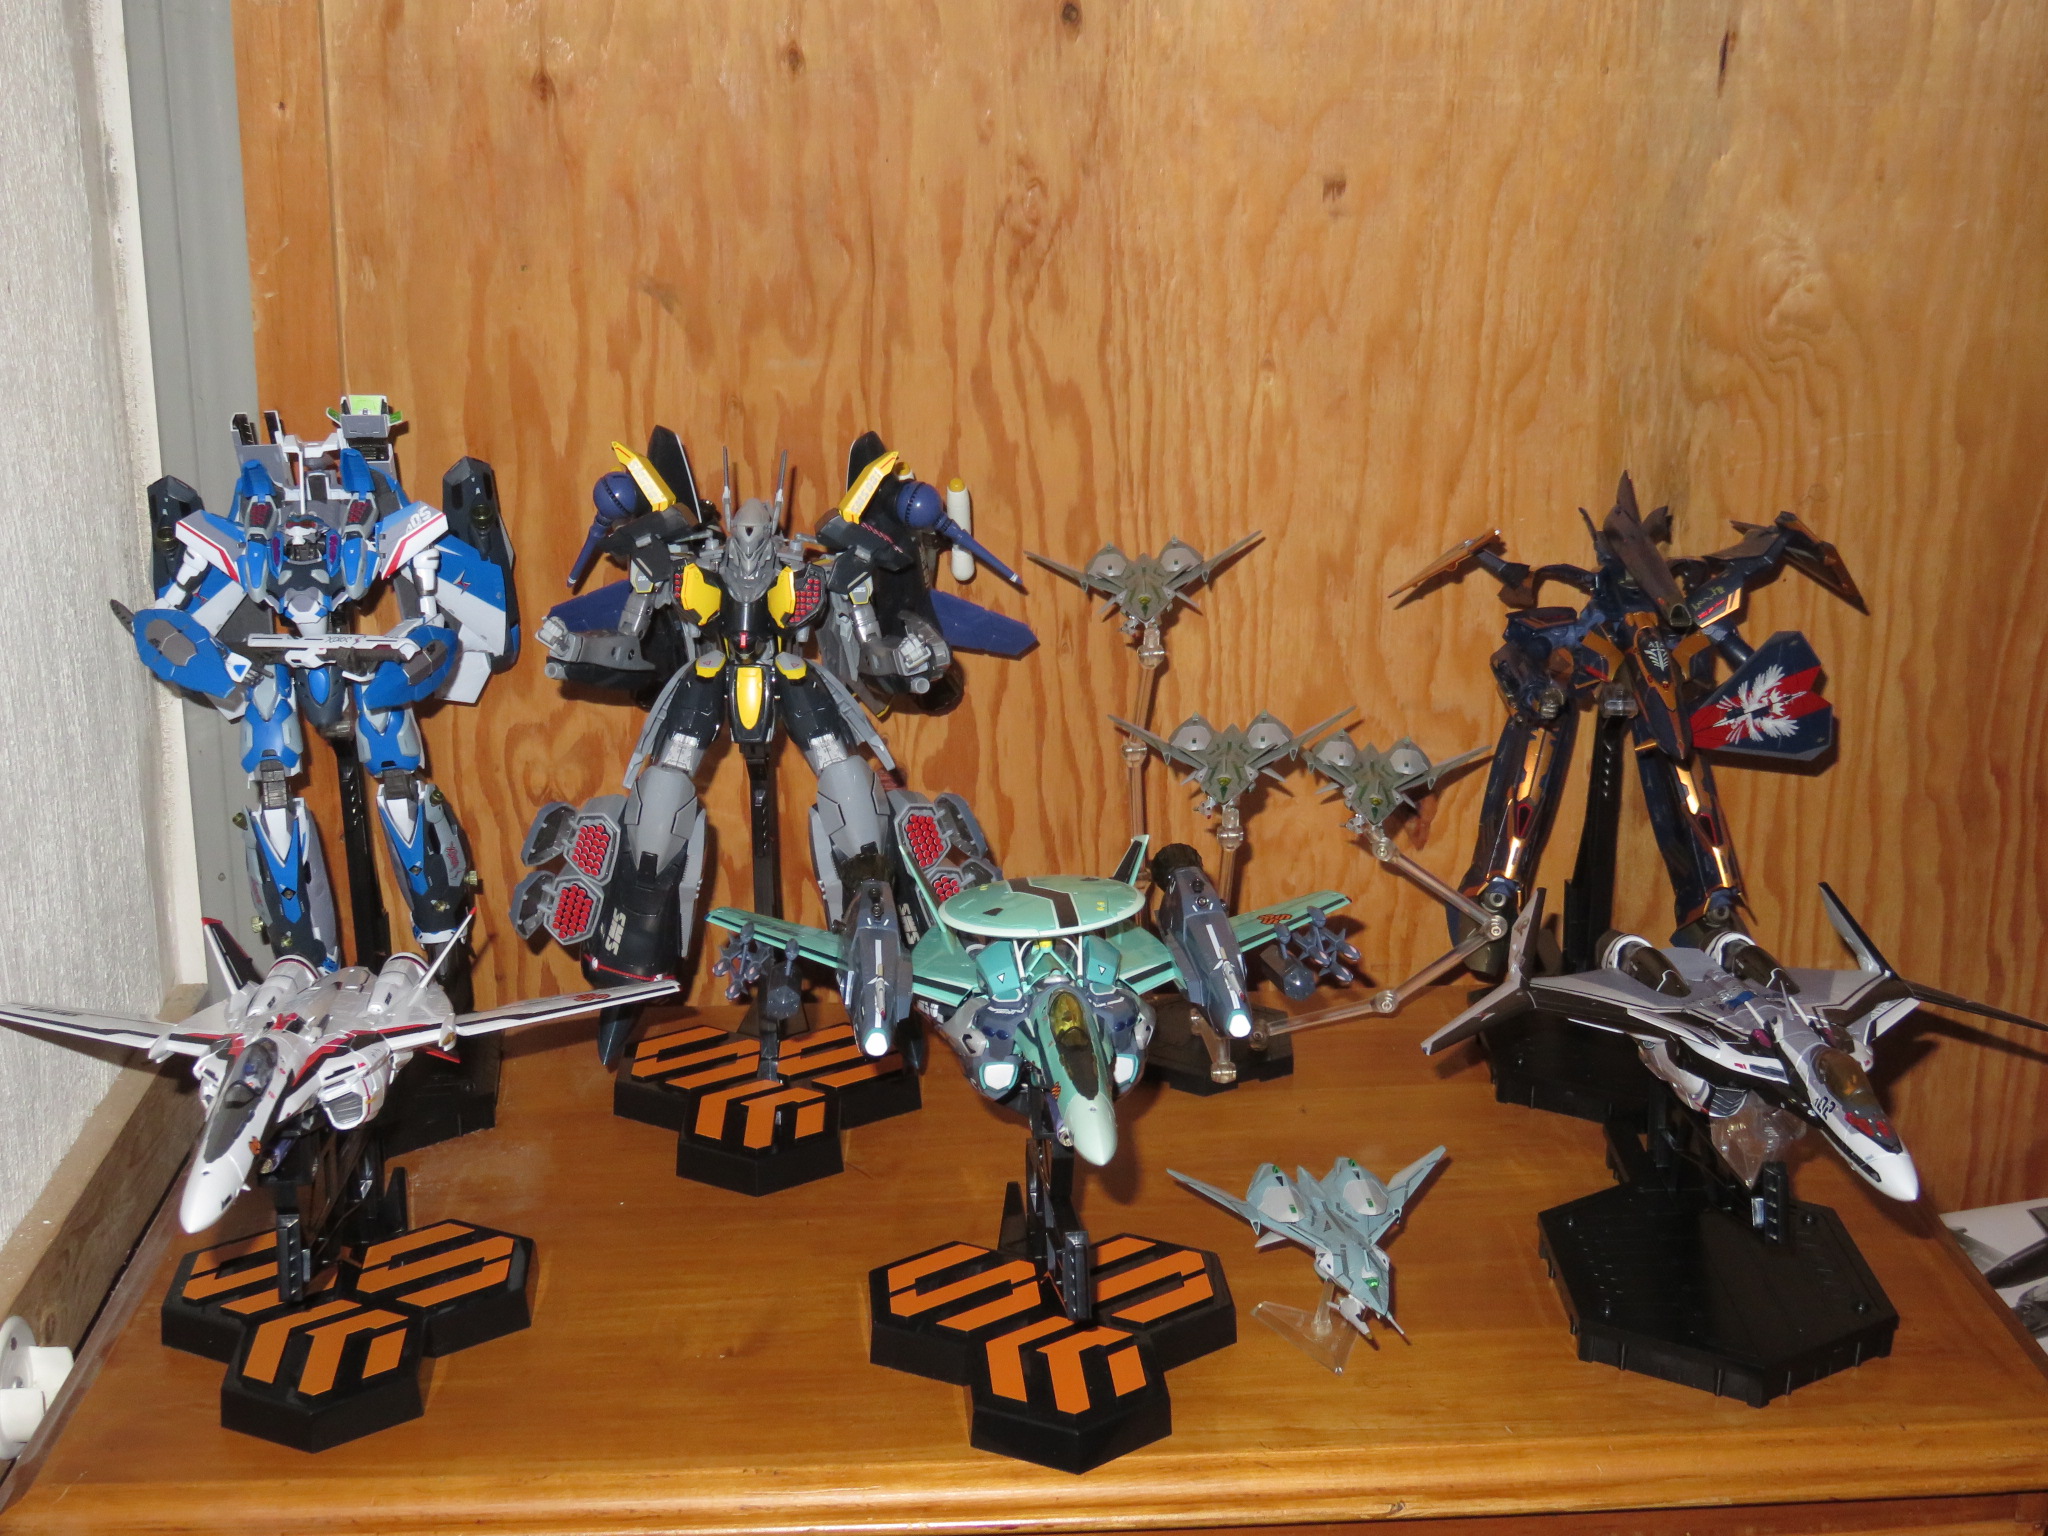
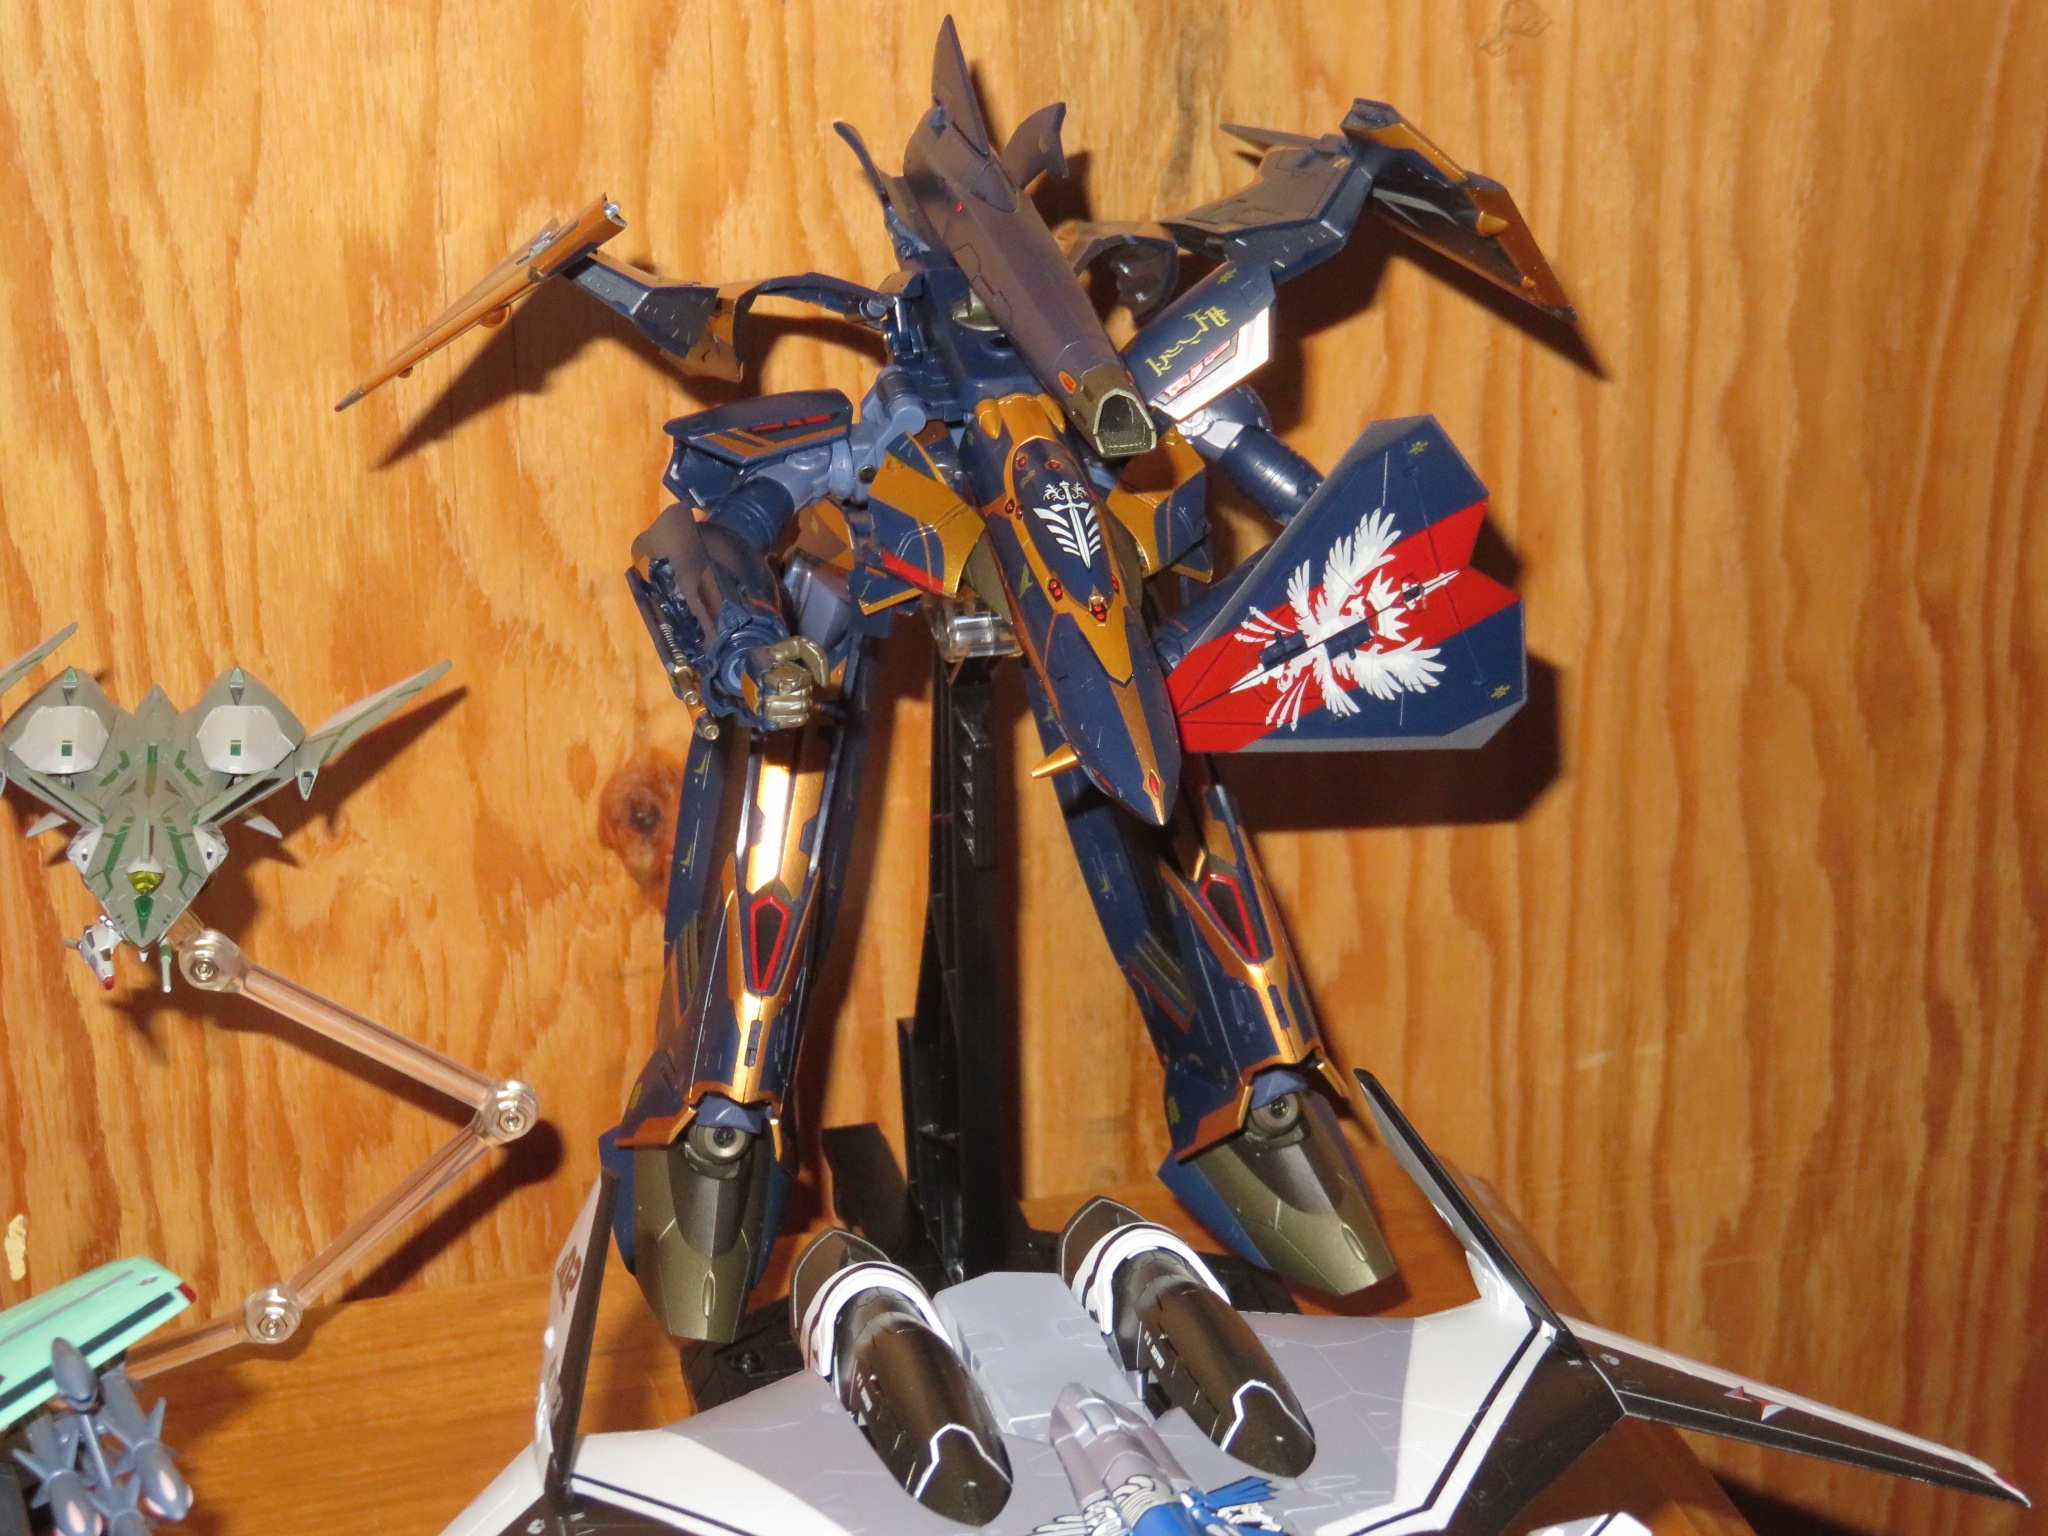
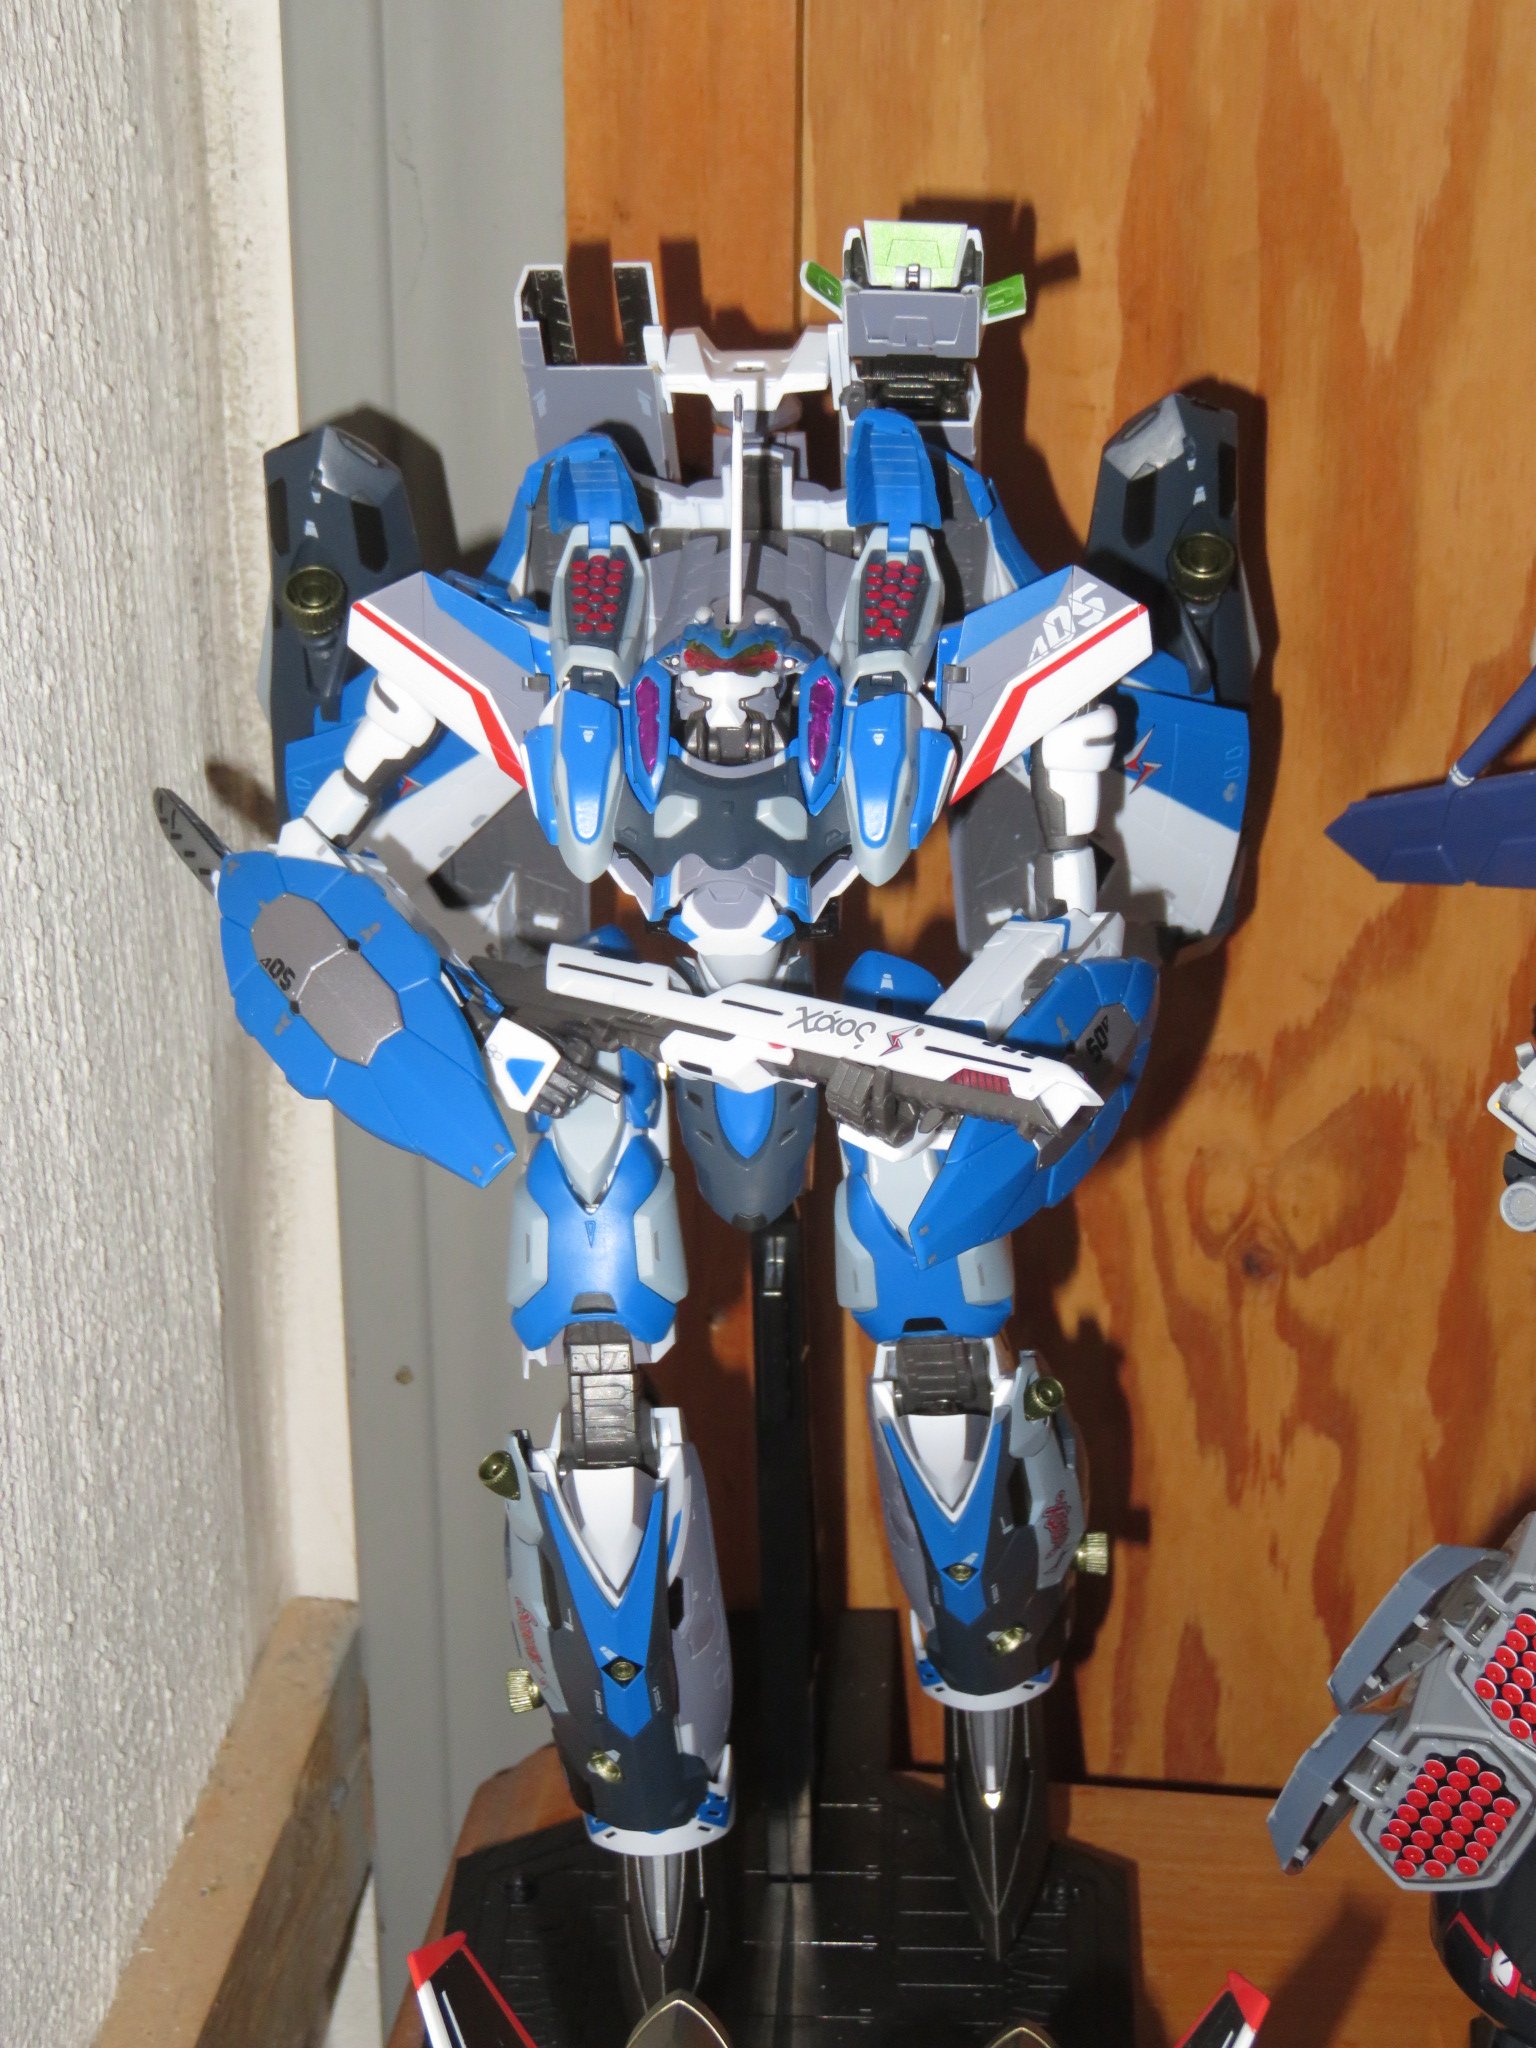
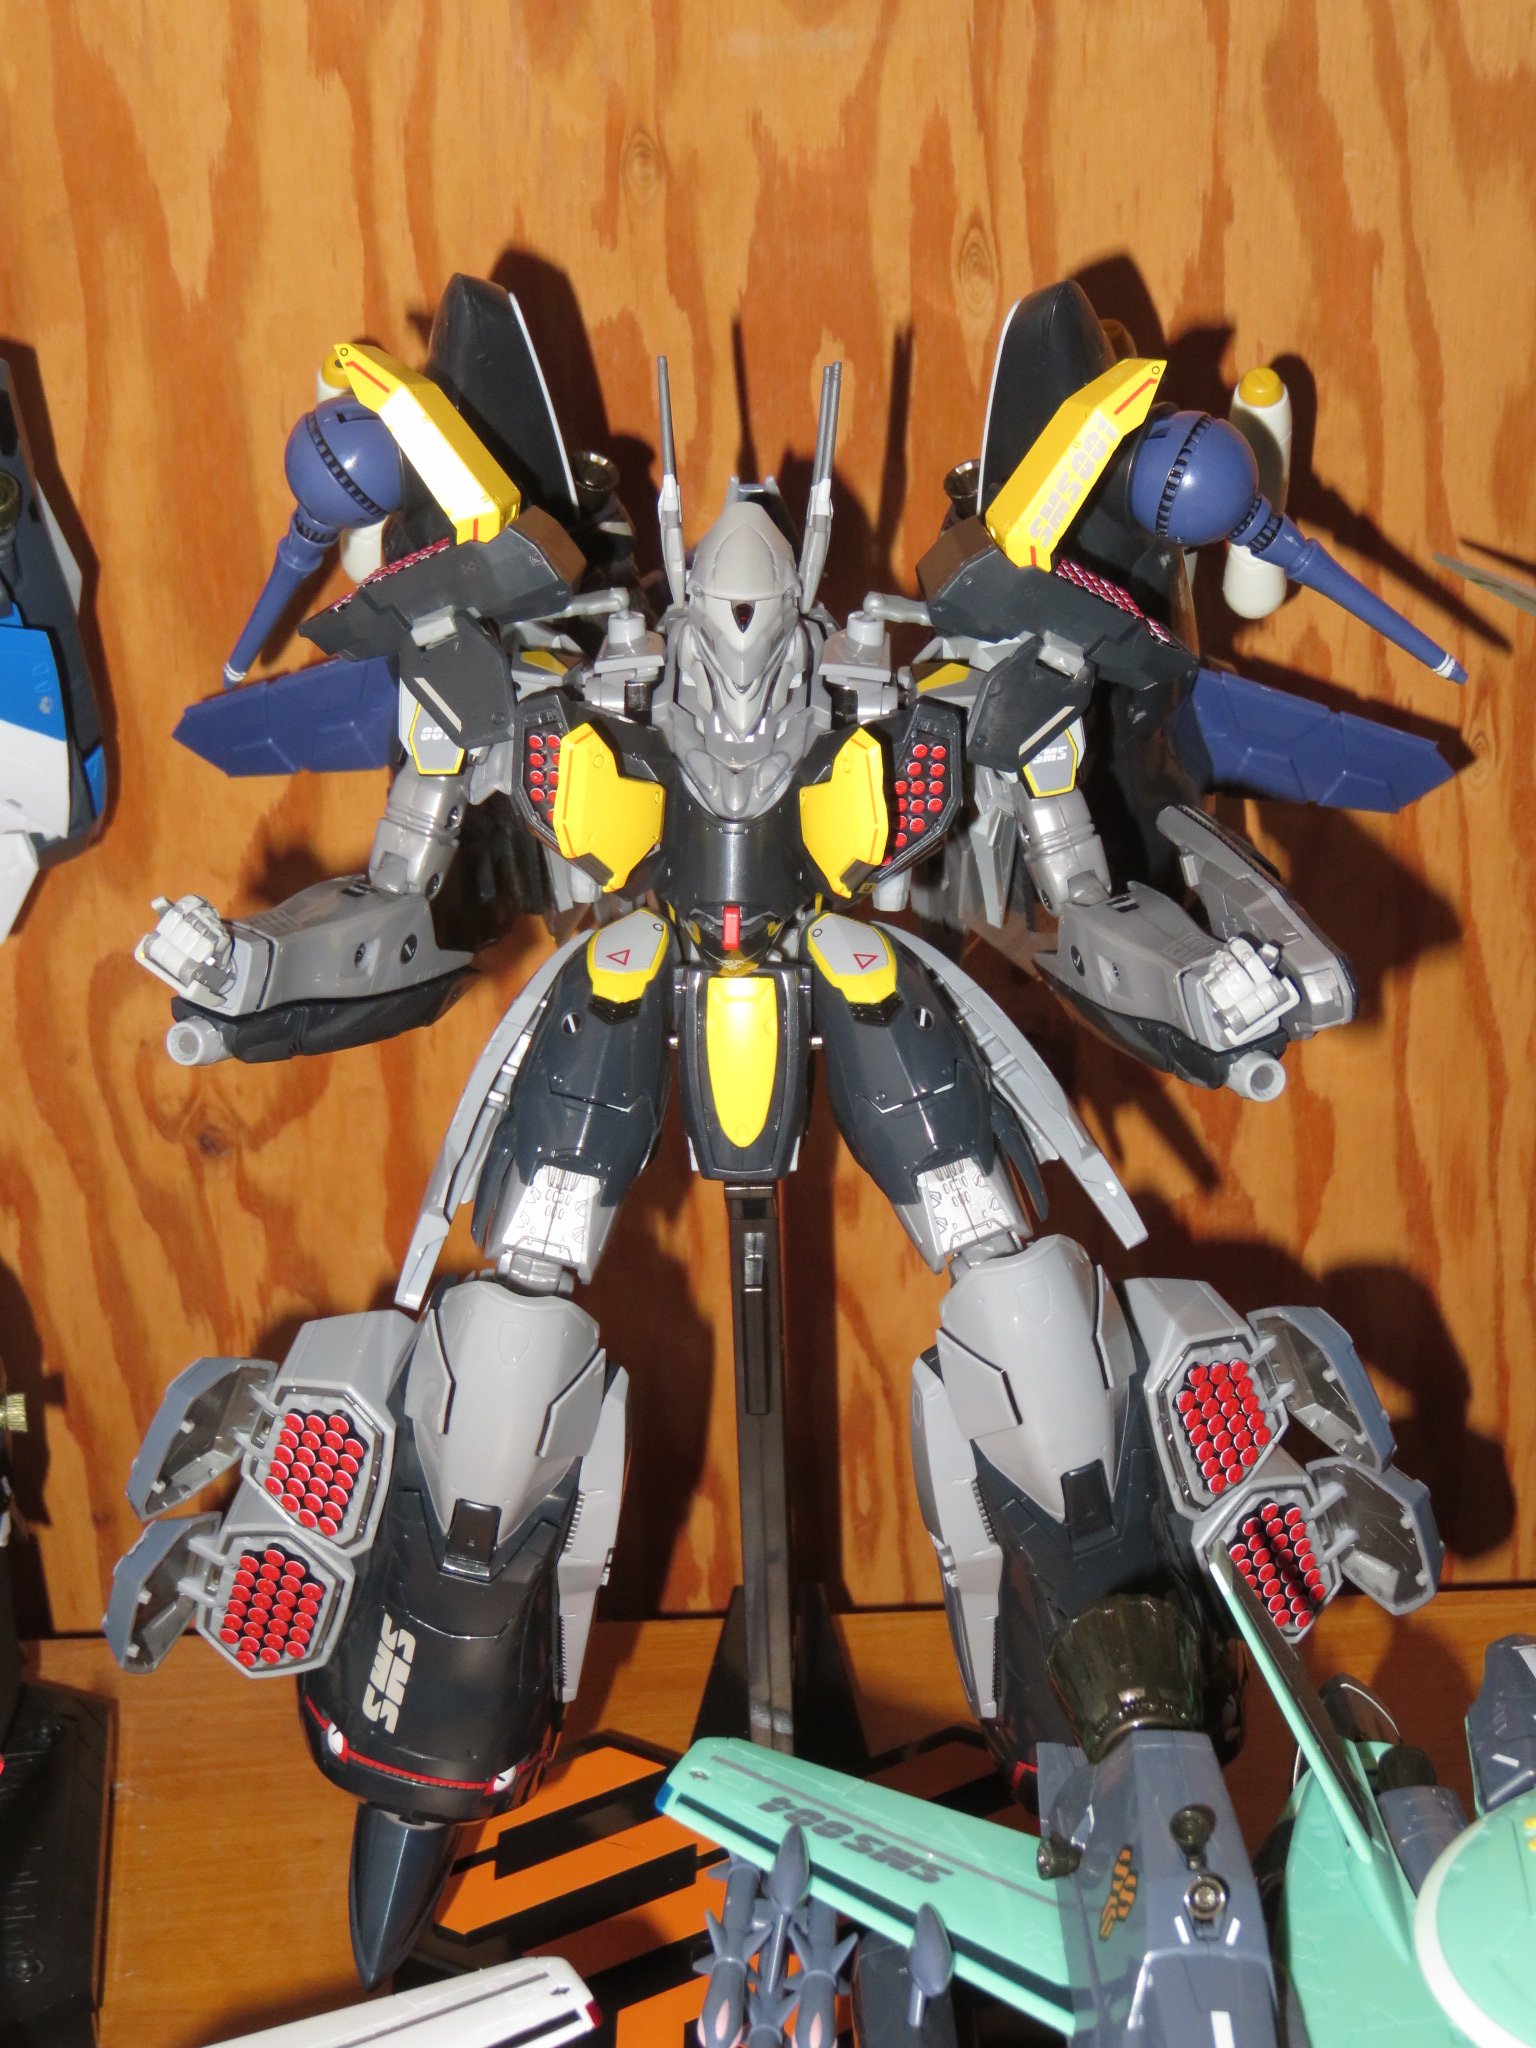
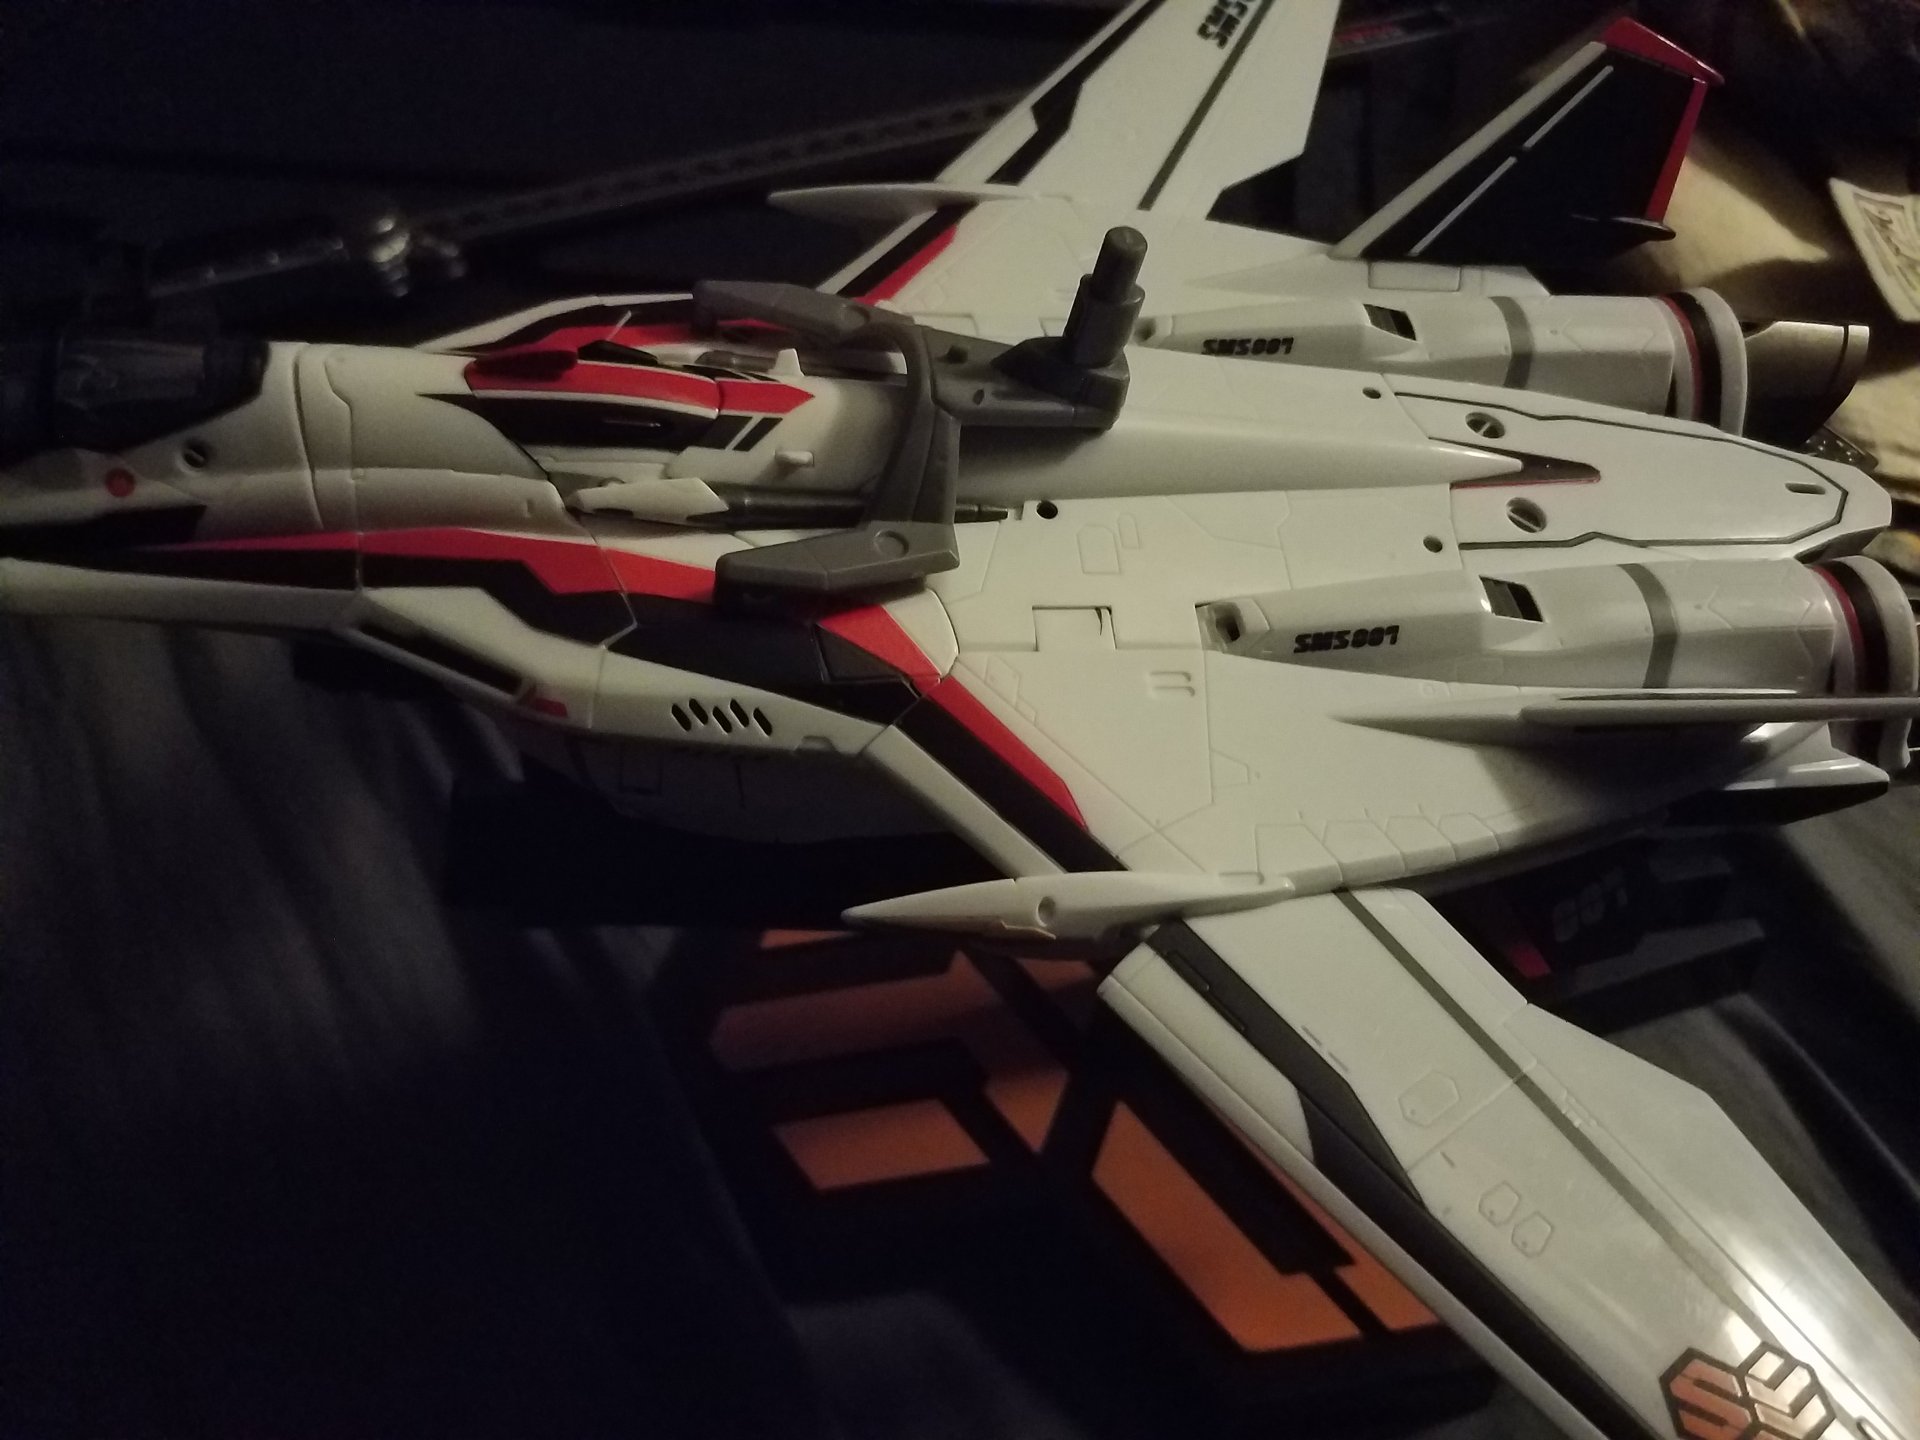
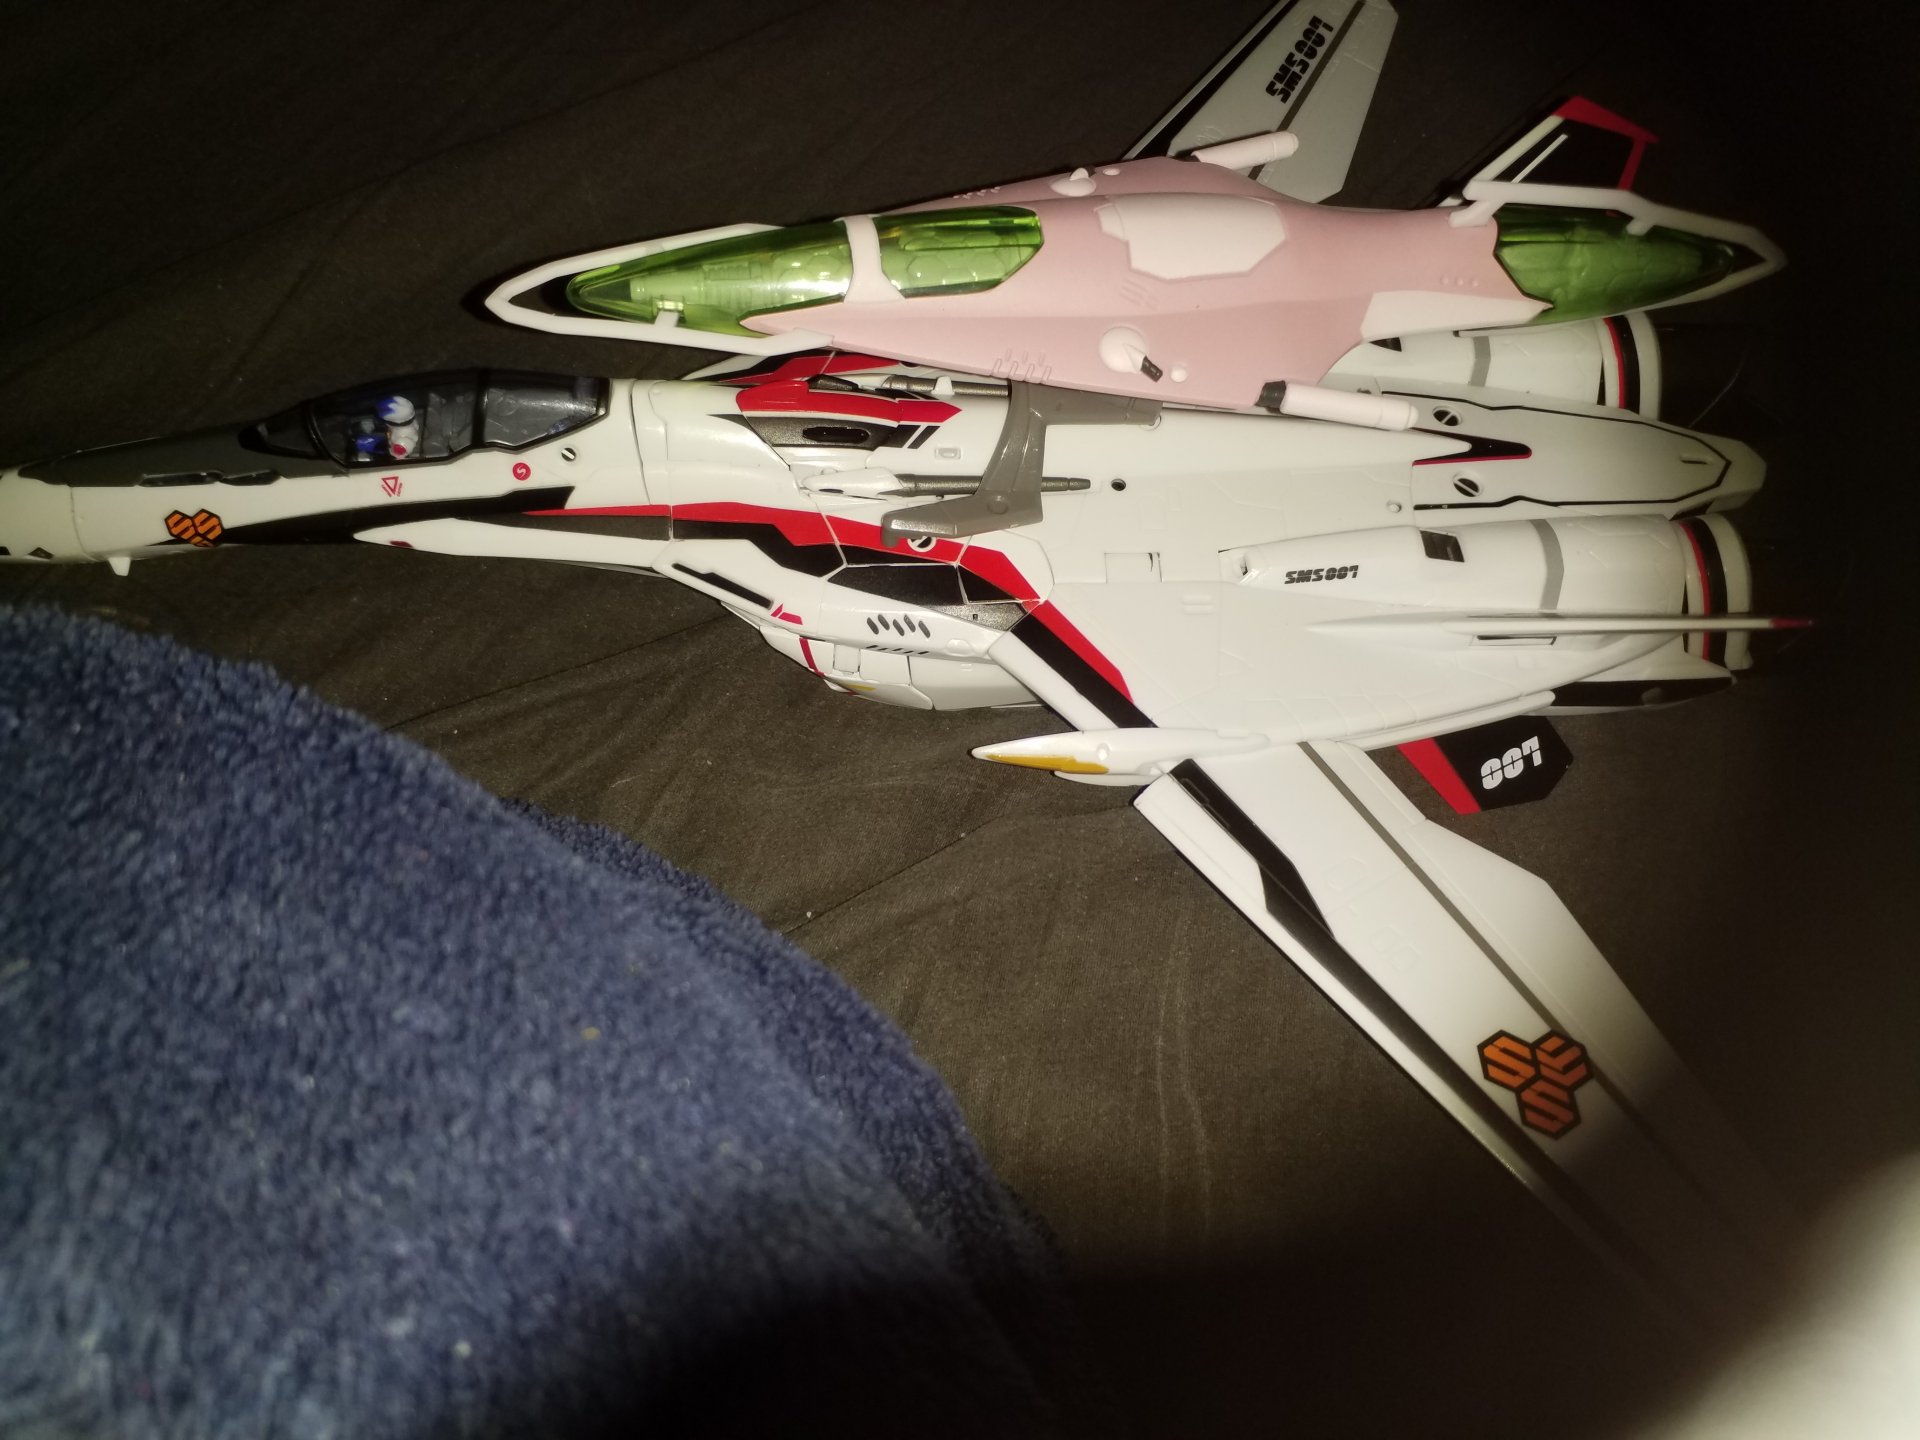
No comparison to most other people here but not bad for 6 months after I ordered my first Valk. I've also got all 3 packs for the 25F,the 25S supers, and the fold booster that I'm gonna have to create a new adapter for to use with the renewals (Or pick up a cheap 25G v1 till I can find an affordable renewal version and use it with that.) Closeups of the posed valks:


-
I'd say there's a pretty good argument to be made that they did indeed do so, though whether that's the primary factor in the low resale price I can't say. As a whole the complexity of the DX 262's transformation is overdone to the point where I'd rate it as one of the most mechanically complex assemblies I've ever seen and that's coming from someone who's last job was working on the design of jet engines. I really like the look of the 262 but the complexity of the transformation doesn't strike me as a good decision when from what I've heard some of the smaller scale models have a simpler mechanism that achieves comparable results.