
NZEOD
-
Posts
1960 -
Joined
-
Last visited
Content Type
Profiles
Forums
Events
Gallery
Everything posted by NZEOD
-
Yes and no. PMMA is the techo name for Perspex Optical fibre. Its actually a POF or Polymer Optical Fibre with a perspex (acrylic) core and a polymer cladding. Its the one you want when you need to turn corners and DONT want snapped fibres or splinters in your fingers. They can be single solid cores with a sheath or without and they can be bundles of fibres in one sheath. The sheath stops light loss though the walls of the strand. Useful, not essential. Adafruit Trinket How Too Manual arrived today so I'll flick through it and summarize the relevant points for our projects over the next week. Specifically: Adding LED Control - Flashing, Fading, Colour shifting Adding Movement Control - Servos, DC Motors, Stepper Motors Adding Sound FX Adding Triggers - Switches, PIR, Timers. Power Sources - Button Cells, LiPos with Recharge function, Mains Power Anything else we can think of to explore, yell out.
-
Well that sucks... no EX Gear pilot. Pass
-
a decade since the VF17 appeared and we've waited for a 1/72 version... alittle longer waiting wont kill anyone
-
wait... you did this over 2 days??
-
Damn... you work fast!!
-

VF-1J “S-FAST PACK” Config. Ver. 1.1 W-St. – 1/72 HASEGAWA MODEL KIT
NZEOD replied to Andrea's topic in The Workshop!
Take a bow dude... -
Line art does look better
-
listen the voices.... whats that? you want to make the VF-17 fighter?.... ok....
-
I'm thinking more along the lines of our resident 3D gurus coming up with one or our own over the next year like they did for the Drones and now the Workroid. Being WAAAAAAAY Down under in NZ getting to Wonderfest isnt an option and Proxy buyers dont exist.
-
I REALLY need a 1/72 VF-17 and a VF-171 series fighters in my Hall Museum but they JUST DONT EXIST! I'll pay a few hundred for one and I'm sure a couple of others would jump on the band wagon with this (maybe not paying the price I would...) to fill out the orders. This is a weird one as its not an uncommon design in the anime series yet its never been done in this scale while most everything else has. Any takers?
-
Fibres easy, its sourcing the right items thats a pain. I HATE the glass fibres they snap at the slightest nick and are quite happy impaling themselves into your fingers. Yeah thats the gnd I use as well. You can use either or both gnd points
-
hahaha yep! I lost a bet in Suai and when I rotated back to Darwin for a week one of the punishments was to be dropped off at 5/7s front gate, in civies, to ask the Duty staff if this was the home of the Man Loving Unit as I required a Prostate exam and heard they were experts... I'm a pretty good runner it turns out The things we do when we are young and dumb.
-
What you do is get a prototyping breadboard ($10 or so) and some male to male jumper leads and you build the system on the board to test it all. That way you can do it next to your PC so making programming changes can be done there and then. Once you have the programming sorted and wiring layout finalized you then remove it from the breadboard and permanently soldier all the wires in. The 8Sticks are a great way to practice and test layouts and learn to program each LED. Just solder a set of 90deg pins to the end of it so it stands up in the board like a dragway Xmas tree light set. Neat and tidy and can be tossed in the toolbox when the wife wants the bench space back without having any wires to tangle.
-
Just scored another Retppu 1/72 VF-4! Bonus!!
-
No no no... thats Sgt not Sir, Not ever EVER... I work for a living Yeah, just read something similar, Wing reaction engines, Body mounted Rolls Royces BUT... the fanes are still all mounted in the wing engines. SO fail one, score one for a match score of zero
-
Look for Kynar Wire. Its used in windings, Its actually stronger and easier to use than the enamel Copper and comes in simlar gauges all the way down to 0.25mm! The size depends on the total current draw of your circuit and its wire length. Got any more details on the types and numbers of lighting you want to use? When soldering with Kynar, you want it to be hot and clean and quick. The heat from the iron burns away the insulation so you don't want that traveling too far up the wire. One trick that works is to mount the iron in a clamp and offer up the parts and solder to it, instead of holding the iron. Works for me anyways. I clamp it to a card box with all my tools I'll need in the box to stop it flipping over. Makes for more a production line setup for doing masses of LEDs or repetitive tasks and avoids placing the iron on a model part. my 23 display cases used 4 LEDS each wired in series with a 2 prong plug and 5 wires... all having to be done the same length.. again and again and again. This sped it up alot and was done on the Kitchen bench while watching Macross Delta, Top Gun...again and Black Sails I've ordered the Adafruit Trinket guide for dummies book so anything I find in their thats relevant I can scan and pass on here its that skating within the rules.
-
FN L7 GMPG And dont be hassling the Kiwis the ND, 5/7 had a PC crew sent home from BATT1 for doing things together they shouldnt... We sent our 113s to Timor to die so we could justify getting the NZLAVs! Such a waste.
-
and yet.... Xander was supposed to have been killed off
-
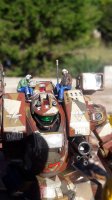
Notice the way the parts are laid out... especially the fans front and rear of the wing engines...
-
...yep.... intake fans to the front black jet exhaust to the rear.... It has atmospheric turbofans when in planets and jets when its a vacuum, same as the Valks have their intake fans covered when in space and run on reaction jets. Think the ones on the wings are the Turbofans and the ones on the fuselage the space rocket motors
-
Hahaha!! I was there in 1999 NZBATT1 as part of the INTERFET and later UNTAET Missions! That's when we were getting the executive ride into country in the Suai Sally Sea King, as the grunts were assaulting the beach in landing craft from the HMAS Tobruk. Wow... small world! Are you doing a 5/7 RAR 113?
-
There is a Games Workshop/Citadel version too... liquid greenstuff. http://fromthewarp.blogspot.co.nz/2012/01/quick-look-at-liquid-greenstuff.html http://piratevikingpainting.blogspot.co.nz/2011/10/liquid-green-stuff-review.html
-
Working on it. Had the privilege of going into labour to deliver (its still not out!) a 4mm kidney stone so I've had the day off at home after spending yesterday in A&E on Morphine and have been busy soldering up my latest loot. An Adafruit Trinket Pro, FX Sound board and 20W Amp for the Street Shootout scene. Just working on sourcing all the sound effects now. The Hall display already lights up on case at a time off a PIR. Its proven to be quite useful for tracking when the little ninja 20month old sneaks out of his bedroom at night!
-
In the ships Hull is where you hide the Neopixel. Use a strip so you have eight addressable Neos then run high quality fibres with lens ends. The Neos and the Trinket board can all run on a tiny lipo or hide a two wire power cable into it though the stand. You could even add motion activation as I'm using on mine to turn on the effects when someone passes near. Add a drop of clear resin thats semi set and suspend upside down... it hardens to form a lens. Seat your Fibre to this with more resin. Use Solid core sheathed Fibres which start at .05mm dia and go to about 14mm dia.
-
No I mean actual 1/72 scale belted up straps