
NZEOD
-
Posts
1960 -
Joined
-
Last visited
Content Type
Profiles
Forums
Events
Gallery
Everything posted by NZEOD
-
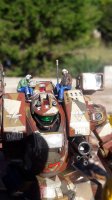
Work in progress so the cockpits arent drawn yet and movement is still being worked on from listening to the vid discussion. I like that they want the hand to be able to pick up a person and that person to be able to fire his or her weapon with in the hand! They are mapping the shoulders as a "roadway" so the pilots can exit the seat in Battroid mode and walk around on top. Great sniper spot. The little details only a Macross fan would get are there though... like the head cannon moving down out of the way as the nose wheel folds away in the landing gear bay. Swinging the Gunpod from storage to deployed in hand will be interesting though. Its the one thing thats always bugged me with Valks. They effectively through the gun in the air and catch it. So its main armament is, for a few seconds, not attached to the vehicle... I really should be on the other arm and the gun hand should reach across to grab it.
-
Stumbled across this... WOW!
-
Soldering fibres? If you mean the enameled wire, the heat of the soldering iron burns off the enamel as its applied. On my own I rub the wire ends on the soldering iron heat jacket to burn it off before soldering. If you want different colour at different optic fibre and the SAME time you will need different LED sources. My controllers are outside the models, hidden in the diorama base and the models connect to them through, for the Destroids and Battroids, their feet where I have a socket they click into, and for the Fighters on the Carrier Deck through a single fibre strand running down each landing gear leg. The Launch Arm ones will connect though the centre of the back pack into the piece between the arm claws.
-
NVM, found the fault. Photobucket is dumbing down the images. When I view the original on my screen I can read clearly the writing in the warning labels but after uploading to Photobucket it blurs it out. PM me your email I I'll send the original files to you.
-
This is the absolute best I can get out of the work scanner I'm afraid
-
300dpi is the best the work machine will do. I guess you'll have to either NOT worry about the decals or go buy another kit then.
-
RESOURCES POST - Where to find stuff and what to use for stuff - will be updated as we all find stuff My current choice of board to control everything is the Adafruit Trinket 5V for small LED only projects and the Trinket Pro for LED and multiple servo projects. Only reason being, I'm cheap and so is this board. Its also pretty simple to setup, program and power. The Trinket 5V https://www.adafruit.com/product/1501 Trinket Pro https://www.adafruit.com/products/2000 A good read to help you along the way is... https://www.adafruit.com/products/2289 A good source of gear... just about ANYTHING in fact! http://www.robotshop.com/en/
-
After talking to a couple of other members about this, I've decided to make a thread for dumping all our ideas and techniques for making our models move, light up and make sounds. Use this thread for anyone with ideas and links to gear, projects and programming. My background is as an Army Ammunition Technician and IEDD Operator. I worked on and operated the REMOTEC Andros among other duties. So messing with gadgets and things I shouldnt are second nature. I also Fly Gliders and compete in FMX on a Husqvarna CR125, Street Stunt on a Triumph 675, Motox on a Husqvarna TC250 and MTB, Snowboarding, Kite surfing and anything likely to result in pain and dismemberment. As such I have messed around alot with cameras and remotes and ways of mounting them, making them move and track a target etc. So this leads me to here and wanting to making my destroids move and track a person around a room with their gun barrels. I have a Tomahawk with light up beam cannons and spot light and a servo in the body to swing it round. The Defenders have the same with both spotlights lighting up and the body swinging. They also have a rotating radar and arms that raise. One is a Defender XV and have PE Brass 6 barrel cannons with also spin at 1000rpm. The Phalanx has a servo in the body and one in each arm and 3 LEDs in the spotlight tower. The Valks in fighter mode have LEDs in the engines and beam cannons and one is getting a backpack lit up mid explosion (current project). All this is powered and controlled off Adafruits Trinket 5V and Trinket Pro Adruino boards and cheap $16 Micro servos, Neopixel LEDs and , thanks to MECHTECH, some insanely tiny gearbox motors for the gatling guns! The diameter of a pencil. Over the next few weeks I'll load up links, examples and programs (called sketches) for making things move and light up yourselves. It may seem daunting but honestly, once you get started, its not too hard. My 14yr old daughter learns this stuff in school now. I'm no expert, I just have a passion of fiddling and making things do the unexpected. Likely some of you here will be able to take my limited knowledge and ideas and improve on them 10 fold. Thats the hope atleast.
-
Adafruit Trinket 5V - LED controller board... thats it its a stand alone board about the size on a marker pen cap, just plug it into a USB to power it and program it. Mine run off a 240V to 5V USB wall socket. https://www.adafruit.com/product/2000
-
no no no... leave them on... it looks good!
-
once you get up to speed with the coding... making those main guns fade up to a blinding strobe effect as they "fire" one at a time in a volley fire way will look AMAZING! Especially when you add in a slight colour change... maybe charging up through a faded purple to a blinding white on firing to a cooling faded red glow after!
-
I've built 2 so far forgetting to fix the legs until it was too late! Luckily one of them is in the Hallway museum display so will never been viewed from side on! Unfortunately the other is a 1D on the carrier deck display and its SO F-ing obvious! Cant fix that one without ripping the engine lighting wires out.
-
Ok, give me a week or two to tidy up the renos and I'll sit down and do a tread on engine lighting then go from there
-
hmmmm... now to model it...
-
so... what is it? An egress ladder?
-
Class!
-
Hah... I seriously doubt they would be offended, more like quite proud of what these ladies have been doing that no guy has beaten yet. If you ever do try it, I can help with the programming sketches. They are written in notepad so they can be posted in a PM and you just cut and paste them then upload to the Trinket and you're ready to go.
-
super simple to wire... one 5v power, one ground, on data in... if more than are needed you just run a line from the first SMD's Data out to the next smd's data in. Literally seconds to solder. And the programming is super easy too with premade code (called sketches) ready to download. They are made by a chick for chicks to sew into clothing and costumes so a guy HAS to be able to do this just for prides sake. checkout Adafruit.com for ideas and tutorials and sketches.
-
wow... simple but effective
-
-
Yeah we sat in ours getting frustrated all looking at the floor waiting for rounds to start punching though it and wanting to kick the navy guy off the Door GPMG! Not a nice feeling. How did you chip the floor like that?
-
-
10 neos cost me about $6NZD and each one is small enough to fit into the lens fitting on the 1/72 Wave Phalanx triple spotlight and still have room to run the enameled wires hidden down the shaft into the body. Thats how small the enameled wires are too.
-
That one shown in the line art is physically impossible to achieve. Notice how much longer the rear flat of the tail section is once its shown folded in that last frame? The artists have taken some liberties to show it folded I think.
-
Sand blaster.... Decals for all three Wave Destroids will be scanned in 3 hrs (lunch break) and I'll post a link to a photobucket where I'll put them.
