
Chas
-
Posts
954 -
Joined
-
Last visited
1 Follower

Recent Profile Visitors
14808 profile views


Chas's Achievements
")
Global's Pipe Holder (6/15)
294
Reputation
-
Awesome! I have wanted a model of this since the 80's.Was this a Woderfestival kit? Don't remember seeing it. Where/ how did you pick it up?
-
Thanks Thom. I'm hoping I can finally bring it to a satisfying conclusion with this round of working on it. 🤞
-
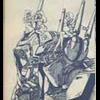
Speaking of old builds, I started this kit-bash/scratch build I think 10 years ago? Some of you may remember my older posts on this. Well I picked it up again, inspired by a lucky win (at a good price) of a 1/500 S. B. Yamato on yahoo Japan auctions. It started life as a 1:700 Nimitz class aircraft carrier - Abrahan Lincoln I think?), but now it's a 1:500 Space battleship Yamato carrier. Overall it measures 61cm (24 inches) which puts it at a comfortable 305M/1000ft. I spent most of my time this weekend reacquainting myself with what I had done, and trying to remember what I wanted to do. You see I'm pretty much just making this up as I go along. It is loosely based on some ref. Images though. After I figured things out a bit I decided to get to work on adding some greeblies to the rear section above the engines. Now that that's done I think I'll move on to adding some plating to the main hull below the flight deck to give some detailing and cleaned things up a bit. The superstructure and flight deck area will likely be last, as I have too many ideas that I need to pare down. None of that stuff on top is glued down yet - just working out placement and such. Anyway: Here are the greeblie bits I worked out today: And some you have some idea where on the ship those bits are:


-
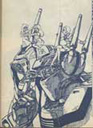
Got most of the panel lines on the Minerva done. Got a good start on the in scale fighters too.

-
🤣🤣 That actually looks really good! I'd also replace the wings with something a little bigger though. What you've done actually reminds me of this.

-
That's what I love most about Crusher Joe - the Mechanical Designs are top notch!
-
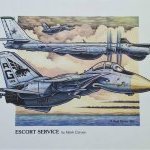
@electric indigo Another spectacular plane! That prop really sells it, but your paint and finishing is gorgeous (as usual). Really great looking build. @Papa Rat that's a nice kit, lots of great detail. Not a resin expert, but if the parts are tiny and not load bearing do they really need to be pinned? Maybe some research is in order, as trying to drill and pin tiny, or thin parts may case damage and if not necessary then best avoided? The Minerva is coming along well. I decided to use a modified version of the paint scheme from the OVA, as I like the extra blue on the wings and tail fins.

-
Even though it's just tape it's nice to see some colour on it!
-
 Great read Greg. Shopping, hanging out with friends, food, fun and music, then falling asleep on the train ride home brings back memories of life in my 20's ( and what happens whenever I visit back home without my wife and kids.) Sounds like you had a good time.
 -
Working on Hasegawa's creator's works Minerva from Crusher Joe at the moment. Planning on a straight up out of box build with a small alteration in colour scheme. As I don't like pure white on model builds, I'm going with a slightly gray-white for the base. Gonna use the artists acrylics for this one, as the tests I did worked well over Mr. Surfacer 1000 as primer. They didn't hold very well over straight, unprimed plastic - just lifted right off, but held firm over the Mr. Surfacer.

-
That is a really beautiful looking model. I was looking to pick one of these kits up last summer, after rewatching the original series on Pluto TV. Think I'll start searching again. Thanks a lot 505th! Just what I needed another kit to add to the stash.🙄 and I gotta agree with everyone else @Papa Rat that Q-Rau looks fantastic!
-
Awesome video Greg! Thanks so much for taking the time to do this, (so I can enjoy seeing all these great kits that I'll likely never be able to own/build🤣) Seriously though I do love being able to live vicariously through your camera!
-
Will do some tests with smoe spoons tomorrow, my youngest is having a sleepover tonight and my bench is in the basement which I've been told is off limits, so . . .
-
Haven't done any modeling today, but I just perfected a home made thinner that let's me spray my wife's old artist's acrylics (from tubes/jars) through my airbrush. So now I have a huge supply of acrylic paints that I can use (straight from the container, or mixed into custom colours) for my modeling. My wife hasn't done any painting in a few years, but the paints are all in good shape though; I made sure they were stored well. I'm particularly excited about the multiple large jars of white gesso, as I have been using a lot of white lately.
-
Calling this one done for now. Oh Damn! Just realized, I forgot the rifle strap! 😲😵💫


