MechTech
-
Posts
4691 -
Joined
-
Last visited
Content Type
Profiles
Forums
Events
Gallery
Everything posted by MechTech
-
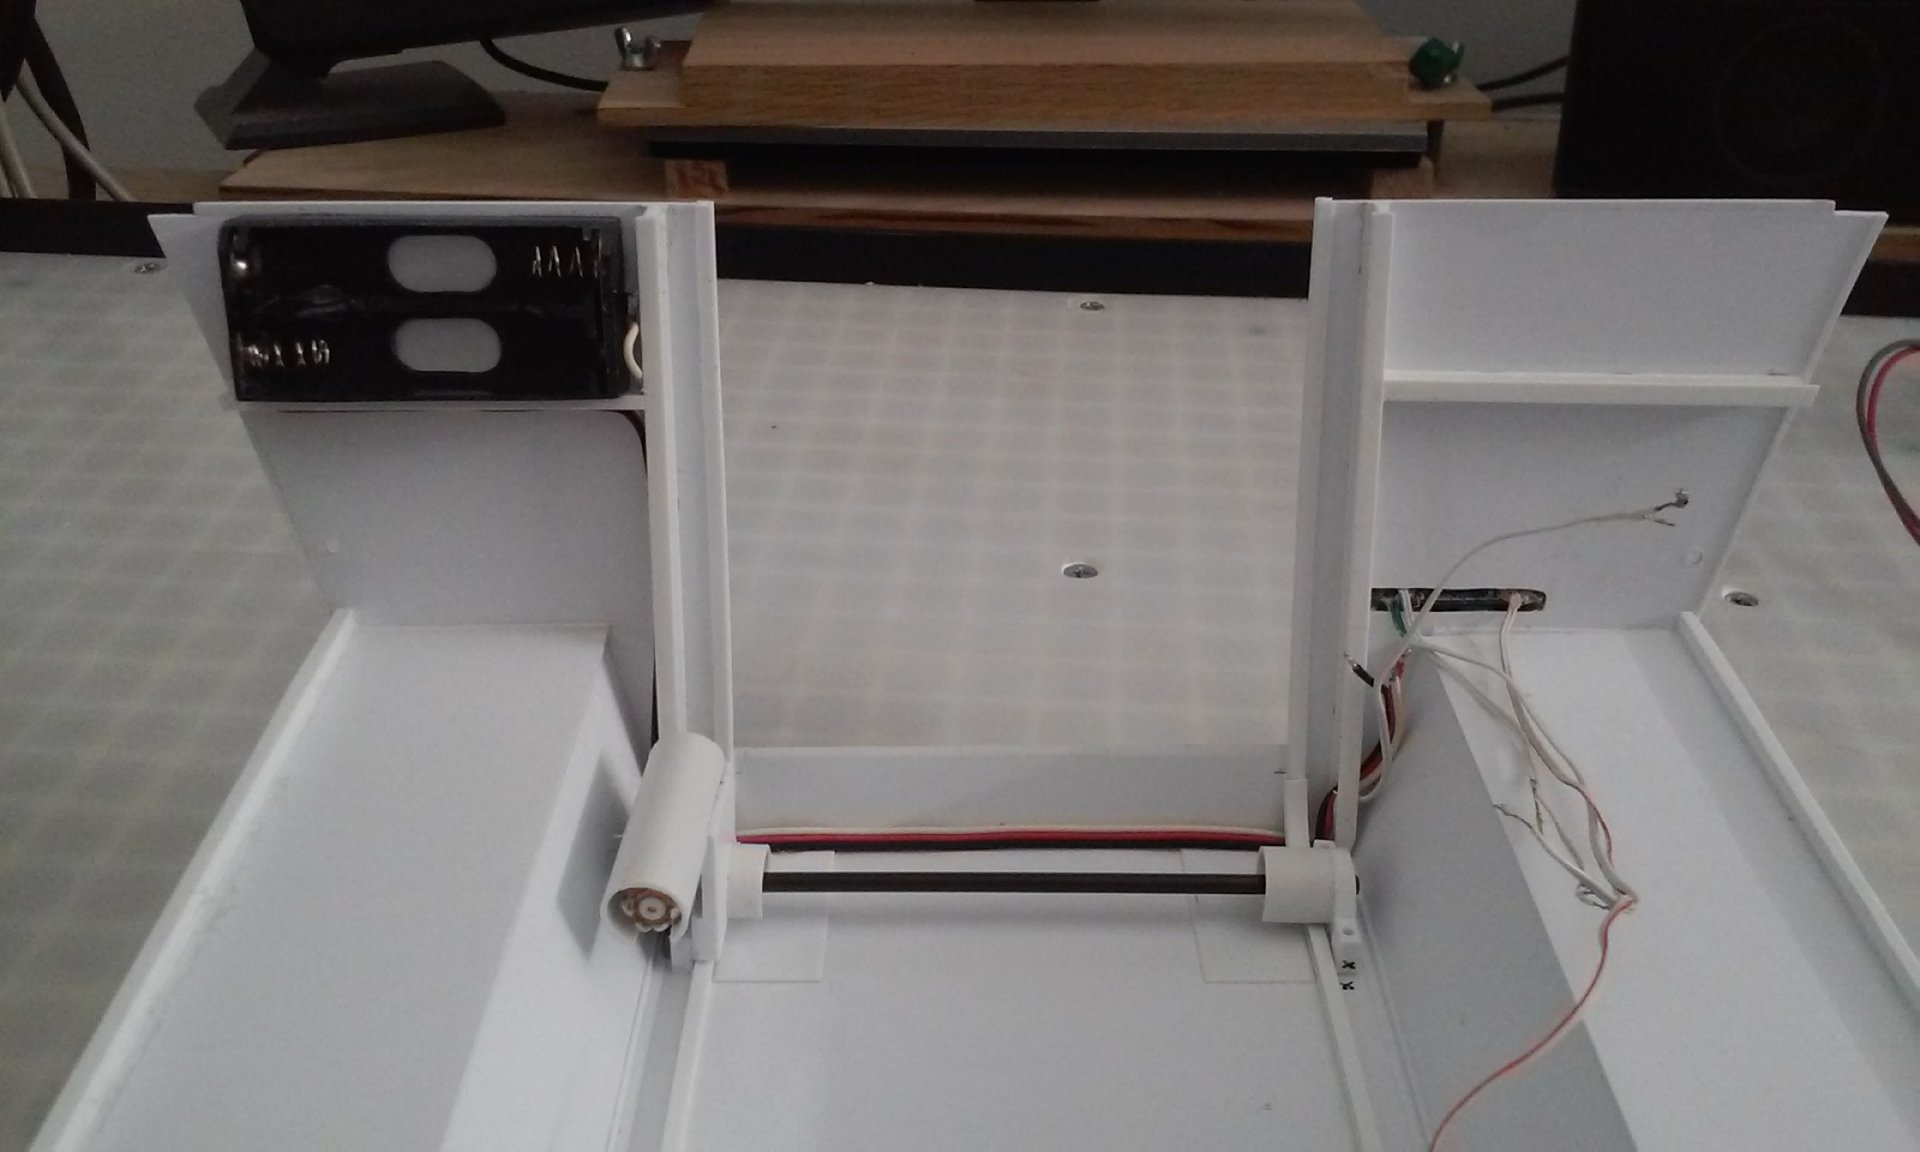
Cool Derex! Remember, a pay check is a GOOD thing SCOREBOARD SHIP ME 3 1 So, the score's not so good. Three dead circuit boards to one working. I think the dry air is making more static than what I think. Not having an ESD electronics mat, I got a sheet of aluminum foil and grounded it to my drill press (which is a big chunk of steel). I then used a lot of hand cream on my hands. Then I kept a hand on the foil at all time. I think this receiver in the ship will be alright. I have to wait to wire it up until the styrene glue dries tomorrow. We'll see! In the mean time, whether the receiver works or not, its in the ship's aircraft control station and is glued in now. The seems just need sanding down. Two AAA batteries will sit in a box inside the hangar and will power the accessories. Its hard to believe Thanksgiving weekend is already almost over! The remainder of the turkey is going into soup tonight! - MT

-
Happy Thanksgiving Everyone! It might sound weird, but I thank God for Macross World and you guys! It's a nice break from work and cool to see all the stuff people are creating. I've also learned a lot here too over the years. Cool, Electric Indigo! Some pilots are way too big or the older sculpted ones look like they are "defiling themselves" as one guy put it nicely in our modeling club. Nice Pengbuzz! You are the master of masking tape! - MT
-
That looks absolutely fabulous Arbit!!! I think it would be worthy of entering into a model show and garner you a prize! You brought electronics, mechanics and styrene to a whole new level! - MT
-
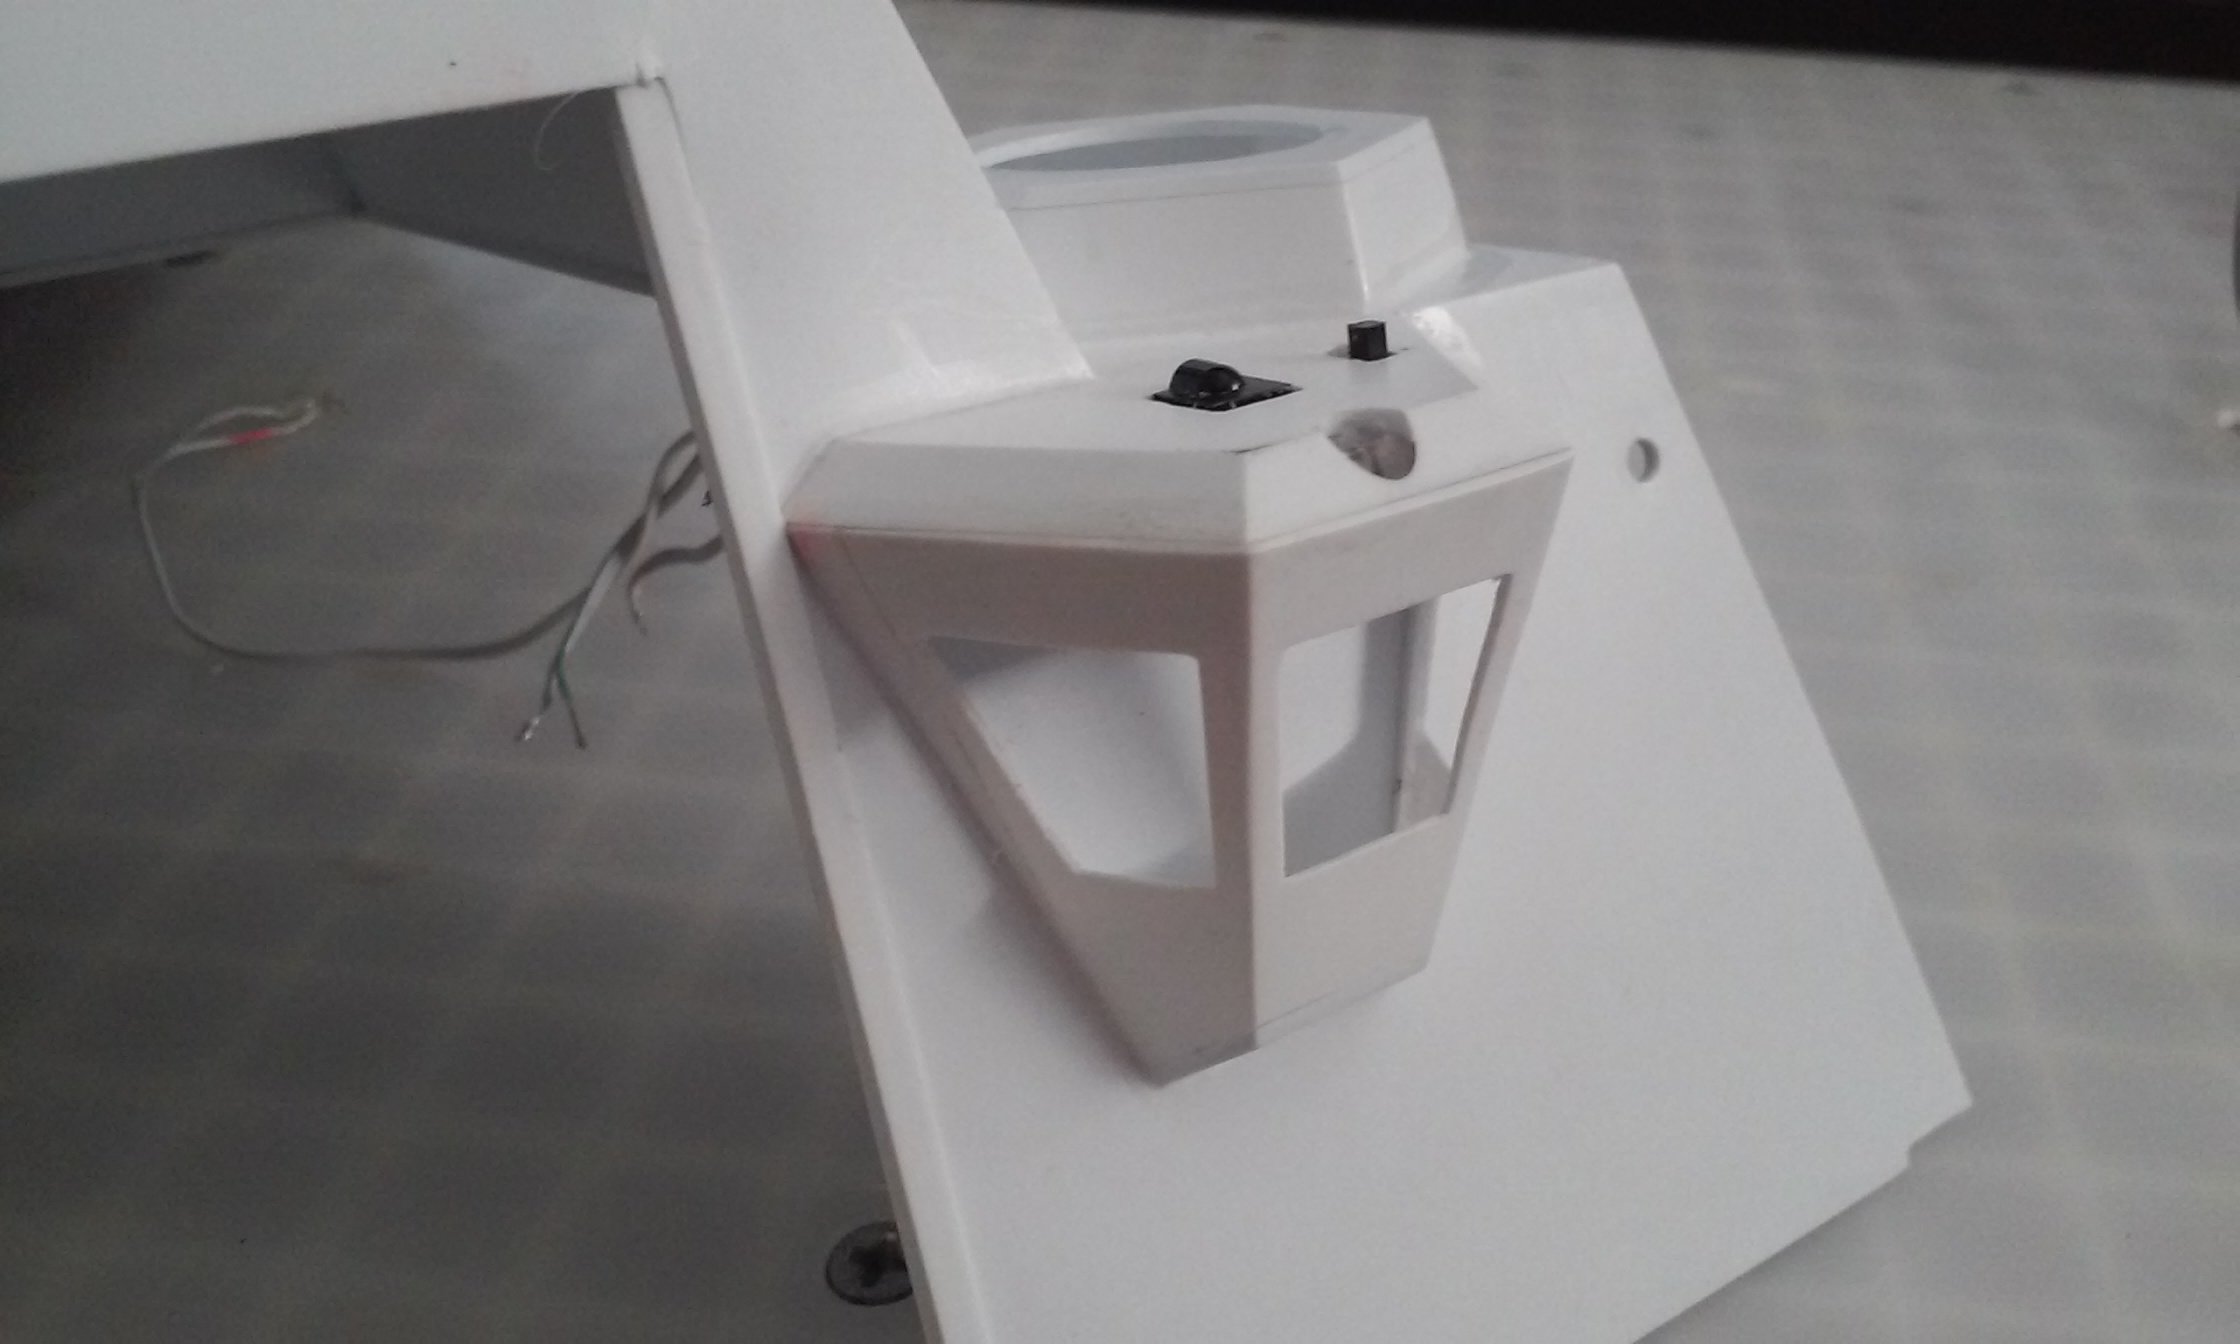
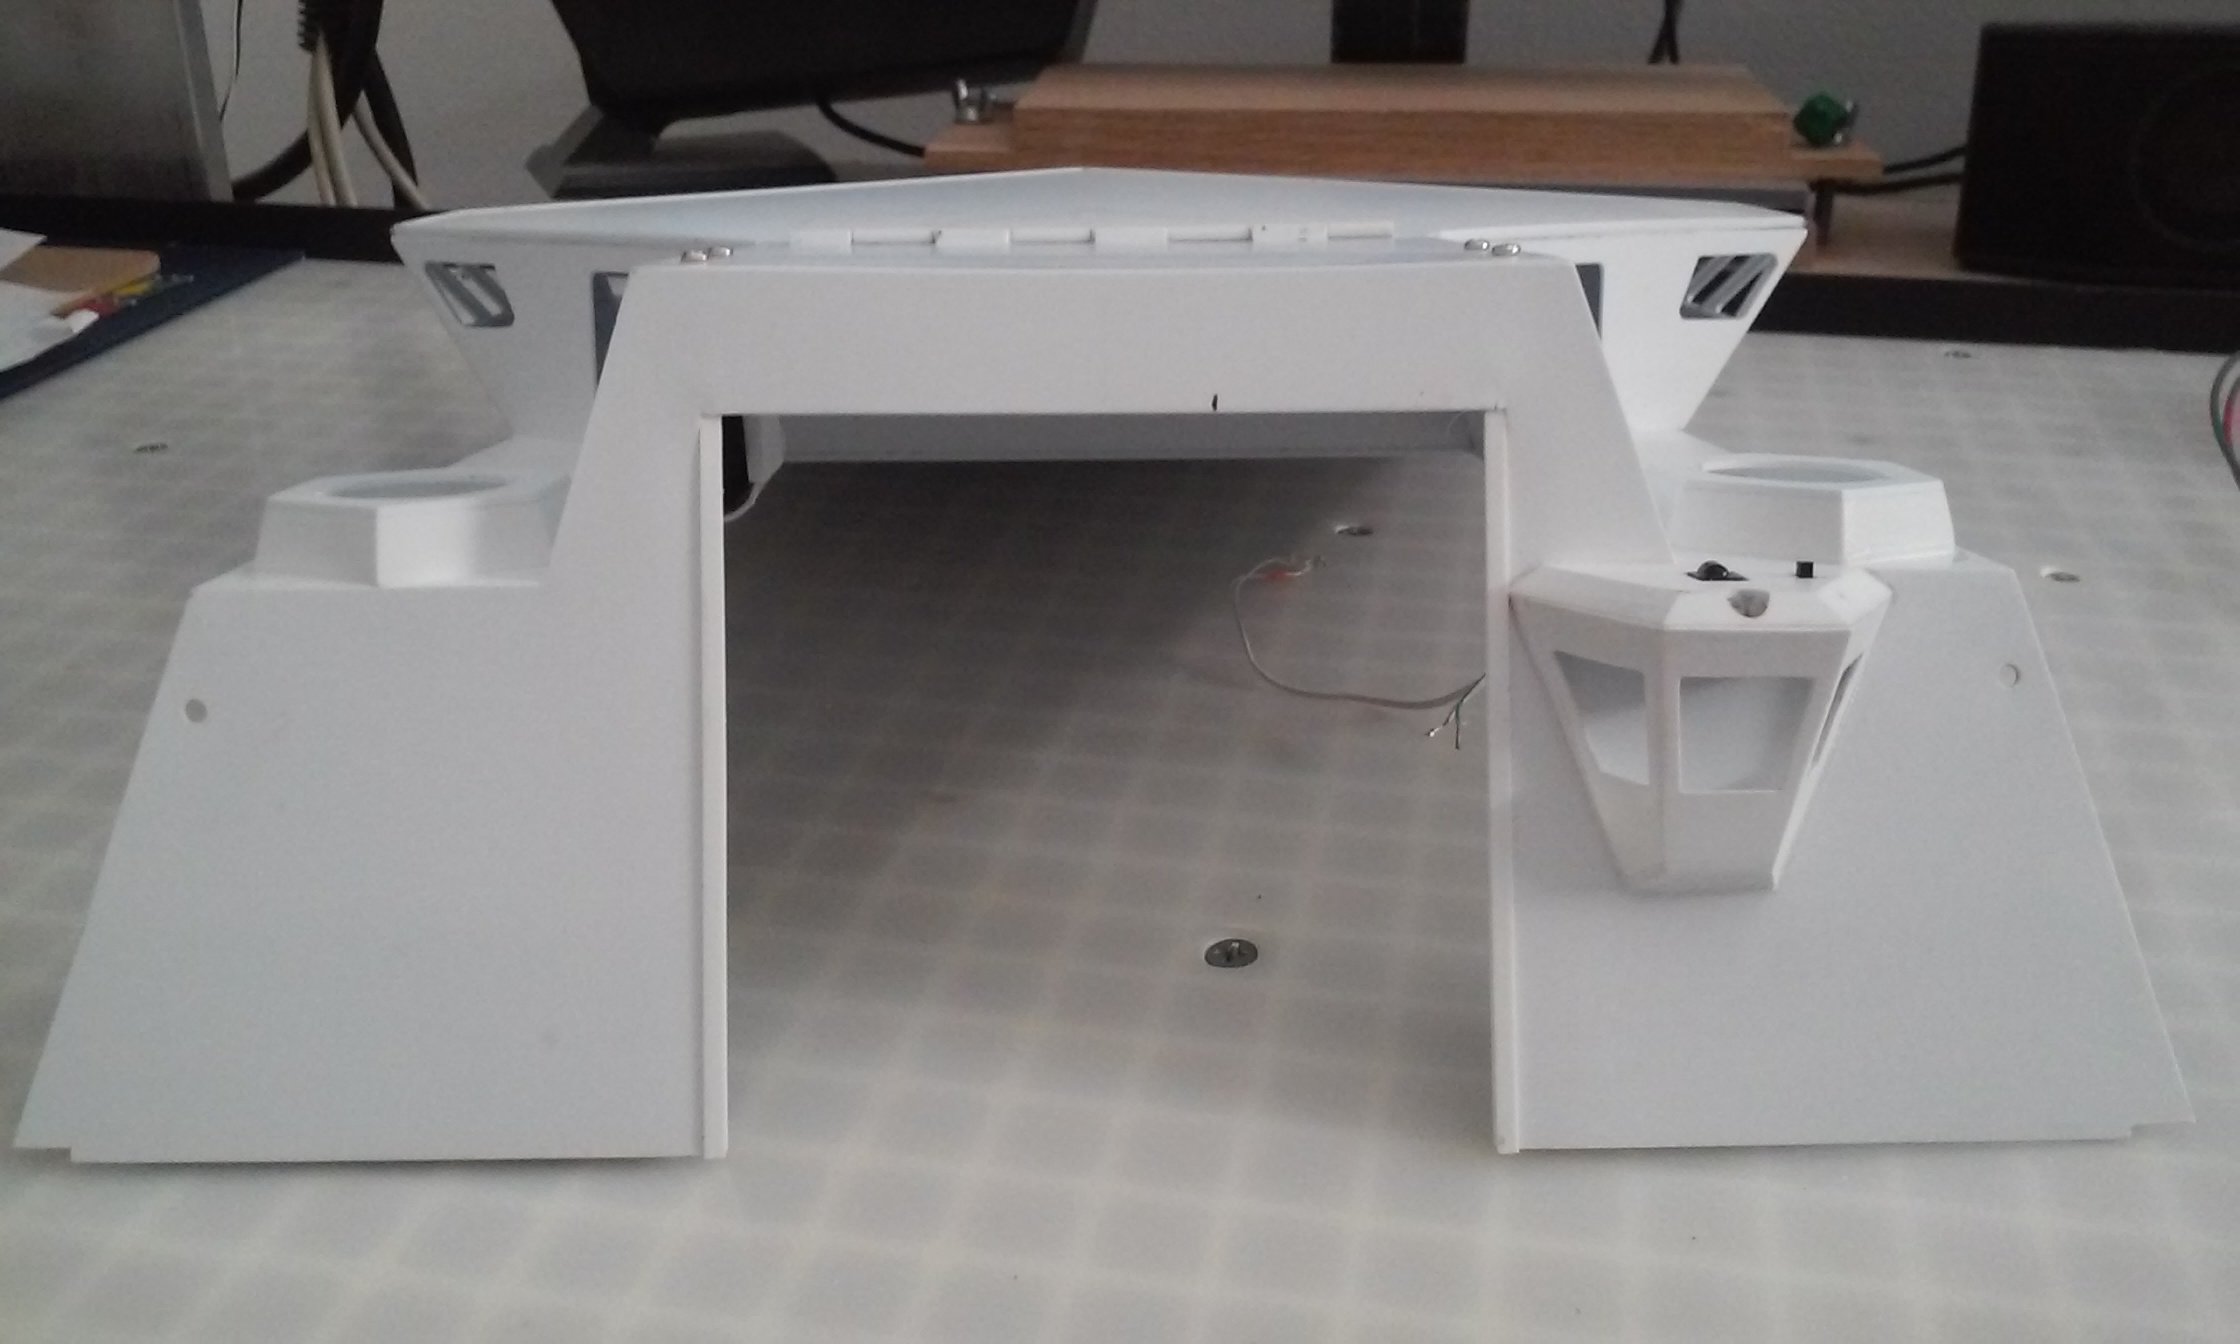
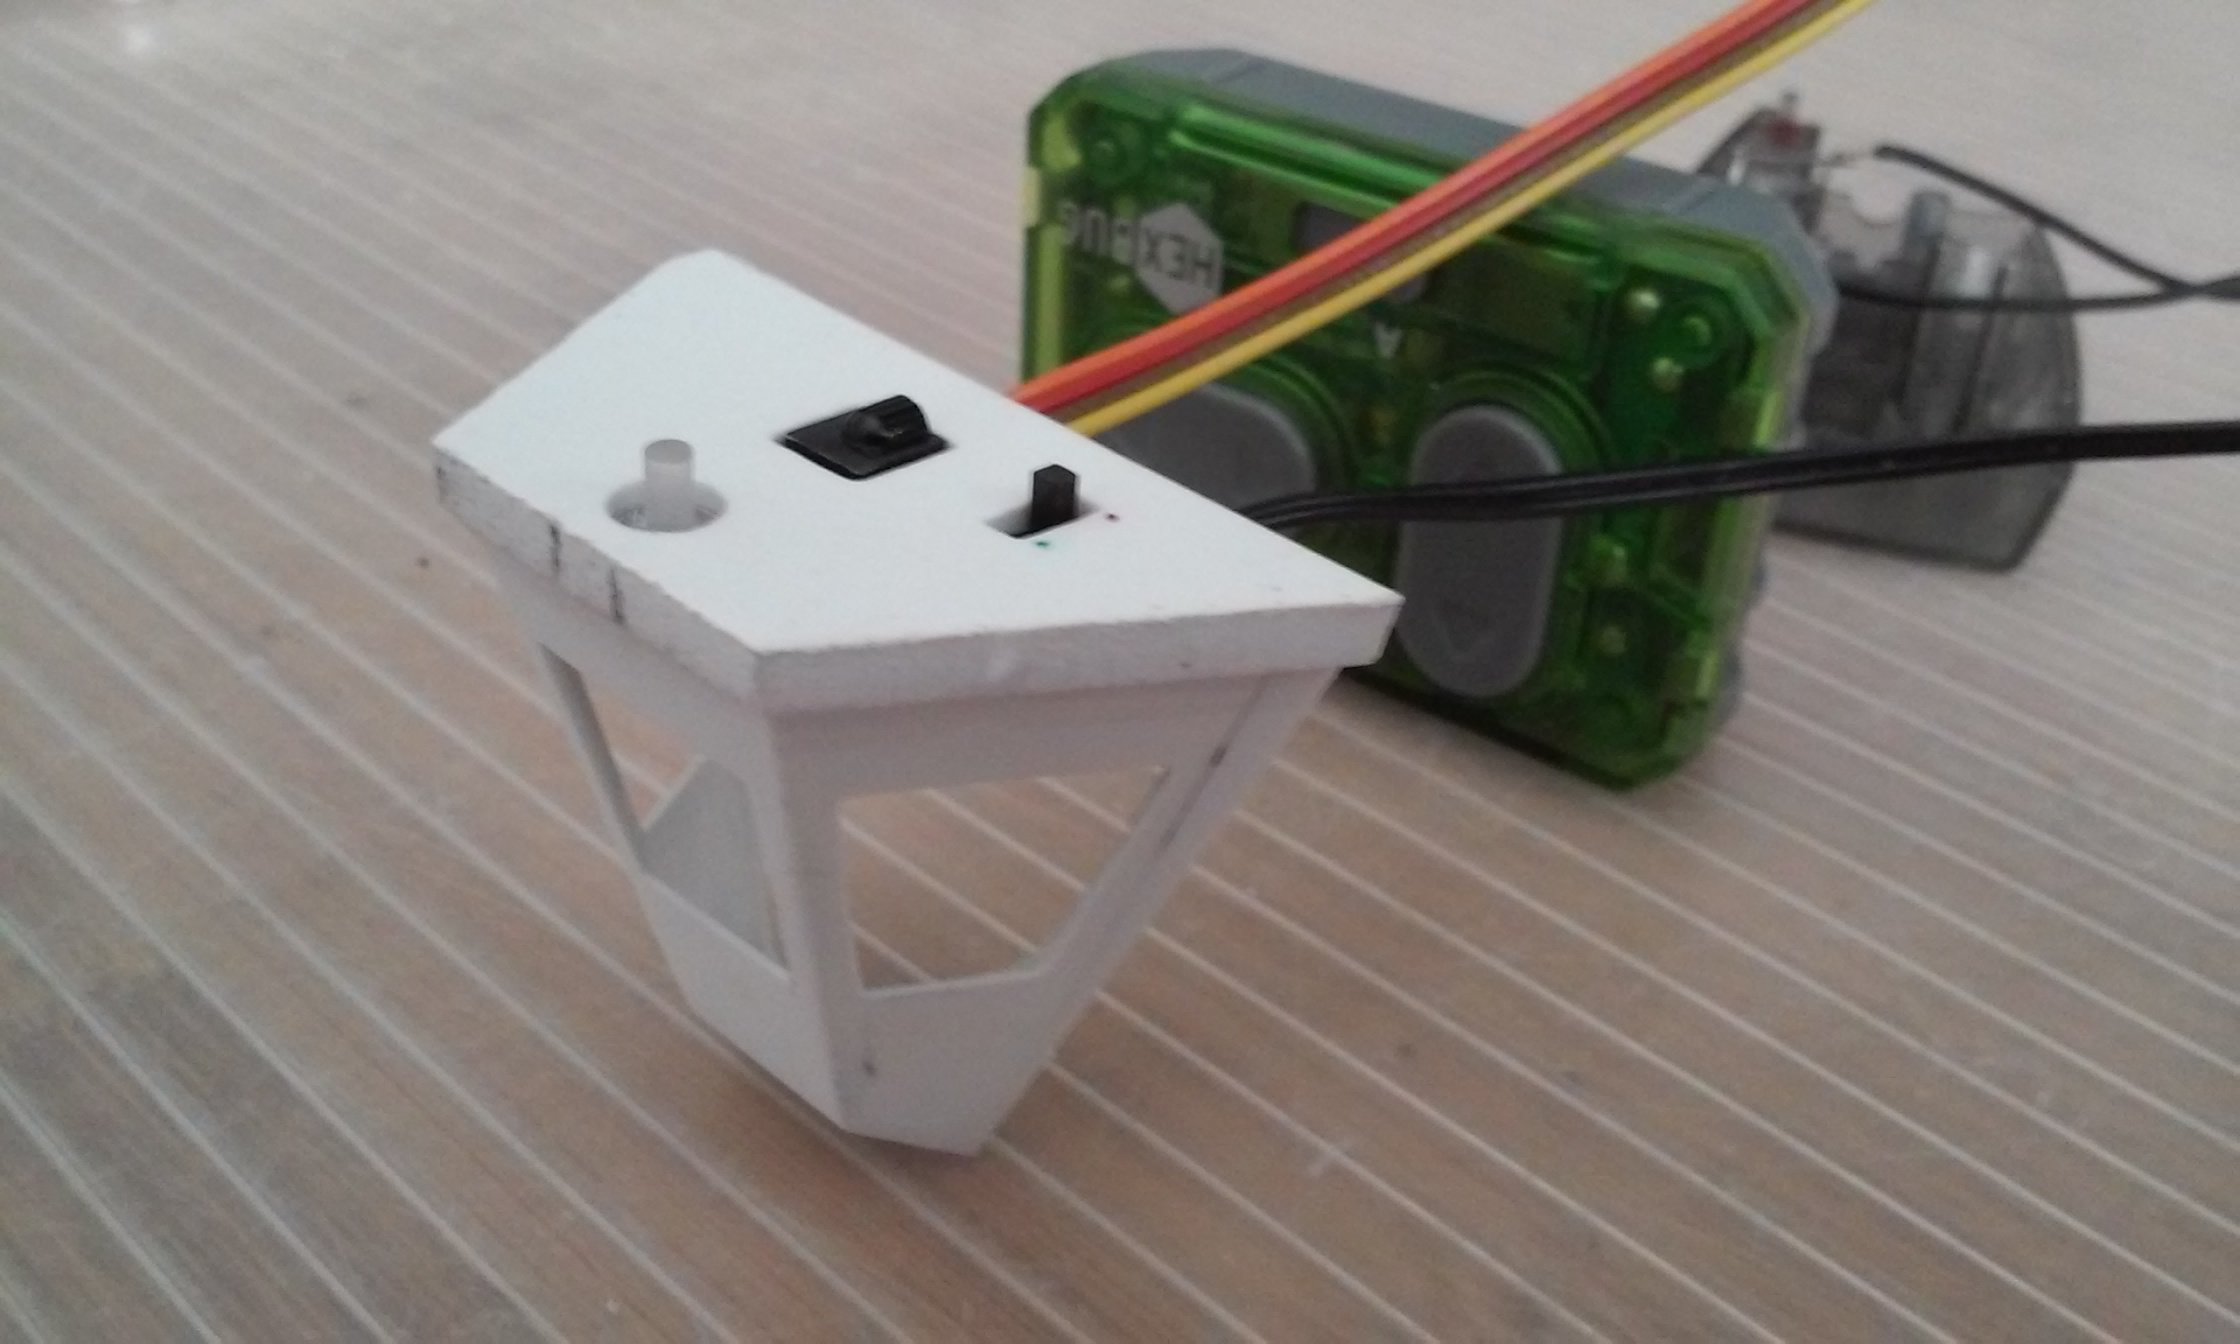
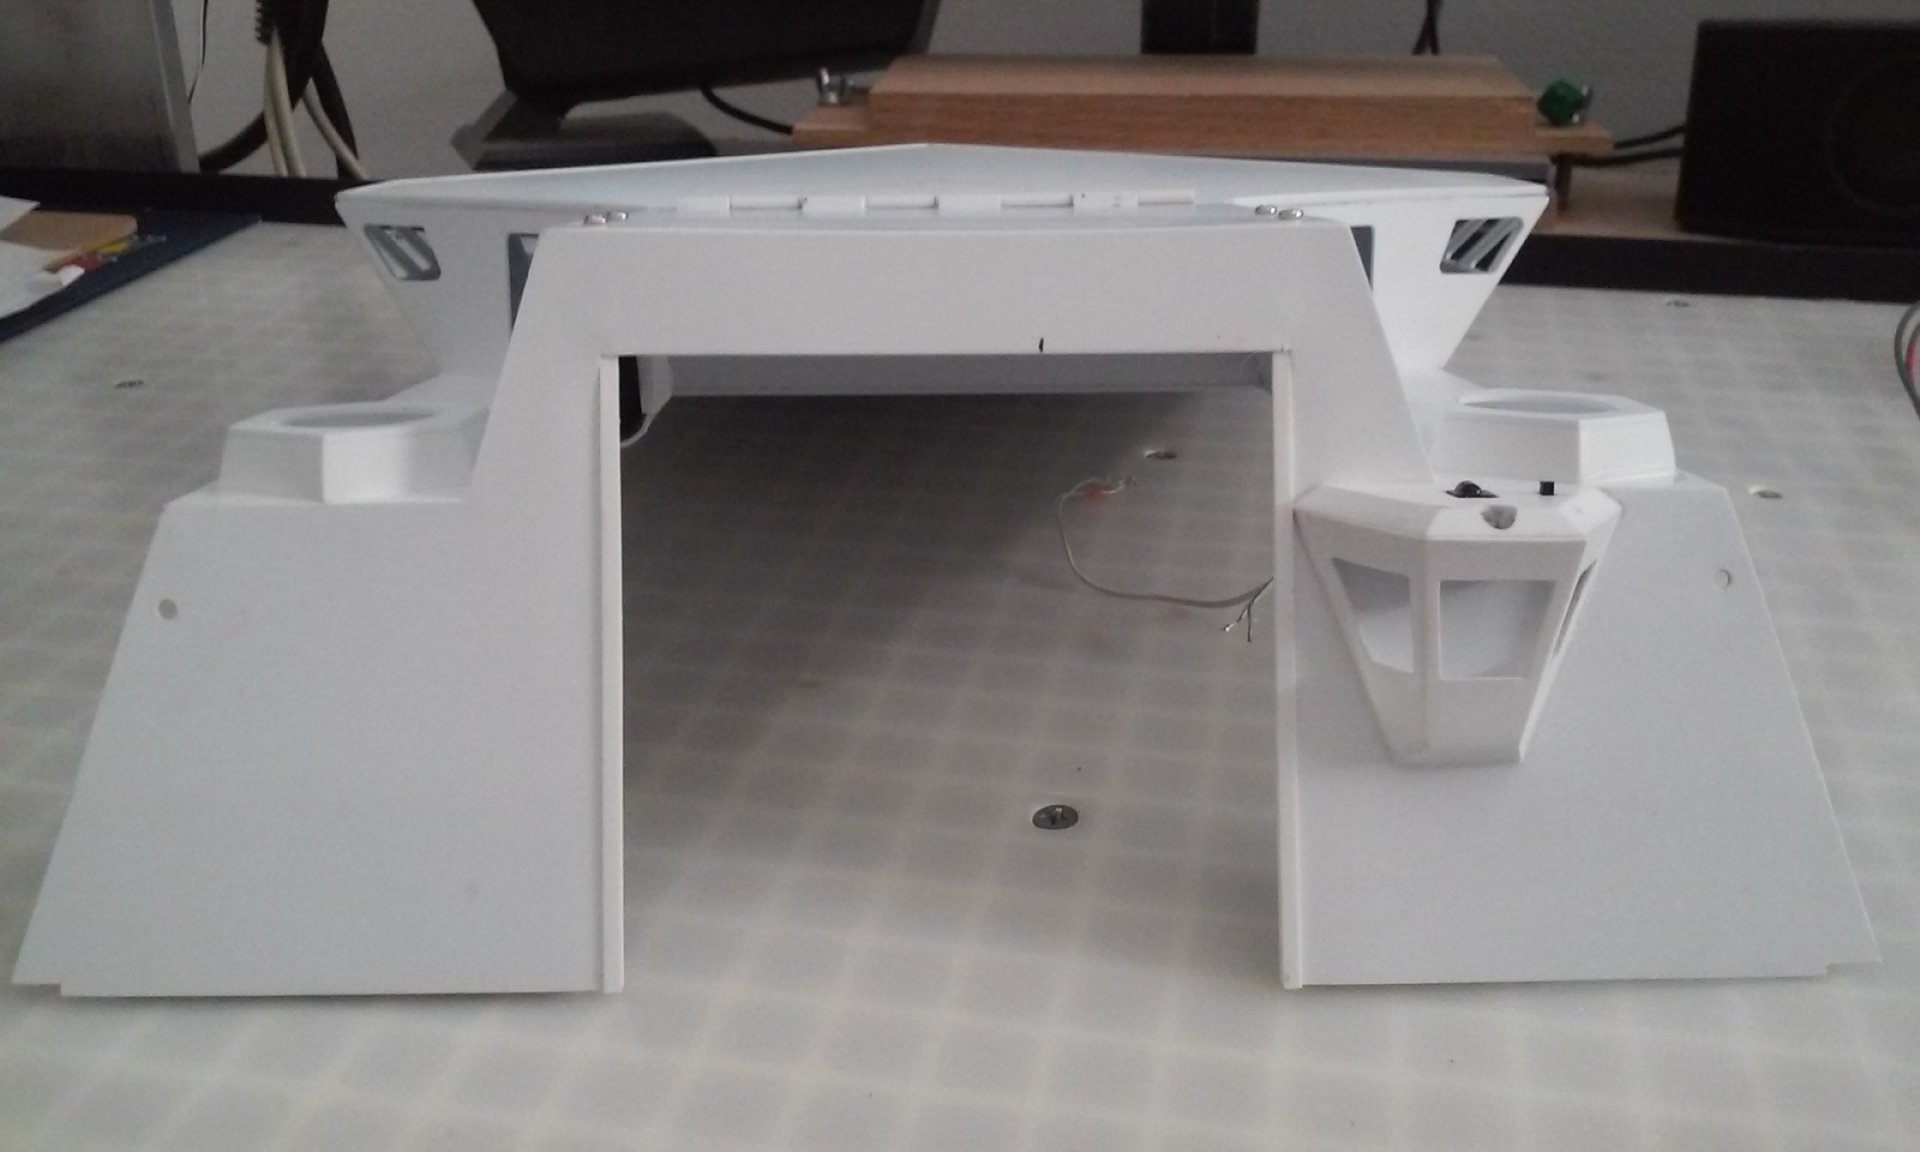
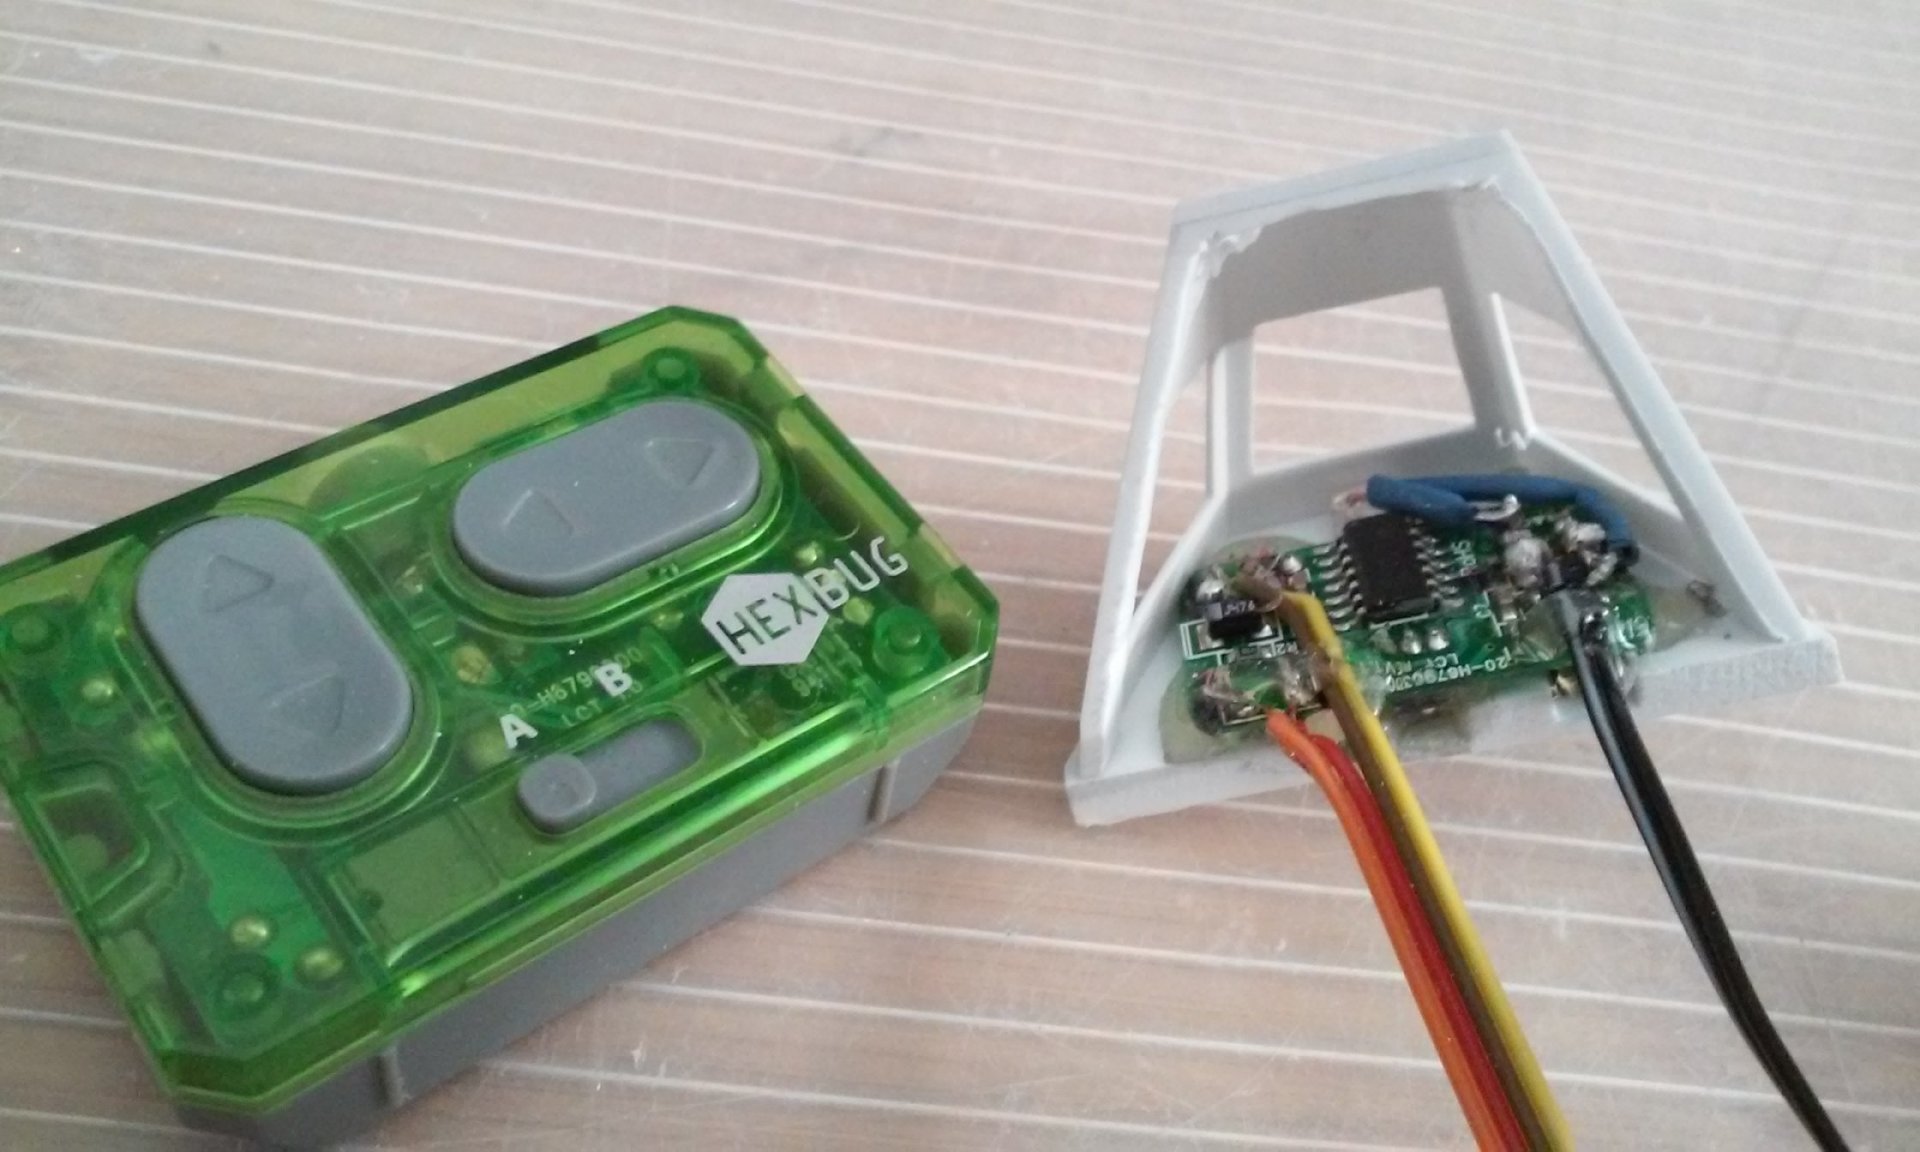
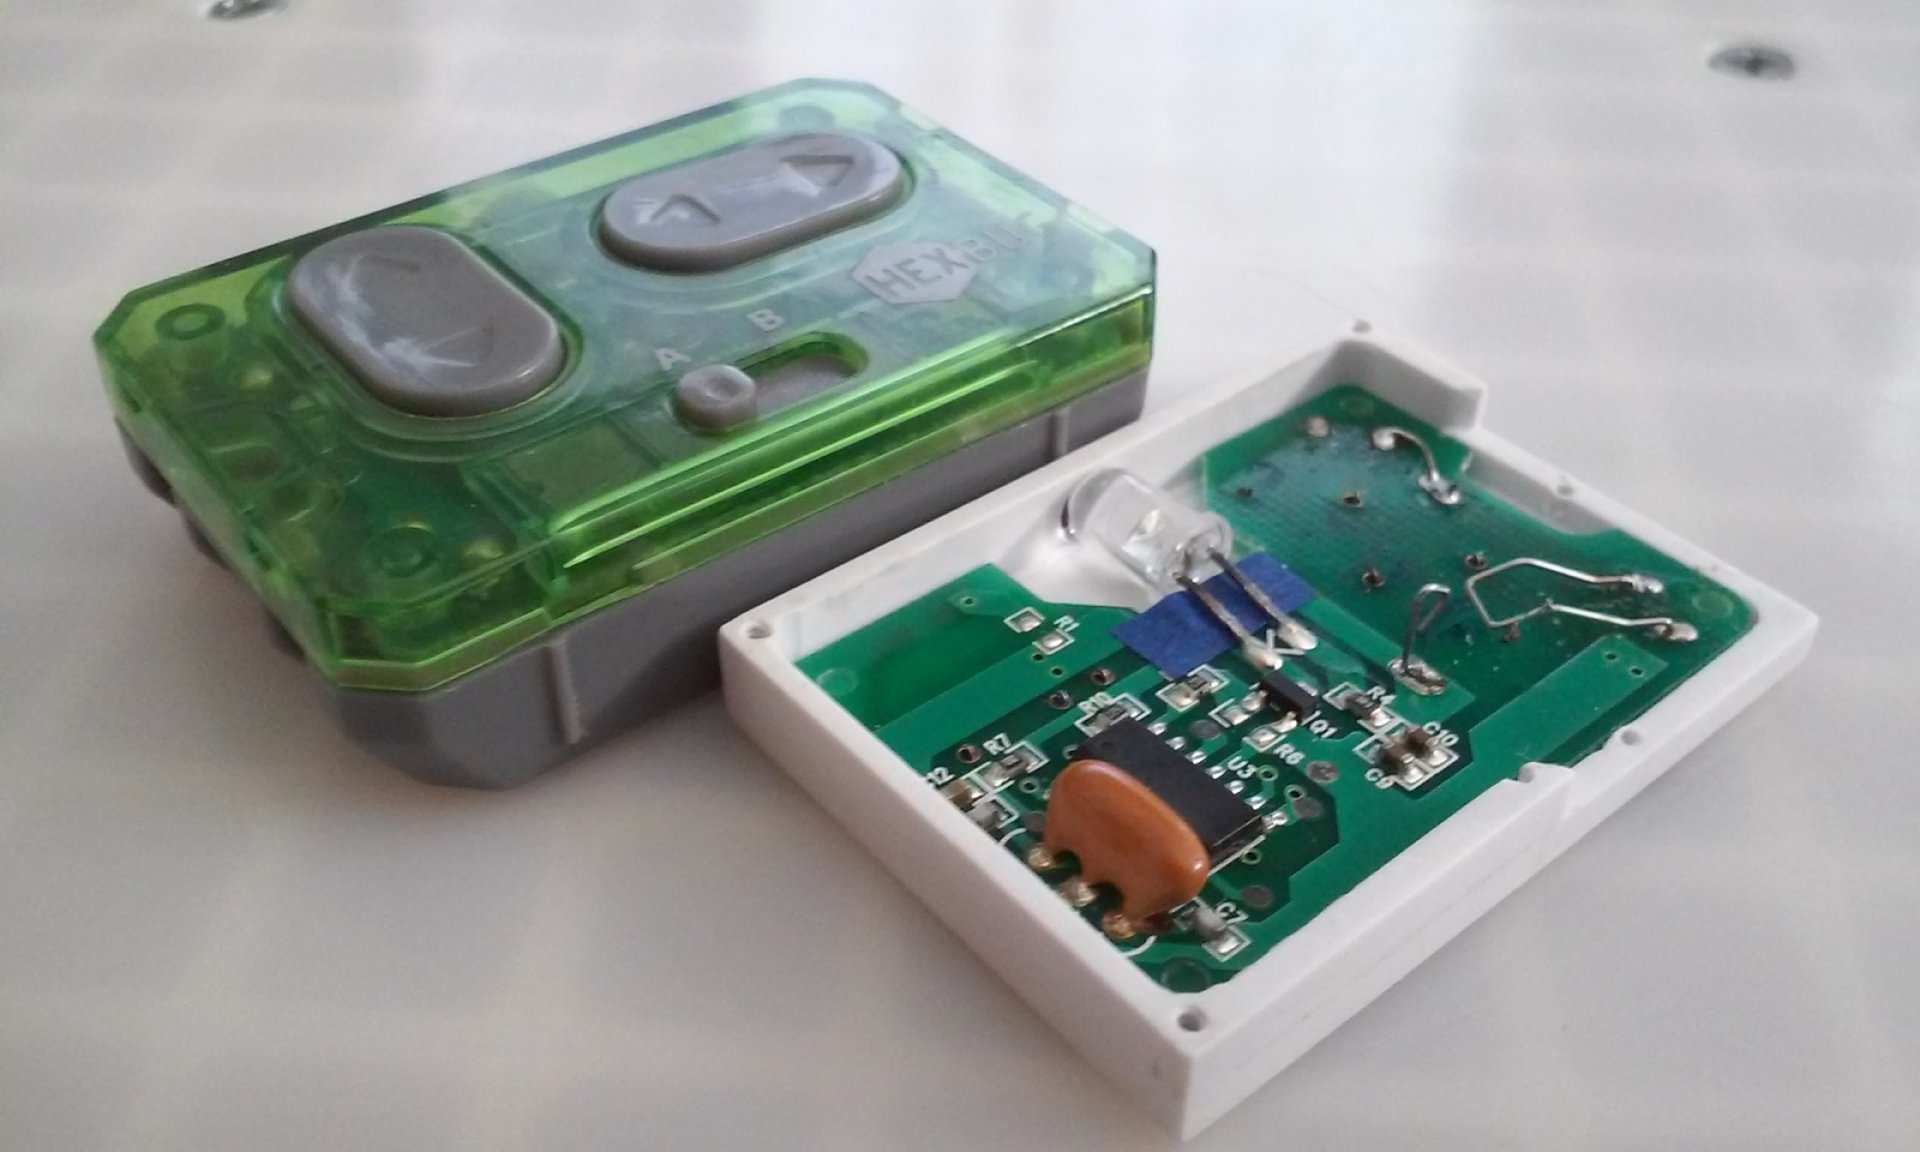
Electric Indigo - Are you cloning Yank pilots and giving them to the Ruskies? Looks like you're putting the jets head to head in a dio? Its slow going due to other things right now, but I got some work done on the control station for the ships flight deck. I took the Hex Bug receiver which is about the size of an American quarter, and added wires and a blinking light to it. The blinking light lets you know its on, otherwise there is no sign. The control station was the best place to hide the board and make it easily visible for the infra red receiver to work. It will be hid in the roof. There is still A LOT of work to be done on the styrene part, but at least the electronics are working. This is what will control the hangar door, the radar and lights. - MT

-
Excellente Chavakaiser! Arbit, yes it has reverse on both channels. In fact, the plan is to take two cheap servos and make them gear motors. Then put diodes across them so they will only go in one direction. That will make the remote three channels. The servos will drive cams to activate micro switches to merely turn stuff on and off. The one untouched up/down channel will power the hangar door. That's my evil plan anyhow. - MT
-
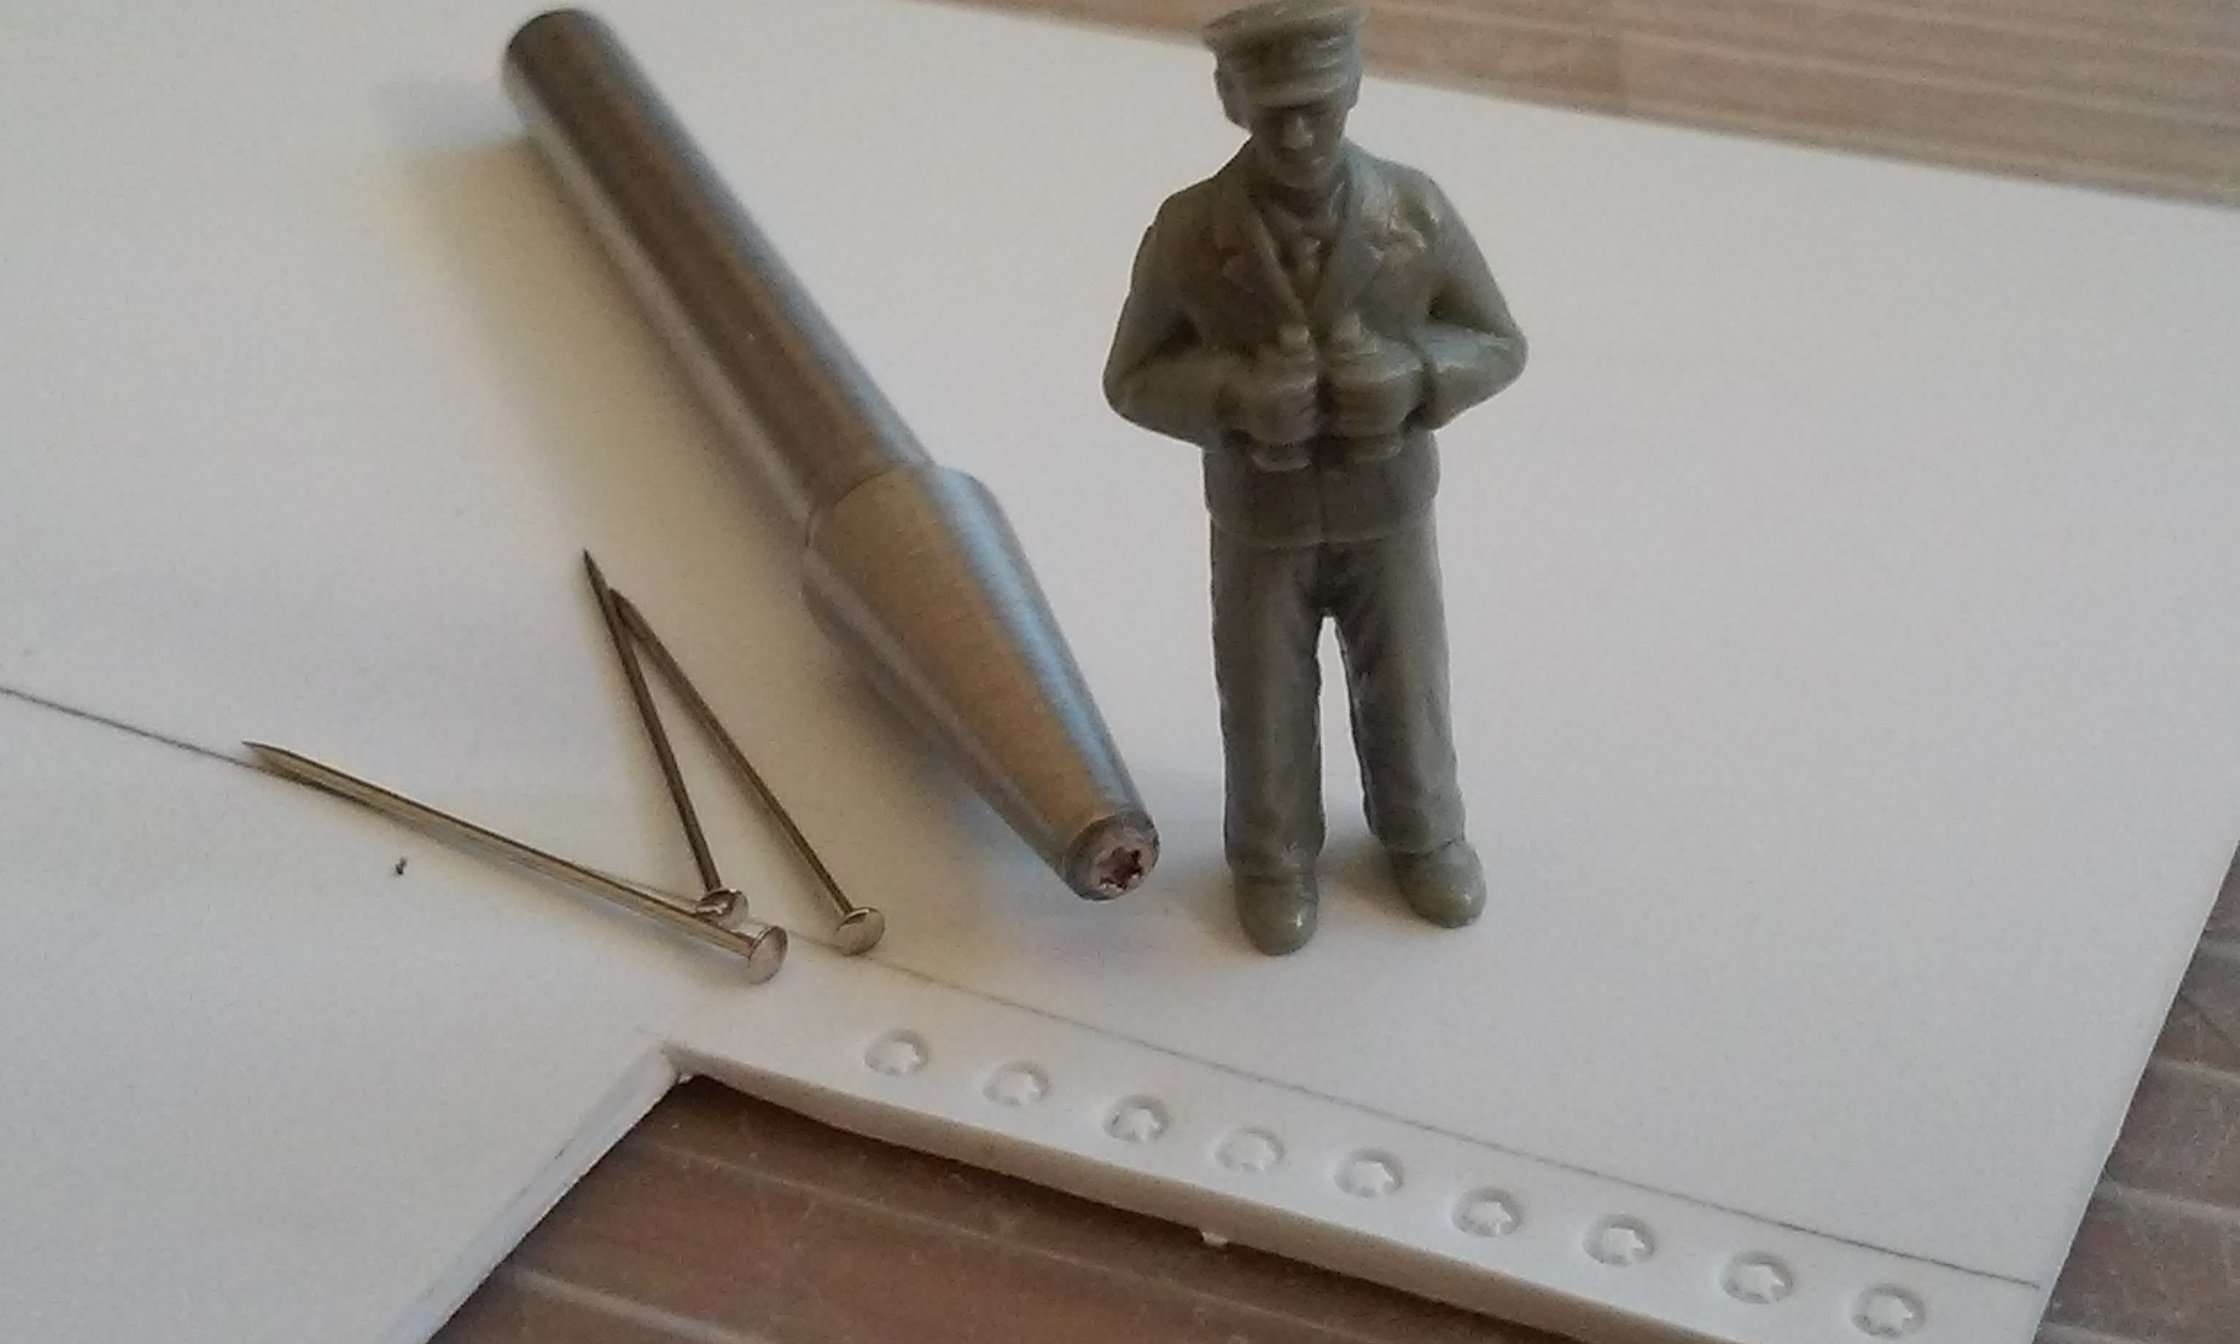
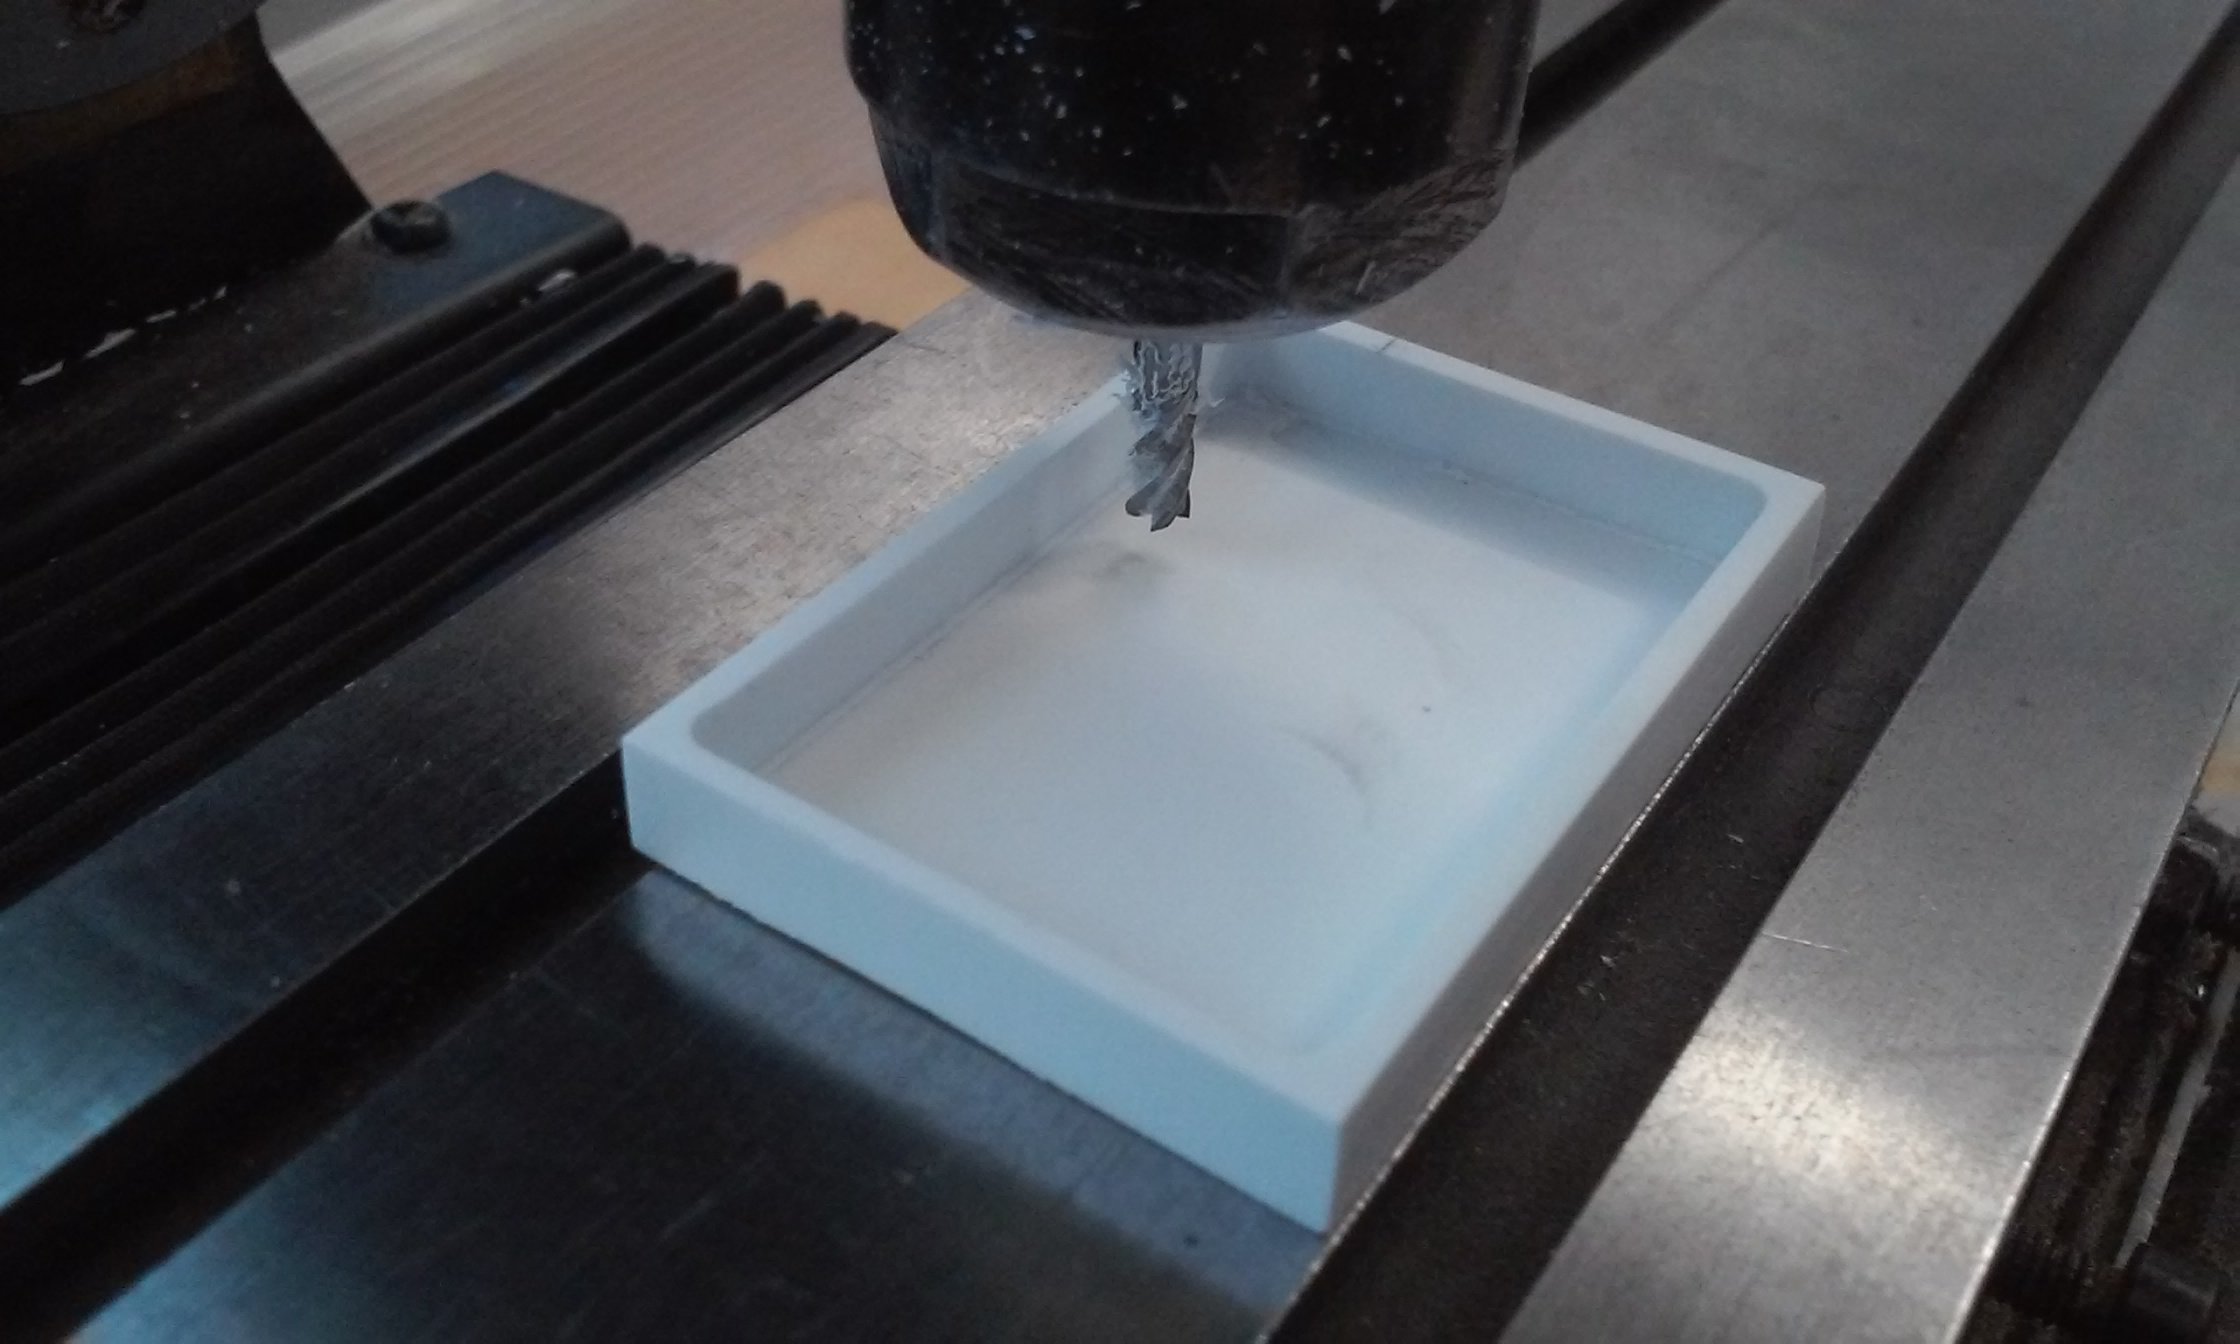
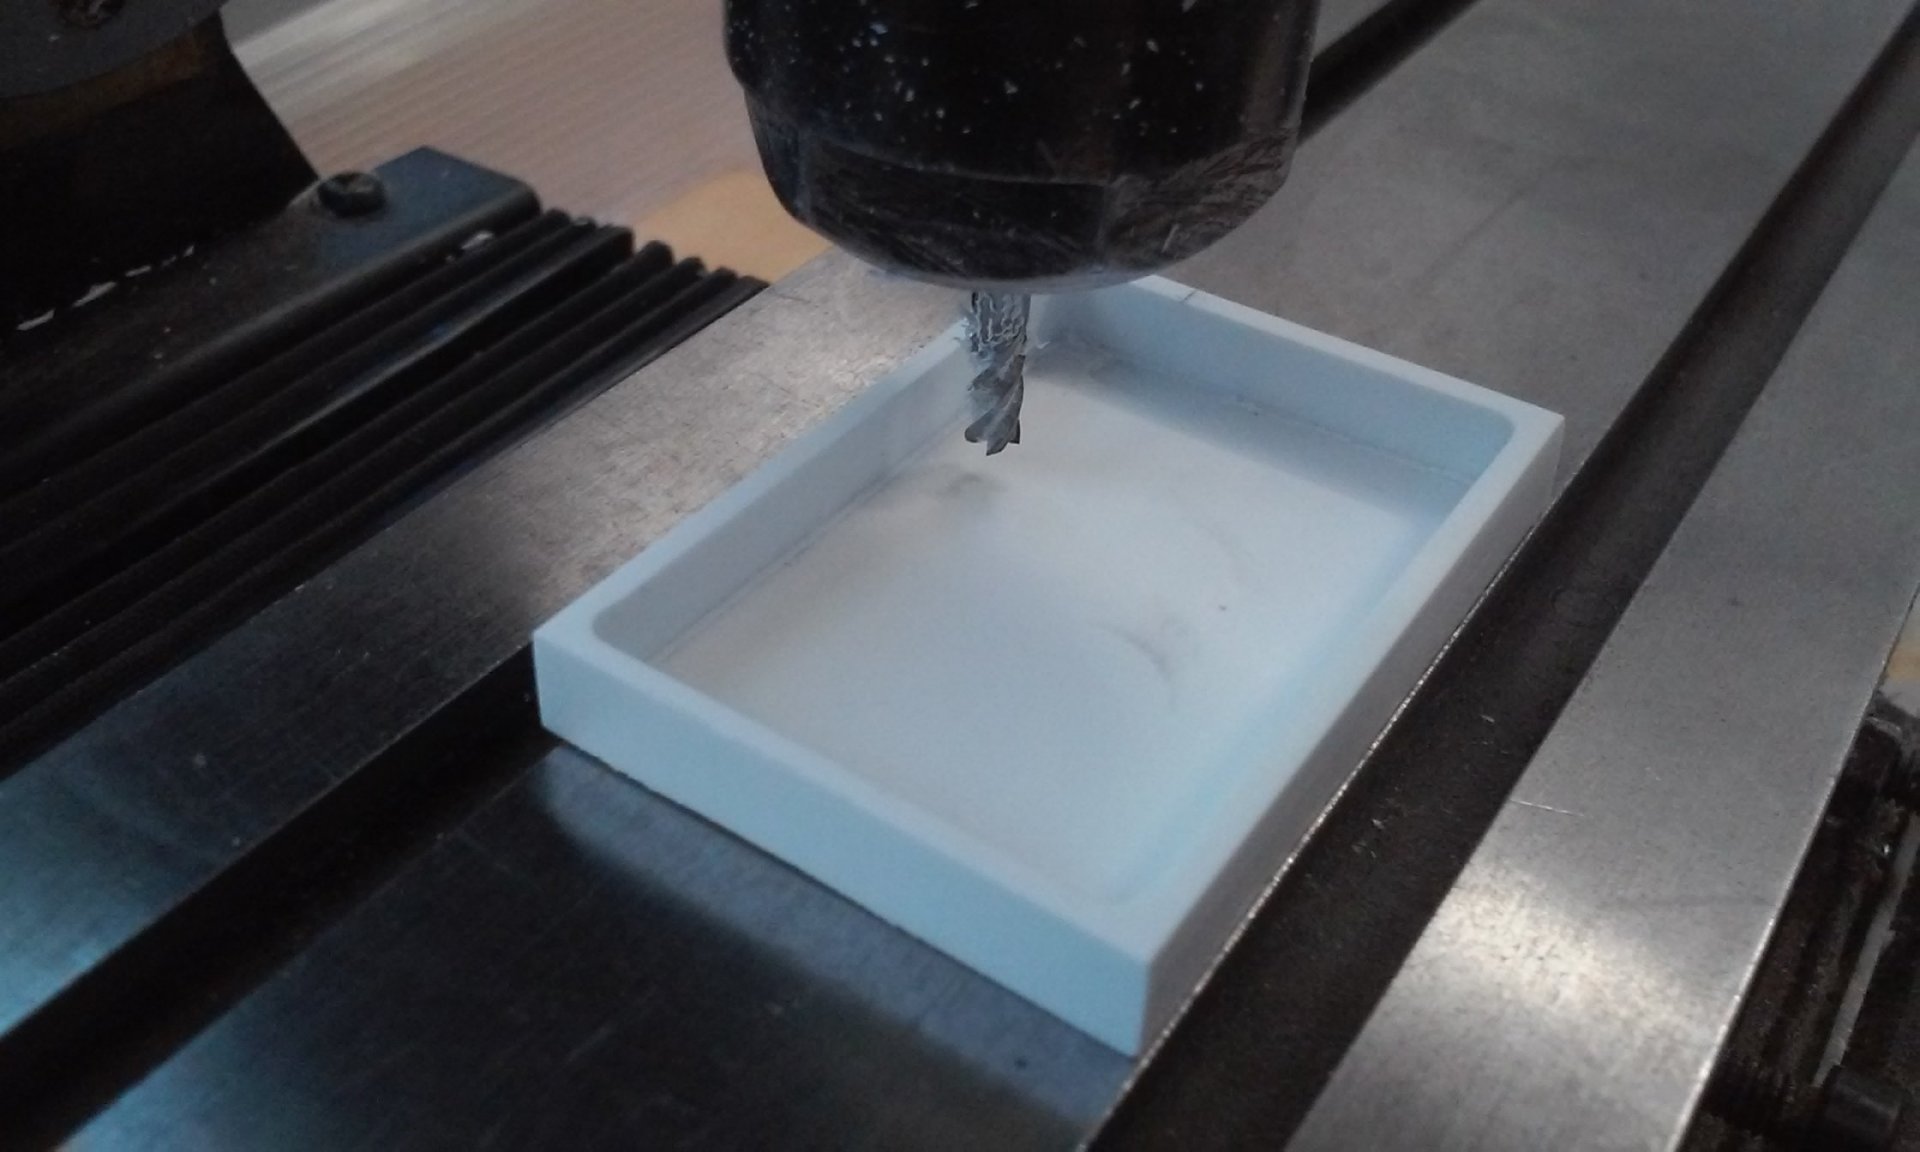
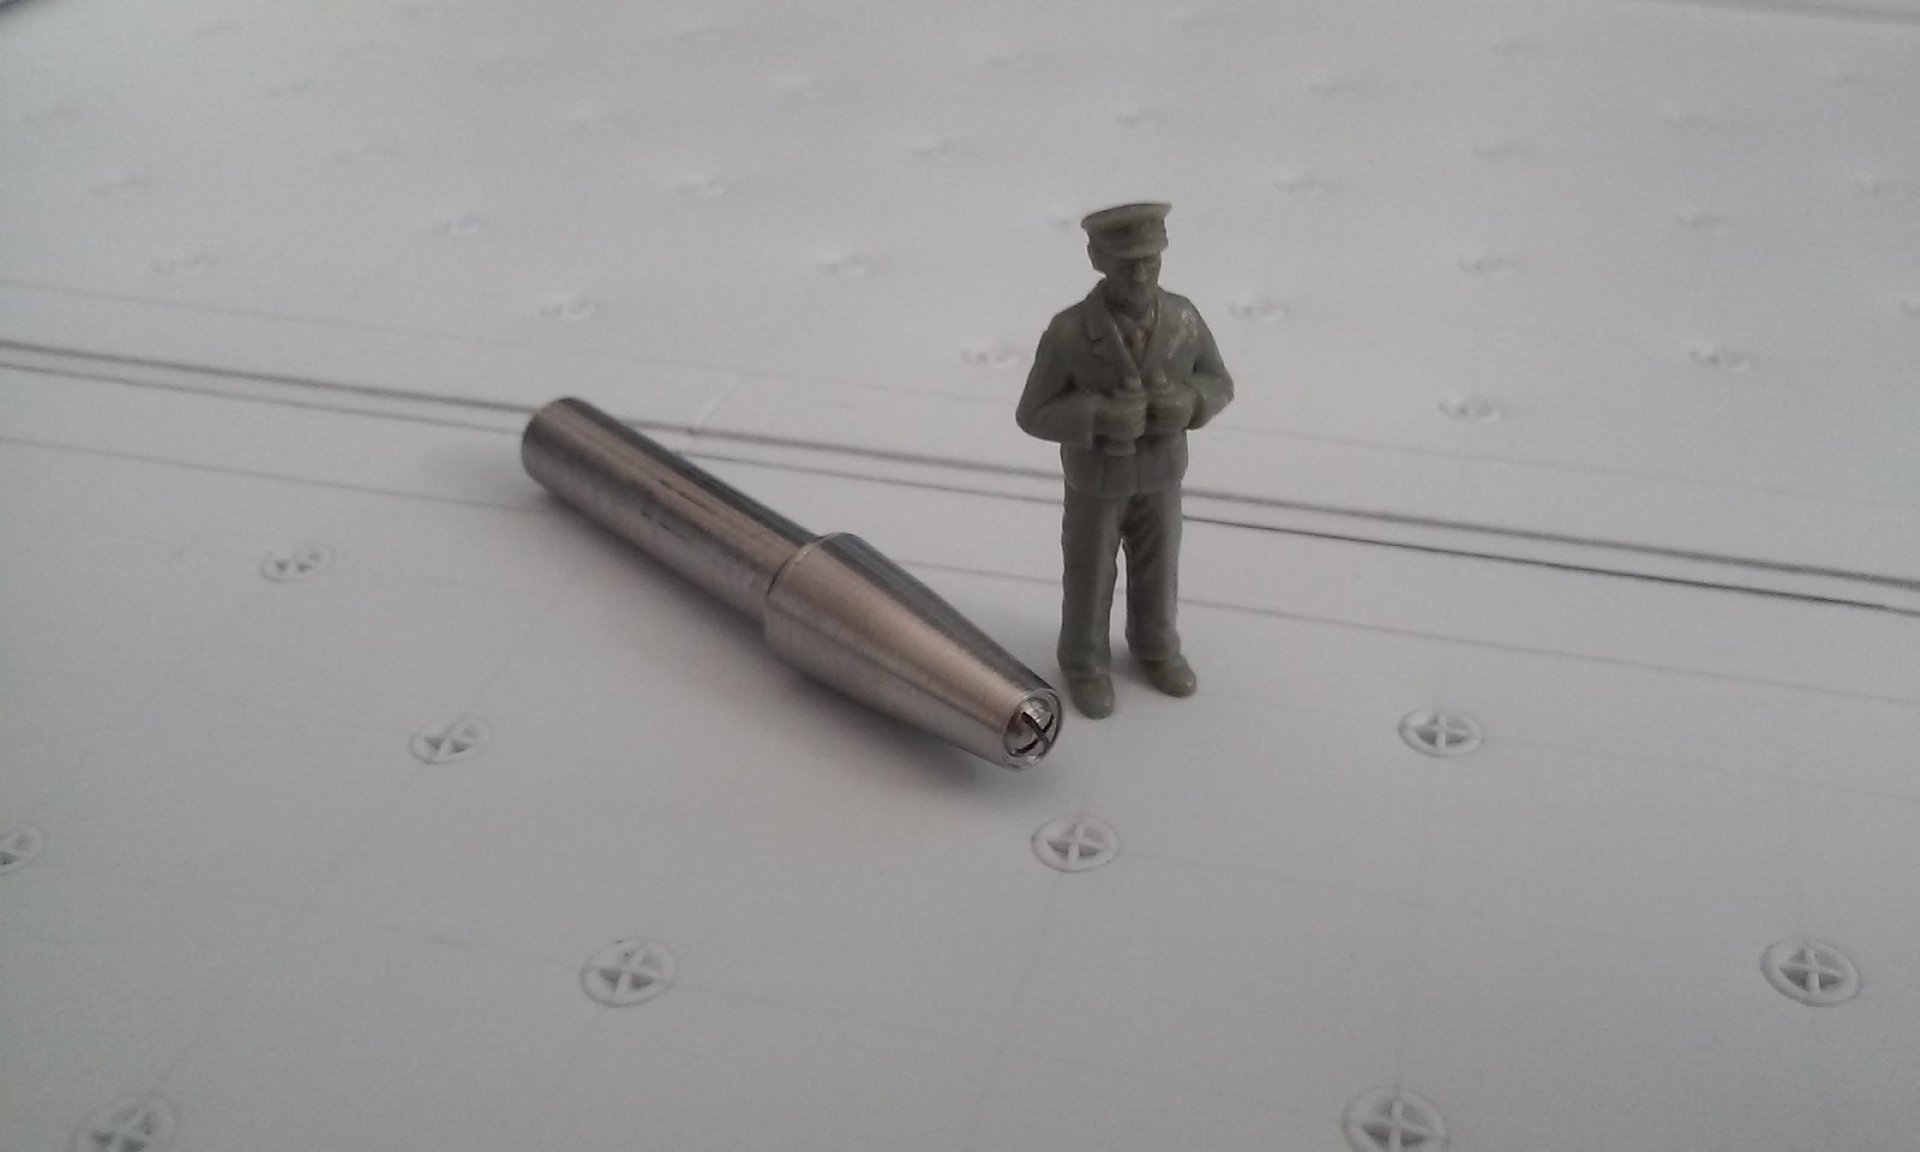
That's cool Derex, thanks for sharing! Its slow going on my ship, but I made some minor progress. The first photo is a die I made for detail on the flight deck (and other models). I took a TINY Torx screw and glued it into the shaft I machined on the lathe. It works great using my drill press as an arbor press. I think I'll shave a bit more off the edges so there is less space around the "bolt head" area. I wanted a tiny remote system for the ships hangar door and other functions. It will stay on the ship so it doesn't get lost somewhere in my home. I made a solid chunk of styrene that I glued together from 3mm (1/8") styrene sheets ( 2 of them) and pocketed it on my mill. Yeah, I could have just glued sheets together to make a box, but it wouldn't have been anywhere near as strong as a solid piece. The guts come from a Hexbug toy. I got three on sale years back for $5 each at Radio Shack. I knew I'd use them someday on something. Instead of the LR44/357 sized batteries, I'm using a 3V CR2032 to make it thinner and smaller. One circuit board worked intermittently so I gave up on it. I prepped a second board and before I could get a good test out of it, it has now failed too. It might be the cold weather and heater drying out the air. I may have blown it with static electricity somehow, despite being careful. - MT

-
That cockpit is beautiful! -MT
-
Great idea and diorama! - MT
-
It just keeps getting better and better! Waitnig on a video with some good lighting to see all the details. These photos are nice and clean too. - MT
-
Pengbuz - Those flame effects look awesome! Don't rush it Rock! It's looking great! Every time I rush things, bad things happen to my projects. That looks awesome Grayson! I think you got a side-hustle going on now. You wanna charge to make some? - MT
-
That's looking awesome Arbit! Did you use reed valves in place of micro switches for your electrical door "stops"? I didn't add any stops to my "garage door," but think it will prevent something from being broken. Better be safe than lazy and break something I can't easily fix after its painted. - MT
-
That is weird! I think Electric Indigo is right. I have that kit and it has a lot of ABS plastic. ABS is great at creating a static electricity charge. - MT
-
Cool Chavakaiser! MUY GRANDE! Cool 505! And yeah, cool painting too! Arbit, That works nice and SMOOTH! The whole thing will be awesome! That's coming along nicely Rock! "I'm Woody, howdy howdy howdy!" That's great Derex! And it looks like you have a new Christmas ornamanent too! Which also came out great. - MT
-
This model looks great! I'm not into SD models, but yours looks great! Nice clean engineering too. - MT
-
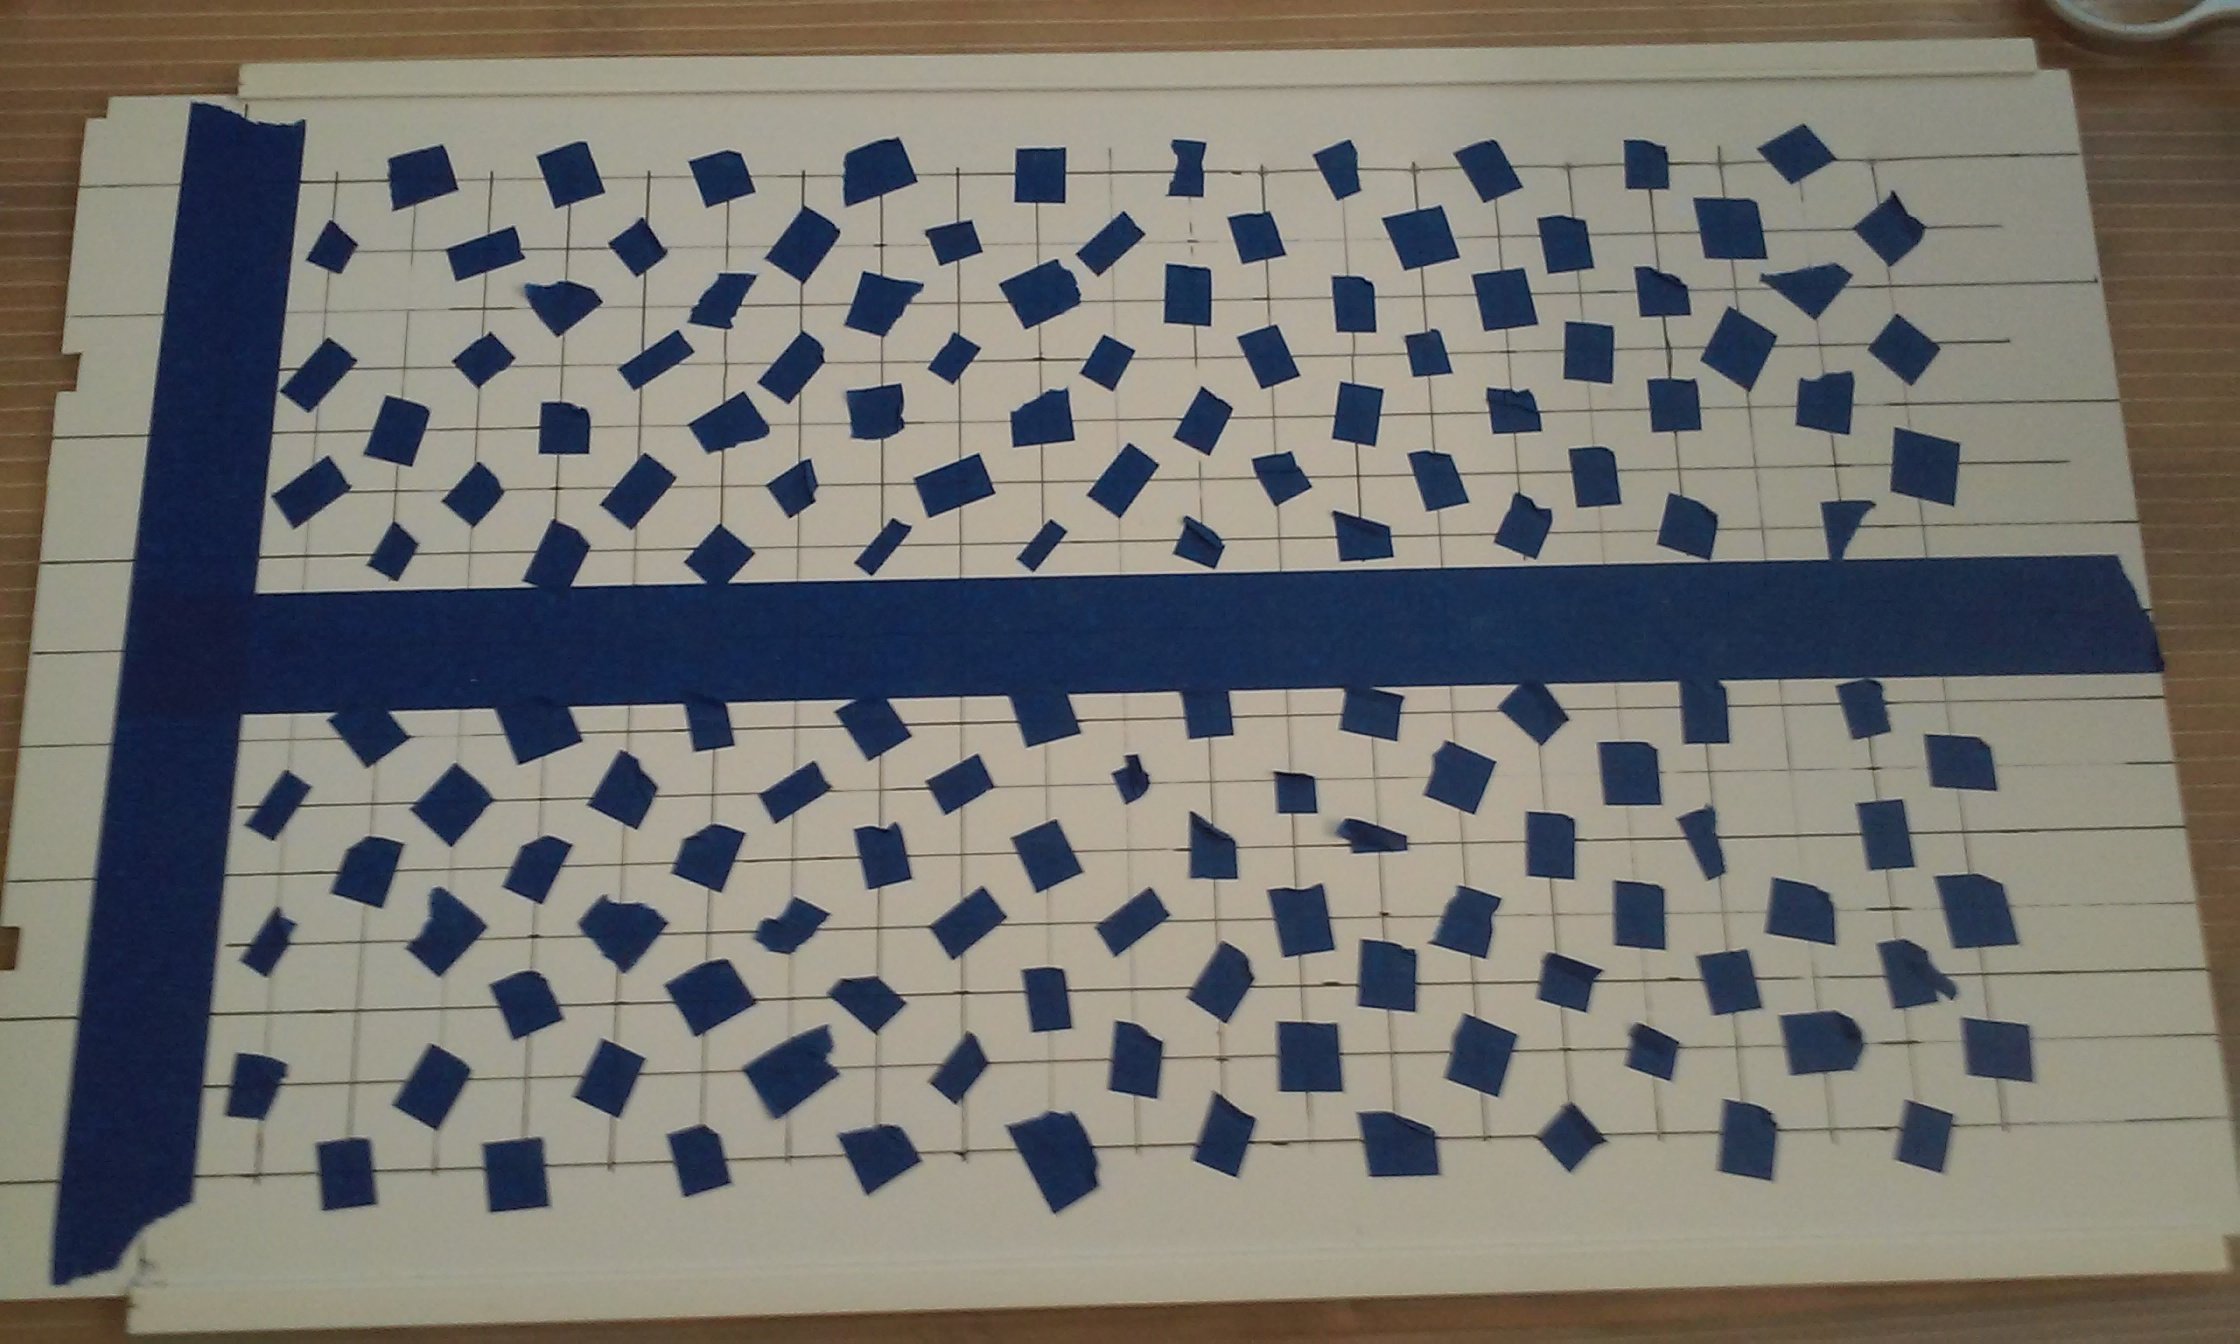
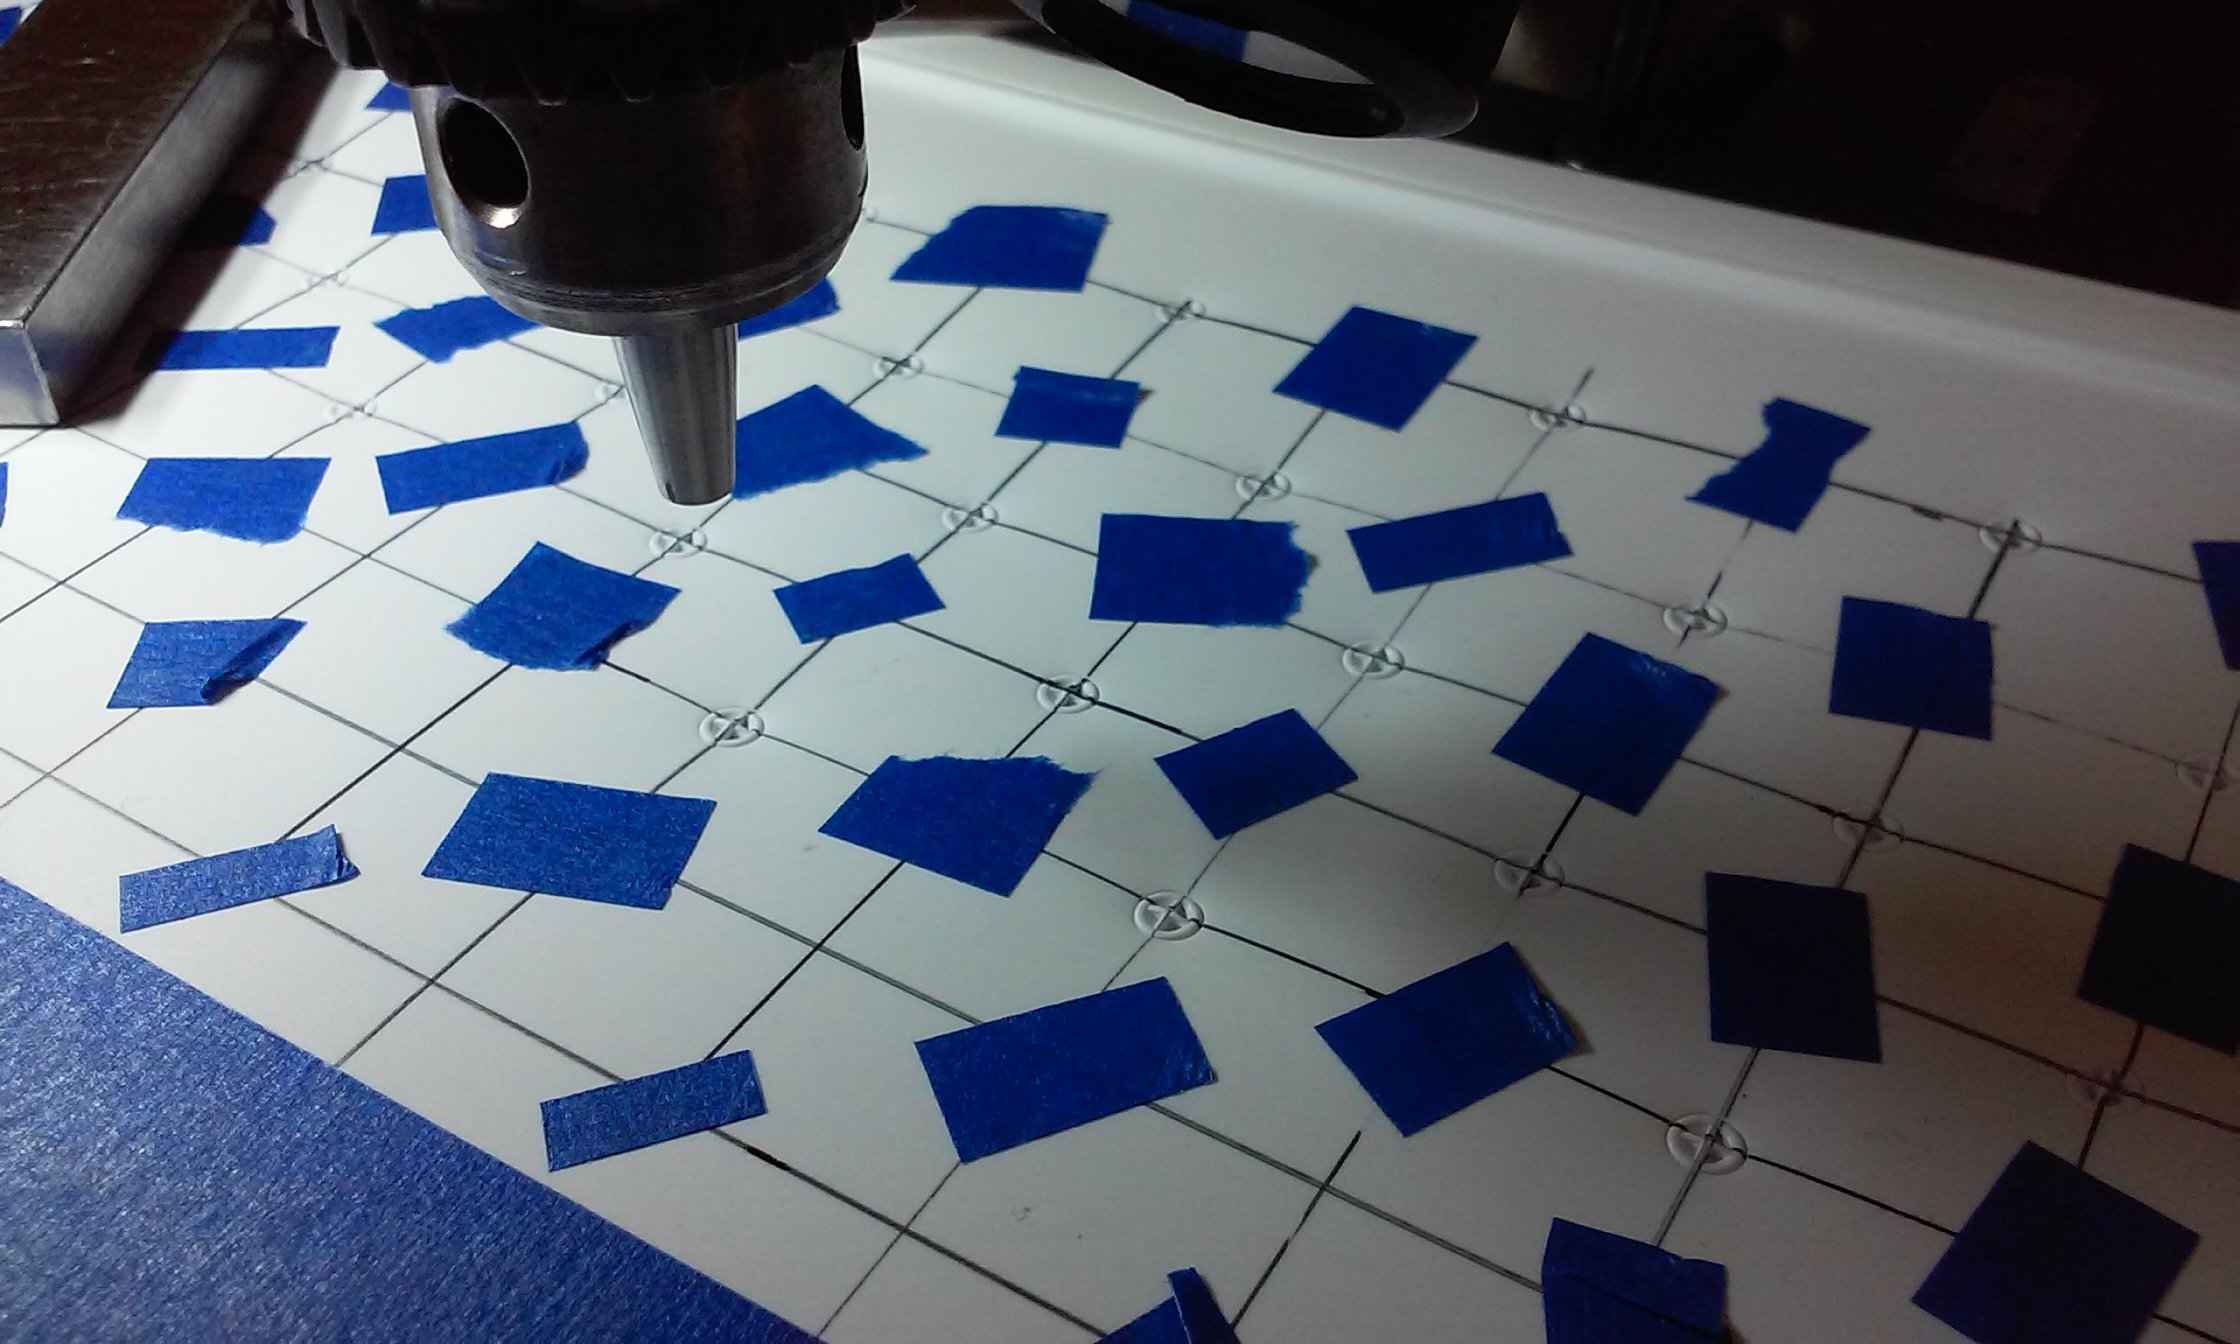
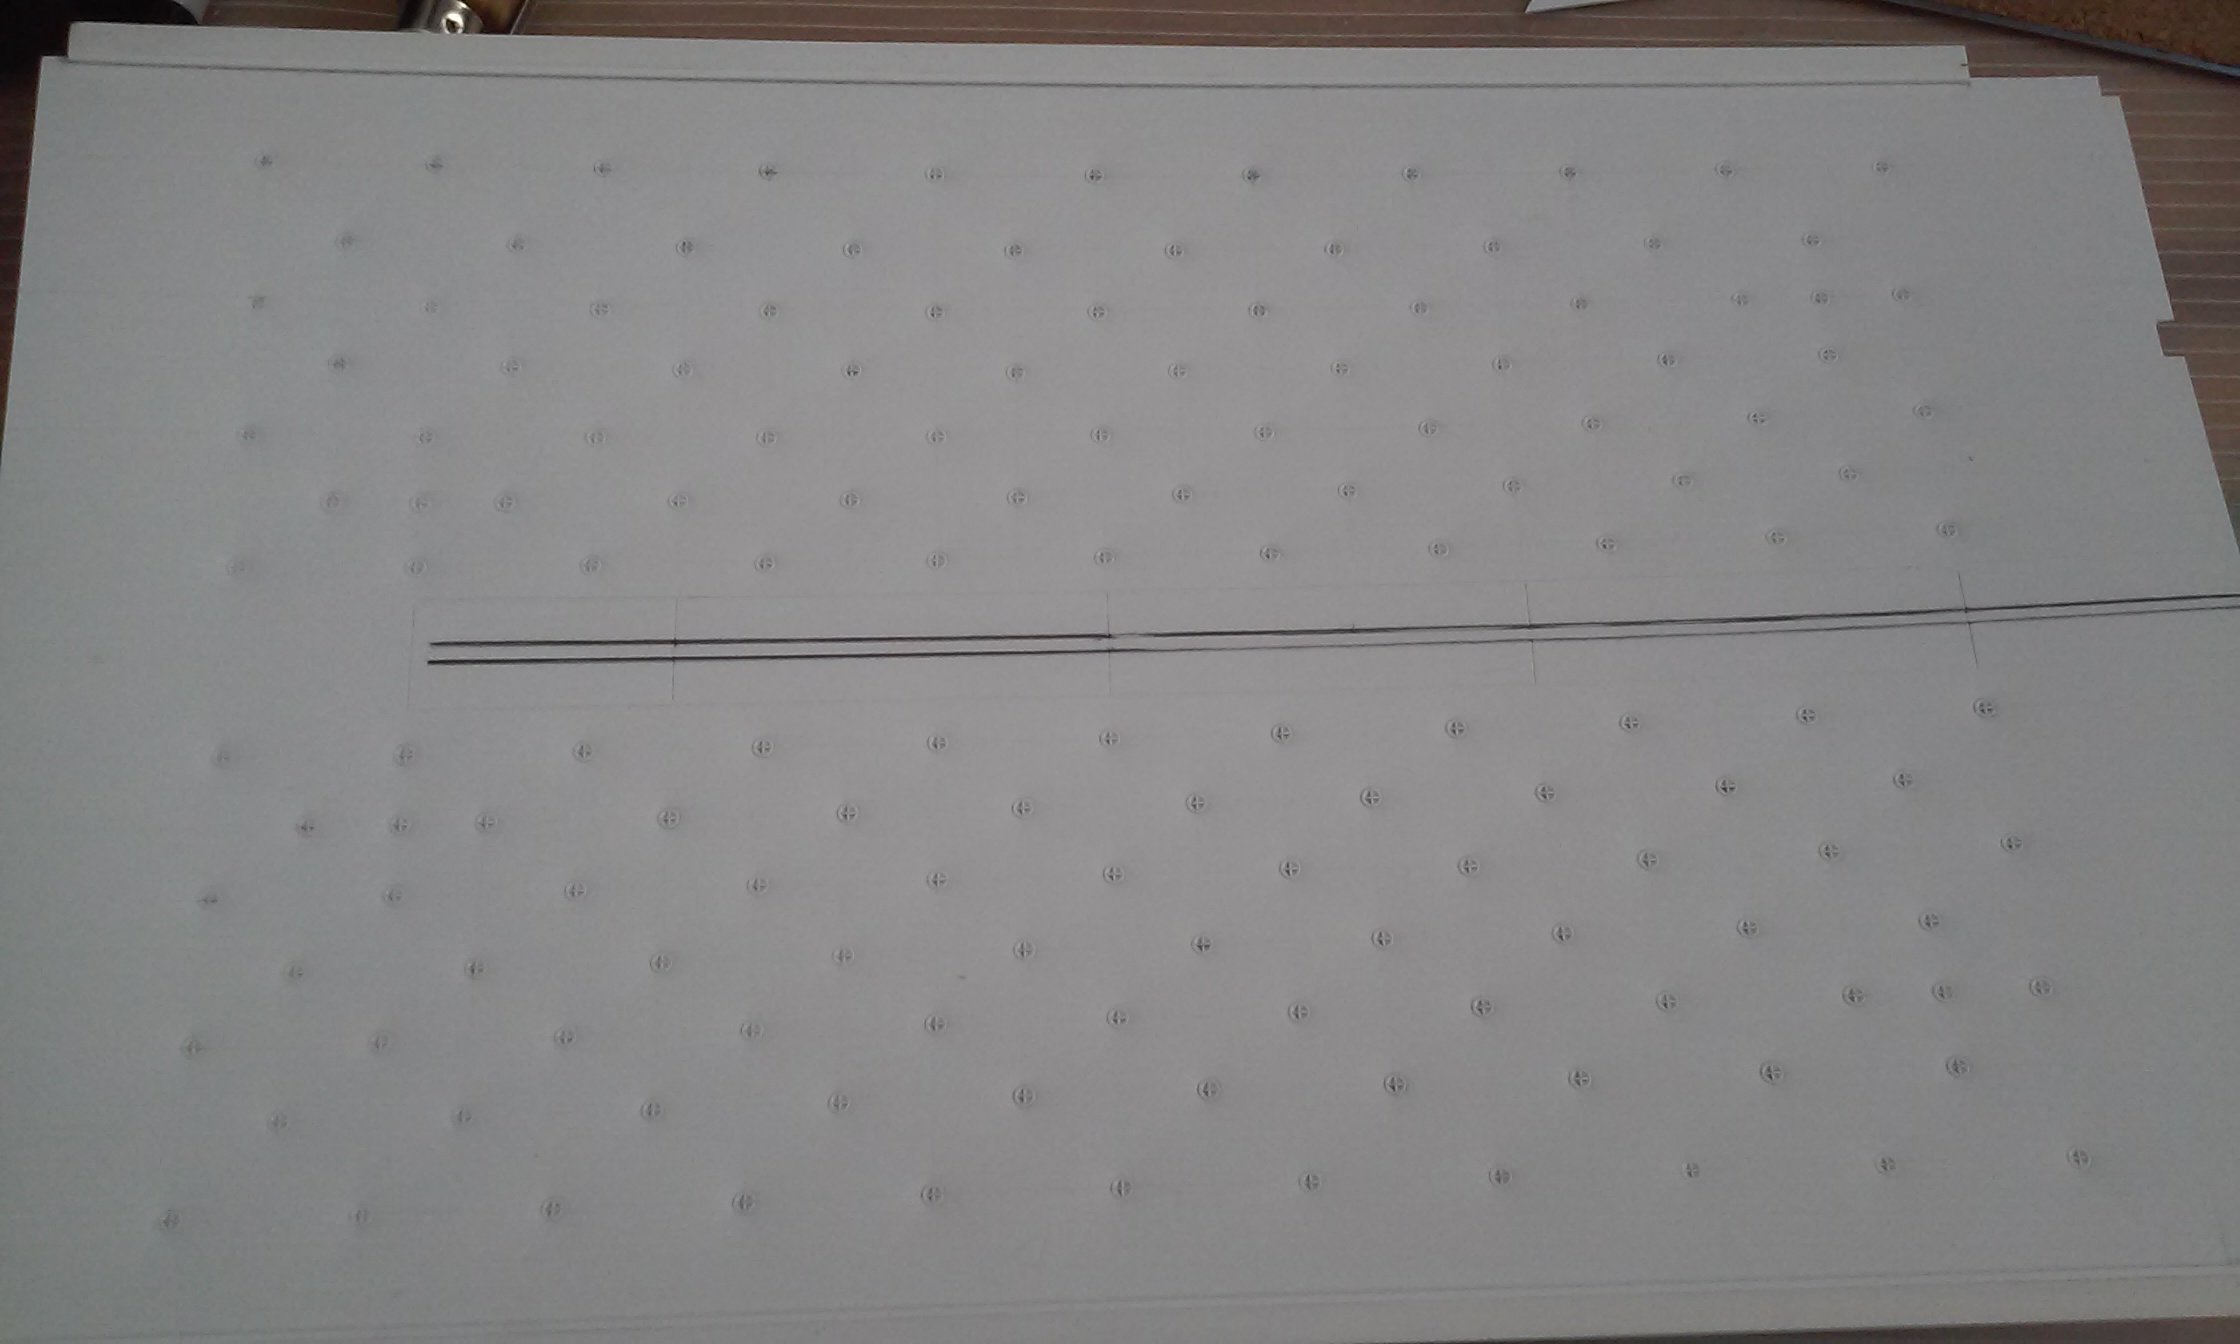
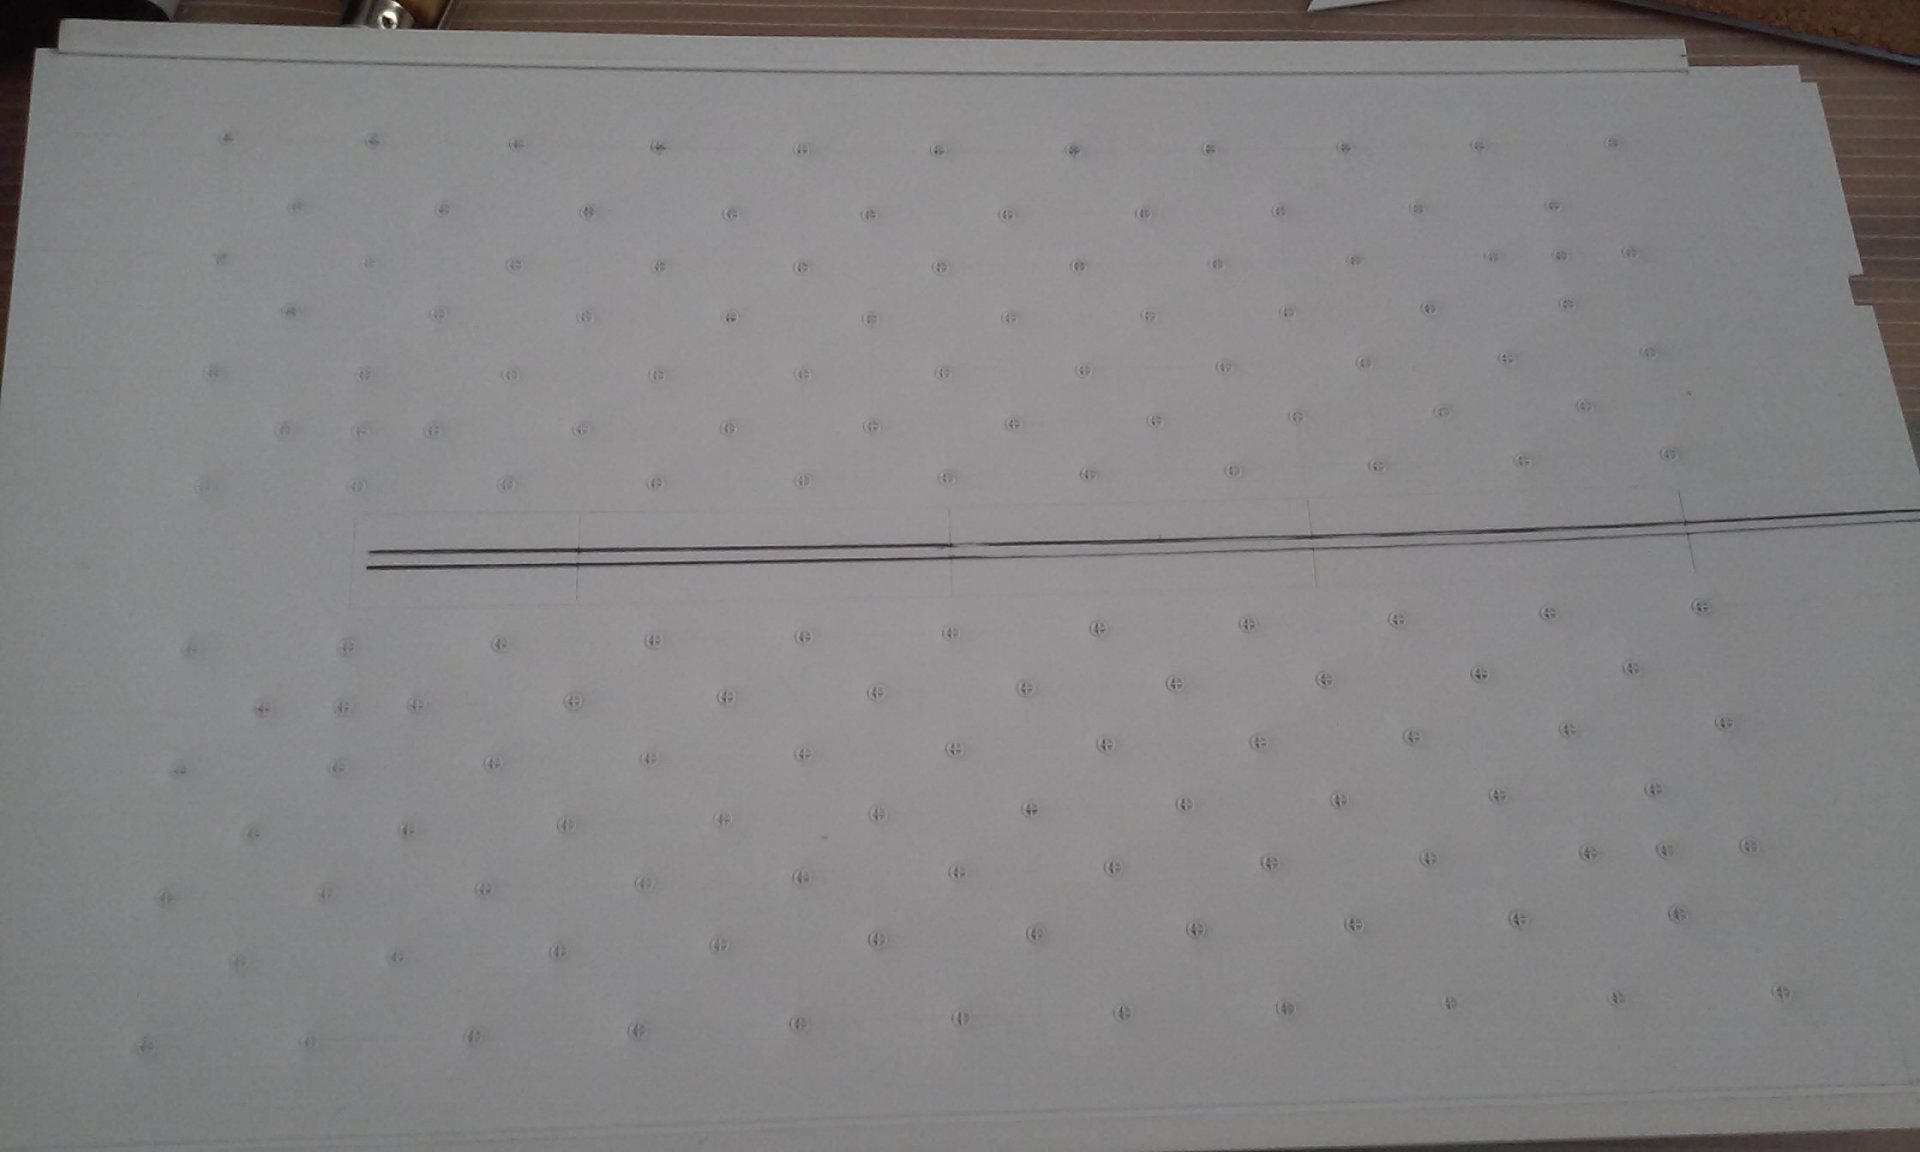
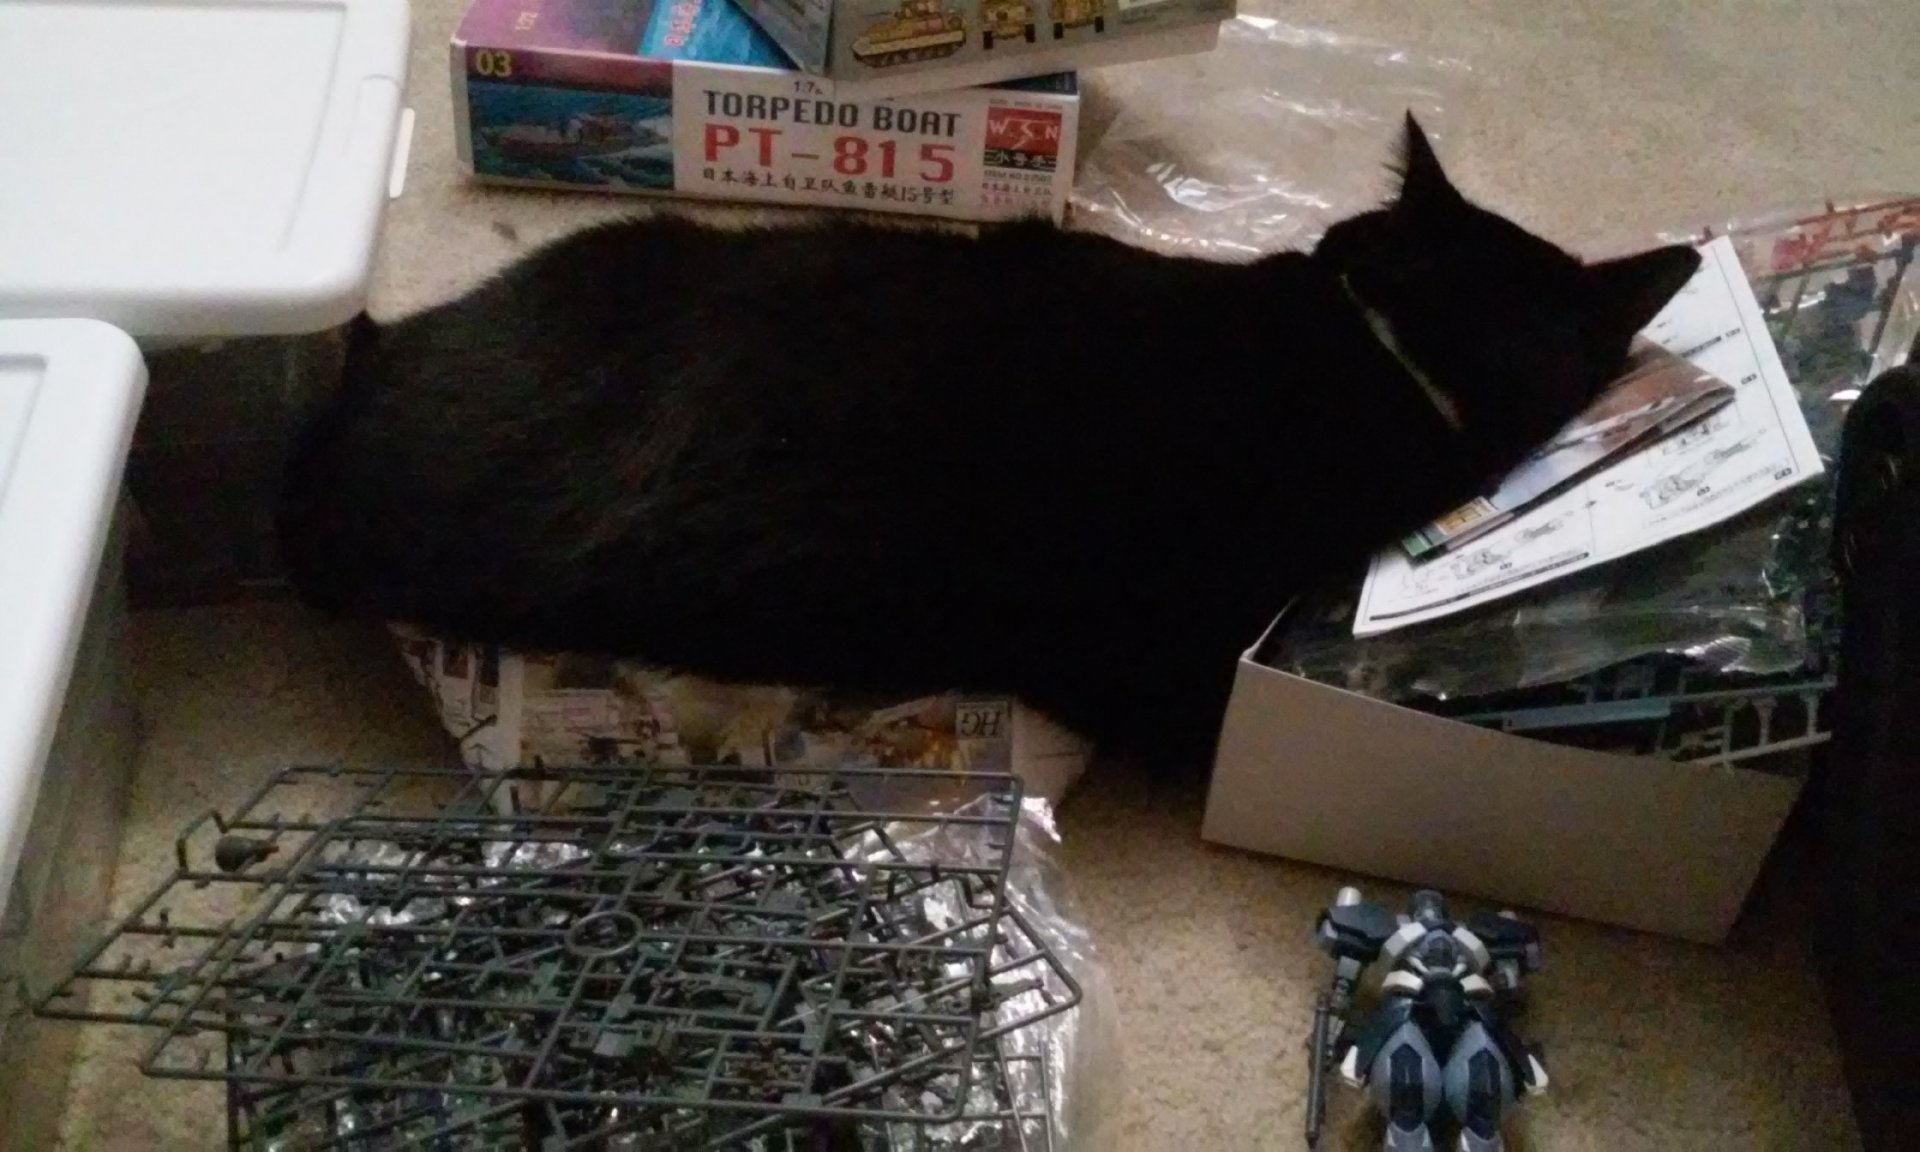
Cool build Pengbuzz! Your project is coming along smoothly Arbit! You need to take that to a show. People will get a kick out of the blue tooth. Checkmate, your build looks really good so far. I guess you're preshading it? I was trying to figure out if it was a new model until I took a second look. Chavakaiser - Fantastico! Time to make the ship's flight deck tie-downs (Padeyes). First I made a die to use in my drill press as an arbor press. Then simply press into the plastic and you have padeyes galore for free. It adds no more weight to the ship from sheets of photo etch, no hole drilling and no gluing. I used masking tape on the grid so I could make adjustments before pressing the deck into shape. I STILL can't get all the permanent ink off the deck, but the padeyes are all clean without marring. The paint will make them stand out. Some of you may ask where I get my inspiration from. Here's two of them. They think AND sleep outside the box! They also seem to like the Frame Arms kits too! - MT


-
Arbit - That came out great! Nice and smooth too. The HMS Invincible class carriers used the same scissor lifts too for their aircraft elevators. I got to see one up close. Chavalaiser - Grande y excelente! Sigan con el buen trabajo! - MT
-
That is a tough one. Even the older model kits with fastpacks molded them in that light greenish color. I thought it was odd until looking at screenshots too! - MT
-
Ha ha! Yes, we recycle! - MT
-
I'm just catching the end of this. Everything came out great Pengbuzz! Especially when you consider it was all scratch built from common materials! - MT
-
Thanks for sharing! I've seen this at Micromark: https://www.micromark.com/Wondercutter For only $399.95 its a steel! I thought of getting one, but its that or making my mill work better. Since most things are made on my mill... My recommended tool: https://www.micromark.com/5400-Deluxe-Mill-Package My mill has another base, but the vertical and motor are the same (from my lathe).- MT
-
Thanks for posting not only all your work, but your parts too! Most of mine are recycled from something else so not much help to others. - MT
-
He he. We always joked about the "beer can" missiles. NOW they actually are that size! - MT
-

Hachette Collection 1/24 VF-1S (subscription collectable)
MechTech replied to CF18's topic in Model kits
That's also a long time to wait on building up your kit. Then you hope the company doesn't fold after your kit is halfway done. - MT -
Thanks for posting pictures Derex. I ddin'tknow that was a kit yet! I'd use the surprised look on Woody's face. It would go perfect with some of the modeling conundrums I face! Cool mods UN Marine. My son and I have been watching Gundam Origins so we're kinda in the Gundam frame of model building now. - MT
-
Cool Nighmareb4macross!!! SMOOTH finishes. That's GREAT Arbit! You just need an aircraft with afterburners blowin'! - MT