MechTech
-
Posts
4701 -
Joined
-
Last visited
Content Type
Profiles
Forums
Events
Gallery
Everything posted by MechTech
-
Thanks 505! I'm shooting for realistic - pun intended! - MT
-
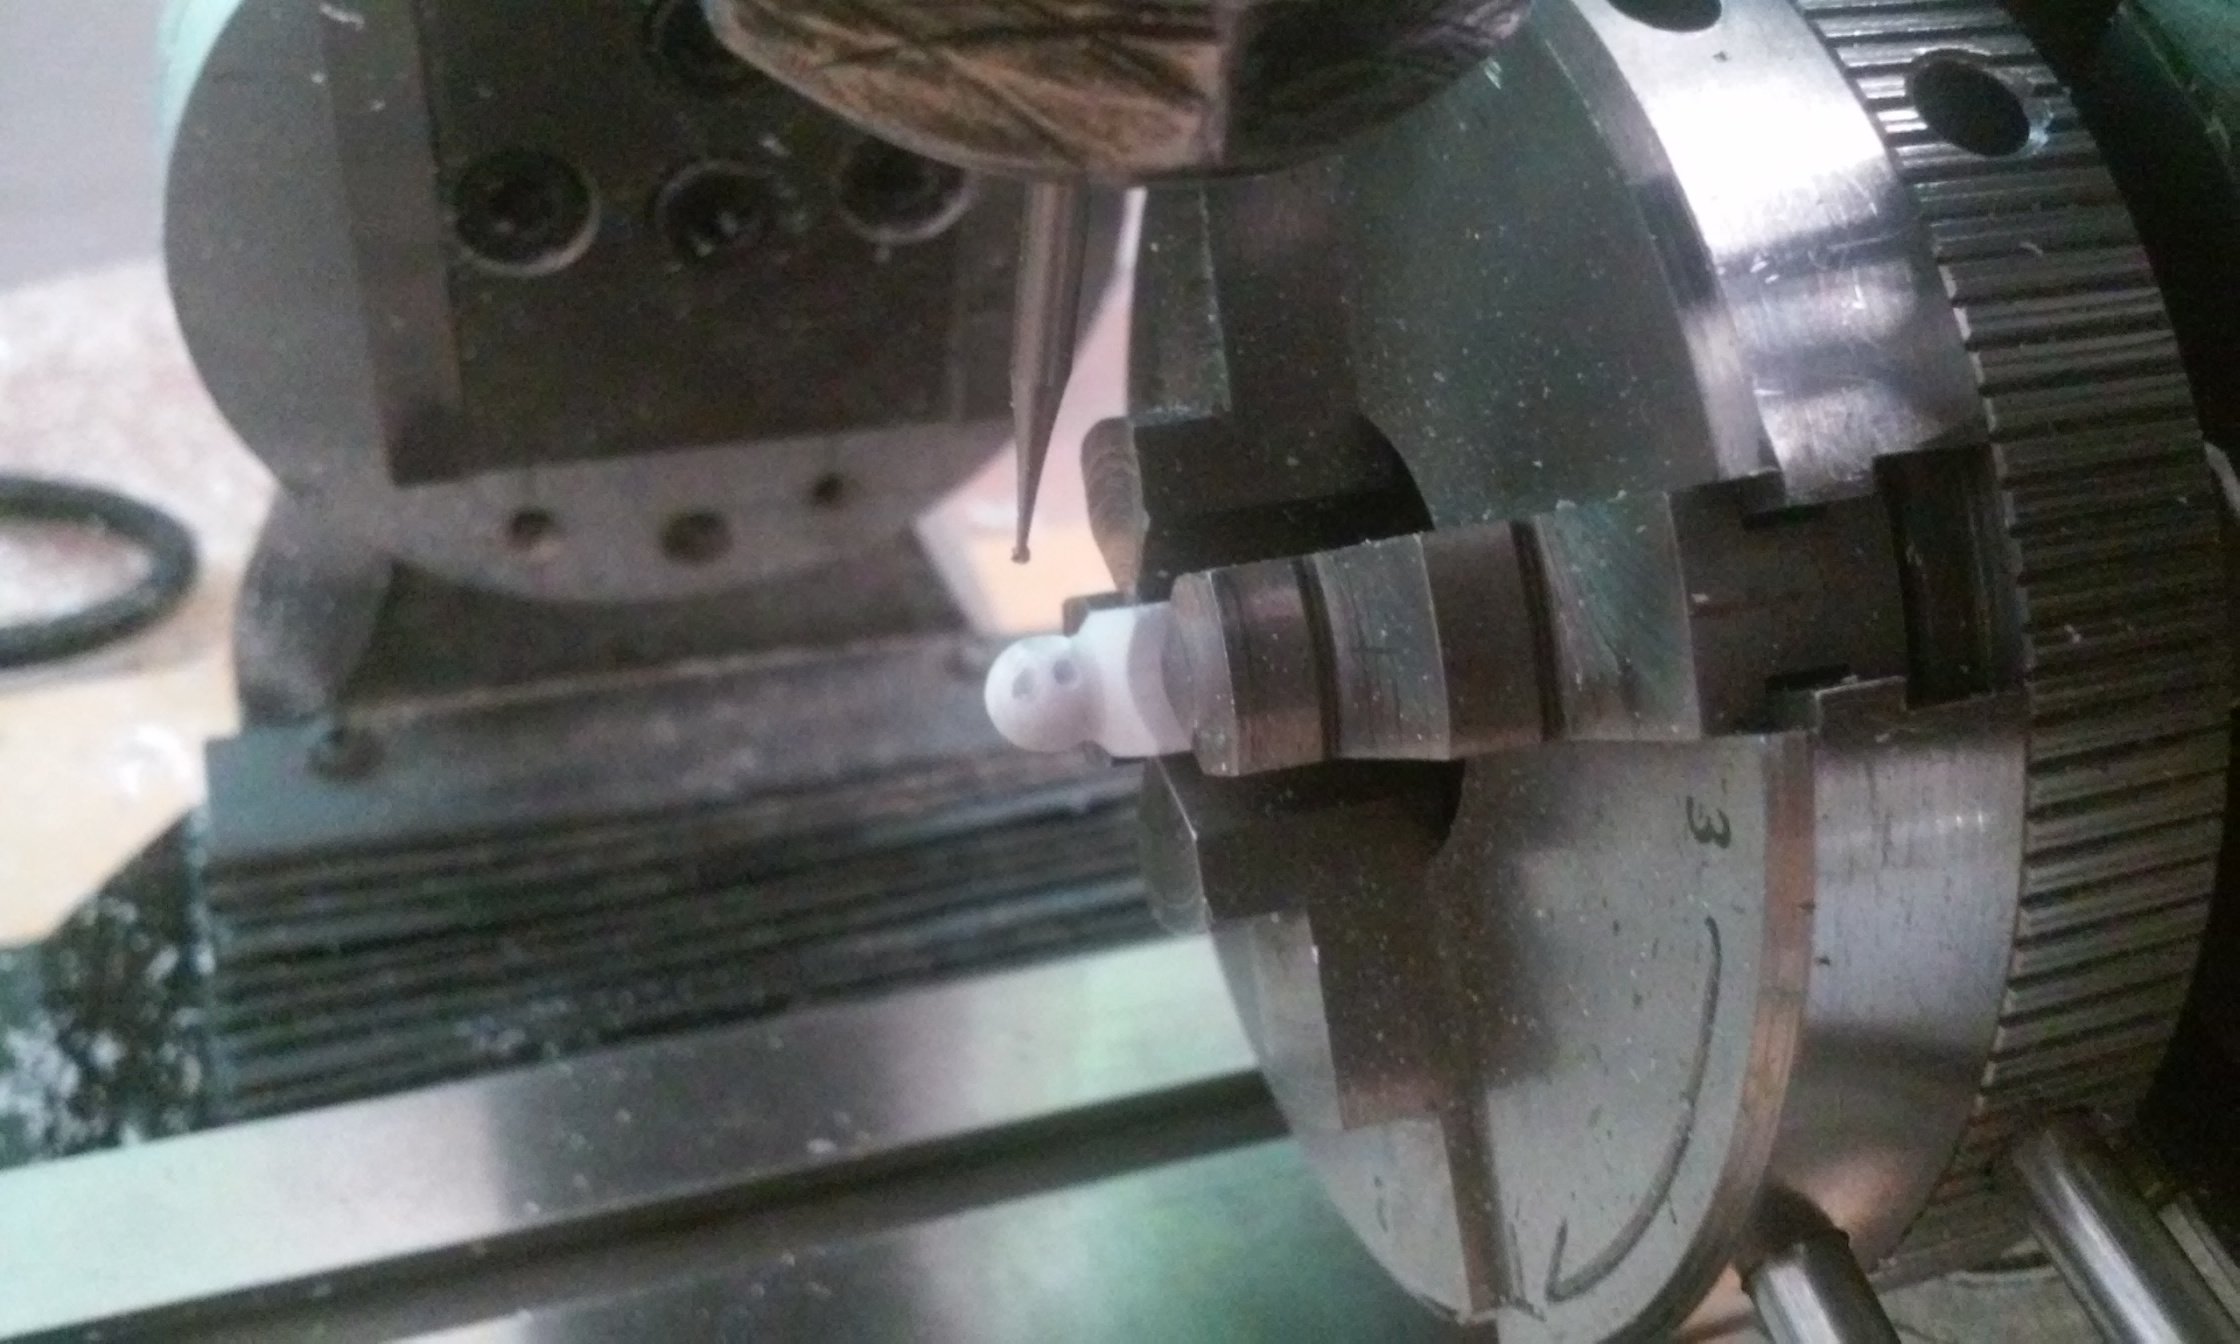
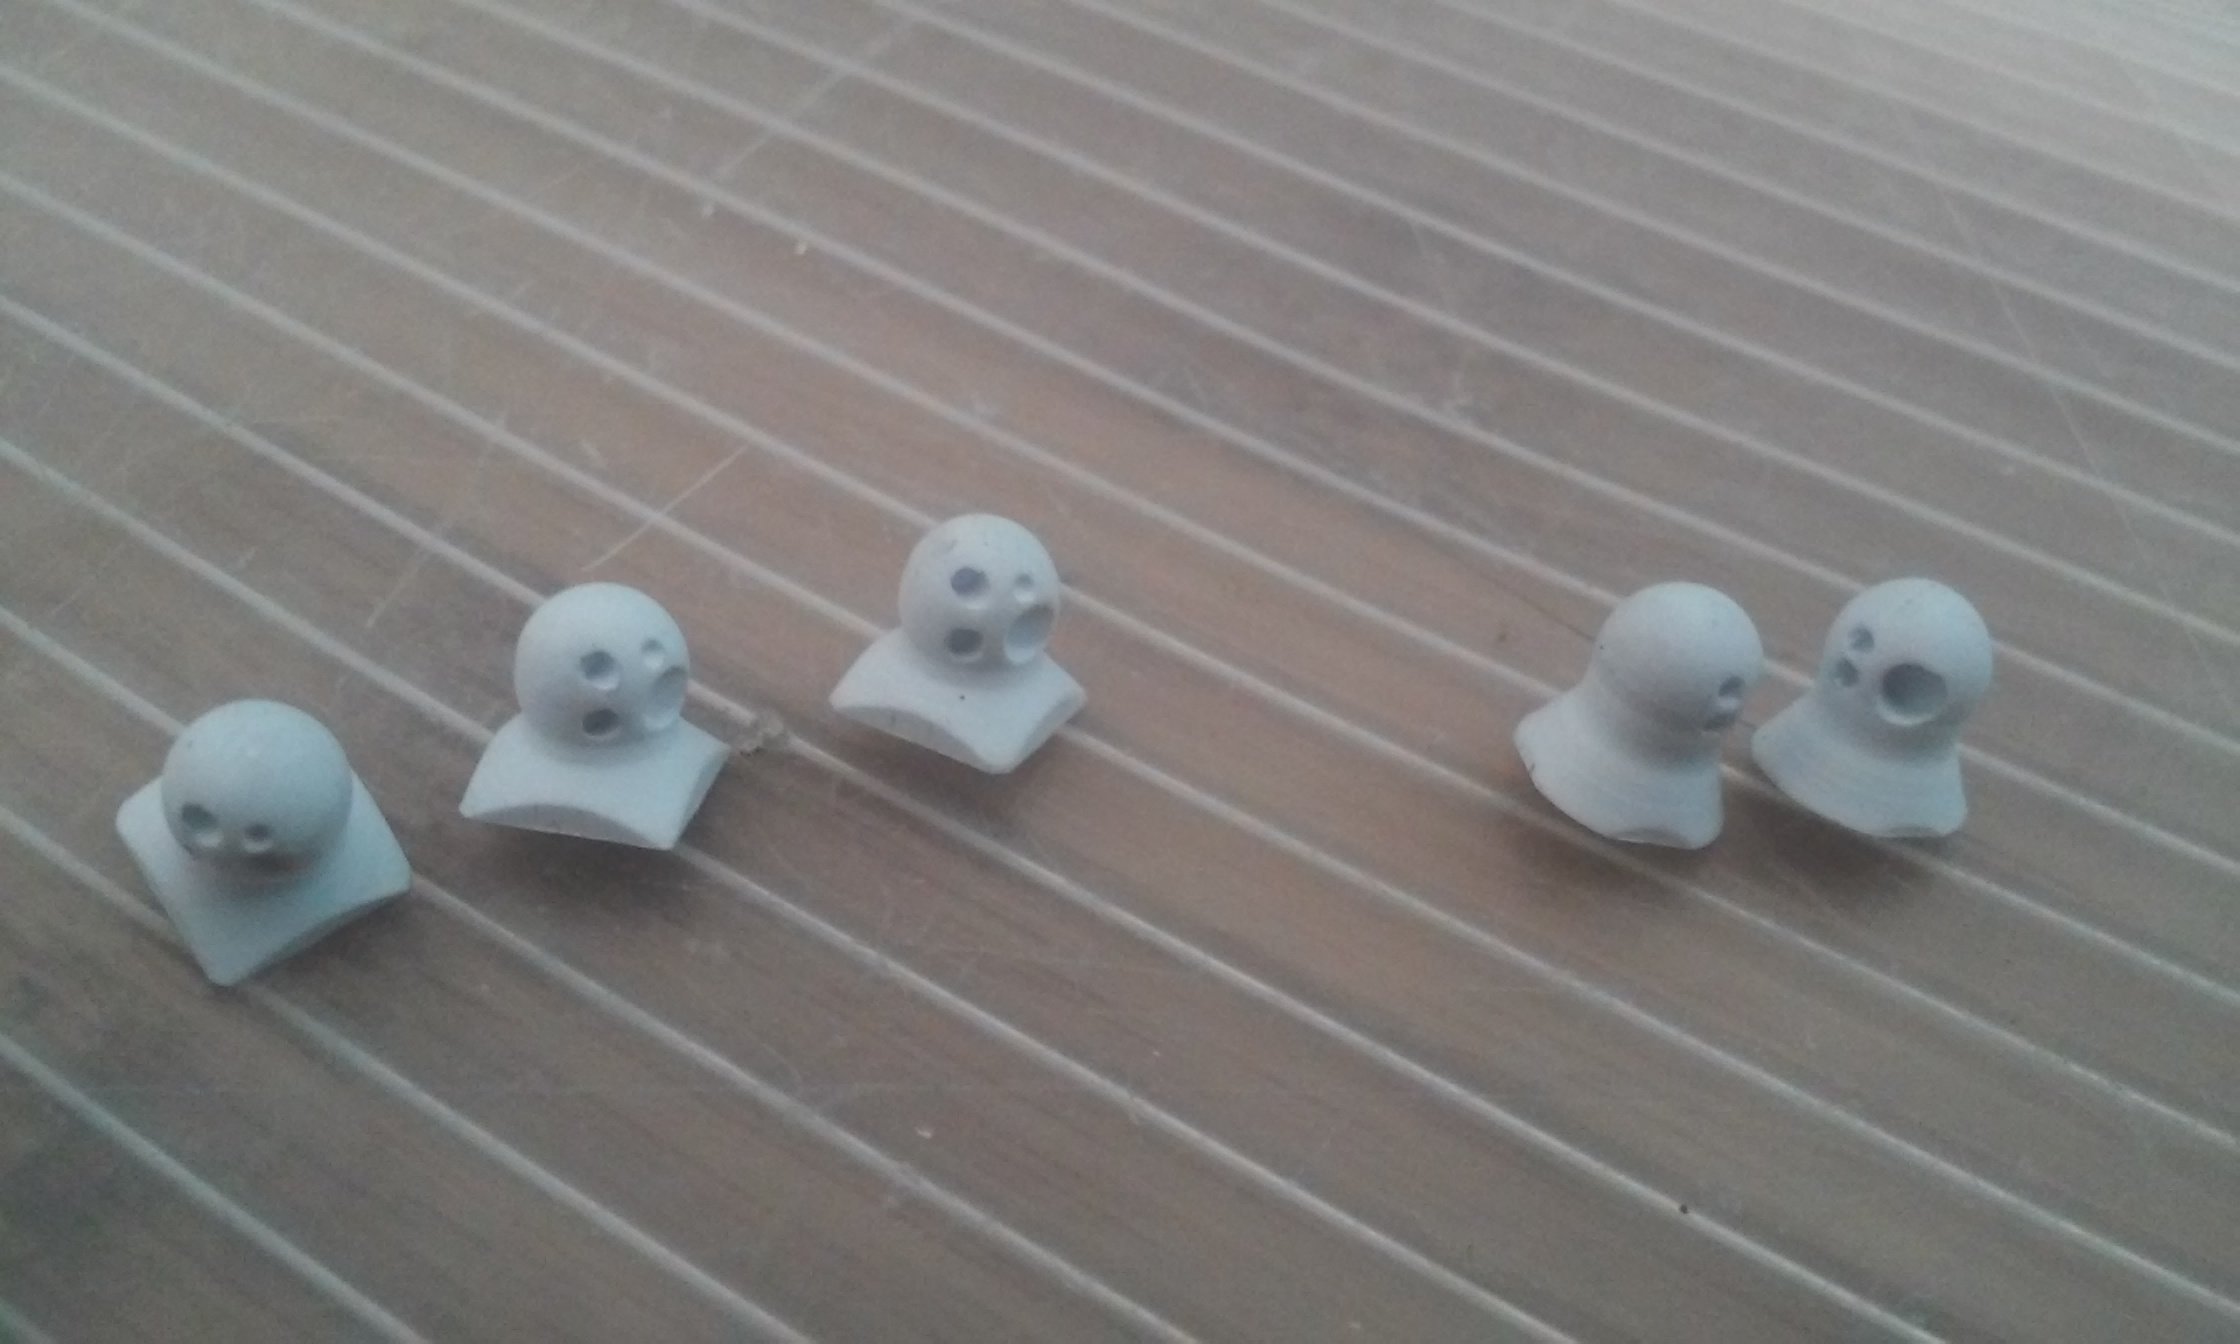
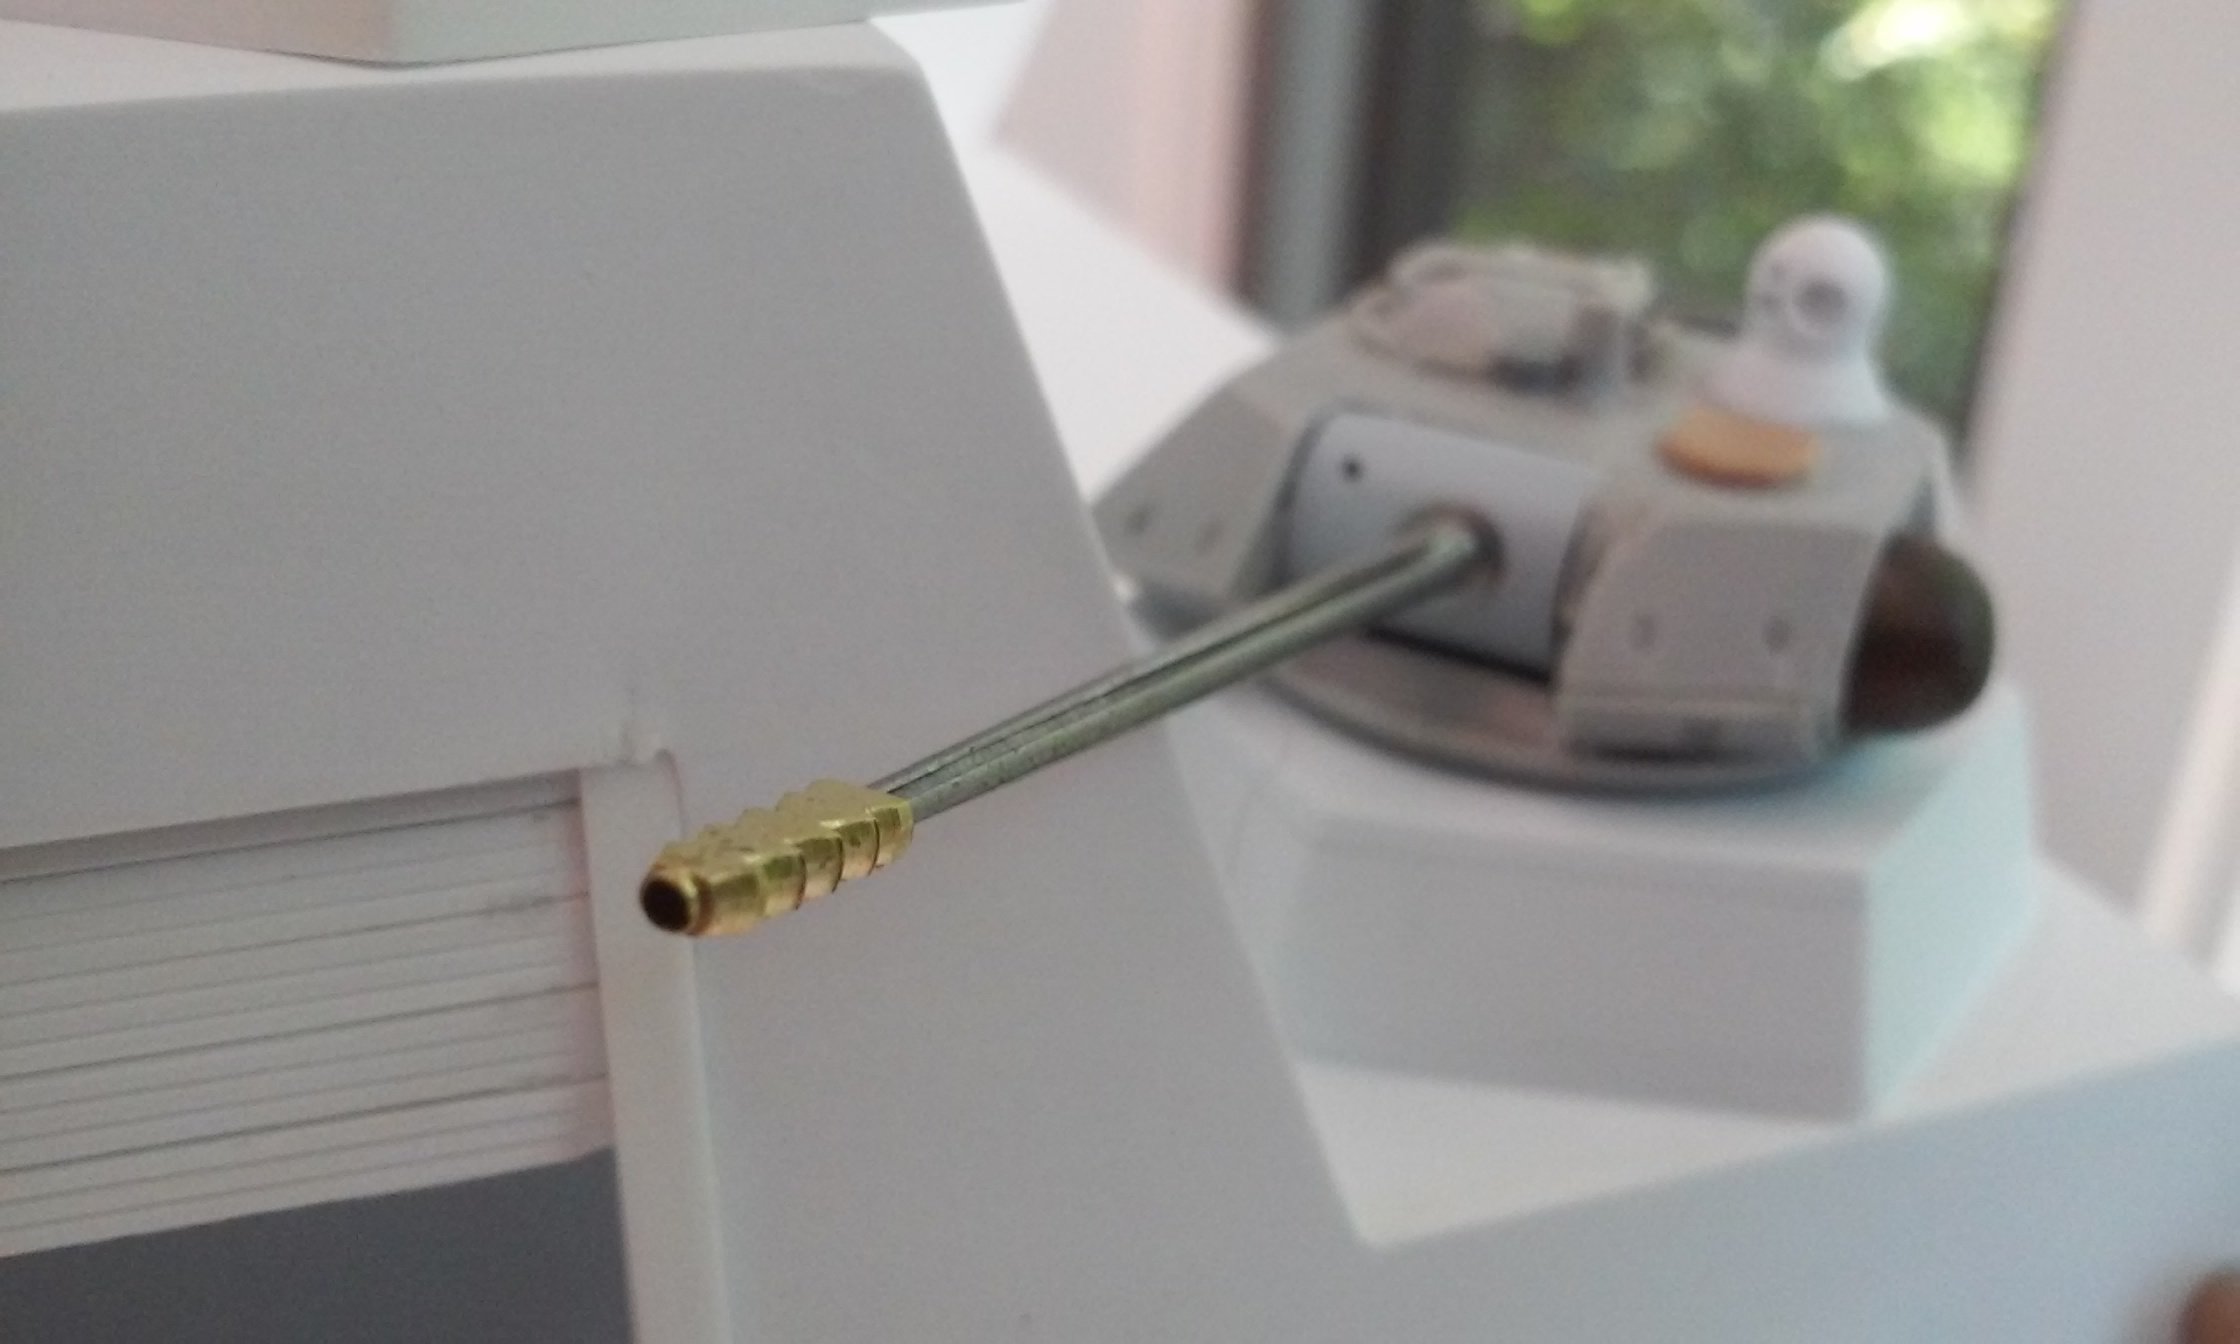
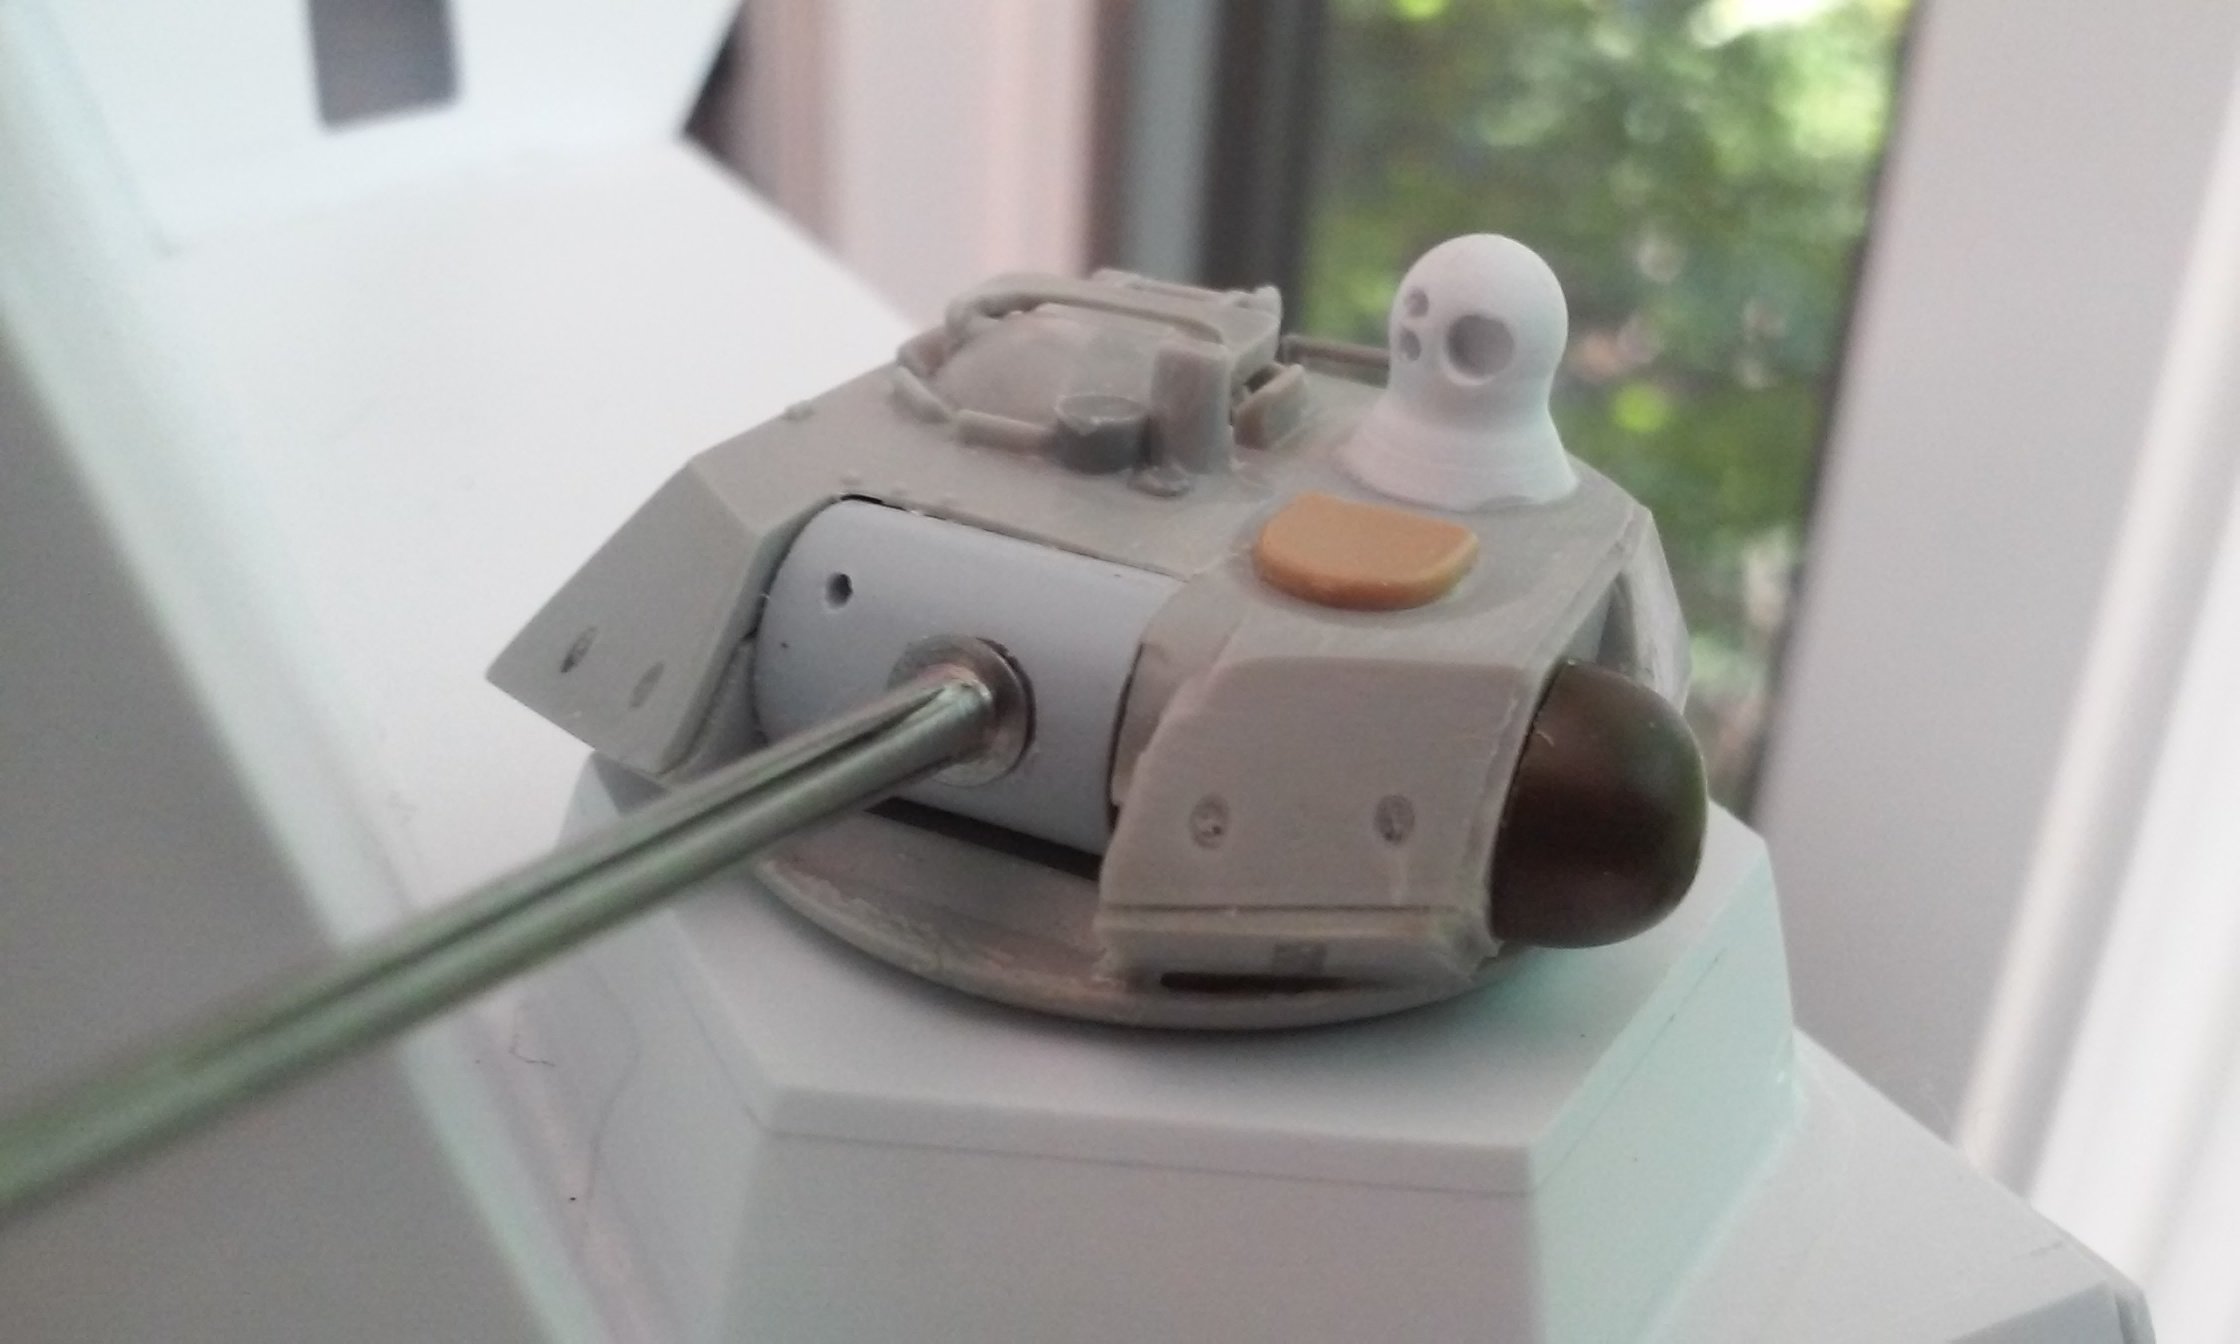
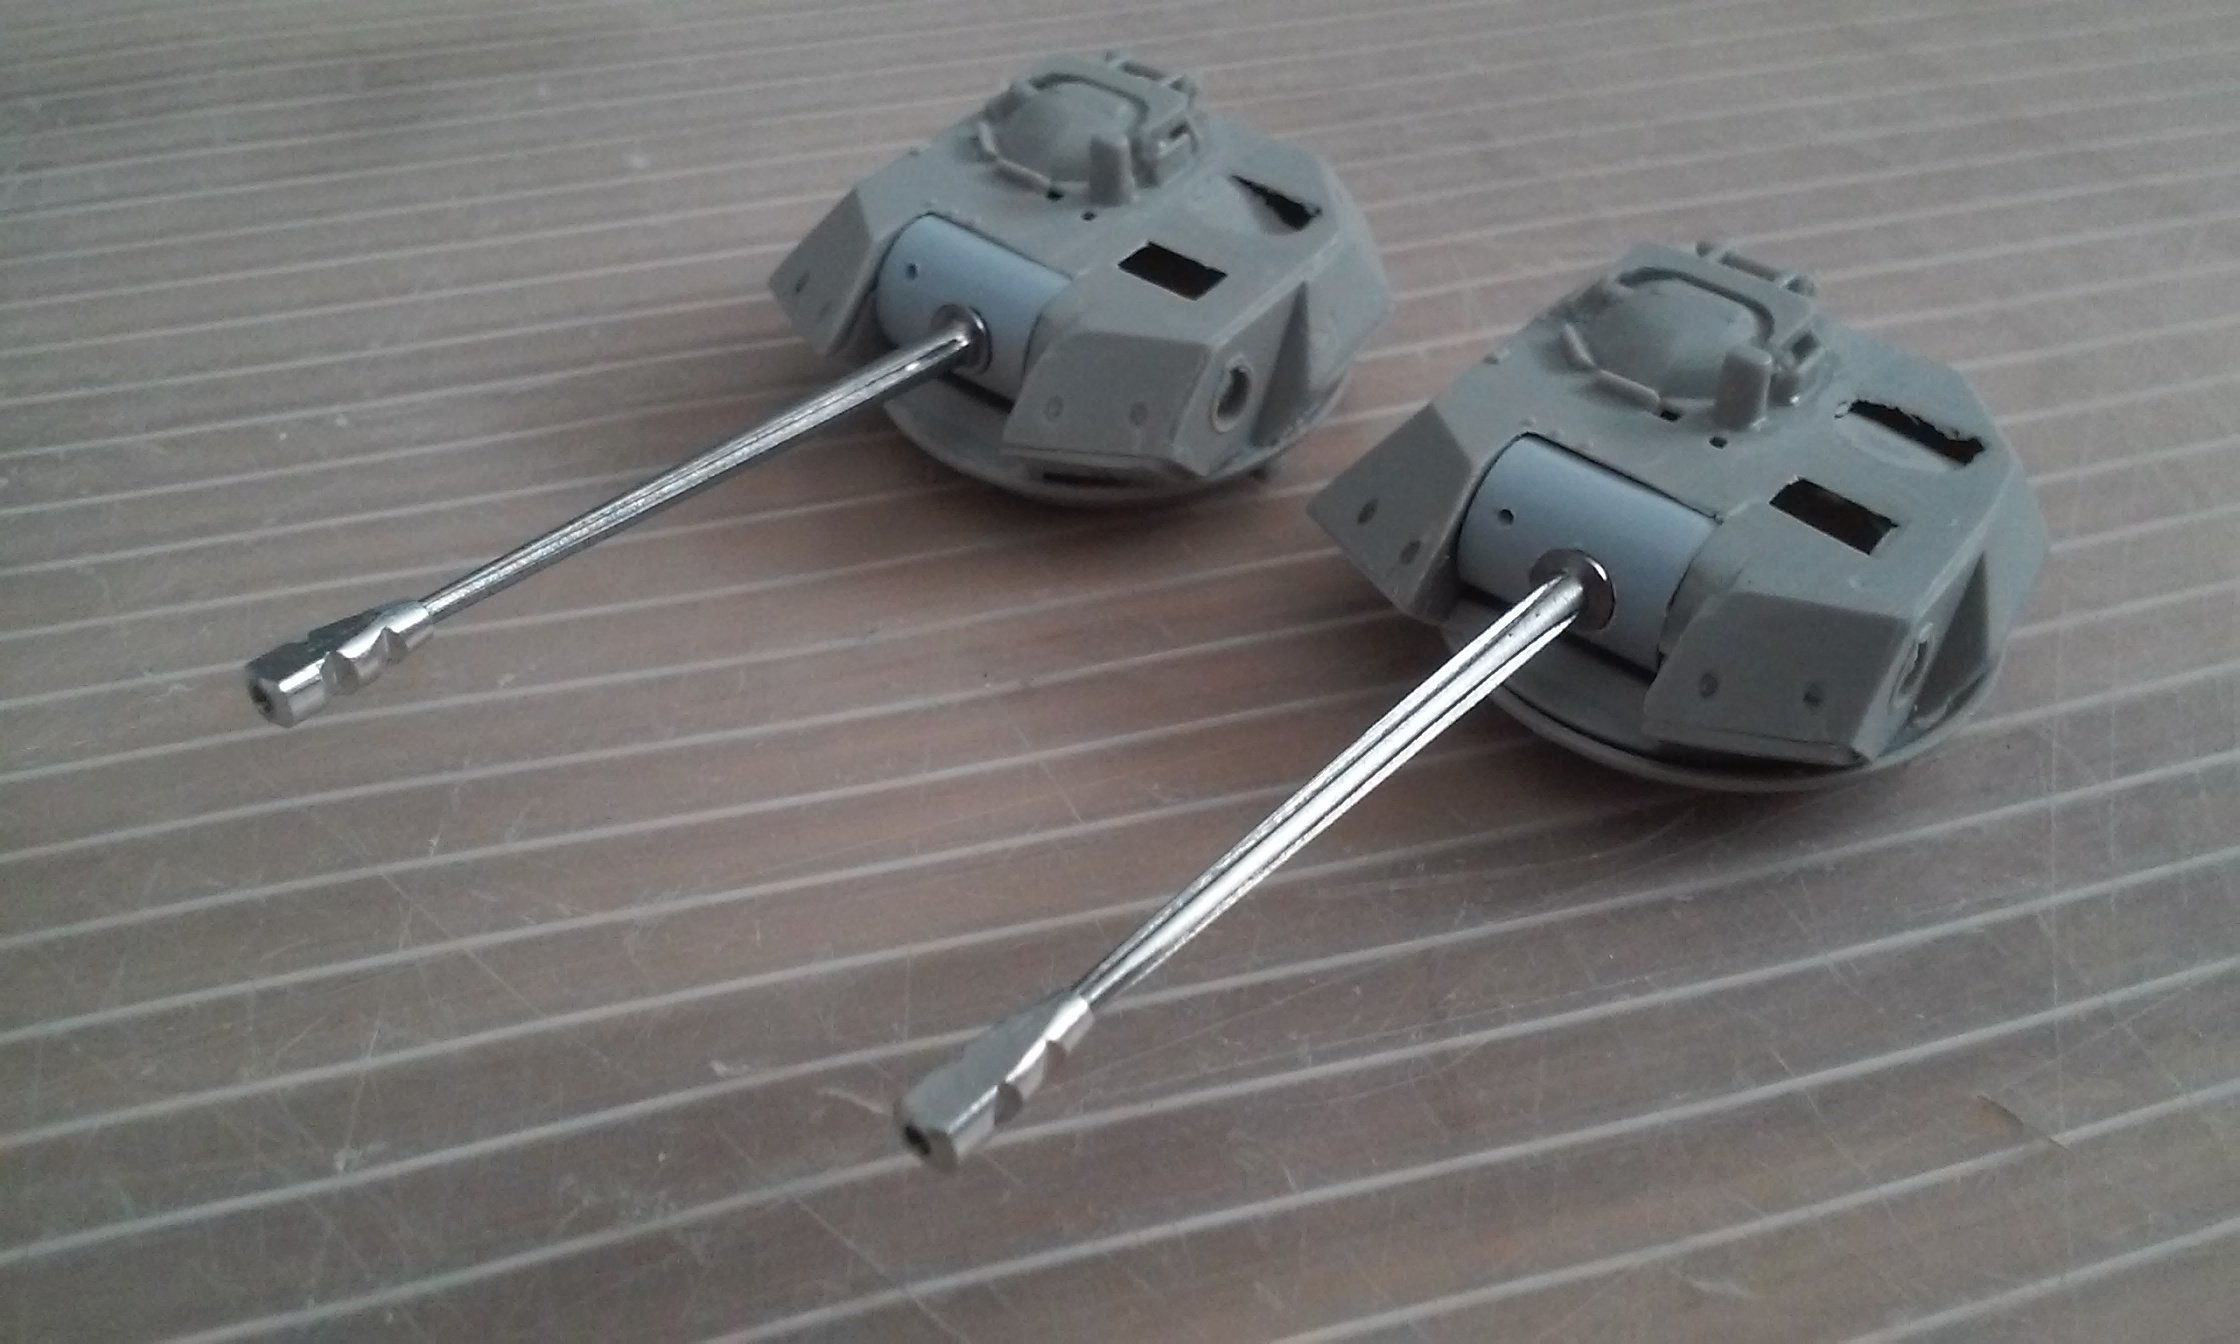
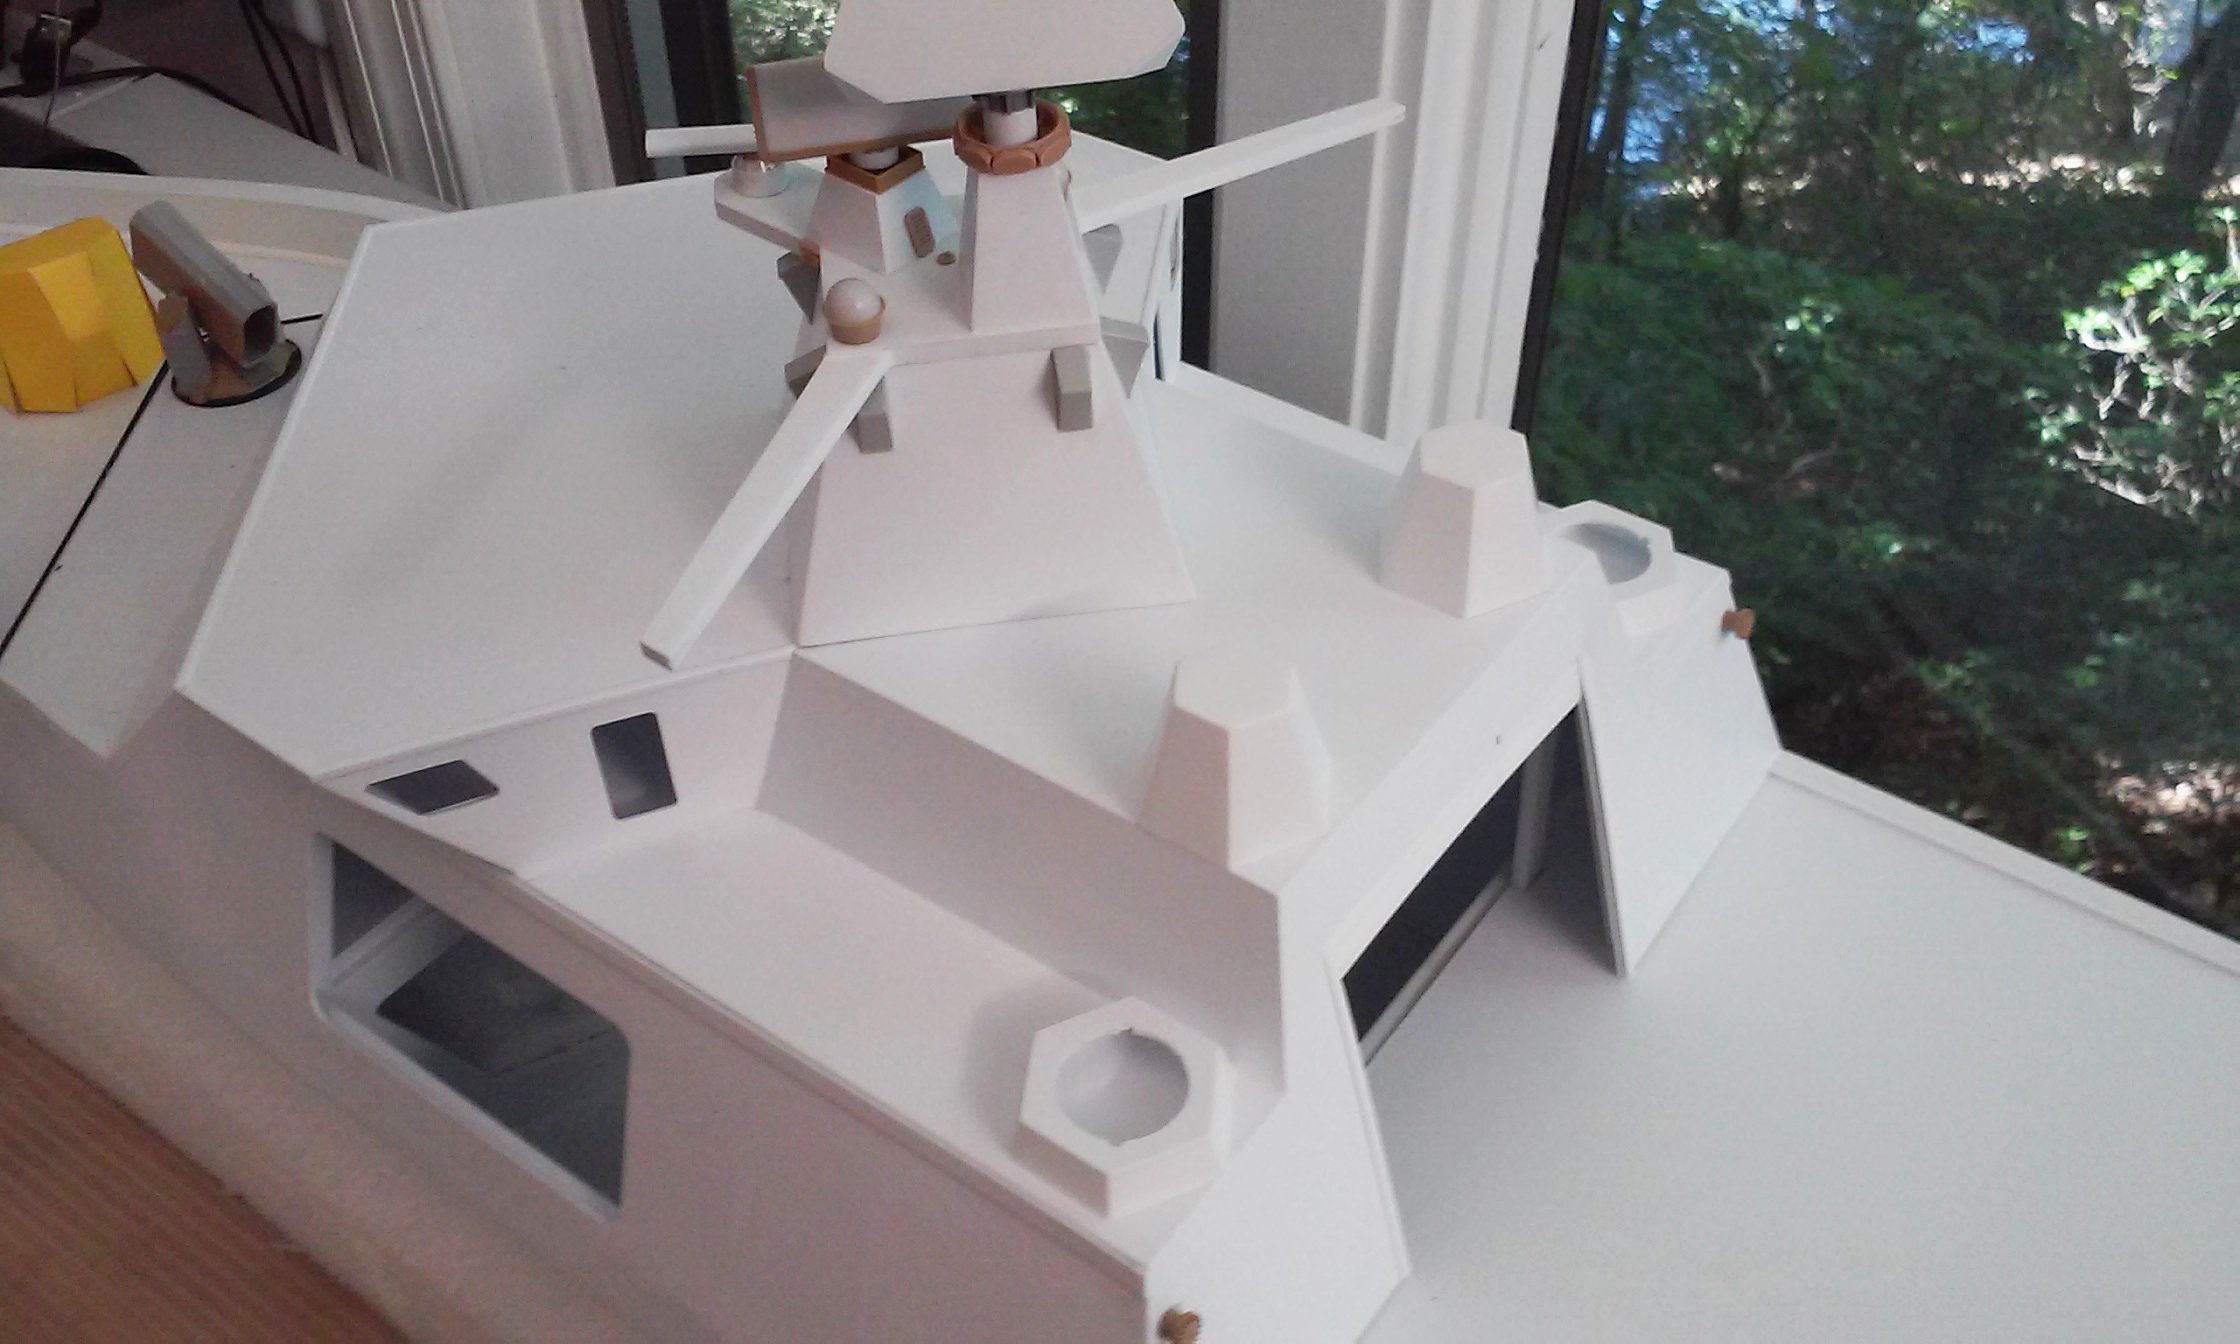
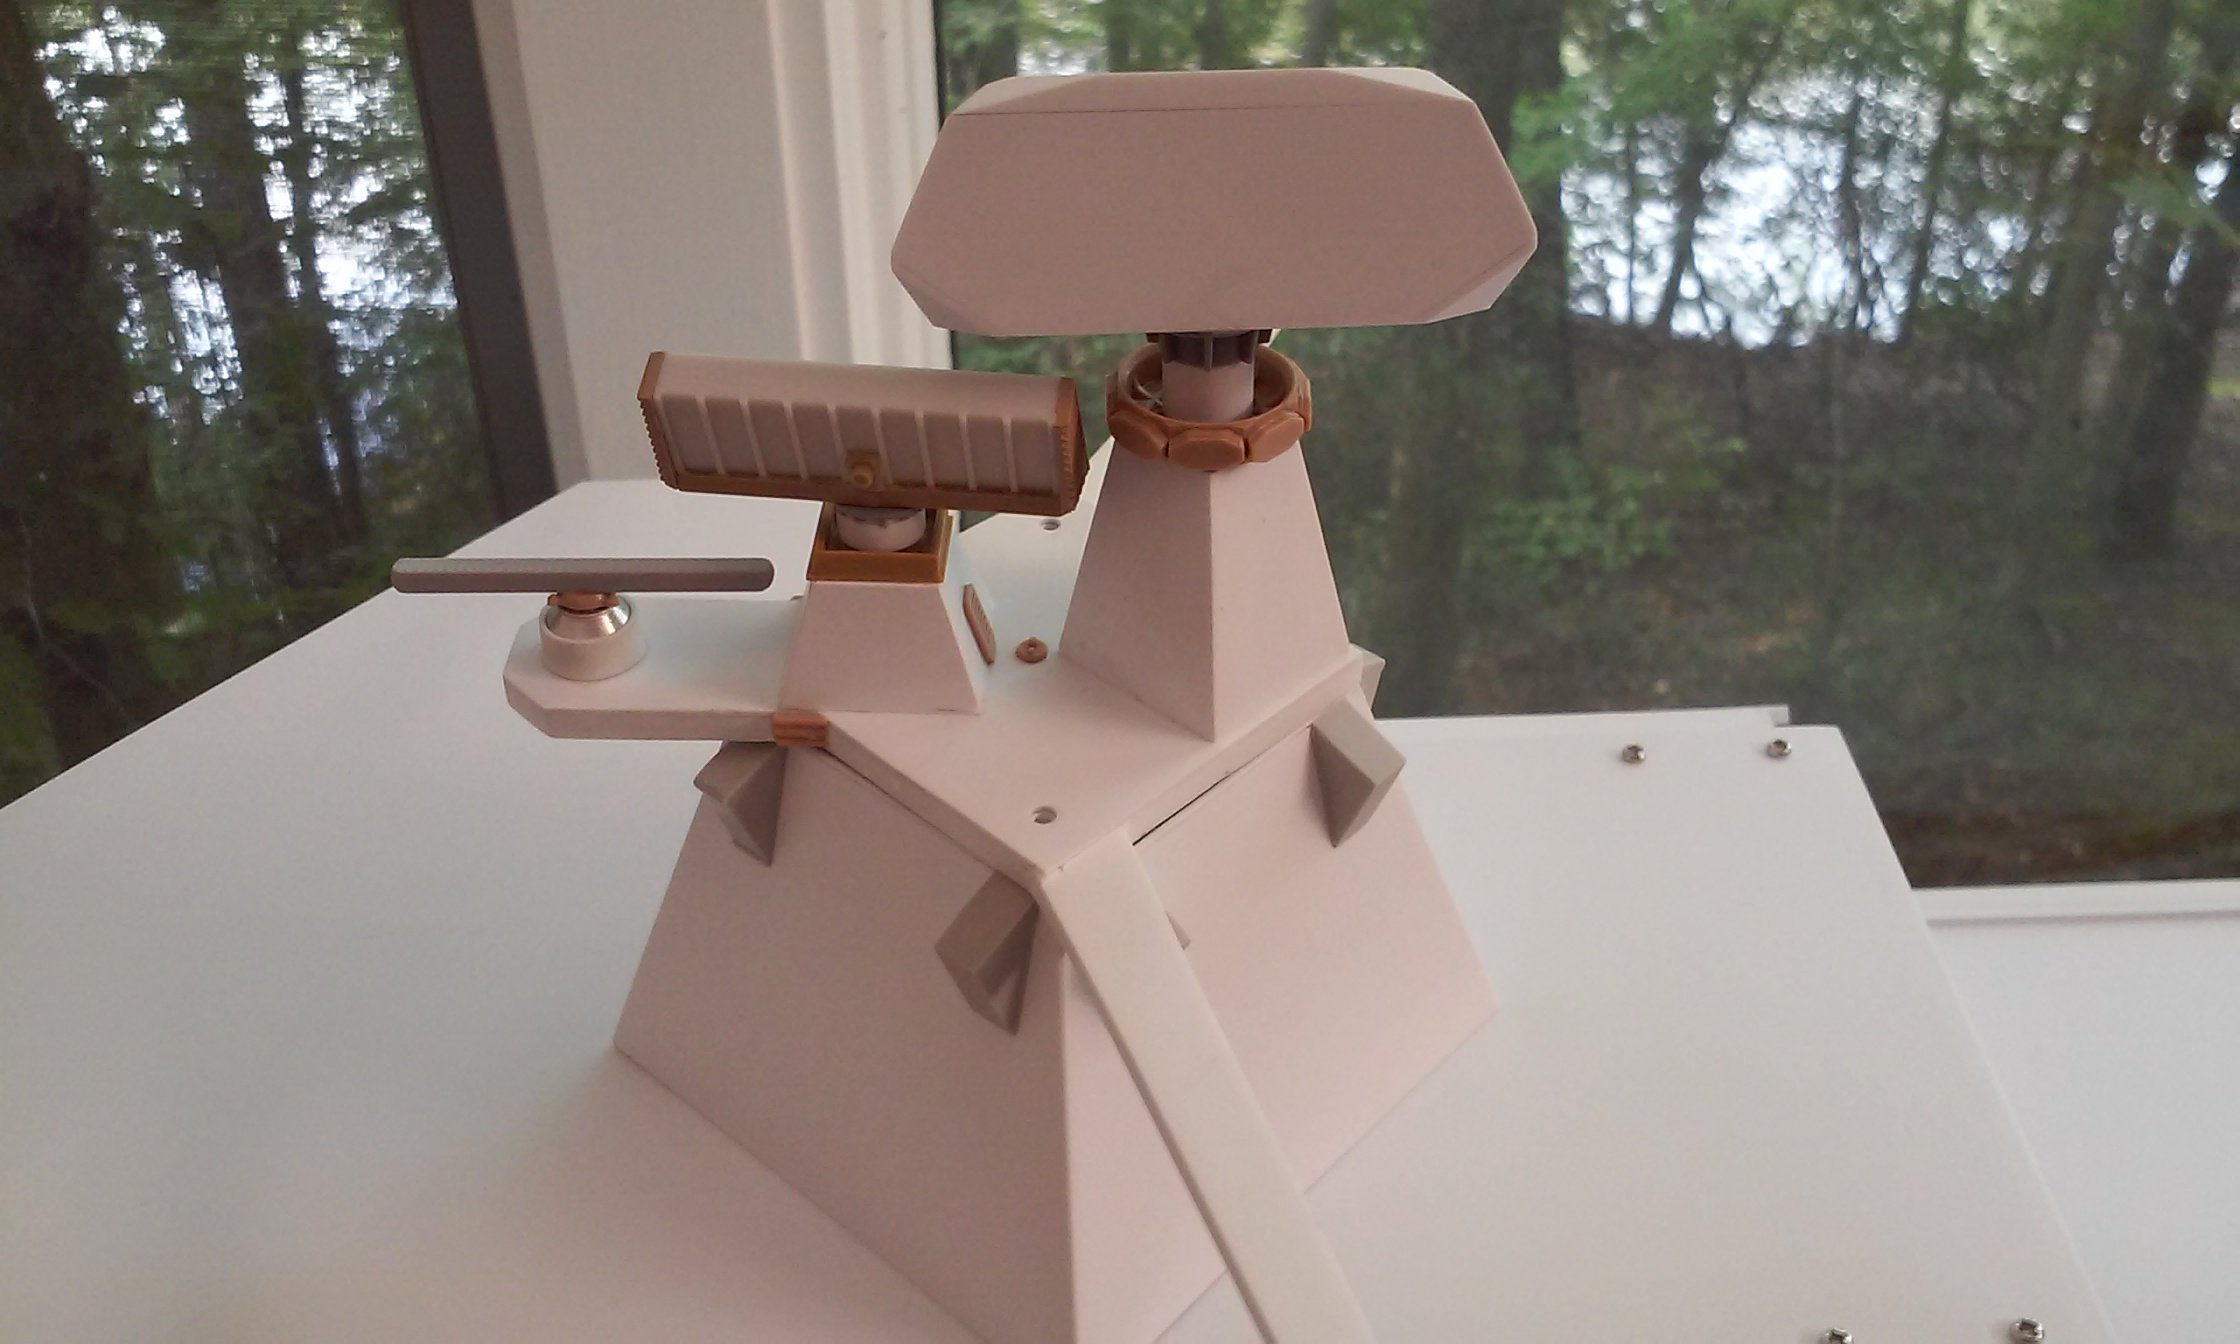
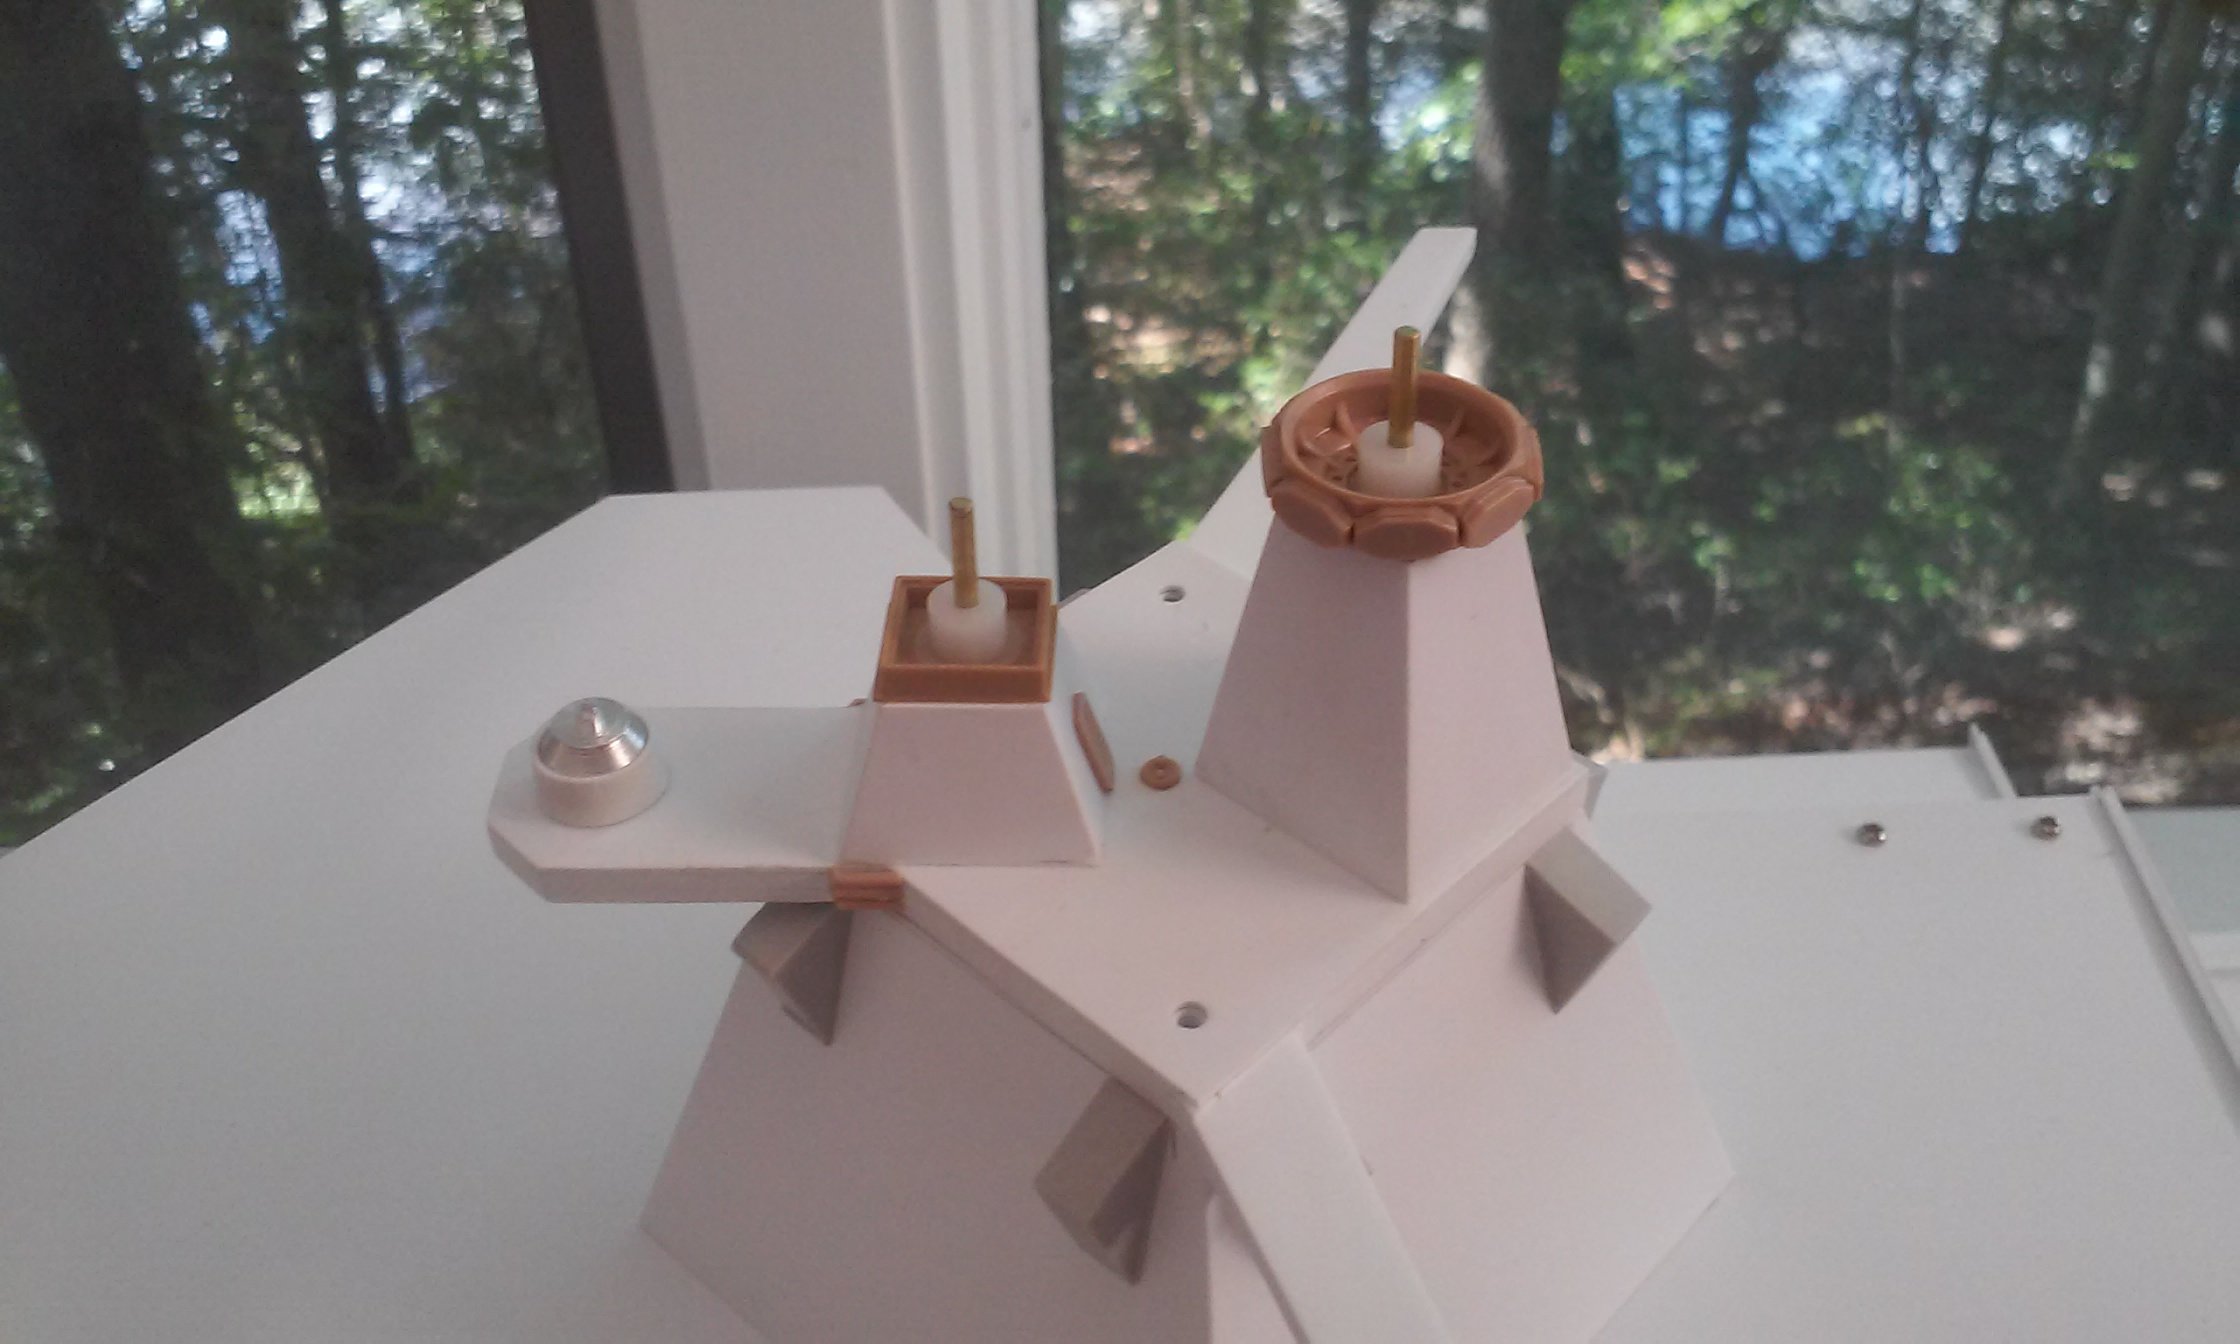
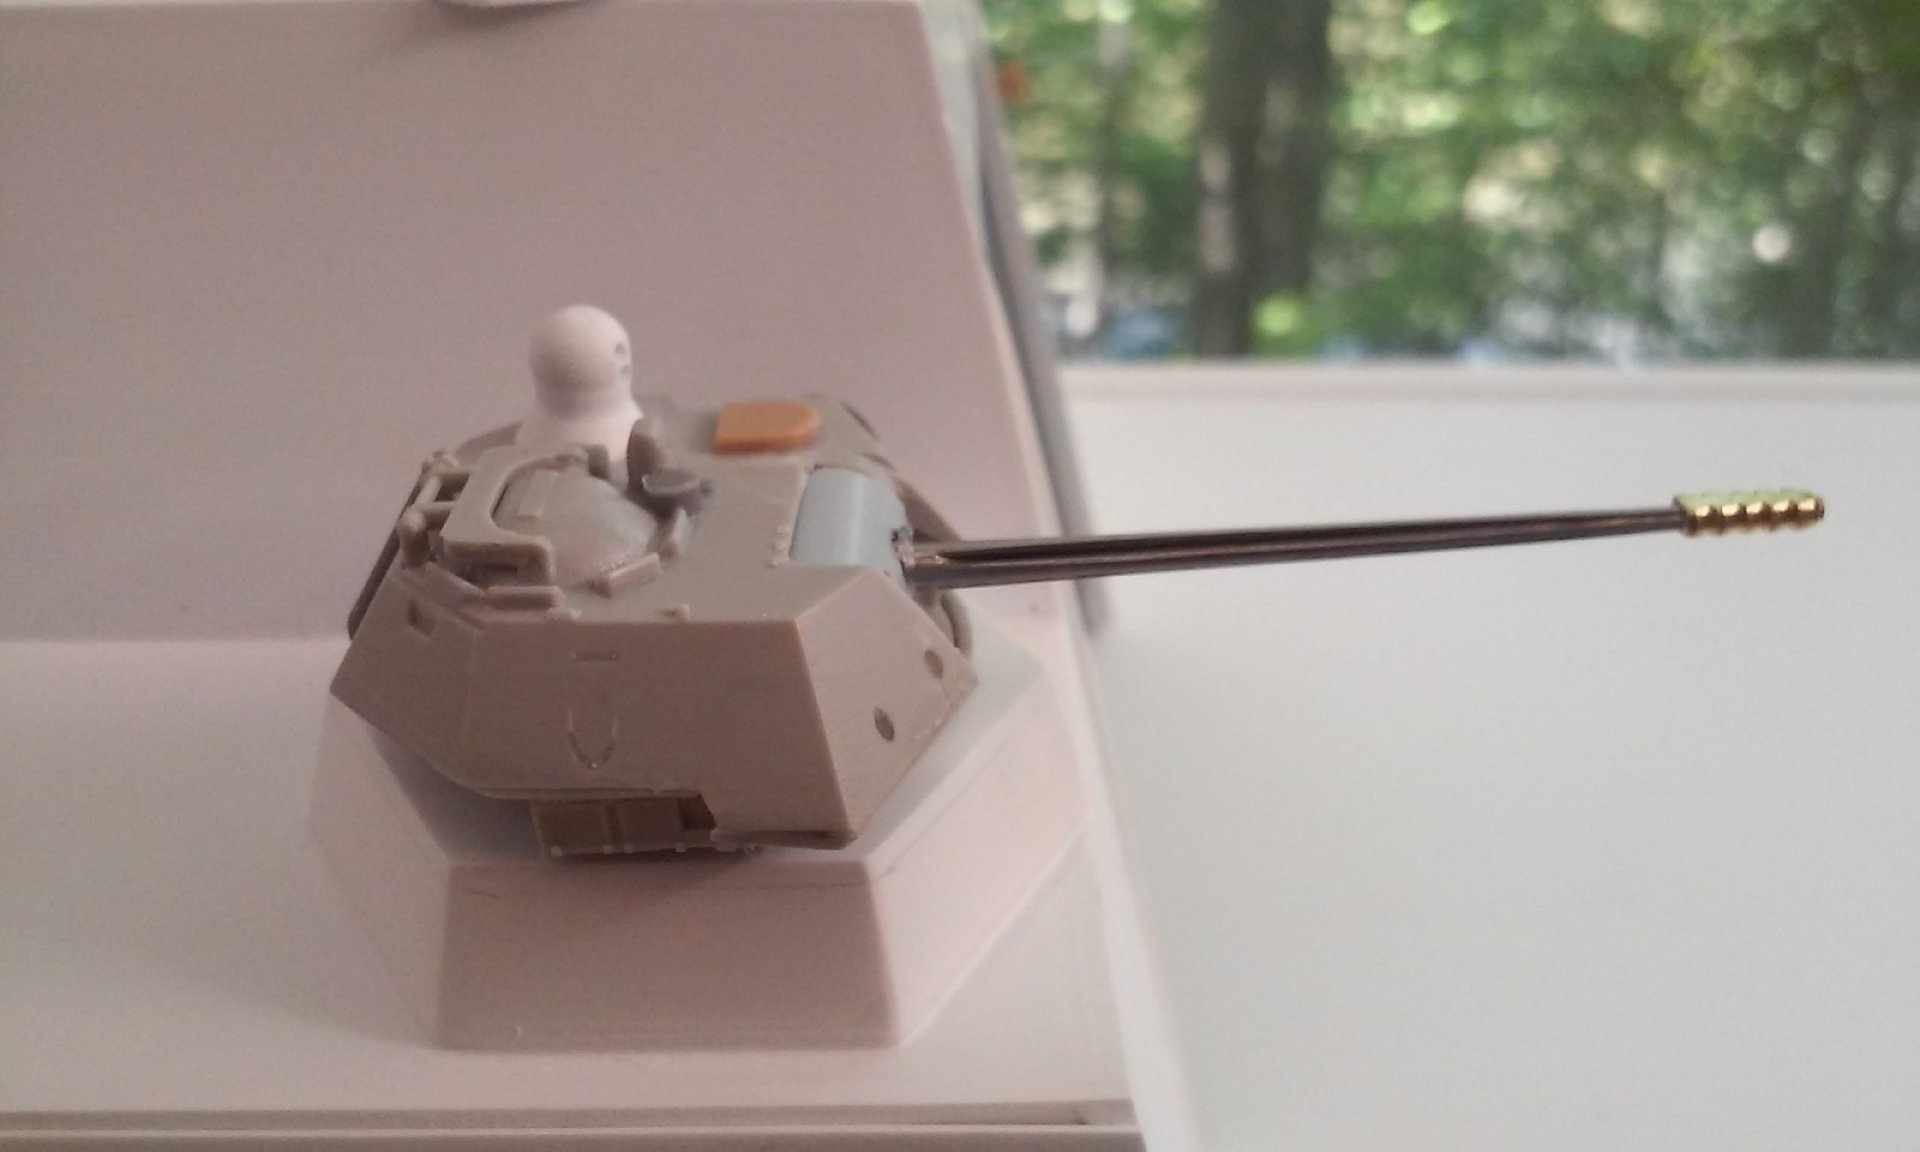
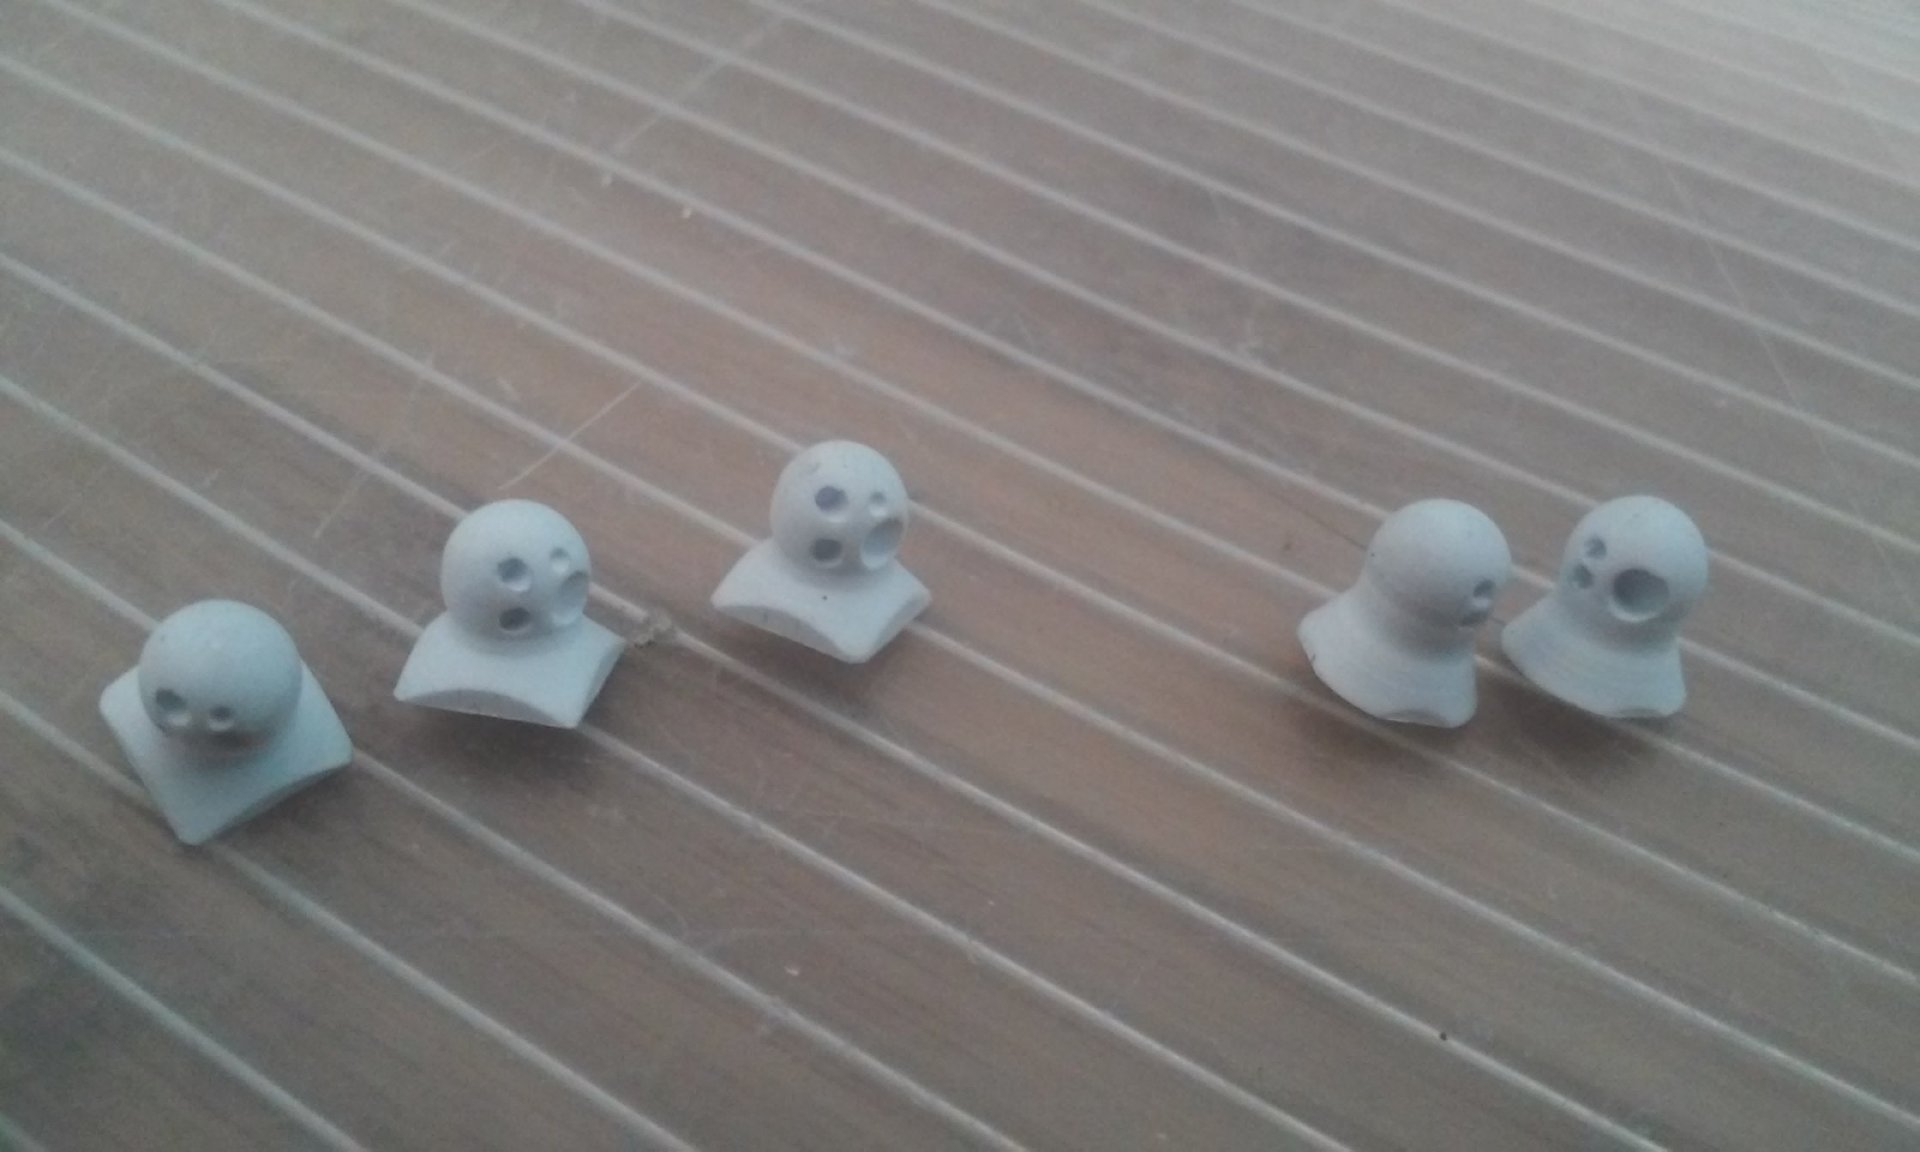
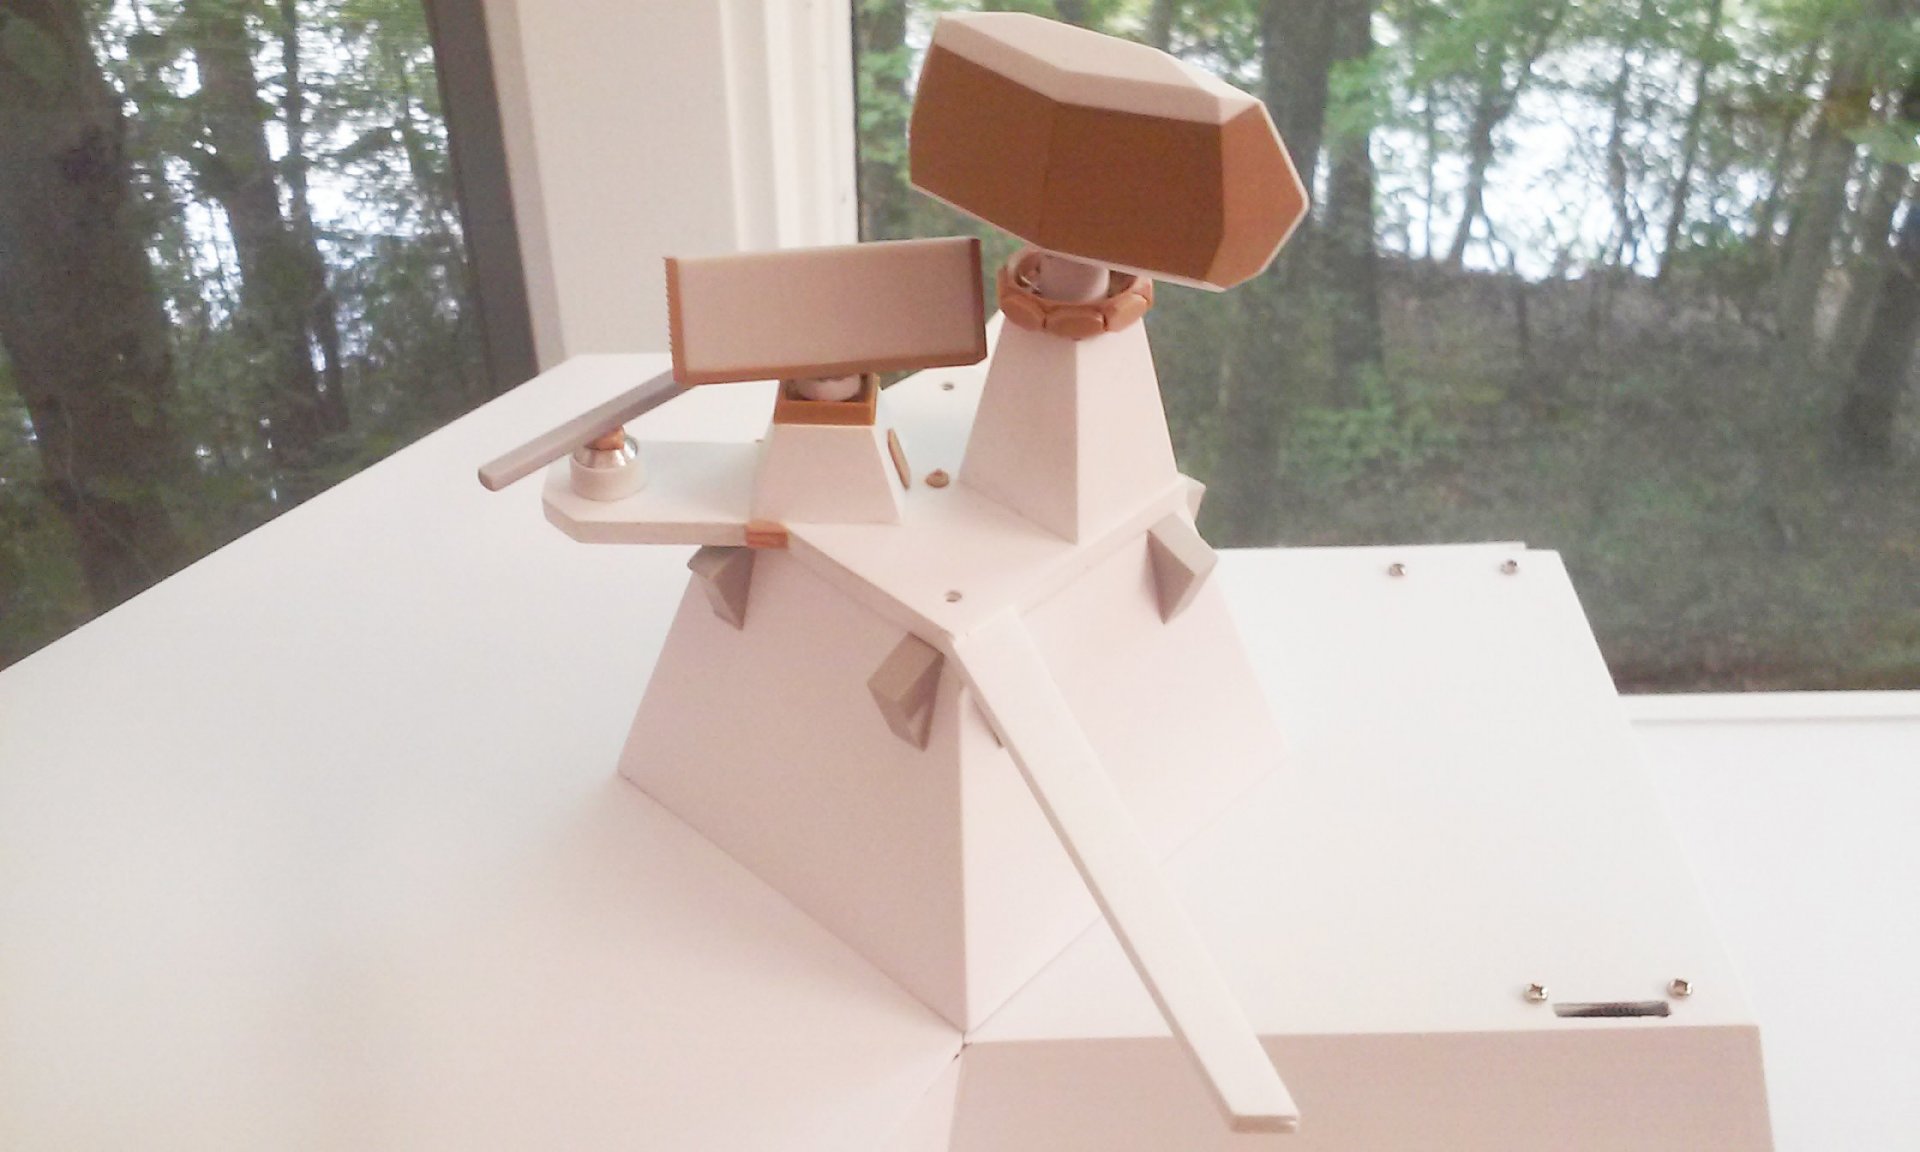
Nice n clean Derex. That thing almost looks the size of the Chrsitmas ornament Defiant we have. Thank you guys! That was the first time I've cut flutes into barrels like that. "Does this muzzle brake make me look fat?" I thought the first muzzle brakes looked awkward, bulbous at the end so I made something more modern looking in brass. The turrets are nearly done now too after adding details. I wanted optics turrets for the ship and turrets so I turned some radii (balls) on my lathe and then milled "lenses" into them of various sizes to simulate lasers, IR cameras and cameras. I just need to clean the dust out of the cuts. Long story short, I rechecked the main turret size and am going to redo the cap firing mechanism to make it smaller. Right now the mechanism sticks out of the turret where it should and has no room to cycle in either. Hopefully it won't take me another month like the last ones did each. - MT


-
I'm just now seeing this. AWESOME work as always! Great details and design work! - MT
-
It's great to see this step by step now from the Workbench thread! Awesome work! - MT
-
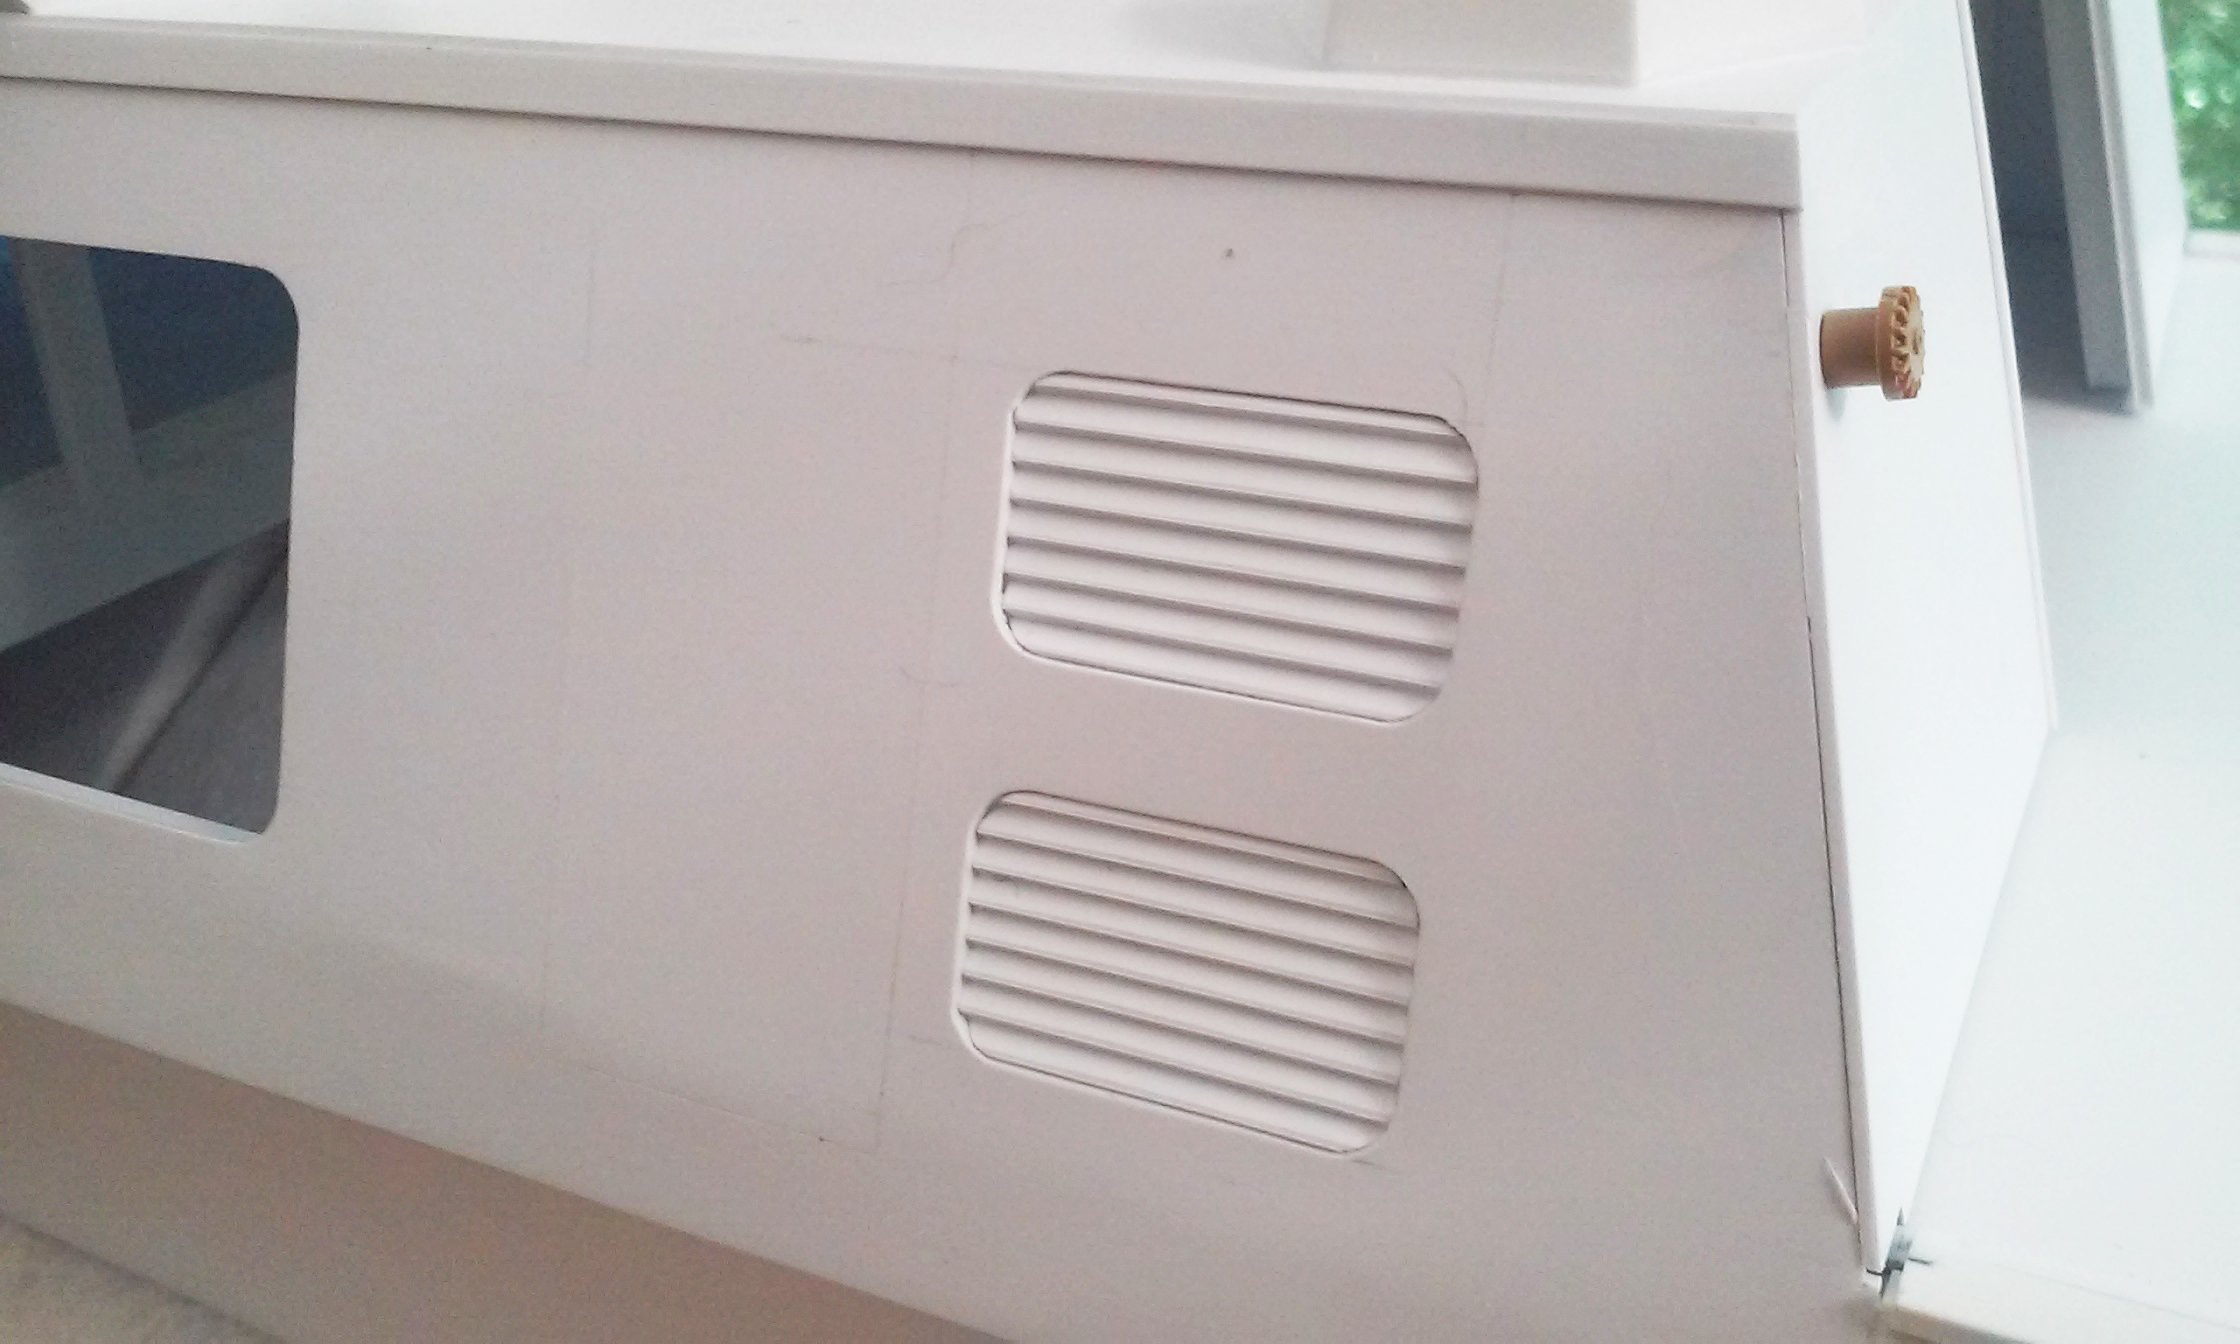
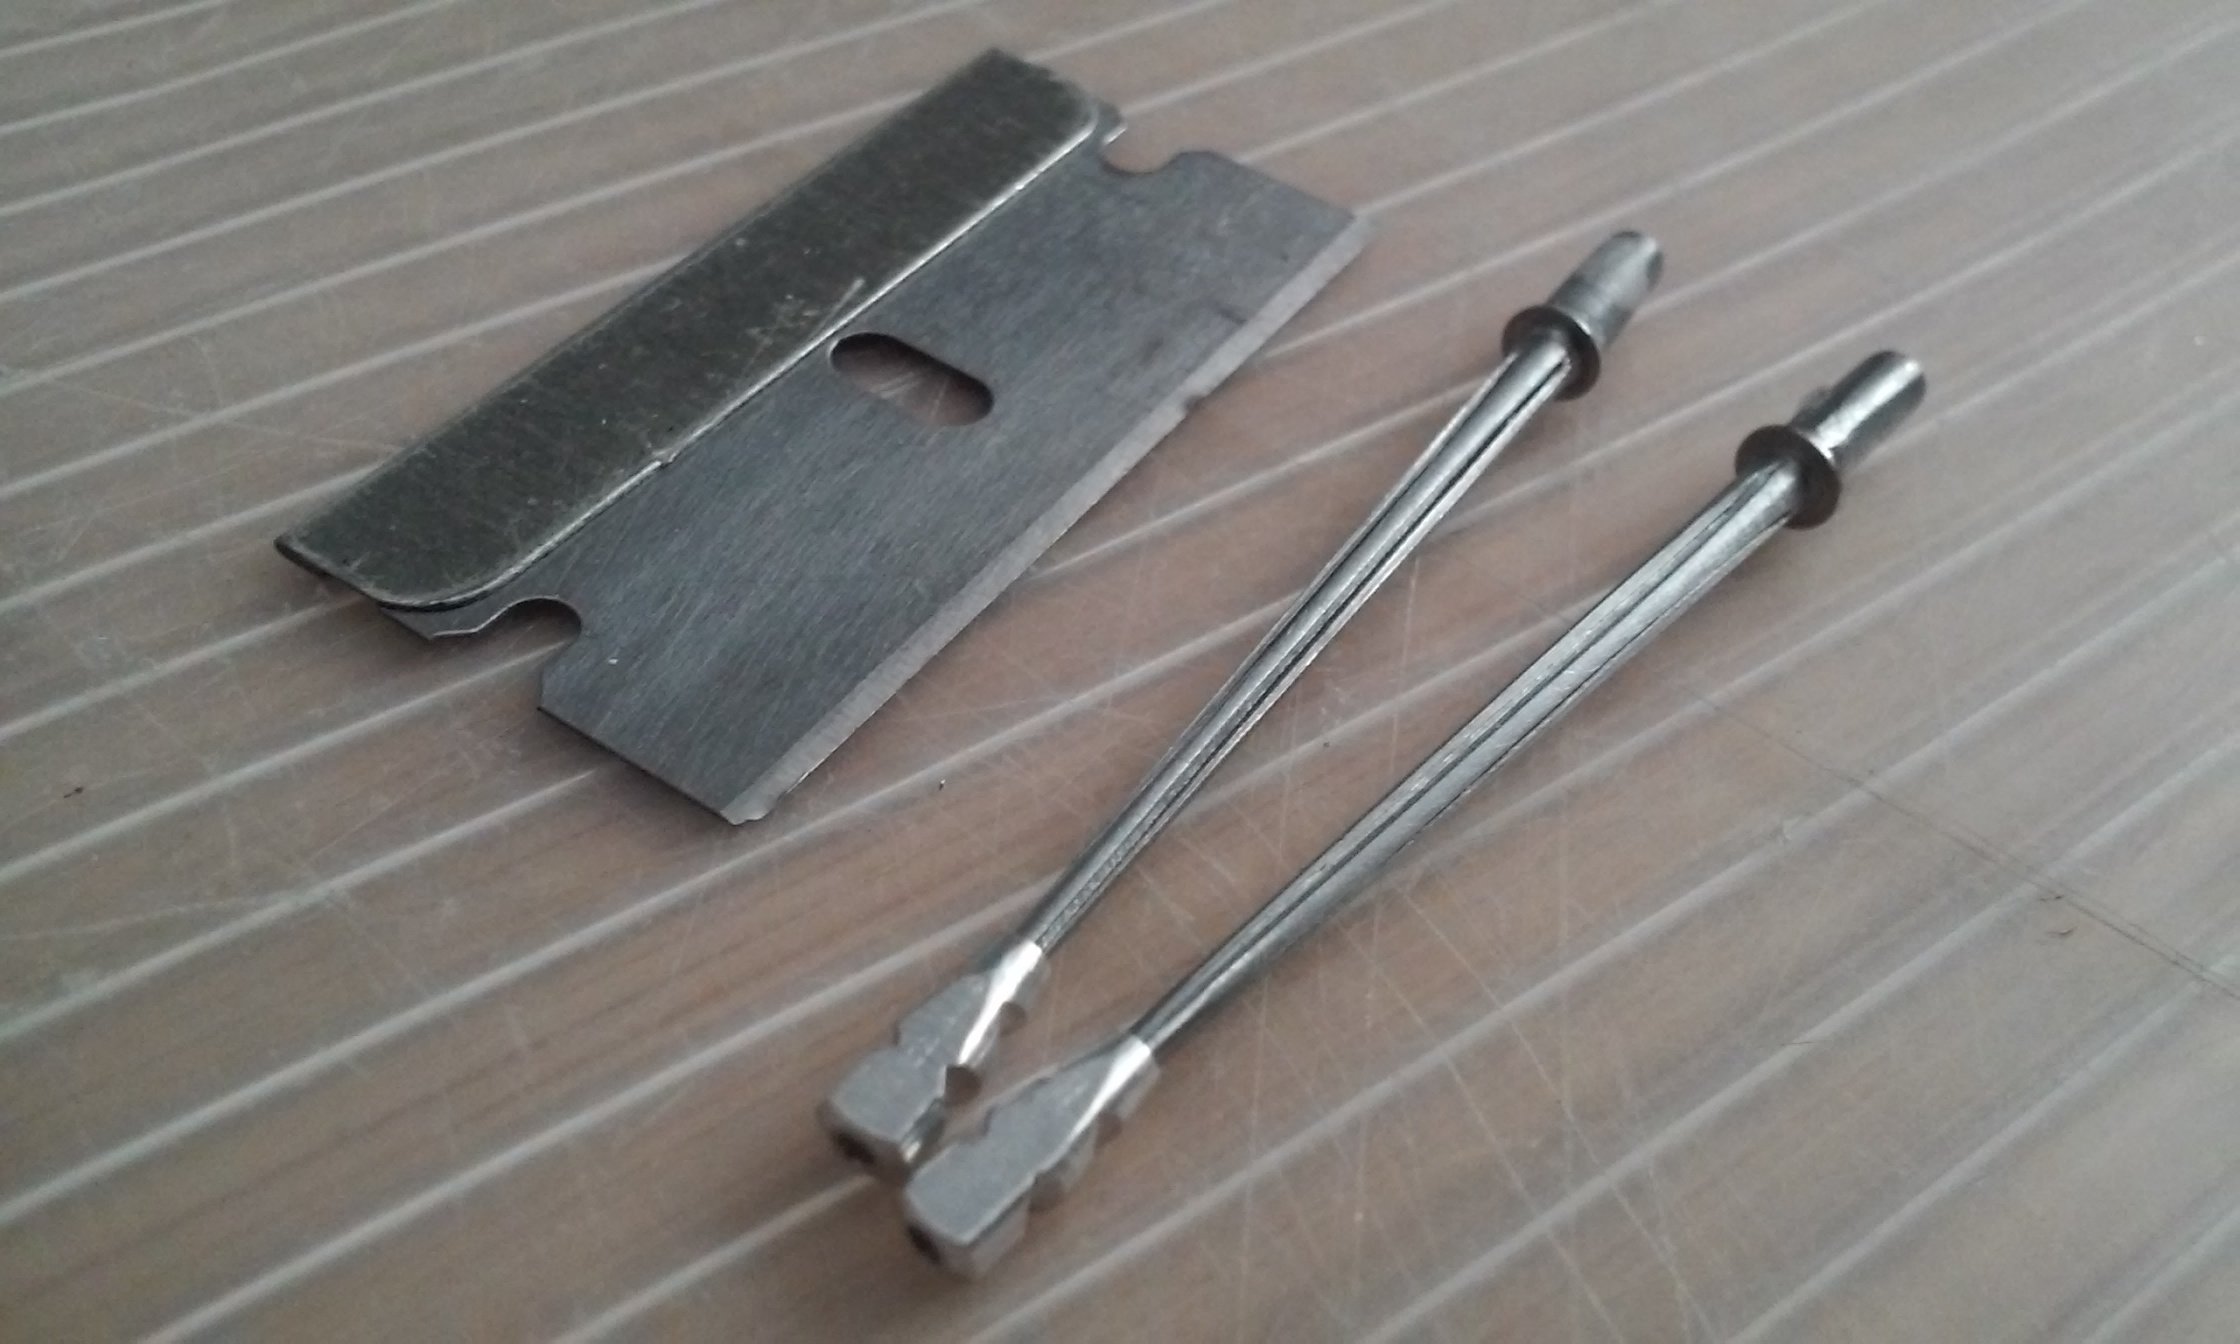
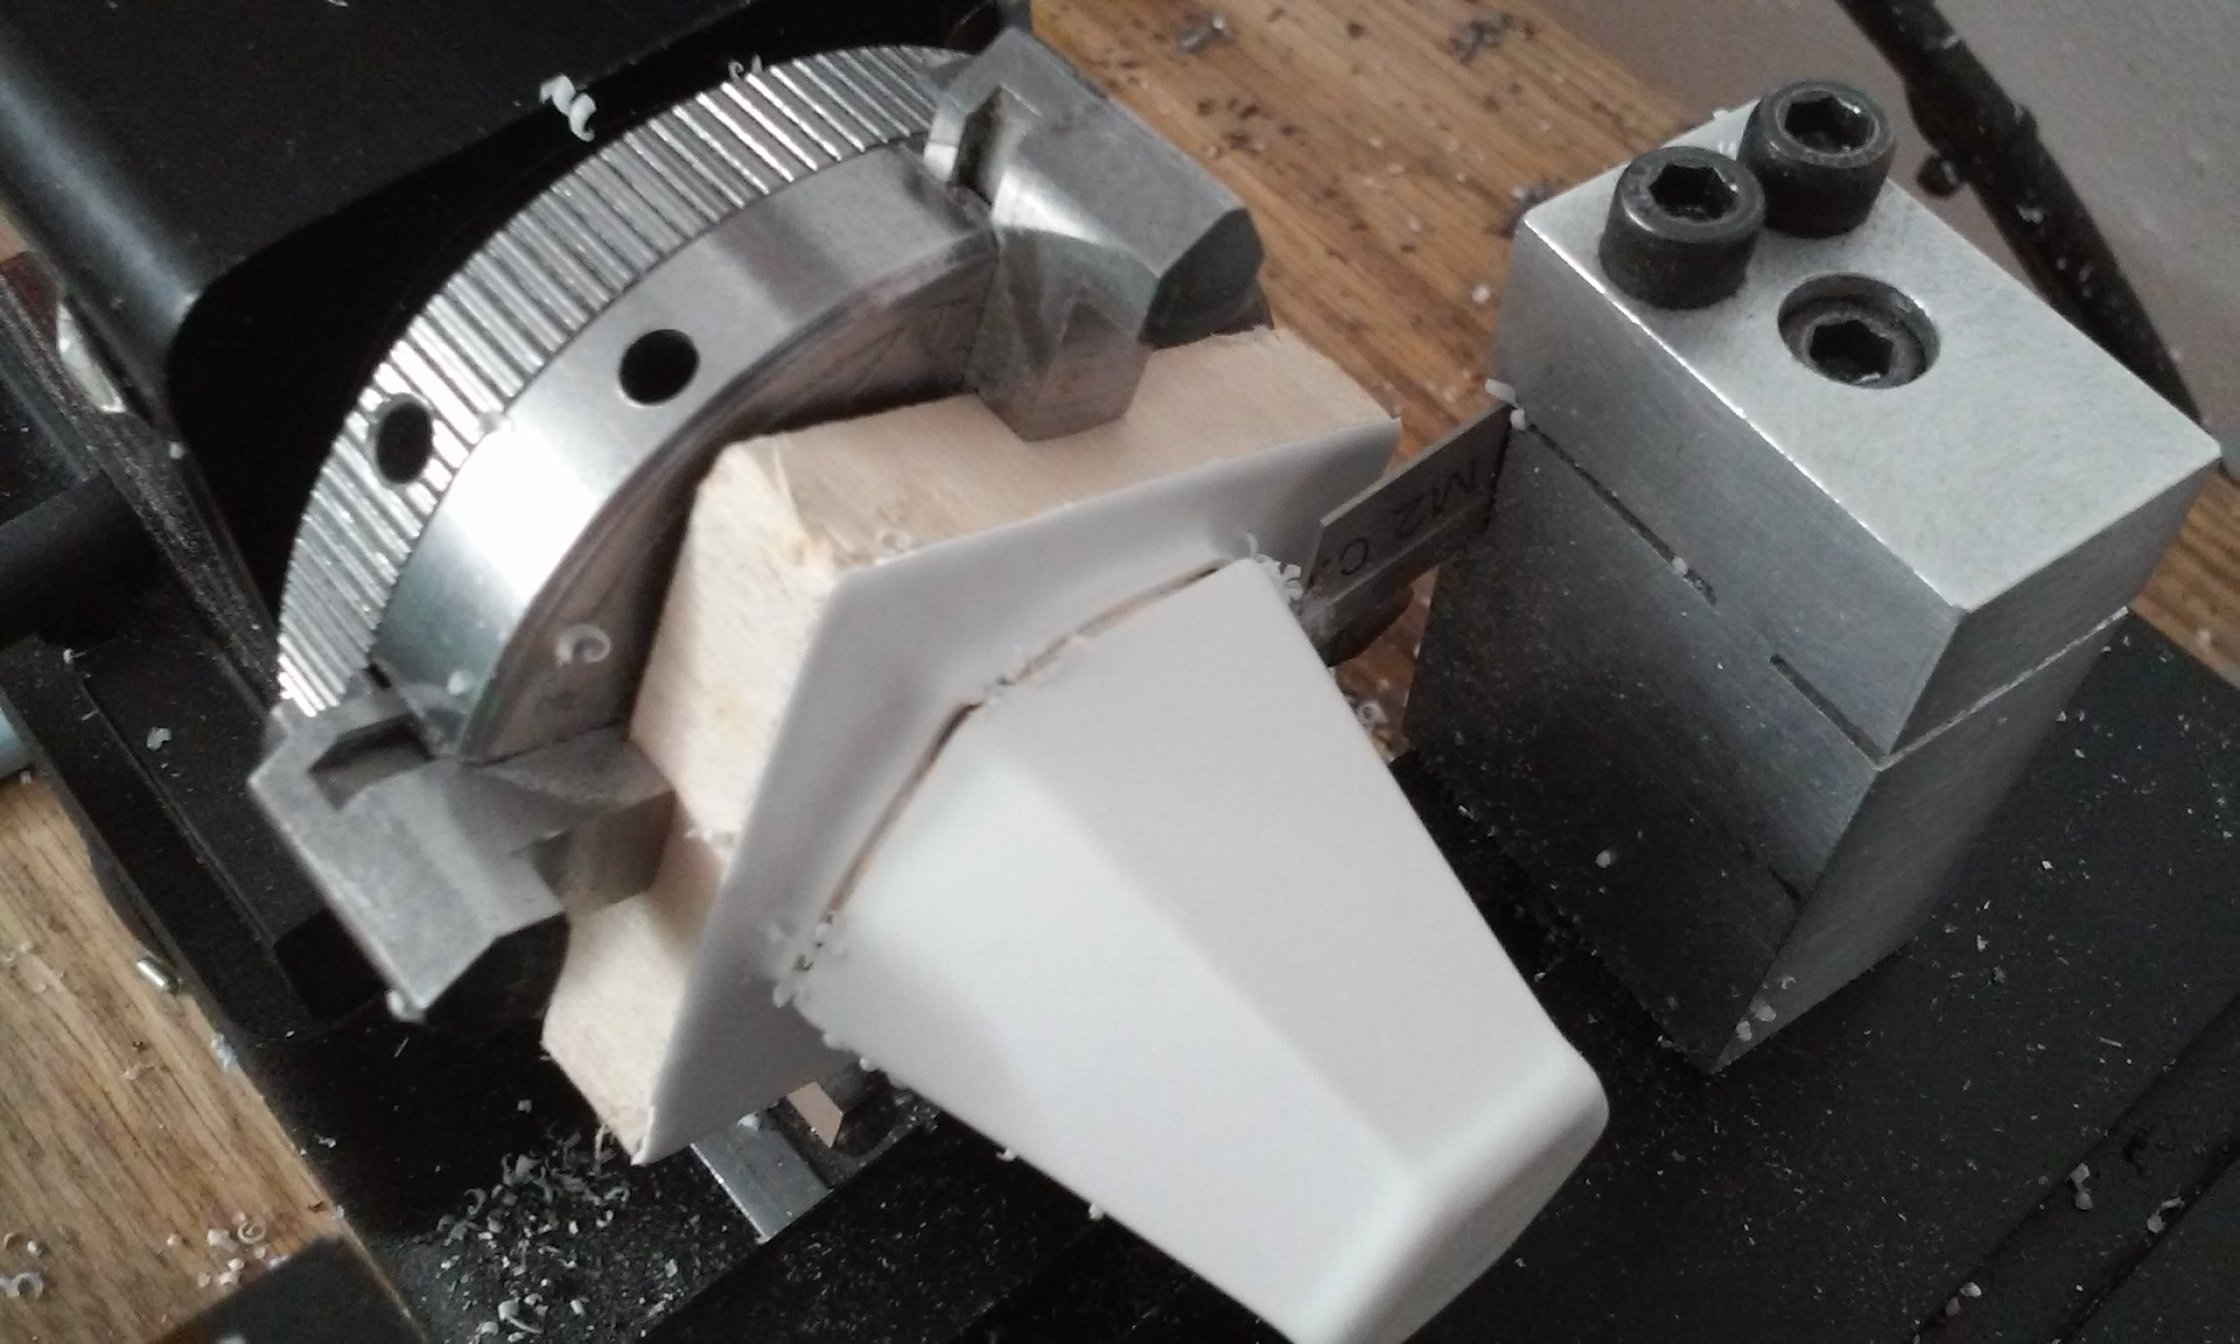
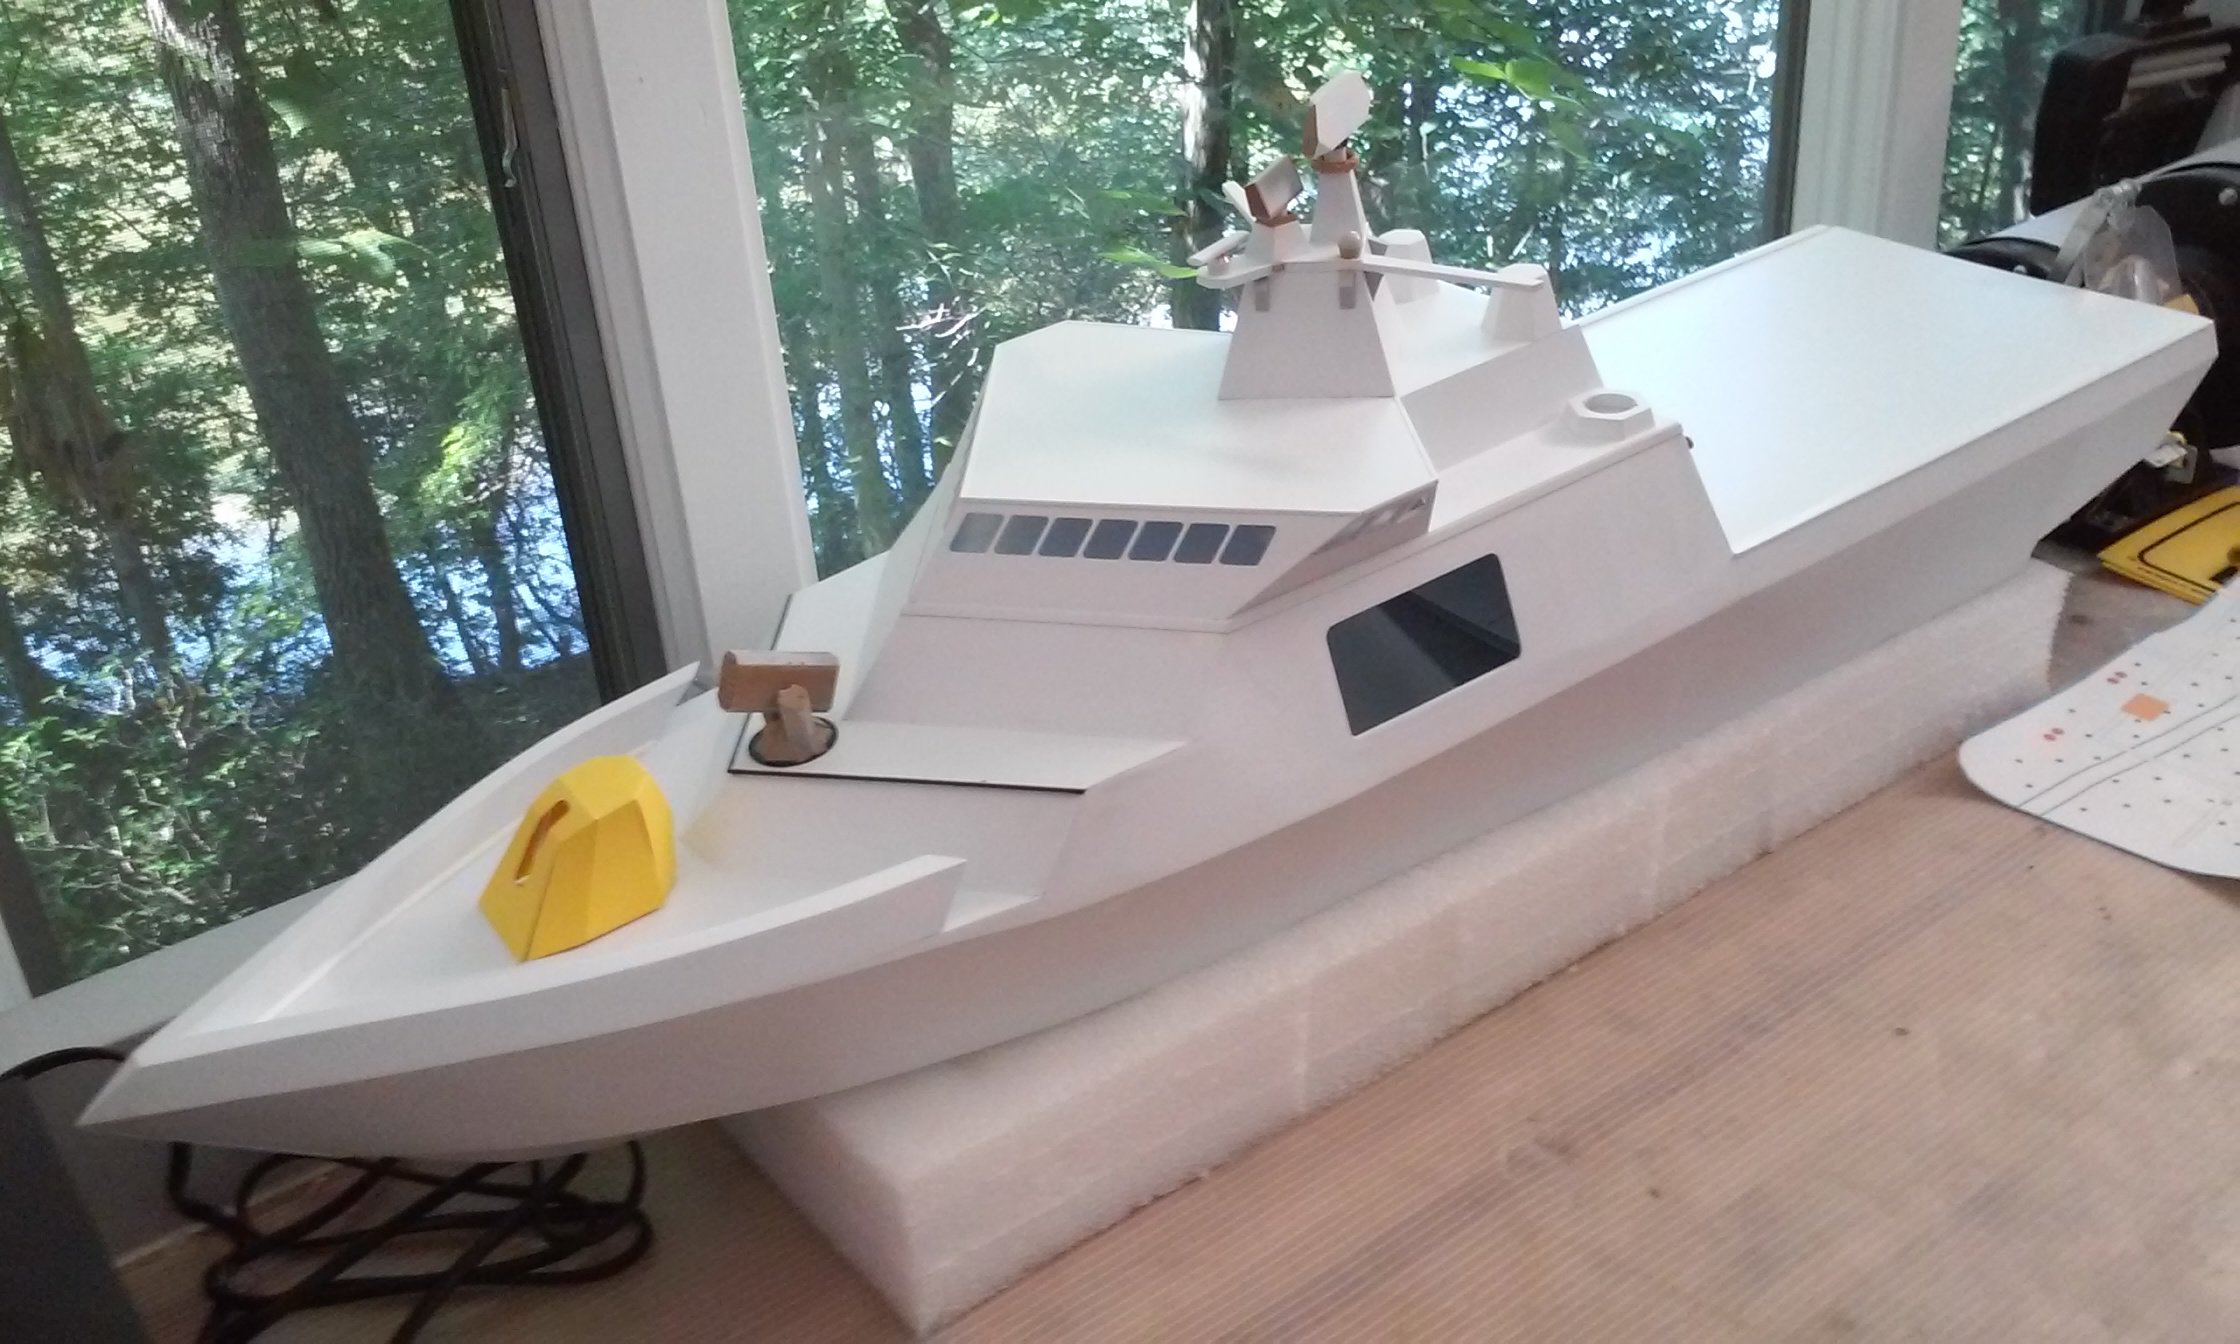
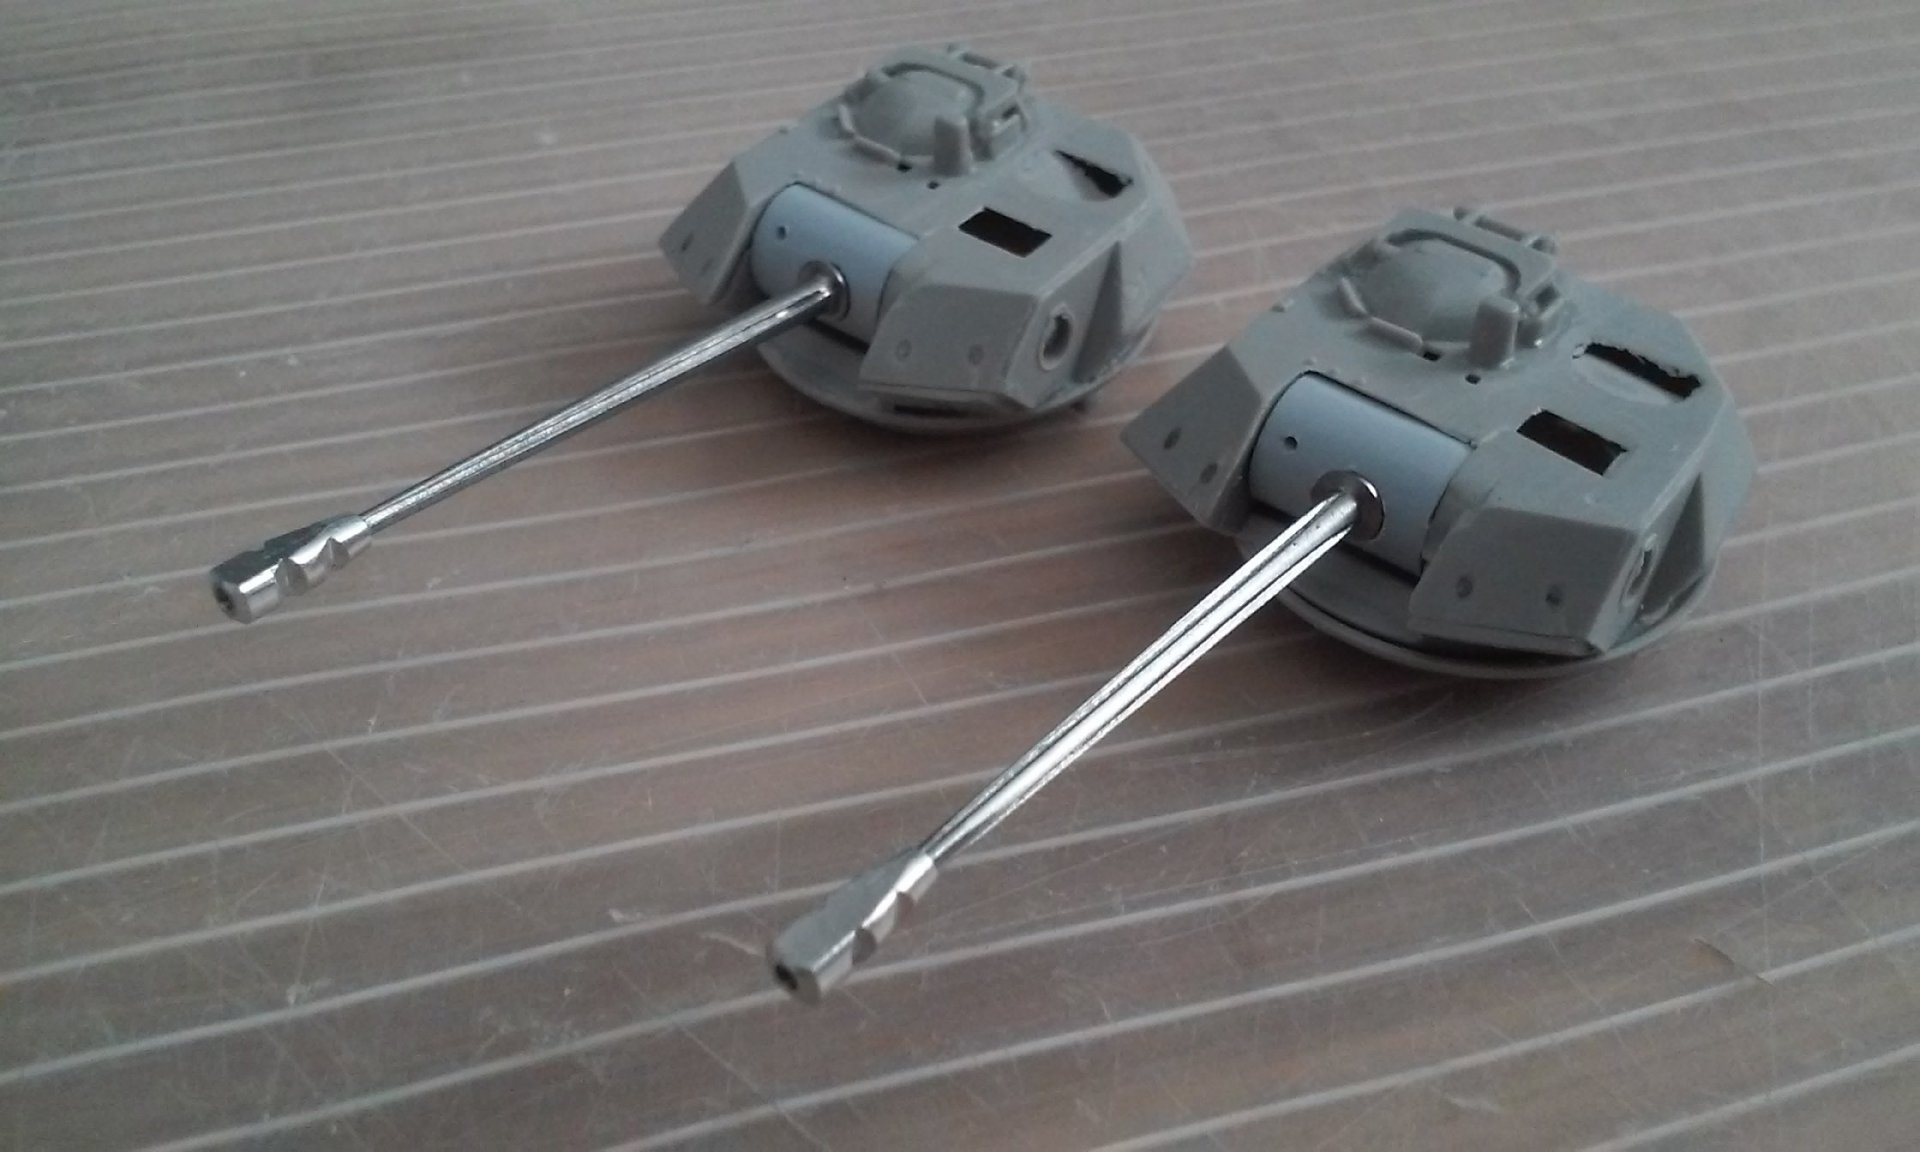
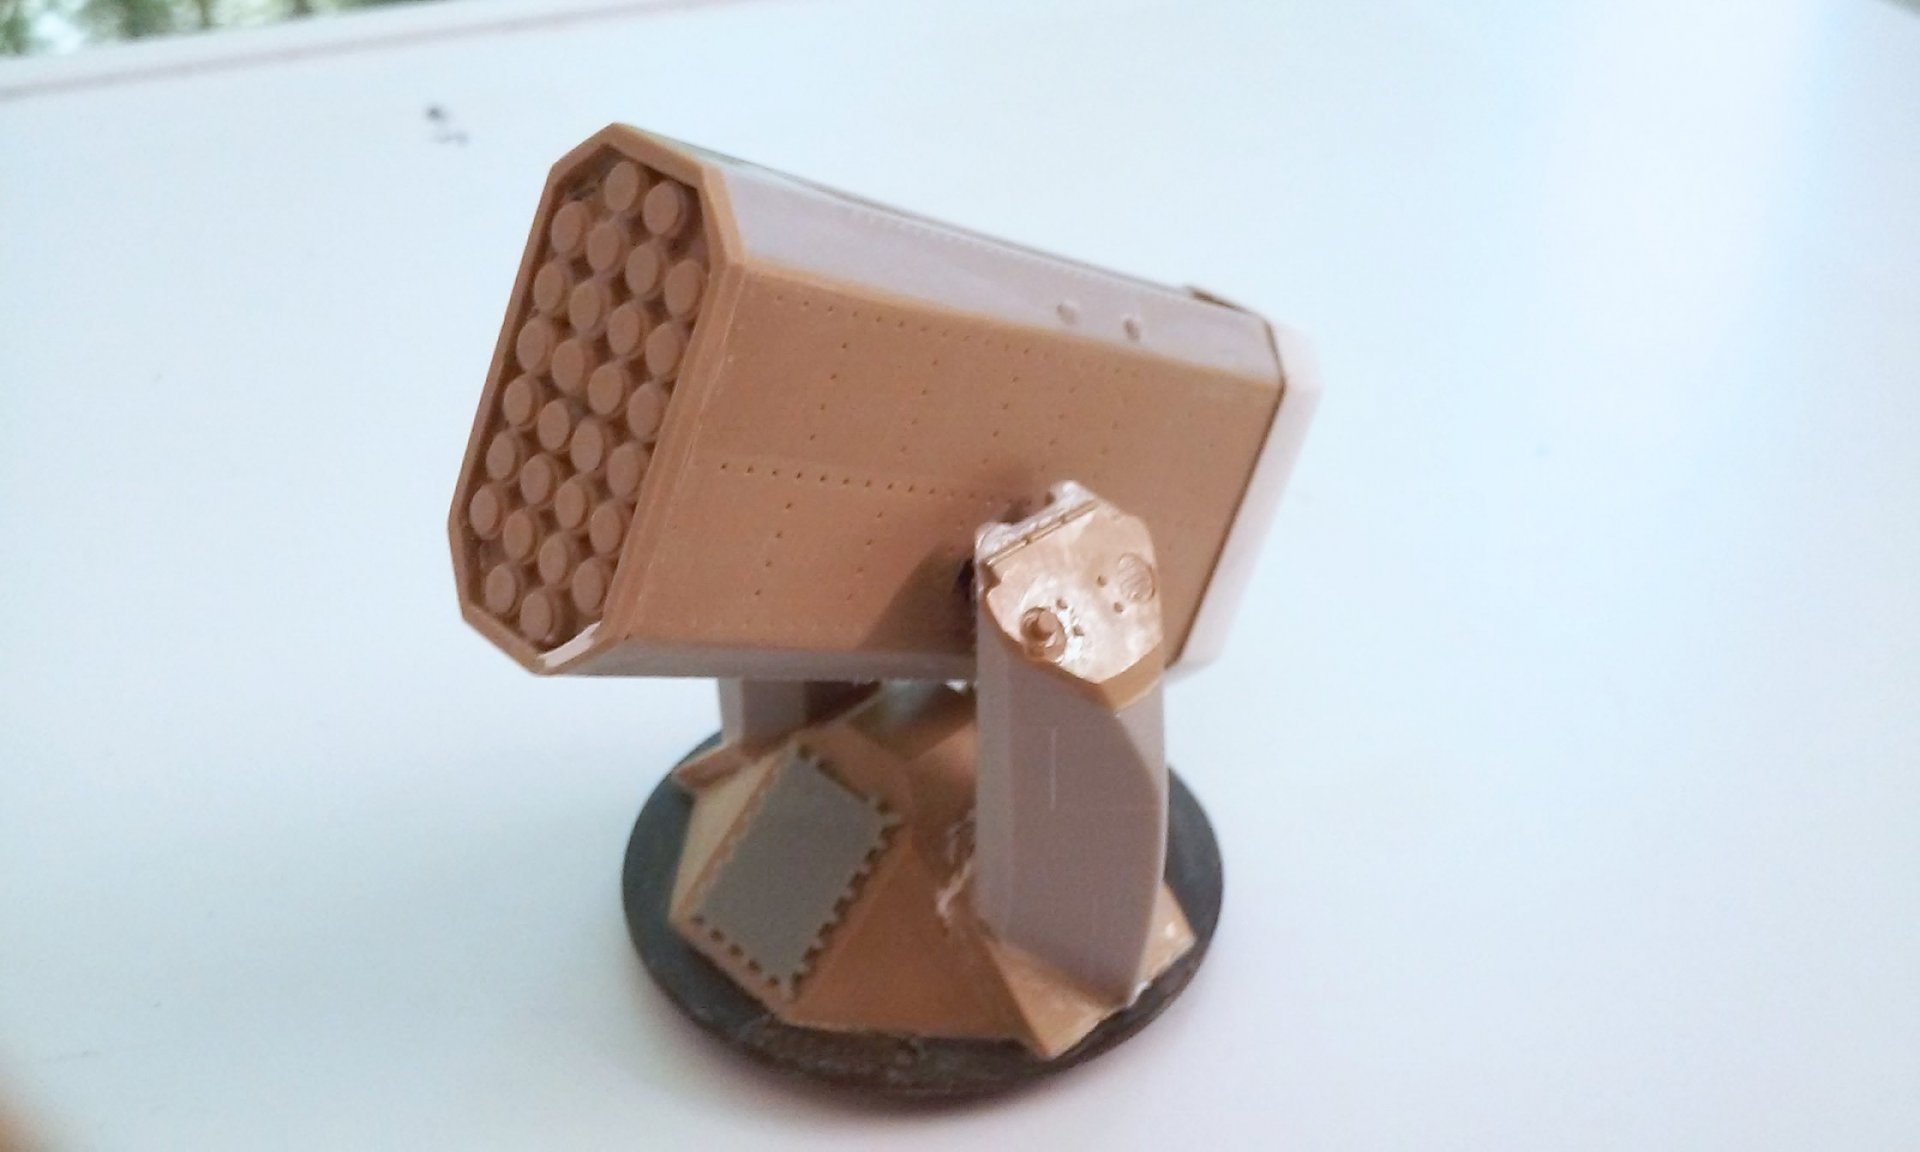
That's looking great Thom! I got some details done this weekend. The first was the louvers for the air intakes. A strip of styrene was milled to simulate the louvers. Then a template was made to etch the four openings and louvers were cut to fit. A thin strip will go between the louvers and the opening. Next, the tough part. I always loved the look of the fluted barrels on the Oerlikon 35mm. Those are what will be the secondary turrets. The tough part is machining them. I tried a lot of methods and materials. Aluminum, too soft. Brass, too hard, but not strong enough. I finally found steel could be lathed thin enough (with a live chuck holder on the other end). Next, I carefully milled the length of them with a special, thin saw blade. The slots were then hand widened with hobby files. I milled some muzzle brakes to go on them, but not sure they are convincing enough. They are shown in their turrets (modified Bradley turrets under construction). Then the RAM launcher was finally completed. Its an enlarged and stealthy version I made up. Next step will be making the tie-downs in the decking areas and other deck related details. - MT


-
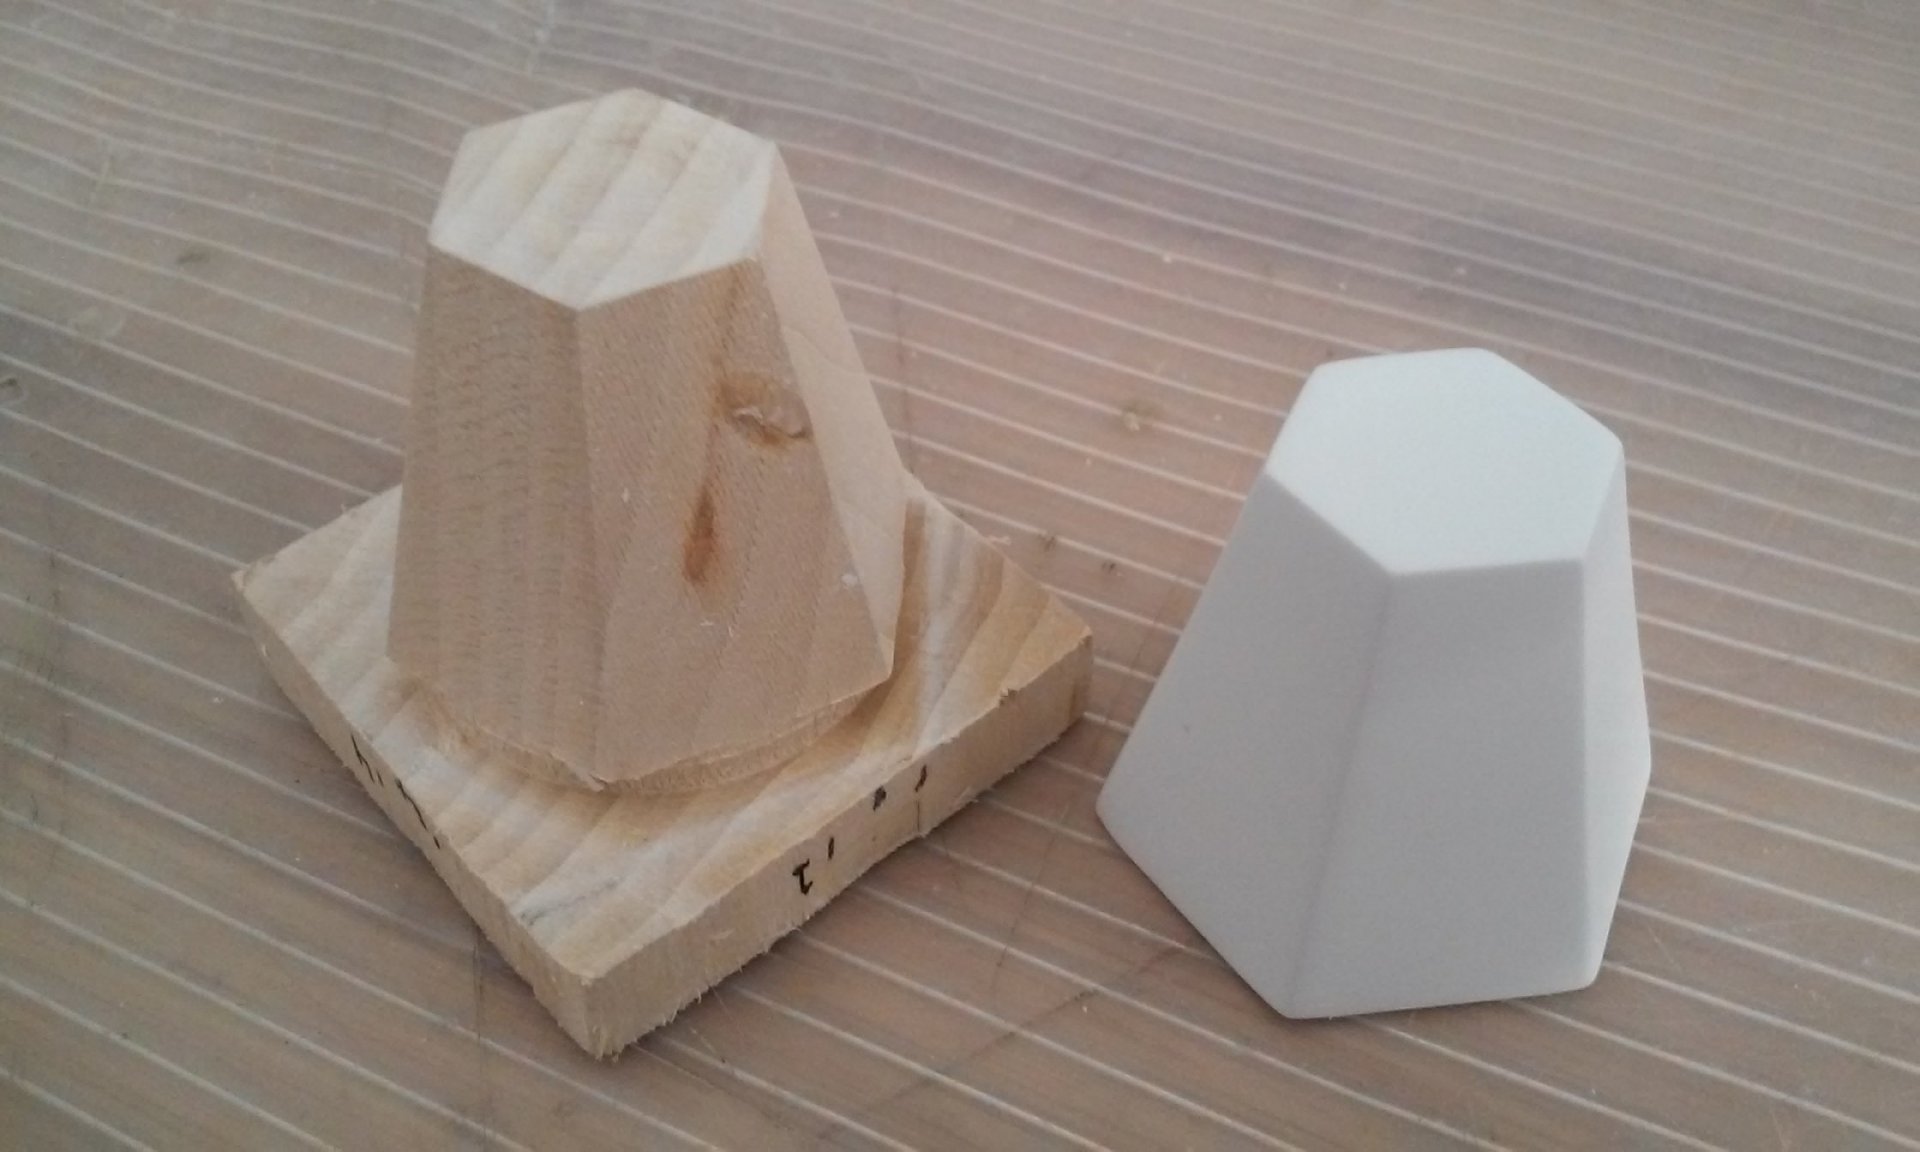
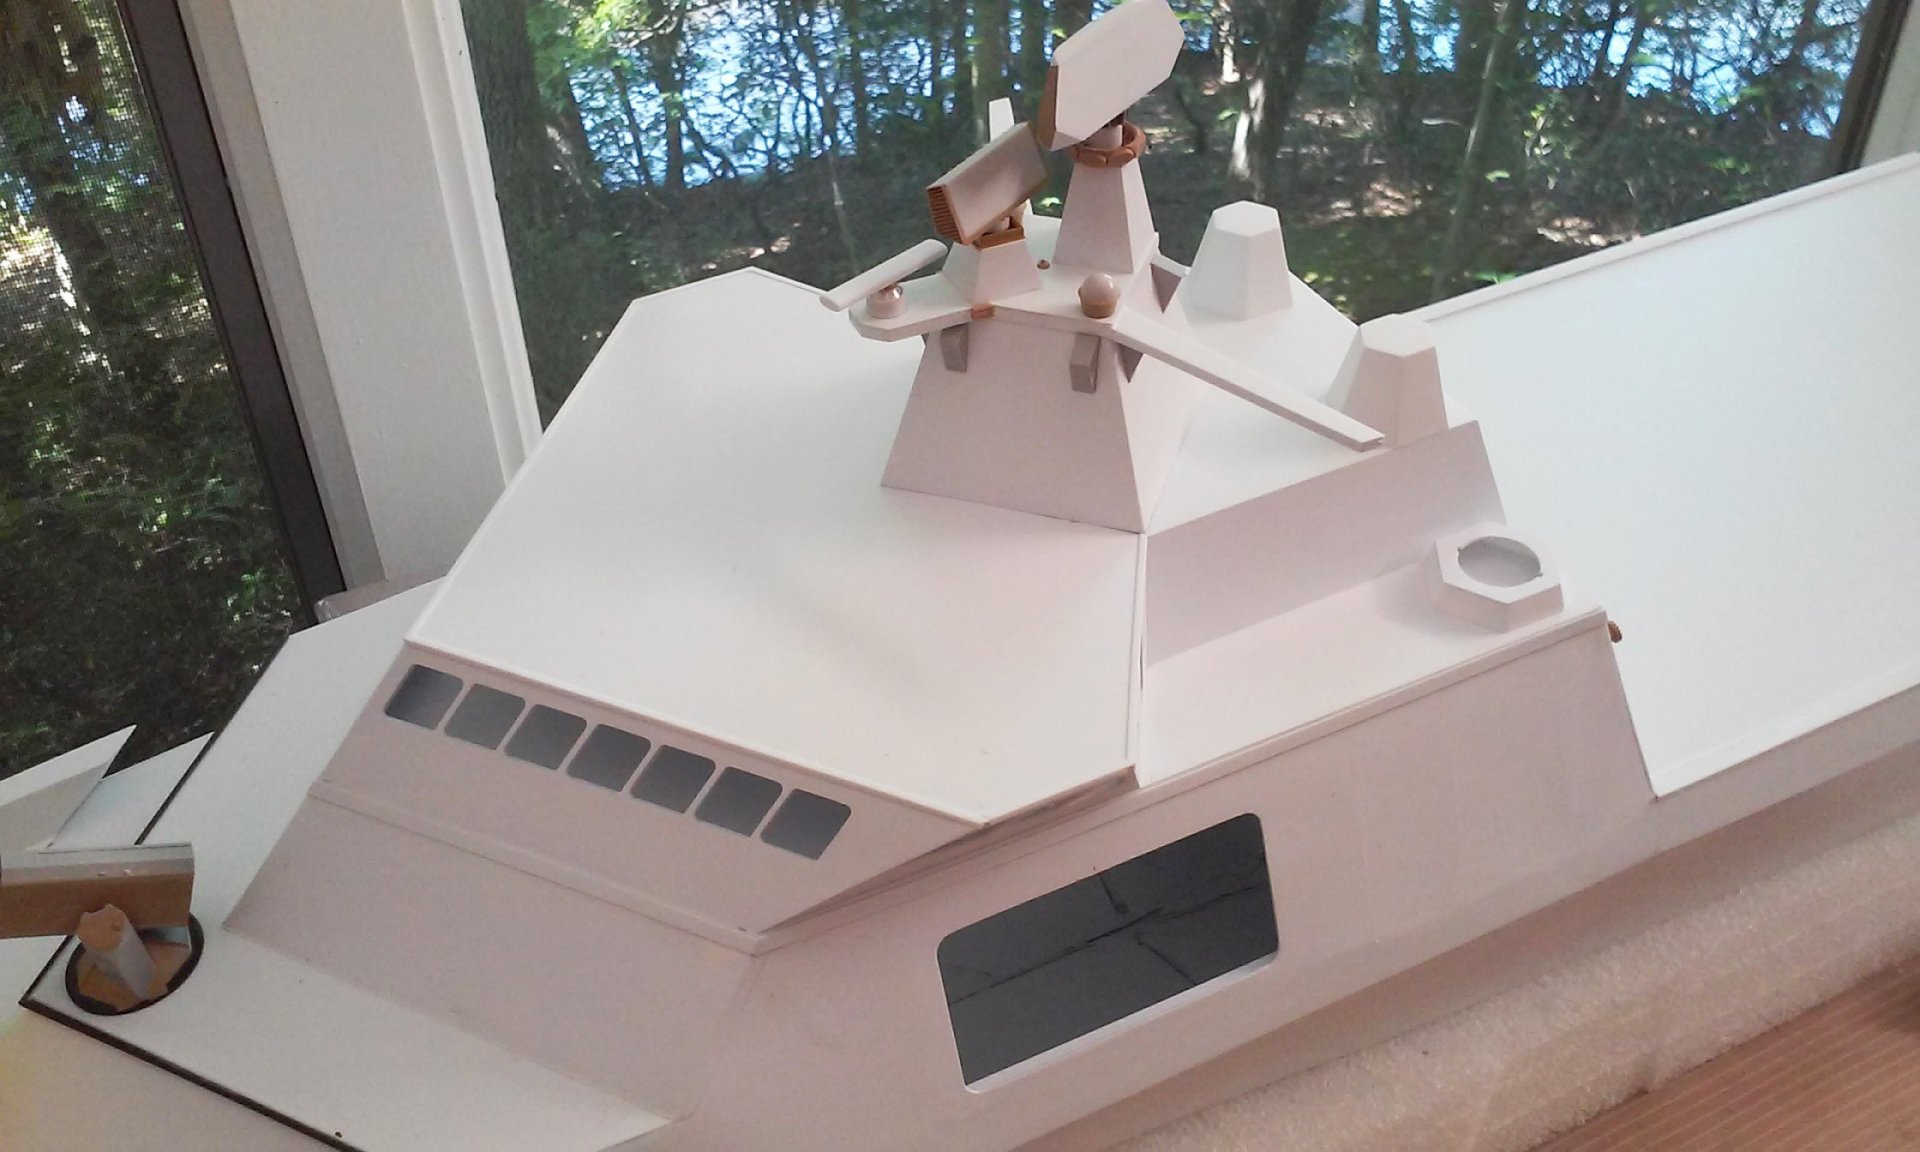
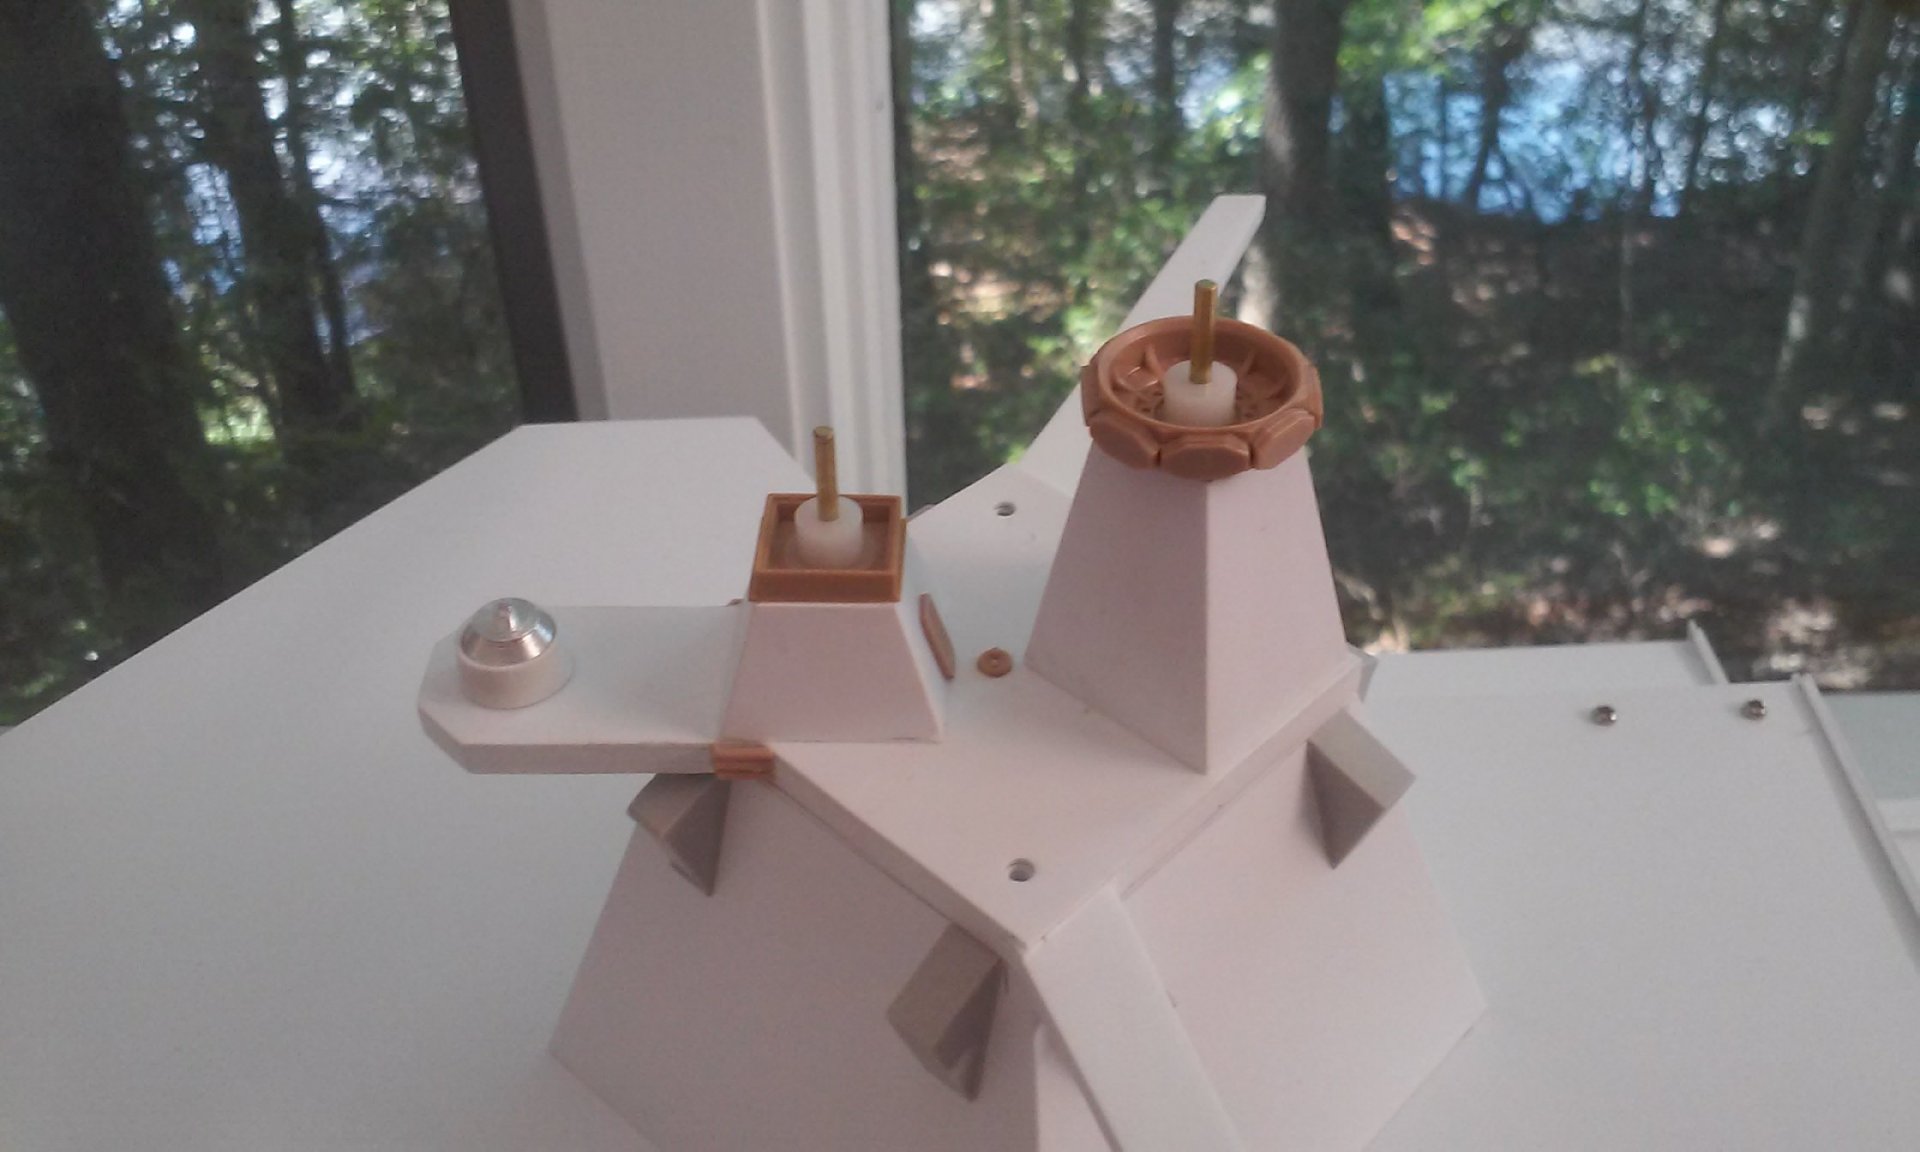
AWESOME Arbit!!! Once upon a time there was this guy asking about wiring up motors. Now you OWN IT man! You're Crushing that Crusher Joe fighter Electric Indigo! (Sorry, just had to pun it) That's cool Bolt! My son is thinking of getting some Tau stuff. Had a productive weekend! I machined a buck for both the SATCOM antennas and the bottom got cut off for the gun turret bases with a new top glued on for the turrets. I machined the buck on my mill in the same chuck that fits on my lathe. After each vacu-forming, I threw it on my lathe to cut the base off uniformly. It saves trying to sand a level base with flimsy plastic sides. The SATCOM antennas are above the hanger (not glued on yet) and the turret bases below it. Lost the small navigation radar antenna and had to make a new one. Also added small link antenna globes below the spinning radars (also covers screw holes). The radar tower comes off and the bridge roof hinges upward to open up. Covered all those seems with angles and other shaped styrene extrusions. The long strip going around the base of the bridge / top of the hanger covers the seem where that top piece also comes off to allow maintenance access. The yellow paper turret and missile turret are all still hypothetical and still under development. - MT


-
Thank you Gabe! I'd listen to Sanity is Optional. Wait, did I just say that? - MT
-
Thanks Thom! Your Saber is looking smooth now. Gabe, sorry, its hard to tell, but is that the kit or the toy? If its the kit, you can just order the sprue. If its the part I think it is, maybe even a textured sheet of styrene. - MT
-
FINALLY got the radars done. The is the third and final version of the main one, second of the secondary. The last main one one my wife thought looked like a dog tag and I thought it looked too old, not angled enough as is the modern trend with some (not all) radars. Also cleaned up the fit between the top of the deck house and the lower half of the ship. The whole section on top comes off to get access to stuff below. I placed a strip of styrene over the seam and will clean it up when the cement dries. I'll get a video up when I get further along showing some of the gimmicks. - MT


-
Thanks for sharing that Rock! - MT
-
I didn't know 3M made that stuff. Who usually sells it?
-
Yep, the carpet is definitely cleaner in the after pictures! Seriously, that is looking way better than the original and it's a rare paint scheme too. Looking good! - MT
-
That looks like a clean print Chronocidal! Not too many bias marks either. That's cool Pengbuzz! I like the styling. - MT
-
With springy landing gear too! - MT
-
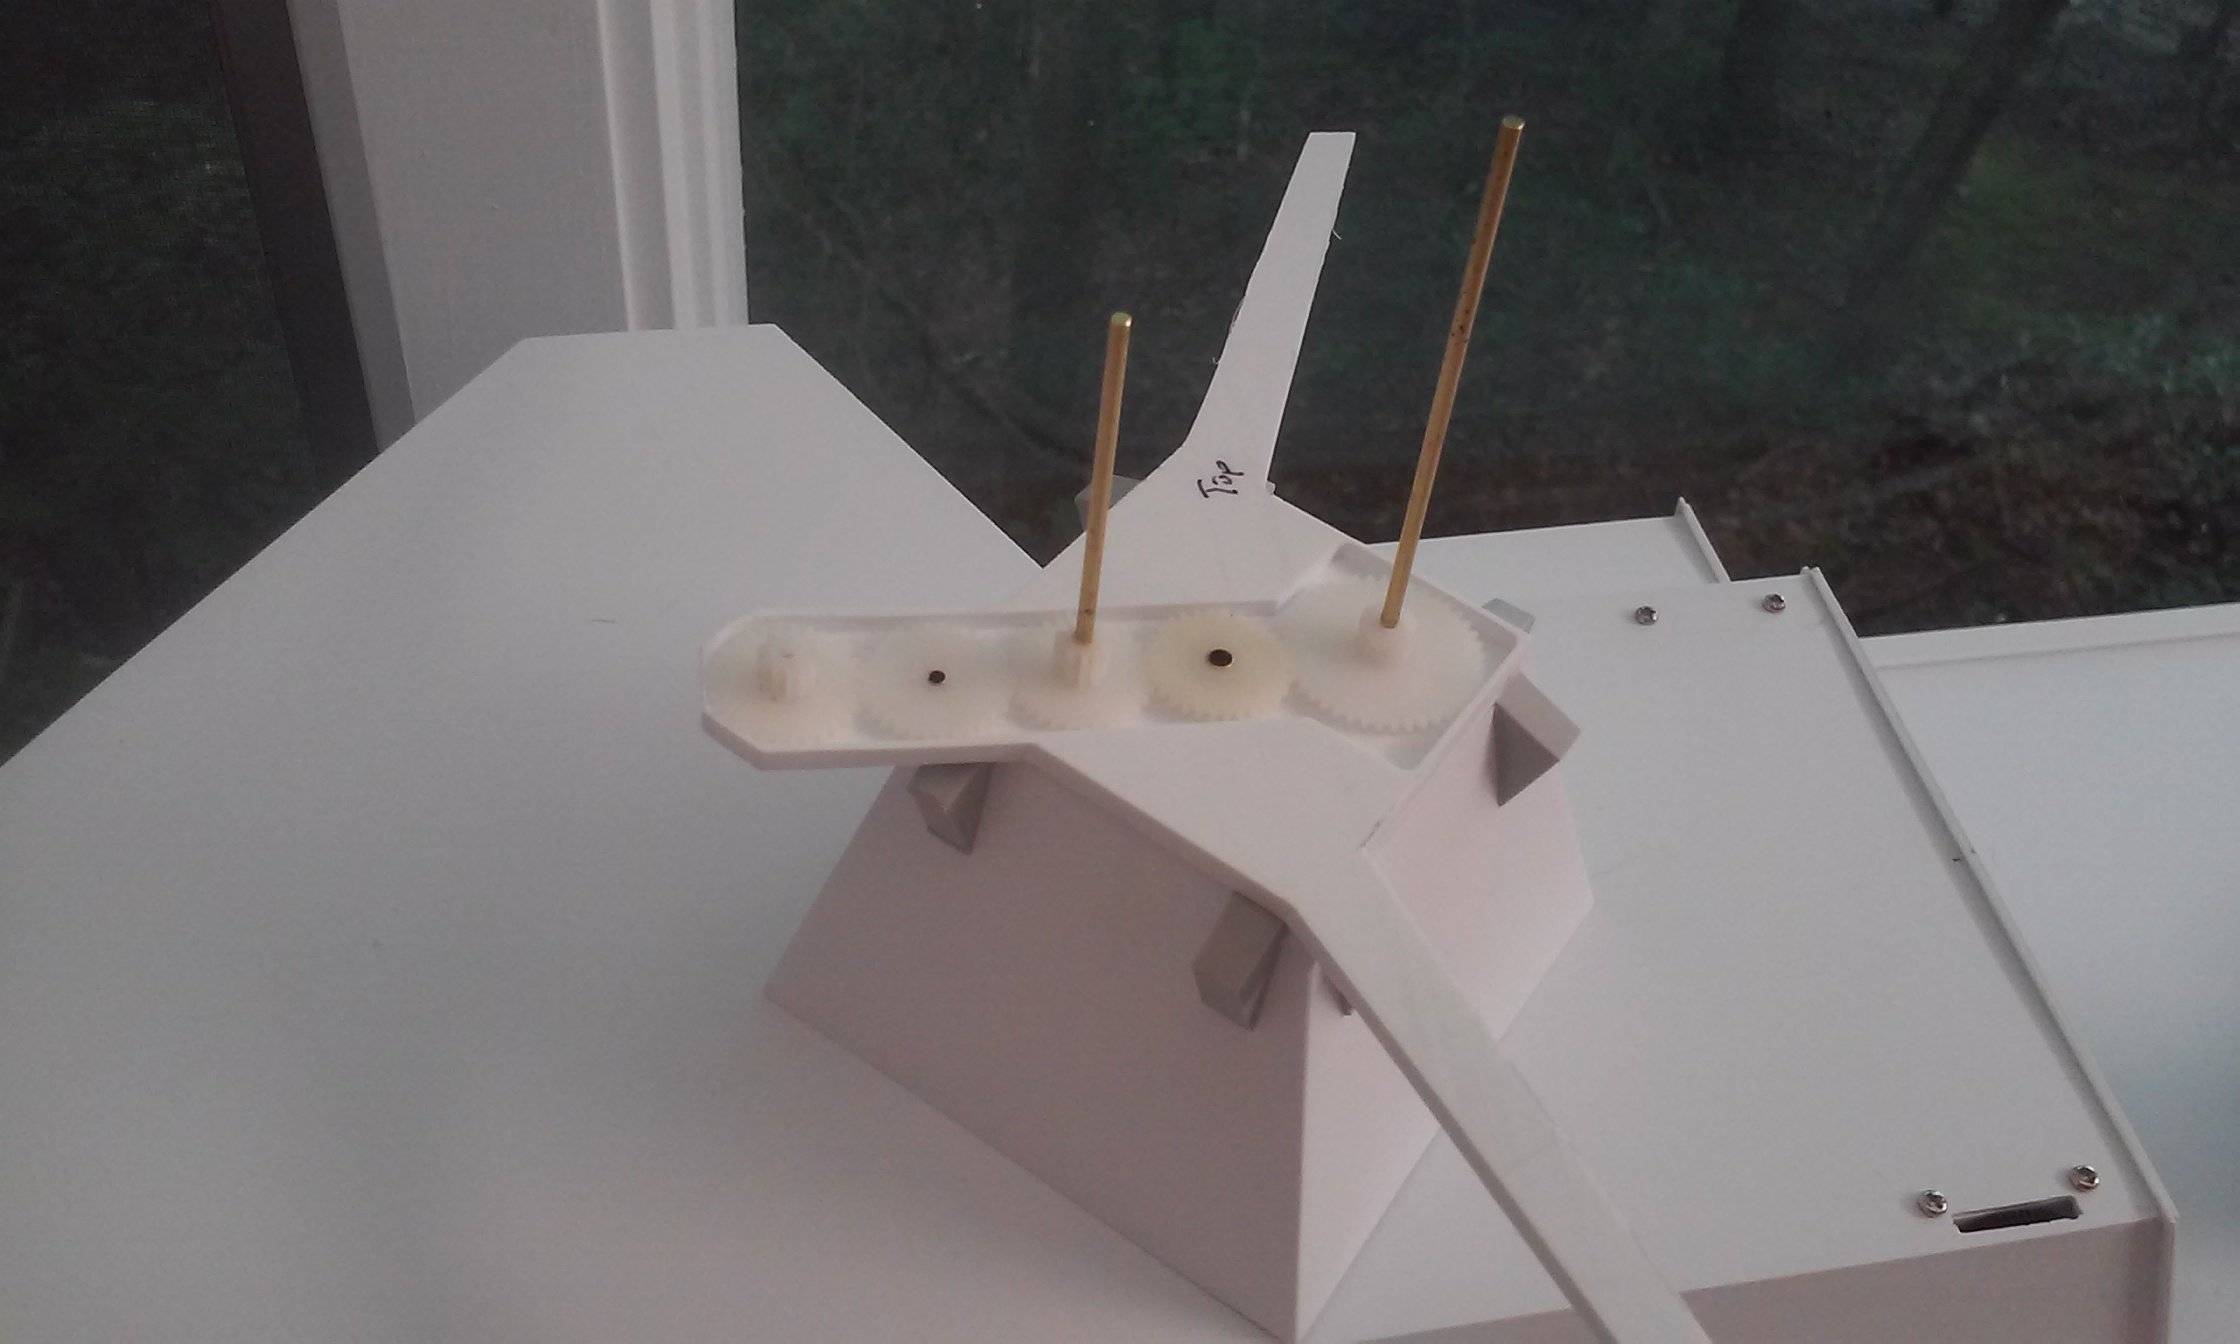
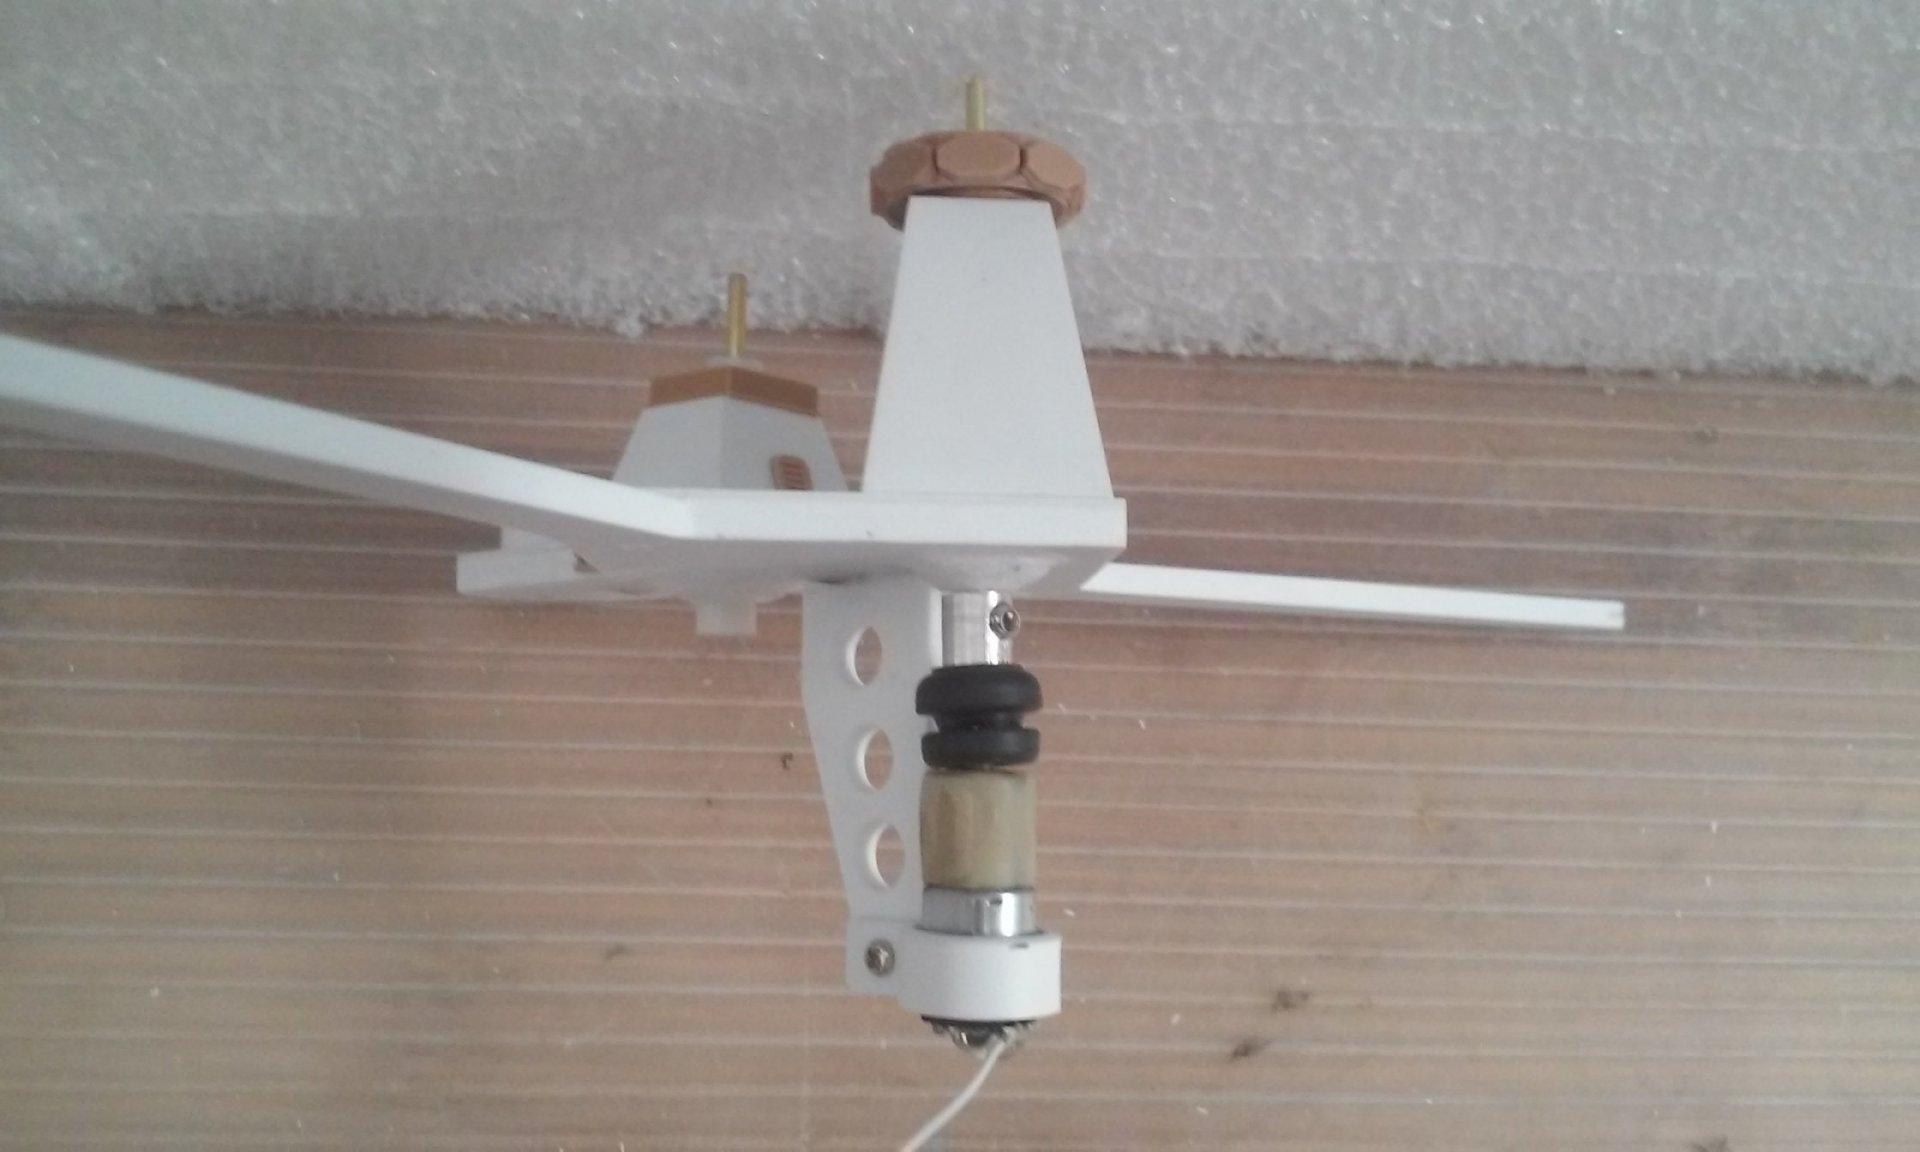
It's cool to see that Round 2 bought all those brands. They have redone a lot of the tooling such as on the Space 1999 Eagle. They even sell aluminum engine nozzles for them too. After three weeks engineering the radar masts, this is as far as I've gotten. The good news is that the whole thing is VERY quiet and the shafts spin true. I took an old Gizmoszone motor (too bad they are out of business now) and made an aluminum dog bone joint for it. There is an old grommet over them to keep them aligned and also quiet the vibration noise. The plastic motor mount also has a rubber ring in it to reduce vibration noise. The radar shafts all spin about the right speed at 1.5v. Also keeps it quiet from the motor not revving so high. The tallest mast has an IFF antenna around it, that's what the funny shaped hexagons are for. Still working on the radars. - MT
-
There's no school like the old school! - MT
-
This is a great idea! I thought of doing this in 1/350 scale, but A LOT is wrong in many references. Anime Magic! Most of all, the anime showing the Monster coming up on an elevator. - MT
-

Bolt’s Blt comp entry#1 Neo Grade VF1 Armored Valkyrie
MechTech replied to Bolt's topic in The Workshop!
This is looking COOL! Love the opening missile hatches. - MT -
Nyankodevice, I knew some guys that would do some awesome paint jobs on the Lexan bodies. It's especially cool when you think that everything has to be done backwards including what colors go on first! El;ectric Indigo, The Toyota Bruiser was/is AWESOME! They still make it! Now they have the Tundra High Lift too (only $372 at HLJ - with snowboards!). The Bruiser's shifting gear box was genius and the whole realistic chassis too. Never got it due to cost and the third channel needed. - MT
-
Grayson, that figures. The front end looks like a Tomcat minus the (older) leading stabilizers and cockpit. Sweet work on that Lexan body Nyankodevice! It looks nice and clean (until you roll it) Is that a 4 x 4 or 2WD? I used to work in a hobby shop (some decades ago) selling all the Tamiya cars. I had a Frog, Hornet, and the Clod Buster with an all fiberglass chassis and hopped up motors/speed control. I've been seeing some of their cars are making a retro comeback - like vinyl records! - MT
-
The A Wing looks cool Vifam! It reminds me of some of NASA's original lifting body designs - minus the laser weapons of course. I've never seen it gear down. That's what makes it look different. Hey Arbit, Pantyhose might be too elastic. the mesh I have is non-elastic. Depending on your door size, maybe the fine mesh fabric tea bags will work? You may have to use multiple depending on size. A lightweight micro-switch should be OK. Maybe a stop on the door to trigger the switch would work? - MT
-
That's cool Pengbuzz! My children actually got me that toy many years ago when they were with my wife in a thrift shop. I was deployed at the time and they said, "Let's get it for daddy for when he gets back." So I got him for Christmas (in February when I got back). My children also thought he was great for busting up gingerbread houses! Make us proud man! He will look way better than the factory paint job mine has. My artist didn't care or "drunk" his lunch. The paint is all over the place. I'm going for the world's thinnest gearbox (well, close anyhow). One motor will drive THREE radar antennas in the same direction. Like the three bears, tall, medium and short. I just have to add a sheet to the top and then make two towers for the radars. Then of course the radars. The radar motion adds realism to the ship when its on the water. - MT
-
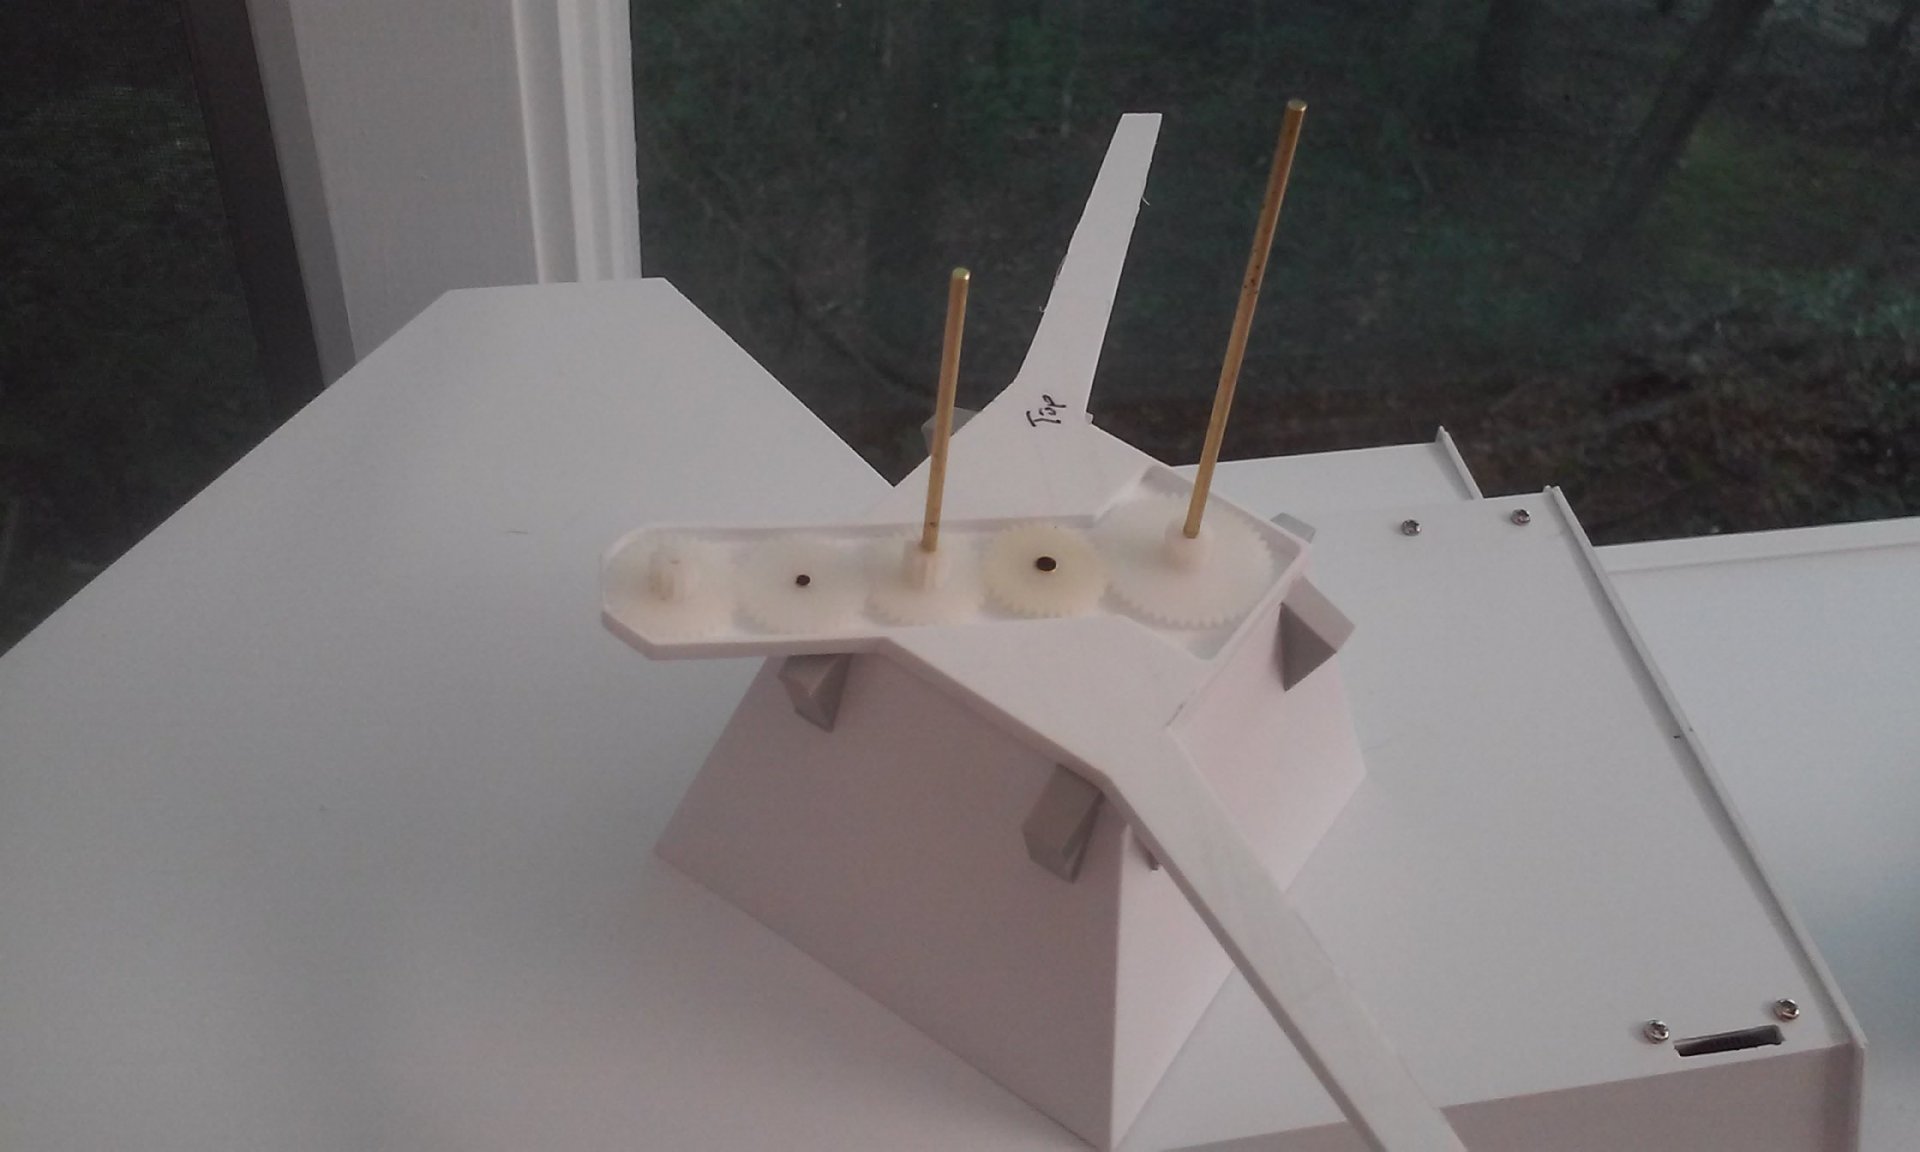
Hi Arbit, thanks! I took scribed styrene and cut it every third line or so. Then I taped the slats down to my work matt with double sided tape along the edge of a ruler. Making sure everything was straight and flush, I used some very fine mesh I have. Not sure where I got it. I see useful stuff and save it without becoming a hoarder. I then super glued it to the mesh and carefully broke the pieces apart after the glue dried. It was very smooth until the two cog strips got glued on. Then I had to re-break the segments up again to make the joints smooth. I don't think I will be using limit switches, but I'm still throwing it around. I'm trying to keep weight to an absolute minimum. The gearbox is from an old camera, but those micro ones you've used should work. I went through my spare gears and found ones that meshed with the cogged belts. Working on the radar gears now! - MT
-
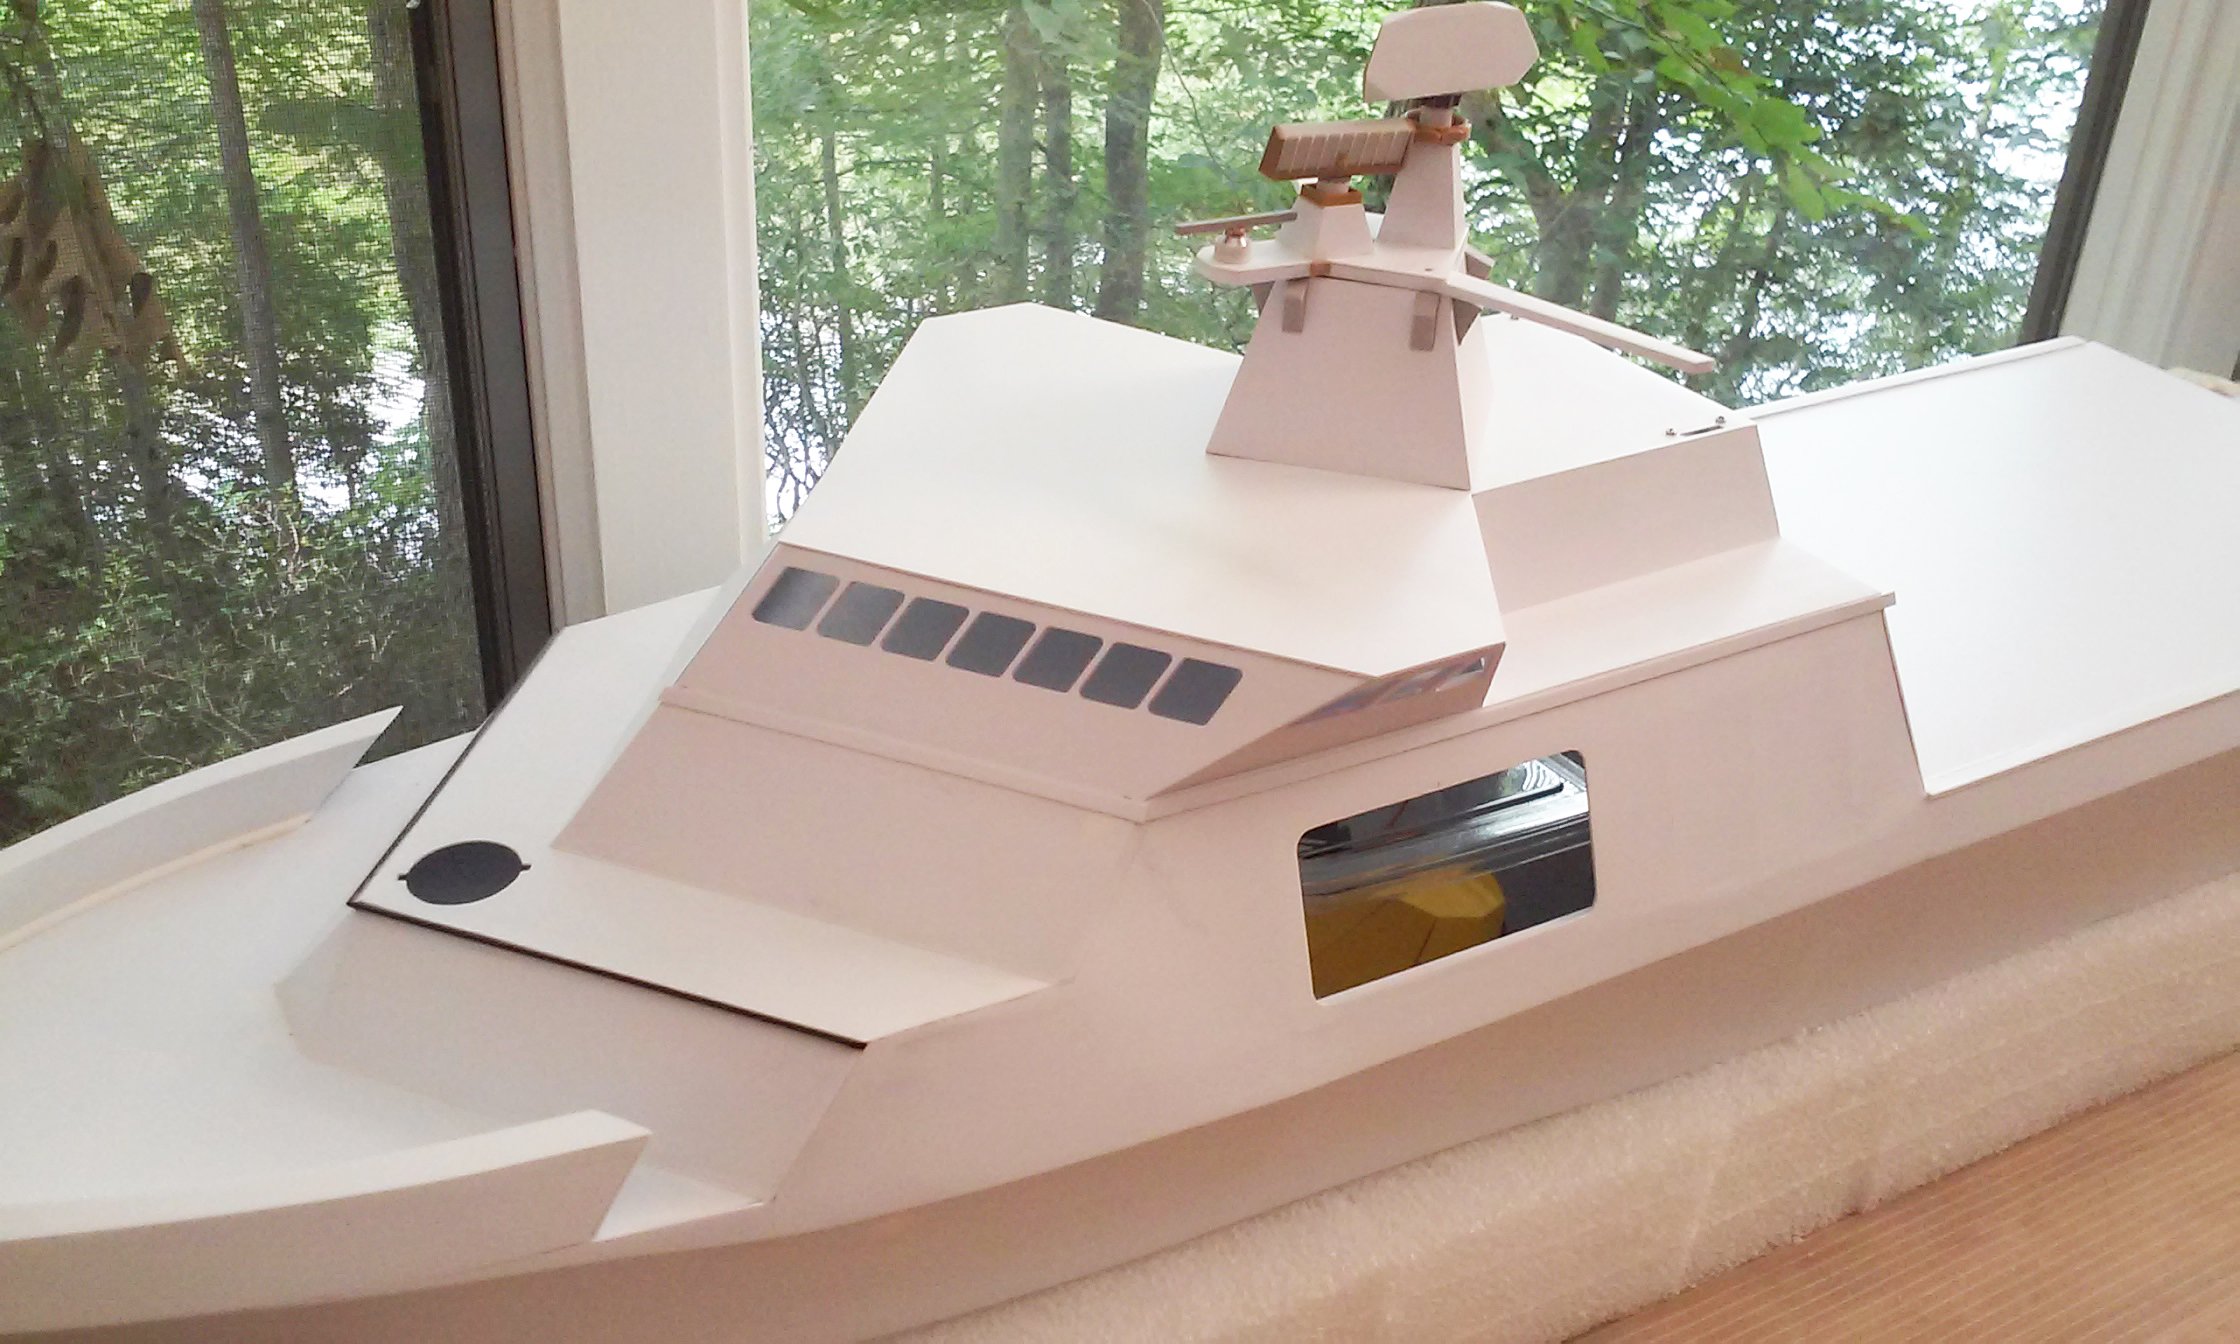
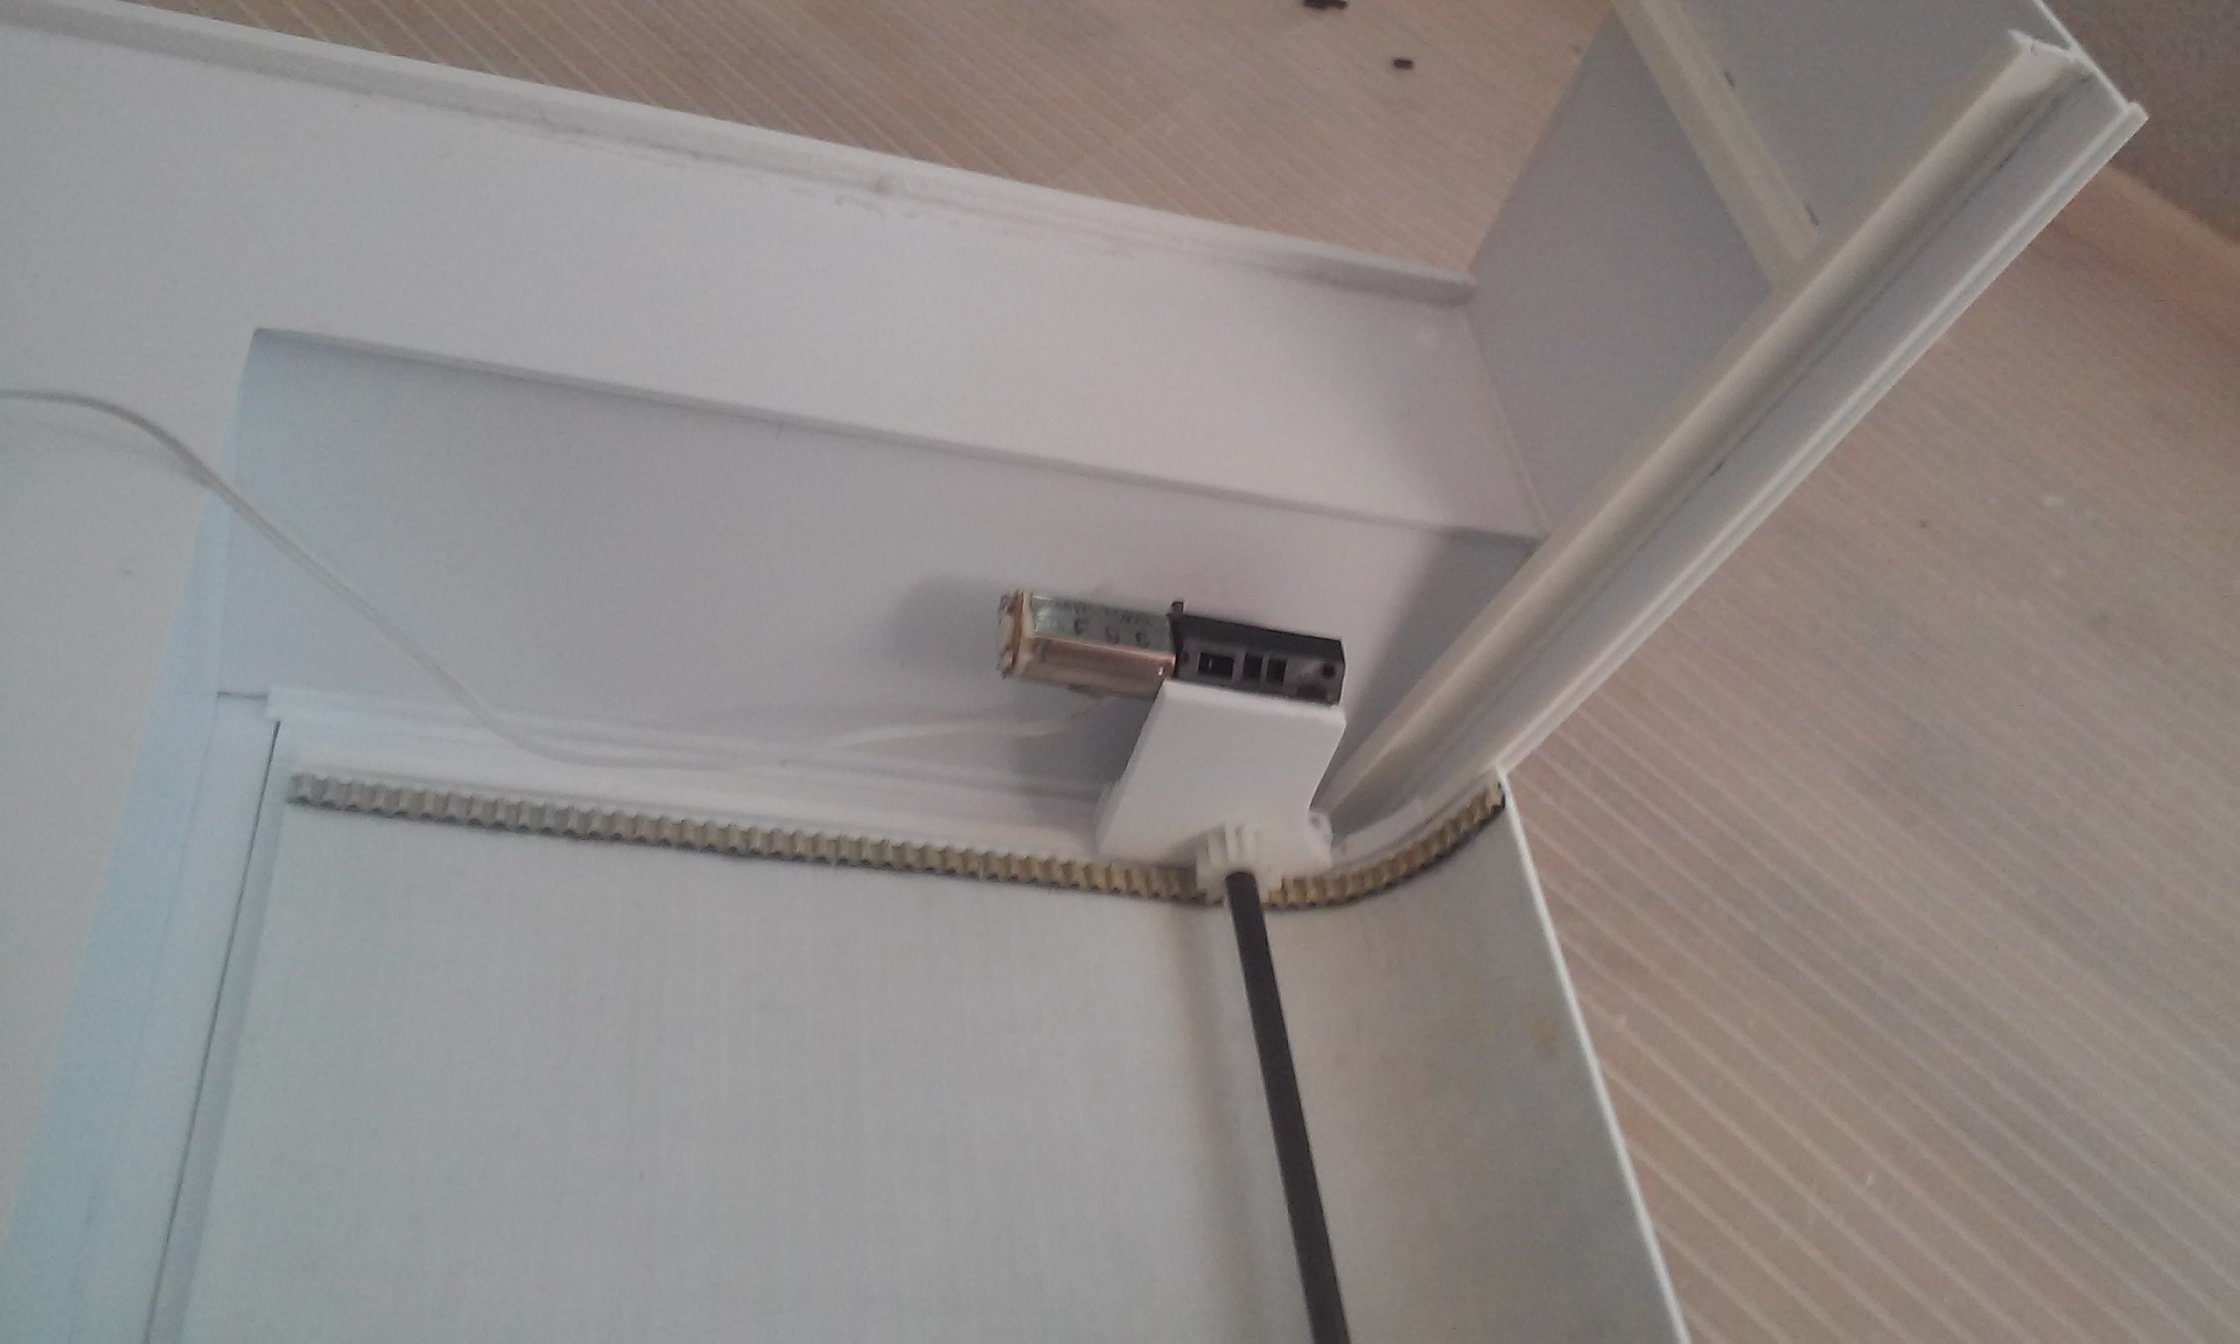
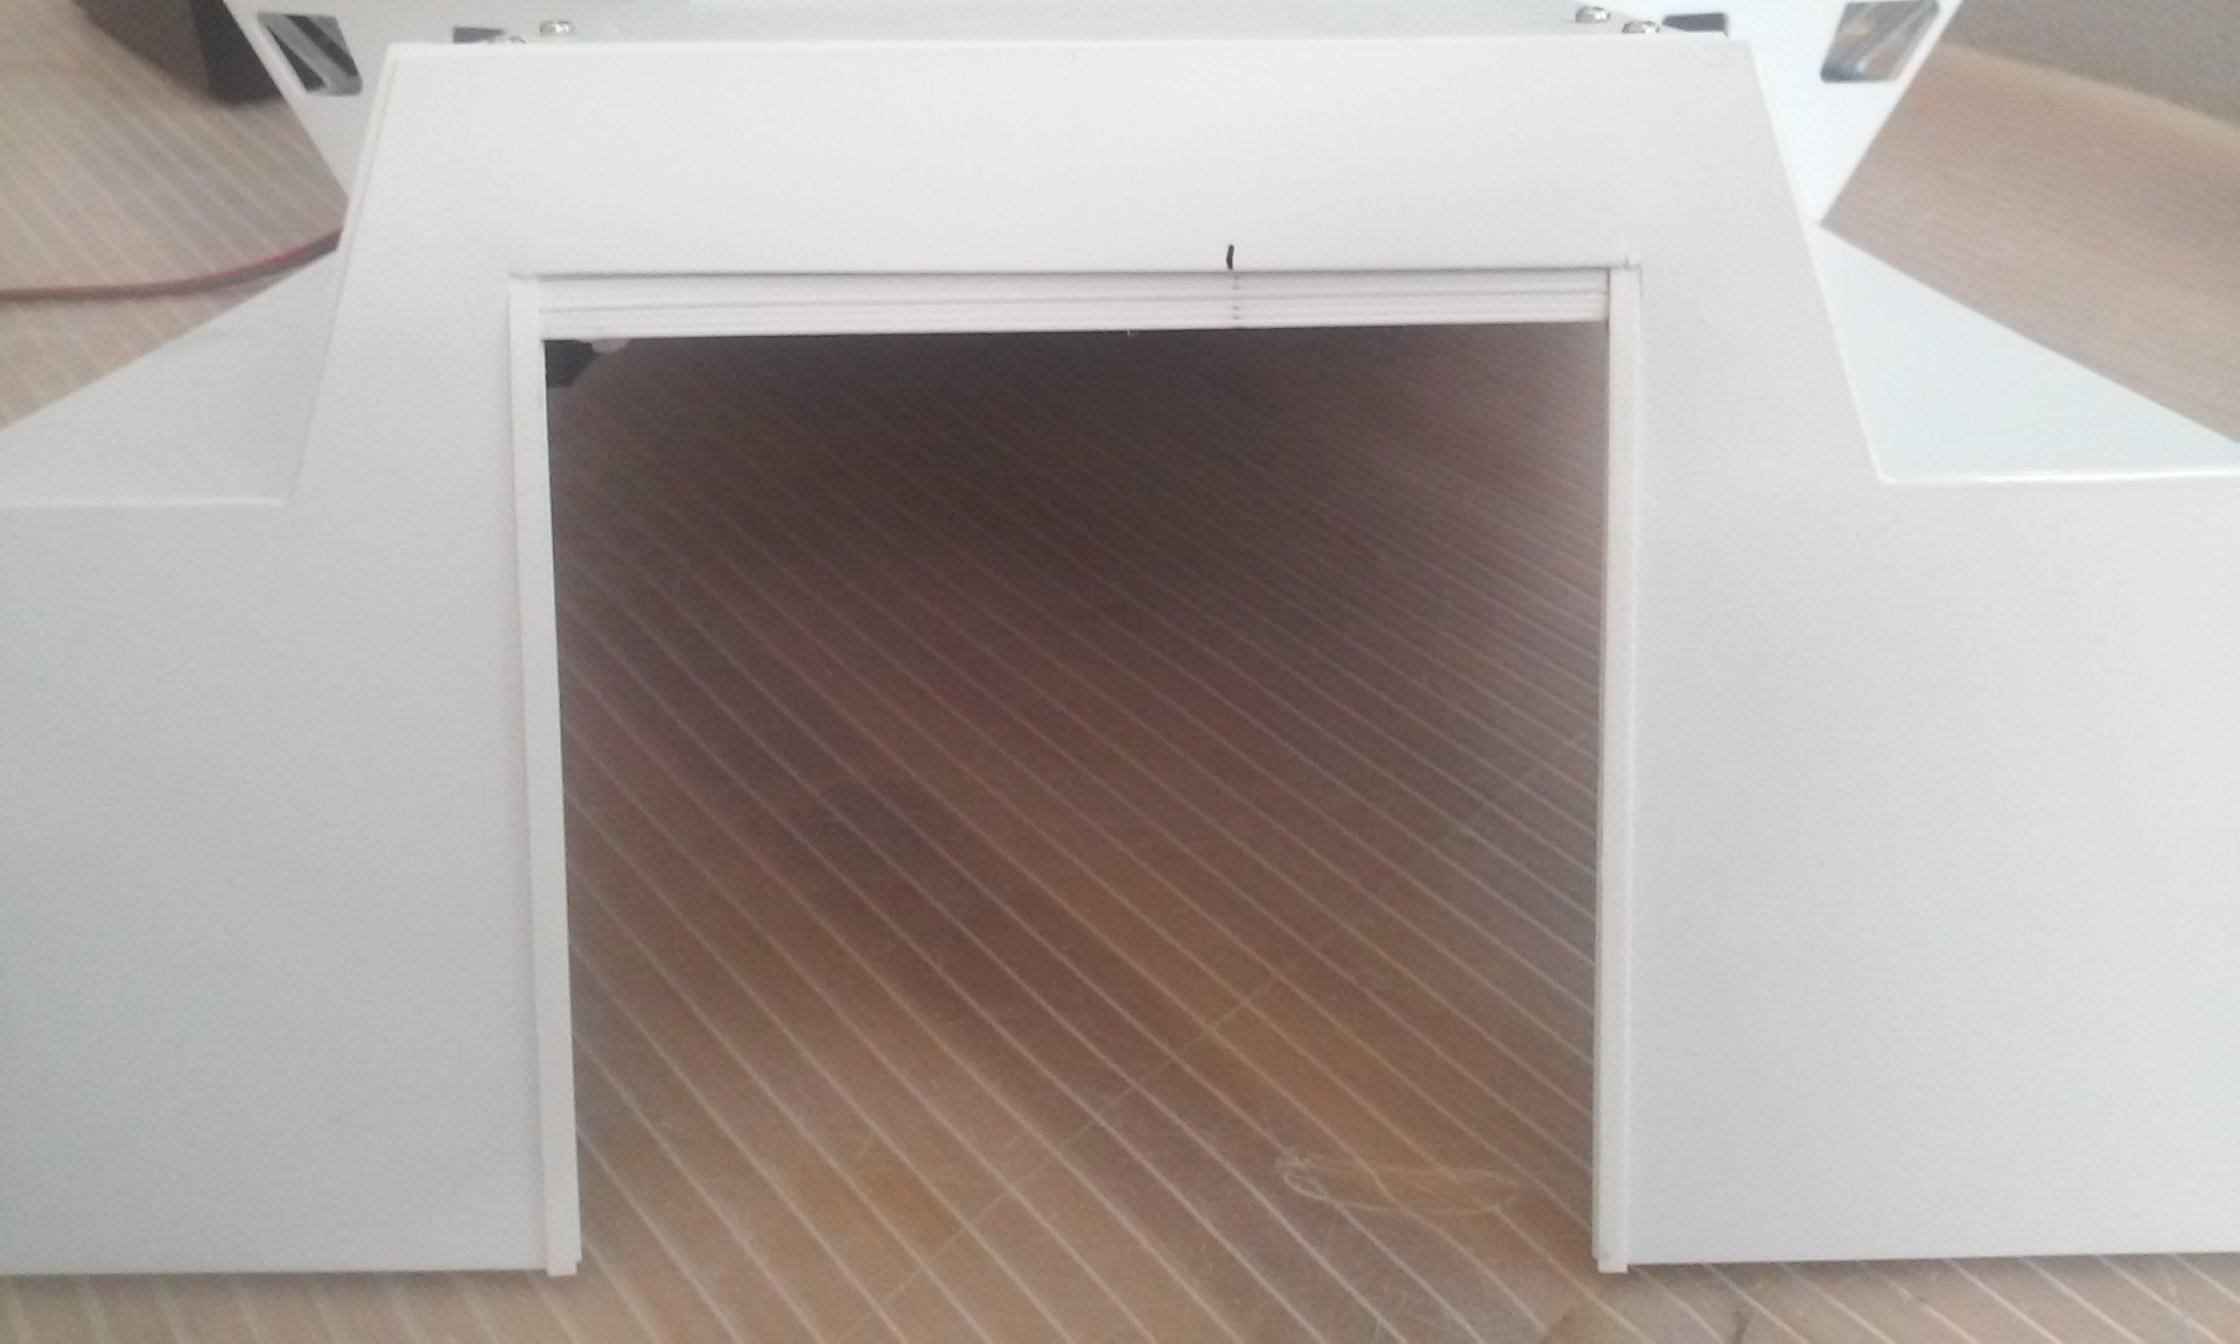
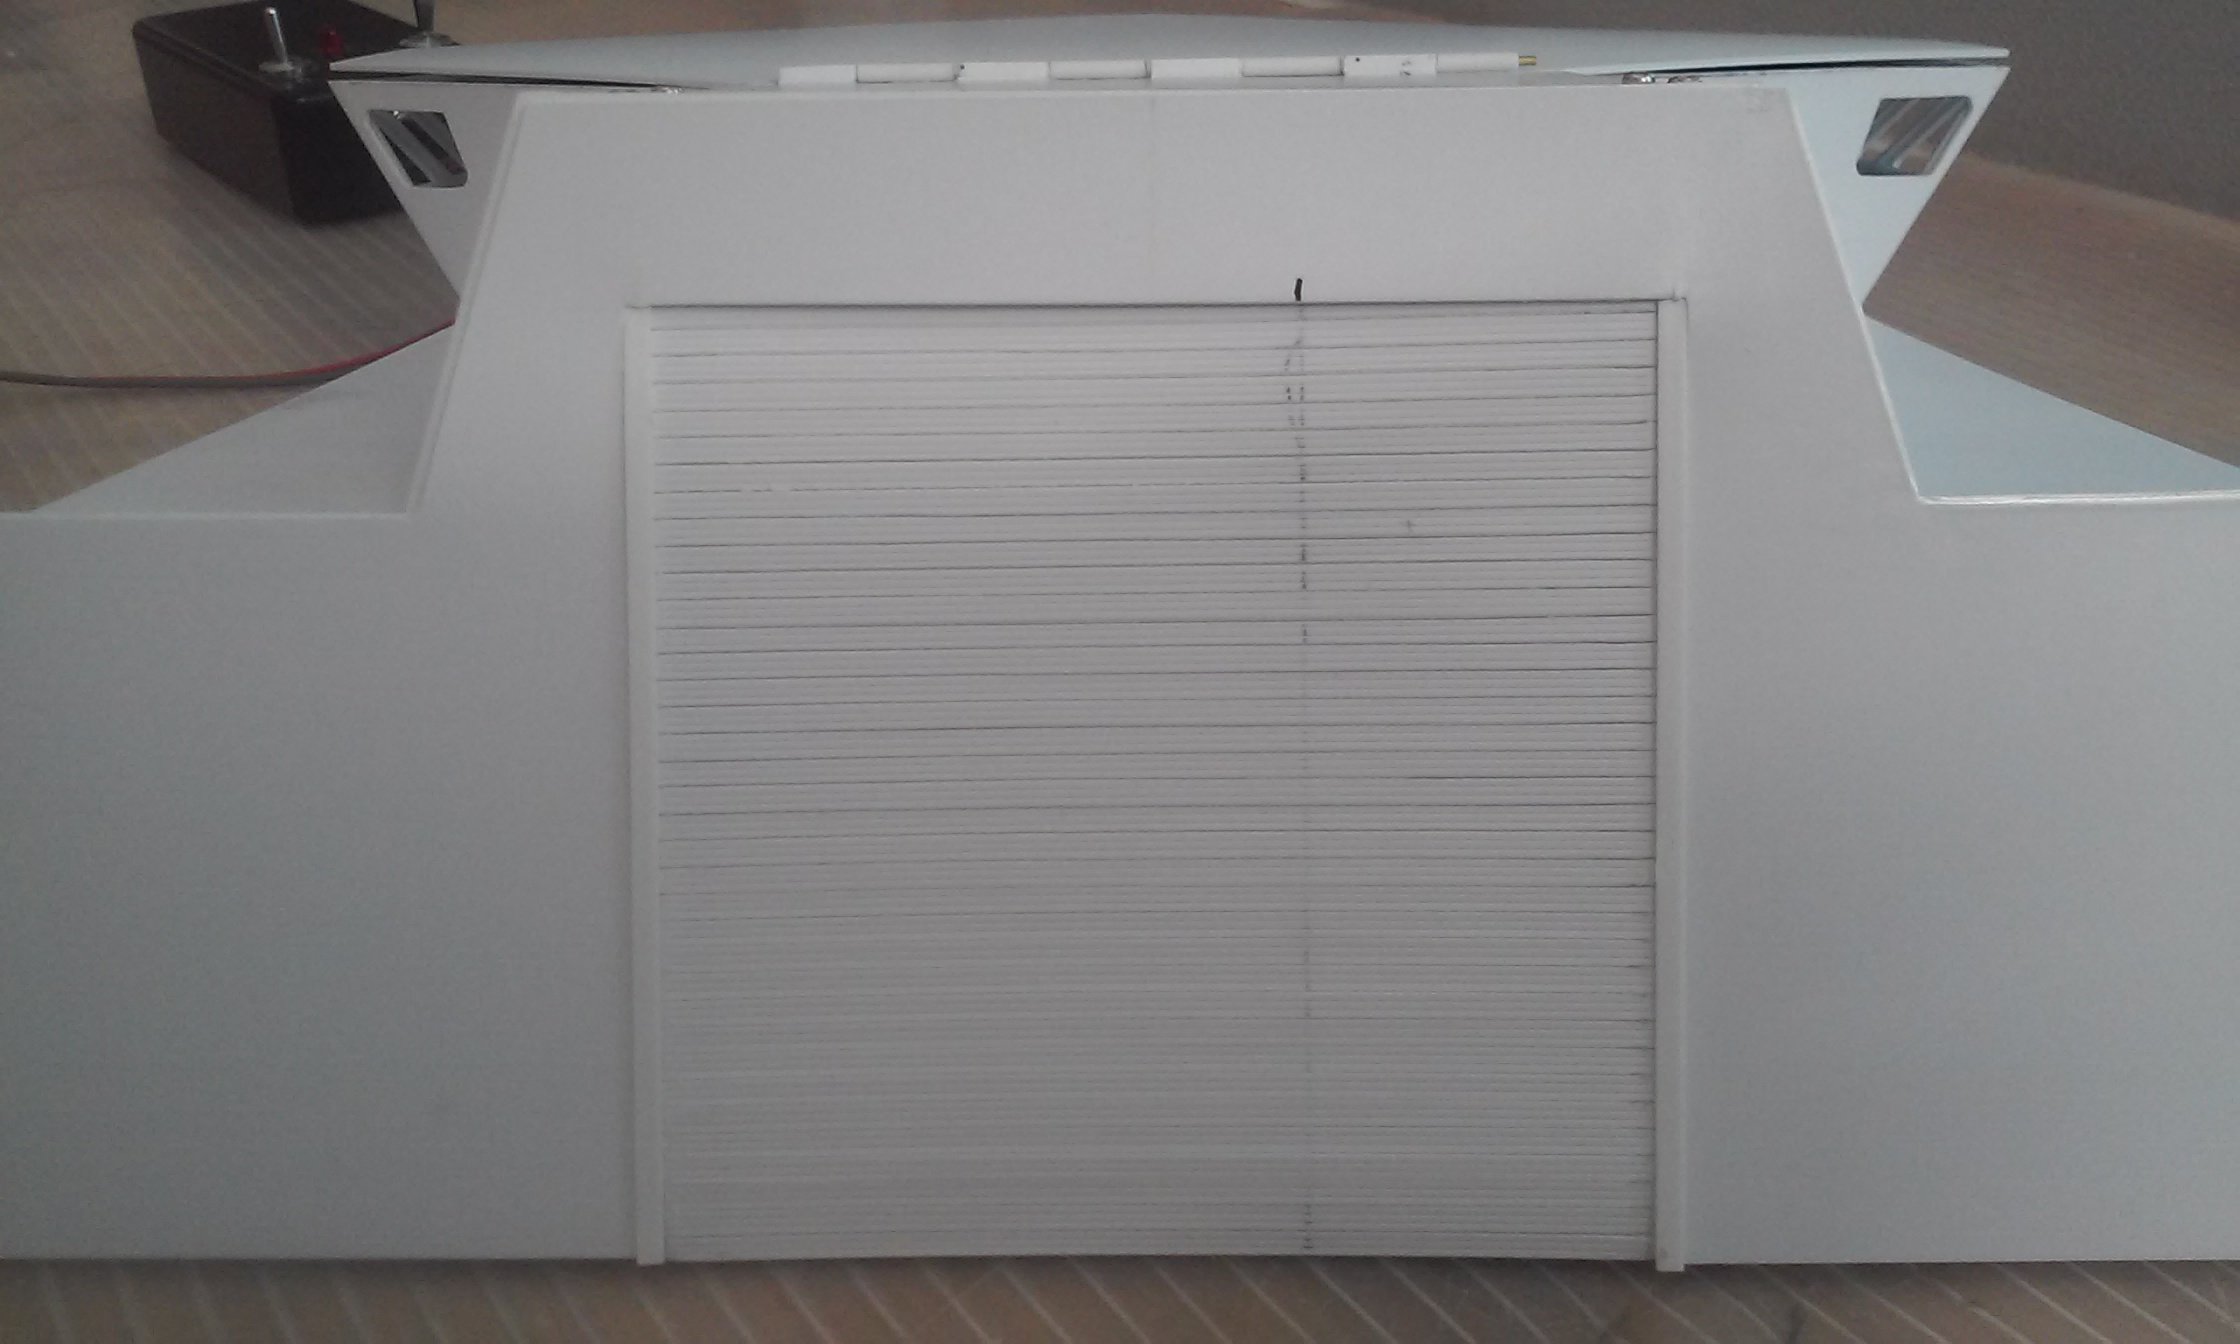
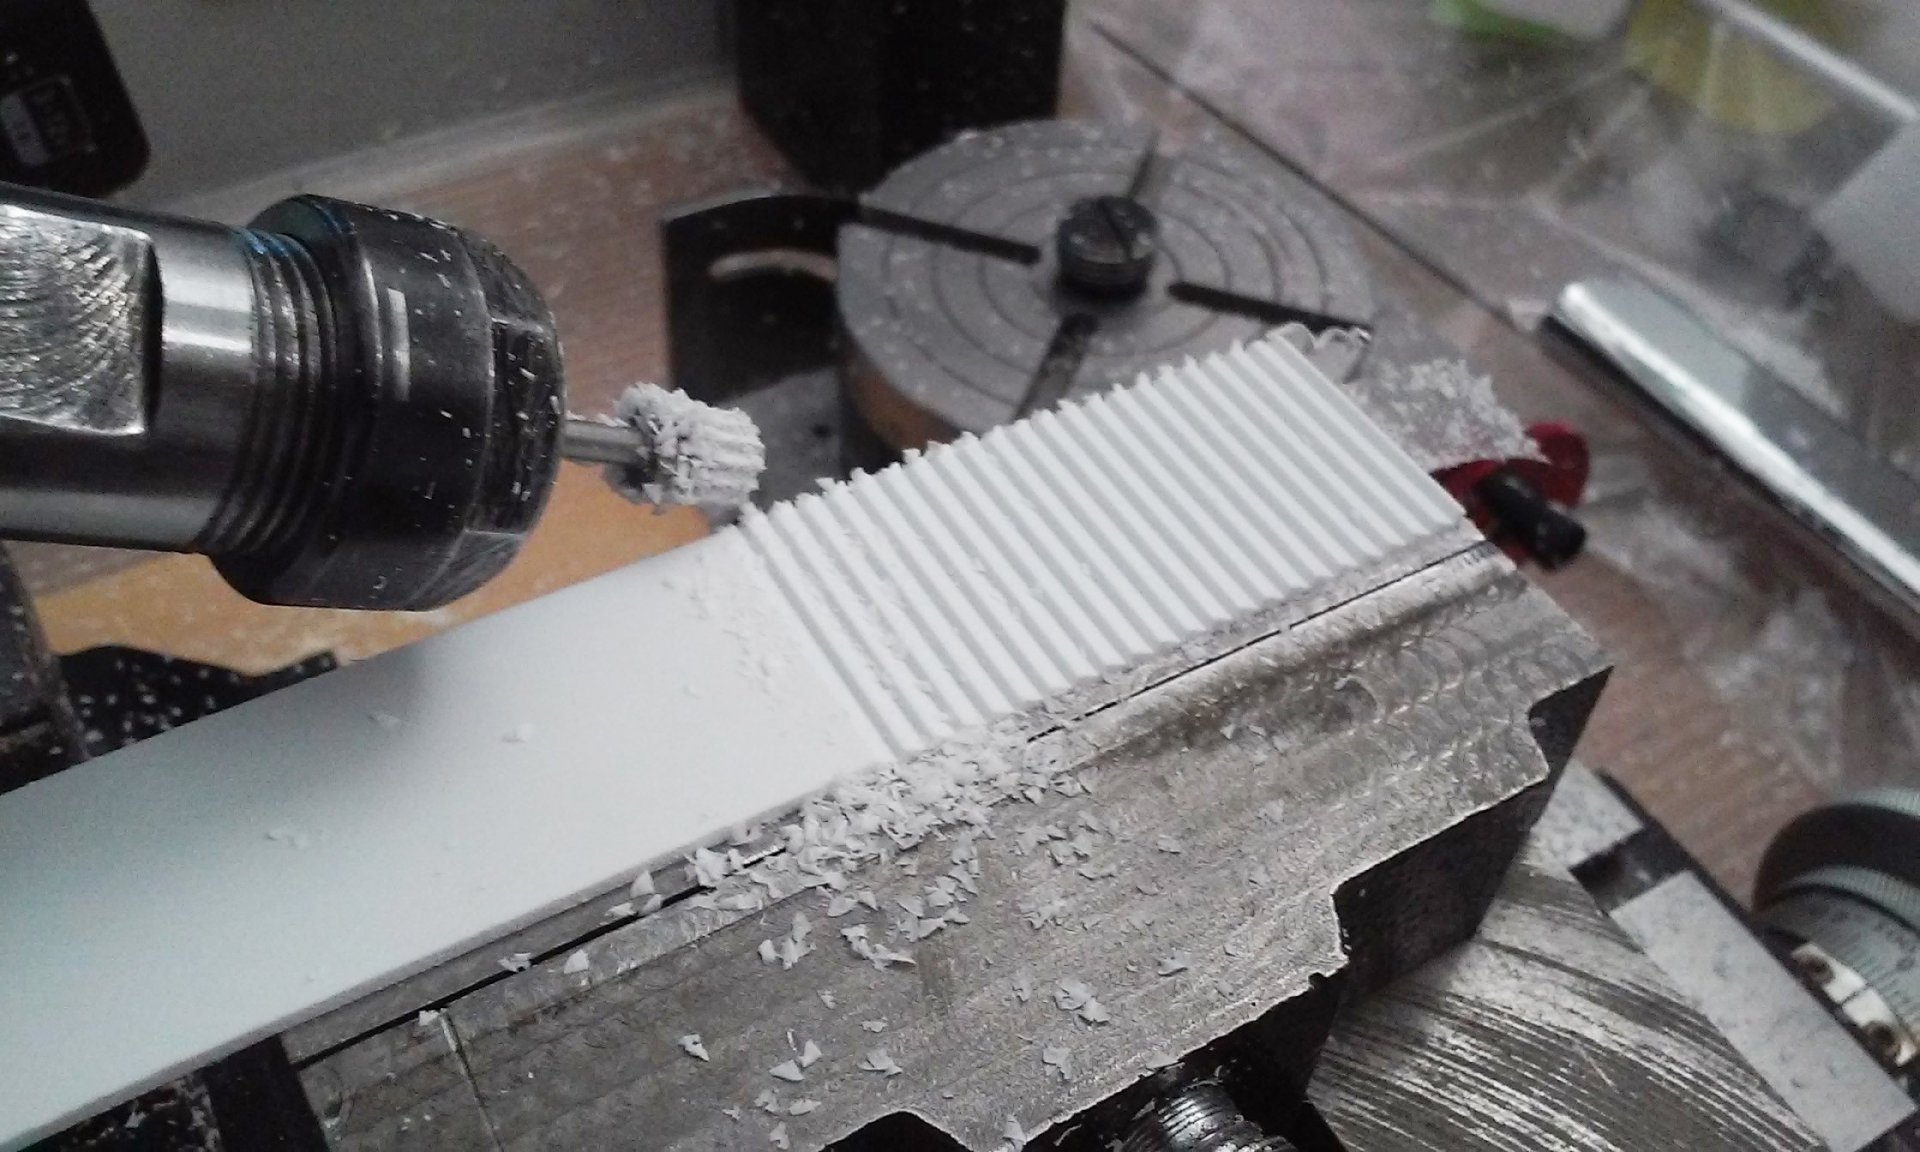
Congrats Kenny on the silver and GREAT looking Viper! The hard work was worth it. Great finish Penbuzz! Your job came out great despite the doors hangup. I like the base you have it on too. I always loved that model. You never forget your first Valk! As you probably saw in the video above, the guy made a roll-up style bed cover for hid R/C truck. It was funny because I already made a similar door for my ship's hangar. This weekend I finally finished the drive for it. So just imagine a roll-top desk or a roll-up styled garage door - that's what I made for my ship. I cut slivers of grooved styrene and then carefully laminated them together with very fine mesh for the glue to adhere into. This made a highly flexible roll-up garage / hangar bay door. I then attached strips of cogged belts (from an old printer) on the left and right side of the door. Then I used an old focusing geared motor from a dead camera and motorized the door drive. A carbon fiber rod goes from the camera geardrive stretched across the door with a gear on both sides to drive into the belts. Styrene "I" beams make up the sides of the door / rails that the door rides inside of. The first photo shows one side up close. Gears on both sides of the door drive into the belts on the door making it move. Really simple, but it was fun to make it work smoothly. Sorry, no video yet. - MT


-
Sorry Pengbuzz, I'm familiar with those delicate doors. I know you can fix it! No way Tom, that's EXACTLY the same thing I'm working on now! Except mine is the hanger bay door! I cut plastic slots too (smaller and thinner). But then I glued them together with a thin mesh on the back as a giant hinge. Not sure of the drive, but I'm thinking of using belt and cogs to drive it. That's what I've been testing. - MT