MechTech
-
Posts
4691 -
Joined
-
Last visited
Content Type
Profiles
Forums
Events
Gallery
Everything posted by MechTech
-
I'm along the thoughts that the artists had "four martini lunches." That's why the varied missile numbers! Actually the other sketch versions of the heads are in the Macross Hobby Handbook towards the back. I'd scan them, but they might come out funny since they are blue on yellow backrounds. PM me if you want them. - MT
-
I've heard of everclear being used for lot's of stuff, but this takes the cake! At least your liver will thank you ! Good thinkin'!- MT
-
Thanks for the updates. After reading all this, I've got a Chunky Monkey Ostrich that's yellowed like a smoker's fingernails I'm thinking of cleaning up and customizing. - MT
-
That looks awesome! Altogether a great build! - MT
-
Good looking "Chunky Monkey." Too bad they didn't look like that from the factory! - MT
-
I don't check out the toy section much, but when I saw the thread, I thought I'd check it out. If any of the toy manufacturers out there are smart, they'd make one. It all started with the SDF. Time for the toymakers to go back to our roots! - - MT
-
Hey Valk, that's tow-riffic! (sorry, couldn't resist). Those are coming together nicely. - MT
-
Alright Shawn and Graham, looks like we need a cosplay section now. - MT
-

How To Apply Iridescent "optical Coating" Effect
MechTech replied to ghostryder's topic in The Workshop!
Dave, I read that too somewhere. I also forgot about plastic gems. You go buy a cheap bag of plastic gems (multicolored) that are chromed on the back and file/sand them to shape and you're done. I also remember that somebody makes clear pearlescent that simulates the non-reflective glass on tanks and laser optics, can't remember who. If you can't take the head apart and your commited to redoing the eye piece, drill it our CAREFULLY and pick the rest out with a hook tool of some kind. Just a crazy idea. - MT -
It is possible to do the whole transforming and joining thang. I was just dying to do it for months! I started to build my own version and yes, it's possible! The excuses are over! Maybe we need to send somebody a petition or somehing? You can't fight city hall, but you can take on license holders!
-
I don't think the directions say to do that. Unless of course there's a coat of superglue underneath it first. You guys are makin' me jealous. The kit looks great. I could feed my family or buy a monster...Hmmmmm Oh wait, the thought of my wife kick'n my butt just brought me back to reality.
-
Don't worry, we know what you mean.
-
I dig those high heels. I think I saw a pair of those back in the 70's! She looks great!
-
How To Apply Iridescent "optical Coating" Effect
MechTech replied to ghostryder's topic in The Workshop!
I've found a couple of methods that work for the "eye piece." If you have clear material, use bright silver/chrome on the backside (mirrored plastic is best if you have some or get a piece of an old toy). I usually use a Tamiya Chrome paint marker. On the front side, use a clear green paint, like Tamiya X-25. This will give you depth and an almost internally lit appearance. Just make sure you use white glue or other non-solvent based glue. If you want to represent cameras like you see on the VF-1D anime closeups, you can drill shallow holes that don't penetrate all the way through. Then chrome coat and clear coat the outside. That will give you an excellent 3D effect. If you can cut your own from a thicker piece of plastic, you will get more depth. A coat of Future will protect the whole thing. You can also get clear colored plastic off a drink bottle. then coat the back of it. It's harder to do, but you can coat the back side with a chromed coating like from a sticker or other material too. I had some great results on a VF-1S and J using the first method. Hope that helps. - MT -
I love Hasegawa, but I'm already married! I build 1/200, but I'm gettin' one o' these babies! Who wants to make the resin accessories to show it opened up showing all it's armament?
-
You know it BigF. Man, that storm Saturday ripped the gate to our rear garden off the hinges! It also ripped the rear fence in half! At least it was cool though, great trade off! - MT
-
I don't buy a lot of toys, but I WOULD have bought that-despite the quality. Oh well... - MT
-
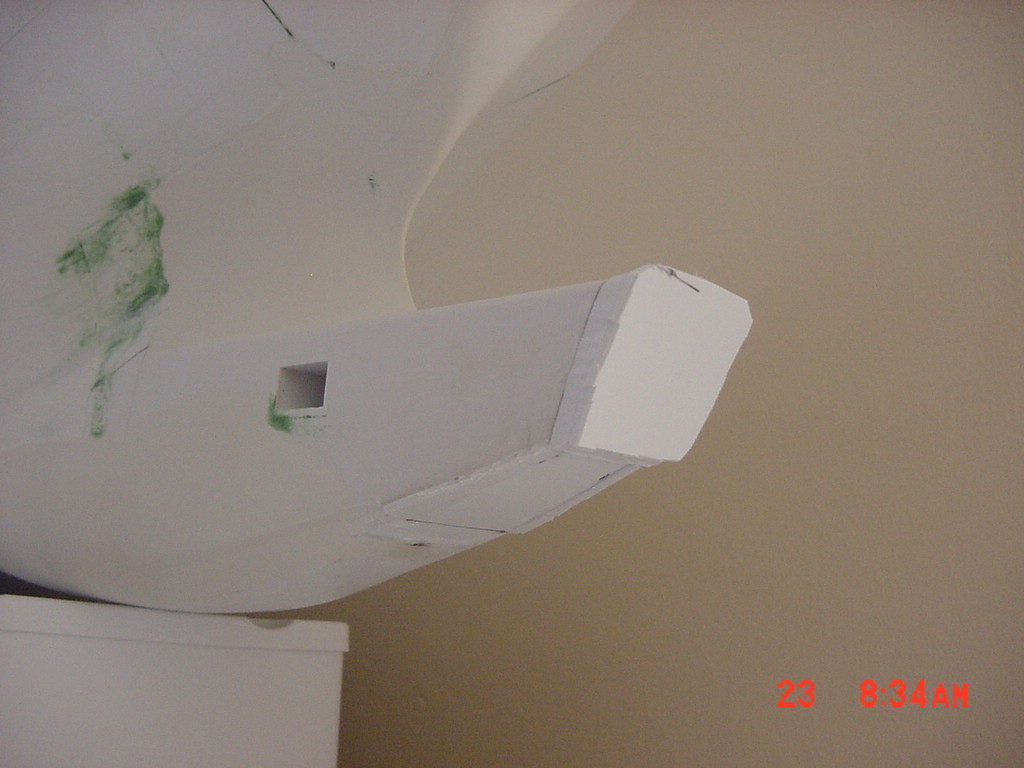
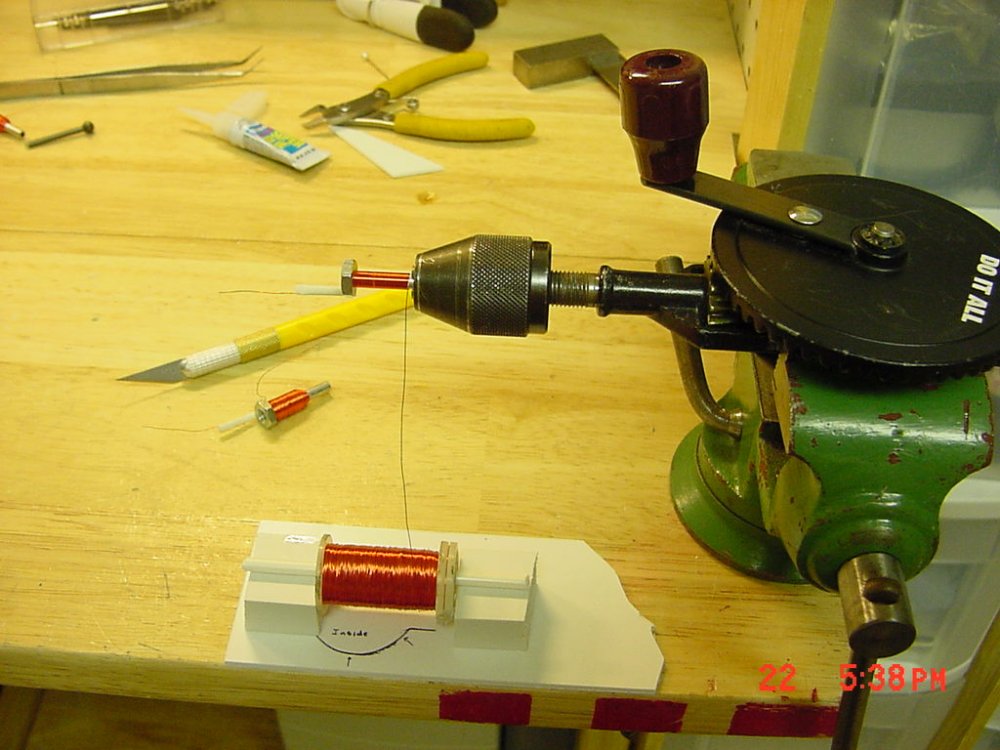
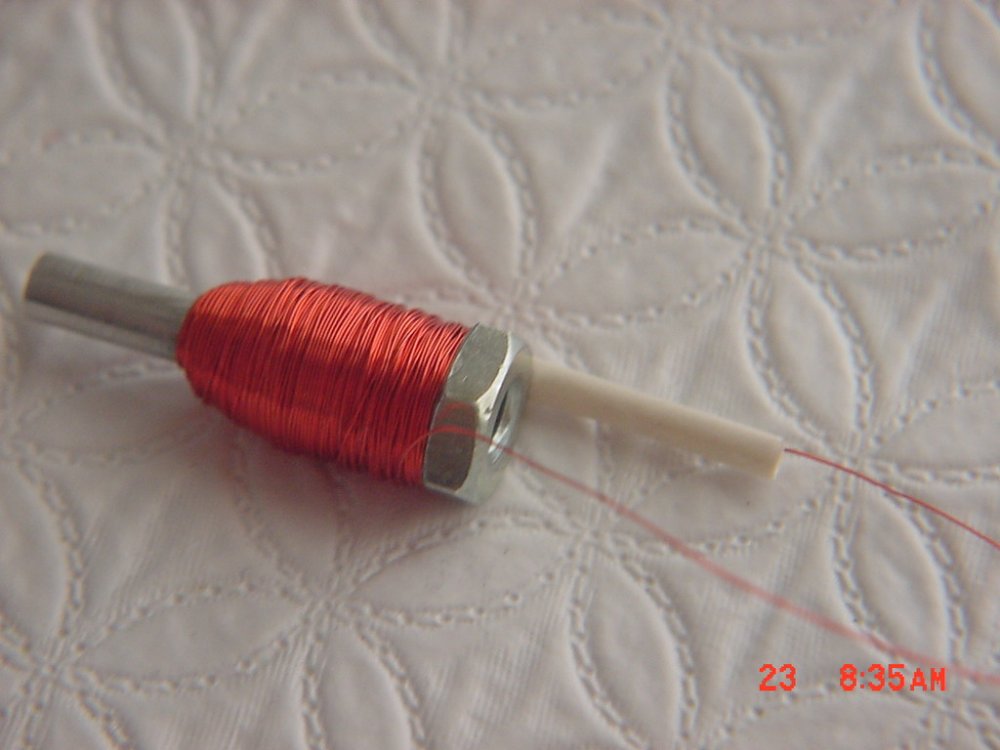
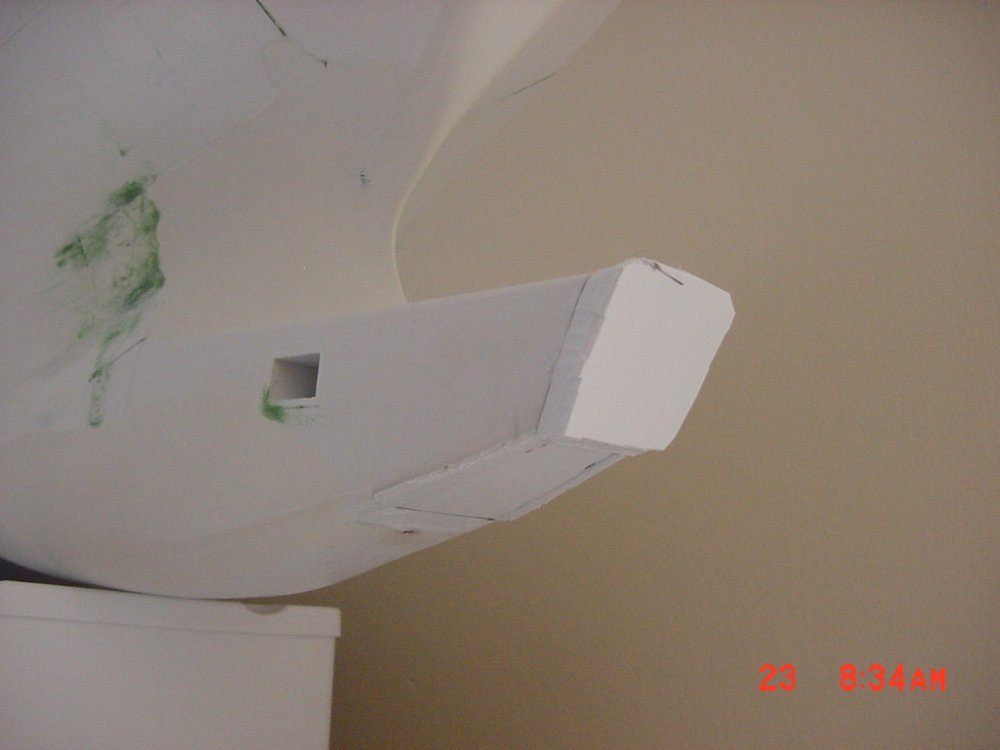
UPDATE: 23 July 06 It's been really hot here lately, but I haven't been sitting on my butt the whole time! I had to make my own solenoids for the actuators on the stabilizers. I couldn't find the voltage or size I need, so I have to make my own (talk about scratch building ). I also changed the shape of the bow nose (ONE MORE TIME!). I inverted the shape from what it is supposd to be from the drawings. It's fixed now. I just have to file and sand it down. Here's some pictures to give you an idea. Winding the solenoids Solenoid core windings Rough cut bow changes I wound the solenoid core on aluminum tube to help it cool faster, plus the bit sticking out will act as a heat sink and spring holder. The nut on the other end helps to focus the magnetic flux towards the front of the coil (the other reason for the shape of the wire windings). This upcoming week is going to be busy with Vacation Bible School, so I don't know how far I'll get. - MT
-
CONGRATULATIONS! Now I know why you "dropped off the scope" for awhile. My only advice is watch changing out the fast packs! The spent fuel rods can be dangerous!
-
Physioguy, The darker colors look cool. The blue doesn't say "ominous" to me. personally, I'd stick with military colors. That's just my two cents (or two pence). BigF, oh the agony of defeat! A hobby shop near me did the same thing. Thank God I was there instead of missing out! If it wasn't for a friend that went upstairs to look for some "older" comics and found "all those weird looking models that were cheap," I would have missed out! Then there's those times I drove a couple of hours to find the store is no longer there (that's happened a couple of times). - MT
-
This is the only other referance I've seen: http://www.hobbyfan.com/product_info.php?products_id=90 Viceland, after a month or two, some formula will get you guys some sleep! (it's worth the money). The "recast" may not be getting enough, 30 minutes is a short time. We also kept our children up more and more each day. Whew, what a rought period that was! - MT
-
That's a work of art! Beautiful! For those of us po' folks not getting the kit, the paint brings out the great panel lines and other smaller features in the photos. - MT
-
Here's a picture with the "Swiss Army head." http://www.macrossworld.com/macross/art/mcr254l.jpg The triple spotlight one will take days less to make though. I had to check in to see if you had photos yet.
-
Hey NMB4M, I bought it in the kitchen section, the hardware section and hobby shops. It's a square with RC car bearings in a tube screwed on the front. The shaft is connected to an old pinvise. The handle is an old RC car pinion gear. The whole thing is attached to a cutting board that I cut a slot in for a miter. It's basically a hand powered ghetto drill press. It doesn't do big holes, but it starts the small ones straight! - MT
-
You're not kidding! It's hot enough in the house! I hope all works out for your improved "shop." - MT