MechTech
-
Posts
4691 -
Joined
-
Last visited
Content Type
Profiles
Forums
Events
Gallery
Everything posted by MechTech
-
Looks great Mac. I've been busy in the other sections and building, sorry for the delay. The Daedalus looks good. I see what you mean about the front hatch. All the drawings I see have varied angles so I'm going with "looks good." I'm still working out the right angles and placements for the stabilizers. Keep up the great work! - MT
-
You've got it made now Isamu! That's what I need. Goat any Dadalus plans handy? Yeah Cobywan, whatever happened to that? Real life getting in the way? - MT
-
Everybody needs one of those over their desks! - MT
-
I think you're about to make some friend and money! How much do you want the 1/200 monster for (that's the main scale I build in)? Afew years ago I'd be droolin'? - MT
-
Sorry BigF, I can relate. I used to have the laundry room. I actually talked my wife into using a corner of our living room at our last house. I kept my stuff in a closet. That way she was less of a "hobby widow" And plus it was TOO hot outside or too cold most of the time! Maybe you can do the same? Our weather here just varies too much. Thanks Isamu. I'm hoping to finish by Christmas, but we'll see how the engineering part goes. It's not like building a kit, that's for sure! - MT
-
Here's Anasazi37's catalog of decals. You can PM him too: http://dwhite.netwiz.net/decals/decal_samples.html I just happned to see this a few days ago. - MT
-
A little bit bigger and you could just pilot it yourself! You actually have the hard part out of the way getting your blueprints done. I couldn't get any drawings to agree with each other from the MPM book. I have to compare several drawings and take a "vote" as to which one works. If you can get a printshop to print it poster size, it will be worth the money. I've done it for some of my parts and it makes life easier. I hope the best of success on your project. - MT
-
Looks great, ready for battle. Have a safe journey! - MT
-
LOOOKIN' good guys. I'm probably gonna have to buy one each. Since I build in 1/200, I can have one of the tow vehicles tow severall aircraft at once! - MT
-
Dean - Thanks for the advice. I will take my time. I'm going for both accuracy and functionality. By the way, I'm in England, so yes, 2:00. Hey Big F - I got some old bearings from an RC car and axle and found brass tubes for it and the shaft to fit into. Plus an old pinvise. The next tool I get will be a drill press! The ant will look even smaller when the top section (which is bigger) goes on. Good thing I didn't have any food laying around. - MT
-
The covers do look better. - MT
-
I always thought that was a cool model! - MT
-
Looks great guys. Both of you. I think more pictures would get you more replies. Keep it up! - MT
-
A UV light or flourescent light will speed up the process. Then give it to a couple of children to play with. The e-bay idea sounds better though.
-
HWR, I'd consider doing the Daedalus doorway if you guys were dead serious. Not to be a killjoy, but my current project is in that "dragging" stage where it seems to be taking forever. My "Macross allowance" (yeah, it's in our budget) is dragging too.
-
Understood. I had to do lots of filling from where I sanded back to even it out. Happy sanding! - MT
-
OK, there's lot's o' talk and just two pictures at the beginning of the thread (very subtle hint). - MT
-
"Talos" was an awesome kit. The biggest walking mecha hands down next to the 1/48 "Crab Gunner." I think Mike's 1/72 Monster kit holds the new title now.
-
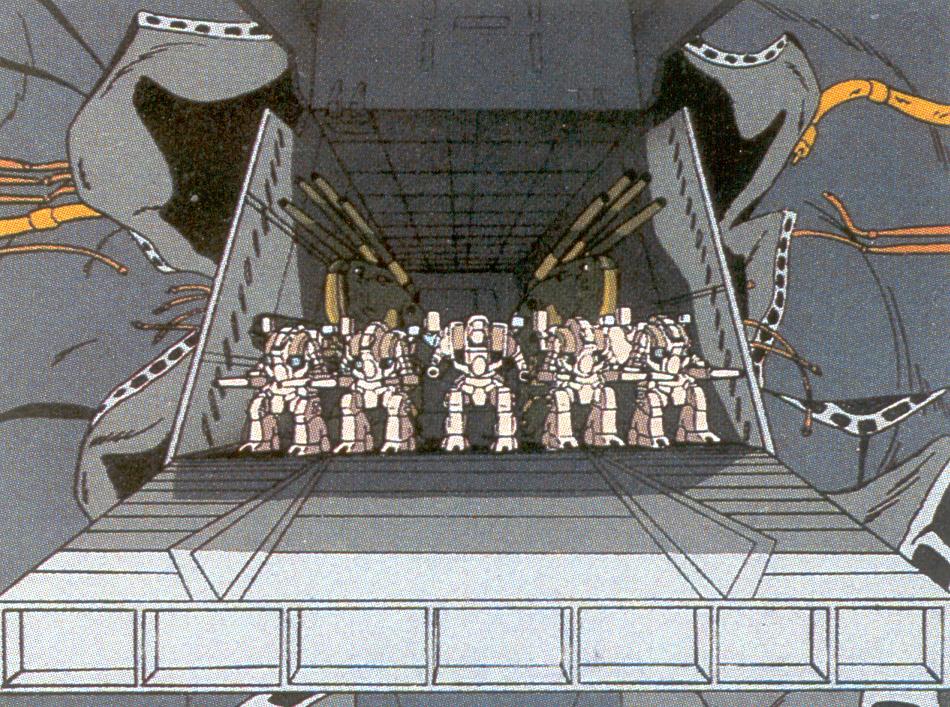
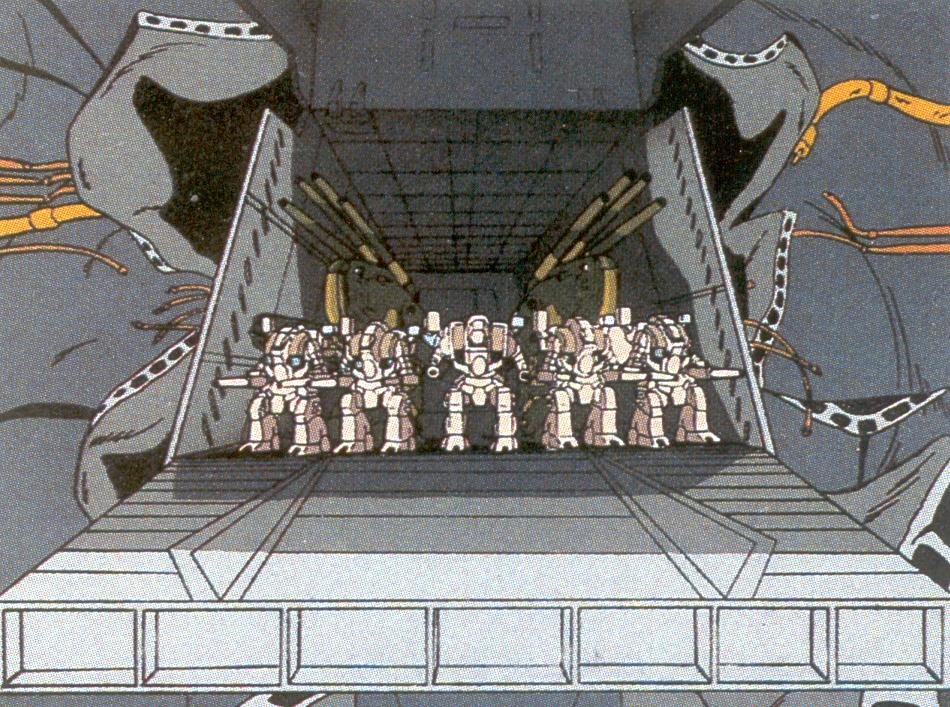
HWR, I'm glad your your eye feels better. I feel your pain, litterally. I did the same thing once and it seemed to take forever for the stinging to go away. The monster I built in the photo is a scratchbuilt 1/100 (styrene and Milliput) monster with one of those cheap re-released Spartans at it's side. It's so heavy it is about 3/4 of an inch lower than the Spartan. I went with the TV version paint scheme. I almost put the smoke grenades on there like they show in the one TV episode, but I thought "just one more thing to break off." Have you really chosen which of the two versions to go with - movie or TV? If you want to go with a Daedalus attack, you really only need two monsters... Two can only fit side by side anyhow, trust me. I hope all works out with the paint! - MT
-
I found out the hard way that Imai models and line art have some "differences" to put it softly! Can't wait to see what you guys come up with! - MT
-
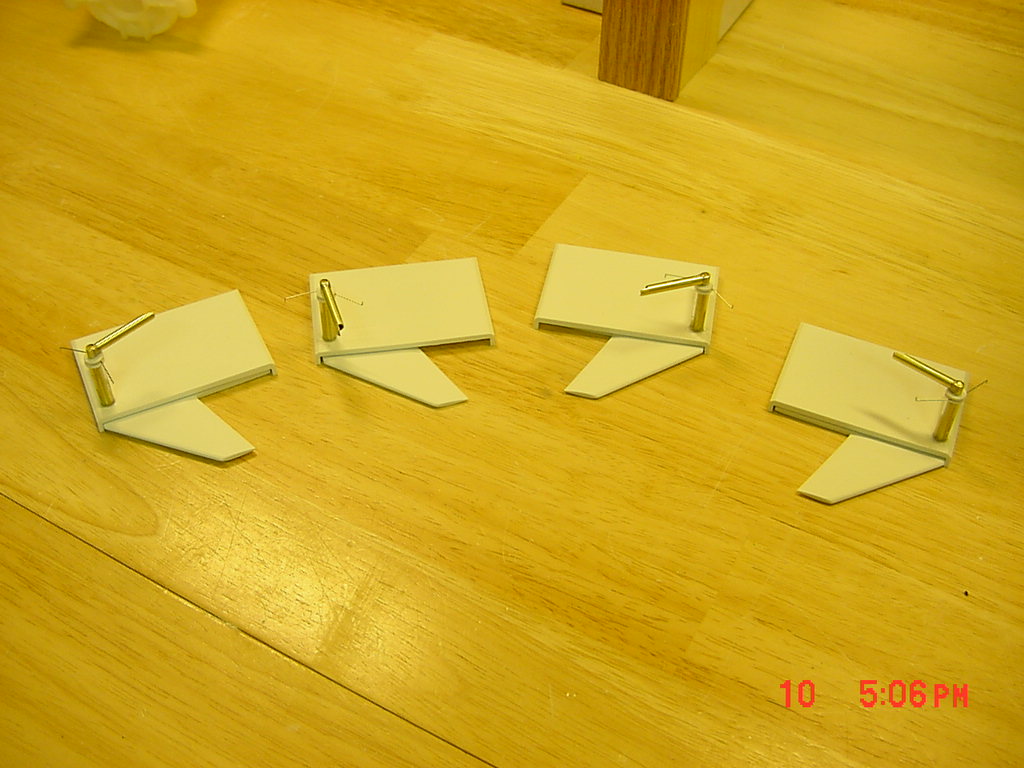
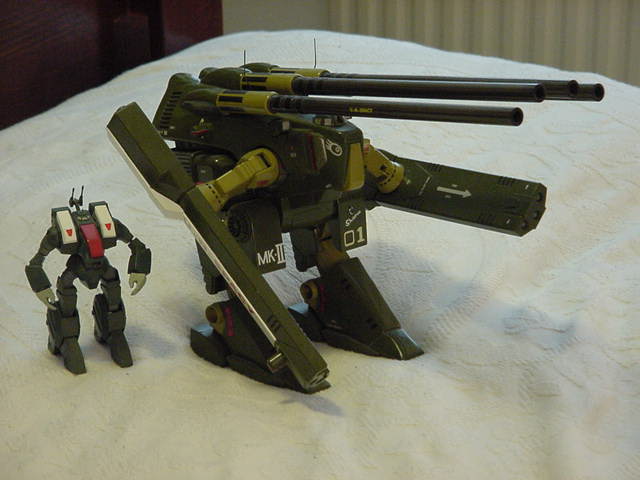
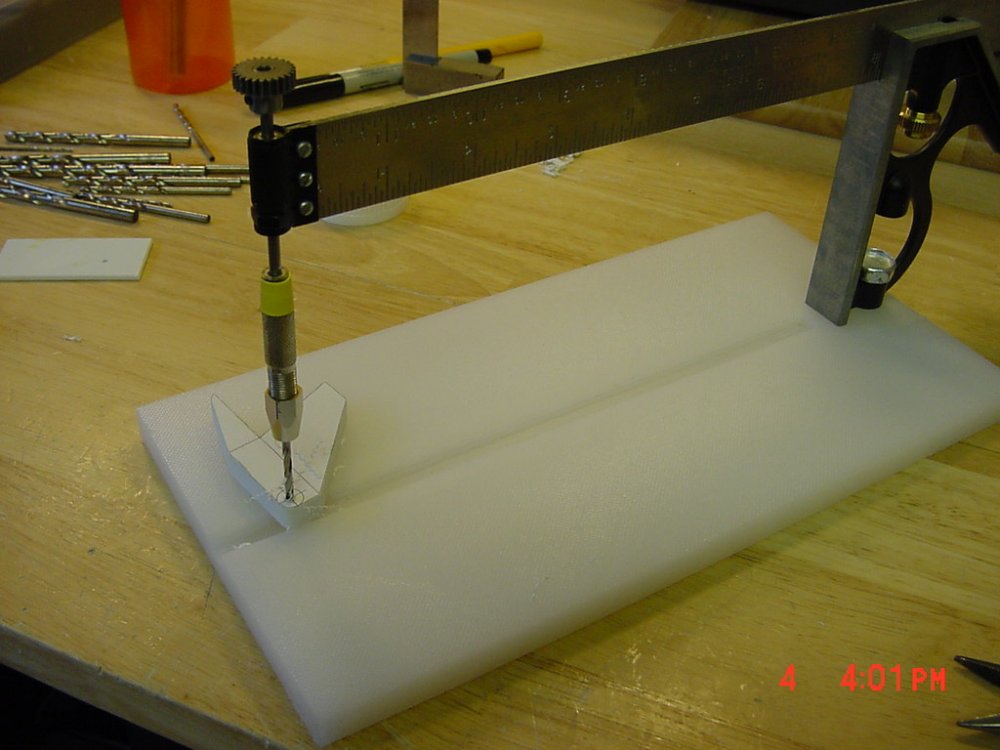
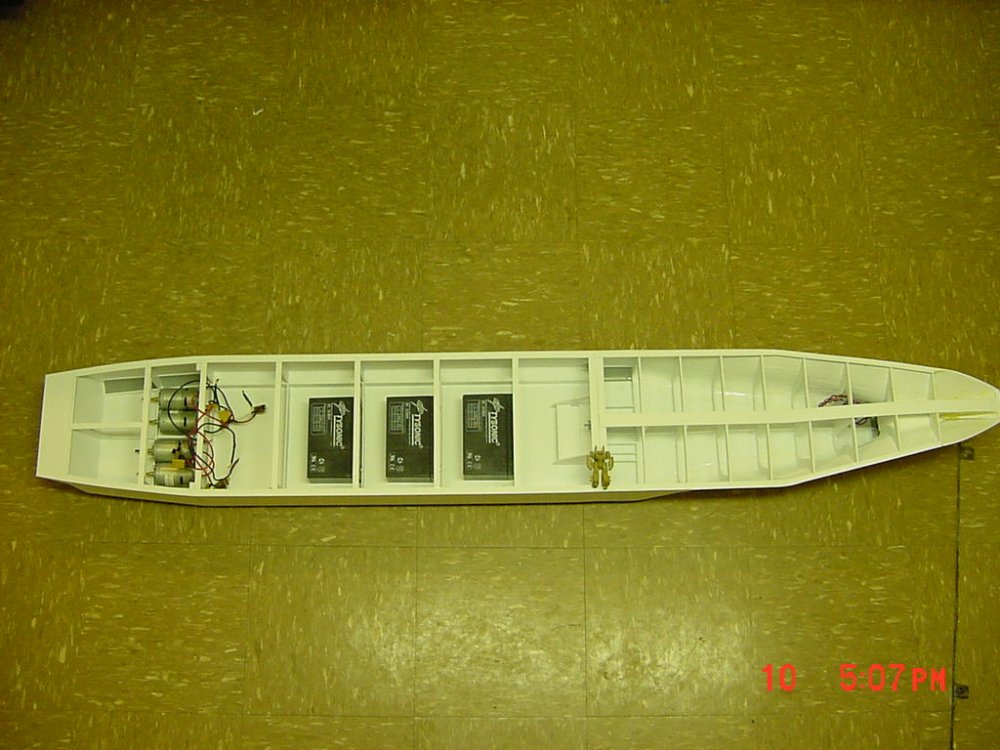
Hey guys, you all make me wish I remembered more from my high school chemistry class. Problem is all the chemicals I've used since then! Here's samples from what I've done so far: Drilling the stab's Stab assembly parts Sample parts layout I glued all the sheets together with super glue (a small bit) and pasted my printed blue print on them for cutting out. The one photo shows my make shift hand drill press for drilling pilot holes. The stabilizer assembly parts are shown loosley fit together and deployed. The "L" springs can be seen sticking out on the posts. I now have to make up the catches and solenoids to catch and release the stabilizer fins. The above shot shows the batteries and motors just stuck in there for an idea of size. Note the 1/200 armored VF-1J in the middle for size comparison (as requested). The motors will actually be in pods at the stern below the overhang (see side photos posted earlier for view). The motors are about "700-720" size. The average RC car uses a 540 size. That's it for now. I gotta get to bed. - MT

-
Can you say razor blade and small hammer? Hopefully the glue will give before your resin.
-
That's a roger on the foot art. It would look great. This a years old BAD photo of the 1/100 one I scratchbuilt (it's packed away still). Over the left leg "whistle" you can see the "Shamu" logo. A better decal on your foot would look awesome! You can't build something as big as that and leave it "plain" looking. I saw an awesome one years ago in "Little Tokyo, L.A." that was airbrushed with a mean tempered parrot face on it. Sounds funky in type: looked awesome in person! - MT

-
Dudes, I just read in Fine Scale Modeler where one guy had problems masking OVER his other paint jobs whithout removing the masking tape and tearing it up. It's slightly off topic, but here goes. He uses slightly damp coffee filter paper! Sounds funky enough to work too! Model Base Guy once suggested Glad "Press and Seal" too. - MT
-
I built the vinyl version a long time ago. I'd reccomend splitting the cockpit and fuselage parts and inserting a 2 to 3 mm thickness of styrene in there (smaller diameter) and then filling it in. Minimal sanding and loss of detail. The slightly longer nose would probably go un-noticed. That's what I which I had done. I had the same problem. - MT