wm cheng
-
Posts
4311 -
Joined
-
Last visited
Content Type
Profiles
Forums
Events
Gallery
Everything posted by wm cheng
-
I personally am a fan of paint washes - I find the Gundam Markers just too thick. Becarefull if you are doing it over the painted colours, the solvent to wipe off the gundam markers might take some of the coloured stripes off with it. With painted washes, you can make really light grey lines that are very subtle and can feather the "trapped" grease from around the coloured circular disc at the leg "ankles" which really adds to the look. I don't think you need to seal the oil wash in anything as long as you leave sufficient time for it to fully dry and cure (several days). However, I always put on a protective clear-coat to seal in the stickers on my 1/60 or decals on my 1/48s.
-

Is it absolutely necessary to primer resin kits?
wm cheng replied to Grayson72's topic in The Workshop!
Yes, definitely scrub them down with dish detergent (without lotion) and a toothbrush. I have used a Tamiya spraycan primer (fine) it goes on beautifully smooth. Lets see the progress shots! -
Hey Valkyrie... are you holdin out on us? Come on lets see them all - even though I can't build right now... I still need my fix of models - I need to rely on you guys for the time being.
-
Wow!! Really great work Grayson!! You can really see the improvement in the very few that you have built already. This is your best work thus far. Flawless paint scheme - I like the fact the trainer is not so weathered. You've really inspired me to think about my VT-1, I've been holding back till I come up with a good way to model Mimay in the back with her helmut off yelling at Hikaru Anyways, fantastic work Grayson - keep it up!!
-
Woohoo!! Thanks Valkyrie, I was really anxiously awaiting a review of this kit - hope it makes it over to Canada soon! Can't wait to see pictures. So what other variants or markings do the VF-0S have other than Fokker's? Do the decals and instructions provide alternate schemes? I actually don't like the wind inserts and prefer the two halves, the inserts have to fit just right for the oil wash to work properly, otherwise the gaps might not be even all around. Thanks, Valkyrie
-
Excellent work Jung I just love seeing your mods - truly amazing! I would love to see them in person someday. Maybe we can get together at AnimeExtreme and hold a little Toronto Macross Con at Silver's place (when it gets warmer!) Meanwhile keep posting your beautiful Valks - I love them!!
-
Welcome back, glad to see people picking it up again! Good effort! Hey did those stands come with the kits? Can't wait to see more - keep it up.
-
Yes, its excellent, I may breakdown and buy one. I just know that if I do, Hasegawa will put a kit out (that happened before with my YF-19 and YF-21). I just find the porportions a bit odd with the Club-M kit (no crit on Valkyrie's excellent job) the nose seems a bit thin and long (needle like) and the engine pods seemed a bit thick. It would be nice it the porportions and engraved details were more aircraft like - Hasegawa had done an amazing job of making the anime realistic!
-
Any updates Valkyrie? You've wet my appetite!!
-
Good Thread! 1. 1/72 Valkyrie Booster with launch vechicle (to fit Hasegawa) 2. 1/72 Launch Arm with portion of launch bay (more accurate than available) - although we may get that soon from Valkyrie... 3. 1/72 VF-4 / VF-X (by Hasegawa) 4. 1/72 VF-11 (by Hasegawa)
-
Wow!! How did I miss this... Great work GunnerX - realy nice subtle weathering. Keep the building comming and posting - I love looking at the works of others (ahh, even if I'm working and can't build right now )
-
Hi oh! Thanks for all the kudos, unfortunately, the first photo with the canopy down was not built by me. The second photo was of my model (can't remember who did the photoshop work though), but I did cut the flaps and repositioned them down which is not the case in the first photo.
-
Sorry to hear about the yellow Mechleader, Any closeup photos for me to see? My models are in a pretty bright room and sometimes even gets direct sunlight in the winter! and they are still fine after 2 years with this technique. I am wondering, did you let the oils dry before sealing them in with the clear coat (I let mine dry at least 24 hrs) Did you wipe away all the excess? What kind of solvent did you use to thin the oil paints - was it low odour varsol? Maybe you should try a different thinner - get a scrap or cheap kit and re-do the panel wash and let it sit to see if it does it again. How long did it take for the yellowing to appear? I have heard somewhere that Future could yellow slightly over time with direct exposure to sunlight. Becareful when you thin the oils down, if you thin too much the colour might break up into little particles (cheaper oils do this) you don't want to go that far.
-
Woohoo - that's a date on my calendar!
-
These little compressors are cheap and cheerful - they do the job for the price and are a good beginner. However, they do heat up, and cannot be used continously, depending of capacity, they must be turned off every 15 minutes or so - its a bit of a hassle to pause your work if your compressor overheats or constantly bend down to switch it off when you have a model in one hand and an airbrush in the other (best to get a compatible foot pedal). Plus if you pause too long, the paint in the airbrush dries and gums up the internal workings of the airbrush. But for small jobs, they are great, and a good way to start - especially that they are oiless. I would invest in a really good regulator though - and that idea of a really long hose sounds like it might take some of the "putter" out of the airflow from these little compressors. Thayer and Chandler airbrushes are good, they are the same makers as Badger.
-
I've used a crappy old refridgerator compressor I bought at the junk yard for $5 and retrofitted it with a decent moisture tap and regulator for a good 10yrs - boy they really made me hate my airbrush (mind you I didn't use my airbrush all that much then!) However, I have an italian made SilAir silent compressor now with a gallon reservior and auto-shut-off. It is like night and day, like moving from an KIA to a Mercedes now - and I must admit, I enjoy using the airbrush and in fact do airbrush more than I did when I had the crappy old compressor. Mind you, I spent over $600cdn on this puppy - but its designed for the artist/illustrator use. I do not recommend the hardware type of compressor since they often use oil as a lubricant in the pistons (in fact the illustration models use a diaphram type mechanism - less "puttter" vibration in the airflow than pistons) which can occassionally travel out through the airline. Good if you have air-driven tools that need the occassional lubricant - bad if you are doing detail model work! Additionally, the reservior type (which is essentially a holding tank - you airbrush out of the air in the tank, the compressor automatically senses pressure loss in the tank at a given threshold and kicks in silently to replenish the tank) allows absolutely even "non-puttering" consistent airflow essential to eliminate splattering and maintaining even lines. In fact, sitting next to the compressor, I don't even know when its on (I've accidentally left it running for days). I know that its a pricy hunk of change - but you get what you paid for! There are smaller cheaper ones, but I would recommend ones designed for illustrator's purposes with enough capacity to provide even airflow from 10-30psi. Remember to get a moisture tap with the air-regulator if you live in a hot or humid part of the country (I live in Toronto Canada, and often see condensation in the clear window of the moisture tap) and I would recommend a oil trap if the compressor is oil driven or lubricated. Good luck.
-
Hey Valkyrie, No exposed magnets, I mean they should be under the plastic inside the booster housing, so the magnets will have to pull through the thickness of the styrene plastic (so it would lessen the attaction and not pull our precious models apart). Don't the connection points of the claw move farther forward, I thought those red decals on the top edge of the booster packs delineate the connection points to the launch arm.
-
I personally use my old (15yrs old) Badger 200NH single action - its been great! Its really simple and easy to clean. With the fine head (IL) attachment, you can get a fairly fine light line which I use for my post-shading. The NH is bottom feed which allows me to use a colour cup as well as small bottles which is a plus. I would invest in a good quiet compressor with a top notch regulator though. Good luck
-
I get them via Lee Valley Tools up here in Toronto, there are a variety of sizes, I'll look into what the smallest ones are this weekend and get back to you. I was thinking maybe four magnets (they are round kind of like little watch batteries) - two per booster - or three one per booster and one underneath the backpack - it would be better if we knew what the points of contact were underneath the "claw". Maybe the claw portion would only have a metal plate, and the magnets are only in the model boosters? Then you wouldn't really have to hollow any resin out. I love the traffic light idea too.
-
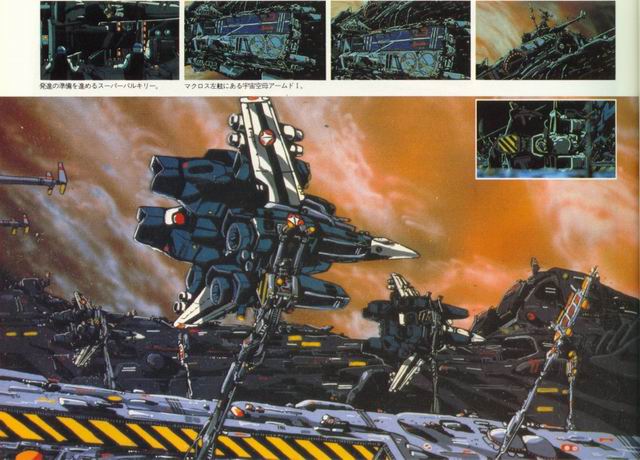
Here's a shot of from DYRL - I'll look to see if I can find some lineart.

-
Yeah, I too think its a scratch build. I think the magnet idea would work (these rare earth magnets are crazy strong) I don't think we need to drill anything, I was just thinking that it would be epoxied underneath/inside the packs. So there would be a layer of styrene plastic between it and the magnets in the arm part. They are so strong, I believe they will hold through the plastic without actual magnet to magnet contact (actually, I think if there was magnet to magnet contact - we'd never get the Valk or packs off without breaking the model kit!). Or I wonder if that photo-etched plate on top of the packs would be magnetic - maybe all we need is a magnet on the arm part itself. But you are right, the packs on the model are fragile, but the model is pretty light, and I held my model by the packs and shook it abit on the angle and it seemed fine (I always, scrape the paint away from the contact areas when I use a "solvent" type styrene cement on joints that will be stressed though). I don't think you need the screw to go though the back pack (IMHO). Actually, maybe you don't have to embed the metal tube at all, the scratch build has it exposed, maybe we should only resin cast the ends. The tubes are pretty common at most hobby or train shops, maybe it could be a two tube system like a 1/4" diameter brass tube on the bottom teamed with a 1/8" diameter tube up top - bonded together it would be quite stiff. Interesting to see what happens, keep me in the loop.
-
Here, here, I'll definitely take a few off your hands.... Looking forward to this with great anticipation!! Ever thought about putting/embedding rare-earth magnets in the arm which can be paired up with rare-earth magnets that can be hidden in the Hasegawa's fast packs (underneath the plastic) just a thought Please keep us informed.
-
You said it Valkyrie! It sucks to be broke (otherwise maybe) too bad there are the crappy character designs as well. What is it, are they originals, they seem to be loose pages... Thanks for the line art pages, they are quite cool, love that FFR-31!! Can't wait for a Bandai 1/100 version of that baby.
-
Hey Phatslappy, Always nice to know one has fans! Thanks so much, I really appreciate it. Feel free to ask away! You could also PM me too. Come on, lets see more modelling... That Yukikaze by LTSO was great!
-
Beautiful mechanical designs!! Any mechanical art books out there yet on this series?