wm cheng
-
Posts
4312 -
Joined
-
Last visited
Content Type
Profiles
Forums
Events
Gallery
Everything posted by wm cheng
-
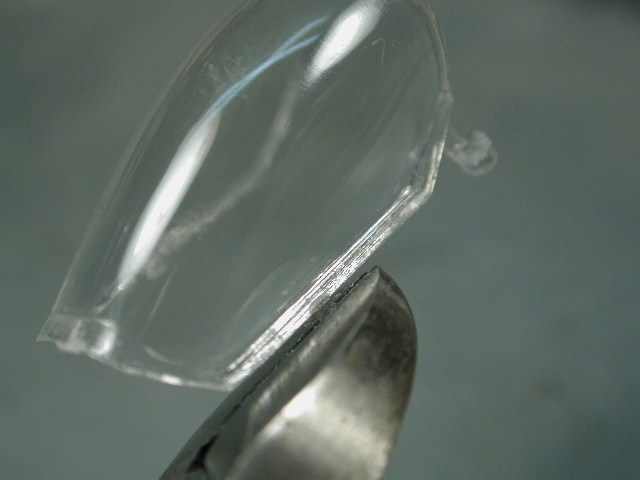
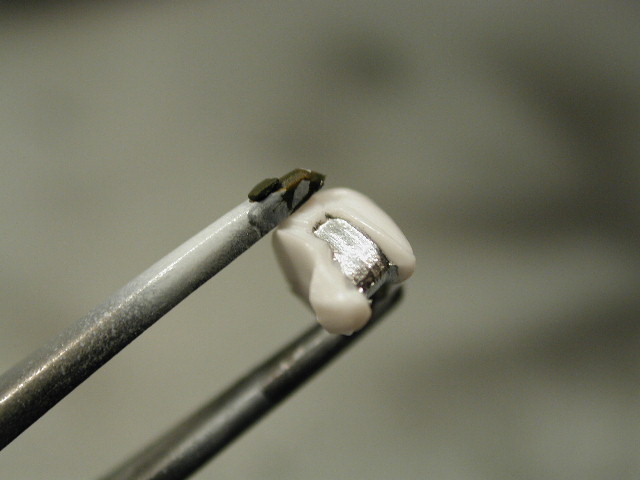
Here's a close up of the seam.

-
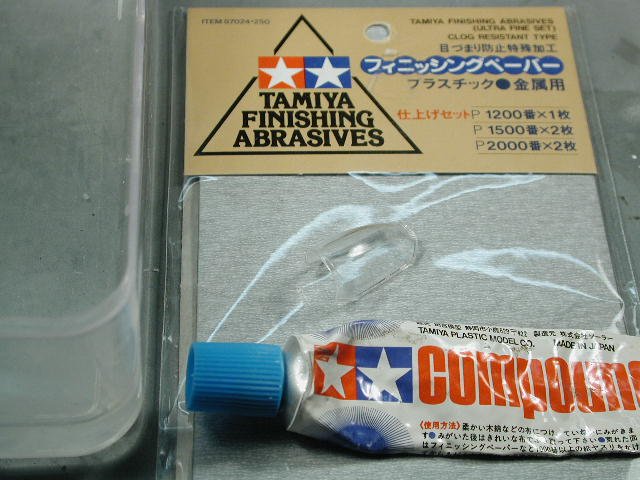
A few updates today - I thought I'd outline the canopy seam removal that so many people seem to be worried about on most of the Hasegawa kits - its not a big deal. As most of you know, there is a longitudinal seam down the canopy as a result of a 3 part mold to achieve the "bubble" effect of the canopy. This bubble effect results in an undercut condition which makes it difficult to remove the piece after molding in a traditional 2 part situation. Most of the previous kits (20 yrs ago) gave us an incorrect canopy profile - so I'm not at all put off by this new process since it gives us a much more accurate to line art canopy and plus, it looks more like real modern day aircraft. Here are the items I use, a small container of water (essential as a lubricant for the sandpaper), the Tamiya fine sandpaper pack (you can see there are 3 grades in this pack, 1200, 1500 and 2000 grit) and lastly, Tamiya polishing compound (its like a toothpaste whereby a fine abrasive particle is suspended in a paste).
-
I skipped a few steps to see if these sheets will interfere with the body attachments later on and trim them down accordingly. I am going to have to let the glue dry tonight before I can proceed any further. I have also put a black artist oil paint wash (thinned down with low odour varsol) in the cockpit and pilot. I will also let it sit overnight before I wipe it down tomorrow. I think I will sand and polish the canopy next to get rid of that seam before I try to epoxy the metal rod. Thats it for tonight.
-
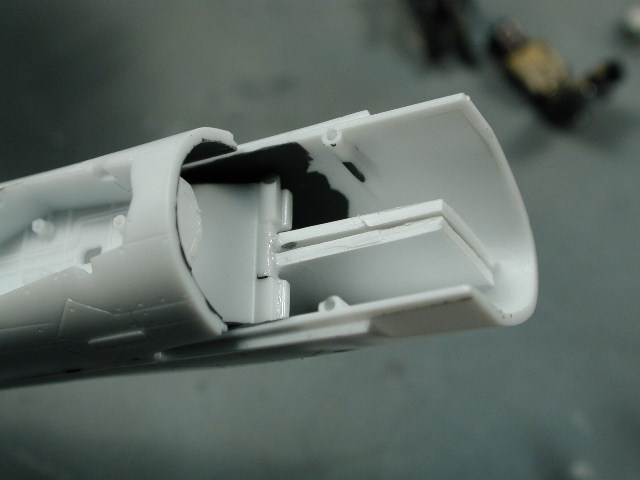
Here is the underneath, I kept testing it with various sizes so that these sheets wouldn't interfere with any other parts later on in the construction process.
-
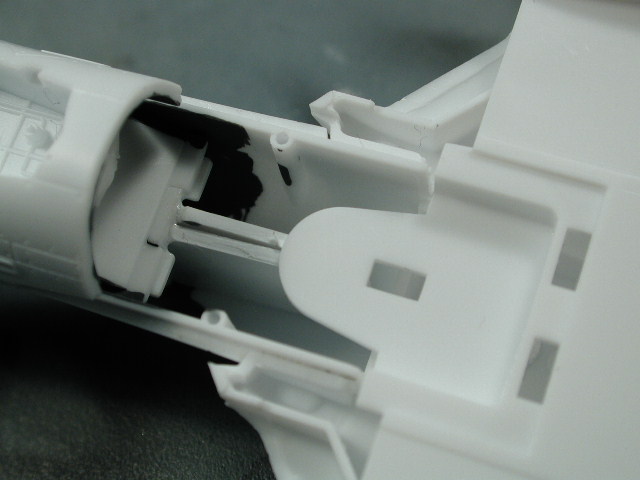
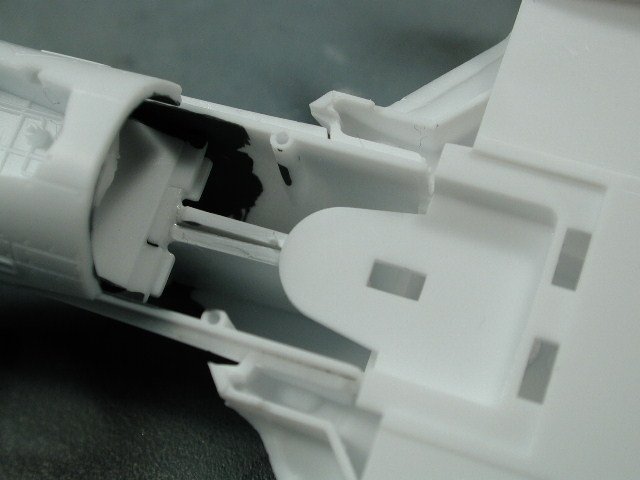
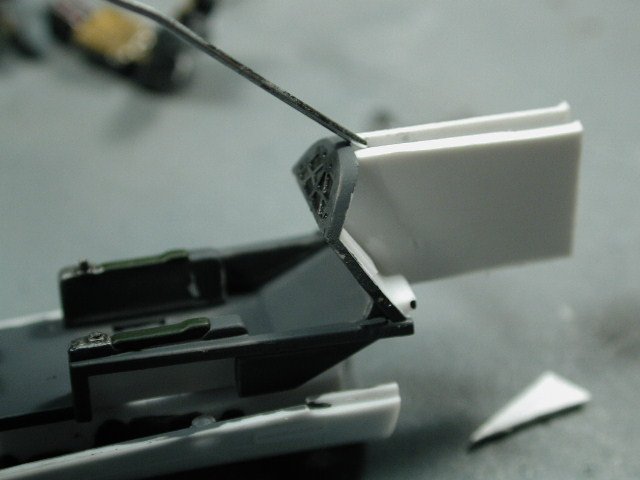
Here is my first trial attempt at a sort of "hinge" I thought that with that space between the rear bulkhead and the fuselage, I might be able to epoxy a metal rod (paperclip) to the rear of the canopy, then this extends down into the body being sandwiched by these two plastic sheets which should provide some friction to hold the canopy up. (Wish me luck )
-
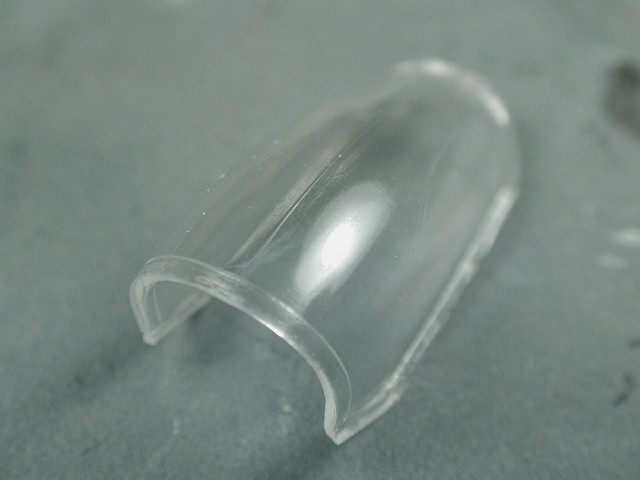
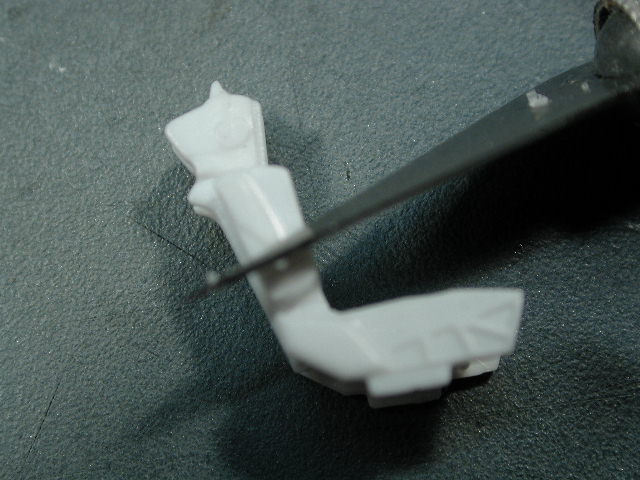
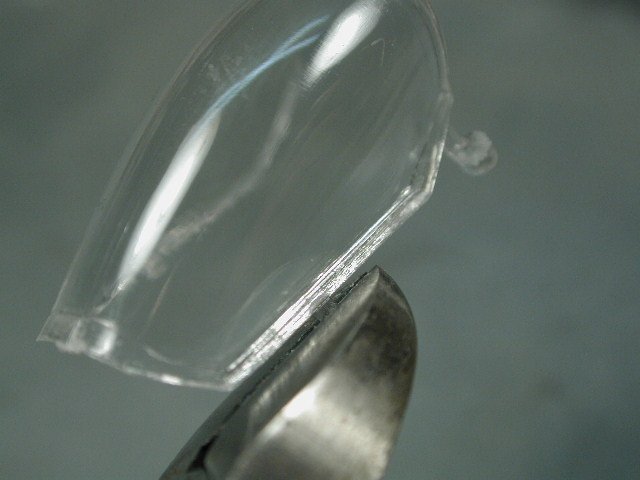
I'd thought I get the canopy out for now to see how it will sit over the cockpit to start planning for the "hinge". Note the clear plastic is much more brittle than the opaque stuff, becareful when you are removing it. Try to trim/cut as far away from the piece as possible. I would also suggest that you trim along the flat side of the sprue with the length of the canopy (notice that the cutters are parallel with the canopy frame) this will minimize any "crushing" that might occur with the plastic.
-
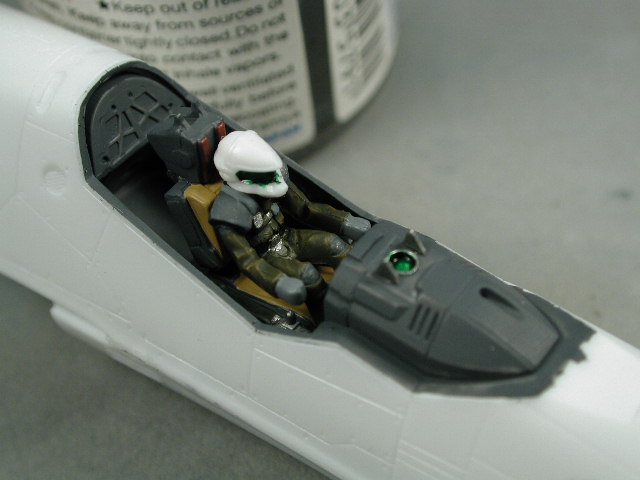
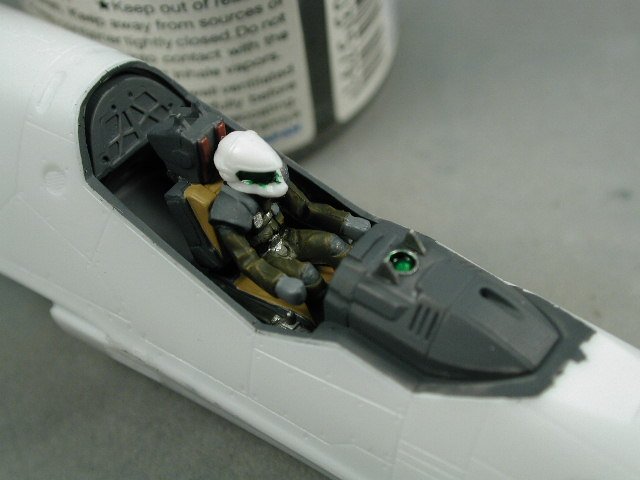
A little test fit before a dark oil wash to pick out the crevasses. I need to see where the helmut sits so I can plan for the overhead yellow & black ejection seat handles. I am planning to make them out of wire.
-
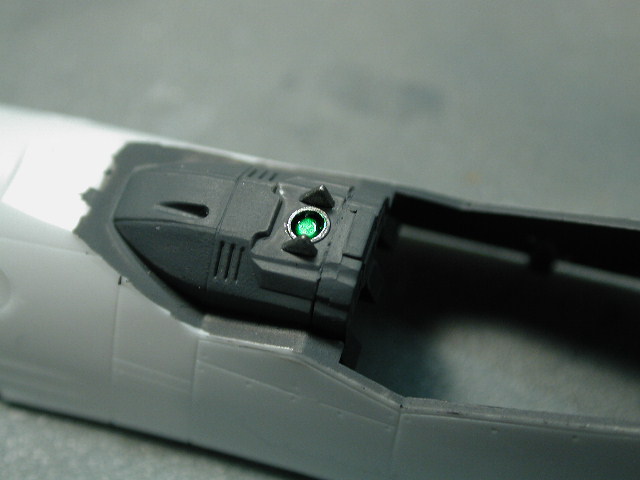
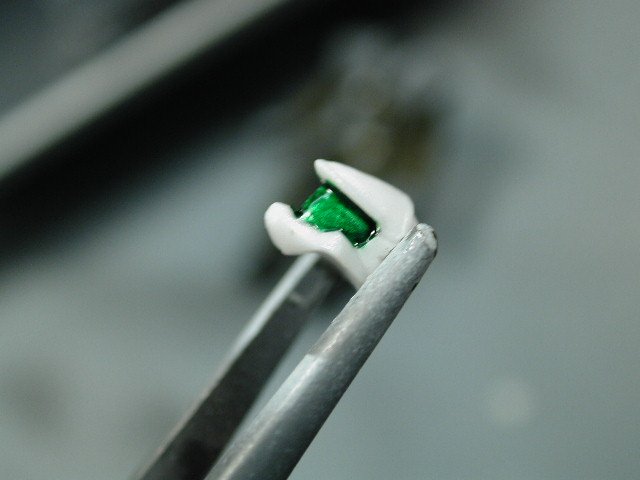
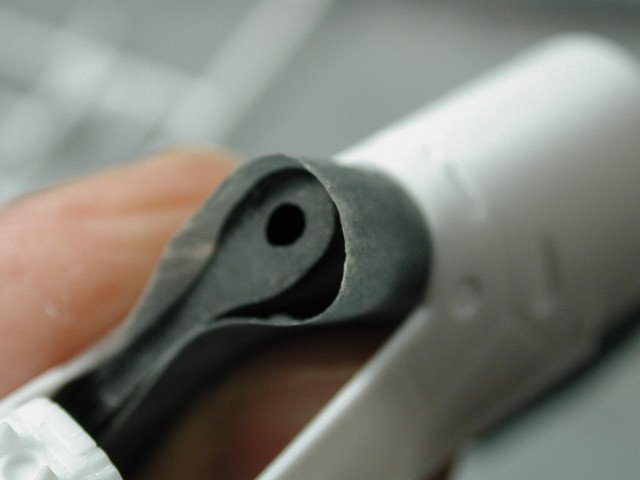
Here's the same trick done to the HUD projection lens, I'll put a drop of white glue or Microscale Krystal Keeler over top when its dry to simulate the glass lens.

-
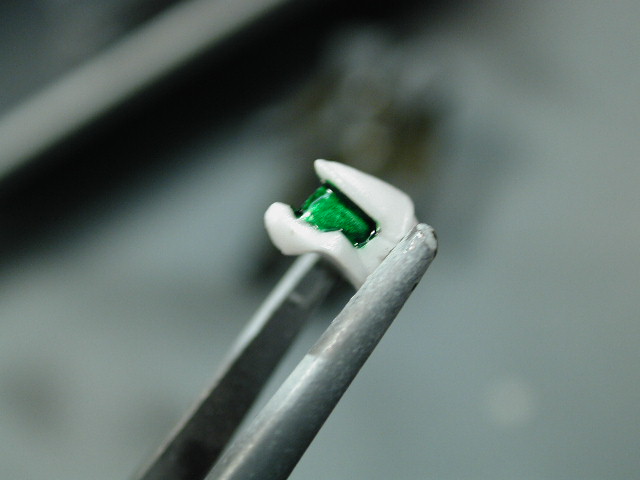
Here's the green transparent colour on... I was a bit anxious, so I am just using the white of the kit as the white of the helmut.
-
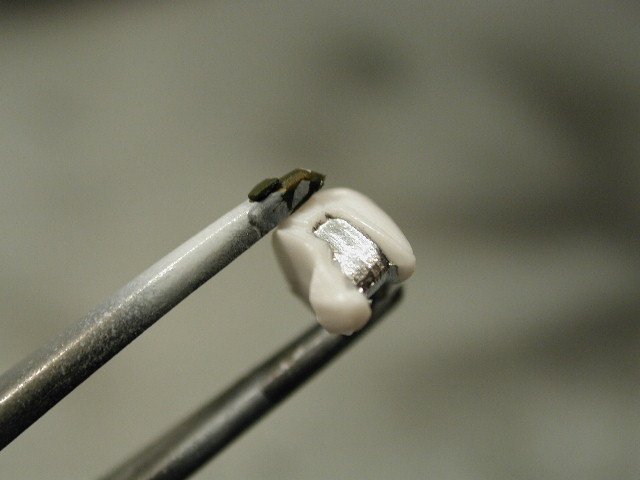
I'm using it for the pilots visor, I will put a clear green transparent colour over top of this - the silver undercoat and layering makes it look more reflective.
-
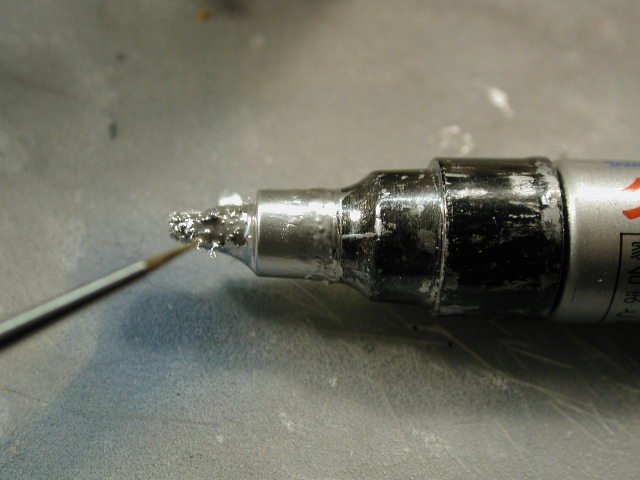
Here's a trick I use to get a good chrome silver going. I have yet to find any paint that is a reflective as this. I use a Tamiya paint marker (its a laquer I believe, because it cleans up with Mr. Color solvent) and I shake the marker with the cap on, and I use the brush to dab at the tip to get some silver.
-
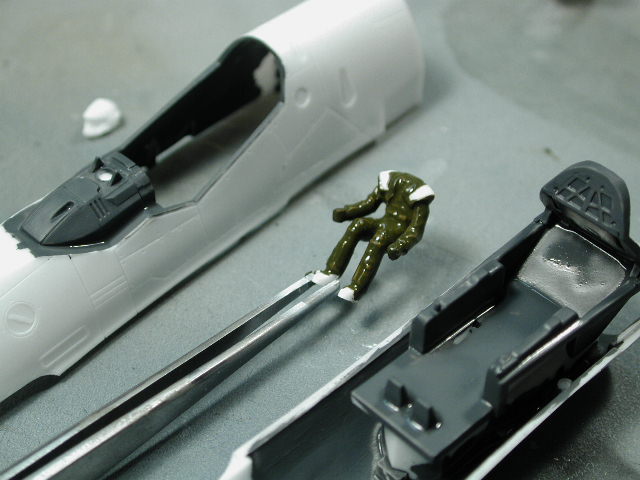
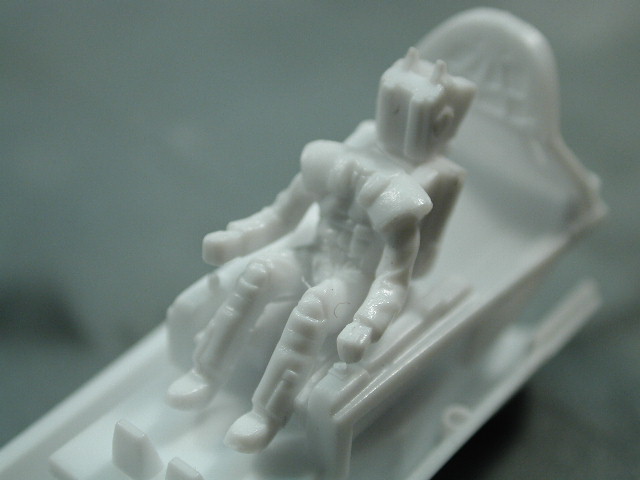
Hey got a few hours in today... Here's the pilot with a few more colours hand brushed on after looking through the OVAs again. You can see I chose to go with the arm rest for now. I am leaving the area behind the seat blank for now until I can find a way of hinging the canopy - I don't want to put anything in the way of that for now.
-
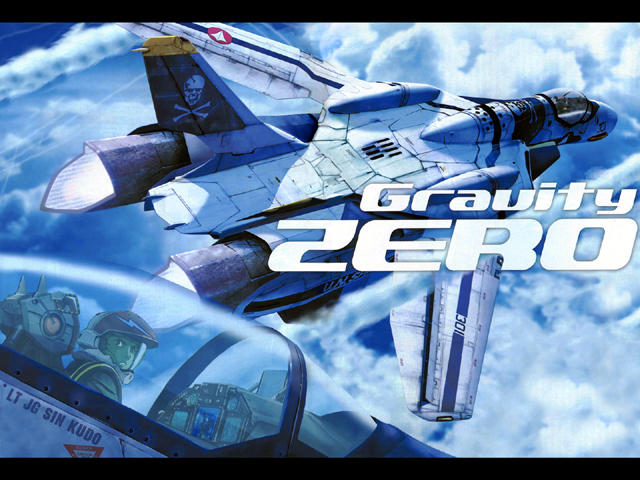
Can anyone tell me if this reference picture is a painting outside of the actual anime or that the finish on the aircraft is actually indicative of the CGI maps in the actual anime?

-
Hey all, At it again - but this time it will be much slower. Only weekends and maybe a few hours at night during the week - so bare with me, it will be a slow ride this time. http://www.macrossworld.com/mwf/index.php?showtopic=5881 Thanks all.
-
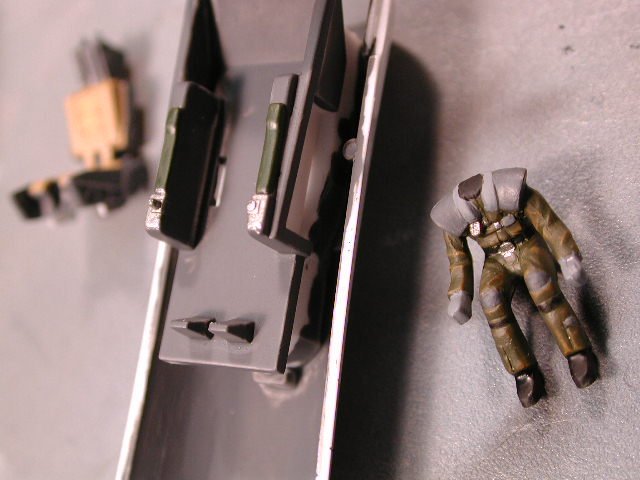
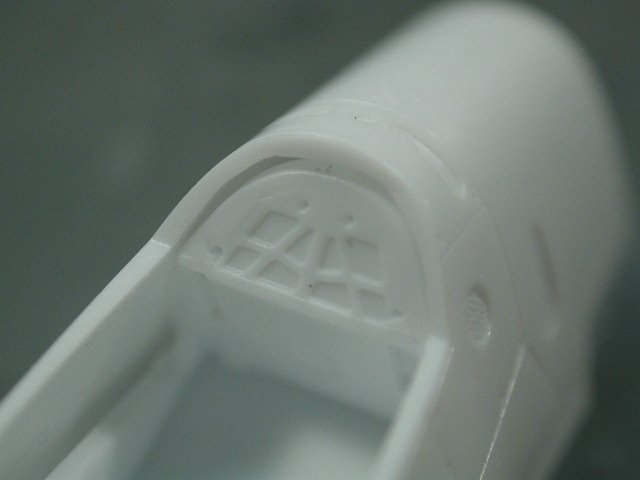
I just hand brush painted these parts - the paint is still wet. I used Tamiya olive drab for the initial coat on the pilot and dark grey for the cockpit interior. The detail on the forward control housing is really great - it even comes with a HUD glass and decal for the HUD. I plan of painting the HUD projector silver, then green transparent colour with a layer of Tamiya smoke over it - it provides a convincing lens effect under the HUD. I'm not sure what to do with the side panels yet - I put photo-etched parts on my previous VF-1, until someone pointed out to me (and correctly so) that they were just green armrest - so I would assume the VF-0 to the be same if not simpler. That's all for now folks, spent most of the day admiring the parts and pouring over the instructions - trying to form a plan of attack Good night for now.
-
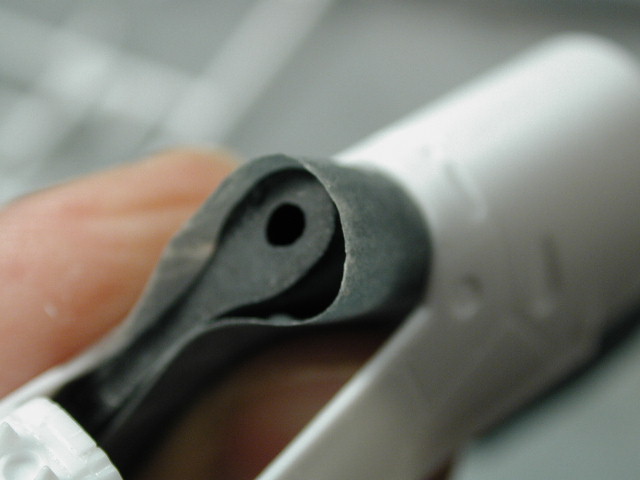
Tough shot... trying to hold it in one hand and holding the camera in the other Here's a shot with these rubber thingys used to help hold sand paper (like flexible sanding blocks) I got a while ago from a woodworking shop (for those of you in the Toronto area - its called Lee Valley Tools - great place, they have the tiny rare earth magnets there too) They come a package of 6 or 8 with different profiles to them, some sharp wedge-like to get the sandpaper into tight spaces, and others round like this one allowing me to shape the opening to follow the curve of the rear bulkhead of the cockpit tub.
-
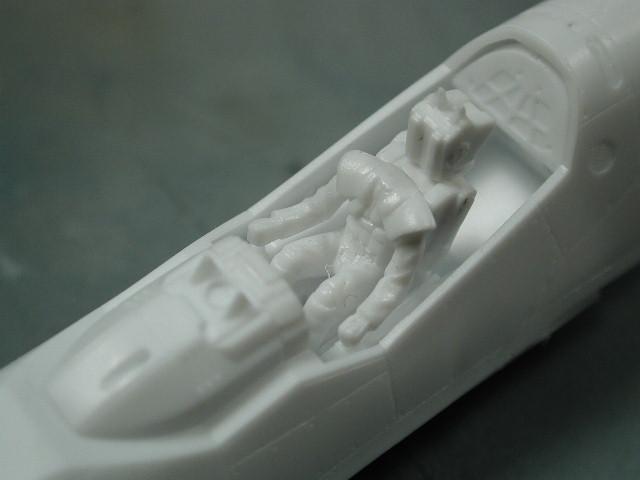
Pretty roomy cockpit eh?? Look at all that space behind him - I guess I've got to break out my spares parts box and start filling it with "gak". I've got a bunch of landing gear parts and actuators from other VF kits where I retracted the gears that I can throw in there. What have some of you done with this space?
-
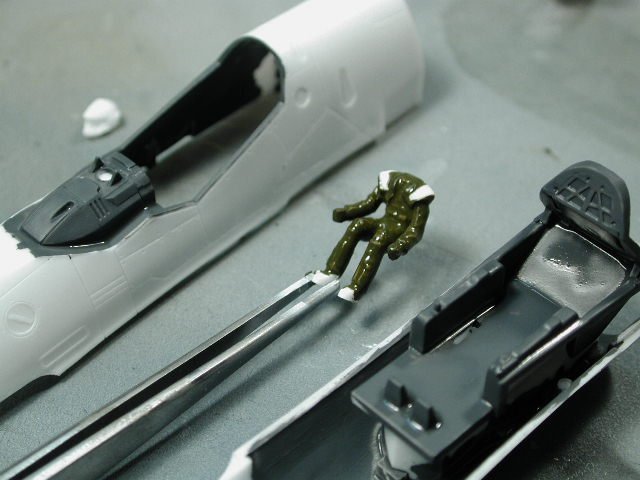
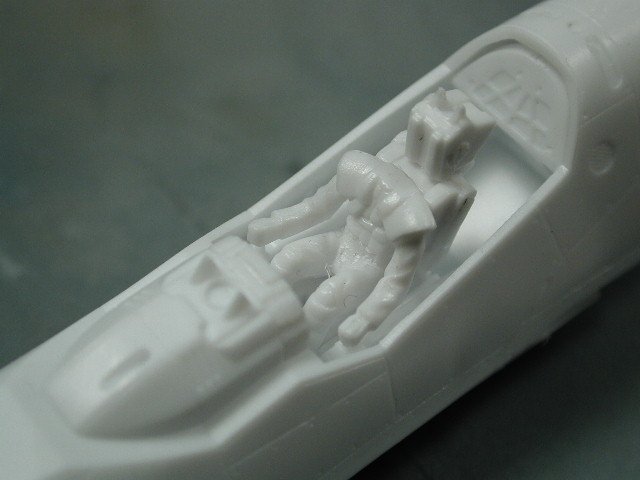
Here is a test fit of the pilot, wierd that the pilot isn't properly contoured to "sit" into the seat, the legs seem a bit high - I don't think you will notice it once he's inside the fuselage and pushed back against the back rest. I tried to glue the arms so that they are assymetrical - it gives a bit of life to the pilot - same later on when I glue the head on at a slight tilt turning sideways slightly. I always try to put a little movement into the pilot. It cut the left controls down while leaving the right ones they way they are. I'll have to look for some small wires to bend into those rectangular emergency pulls above the pilots head.

-
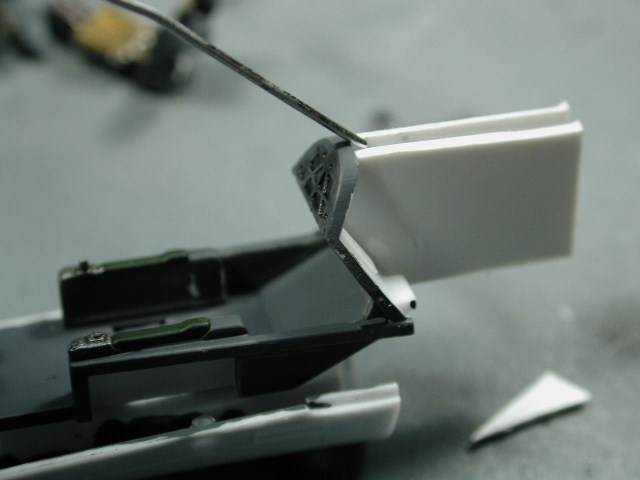
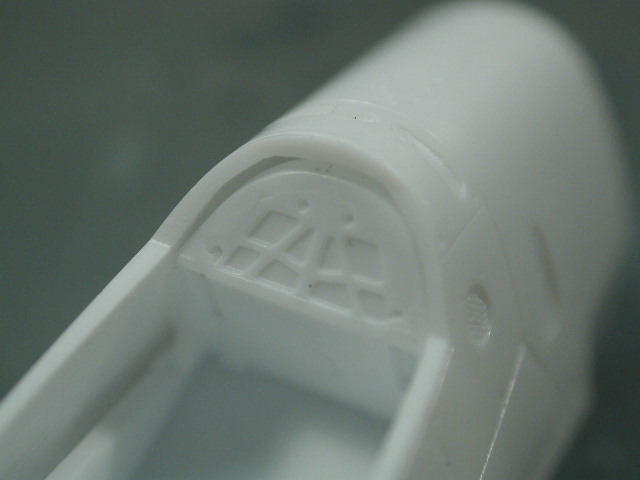
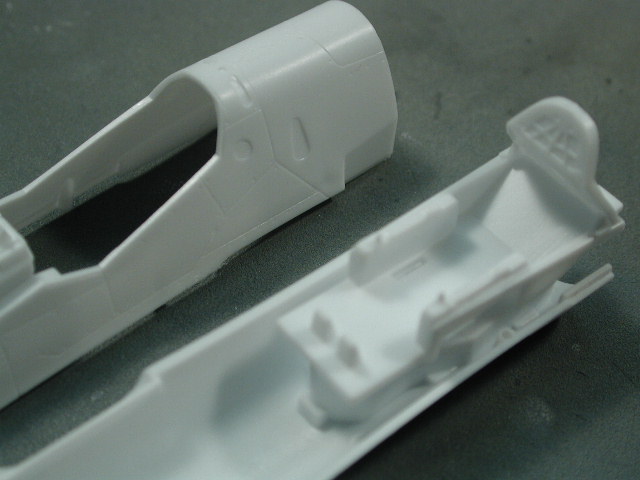
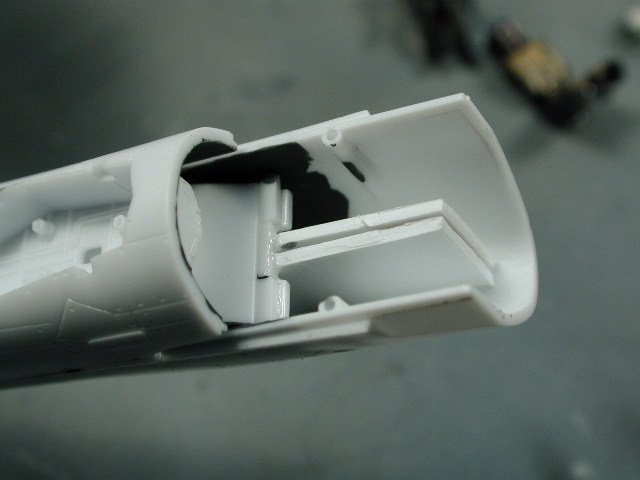
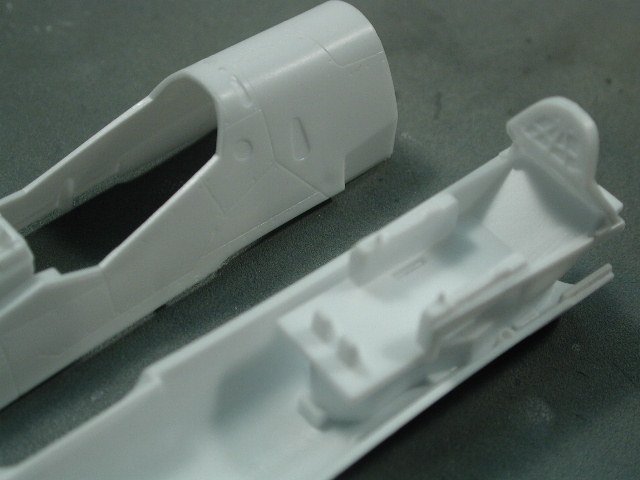
This closeup shows that the back of the cockpit tub doesn't fit snuggly with the top of the fuselage halves. Its not a bad thing here - I don't think they were meant to attach - having a layered look with a dark reveal in the middle might be nice. However, the thicknesses of the top half the fuselage isn't consistent - so some sanding will have to occur to provide an even opening all around the curve of the bulkhead.
-
I think its important to not follow the steps to the letter, you should pre-build assemblies in your mind first - trying to identify any problems like hard to reach areas before you actually go ahead following the instructions. Always test fit as much as you can. I decided to glue the cockpit tub down first and do a dry fit of the fuselage halves. This helps me to identify how much of the inside grey one needs to paint which is visible from outside the cockpit.
-
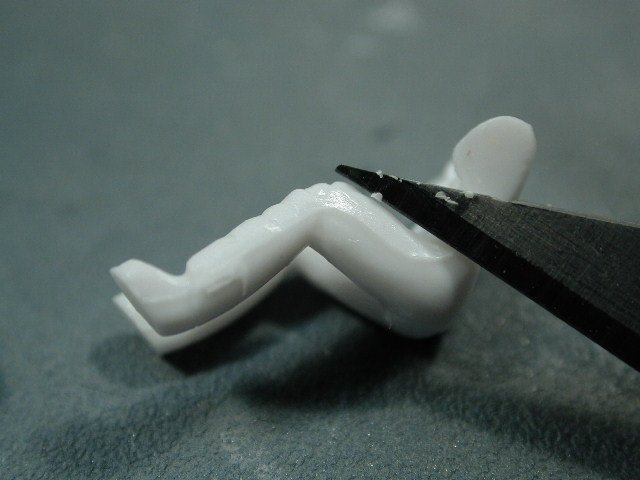
Sorry for the fuzzy pic - here's another seam to be scraped on the pilot.
-
Hi all, Well, I just couldn't wait - this new VF-0 kit looks too good to pass up. This will not be my usual 2 week progress - fortunately I am working now, so it will be probably one weekend day and a few hours in the evening if I can sneak it in here and there. This build up is dedicated to Myersjessee. It was through his generosity that I recieved this kit. He kindly donated this kit for me to build here at MacrossWorld to share with you all. I would just like to say thanks again, and that I appreciate all the kind words and feedback I get from this great site. Now on to the kit... Thanks to Valkyrie, I won't have to do a kit analysis - I think he thoroughly described the kit very well. Don't be discouraged though, it doesn't seem to be quite as tough as it may seem (or so I say before I actually start - lets see what the verdict will be when I finish ) The molding is as beautiful as Hasegawa ever is, however, I feel its slightly "soft" and there are a few minor panel lines which either terminate at nothing or run pass some other lines. It feels a bit rushed for Hasegawa's standards - but still miles ahead of any Revel or Monogram type kit. I can't wait to get into the paint and weathering of this baby - I think I can finally go to town on her - Macross Zero seems so much dirtier and the CGI texture maps shows all sorts of worn edges and streaks. By the way, I would love any and all reference for the finish of the aircraft or pilot - I was going to go over the 3 OVAs this weekend to see if I can get some decent captures - but if you guys have anything, it would help. I think this one will be with the gears down, I'll try Valkyrie's magnet idea on the fast packs and hopefully devise some way of either hinging the canopy or allowing it to be displayed in either the open and closed positions when I am done. I would like to open the airbrake on this baby. Here's two questions for David Hingtgen (our resident aircraft guru) - the circular impressions on the airbrake, are they supposed to be "holes" (like the old Dauntless flaps?) that go right through - if I display the airbrakes out, should I drill those out? Secondly, do the VF-0 have those sliding folwer flaps like the VF-1? The flap area seems so large on the VF-0 that it doesn't seem to make sense for them to be fowlers - so are they just regular flaps. I'd love to do something with them, but I don't want them to interfer with the swing of the wings. I'll start with the nose/cockpit area. Here are the seats, not much as to be done here except scrap the delicate mold seam from the sides of the chair, I just use the exacto knife and scrap across it gently a few times to take the excess seam off.

-
Hey, you've sucessfully hijacked this thread Lodizah! Great work - very fine looking model so far. She's a beaut! How about some weathering? More pictures please... Hey Valkyrie, how the progress on your baby! we're still interested - I might join you very soon - I've just recieved my VF-0 via the very generous Meyersjessee!
-
Nice build up so far Valkyrie (I am vicariouly living through you until this kit comes to Canada!) I am actually off from work for the time being, so I can start one of these babies - but I lack the kit for the time being. Great work, keep it up! What is ELO? or Mori mori?
-

Is it absolutely necessary to primer resin kits?
wm cheng replied to Grayson72's topic in The Workshop!
Since the resin parts are much heavier, I usually drill one or several tiny holes in the connection points (which are always too small of surface area for the epoxy) and epoxy metal pins (I rough them up wth sandpaper, they are usually paper clips) as re-inforcement to help hold everything together.