Cent
-
Posts
806 -
Joined
-
Last visited
Content Type
Profiles
Forums
Events
Gallery
Everything posted by Cent
-
I didn't use magnets, the kit was super tight as I was assembling it already. Squeezing the parts together and pushing them up into place, they locked and held just on grip and stiffness. The tightness is enough to scrape paint off if you're not careful. I'm not sure if it was because it was the first time assembling it (I didn't do preassembly) or if the several coats of paint increased the tightness, but magnets are completely unnecessary for it. I can't even raise the legs to a higher position if I tried, its already pushed up as far as it can be against the body, and doesn't sag at all.
-

Official Bandai 1/60 Scale DX Toy Thread Ver.6
Cent replied to Duke Togo's topic in Hall Of The Super Topics
eugimon [yuu-jee-mon] - adjective 1. Characterized by indecisiveness and the ease of being persuaded both ways. Self-opinion generally lies in that of the previous poster. Also seen as a tendency to be parted from one's own money foolishly. -
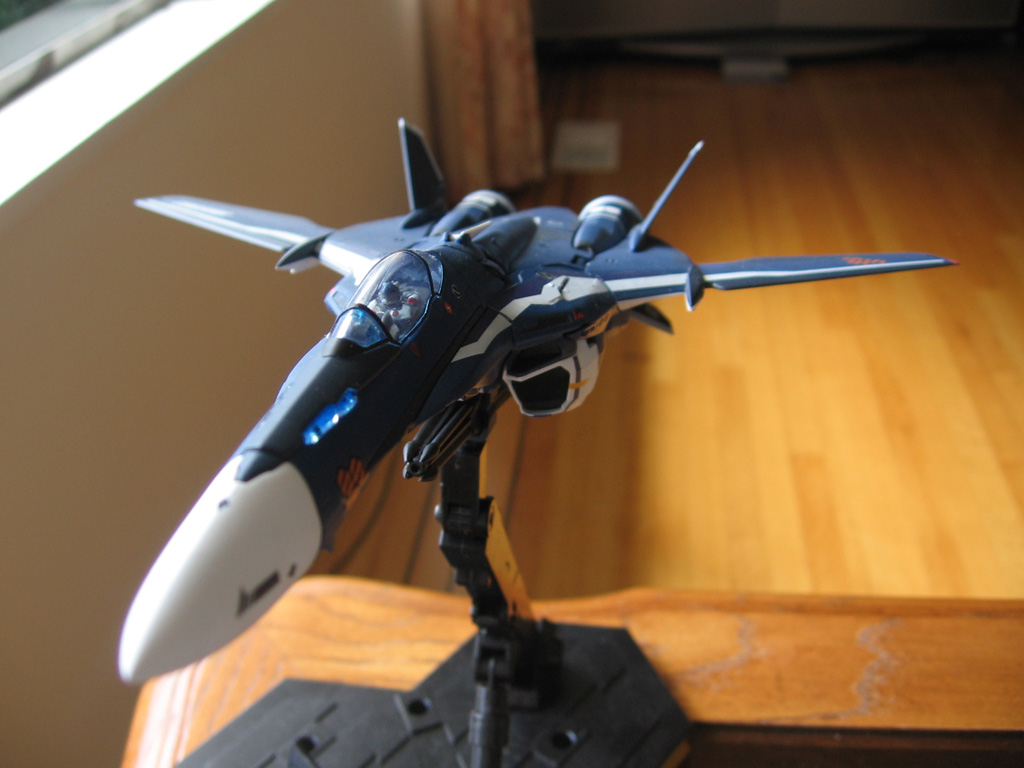
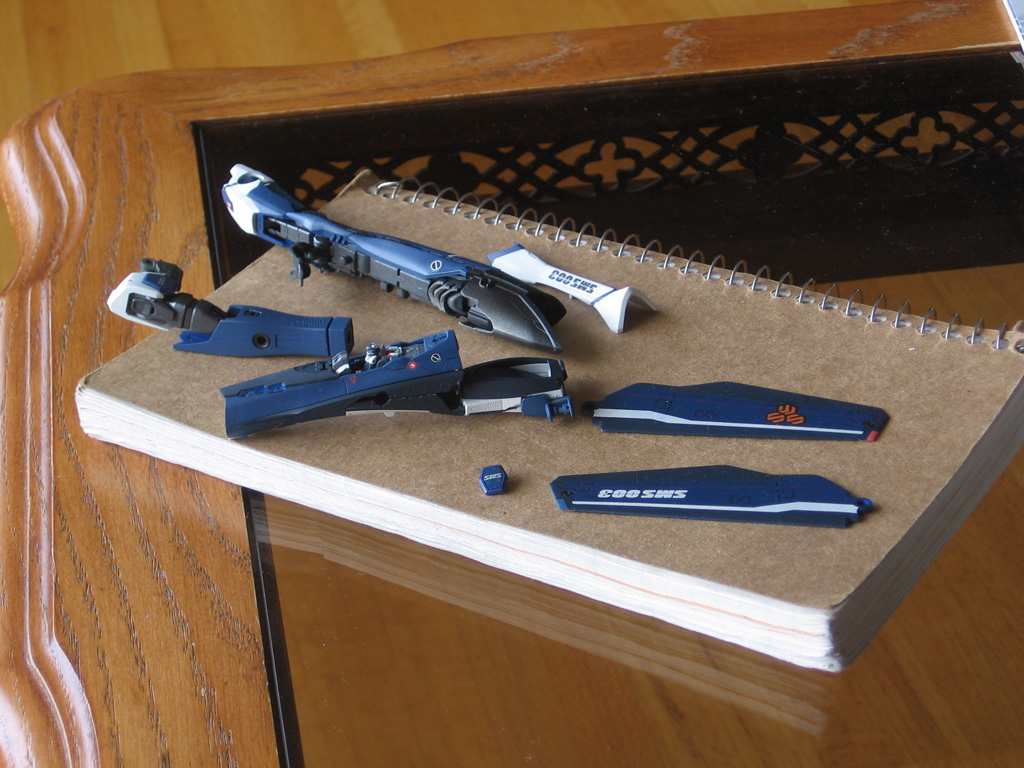
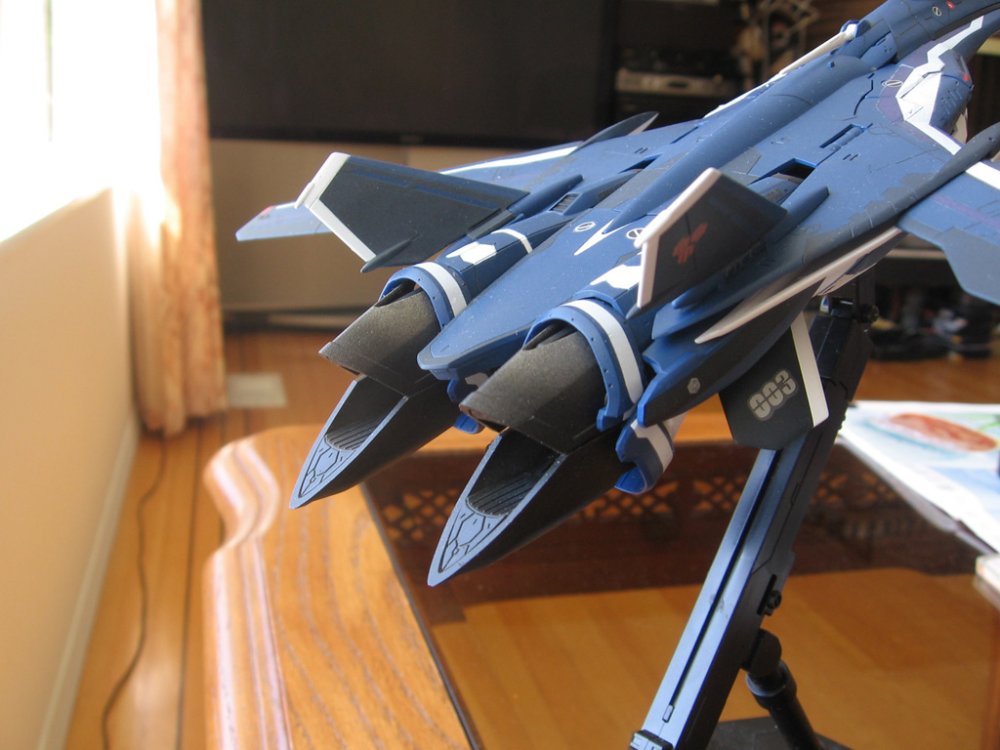
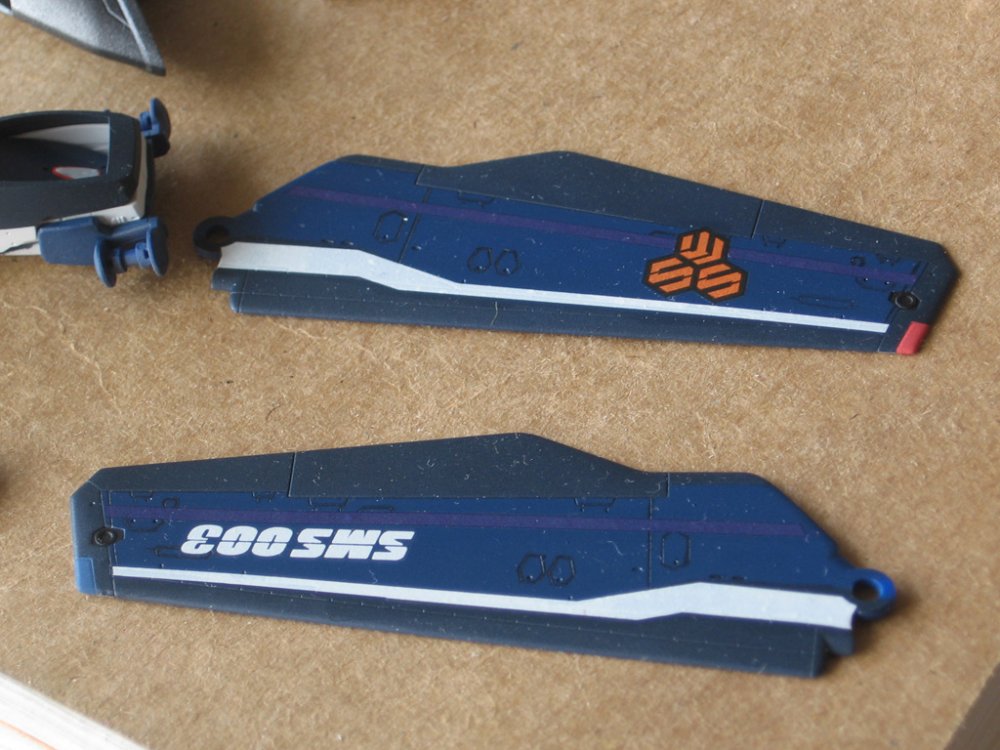
Thanks for the advice, Cheng. I definitely had a ton of silvering issues on the decals along the underside. While I did use a few coats of future on the parts that I expected to decal over, it was still not enough for the 003 on the tail fin or the large black arrow below the fuselage. I'm considering pulling them off to redo it, but I'm out of time atm.
-
Bandai 1/72 Scale Macross Frontier Model Kit Thread Ver.3
Cent replied to azrael's topic in Hall Of The Super Topics
Just a question before I start planning my Armored kit... Can the yellow-hatch missile pods all open up while still in fighter mode? That would be all 4 leg pods, the 2 chest pods and the 2 shoulder pods. -
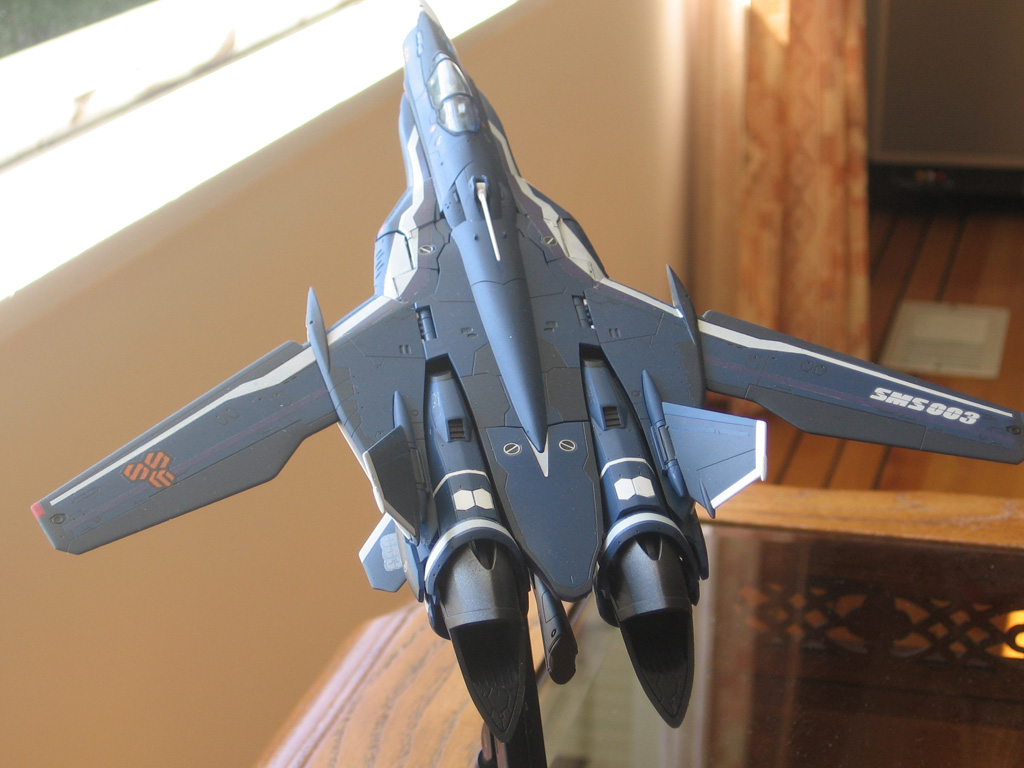
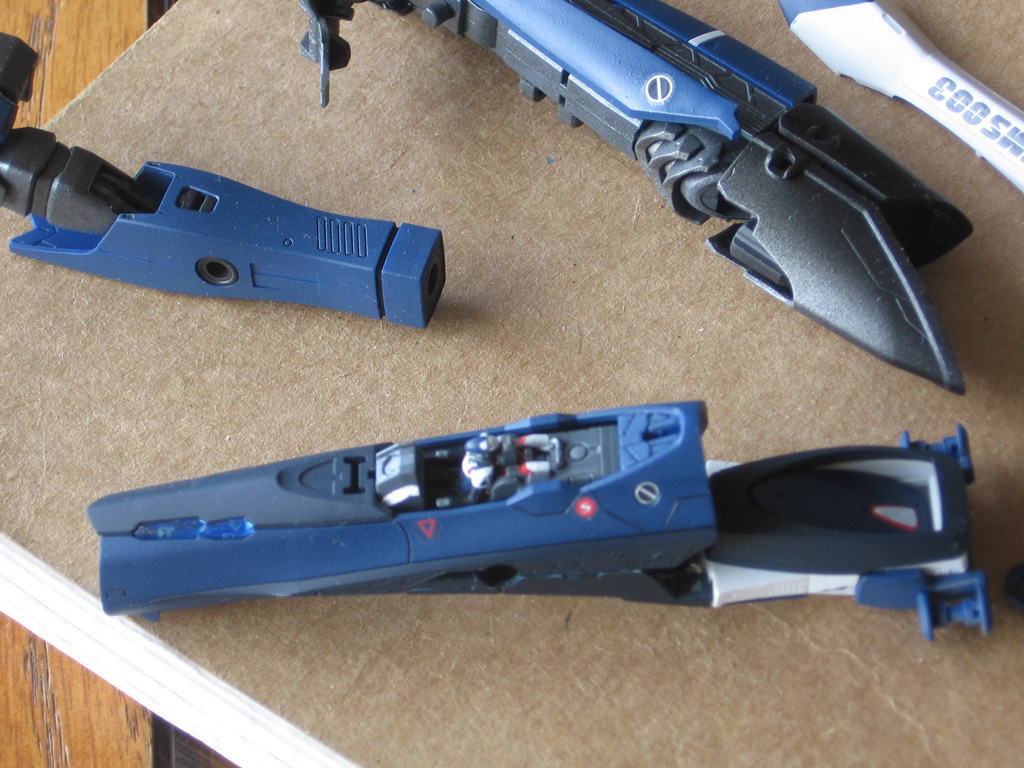
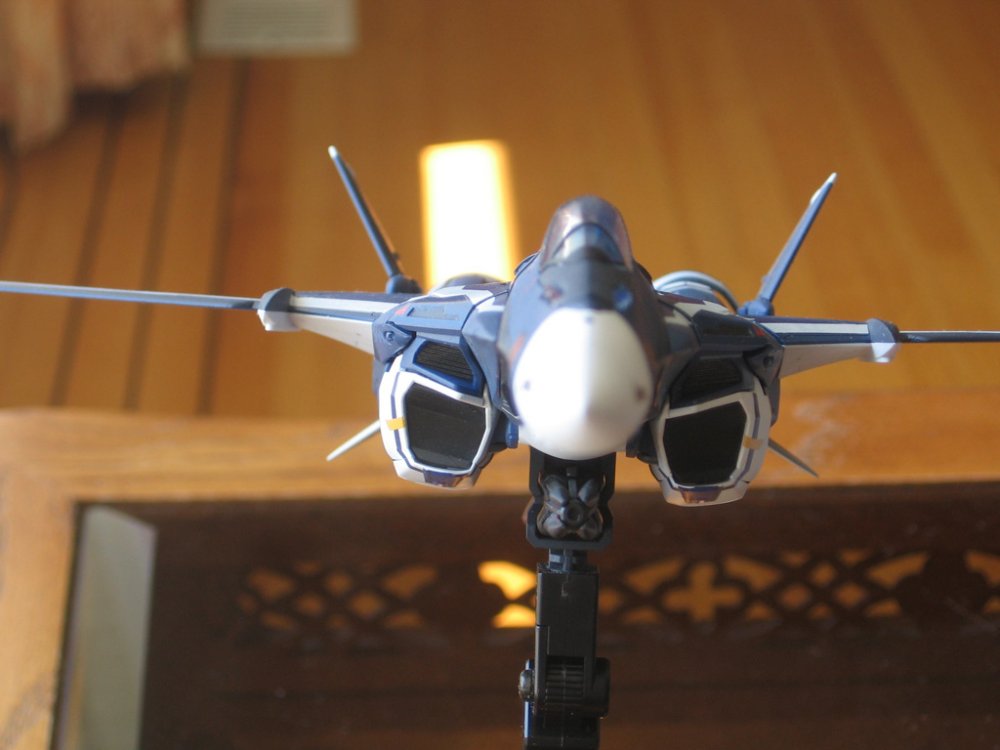
Okay, well I've just got to do the forward red lights on the sides of the fuselage, and to dab in the paint for the vents along the plane. Here's where it is now. Placed it on the provided and hastily-made stand from the armored VF-25S. to take pics. You can see in a few pics that assembly has gotten some of the white paint to rub off onto the blue >_> FML. I'm still thinking of adding weathering... But I usually don't like weathering. So I guess that will have to wait.


-
Official Bandai 1/60 Scale DX Toy Thread Ver.6
Cent replied to Duke Togo's topic in Hall Of The Super Topics
You must have some good eyes. I still can't see what you're talking about XD -
Bandai 1/72 Scale Macross Frontier Model Kit Thread Ver.3
Cent replied to azrael's topic in Hall Of The Super Topics
Meh. Mix up your kits? Put a hasegawa somewhere in between your MF kits =P -
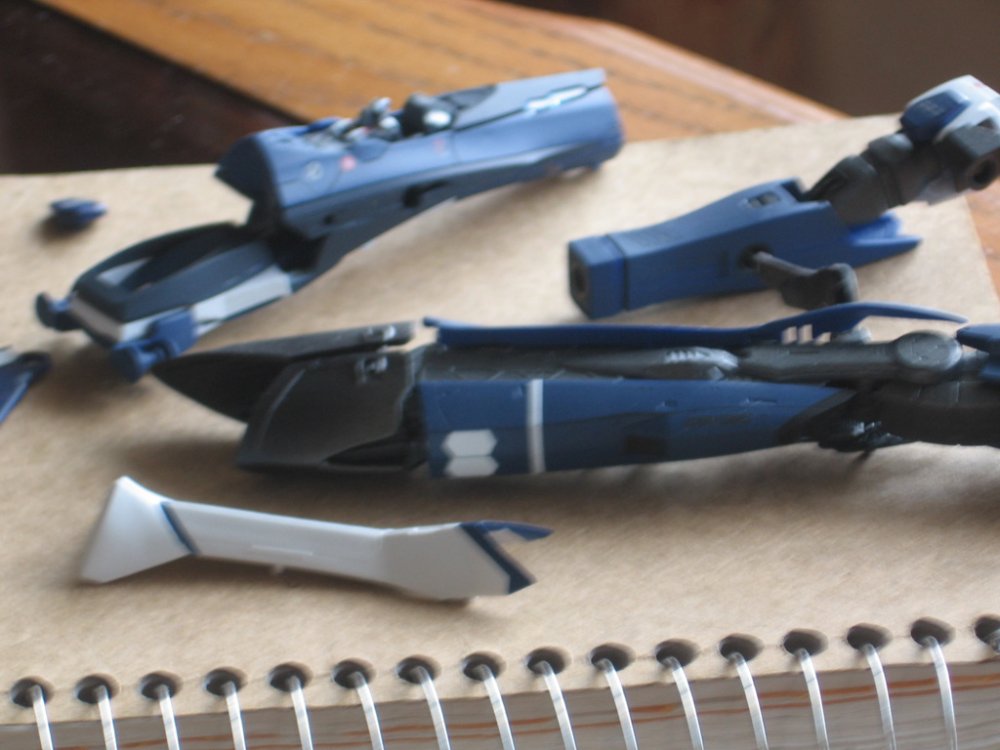
Haha. I skipped initial assembly altogether, since I assembled a VF-25F before... And reading through Micky and Cheng's builds, I knew which parts needed to be painted beforehand. =P However, you may still want to preassemble certain pieces for painting, especially if you want to putty the gaps between the pieces. This applies for things like the arms, nosecone and stuff. Doing that makes masking a lot tougher though. You can read Cheng's comments on that to see what I mean. I spent most of the day assembling my VF-25G... And wow. I had way too many super-snug pieces that I really had to be careful not to scratch off the paint when the parts rubbed together. Some scratching on the kneecap occurred inevitably, even despite the coats and coats of clear coating I put on them. I applied the remaining decals and set to dry. Not enough sunlight to get a good image, but i took a few pics anyway.
-
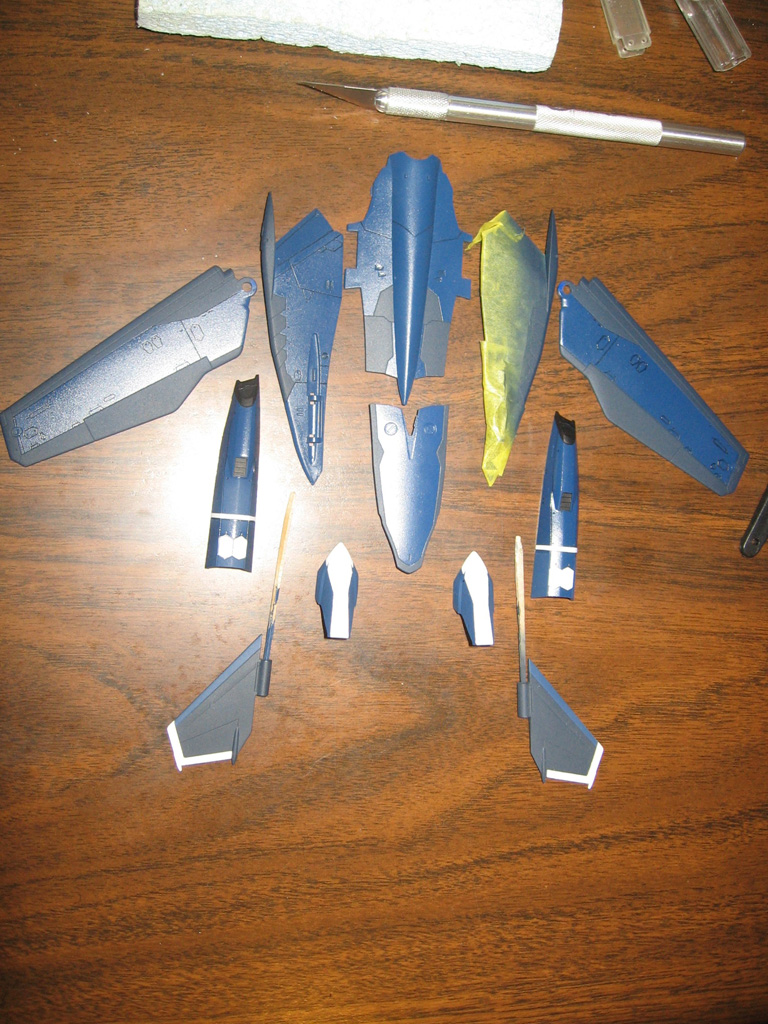
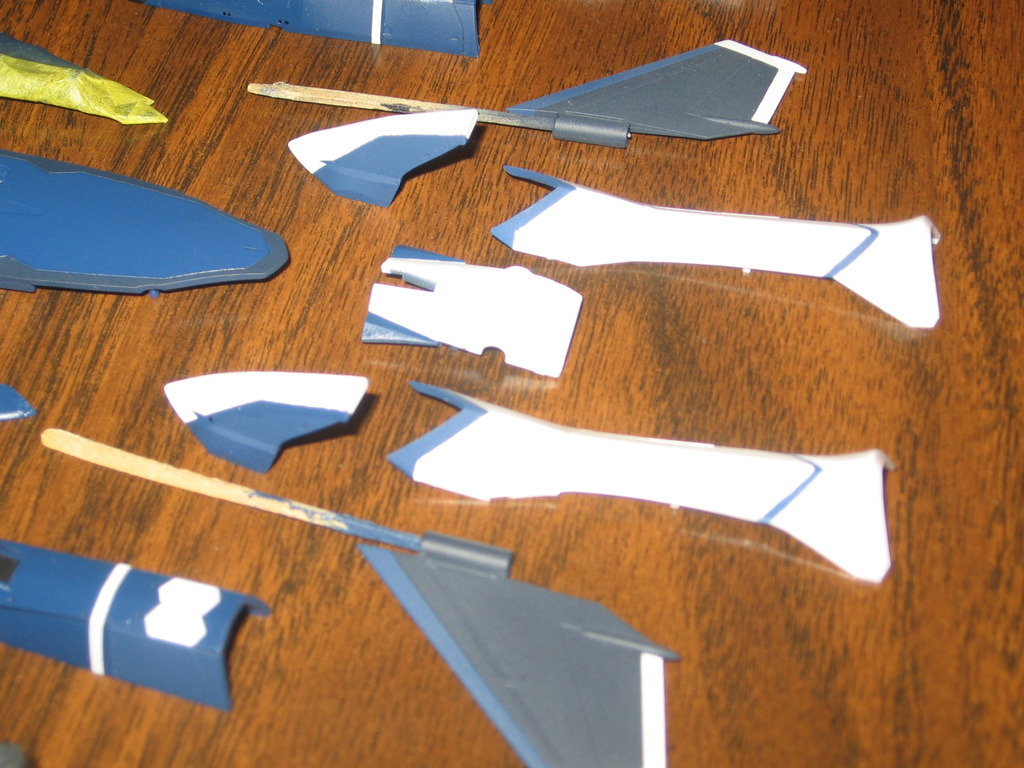
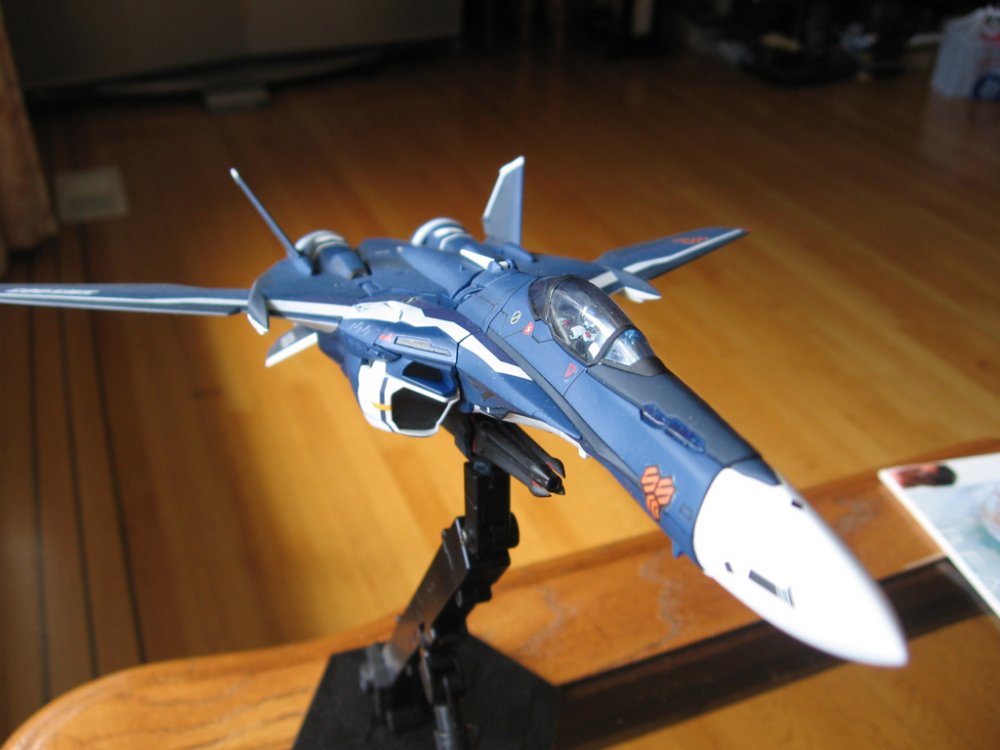
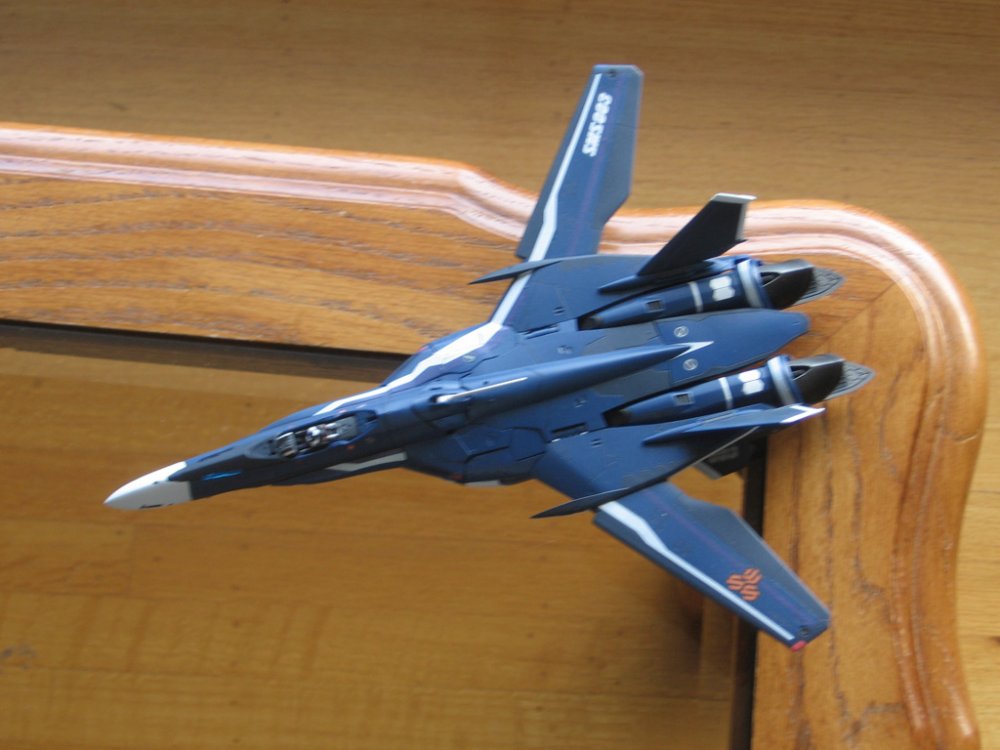
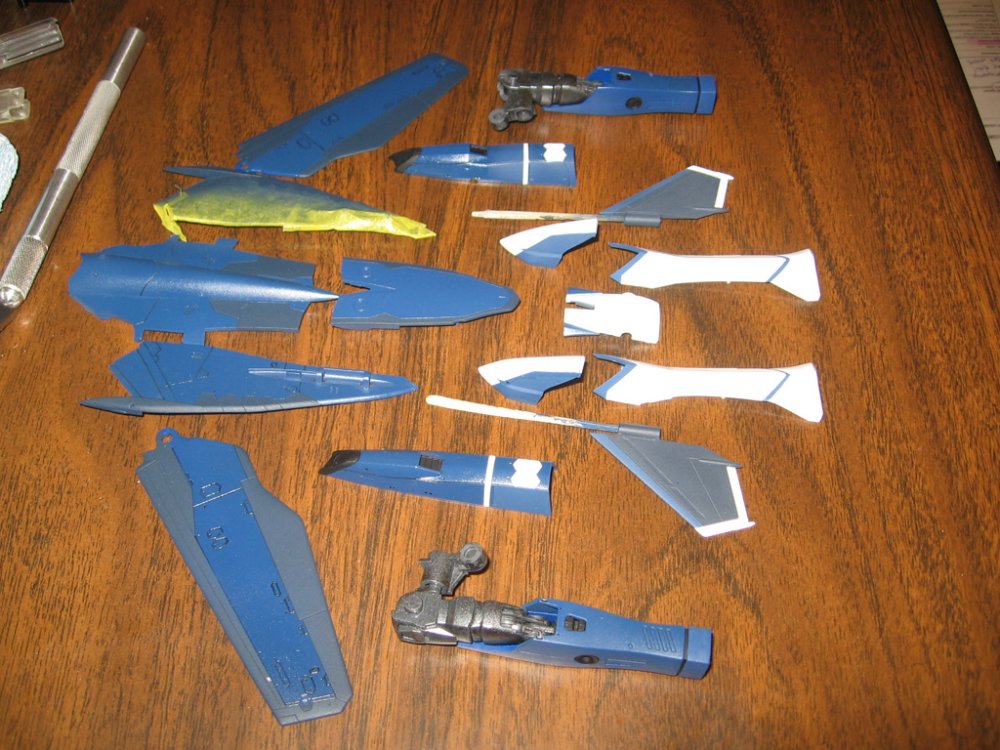
Nearing completion. Placing down final individual part matte coats and then I have to finish the decals on the front half of the plane after fitting the pieces together. One regret I have with this kit is that I used a gundam marker near the beginning, and it just looks terrible. =/. I'll be watering down some black acryllic for the panel lines next time. Painted the red/blue lights on the tips of the wings, and the white stripe on the underside. Partially assembled legs, waiting on some remaining parts to dry. The shoulder hexagonal decals had to be sliced up into tiny triangle pieces, but I got it fitted together pretty well. Excuse the layer of dust >_>


-
Put a cross behind her and you got it.
-
It's like something out of a scifi movie.
-
Official Bandai 1/60 Scale DX Toy Thread Ver.5
Cent replied to azrael's topic in Hall Of The Super Topics
But that's what he does in the anime! That's anime accuracy, amirite? -
Official Bandai 1/60 Scale DX Toy Thread Ver.5
Cent replied to azrael's topic in Hall Of The Super Topics
Yea it looks like the intake movement is inhibited even more with the armor. From the review that was posted earlier, the gerwalk mode looks like the VF is just falling over, even on the stand. http://hima-toy.cocolog-nifty.com/.shared/...009/08/11/g.jpg -
I really like those vent decals you added on the side of the plane (where the wings tuck into the body).
-
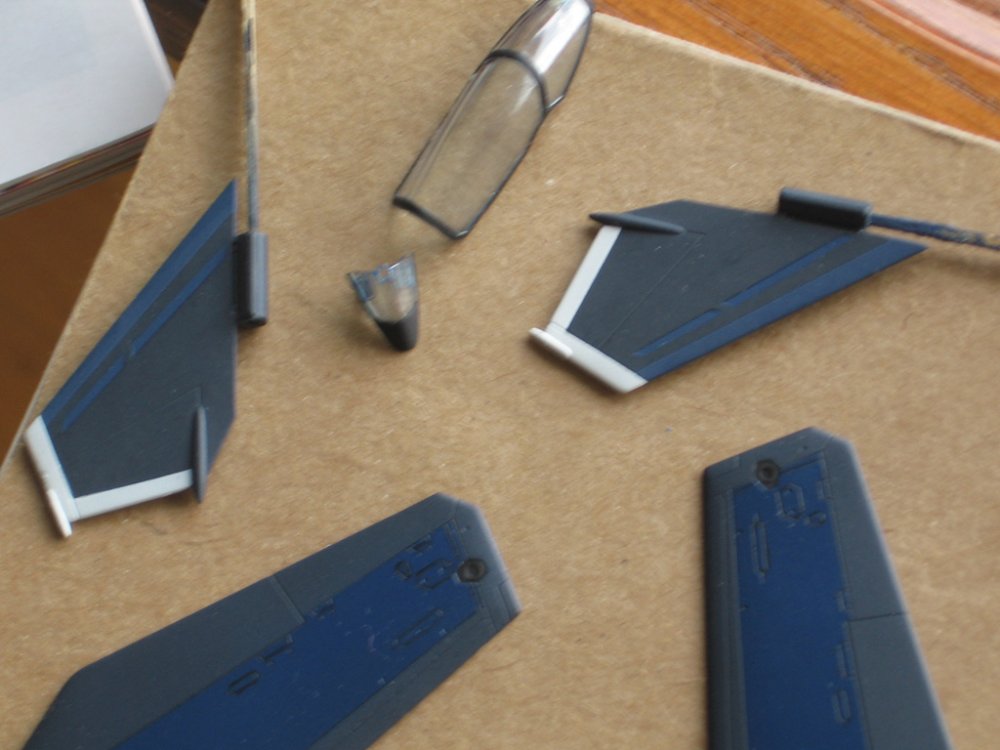
Sorry, I completely misread what you posted >_< I have never tried using clear gloss acryllic sprays, so I can't comment. =X But I did use the dullcotes, and I didn't like them, like I posted above. I'm glad you didn't have any issues with it. I did paint all the colors on the fins, and while it is difficult to color match, I wasn't going to be too worried about it anyway, since I much preferred them to matched decals anyway. However, it worked out well, since the flat white paint matches the white decals very very closely. As for the 2 shades of blue used on the fins, those are matched with the 2 shades of blue present in the body of the plane. Since everything was repainted, everything matches. The only issue then is to paint instead of decal every place where there is a blue decal present. Honestly, that won't be too difficult to do, I'm just wondering if I'm going to be a little lazy or not. If the colors don't match well at that point, then I will just paint it, and color wont be a problem at all.
-
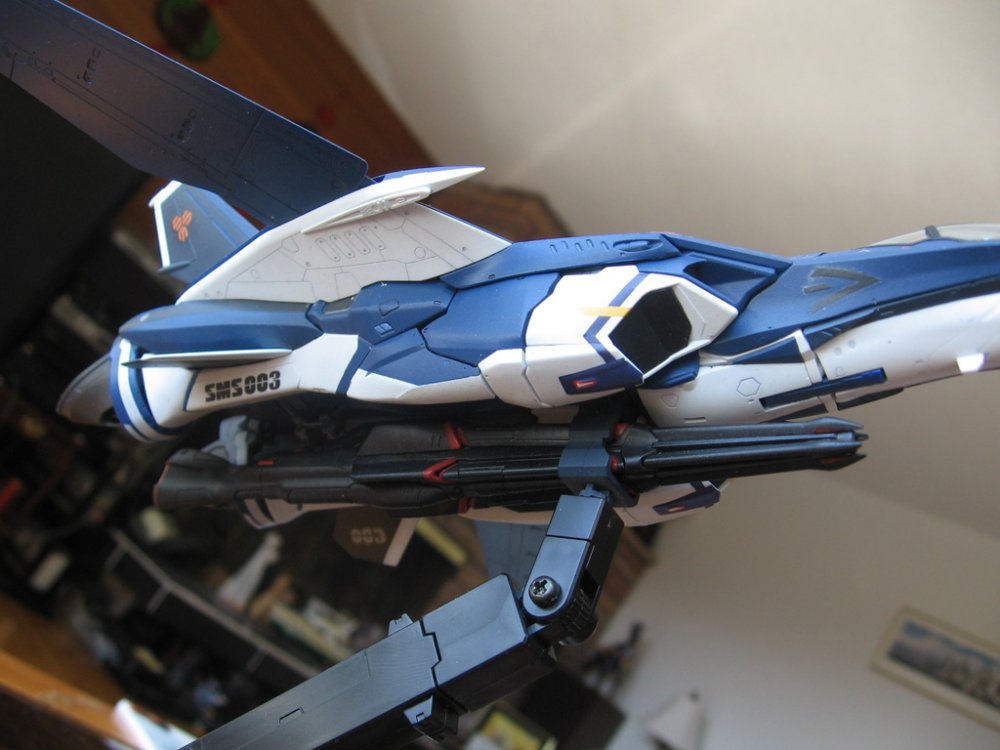
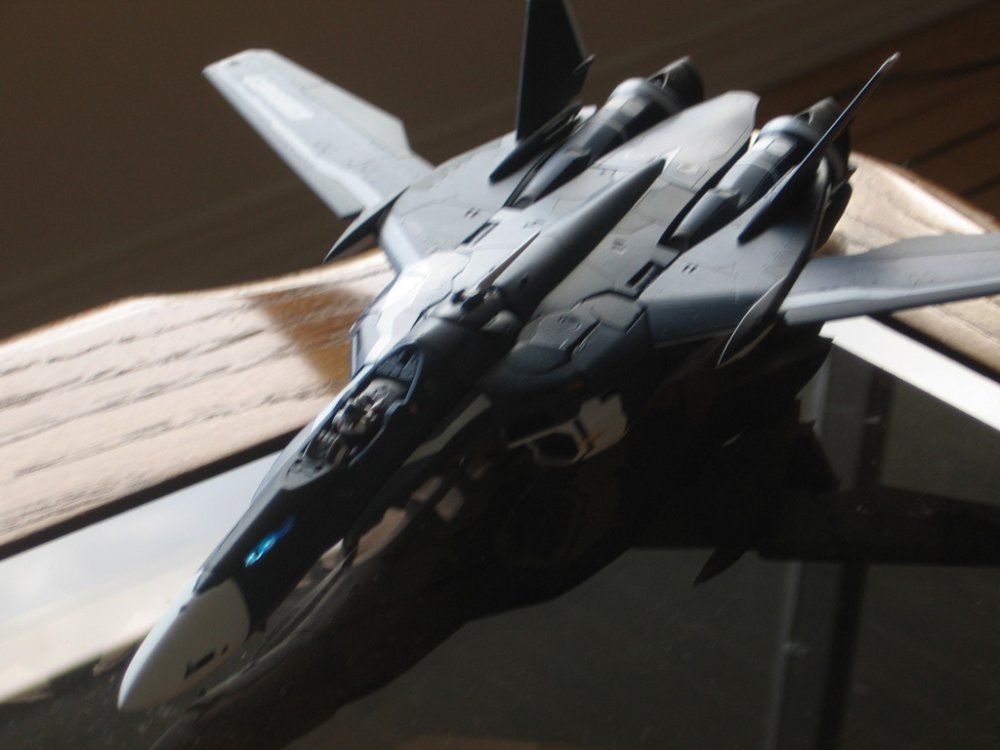
Wow. Funny you mention that Testors Lacquer Dullcote. I used that on my VF-25F, and only lightly! Ended up with a bunch of watermarks and speckling just like yours. It wasn't that bad, since all the white on my VF-25F was unpainted, but even so.. I've had bad experiences with that spray, but I don't know why that happens either. I've heard that putting lacquer or enamels over top of acrylics is a bad idea, but at the same time, I've also heard its fine. I'm totally stumped, and I've just decided to stick to mixing Tamiya Flat with Future for my matte coats. Even Createx Matte coats work poorly (too glossy). Oh btw, I was using Acrylic Tamiya Clear Blue for my canopy. When I tried to mix that with future to tone down the blue, I got this stringy mess. For some reason Clear Blue does NOT mix well with Future. It was almost the same as when I tried to water down decanted Tamiya Airsprays. Also disaster. In the end, I had to dilute the Clear Blue with Tamiya Clear and a bit of water. Having too much clear makes it really thick, yet having too much water has the blue solution just not stick at all to the canopy, so a good balance had to be achieved. Also, the decals are a pain in the ass. The rear foot cover decals (the horseshoe foot cover with the white decal stripe) are terrible. You can barely get them in place without having them wrinkle left and right. I don't even think they follow the curvature correctly, resulting in the wrinkles. The front decals fit perfectly though >_>. I was seriously contemplating just painting these decals on. Bandai also has huge decal borders, often oversizing the decal, or giving it contour issues. I think I'd have been seriously screwed without some decal softener. I'm working on the underwing edges right now, painting the white stripe and the red/blue light decals instead of using the provided waterslides. Below, I masked and airbrushed the hexagonal bolts on the wingtips, airbrushed the canopy frame, and painted the remaining inner blue stripe on the vert. stabs. Pic qual sucks though.
-
PVC figures are one thing... But to be honest, I've never been able to appreciate dolls, western or japanese and of any size/scale. Just too creepy. Theres some uncanny valley for you.
-
About an hour ago, I started to see a similar outage crop up. It went away surprisingly quickly though. About 20 minutes later.
-
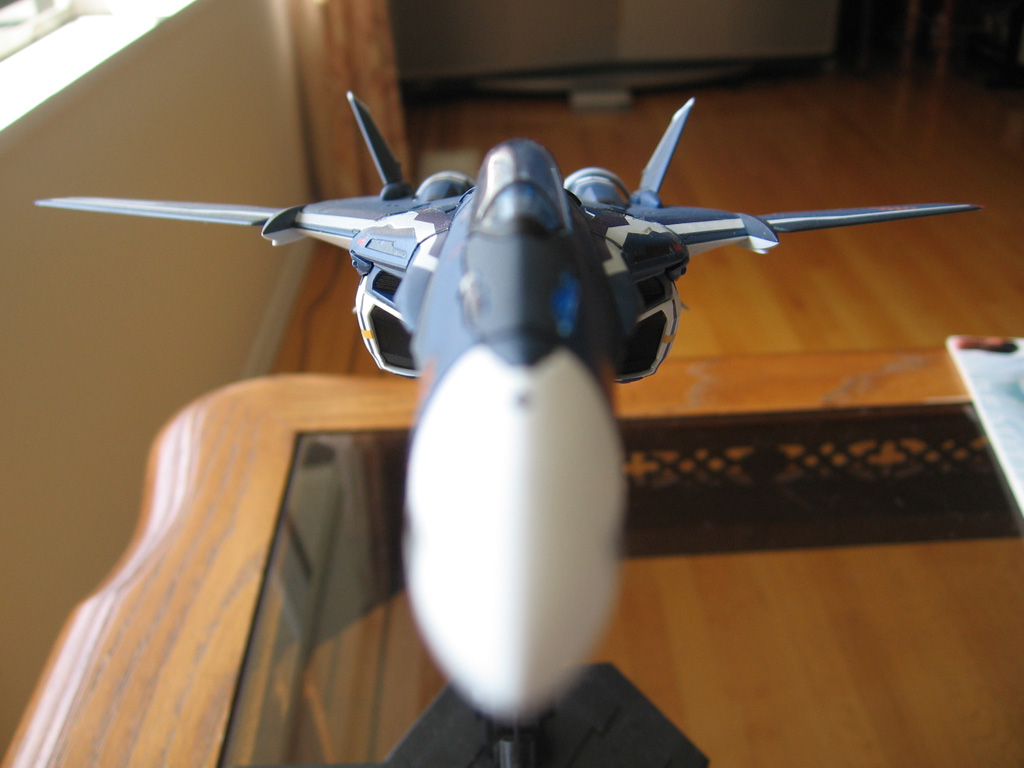
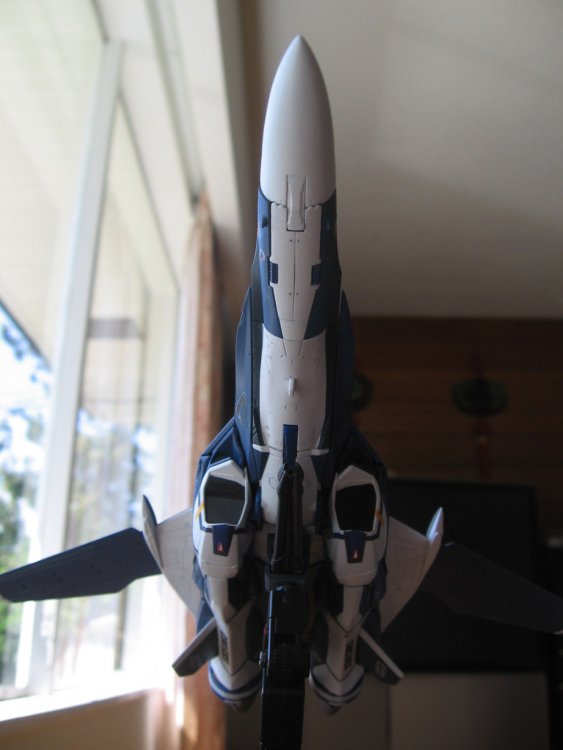
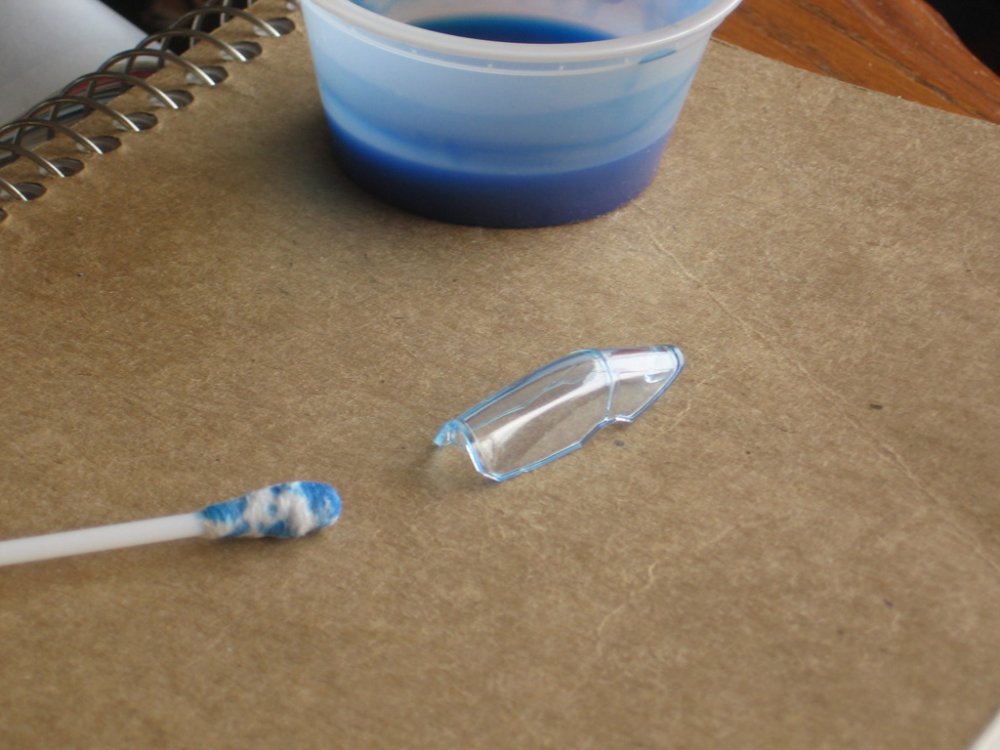
Finally got the canopy: tinted in light blue, single outer coat. On the back of the kit instructions it shows a darker purple, but I generally like my canopies to be lighter.

-
Official Bandai 1/60 Scale DX Toy Thread Ver.5
Cent replied to azrael's topic in Hall Of The Super Topics
Doesn't look like its straight here either. http://www.starcraftwars.com/wp-content/up...27200000006.jpg -
Well, he is a head pilot.
-
Honestly, its my first time gloss coating over a flat base with the intention of matte coating as a final layer. I hope the base color doesn't get distorted underneath all those coats. I won't really know until the final layers are on, unfortunately. imo, the best it ever looked was with a flat base coat, with nothing on top.
-
soap generally destroys my paintwork. Then again, I work in acryllic, so its kinda expected. I haven't had a lot of time to work on mine either, but I I think I've deviated ever further from the plain blue standard design. I've painted the rear leg vents black, along with the vents in front of those. Painted the white stripe and the rear hexagons. Masked and painted the kneecaps, the inner arm details and the outer body trim. Its a little strange to do the outside trim as a darker blue, but I hope it'll work. I guess I'll see in the end. A lighter blue (than the standard body blue) seemed a little off to me, and didn't go well with the wing decals. Oh yea, the standard blue was gloss coated. Thats why it looks so shiny in the photos. I gloss coated them because when masking over them without the coat, the paint had a tendency to peel a bit. Thats what I get for not using a primer. I'll still have to gloss coat everything again before applying decals, but I'm still a ways off from that step. I'll need to matte coat yet again at the end... I've lost track of how many coats I've done now. Next in the things to do is to attempt to put tiny rivet depressions in the panels... However, considering that I've already painted it, it may be a bad idea. The rivet indents cause the plastic around it to bulge upwards, which is usually sanded down again before the paint process begins. If it proves to be too troublesome, I will probably just skip riveting and proceed with the gloss coats. I'll have to save the rivets for my VF-25S armored kit... Which is really what all of this experience is leading to anyway.


-
Bandai 1/72 Scale Macross Frontier Model Kit Thread Ver.3
Cent replied to azrael's topic in Hall Of The Super Topics
Alright, vf-25birdshitsplatter go! -
Yea, a MW4 get together would be pretty awesome. I have the Megamek packs and all that stuff too, but for Mercs. I dunno if that makes a diff. I do have MW4 too, its just not installed atm. I wonder if we have enough people...