
NZEOD
-
Posts
1960 -
Joined
-
Last visited
Content Type
Profiles
Forums
Events
Gallery
Everything posted by NZEOD
-
What I'm listening to lately while painting macross
-

Armageddon NZ 2016 - Shoji Kawamori attending
NZEOD replied to NZEOD's topic in Conventions and Local Gatherings
Will do -
that would be the easy part
-
Anyone needing Shōji Kawamori's autograph? There is a signing session this weekend at the local Expo
-
Brilliant! Never thought to look there! The Glaug shall burn!
-
Its this weekend http://www.armageddonexpo.com/nz https://www.iticket.co.nz/go-to/armageddon-expo-2016 Animation Guest - Shoji Kawamori - Creator of Macross http://www.armageddonexpo.com/nz/anime-manga-cartoons/shoji-kawamori/ Autograph Session Times – 3pm to 5pm - Saturday and Sunday, 11am to 12.30pm - Monday Panel Times – Stage Two, 2pm Sunday 23rd
-
Anyone built one of these? Can I make the foot move - only has to be slightly - if I were to hook it to a servo or vibration motor? I need to model a Glaug laying on its face in the dirt and want to make somethings on it twitch every now and then. So I am hoping the foot has a pin joint and not a solid plate that glues it to the bottom of the leg.
-
not so much in his video, but thats fixable. He used LEDs the turned on and off instead of a flicker/fade
-
just found a link to a guy who resin cast some flames... I'm going to try it! http://www.figurepainters.com/tips-tutorials/2012/9/15/lighted-warmachine-menoth-vessel-of-judgement-battle-engine.html
-
you'd need too great a layer of paint... tinfoil it. I'll get back to it this weekend and let you know how it goes tin foiling it.
-
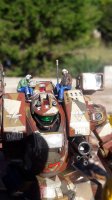
Yeah I'm in the process of collecting Tomytec and Kato N Scale buildings to do a Downtown highrise shootout scene and having to use ARII 1/100 kits for the Glaugs and Pods. Also collecting the parts to do a Chemical Plant for another Battle scene. Imagine the epicness of Pods and Valks fighting in this display... I really like the idea of having a Glaug fallen back into and though a large Storage tank, the volatiles spilling out around it as it all burns (flickering LEDs and Xenon flash tubes under a hotglue and resin "fire"?) with the valk squad looking on dispassionately.
-
I had a pair sitting next to me but never needed them.I do have a reasonably steady hand though
-
Only took an hour to do as well. Pretty simple to piece together. I had to glue the nose cone on and I've chosen to glue the tail fins and the legs to the body and pilot to the seat. Should be able to get it down to 45mins on the next 3. Used a blade to remove the items from the sprue instead of clippers and it worked fine. Each piece does need the sprue tabs in the parts trimmed off once its removed. Tamiya cement worked fine to glue everything including the nose blade antenna. Only bits that are easy to screw up are the feet/nozzles upside down and the LED Plates upside down in the legs. The electrical connection from the stand into the plane is a bit iffy and needs a little fiddling to get it to light up. The OP11 light unit needs 2 x LR44 Hearing Aid batteries, or you could mod it easily enough to run off a USB plug with a 100ohm (brown black brown) 1/4W resistor soldered onto the Negative/Ground wire of the USB cable. http://www.petervis.com/electronics/Standard_Resistor_Values/Resistor_Colour_Code/100R.gif Also... there is a piece of clear plastic film in the battery holder... its tempting to remove it but DONT. Its an insulator to stop that battery cell from shorting out.
-
My 1/144 Dragon deck, not yet, finished, weathered and populated yet. I have 4 of the Italeri 1/72 decks as well with a servo that raises the JBD. One of the ES-11Bs will be displayed on this hooked to the cat with wings still raised.
-
OP11 does come with some adhesive foil, I just didnt realise it was needed. I'll go back ans fix this at a later stage either with their foil or some tinfoil of my own - as tinfoil would be thinner and easier to shape.
-
VF-1 above the Dragon Carrier deck Engines Lit The Light Leakage issue... Easily fixed with some tinfoil lining inside the legs
-
Beware... the Fighter mode legs are NOT light proof and without some foil on the inside just forward of the engine nozzle, the OP11 light set will shine through the leg plastic.
-
Not a lot of heat transfer in a vacuum so near misses wont be imparting much heat and gaseous blast damage in space.
-
Damn these things are TINY!! Just assembled one on my lunch break. Pretty quick builds, but I DID need glue for the nose cone and for the parts i modified to do a transformation sequence halfway between Fighter and Gerwalk. Cut the centre out of the Gerwalk underside plate to the fighter folded arms would still fit and removed the arm sockets. Now to lengthen the engine light cables to hide the control board under the display and hollow and silver light proof the legs for the light tunnel.
-
WOW, just bought another VF-1s and ordered and paid for it on Thursday afternoon from Amiami Japan... it arrived today, Monday, at work at 0735hrs. 8836km... damn!
-
I'll keep my eye out for you on the 1/44 decks. Finished up that Dragon deck I bought last week. Had to sand off all the 80s style raised panel lines, but its come up good since. If you ever need it, Model Master Engine Grey is the modern carrier deck colour of choice on the shipbuilders forums. For a DX, the 1/72s could work better than the 1/48 one. Try a cheap Italeri 1/72 deck as a tester. Considering getting the 1/200 deck just to see how it could look with the GiMIX VFs
-
Another company is about to release a 1/72 carrier deck base that we can use to display models on. http://www.tsm-wing.com/product-detail.php?pd=65
-
ahhh but see.. thats the beauty of them... they are smaller so you need less space... go on... do it!
-
yep... went better on the second one tonight. just a pain in the A to get it all sitting tightly in Fighter mode and mounted on the wall into the display case.
-
ok the second one assembled tonight and it was a lot easier now I got how they go together and how they look when done